Transcripts
1. Introduction: Shading is a crucial element
in illustration that can greatly enhance
the visual appeal and realism of an artwork. If you want to learn
how to bring depth and dimensionality to a two-dimensional image with
easy-to-follow instructions. Then this class is for you. Hi and welcome to my class. My name is Jutta Schneider. I'm a skillshare, top teacher, illustrator and
designer from Germany. And then this class, we will explore
shading techniques in Procreate on the iPad. Together, we will embark on an exciting journey of creating a cute furry monster from sketch to Stunning
finished artwork. In the first part of this class, we will delve into the fundamental
principles of shading. We'll cover topics such as
light sources, value scales, and shading
terminology that will help you bring life to
your illustrations. Once we have grasped
the shading basics, we will dive deeper into the
intricate world of trying. Third, can be a
challenging task, but fear not, I'll share
valuable tips and techniques. And of course, a set of awesome procreate brushes that will enable you to add depth, volume, and texture to
your furry creatures. Together, we will try our hands at an
exciting case study, drawing a cute monster. Starting with a rough sketch, we will gradually
refine our artwork, adding layers of
texture and shading to bring out the unique
personality of our monster. I will guide you
through the process, providing insightful
commentary and addressing any questions
that may arise. As a special bonus, I'll share a video
on how to create your very own fur
brush in Procreate. I'll demonstrate the
process step-by-step. So you can create a personalized tool that
suits your artistic style. By the end of this class, you will have gained a
solid understanding of shading principles and
how to apply them, including to drawing fur. You'll also have completed your own adorable
monster artwork and learned how to create a custom fur brush in Procreate. This class is made
for you when you love drawing on your iPad
with an Apple pencil. When you have already a little
experience with the app, Procreate, when you are seeking to enhance
your shading skills. Or you love monster
and everything furry, as well as Procreate
brushes and creating them. So join me on this creative
journey as we uncover the secrets of shading and breathe life into
our furry monsters. Let's get started. I will see you in class
2. Class Project: In all my classes, I put a lot of emphasis
on the class project, and this class is no exception. In case you wonder why. Let me explain. First. I want you to grow. Completing the class
project allows you to apply the knowledge and skills you have learned
throughout the class. It gives you the opportunity
to challenge yourself, experiment with
different techniques, and explore your creativity. Second, develop your skills. The class project provides a practical platform to
enhance your artistic skills. Art is a hands-on
discipline and actively working on projects helps
you refine your techniques, improve your understanding
of odd principles, and develop your
own unique style. Third, build your portfolio. Completing the class
project contributes to building a robust
portfolio of your artwork. Having a well-rounded
portfolio is crucial. Each finished project
adds to your collection. Demonstrating your
commitment, dedication, and growth as an artist forth, receive feedback When you
finish the class project, you can receive valuable
feedback from me or peers. These Advices can
help you identify areas of improvement and
discover new perspectives. Fifth, get a sense
of achievement. Completing any project,
including the class project, brings a sense of accomplishment
and satisfaction. It's a tangible representation of your efforts and dedication, boosting your self-confidence
and motivation. Six, enjoy the
community engagement. We are very lucky to have such
a supportive community of fellow students who share a common passion for
Art here on skillshare. By finishing the class project, you can actively
participate in discussions, share your work, and
engage with other artists. And lastly, Foster
accountability and discipline. Setting a goal to finish the class project and
following through with it, develops a sense of
accountability and discipline. In summary, you see you can only benefit from accomplishing
your class project. In this class, I would like you to follow along with drawing and shading a cute furry monster and upload it to the
project gallery. You can do so in
the projects and resources tab on the
skillshare.com website, here you simply hit the
create project button, upload your image and share your thoughts about your
project or the class with us. Make sure you upload
your artwork as a JPEG. As PNG files are usually
too big to be uploaded. I am already very excited to
see your cute fur-monster. So make sure you
share it with us. Let's engage with one another
in the project gallery.
3. Resources Download: As usual, I'm offering a lot of resources in my
Skillshare classes. If you go to the projects and resources on the
skillshare.com website, you will find my resources
here on the right hand side. In this class, you're gonna get a cute monster brush set and also a cute
monster color palette. For Download is fairly easy. You just tap the file. It asks you if you want to
download the file, say yes. And as soon as this little
arrow here has bounced, you will find the
file within here. If you tap it. You're gonna find that in your Download section
of your iPad. And by just tapping the file, it's gonna be imported
into Procreate right away. You find it at the very top of your brush library.
There you go. Here you find the
cute monster palette, which is the colors I am
using for our class project. Do the same. Hugest,
hit the file. You allow the Download. Wait until this arrow
here has bounced, tap it, and then tap the file. Tap the file again, and it's being imported
into Procreate. And this time you'll find
it at the very bottom of your color palette
library. Here we go. There it is. How simple is that? I just wanted to add. Sometimes I receive
a failure notes from students that weren't using the Safari browser when
downloading their files? Well, that happens sometimes. If you have trouble
downloading the files, why don't you just try out another web browser and
see how it works there? And now we're perfectly
prepared to dive right into the class
subject, which is shading. And in our next video, we're going to learn more about the principles of shading. I will see you there.
4. Shading Principles: Let's first clarify
the term shading. Shading is the indication of light and dark areas in an object to create depth
and dimensionality, it is an important step to turn a to D flat shape into a
lively and realistic object. By using shading
techniques effectively, we can create illustrations
that are more visually interesting,
dynamic, and engaging. However, to administer shading correctly to our illustration, we need to understand
the different levels of darkness in a
three-dimensional shape. Let's first talk about
acute shape to give you an idea of how to shade
an angular object, which is fairly simple to do. There's our little cube. By now. We can't distinguish all
the different phases because all the sides
have the same brightness. Let's imagine now our
light source is here. Obviously, the phase closest to the light source is the
brightest one, the highlight. The face opposite the
light source is logically that darker spot as not much
of the light reaches it. This is what we call
the core shadow. The other phase we
see is medium bright, which is called the halftone. Our object also casts a shadow onto the surface
where it is placed. This is our cast shadow. Lastly, we have the
occlusion shadow right below or cube where
it hits the surface. This is our darkest area. Both occlusion and cast shadows appear a
little bit blurry. So now all shading is done. Then wasn't too
difficult, right? Here comes an
important side note, like all the drawing
rules in illustration. Once we understood them and
can apply them correctly, we can start bending the rules where we
think it makes sense, where it adds to
our personal style. It is however important
to understand the principles properly before we can start to ignore them. To be able to ignore
where it makes sense to me not to make an
insignificant mistakes, there would lower the
quality of our illustration. Now, let's move on
to shading a sphere, which is a little bit
more challenging as we need to use the gradient
shading technique. Gradient means that light
areas transit into dark areas gradually avoiding to leave visible increments
as much as possible. So here comes us fear, which appears as a
circle for the moment. Let's turn on the
light and see how our circle needs to be shaded to appear
three-dimensional. Of course, there is the
lightest part facing the sun. This is our highlight. Opposite to that side, we have the darkest part also facing the surface on which
our sphere is placed. Remember, that is
called core shadow. The invisible border between those areas is our terminator. This is where the lighter part ends and the shadows starts. The area between
the highlight and the darkest core shadow is
called half on mid tone. This is basically the
initial brightness of the you we used
for our circle. Although the half
tone is gradually fading towards both
light and dark areas, since our shape is
not translucent, also casts a shadow
onto the surface. The cast shadow, we can basically think of
lines coming from the light source
across us fear towards the surface to see where it makes sense to place
the cast shadow. The occlusion shadow
is right beneath the part of our sphere
that touches the surface. Finally, let's add
the reflected light. For whatever reason, this is
my favorite part of shading, and I think it adds the
most to our illustration. Let me explain. Even though this is
the darkest area of both our sphere and
the shadow it casts, there is still remaining
light that hits the surface and bounces
back to us fear. This adds not only a nice
shimmer to our object, but also adds contrast, which is often quite useful. Let's recap. The lightest area of our object
is called the highlight, and the darkest part
is called core shadow. The equator line in-between
is called the terminator. And on a round object, the US change from light
to dark gradually. On the surface, the object
throws the cast shadow, As well as the occlusion shadow. And remaining light
is reflected onto the edge of our objects
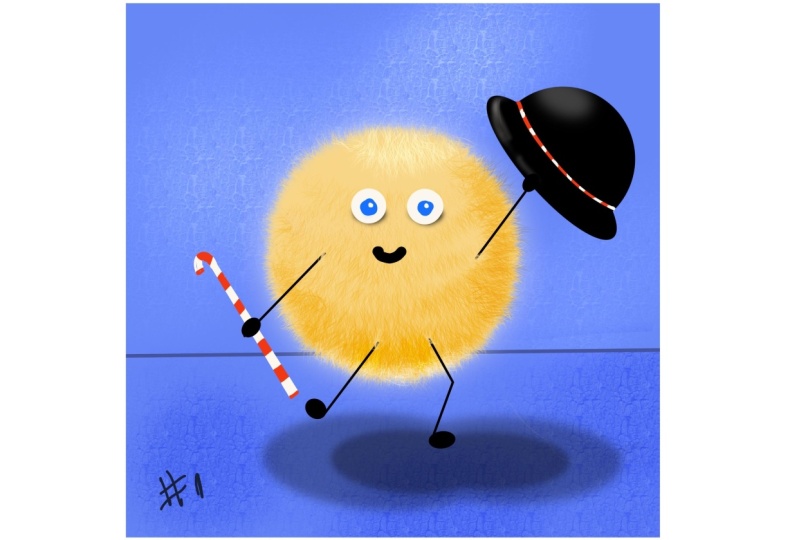
closest to the surface. And in the next video, we're going to practice
what we've just learned by drawing a furry ball. Because this class
is about drawing a Furry Monster and
shaded correctly. So see you in the next video.
5. Shading Practice: Let's get started with
opening a new canvas. I'm here in my project gallery and I'm going to tap
the plus button. And I will pick my square
3,000 pixel canvas. If you don't have
anything like that, you can just go ahead and
tap the plus button up here. Here we are with
our canvas panel. And this is where you can insert all the numbers you want. So I've set my
measurements to pixels, and you could just type
in 3,000 by 3,000 pixels. And here it also tells you how many layers
you will receive. So here we have 70 layers, which is fairly enough for me. However, if you have
a smaller iPad, you might have
weightless layers. And you can decide
if you want to go with these small
amount of layers, or if you want to decrease the size of your
canvas, Let's go, say go with maybe
to 2,500 by 2,500. And that gives me 103. And you need to check on
your iPad if that is enough. If that gives you
enough layers to okay, I don't need this kind of Canvas because I have mine already. Basically this highest
doesn't really matter anyway. I just like to share
my Art on Instagram. That's why I just like to
go with square canvas. However, that is not super
important for our practice. That's hit Cancel and I'm
going to hit this one. Now. Here we have our new canvas. First, what I wanna
do is draw a circle, and I will use one of the brushes that come with
a set we just downloaded. Let me quickly show
you what's in there. There's to sketch your brush, which basically
works like a pencil. We have two liner brushes. The nice liner with a
little bit of a taper, and the nice liner or mono, which has the same width
from start to end. Then I've added, and
I'm really proud of those brushes for
different for brushes. The short one, the wonderful
medium for foot long fur. And for curly for you
can try them out there, pressure sensitive and then add the nice impression of reaffirm. Here we have to stripy brushes. I like to use them
for my backgrounds, but you could also
use them as shader. Then there is my soft shader, which I like to use for
shading glossy areas. And then we have ten different texture brushes
that helped me to give my monster features like
just a little bit of a texture that it just
doesn't look flat and, and all glossy.
That's the brushes. So for now, for my circle, I want to go with
a nice liner mono. And then from my color
palette, the monster Paulette. I think I'm going
to go with yellow. And I just draw a
circle that has, have the ends meet, that it turns into a circle. And if I tap the canvas
with one finger, it turns into a perfect circle. So let's fill it with color. Okey-dokey, that's
how basic shape. It's just not super good to, to recognize right
now as the air, as the background is white. So I want to add some
background as well. I'm adding another layer by
tapping the Plus button, grab it with my
finger and just put it below our yellow ball. And then I guess I will fill it. I think I will fill it
with this blue shape. Yes, that looks good. Okay. This is just a circle for now, but I wanted to look furry. So I'm gonna go
back to the layer with a yellow dot here
with a yellow circle. And I'm going to
pick my first brush. Let's go with the
fur medium brush. And now I will draw
all around the circle. And that was the wrong color. I need my yellow. And then that will create
nice and furry outline. You can see what it is. So what do we can do
is we just press, go back and forth until we can't see the edges of
the circle anymore. Just go all around until
the edge is banished. Here we go. And it doesn't matter
if it's not super, even, it is even more
organic and natural. Wednesday or some,
some lamps with a lot of fur and some
gaps may be in-between. So let's say the light
source comes from up here. And let me indicate with a little arrow that
I don't forget. I want to add a new layer. Go to my mono line brush and just draw a little
arrow here on the corner. So this is where the
light hits the ball. So this is gonna
be the highlight. And it's going to turn
darker towards this area. And the cast shadow is going
to go in this direction. Let's go and do it for
shading with a, for brushes. We can use a lot of help of
Procreate because picking the right color for shading
can be quite challenging. We could just go
ahead, for example, and shade with a dark
color and white. But I'm going to show you
what happens if we do that. So here's our yellow
ball layer and I want to add a new layer and turn that into
a clipping mask. I'm going to tap this layer
and tap clipping mask. That helps me to only draw where the yellow ball is below, but not on anything elsewhere. So if I would use, Let's say black, go
and pick my fur brush. I want to go with a
long for right now. And start here indicating
the darkest area of offer, both moving towards the
top and as you can, as you will notice, when
you use the brushes, they are pressure sensitive, so the harder you press, the darker they will get, and the lighter,
lighter obviously. And then I'm going to add
another layer on top. Turn it into a clipping mask. Pick a lighter color here. And then I start here
with the highlight and move towards the dark area. So this looks good. We can distinguish
different hairs. We can distinguish
light and dark. However, the color has
turned really dull. Yeah. But due to the fact that
we've used black and white, that took all the liveliness, vividness from our yellow you. This is what I
really don't like. So I don't want to shade
with just black or white. It makes everything
dull and boring and it's not bright
and popping anymore. So instead of using that, we can use the
help of procreate. So let me add another layer, turn it into a clipping mask. And now we're going to
use the blend modes. We find the blend modes by
tapping this little N. There's the opacity slider that makes everything on this layer
more or less opaque. And here we see a full list
of different blend modes. Usually it's set to normal, which we see with
the N here above. We find the blend modes. It turns everything darker. And down there we find blend modes that turn
everything lighter. And a lot of more blend modes, which I can't all
describe today. However, my favorite
ones at the moment, our Linear Burn, Color Burn, or multiply, and screen
color dodge or add. Linear Burn Color Burn and
multiply it to darken a shade, screen color dodge and
add to light and a you. And I show you how
that works right now. I want to set this
layer to Linear Burn, and I don't have to think
about any color I want to use. So I just go back
to my yellow and start drawing over it and then
you will see what happens. It turns my yellow color into a very bright
and saturated. Wonderful look. How pretty that looks. Way more vivid and
way more saturated. Okay, I'm going to add
another layer on top. Here we go, set it
into a clipping mask. We still are with the same
year we started out with. And I will set this layer to, let's say, let's say screen
and see what happens. Here is our light source. So here's where I start with the highlight with
a lightest fur. And then I move my way
up, my weight down, of course, to the darker
area. And here we go. So I'm going to enlarge it and you see this
looks like reaffirm. It's amazing. I'm so in love with
these brushes. So here we can check if we
shaded everything correctly. Here's a highlight
which could be actually like even lighter. I think. I want to add a little bit
more accent here with Wyatt. He just had this Hendrik
tiny little bit. And this is our highlight. This is our mid-tone area. Here we have the trimming
a line somewhere there. And down there we
have the core shadow. What's missing right now is the cast shadow and the occlusion shadow
on the surface below. And that's what we're
gonna do right now. Let's just add another
layer on top of our blue shoes are mono line
brush and pick a dark color. So, and to follow this
light source here, we need kind of ellipse
down there in that area. Although I'm going
to start out in the center and just move
it where I needed to be. Just an ellipse and finger on my screen to
make it horizontal. I dropped the color in and then I just move
it to this side. If I turn off snapping, I can move it a little
bit smoother here. And this is where
we have room for our own artistic style
or artistic choice, whatever we like better. Since the light source is here, we just cannot place the cast shadow on
this side of the ball. That would look odd. But this is absolutely fine. And then we have another
great function here. Under the Magic Wand Tool. We go to Gaussian blur. We want to blur the edge of our cast shadow a little bit by just swiping to the right. I like that. It's just a little bit
too dark for my taste. So I'm gonna go and tap the N on the shady layer and turn
down the opacity little bit. Kind of like that. Awesome. So the last thing
that's missing here on the surface is our
occlusion shadow. I want to add another layer. I want to go pick my nice liner
and draw another ellipse, tap the canvas to make it horizontal and fill
it with color. Then I tap the
arrow tool here to move it around to where
I think it should be. And also, I want to
blur that quite a lot. That it fades into
the cast shadow. Super. It looks already like
really three-dimensional. The only thing that's missing is the reflected light and
a little bit of a glow. So let me show you
what I mean by that. I'm going to add
another layer on top of the two shady furry layers and turn it into a
clipping mask as well. And then I want to go
and pick light just for that and my medium fur brush. And now I'm just
carefully going around the edge here to just
mark the reflected light. You can see right away. It creates a great contrast
between both of those dark, shady areas meeting the
darkest core shadow area of the ball and the, the occlusion shadow
on the surface. And that already gives it a
little bit of a nice glow. That's enough. You can go and draw it
as visible as you like. I like to go with just a
tiny little indication, but if you like it
brighter or thicker, that's perfectly up to you
and your artistic choice. I guess I want to add a
little bit more here to just indicate the highlight a little bit better. Here we go. And what I wanna do lastly, is I want to add a little shimmer from
behind of the ball. And I wanted to show you
what I mean by that. Let's go to our Layers
panel and add a layer. Let's say on top of
our shades here, maybe below, I guess
below is better, right on top of our
blue layer here. And I want to set this
layer to Color Dodge. Maybe. I want to pick the same blue as my background
by just tapping it. The color picker is going
to pick the same color. I need my mono line brush. Here. We go back to
the mono line brush. And now I'm just drawing a
circle behind a yellow ball. Let it snap and
fill it with color. We can't see it because it's
hidden by it, by the ball. However, we're going to see
what happens in a second. I want to go back to
the Magic Wand Tool, go to Gaussian blur and
blur it quite a lot. And now you can see the
shimmer appears from behind. Maybe that's a bit
too much like this. I hope you can see it. Here's the glow appearing. And I got That's alright. So we have a little
shimmer behind our ball. Maybe we want to move it
a little bit to the top. This end here we have our greatly shaded furry ball with its highlight
is Mitch tone. Its core shadow, the
reflected light, the cast and occlusion
shadow on the surface. And this is gonna
be really helpful, this practice for
our class project, which we're going to
start in the next video. So let's get ready for our final artwork and I'll
meet you in the next video.
6. Let's Draw a Monster: Sketch: Let's get started with
our class project. And as usual, we're gonna
start with the sketch. As you can see, I've already
opened a new canvas. It's a 3,000 by
3,000 pixel canvas. The size doesn't really matter. You just go ahead and
open a size as you like. So let's now move on to the SketchUp brush from our
cute monster brush set. It's the one that
works like a pencil. We're going to
pick a dark color. We could turn down the
brush size a little bit. This is how I envisioned
my monster to be. I wanted to be like an oval
shape with 2 ft and two arms, a huge mouth separating
the head from the buddy. And I wanted to have
two horns and I tale, and I wanted to hold a balloon. So let's start out with
drawing kind of a bean shape. Somehow it looks
like a minion or so. And what I also want to achieve is the three-quarter position. I don't want it
to be too much in the center and facing
the camera directly. As I usually think, these are quite boring poses. So I want to make sure it's
kinda facing this way. So here's the 1 ft behind. It's hidden from the body and the other foot
is in the front. Here we have this huge Mao. And let's see, this is
the lower lip down here. And what's really
important for me for the mouth is that it has a little curved upwards to
indicate a friendly smile. Here's one I, and here
we have the other one. And that's what I mean. The eyes are not in the
center of its phase. So it's not facing me directly, but it's kind of
facing in this way. And that is very important for a more energetic and
lively Illustration. And let's see, I want
to create an axis to just show me where I need to
place my horn and my arm. So this is just a
guideline here. And I want who are number one
to be high enough in here. And the first arm is going
to be here, maybe like this. And here's the hand with a cell. And here's the other arm with his hand
holding the balloon. Our balloon is here, quite tiny. That's supposed to be the nut. And then we have this
flowy string here, which the monster is holding. And I want the monster
to look at the balloon. So I need to erase some of these lines here to not
be distracted too much. And the pupils are enough to indicate
where it's looking at. It's looking like
this to the balloon. And maybe we can place the pupils even higher
towards the border of the, I kind of like this. So here's this other board. I also want his horns
to have stripes following the
roundness of the born. Oh, and I think it needs teeth, like really wonky monster teeth. I guess two are enough. Here. We have the little tail that's kinda looking like
a crocodile tail. Maybe, maybe with
some spikes on them. By X or scales. I don't really know
what they are. And then I think this is the
basic shape of our monster. So let's position it
where we want it to be. If we have snapping
enabled in our Canvas, then it's really helpful
to place it in the center. Although the real
center of this shape might not always be
the visual center. So sometimes it looks better if you move it to the side
for just a little bit. But that's working easier
when we disable snapping And I guess that's
very good so far. Now I want to clean
up my sketch a little bit just to make sure I will use the
correct outline later on. So I want to add another
layer on top of this one. And from the bottom one, I'm just going to
lower the opacity a little bit that it's
not too distracting. Then I draw just nicer
lines on top of my sketch. So I want my balloon to
have a little taper towards the bottom, like this. And then I want the
string to come down in a, in a nice curved flow because a straight line would be
fairly boring to look at. Okay, then we have the
monster's body here. And I guess we need to be careful that we don't have a too wide as the fur will add
to its width us well, let's make it a
tiny Ted, smaller. And clean out these lines here
just to make sure we have the proper outline we really
want to use later on. When we start inking
out our shapes, we will make sure we layer
are Illustration properly. That means we will start
drawing the shapes that are in the back onto the bottom layers and then work our
way up to the front, adding layers as we needed. Let's go on cleaning up our
sketch as much as possible. I want to have an I here. And this time I want to
make it perfectly round. Although I don't know
if we'll keep that in our later finished artwork, but it makes it a little
bit easier for now. I'm just going to duplicate this one with a double-tap
on my Apple Pencil. To duplicate it. Then I just move
it to the side and now I have to is right
next to one another. But I guess I want the
eyes a little bit higher. So let's move on to the Layers panel and
merge these two layers. So I tap this from selection layer and merge
it with the one below. Then I go to the selection tool and I just
draw around those two eyes. Move them upwards a little bit. Maybe I change the angle. Here we go. Okay, let's follow the line of the monster and it
smells further. Here's the foot in the back, and that's the
foot in the front. One arm comes out
here in a nice curve. That's really important. And he has its
little hunch here. Other arm kind off. This way. Maybe. I've changed the angle
a little bit just to make sure the flow of
the line makes sense. See, Let's see which direction this little hand is facing. I guess, like this. And the thumb is going
to be like that. So this needs a little
clean up once more. So the thumb covers the string, but the rest of the
string must be visible. So let's draw this line again. Like this. What I also noticed right
now is that his left eye, the eye that's
further in the bag, appears bigger than
the right eye. And I guess that's the
perspective problem. So I want to make sure I
decrease the size of this. I just perspective why is it needs to appear
a little bit smaller? So go to the selection
tool and draw around this. I here. Go to the Move tool and
decrease it a little bit. I need to turn off
the old sketch. But yeah, I'm pretty
sure I like that. But now I noticed
my mouth is too far down and I need to get it
a little bit higher maybe. Because otherwise, our
monster loses its cuteness. I'm going to try and get my
mouth a little bit higher. Because when I is and
mouth are closer together, that just adds to the
crudeness texture. And the further apart they are, the more mature it appears. So I want my monster to be cute. So I will make
sure I placed eyes and mouth close to one another. And now I want to add the teeth. So let's turn on the
old sketch once more. And here we have
the monkey monster. Teeth and the eyes are
kind of like here. Horn number one. And here we have the same
problems with the eyes. So that means the Big Horn needs to be a tiny little bit smaller. As the front horn. Later on we can make sure
we copy one horn and then transfer to the other side and make sure we're happy
with this size. I guess that looks quite good. But this arm here needs to
be a little bit thicker, kind of like that. And I also want the
arms to have stripes. I guess that the
shape of our monster. Now, the next video, we're going to ink out the
basic Shapes of our monster. And I will see you there.
7. Basic Shapes: Our sketch is finished. And what we need to
do now is to create the basic Shapes starting
from the back of the monster, moving towards the front. So that means, I
don't think we need the old sketch so we can
turn off its visibility. And I want to create
my first layer above this old sketch.
That's this one. And on this layer, I want to place this horn, the balloon, this arm, and maybe also his foot. I guess my monster is
supposed to be pink. Arms and horns. I want to have in yellow, as well as the scales and
semilunar supposed to be green. So I want to start with my yellow tone and I'm using
my nice line are mono brush. I start to follow the
lines of my sketch. Although right now it
is very distractive. So I turned down its opacity and I turn the blend
mode to multiply that I continuously
can see it even though I draw other
shapes and colors below. So let's go and follow
this line here. And for the arm, I guess, Let's see how thick we
want our line to be. Maybe a tiny little bit more. I'm just going to go with a
very thick stroke to make sure my arm has the
same width throughout. It's important that I
don't draw the thumb as of yet because
the thumb needs to be on a different
layer because technically the
thumb is in front. And I guess I will place it on the same layer as the
other horn and arm. But I still don't like it. I guess I wanted a
little bit thicker. So let's go with a thicker
brush size and try it again. Here we go. The balloon
can also be on this layer, and I want the
balloon to be green. Alright, and on the next layer, we can draw them monsters foot, the foot in the bag
and the monsters tail, and I guess also
the monsters head. So let's go on, add another layer
and start following the outline of the next pieces. It's not super important
that we have a very, very proper and tidy
looking out nine here as we will cover
it with her anyway. So don't worry about
that as of yet. And on the layer on top, basically, we can place
the monsters torso. Let's add another layer. And to make it easier
for us to see, we want to turn
off the layer with the head and foot and the
tail just to have it easier. Now, what's really important is that we keep
this upward curve here just to indicate
a little smile. We want our monster to be happy. On the next layer, I want to place the front foot. So let's go and turn off the
visibility of this layer. Add another layer and
just follow the line of the foot underneath the torso. Actually, this is
where we want to place the eyes and the
teeth of the monster. And it needs to be
below the torso. Because we want the torso
to cover the teeth. That's very important
to create this depth. Again, this is the point
where we have to add the blue color to
our background just to have the eyes and
the teeth visible. So let's add another layer
above our sketch layer, the messy sketch, and just fill it with
our lighter blue shade. Very pretty. And now
we need a layer, as we said, below the torso. So let's add another layer. I guess this is a great
moment where we can just name our layers to have
it easier later on. So the blue layer, we're just going to name background by tapping it
and this Windows appears. Then we say Rename and
name it background. I'm usually really bad in naming my layers and I keep my
illustrations messy. But when they are only for
me and not for any customer, I'm fine with that. However, it really
makes sense to name your layers because as
soon as it's getting more complicated or it is
worked for a client, it is really important
that you keep your Illustration tidy
and name your layers. So please don't follow
my bad example. So you always name your
layers to help you finding the right layers
where to place your things. So this is the back, arms and back Body Parts. Let's call it back Body Parts. And then we have had
Feed Foot at tale. But for now we want to stay on the eyes and teeth
layer and draw those. I'm still not very happy with the placement of this I here. I guess the problem is now that it's too close to the horn, I want to place it a
little bit further down. And I'm going to
start with this is first to just copy this
one onto a new layer. And I'm not letting
this circle snap because I'm not so
much of a friend of the perfect shapes in my illustration as usually
it appears not natural. And remember, it's a Monster. Monster always are looking
wonky and other layer above, I'm going to place the pupil
and name it right away. I use my black color. And now we want to just group these two layers
to duplicate it. So we just need to swipe to
the left and tap duplicate. And now we can just use the duplicated group to
move it over to this size, make it a tiny tab, smaller. I guess that's all right. But I want to replace the pupil. So I just rotate the eye. And now I want to check
and see how it looks. So I'm going to
turn off my sketch. Turned on its Body Parts. Yes, that makes
more sense to me. So right now it's
not touching the foreign and there's a little
bit of space in-between. So I guess I really like that. And now I want to clean
up my layers again. That means I'm want to
merge certain layers. So I want to make sure that
this layer out of this group is going to be merged with
the other eyeball layer. So I just place it
above and merge. And now I have both
eyes on the same layer. I'm going to do the same
with the pupil here. And now we have this
empty group which we can just delete to
save on layers. All right, let's turn on our Sketch and go back to
the eyes and teeth layer. And with white color, we draw our teeth so
they can be wonky and have whatever shape as monsters teeth
and radius trade. And I've really never seen
a monster wearing braces so that they can just look
whatever we want them to. So let's now add a layer above. And this is where
we want to place the front horn and
the other arm. But actually, we said we want to duplicate the horn
that's already there. So we just draw
around this horn, flip it and place it
in this position. Let's check I'm on
the right layer. Go to my selection tool, draw around the horn and
double-tap on my Apple Pencil. Just say, Duplicate. This is the copy and paste menu And if you didn't change your default settings
from a Procreate, then you probably will
find this copy and paste menu and not on
your Apple Pencil, but you will find it with
a three-finger swipe down. Let me just quickly
duplicate this horn and move it up to where
it belongs to. And then I'm going
to show you how I did that with my Apple
Pencil because I quite often use the duplicate
function and I find it quite handy to have the function
on my Apple Pencil. So you just open the
wrench tool and go to Preferences and then
Gesture controls. Here we have the
copy and paste menu. And as you can see, I enabled Apple pencil
double-tap, that's toggled on. And by default, this function is the
three fingers swipe down. You go pleased with
whatever you prefer. I just find it super
handy with a double-tap. Now you know how
to find a copy and paste menu with a
three-finger swipe down. I still need to flip
the horn on this layer. That's the layer we just copied. So I need to flip the
worn flip horizontally. And then I'm going
to move it over there and rotated a little bit. I want to check if
this Horn appears too small or vice versa. The other one appears too big. And I guess that's the case. So I want you to go
back to the bag Body Parts and decrease the size
of this horn a little bit. A tiny text smaller, I guess that's enough. Let me just check quickly if
it's in the right position. Oh, sorry. We need to turn the
sketch on first. And I guess we even need to, need are messy sketch. So let's move that up
to see here our axis. Yeah, and I want to put it a little bit more
towards the front. Yes, I liked that a lot. Awesome. Sketch off. And on the same layer, we can also draw the arm. And if I remember correctly, we had the brush size
with 38 per cent. That's just quickly check. Yeah, that's kinda
the same width, just not the same color. So let's go back to yellow. And I guess I want to go with 40 per cent as this
arm is in the front. So it needs to appear
bigger anyway. So maybe let's turn
on the first sketch once more just to meet our axis. Alright, that looks
fantastic so far. Turn off the sketch. What's still missing
is the scales, and we can neither
place them on the back, arm and back horn layer. Then they would be hidden
by the parts of the tail. So that means we need
to place them between the torso and the tail there as I want them to be
partially hidden by the torso, but on top of the tail, I want them to hide part of
the tail for depth reasons. So I guess I want to place them on the same layer as the eyes. Yeah, I guess that's alright. We'll find them there. I need to decrease my brush
size and just basically just draw like soft
rounded triangles. So the inking part
is basically done. And in our next video, we're going to go ahead and
give our monsters furry part. It's for its texture
and another outline. So I will see you
in the next video.
8. Shading Fur Pt. 1: Alright, now let's
move on and give all of our furry
monster buddy part. It's shading and its texture. That's gonna be so much FUN. You'll see we're going to
use my fur brushes now. And to be honest, I'm
really proud of them. They are so cool and
create a gorgeous effect. What am I going to do first
is going to the head, foot and tail layer and give
each shape of Furry outline. That is very important to
create a realistic look. So we are going back to our pink fur color and pick the first
short brush for now. See how that looks. Yes. So we just want to redraw
the outline of its head, and we just use the
first short brush to create this fairy outline. And I want to make sure
it's probably easier to see when I toggle off the visibility of the
body and the sketch. What is important for me
right now is that we can't see this trait outline of our shapes we drew in
the previous video. So I'm gonna go
back and forth with my brush to make sure
this line disappears. Now it all just looks furry. Then we're going to do the
same with its back foot. But I guess I want to decrease the brush size a little bit. We basically need for only
on the top of his foot because where the foot touches the ground there it
is just pushed flat. Or maybe he even has skin
only on his soul. Who knows? We can see that because
it's standing on it. I just want to erase those
tiny little pieces here. They look kind of odd. So that's much better. Maybe just add some. Some are short hair
to have it fade out. Yeah, I guess that's super cute. And the last part is the tail. I need to mention. The only thing that
doesn't work with our furry brushes is I
can show you right now, the brush, the hair are
following the stroke, but for whatever reason, it doesn't work anymore. When I rotate the canvas, the for just lays flat. I can't tell you
why that happened. I couldn't find out yet. So if you have the answer, please let me know
in the discussion. Because this is a real, real to me and I really
want to figure that out. So the fact is that you
need to know if you draw with your fur brushes and
only with a Furry brushes, you can't rotate the canvas. Otherwise, the fur
just lays flat and doesn't follow this
trope properly anymore. So again, if you happen
to know the reason, you can really help me
out and let me know, please create a discussion
below the class. But for now, let's move
on and give our tail and nice very outlined just
without rotating our Canvas. Oh, it looks already
so fluffy, so fat. All right, let's move on to the next furry layer
with the torso. And here it is
important that we for now keep the visibility
of the head, foot, and tail
layer as we want to have those ends here
meet perfectly. I just want to turn down
the opacity a little bit. That is still can
see with a mouth starts and the head end. So let's just make sure now that we meet the line of
the head perfectly. I just need to check how long
buffer brush needs to be. I guess that's alright. Here we can pick out
a little bit more just to indicate it's lower lip, which stands out
a little further. Now, we follow this line here. As you can see, parts of the teeth are gonna
be hidden by its fur, which is exactly what I want. So we have all body
parts but the foot. So I'm going to toggle
off the visibility of its torso and move on
to the front foot. And I guess we decrease the size for that a
little bit once more. So as you can see, we can still correct that outline in case we're
not happy with it yet. Let's turn everything on again and set the
opacity to max. That looks so cute
and chubby, friendly. But actually we can see the friendly smile as
of yet because there is no shading yet and we can't distinguish any
light and dark areas. That means we're ready
for the front part, the shading of the furry
parts of our monster. And for the ad, we need to first indicate
our light source. And I'm going to show
you what I mean by that. It is important that
we can quickly refer back and forth to where
our light is coming from. And for me, it's helpful when
I just draw some arrows. I want the light source to be up here in the top-right corner. I'm going to add another
layer on the very top. And just with my
mono line brush, I'm just going to draw a few arrows pointing
downwards just to help me understand the angles
of the light rays and which parts need to be
lighter areas in my object. So this is the light source, that means here is the
lightest part of our monster. Whereas here it's gonna be the darkest part because
the light from over there doesn't reach much of its tummy and also
not of its feet. So we keep that in mind. When we start with a shading, we need to build
up the value from pretty dark to quite light. Alright? We want to start with
a head of our monster. We go to this layer. And what I'm gonna do now is
just adding a clipping mask, tap the layer and turn
it into a clipping mask. Because what we draw on
this layer will only be visible where there's pixel
in the layer underneath. So that's very helpful. And I need two different
clipping masks, one for the shady parts and
one for the highlights. So I'm just going to go
back to the head, foot, tail layer and hit
the plus again. Then we have just created another clipping mask right
away that saves us sometime. So the bottom layer is going
to be for the dark values. And this is what I'm
going to turn into, let's say, Linear Burn
blend mode for now. And that we just check if we
are happy with the colors. The top one, I will turn
into Screen blend mode. Alright, so I want the
fur on his head and on its torso to be long because
it looks so cute and fluffy. So I pick my foot long brush and go back to the pink color. And now, as I already said, I want to build from the darkest well you app
to the lightest one. That means since this part is the furthest away
from the light source, this needs to be
the darkest part, especially since it's also
covered by the lower lip, which also cast a shadow. So let me show you what I mean. I'm gonna start at the bottom here and just move my way up. But I think the first a
little bit too short, I wanted to be a little longer. Here we go. And then I start from the
bottom and move my way up. You will notice the brush
is pressure sensitive. So the harder you press, the darker it's going to be. And I want to make
sure that I don't have those visible
increments in-between. Here, we'd see a lot
of dark hair, so cute. And I guess I will carefully at dark hair around its
eyes to create some, some shadow here to the eyes on like balls
that stick out of the fur. And they also cast a shadow, especially towards
this direction. And as well as this
horn here that also casts a shadow
in this direction. So here is where I mark a
little bit of a darker area. That's great. And now we move up
to the screen there. But let's increase the
brush size once more. Then we start here, as here is our
light coming from. And then we move our
way towards its mass. Alright, let me zoom in. And now you can see all those Fun hair
in different values. Some are darker,
some are lighter. And that's just looks so natural to me and I
really loved that. And it looks all fluffy. So let's add some
more lighter here. Here. Always following the shape of its head to indicate
that it's a round shape. Maybe some highlights here. And then our next video, we're going to continue to shape the rest of our
monsters Body Parts. So I will see you there
9. Shading Fur Pt. 2: Let's continue our
shading for the foot. I want to change to the firm medium brush as it's a little bit earlier than
the first short Brush. And here, again, we need to
go to the Linear Burn layer. But maybe this is a
good moment to check. If we like a different value
better than linear burn. So let's just go and check
how Color Burn looks. Now, that's not so vivid. Dark and either, and multiply
also not, that's too dull. So I guess Linear Burn
is the best option. So I like that. Alright, so let's go back to the Linear Burn layer and
let's shade our back foot. And also the foot is
rounded this way and it's torso also casts a
shadow onto the foot. So this must be the darkest spot where the tummy hits
the foot leg here. And of course, the bottom
is also the darkest area. However, I really don't
like the brush size, so I need to increase
it a little bit. So Cute. Very, very nice. And then on the next layer, we go with the lighter value, move our way back. And here's probably
the lightest spot. Here. It's probably gonna be the reflected light
from the bottom. If we're not happy
with that, later on, we can still make some
changes. Alright? The next part is the tail. And this is also curved. So we need to draw this
kind of curved lines. And again, we are going to
start at the darker part. The bottom part of its
tail has to be darker, as well as here
behind this spikes. And also here where the tail kind of
grows into its torso. There's also the darkest part. Let's see if that's the right
brush size or we want to go maybe with the
for long brush. Yeah. I guess I want to go
with referred lung again. And on the next layer we
create the lighter you. And that's for sure,
since the tip of the tailors facing the
light source directly, this must be the lightest spot. I'm not going to draw
all the way down as we want the bottom part
to be a little bit darker. That looks so natural. Awesome. All right, let's move on. The next part is its torso. So we're going to do this
same with the torso. We add a layer, turn it into a clipping mask
at another layer below, and turn the blend modes, the bottom layer
into linear burn, and the top layer into
Screen blend mode. Here we go. Here with its body. The belly needs to be darker, whereas is back is
going to be lighter. And we also want to
make sure that we create a lighter area
here below his arm, where the tail hits
its torso that we have just enough contrast
to be able to distinguish here this line
between tailored torso. Let's see. Around
the bottom layer, we are with our furry long
brush debts are right, and the roundness is like this. So we need to draw this
kind of curved lines. Here sits darkest part. The further upwards I get, the lighter I press. And then on the next layer, we're going to fade
in the lighter value. So the bag is probably
the lightest part. Because I said, I want
to create this like a visible contrast line
between tale and torso. And what I really like is that the first points in different directions that's
also supernatural looking Then of course, the top part of his lower lip has to be lighter. Also to create the
contrast again. How cute? I also want to add
on the layer below, maybe with a smaller brush size. I want you to create a little darker shade
here below its arm to also indicate that there's space in-between his
arm and the body. That means I'm going to draw a little bit of a
darker area here. Just a tiny indication. So that creates the
shadow under its arm. Shadow the arm casts
onto its torso. So the last part that's missing
is the fur of the foot. We're going to move
on to the front foot, add two clipping masks, and get started right away. Go back to our
furry medium brush. And of course, the darkest
area is the bottom part of its foot and the very light
part here around this area. To also create again, this outline is contrast. And again, we follow
the shape of the foot. The bottom part
needs to be darker. And the top is going to be
the lighter. Wonderful. So we're able to distinguish
each body part and also the way it's curved and
positioned and pointing towards. So that makes it super three-dimensional and it
creates this wonderful deaths. I guess what I want to add right now is the reflected
light here on the bottom. And I guess I want to do
that on its tail as well. Later on, I'm pretty sure we will do some
refinements urine there at some reflected light. As we notice that we
need more contrast or glow to create more interest. And that's just what we're
going to do in the end. For now. The Furry
part looks fantastic. So let's move on. In our next video.
We're going to shade the rest of
its body parts, which are smoother
and more glossy. So there's a little bit of
a different process and I will explain more in the next video.
I'll see you there.
10. Shading Body Parts Pt. 1: Now we're ready to shape
the rest of its body. And the balloon. That's a little bit of
a different approach. We are going to start
with its back Body Parts, which is the balloon, the back arm, and the horn. We're going to add a few more clipping mask
this time, not just two. Because first of all, the arms and horns
should have stripes. I needed layer for that. Then on the next layer, I want to give the
monster a little bit of a texture because right now it looks super flat
and super digital, and I don't like that at all. There comes my texture
brushes in quite handy. So we're going to add one
layer for this Tribes, another layer for the texture. And then of course, two more layers for the
shadows and the highlights. And we're going to play a lot
with a blend modes again. So let's just do it. I add another clipping
mask and three more below. The bottom layer
is going to stay in blend mode normal because I want to draw the stripes there and they're going to
be a dark pink shade. So we don't need any
blend modes at all. The next layer though, is going to be a Linear Burn
layer again for the texture, as well as the layer on top. Linear Burn for
the dark shading. And the last layer is going
to be Screen blend mode, highlighting if
that's a word even. So first of all, I want to start
with it's stripes. And this is what I used
the dark pink for. And go back to the
mono line brush and make it a bit thicker. I'm going to just
add some stripes following the
roundness of its arm. That I don't have to change the brush size
every now and then. I want to do that on
the top RP right away. So let's just go ahead and do the same process here
at a clipping mask. And three more underneath. Leave the bottom at normal. Can the second one into linear blend mode as
well as the third one, the top one into Screen blend mode just
to save us some time. So here we go. This looks at here where
the arm reaches the fur. And this is what we're
going to change in the next step where we
come to this layer, what I want to do is I will
erase part of the arm, having it fading into the fur. And that looks way more natural. But for now, That's alright. So let's go back
to the layer above our back Body Parts and draw
the horns stripes here. Here we go. I just don't like the
tip of the horn here. That looks somehow odd. I want to erase a
little bit of that. Yes, that's better. But it also saw we didn't draw
until the very top of it. Yes. Alright. And I guess I want to do the same on the other
horn right away. Go back to the
other normal layer on top of the front horn. Alright, let's move on. Then we go back to the back
Body Parts on the next layer, which is the linear burn one, we want to give our Body
Parts some texture. So this is what I've added
the texture brushes for. There's texture pay per crackle, leather cords, RAF, and so on. You can play around to
see what you like best. I want to use now, I guess for its horn. I'm going to go with the course. And I guess I'm going to go
back to the yellow color. And then I just draw over the
horn with a texture brush. And you can see what happens. It just at some subtle texture For its arm, I guess. I want to go with letter maybe. I'm just drawing over its arm. Oh, no. Look at him. He forgot to cream. For him. He needs some lotion, I guess he next. Great. So for the balloon, I go over to green
and I guess I want to go with grunge texture. I don't like the crunch here. What about course again,
yeah, that's better. Just a tiny subtle
hint of a texture and that we don't forget what
texture brushes we've used. We're going to move on to the front Body Parts again
to do the same there. So that's our first linear
burn clipping mask on top of this tribes and the
front horn. Here week. Oh, oh, and I noticed I also
don't like this tip here. So let's go and make that
a little bit pointier. Erase this kind of thumb. That's way better. Alright. So I also noticed something
within stripe here. This tribe looks as if we've accidentally
erased some part of it. So sorry, I need to go
back and fix that first. Go back to my nice liner mono. It's just sometimes when
I move my Apple Pencil, this copy and paste window appears because this Apple
Pencil is very sensitive. I don't even notice
that anymore release, so I just tap the X to get
rid of it, so that's better. And since we're in
the fixing part, I can show you right away what I meant by letting it
fade into the fur and fur that we're
going to go to the eraser and we want to
pick the soft shader brush. This is what we're going to
use for shading later on, but also for erasing and having the Parts kind
of vanishing into the, let's see, what's
the brush size? And what I'm gonna do is just start to erase with
the soft shader, this harsh line of the horn
to have it fade into the fur. And that makes it look super natural as if it would be
covered partially by the fur. Here we go. It looks like the Horan
just grows out of the for. I think I could erase
even a little bit more. And that way it looks
way more natural. We can do the same
here with the arm. That looks so realistic. So we're going to do the same
later on with its eyes as well as with the
bottom of the scales. Now let's go back
to the texture. And now, now it happened what I tried to avoid, I
can't remember. I guess we had
course for the horn. And the yellow color. That's the red one. And for its arm, I guess we had leather. Let's see. Yes. That's the one. We go back
to the back Body Parts. And now we're going to
indicate the shady areas. And for that, we want to use either the soft shader,
we're the stripy. It depends on how
you want it to look. For now, I guess I will
go with a soft shader to just create a very
soft and glossy surface. You could also go ahead and use this try b1 and then that looks
a little bit more course. So that's a matter of taste. But I guess for now, I will
go with a soft shader. And I guess I will also let
say change too dark pink. And I will shade on the
second Linear Burn layer. I will mark the roundness of the monsters arm to indicate kind of like
a pipefish shape. So obviously here, the part
of his arm facing the ground, darker because they
don't get the light. And also its torso
casts a shadow as well. So here it has to
be dark as well. And to create this kind
of pipefish outline I marks some shade here, just to indicate the
roundness of its arm, as well as around his hand. And here in the
middle of his hand. And I notice we forgot to draw. It's going to come in the next layer with the
other body parts like this. You can see we already created some sort of a
natural highlight here. And let's move on to the horn. I guess we want to increase
the brush size a little bit. This is definitely going to beat the Dark Side of the horn. And this is going to
be the lightest area. Although since it's
round like a cylinder, we also need to give a little shade to indicate
a little bit here, just where it fades
towards the background. And then here, as
well as its head, also cast a shadow
onto the horn. Awesome. Then we
can also move on to the balloon right away and
go and pick the green color. Then for the balloon is clear, this is the lightest
area of the balloon, and this must be
the darkest part. Let's go on and start here. I want to erase a little bit
down here where the NADH is. And I guess I want
to change the eraser back to my nice
liner mono brush. And I see I missed a little
bit of color here as well. So I want to go back
to this layer and draw that in right now
that I don't forget. So let's pick the nice
liner and just draw it in. And now let's go back to the
second Linear Burn layer. And actually, we should
name all those layers. You see what a messy
Illustrator in, please, please don't follow my example and always name the
layers correctly. So this is our first
shading layer. Let's go ahead and go back
to our soft shader brush. Marks the bottom part here. What I also didn't draw yet
is this tring of the balloon. We're going to do
that when we draw all the rest of thumb and the other
parts that are missing. Alright, let's move
on to the highlight. This is the Screen
blend mode layer. I'm still on green. And now you'll see what happens if we start drawing
the highlight. I just want to make sure that I draw the right angle here. You can see even though
it's the same green color, the same you, the brightness
is so much brighter. So this is going to be
fading in towards the dark. And this year is the
terminator line where the balloon is the widest and then decreases again
towards the bottom. And in case it's not light
enough for your taste, you can still change
to the white color. Make it really bright. Oh wow. That makes it super
glossy right away. Since we are missing
the contrast here, I will add the reflected
light right away. I'm just going to go
with the white color. I also want to erase
here down with and not. And then I can indicate the highlights on
the nut as well. Shading the reflected
light actually is the most flexible part in our illustration because there's room for our artistic choices. So as long as we don't make those huge mistakes like when
the light source is here. And we placed the cast
shadow in this direction. That would be like a
real visible mistake. That would show that we
have no clue about shading. But since we do, we will put the
cast shadow here. And with a reflected light, we can just add as much glow
and as much shimmer and also as much contrast as we think that
illustration needs. So here we have the room for flexibility and it really
adds to the illustration. So that's why I'm going
to go ahead and just add the reflected light here to create this
wonderful shimmer. And I'm adding this
basically mainly there where the Body Parts up facing away from the light source
towards the bottom. Alright, this looks
already fantastic. And in our next video, we will continue shading
our front horn and arm, the scales or spikes
and the eyes and teeth. I will see you there.
11. Shading Body Parts Pt. 2: We're ready now to shade here
the rest of its Body Parts. So let's move on to
the layer where we created all the
clipping masks already. So we're here on top of its front horn and front arm
at the Linear Burn layer. And we're going to go back to our pink color and start the shading with our
soft shader brush. I'm just going to
add some shade here. This is the darkest
part of its arm, as well as here around his hand. And to indicate
where the thumb is, we just create a
little line here. And also we need to shade
here a little bit to indicate the roundness
as well as the horn. And here with the horn, this is the darkest area because this part is
facing the light source. So let's add some
highlights here. And I just saw that we forgot the highlight at the other horn. So we're going to do
that in a second. I'm going to go over
it with my white color because this is facing the light source and I want
it to be really bright. And here I want to create a little bit of a
reflected light. That looks good. So let's
just quickly jump back to the other horn and give
it its highlight as well. Let's go back to the
pink color first. And this is going to
be the lightest part. And now let's go back
to shading the arm. So go back to the screen layer
on top of the front arm. Decrease the brush size, go back to pink and just draw a tiny TED of
a highlight here. And also on its hand and thumb. I guess this is also
the layer where we can add some of the other arm
that's still missing. So let's go to the layer
which we didn't name. Thick yellow. Pick the nice Schneider. I'm all know, brush in
a pretty small size. Yeah, I guess I want to drag
that little bit upwards. So it basically holds
the string like this. I don't really like
to draw finger. That's why a lot of
my characters just have like a mono
finger hand thingy, but that's just me. Alright, so let's move
on to the shading. That means we need to give
it the texture first, which was I guess leather. And then the shading and pink
with the soft shader brush. So this is probably the
darker part of its thumb. And this is going to be
the lighter part up here. So we can make it a little
bit lighter because it gets more light
from the light source. We can also indicate a little bit of a
reflected light here, just to create the contrast and make the thumb
more visible us. What's missing now is
the eyes and the spikes. So let's move on to this layer and add three more
clipping masks. This time, I don't need
a fourth clipping masks because I don't want to add any stripes or any
other pattern. I just want to add
texture and shading. So let's add two more below. The bottom ones, I want to
turn into linear blend mode. And the top one end to screen. Here we go. Now let's start with a texture. And I guess for the I is, I want to go with a
texture of grunge again. And I will pick my
light gray here, up there in the corner. And let's just see
how that looks. Just some subtle texture
to just not have. It's so flat and digital. And I also want to add a
texture to the spikes. And here I guess I want
to go with the dots. We have dotted spikier
spikes here. Let's see Oh, yeah, that looks fantastic. Great. I like it. And since it's still not
natural looking for me, I want to erase
parts of the eyes and the spikes that
they fade into the fur. Let's see. We need the
soft shader as our eraser. And we just want to
erase these kind of Parts of the eyeballs to have
them fading into the fur. And the same here. Kind of in the same area. Yeah, wonderful. And now they don't look
so unnatural round and sitting on top
of everything, but now it's sinking
into the fur. So we need to do the same with the spikes as they are
also picking out over for. Alright, so let's move
on with the shading. On top of this, we're going
to start the shading part. And I think for that, I will go, especially
with the eyes. I will go with a
dark gray first. And then let's see
how that looks. I'm on my soft shader brush
and I will just draw around this area here to
indicate where the eye, it comes out of the fur. And you can give
as much contrast and shade as you'd like. It can get as dark as you want. It's up to you. That's also where we have
artistic freedom again. Yeah. Grade. I just think the gray looks kind of dull for now. So I want to have some sort
of a reddish tone in it. And I think I tried to go with the dark pink shade
a little bit. But but no, that's
not dark enough. So I'm going to my color disk and just turn that
a little darker. I just want to the pink to cost a little bit of a colored
shadow onto the eyeballs. Because it looks way
more natural and the colors are a
little bit more vivid. Yeah, great. I like that. And I don't think we need any
highlights here because the white of the eye is
already quite bright. So let's move on to our scales. And we go back to the
pink color again. So here where the spikes come
out of the It's probably the darkest part here where it's vanishing
into the first well. And to indicate the roundness, I also want to draw
all around the edges. We also need to give
some highlights here where the scales are
facing the light source. Here I'm not going
to mark the edges as the scales or spikes
are kind of round as well. Wow, looks fantastic. So we're almost there guys. We're almost finished. I guess the only thing that's missing right now is the string. So we can, I guess we
can draw the string onto the pupil layer. Let's see. So this is where the thumb is, exactly because we want the string to be
covered by the thumb. So if we draw it on the
pupil layer, we are good. I'm picking my dark color and the nice liner
mono, pretty small. Then I'm going to
draw something like a like a flowy line down there. But I guess that's too sick. So let's decrease the
size even further. Then drove flowy lines down. Here we go. Our monster holds the balloon. And it is so pretty amazing. Alright, Where are we gonna
do in our next video? Is we take care
of the background because that's
still quite boring. And I will see you there
12. Background: Alright, the last thing
that's missing for a wonderful class project
is the background. The background is
still quite boring. So what I wanna do now
is disabled the arrows. I move down to the layer with
the blue background color. In my opinion, the blue
is still too bright. So I guess I'm going to go ahead and pick the
dark blue color. But I want to have
a separate area here where the monster
standing on the ground. So I'm going to
add another layer on top of our background. And for that, I will pick
the light blue color. I'm on my nice line
and mono brush, and I'm just going
to draw a line here. Super simple, habit snap, put my finger on the screen to have it perfectly horizontal. And then I just
fill it with color. So that's already a little
bit more interesting, but still quite digital. So I want to add
some texture now. And we will work with
blend modes again. So on my background layer, I will add another layer and turn it to linear
blend mode. Again. Please always play around with the blend modes to check
what you like best. So add another layer
in Screen blend mode. And now we're going to
use the other brushes. I've added the stripy and the stripy brush
brushes as they create a very pretty texture
that at the same time indicates something
like light rays coming into our illustration. Let me show you. I'm with a blue color
and go to the linear burn bottom layer here on
top of our background. And since the light source
is coming from here, but darkest areas are here. Whether monsters throws
the shadow onto the wall. So I'm just going to
create random stripes. I really like that. I wanted to be a little
bit darker here too, because I kind of like imagine also the balloon
to cast a shadow. And if I move on to
the next screen layer, then you can see I do
the same just with a brighter whew. Alright. I'm just not super happy because this blue
seems to be too dull. I want to play around. Maybe. What about if
we use colored dutch? Let's check. Or add. I think I like add. It is nice and vivid. Yes. That looks better. If we find that too bright, we can still turn down the
opacity of this layer. But for now, I guess
that's pretty nice. That looks good for the
wall behind the monster, but we still need
to take care of the bottom where our
monster standing. So let's move on to this layer. We can rename it. We just name it ground. Everyone to add two
more layers above. And now we have to turn
them into clipping masks. We didn't have to do
that with the wall layer because that layer basically
fills the whole canvas. That's why it wasn't necessary. For the ground layer. We need clipping mask again, and we still need to
change the blend mode. So it turned this
one into linear burn at the top one into screen. And let us just check
how that looks. And now I still want to
use this stripy brush, but I want to change
the angle a little bit. So to just indicate the
shadow the monsters casting. And that's going to be of
course, in this direction. Let's go ahead and just draw
the darkest areas here. And the lighter area on
the next layer here. Maybe here the bit where the monster doesn't
cast the shadow. Oh, yeah, that looks great. We need the cast
shadow on the floor. I'm just going to add another layer and we can
turn it into a clipping mask And then I'm going
to go and pick the dark color and my
nice line-up mono brush. And then I just want to draw some sort of a blob in
this direction here. Oops. What just happened to his? We didn't close the shape. So I'm going to make
sure that we close the shape and then we
can fill it with color. And this of course,
is way too harsh. So let's add some gaussian Blur, which we find under
the Magic Wand tool. So we just tap it and
now I just swipe to the right with my pencil to
blur it as much as I like. And then since
it's too dark now, I'm just going to turn down
the opacity of this layer. So that's the cast shadow. We need the occlusion
shadow as well. So let's go back, add another layer and turn
it into a clipping mask. And then we just draw
an other kind of a blobby shape just down here underneath the monster
and throw in the color. And now we add some
Gaussian blur as well. Here we have quite some room
for artistic choices again, in regards to the shape and where exactly we
want to place it. As long as we stick to the
basic rules of course, and don't put it into
the wrong direction, for example, I right. I guess we need to
turn down a little bit the opacity as well. That looks fantastic. So I want to add a little
glow behind my monster. Now, just to achieve
some shimmer from behind, add another layer. Then we have to play
around a little bit. I want to choose one of
the blue tones again, and I'm going to go with
a darker one right now, also the nice liner mono. And let's say we're gonna go
with add as a blend mode. So I'm drawing a circle and
see how the color appears. That's all right, but let's play a bit with the blend modes. What about color, dodge, screen, too dull, I guess. Let's go back and forth. Now. I don't like that yet. So let's try the
lighter blue tone. Just erase what we drew on this layer and draw
another circle. I guess I like that much better. What about screen
or what about add? Not colorful enough. I want some tinted glow. It's I guess Color Dodge. It is. Just erase the shape
we have right now. And now we just want to draw
a rough kind of shape behind the monster that has kind of the same shape
as the monster itself. Fill that with color. Yeah, it looks good. It's there. And I also
want to have the same behind the balloon. Alright? And now we just give
everything a Gaussian Blur. You can see it here. This shimmer that comes
from behind. Awesome. I just want to move it
a little bit like this, but I'm still not completely
happy with how it looks. Maybe I just go back to add. Yes. So let's turn down the
opacity of the layer. And now I think we still
need some reflected light here on the
monsters, Tommy. So let's go and find that layer. It's this green layer. And I want to go with white. And I guess it's time I
will pick the soft shader. Great. I guess I also want some shimmer
here around his eyes. So let's find that layer. It's also the screen
layer on top of the eyes. Just some reflected
light down here, just to add some shimmer. And it creates so
much more interest. And you guys, it's finished. It looks fantastic. And as usual, please always
go with what you like. Best go with the intensity
of lighting and shading. Make is as bright and as
dark as you like it best, there is the room for
your artistic choices. And then our next video, I will show you how to
make your own fur brush. So I will see you there.
13. Bonus Video: Make Your Own Fur Brush: As promised in this bonus video, I want to show you how to
make your own fur brush. For me as a teacher, it is always very important
to share all my knowledge. So it is also a very
important part of Procreate Art to be able
to make your own brushes. A few very important notes about brushes when you
make your own ones. And you also draw the template. That means you will
always have to work in a square canvas. So this canvas is again
3,000 by three pixels. And I showed you in the lessons before how to make
your own Canvas. The second important
part to know is when you draw your own shape, you will always have to draw
it in a very extreme black. You, if you're not
at a very black, at a pure black, you, your brush won't be as
opaque as you want it to be. So let's go to our color picker
here and change to value. The value area. You just pull all
the sliders to the very left here in this RGB area. And when all the numbers
here are at zero, then we picked a
pure black till. So I'm going to use my
nice liner mono again. And since we draw offer, we want to think about how our fur is supposed
to look like. Do we want each hair to be a
little thicker or very thin? Do we want it to be a
bit curved or straight? And I think I'm gonna go with a fairly half moon
crescent shape. That could be like
a nice single hair. And I want to place it in
the center of my canvas. So I'm gonna go to the arrow
tool, enables snapping. And then I just pull until I see this yellow
cross here in the middle. So that means now my shape
is in the very center. Next, I will do my pet
Apple pencil trick again. I just double tap on my
pencil n-tier we go. And now I want to say copy all. This is very important that
we don't only copy the shape, but the whole canvas
with a white background. Then it's time to go to the brush studio and
make our setting. I'm in my cute monster brushes, brush set, but you can go
in any brush that you want. And then I just tap the
plus button which opens up the brush studio with
a complete new rash, and it has all those
default settings. I want to start by
adding our shape. Here we go to shape two, shape source and tap Edit. Here we're in the shape editor. And now we want to import
our canvas we just copied. So let's tap Import. Let's paste NTU Ico. Right now. The shape is just vice versa. We needed, we need the
colors to be inverted, like the background
has to be black. And the shape we want to draw
later on needs to be white. And we can achieve that by
just tap with two fingers. Here we go. Now we hit done and our
shape source is set. It's of course not
exactly what we want, so we need to make
further adjustments. So first of all, I wanted to start
with a scatter. And I guess I want to scatter
it by kinda 13% or so. And it is very
important that we set the rotation to follow stroke. We want, I think we want to
have more hair than just one. So we set count to
go with for maybe. And right now it
looks super equal, which is also not
nothing we would like. So I want to toggle
on Flip X and now it's facing this way and it's also facing
the other way. And something weird
I encountered, which I can't explain. I just do it because that's
what works is we need to change the angle for
whatever reason, 90 degrees. You're turning this wheel here. The next settings we need to
do is in this trope path, I want the spacing to
be a little bit bigger. And I want to add a jitter. Quite a lot of a
jitter because now it looks way more
natural and fluffy I guess, yeah, 39%, 40 maybe. Let's move on to rendering. We want to make
sure that it said too intense glaze
and flow is at max. Wonderful. We don't have to change
anything else here. But we want to go further
down to Apple Pencil. And here we want to set
the opacity to max. That means if you just hit
the Apple pencil lightly, it's gonna be very light. And if you go and press harder, it's going to be darker. So that's very important. We don't need to change
anything else there. But with the properties we need to enable oriented screen, the preview size can be maybe, Let's see how that
looks later on. We need to bump up the max size. I'm usually going
with 350, 400%. The minimum size is usually
kind of three-ish parcel. See, that takes beautiful. Let's tap done for now and try out what
we've gotten here. We want to make sure we got to do that on a new layer that we don't destroy our
initial, initial shape. So cute. Let's make it a bit smaller. Maybe we're going
to choose a color. Let's go with green. And here you go. And you have a cute furry ball. If you add another layer and
change the blend mode to, let's say Linear Burn again, you can add what we really need to turn it into
a clipping mask. You can add the shading. And it just adds
this nice texture. And it looks like
you've drawn each, each hair like individually. But you've not because
you were able to make your own fantastic brush that does the most
of the work for you. Thanks to Procreate. This is really amazing. Add another layer and
change the blend mode. And here we have an
amazing fur texture. What we should not forget
about is we shouldn't name our brush and make sure
no one can just copy it. And as you see, this is what this hatching
preview size is. We can turn it smaller or
bigger or whatever you prefer. It doesn't really matter. It's just what appears in the window in your press
it in your brush library. We need to change a few
settings in about this brush. So we want to name our brush. For medium, curly. It's made by you, so you tap your
name, then use sine. And the most important
part is if you don't want other people
to copy your brushes, you need to add a photo. As soon as you've added a photo, you will make sure that
this photo appears in every copied version
of this brush. So you just tap it on and
wait until it's uploaded. And there you go. Don't forget to tap Done. Now you have your fur,
medium curly brush. And I encourage you to go and
try out different shapes, different sizes, different
width maybe if you want to. And maybe you can use it for whatever else shape
that you can make some plant brushes or
leave brushes or whatever. So I really hope
you've learned a lot about the brush
studio right now to, and you are able to make your own great
signature brushes. And in our next video, we will have a little
conclusion of what we've learned in this class.
I want to see you there
14. Conclusion: Congratulations on
completing this class and thank you so much
for staying with me. Throughout this journey,
you have gained valuable insights to
shading Principles, explored the intricate
world of fur, broad your imagination to
live on the digital canvas. By understanding the fundamental
principles of shading, you now possess a powerful
tool to add depth, dimension, and realism to
your digital drawings. As a bonus, he would
have learned how to create your own custom
fur brush in Procreate, having personalized brushes that suits your style opens up, enters possibilities
for creating unique and stunning
fur textures and enabling you to infuse your artwork with your
own artistic flair. Of course, the journey
of artistic growth, never truly and practice
experimentations are key to honing your skills and discovering your
artistic voice. I hope you'll continue
exploring shading techniques, experimenting with
different subjects, and pushing the boundaries
of your creativity. And remember to upload your finished class project to the projects and resources tab. This is a fantastic
opportunity to receive feedback from your
fellow classmates and me, engage in discussions and inspire others with your
unique artistic style. Don't hesitate to ask questions, provide insights and support your fellow artists on
their creative journey. In addition to Skillshare, I encourage you to share your
item social media as well. Use the hashtag furry monster and techniques in your post. So I can see an honor
your furry creations. You might also want
to subscribe to my YouTube channel where I regularly share
procreate tutorials, of course, for free. Thank you for joining me on
this creative adventure. I hope you've enjoyed the class and founded enriching
and inspiring. If that is the case, please consider
to leave a review as it helps other students
to find this class. Now, armed with your newfound
knowledge and skills, go forth and create your
own furry masterpieces. I can't wait to see what
you guys will come up with. Happy drawing. I will see you in my next class.
 Jutta Schneider, Artist | Educator