Transcripts
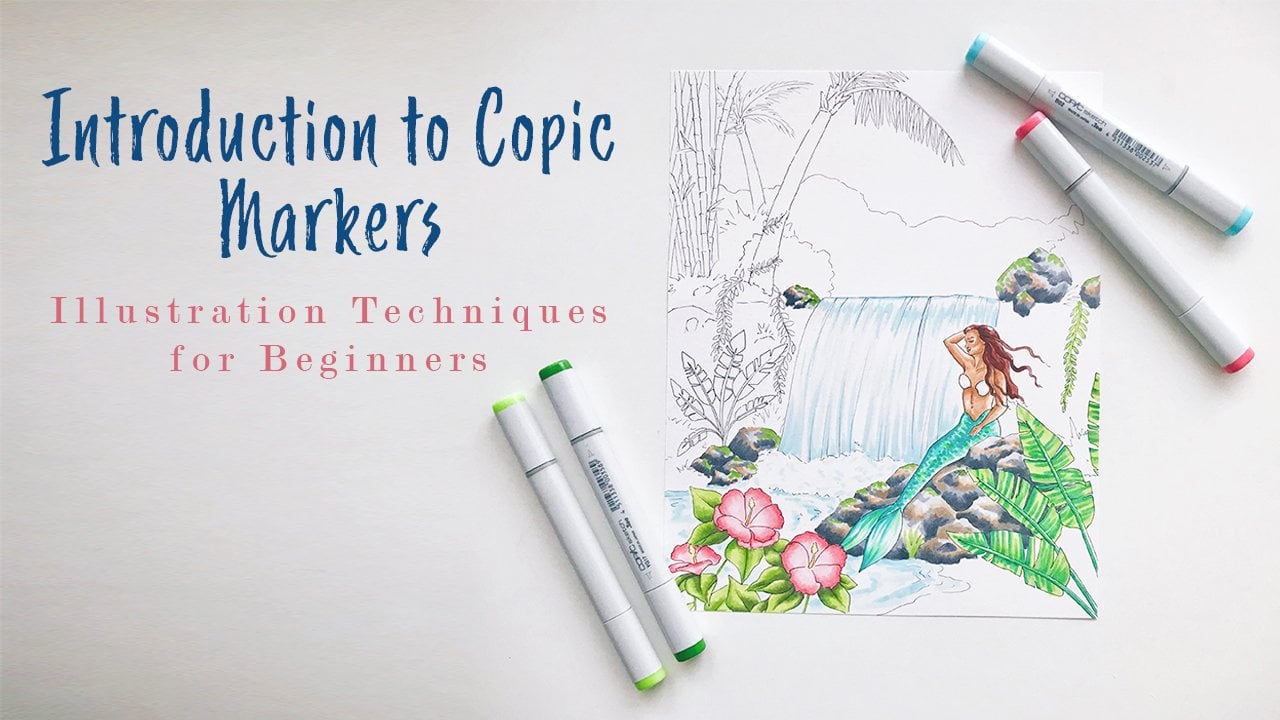
1. Introduction: My name is Elizabeth leg line, and this is my seventh seal shop class. Today's class is about how to create a realistic and adorable portrait of your pet. In illustration. Worker. If you aren't familiar with illustration markers, you can check out my previous course, which is introduction. Niko Pick markers Illustration. Techniques for Beginners If you want to familiarize yourself with on the coloring techniques that will use in today's class, prior experience and illustration markers will be helpful for today's course. But if you're a beginner and you want to just die right in, definitely go for it. If you're up for the challenge today, our view, my favorite coloring techniques and materials and we'll go through how to pick a great photo and the best way to tackle an illustration of your pet. I'll go through two examples with dull portrait's and today's class, but the same principles can be applied. Teoh, your cats or any other furry friends, pet or pets are one of my favorite projects because they're always a meaningful and it's a really friend. Break for my usual work, which is with mermaids and marine life is the perfect projects work on at the moment as we are made. Coben 19 Quarantine. This is the first time I put on makeup any nicer in a little over two weeks. So I think we're all a little bit bored and looking for something fun to do. The class project for this course will be to submit your reference photo that you've used of your pet and then you're finished illustration. I hope you guys have a lot of fun with this class and I can't wait to see the finished portrait of your pets. Feel free to tag me on social media as you're checking out the class at E j W Underscore, underscore art and let's dive into materials to get started.
2. Materials: for materials. For today's course, you're gonna want to grab a pencil, an eraser for some sketching. You're going to want your reflection of file under pens, which will use for outlining and details I have micron pens on. Those are my favorites. We'll be using those today, and then he wants also grab a white gel pen or some other type of white ink, which were expressed for highlight. And then I also have my marker paper. You want to use more paper because it maximizes your blending and allows for the best possible effects from using illustration workers. I have coped with marker paper with me today, but Strathmore can sing, and there's tons of other brands that have it. You could pay a small patrol craft store, all of the public close at the moment so you could order some from Amazon or any cross store online. And then the last but perhaps most important thing. The alien today is your illustration workers. I have all of my markers organized and this art been by color, so I have a couple different brands and here co pick Prisma, Color, Windsor and Newton Black Studio marker. So you could definitely pick out whatever market brain works best for you. There's a variety of prices if you're kind of more entry level, the black studio markers or Artie's A markers are great alternatives, and then the person of color co pick are some of the more expensive ones. But I have. All of my kind of browns and grays are over here, and which is I'm going to be mostly sticking to today. One thing that I highly suggest investing in is a set of grays. I have the full set of coping marker, cool grays, which I used a lot in my shadows from my drawings. I have the cool great because they work a lot of with blues with my ocean work, but you can also pick up. They have warm gray and neutral right as well. So if you want to go with one of those, but I just highly recommend it makes it really easy for blending. So if you want to invest in something like that before we get started, I highly recommend otherwise you can probably work with what you have, so let's get into it
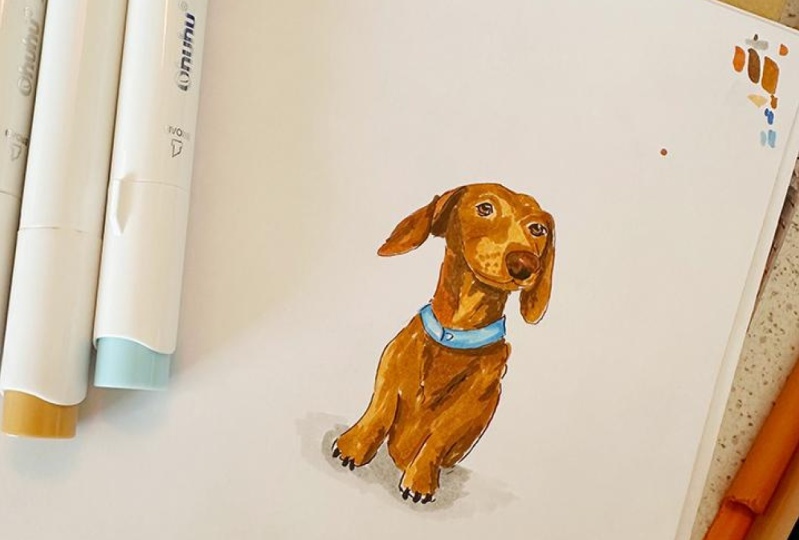
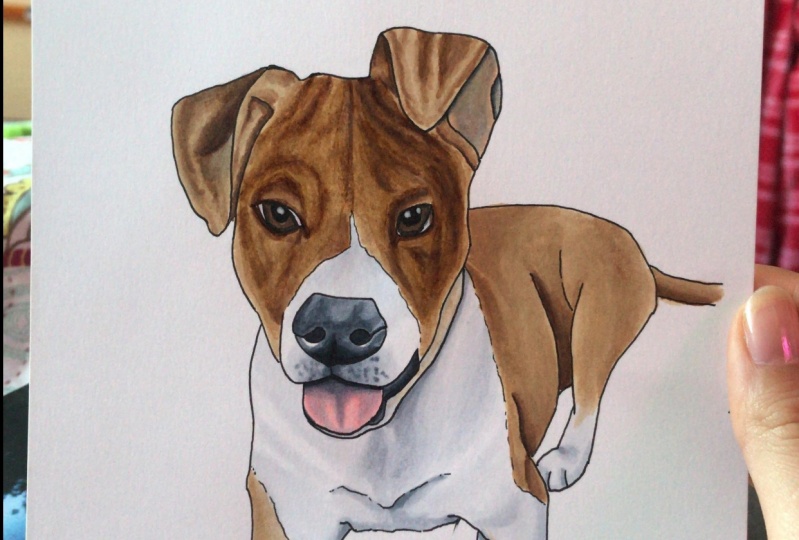
3. Picking A Photo: for the first step for your portrait is gonna mean to pick out a photo. So I suggest choosing a well lit photo, preferably in some good natural light. You want to pick a photo that has minimal, distracting details, like you don't want your dog to be surrounded by toys or have you know, like a leash on or something, and then either choose of close up of the face or on unobstructed, full body shot. These are going to be the two pictures are working with today. So I ran a little contest on my instagram eso. I picked one that way, and the other one was from a portrait donated to an auction. So we're working on both of those to kind of show wanted to maim or close up of the face, and then the other one obviously, is a more full body shot. So then these are just some examples of some my work in the past again, this is more of a close up of the face. I did include, like, the least detail in this, but it just shows what great national light will do. And then again, this has, like, very minimal background, and then I also did this one. So I took 100 just the dog from this one, and then just did that on the white background. Made it really easy, because again, there's something on in the way are obstructing it so really easy to just translate to that white background, which I think just gives the portrait of a great look. In that way, you can focus on the dog without having some distracting background or trying to get a photo with a perfect background. So definitely go through your camera roll, have a little photo shoot if you need to, and then let's dive into the drawing.
4. Tracing & Outlining: Okay, So for this first part, once you've chosen your photo, we're gonna talk about tracing and outlining. So this part of your video, you're gonna want your pencil and eraser. I'm using a to each pencil for a nice light line. Teenager micron pens with outlining. And then, of course, your marker paper. So I have gone ahead and removed a piece from my sketchbooks on gritted out to an eight by 10 and then I'm gonna trace this photo for this one, and then another photo I had actually already traced in outlined. So we'll go through the process of doing that. I just find it easier to just use your computer or iPad. If you have a light boxes, I'm just go ahead and trace the image that you have. It just makes it easier. There's no point in spending hours sketching something out. We can easily trace it or something like this. So I'm gonna go ahead and traces image, and then we'll get into the details. So here I have done my simple can trace from the computer screen, so I pretty much just did general outlines and any color changes or anything. So now What I'm gonna do is go in and sketch a few more details that I didn't get in the tracing, just referencing the photo. And then we'll move on to outlining and I'll discuss how to go through details with that. Now, I've refined my sketch a little bit more. Um, and I'm almost ready to start outlining. So a few things here I want to think about when you are outlining and tracing are you want to make sure you have your features like their tongue, nose, eyes, ears and then think about their general body shape, details like pause and everything and then where there for changes, direction. So the amount that you're gonna outline is gonna be totally up to you. You could make it as detailed or as general as you want. So I normally kind of do. Like I said, their general body shape, their futures and everything, and then you can see here I did like the kind of changes direction of all the for on the lab, and I'm gonna do the same thing here. If your dog has curly hair, you might want to add a little more detail with the texture of the for. And then also, you can dio if your dog has spots or something you could do outlines based on that as well . So I'm gonna go ahead and do the outline of this one. I'll do a little time lapse while I'm doing it so you could see the details. I'm gonna use all my microphone pens, so I sort of balance my lines with doing very solid, smooth lines based on their for and then areas where it's a little bit more fuzzy. And again it will kind of be be based on your dog or cat breed or, if you're doing that, another pet based on that. But I'll do a quick time lapse while not lining this one's. You can see how I do my details. Okay, so what? This stage, you are finished with your outline. For the most part, you can go ahead and a restore pencil lines. If you do want to leave a couple that are for areas either where the color changes or something that you didn't want outline, you could totally leave those. Sometimes I leave some of those really lightly, but I'm just gonna go through and erase all those other pencil lines, and then we will get into coloring
5. Coloring Eyes & Nose: all right. So after you're finished with your tracing and outlying everything, the first thing that I'm going to do when I go to start coloring a portrait is the eyes and the nose. I start with those because especially the eyes are a detail that you want to get right, because that's where it's really gonna bring your piece, toe life and really give that connection. So that way, I always start with the eyes, because then if I mess it up, I can only start again. And you know, the tracing and outlining will be annoying to do again. But it's not the end of the world like I said. So I'm gonna go ahead now and start with the eyes, and then I'm gonna do the nose as well. Just cause that's another kind of smaller detail. And then we'll go into more the general for colors on larger areas. For the materials that you're going to need for this part are gonna the, um, your micron puns again to add in any details? My secret weapon issues a white gel pen so that you can give eyes that highlight on And then, of course, you want your co pick markers. I have a little extra pad of paper here that I'm gonna use to test out my colors before I get started on my actual piece on. And then one other helpful piece can be that if you're having trouble with the eye color, If your picture is too dark, go ahead and turn the brightness up, especially for this part just to kind of get a little bit more contrast in the eye so they can determine how you want to color that. All right, so I'm going to start with this piece so this one's a little easier because it's bigger with the other One's a little more zoomed out. So what I'm gonna do is choose some darker grays to start with, because that's what we're gonna use for the pupils and any shadows around the edges. So I'm gonna grab. I have my C nine and C seven, and then I'm gonna want Teoh use a dark brown. So one layer, this one, I have 29 that I think I'll go with the 35 we'll kind of start with those and then see where we go with that we wanna work one eye at a time, So I want to start with the darker, actually, start with si seven and kind of just go around the edges. One thing to keep in mind with ease portrait's is that your home peas is going to go through a period where it's gonna look really scary. And you're gonna be like, What am I doing? What? I promise. Just keep adding those details it's gonna turn out. Okay, so right now I'm just working on layering. So I layered in the shadow and I'm go where? In a dark brown and then later, Brown, I'm gonna give all of that a minute to dry, because as much as you want things to kind of blend together, you also want to give it a minute to dry for where you don't want over blend. Um, so once I let that dry a little bit, I'm gonna go in with another later gray, just to tone down that kind of little break gold and come, as I discussed in other videos on you always wanna work dark to light. But in this case, with eyes, I don't usually start with the absolute darkest. So I start with, like I said, I started with my C seven instead of my C nine. And once I'm gonna let all of that dry, then I'm actually going to go in and add got even darker shade. So in the meantime, get started on the other one now, eyes air. Definitely something that are gonna take you a little bit longer when you start feel free to, you know, you could do a couple practice tries on a piece of scrap paper. Um, if you're not confident with it yet, I've done a lot at this point, so hot, a good amount of practice, so I don't feel a little bit more comfortable. I used to just rolling it together here. Like I said at the end that, um, the white gel pen with the highlight is really what's going to give. Give it that life. All right, Now I'm gonna go back dark. Is she all right? So there we have that, and then I'm gonna add if you know, the whites of your dog's eyes are showing, you're gonna want to go in and definitely toned that down a little bit. That's obviously not It's kind of prey weight as is. And then you can also add pinks or anything like that to tie down even more for the one. And then again, however complicated your you know, all right is going to depend on the photo as well. If it's a really close up photo, you might really have to go into a lot more detail versus if it's kind of far. All right. And then once you're feeling confident with the way that you called it with your marker is you want to go in with your gel, penned those highlights tested on my side piece of paper here. And then, you know, your highlights they're going to depend on photo as well. We might kind of different shapes. Okay, so now that we've done the eyes on this one, I was gonna do the father portrait for another example. Okay, so then this one has smaller eyes. That's not gonna be quite is detailed, but we are gonna follow the same principles. I'm gonna pretty much use the same colors. I just think I'm gonna dio not coy as vivid with the Brown. I think I'm toned down a little bit again. We're going in with our darker colors. We'll just go in and and then you're layering Will also kind of depends on what colors that you have in your coping markers. I have the cool grey set that I use a lot, so I sometimes have to warm up those colors, Um, with more shades of brown. But you could have if you had the warm gray set. You know, you'd be kind of on the opposite side and looking to tone down, um, and possibly cool off those colors, so it's just gonna depend. And once you've had kind of your set of markers for a while, you'll start to realize that kind of what works and you'll have kind of like go to layering groups that you'll go to so and canned last steps highlights. This is a little bit of a darker portrait, Bad gray, and then we'll do the noses. All right, so starting again with this one for the nose again working, darkest to lightest. So I'm gonna go in with my darker one first filling in the nostrils and then the noses will kind of depend. Um, some some dogs have pretty much just kind of, you know, black, dark grey noses. Some have a little bit more brown's or pinks, so that what kind of dependent your layering this is one that's more just like an easy, dark, dark color. It's just kind of go through all that wearing. And then, just like with the I, sometimes you can add those little highlights with the white Joe Penn to really give it a little more life. So when I'm working with my sets of gray, since I have, you know, each one in the whole set, I tend to skip, um, one or two as I'm blending, as I don't want it to look to. To smooth of that make sense. Um, and then sometimes, if you're really going exact color by color, it can get over blended. I tend to skip, and then what you can always do is I often go back and then kind of dark in it up again a little bit. In certain areas, be wanting to go back and add some texture as well along the way. That's one thing you could do with layering as well is if you go back with the same color it will darken it a little bit. So if you kind of treat it like a first coat and then go back, Yes, you've got dark and, um, its texture. And then as a last stuff, I'm gonna go in and just dark in these a little bit more, really? Get that depth with nostrils, all right? And then this is gonna be one that is a little bit later, a little bit more brown. I start with darkest shade again in those marshals colored so later. And when you are layering, if you want to take your colors from cool toe warmer, um, or anything you want to start with, you know, if I want to make this warm, I'm going to start with the greys. And then I'm gonna layer the warmer colors on top to bring it up to that warmer color. Because if I lay the Browns down first and then put the blues down, it's just gonna pull it a little bit more towards Gray. That I'm gonna want, right? Started with that 66 now skipping C four. This one has a real strong highlight over here. So that area out and now I'm gonna go in with more colors again. I am working quickly so that these colors will blend right into those Berets instead of kind of just sitting on top. And then I'm gonna kind of let all this sit there for a second and kind of blend, and then I'll go in and add, um, so little bits of war. Bits of texture, like a little bit of great back in. I just love with darker areas, All right, And you finish in other news.
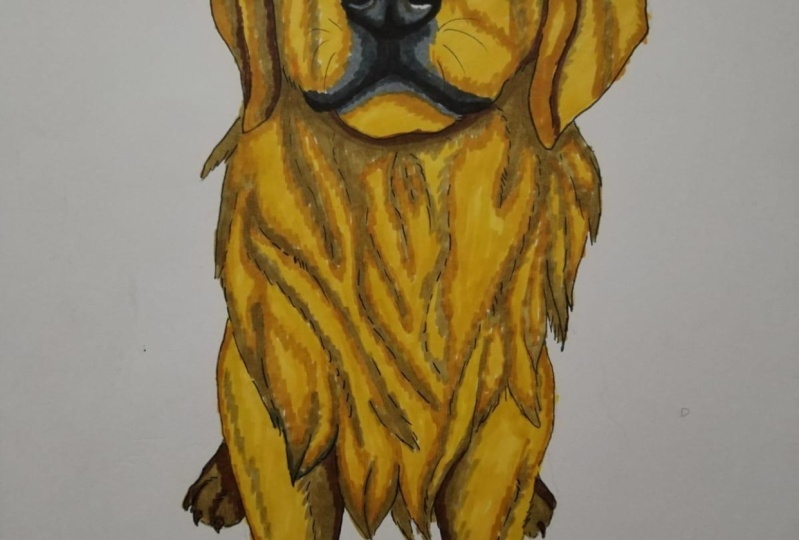
6. Finishing The Face: So at this point, you finished the eye than the nose. So you're ready to start working on the face again, Like the eyes nose. You wanna work on the area? That's easier to mess up. The face is obviously important part of your portrait. So you want to start with that? What I like to do is start with the darker areas and then work one small section of time again to maximize blending. Um, what I do is usually work one year at a time to start with. That doesn't easy way to section it out. And then I'm gonna go around the eyes and the nose and kind of work outwards from there. You want to work in the direction that the fur is growing, just makes it easier. And then your flick brushstrokes are going in the correct direction to really give it life and then just one other quick tip before we get started. Once you've figured out what color is you want to use for your portrait, make sure to set aside those markers so that you don't forget which colors you're using. If you end up stepping away from your project and then come back to it. So that's a few tips about getting started on the face. Um, so now we are going to get started on the ears, Okay? For this year, I'm starting with this side over here. I have picked out mostly e thirties from my co pick set for this coloring. I'm going to start with E 29 for my darker color for the shadows. So I'm gonna start with the section of the ear and then we'll move on to the for where it's connected to the rest of the face. Start here with the shadow. I want to make sure you're using those flick motions who maximize your blending potential and then also make sure that you're doing them in the direction of the for and the shadows on. If you really want to get that more realistic, look as much as possible. Make sure that you're working dark to light, and then depending on how you wanna kind of style your piece, you can work quickly for seamless blending. If you really want those colors to really bleed together and look a seamless as possible, or you can give it a minute to dry between each color or layer. If you don't wear color supplee together as much to give mawr individual brushstrokes so you can work in as many layers as need to some areas that you're working on. You might just need one layer, and then sometimes you might want to go to go over it a few times to really get the look that you want. It will just kind of depend on your blending techniques and preferences how you end up going about it, deciding whether to go in with a little bit of cool gray in this area to tone down a little bit of the warmth and keep filling in with the lighter brown for a second and let all of that finish blending. But I do think I'm gonna throw in a little bit of the cool gray, and then that way it will just work its way into those browns and cool it down. Just that perfect amount for the shadows to give it a riel mystic look. So I think that will be perfect. So alleges that do its thing and keep working. All right. Now, using the same color, something go over this area here and then get to work on other year. - Now that I finished the ears, it's time to work on the rest of the face. You can grid this out however you want. You just don't want to tackle the whole face at once. If you really want that seamless blending look, So what I tend to do is either start around the snow. This dog, for example, has a white spots around its now, which would be an easy place to start. And then you can, like, finish the tongue, which is obviously separate. Um, and then what I'm gonna do is work around eyes, and then I'm gonna work the area above each eye and then below, so those will be kind of four different areas. So that's how I'm playing to get it out, be using pretty much the same colors for the face. So I'm going to get started. - Okay , so now that I finished the face of the first portrait, I am going to switch over and do the face of the other one. So all of record a time lapse, Will I do it so you can see all the details as they work through it
7. Finishing The Body: So once you finish the face, it is time to work on the body. So the face was relatively easy to suction out. And just like the face, you want to section out the body for your coloring strategy. You construction it out, how we want, and it will depend on the dog's posed how it's easiest to divide up. So for this one, you can easily section out leg by leg and then when do the neck area to tackle that one and then for this one. It has some white spots and brown spots in the front, so I'll divide that up and then do the legs in the front and then do the back area. So for coloring the body on it will depend on the for texture of your pet. How you tackle the coloring. Both dogs that I'm doing today have short hair, so it's more of a smooth blending look. But you'll definitely use a similar techniques, no matter what kind of for your pet has, you still want to work from dark to light and work in small sections to maximize blending. So as you can see, I'm starting with the back area here with those same brown tones that I use for the face. I'm simply going with that and they're adding in some cool grays to tone down certain areas and add shadows. Whereas in the front and some of the areas, I'm starting with the gray and then layering a very light kind of peachy color on top to warm it up a little bit on. That's pretty much it. So then, for this one, my time lapse is a little bit more extended. I started with areas that were most obviously separated so that I could finish those that kind of checked them off the list as I go. So start with some of the legs and the tail so that I'm slowly working towards EU larger areas so as you can see it now, but I'm kind of working in this area, I'm headed towards the larger area towards the top. So then what I started at kind of the neck area is finished, kind of all the folds on the for there. So again, you're kind of just chipping away small areas at a time, So then you'll get to that one big area and and finish it off
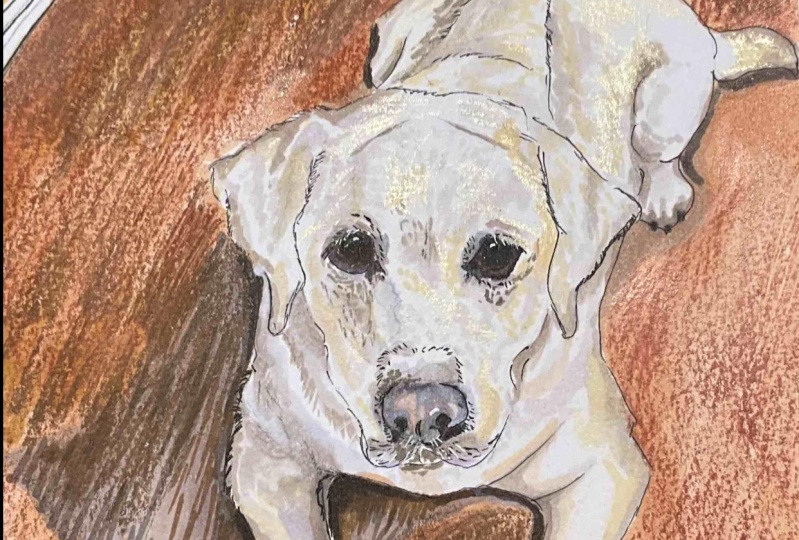
8. Final Details: So now we're almost finished. The portrait your face and body are mostly fished, and the last thing is, just if you want to go through and add some finishing details So this is gonna totally depend on the pose and lighting of your pet. So you might decide if you want. You could go through and add highlights to the nose, little fuel, white dots there on my Joe Penn. Or you could add more fine details like whiskers. So I'm gonna go in with a really fine pen to add a couple whiskers. So you just want to do some really quick light strokes. And again, this is just adding a little bit more realism to your portrait, Really bring it to life. So now this one is pretty much finished. So I'm gonna go back to the other portrait, all right? And I think the only thing that I need to add to this one is the toenails. So some of them are kind of Ah, dark gray. And some of them are a little bit more pinky color. Go through and on those one by one. You sure that every details filled in and then I think again. I'm gonna add a little bit more highlight to the nose for this one. And yet, Yeah, a few little hairs and then this one's finished. So hopefully you enjoyed today's class. I had so much fun working on wolf of these portrait. And I hope you have fun coloring your pet. I'll do a quick comparison of each piece with the original reference photos so you can see the final product. Okay, so you can see here we have our first finished portrait. I did a little bit of more zoomed in one for this one because obviously part of the dog was kind of obstructed by the covers on the bed. So I zoomed in a little bit focused on the face and the eyes and happy with the way that this one turned out. And then this is the 2nd 1 here, a little bit lighter. So there's a great full body one. I'm really happy with a weight the way that this one turned out to a little bit more dramatic lading on the side. But I think that the colors turned out really well and I really like the mix of kind of the warmer colors with the greys you think gives it a really cool effect
 Elizabeth Weglein, Artist and designer