Transcripts
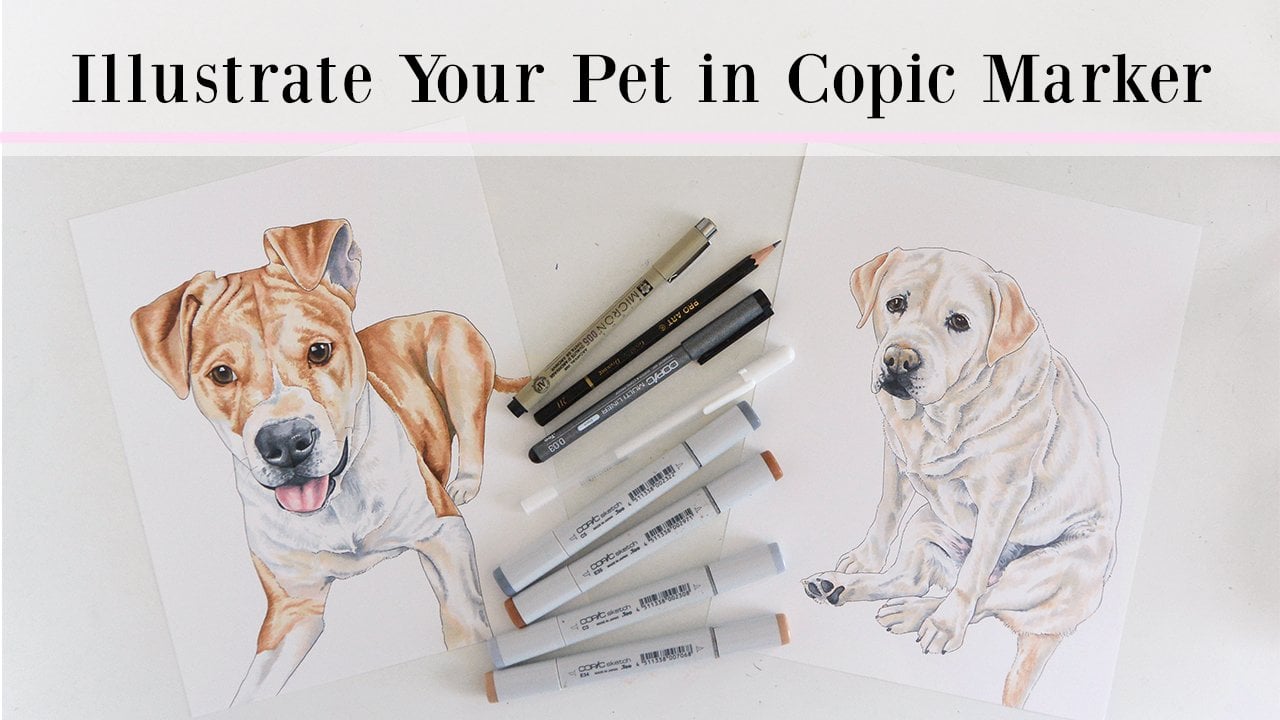
1. Intro: Hi, My name is Elizabeth Line, and today I'm back for my sixth skill share class. So today we're gonna be diving into the world of illustration markers, specifically coping markers. I first discovered coping markers in my first fashion illustration course in my freshman year of college, and since then I've completely fallen in love with the medium. It's one of three primary mediums that I use, along with acrylic paints and my letter pens, and I incorporated into my work with ocean themes with my mermaid's and marine life and as well as in my dog portrait, which are one of my most popular commissions. I always get questions about what the medium is, what I'm presenting, working marker. It's kind of different, and it's a great medium. They kind of make your own, and I find it kind of quick and then easy once you get the hang of it. So whether you're a complete beginner who hasn't picked up your first marker, or maybe you have a few, you know how to use them, or even if you're just frustrated with the medium and need a little bit of instruction, this class is gonna be for you. We're gonna talk about how toe pick up your first marker, pick your colors and how to understand the kopek system they were talking about Using your marker is blending and everything, and then we're gonna work through a class project together. I've created on original illustration for the class project of this course. So we're gonna be coloring that together with all the techniques that we learned today. So let's get started.
2. The Copic System: So I want to start with a review of the markers that coup pick has to offer their first and probably most popular. One is the co pick sketch marker, which, like all of their markers, is gonna have a dual tip, and it's gonna have a brush tip and a chisel tip. Then the co pick. Classic markers are gonna have just a been bullet tip and then a chisel tip. We have the child marker that has again the brush tip and the chisel. Tip someone to the sketch marker. But it's gonna be a smaller version. And then we have the wide marker that just comes with their one very wide tip for large burke. So then the type of marker that you choose is totally up to you. It will be up to your style and preference, but those are going to be your options, and then I'll go into the color system. Not every color is available in every marker. We'll talk about that, and then one of the other great features of co pick is that the markers can basically last forever. They have replacement Nibs that are available secret. Replace the brush chisel whatever tip you need if it gets worn out. They also have their various Inc. Which has the same color codes as their markers. So you just pick the correct color code and you can get extra ink that will refill your marker multiple times so you don't have to get a new marker every time, which is just on awesome feature. So now we'll go into the co pick color system. Okay, so this is the full Copa color system. This is their full color wheel. Of all of their 358 colors. Each of their colors is available in their sketch markers, and then they have these symbols for which ones are available in the wide the co pick and the channel markers. So this is organized by color and then by blending groups and everything's will go through kind of how that's all broken down. To start with the simple ones in the middle of this color real here, it's gonna be all these ones around these air, all of the grays that they have. So w is gonna mean warm gray, and then we actually have fluorescent colors here. So it hasn't s before the other letter. That's in the case of fluorescent, and we have the coolest blender and then black C is gonna be the cool grays and is going to be the neutral grays and T is going to be toner gray. So then the number after the letter for all of those is just going to indicate how dark it is. So the higher the number, the darker the tone. So then when we get into colors, they have the red, yellow, red, yellow, yellow, green, green, blue, green, blue, blue, violet, violet and red violet. And then e is gonna be for earth tones. So once you have looked at what letter, the marker that you want is that's gonna tell you what color family it's in. And then it's gonna have two or more numbers after that letter, which is gonna indicate the blending group and the saturation. So if we're looking at the Reds, the first number is gonna be the blending group s. So as you can see here, these going to be like our twenties. So the lower the first number is of your marker, the more saturated the color is going to be and then the second number is going to be how light that color is. So if both numbers are really are smaller, like the double zero Triple zero, those are going to be your really light but saturated colors and then all the way over to you're less saturated colors on your darkest so you can choose your colors. That way it makes it easy because this chart shows each blending group so like each blending group would be, you know, like I said, our thirties are twenties are forties and then not every blending group has every number. After that, you can see this one drums from our 22 to our 24 so that just kind of depends. And then the earth tones are not necessarily organized. My house saturated, they are. They're just in different one than groups, so that's gonna be kind of up to you. So this is one way you can kind of go about exploring the kopek system, deciding what colors you want if you want them organize into blending groups or, if you want to come just picked random ones also show you their hand color chart, which I have that will actually allow you to color in the colors as you go. It's organized a little bit differently, but it's really helpful once you start adding to your collection to have that on hand. When you're choosing what Coupet colors you want, it's gonna kind of depends on what subject matter you do most. I'm going to be showing you my marker box, but I work with a lot of like mermaids and ocean themes and everything. So I have a lot of the earth tones because for skiing, hair and everything like that, and then I have a lot of the blues because again, ocean themes like to have a variety of blues. Next, I want to explain the greens that I have actually have some other brands of greens, but I need more coping greens if you don't have any coping markers. Also, you can often by markers in different blending groups, so you can buy like packs of them, which is gonna be cheaper than buying one marker at a time. So definitely explore what either you know your locals of like art supply store has to offer, or if you want to look online and see how you can start your collection or add to it. It's a great place to start, and then I'll be showing the other chart that I'm talking about to make it easier for you to see what you have. Okay, so now that we've discussed how the co pick system works everything, I want to show you my box of coping markers. So, as you can see, I mostly have the sketch markers, much like I said are the ones with the chisel tip and then the brush tip I. I have one of the classic coping markers, so that's going to want one with just the fine tip in the chisel tip. And then I also have one of the various Inc for the B double zero, which I use a lot. Um, I keep all of mine organized in this box, which I've linked in the Project guide as well. It just keeps them organized in this way, can see all of the ends and then easily be able to pick out colors. Besides, was in my box here, I kept my grand markers just in the boss. They came in, so like I mentioned, I have the cool grey set, which I really like. I got the cool guy just because they work with a lot of blues and, like, um, with my ocean kind of pieces. So I wanted to work more with the cool grays. I had cool greys in the black studio markers originally, and they saw a little bit in collecting. The money isn't occasionally so. That's why I ended up choosing the cooler, getting for the co picks because they're my favorite. I do have some other types of markers in here as well, which I mean discuss in our next video all about other materials like papers and other kinds of markers. I also want to share my filled inversion of the, um, color chart. So just to keep track of what color is that I have and how they blend together, I just feel in this color chart as I get them. It helps me see on like, feel in blending. Groups like these are the two kind of blending groups they use most with browns and skin tones and everything. It's also how I chose some of the blues, but again, this doesn't reflect my entire box of markers. because they do have some other brands. Like I have a lot more greens in this chart shows and everything, but just a great way to keep track of the clothes that you have. And that way, you kind of know and could easily pick out colors like I keep this on my wall for easy reference.
3. Other Materials: X. I want to go over some other materials that you're gonna want to use for today's class. So one of the big things about working with Marker is using the right paper. Using marker paper will make it a lot easier to blend your colors and will just lead to better results. Overall, Um, I use either the Strathmore marker paper or coping even makes their own market paper that I have in their sketchbooks, which I have in two different sizes. Canceled also makes marker paper, and I'm sure there's tons of other brands it's easy to find at Michael's or anything, or obviously you can order online, so it's not too hard to find, but I definitely recommend getting that before trying out any of the techniques in the class today. Also, of course, need some pencils if you want to do some quick outlining or anything, and then I always use my fine letter pens with Michael picks. Your kopecks won't smudge your fine liners, so I either use the Micron pens or Kubicki even has their own brand off multi liners that I use as well. So it's just a couple other things you're gonna wanna have, and then I'll dive into some other brands of illustration markers if you want some more options. Okay, So when I did dig into my marker box a little bit more and show you some of the other brands of markers that I have when I first got into illustration markers. I have a lot of the Blix studio markers. These were for a fashion illustration cost that I was in. This was kind of my first introduction. Teoh illustration. Markers. Um, all the ones that I have are gonna be like the broad tip and then the fine tip. I still have a couple of different ones on, and I guess that I got the cool grey set of those markers. Blix still offers these markers. The packaging is different. So if you go toe, look at those or purchased those, you are gonna see different packaging now. But another great one is the Prisma color markers. Their premier markers are also awesome. They have one of the brush tip and then the fine tip, um, which is a little bit different than co pick. So that's kind of nice. It's like if you prefer that type And then they also have one like, oh, pick that has the chisel tip and then the fine tip eso president Color is great. I have a bunch of their colors as well. I s o got kind of like a basic pack from them, so I'm still enjoying using a lot of those A couple other ones. I have one of these touch markers were gonna be very similar to co pick similar price point and everything again brushed hip and a chisel tip. Um, I got one of these in a sketch box subscription, and I do really like the marker. Um, I'm kind of just been using kopecks because that's the system that I know. But I do highly recommend this one. I really enjoyed using it. I do use it a lot. I also have one of the Windsor Newton pro markers, So this is gonna be one I have to find. Tip, and then a chisel Tip. I have two of these. I have this break green in this kind of turquoise color. So again, I really like those. So another alcohol marker. I have some that were this was again from sketchbooks subscription. They made their own version of their illustration markers that come in some of their subscription boxes. So those were kind of the other brands that I've used. Here's another touch marker that I got so definitely exploring. Figure out what brand is best for you. A lot of the techniques I'm gonna talk about in today's class doesn't matter what brand you're using code because just kind of the most popular and the most comprehensive system.
4. Picking Up Your First Color: okay for this first lesson is just gonna be about using one color. So go ahead and pick your favorite color or whatever one you want to use, So I'm going to grab a pink one. I have RV 11 here. The coping sketch marker. Um, so I'm gonna be using the brush tip for now on. That's always my favorite part to use, So that's what I'll be using for most of these videos. So the first thing you want to know about using your coping marker is that you don't want to draw in zigzag or swirling strokes or anything. It's gonna lay down your ink unevenly and over saturate parts of the paper. It's also gonna make it difficult to blend with other colors and then so you don't want to do anything. As you can see, it's leaving big ink blots on the sides of the zigzag. So what you're gonna want to do is actually color in flicks like this that are gonna lay down your more evenly and allow for easy blending. And then, as you can see, um, so this is kind of creating an outline, so that's nothing. You can kind of go over this outline and then you could always like, layer your ink very dark, but layers with my drawing with kind of high. This outline it's starting to were swirling around. It's gonna leave, you know, kind of uneven deposits. So again, you're gonna want to kind of flick with the color like this, which will help again with that, even blending. And then you can do that kind of outline smooth out at the edge. You could also always do the outline first so you can do do your line and then flick out from there. This is gonna become more obvious as we dive into how to blend and work with multiple colors at once. But that's just kind of introduction, picking up your first color and seeing what you can play around with with that.
5. Blending: Working Dark to Light: OK, now let's get into blending. So, as I talked about in the beginning, co pick has organizer markers into blending groups so you can definitely use those blending groups. If you really want that really smooth and seamless, looked your drawings. Or you can totally break out from that and blend with whatever shades you want. For example, I would could be using the all the E thirties as one blending group. I don't have quite all of the markers, but those with bone seamlessly. Or I could just use, you know, all the red different reds that I have for blending. So it's kind of just up to you. One of the first things that we're gonna be talking about is how toe work from dark to light, which is the way that I always like to blend maiko picks. Working dark to light just helps with. Then you can start with kind of that outlines and shadows and work to the lighter areas, and then it kind of avoids over saturating and over blending your colors so we'll start and just sketch some squares, which will be using to practice some different blending. Okay, so then, if we're going to start with the E thirties and blend all the way from the darker shade that I have to the lighter shade. So I'm gonna start with the darkest shade and then again using those little flicks like we talked about in our previous video, we'll be creating that darker anchored bit on What's great about working from dark to light is that then you could take the lighter shade and just blend right over that darker shade because you can't really go over obviously, um, lighter shade with the darker shade when you're shooting, Um, and then with this, you don't have to completely start at the bottom, just kind of blend as long as you're blending over the previous color. And then one of the things with blending in marker is that it's not instantaneous when you're working, especially on marker paper, it actually takes a few seconds for the colors to kind of blend and even out so you don't totally notice it at the beginning. But you can see how these kind of colors have kind of blended together a little bit more seamlessly than after getting so That's like one of the most important thing about working for dark slate and then just recognizing, um that you need to work kind of quickly with your blending, but it doesn't happen right at the same time. Eso Now let's blend some greens. Let's start with this darker green And then the way you blend is also gonna depend on your subject matter. Sometimes you're gonna want obviously that really seamless beautiful blending. And then sometimes you do want more of a blocky look. So I kind of got into that, too. And it will just, you know, depend on your personal artistic style. And then the subject matter. I go, you know, kind of back and forth on which styles I use. So as you can clearly see, all of these greens are from the same group. So I'm kind of changing the color as I go. But then layering this one on top is gonna kind of even out all those colors. I can even dio this way and again. This is more kind of blending on a larger scale, which you know, so you can still see the marker flicks. That's one thing. It's very hard to achieve. A perfect seamless Grady in and like, larger formats. So you can't just have to experiment and see what kind of ways work for you. Um, when I wanted to show kind of, ah, more blocky style. So what you want to avoid It's just kind of, you know, laying down one color going down your next one. So obviously this style doesn't achieve nearly the same effect that the flicks do. And then so one of the other great things about blending in your CO Bix is you can do multiple layers so you can do, you know, perhaps your first day of green, and then you can go back and all the colors and layer again. If you are going to do that, you wanna wait a bit for it to dry because sometimes if you just layer it right back on top , the papers getting it over saturated, and then it's going over blend and not work quite in the way that you want. Um, but then you know you can over you can go over all the colors. Or maybe you just want to go over the darkest color. Just add a little bit more of that darker shadow. Um, and I'll show you kind of while you can't work in the opposite direction. So if you want to start with a lighter shade, it's hard with that. Is that then, like we talked about your starting, you're creating a line in the middle with your flicks. So as you can see, we've created that kind of extra line, which, where the ink is gonna over saturate, which makes working dark to let our light to dark a challenge. So what I often dio like I said, is work from dark to light. And then if I need more shadow, I'll just go in and go over that darkest shade to achieve the blending that I want on. And then we'll kind of discuss that in our last video with the coloring page to see kind of hell. This works in an actual piece versus just coloring some different blocks
6. Working Quickly & Efficiently: Okay, So the next thing that we're gonna be talking about with blending is how you want to work quickly and efficiently with your blending, because the colors you want the ink to be wet for them to blend, you'll need to work kind of in smaller areas. So instead of, for example, if you're starting with a dark color, you wouldn't just go around your whole drawing, adding darker bits. I don't know what this is. It's not even a sheet. For example, if we did, you know all of the darker red bits in a drawing we don't want to go through, do all of that weight, and then we'll go back and at the pink because it's not gonna blend nearly as well. So as you can see, it's blending a little bit what, For example, if we're doing one little bit of time, you can see how that color is blending so much better than these different ones. So you really wanna work? You know, for example, of these were flower petals. You're gonna wanna work one flower petal out of time versus doing you know, all of the darker parts of a flower petal and then adding the highlights. So just for another and it's a little bit confusing because, as I mentioned, it takes a little bit of time for the markers and the thanks to blend. So you're gonna wait a couple seconds and then see how it kind of changes and blends together. But again, you don't want to wait and do one color and then let that dry for, you know, 30 seconds and then go in with another color, because by then the ink is going to have kind of dried into the paper, and it's not going to provide nearly the scene smooth blending. So we'll review this as we get into the class project, which I'll introduce next. But I hope you kind of see, like, clear example between the two blending bits. So again, just something to keep in mind why we're doing your blending, Um, and then we'll put this into use in our next video
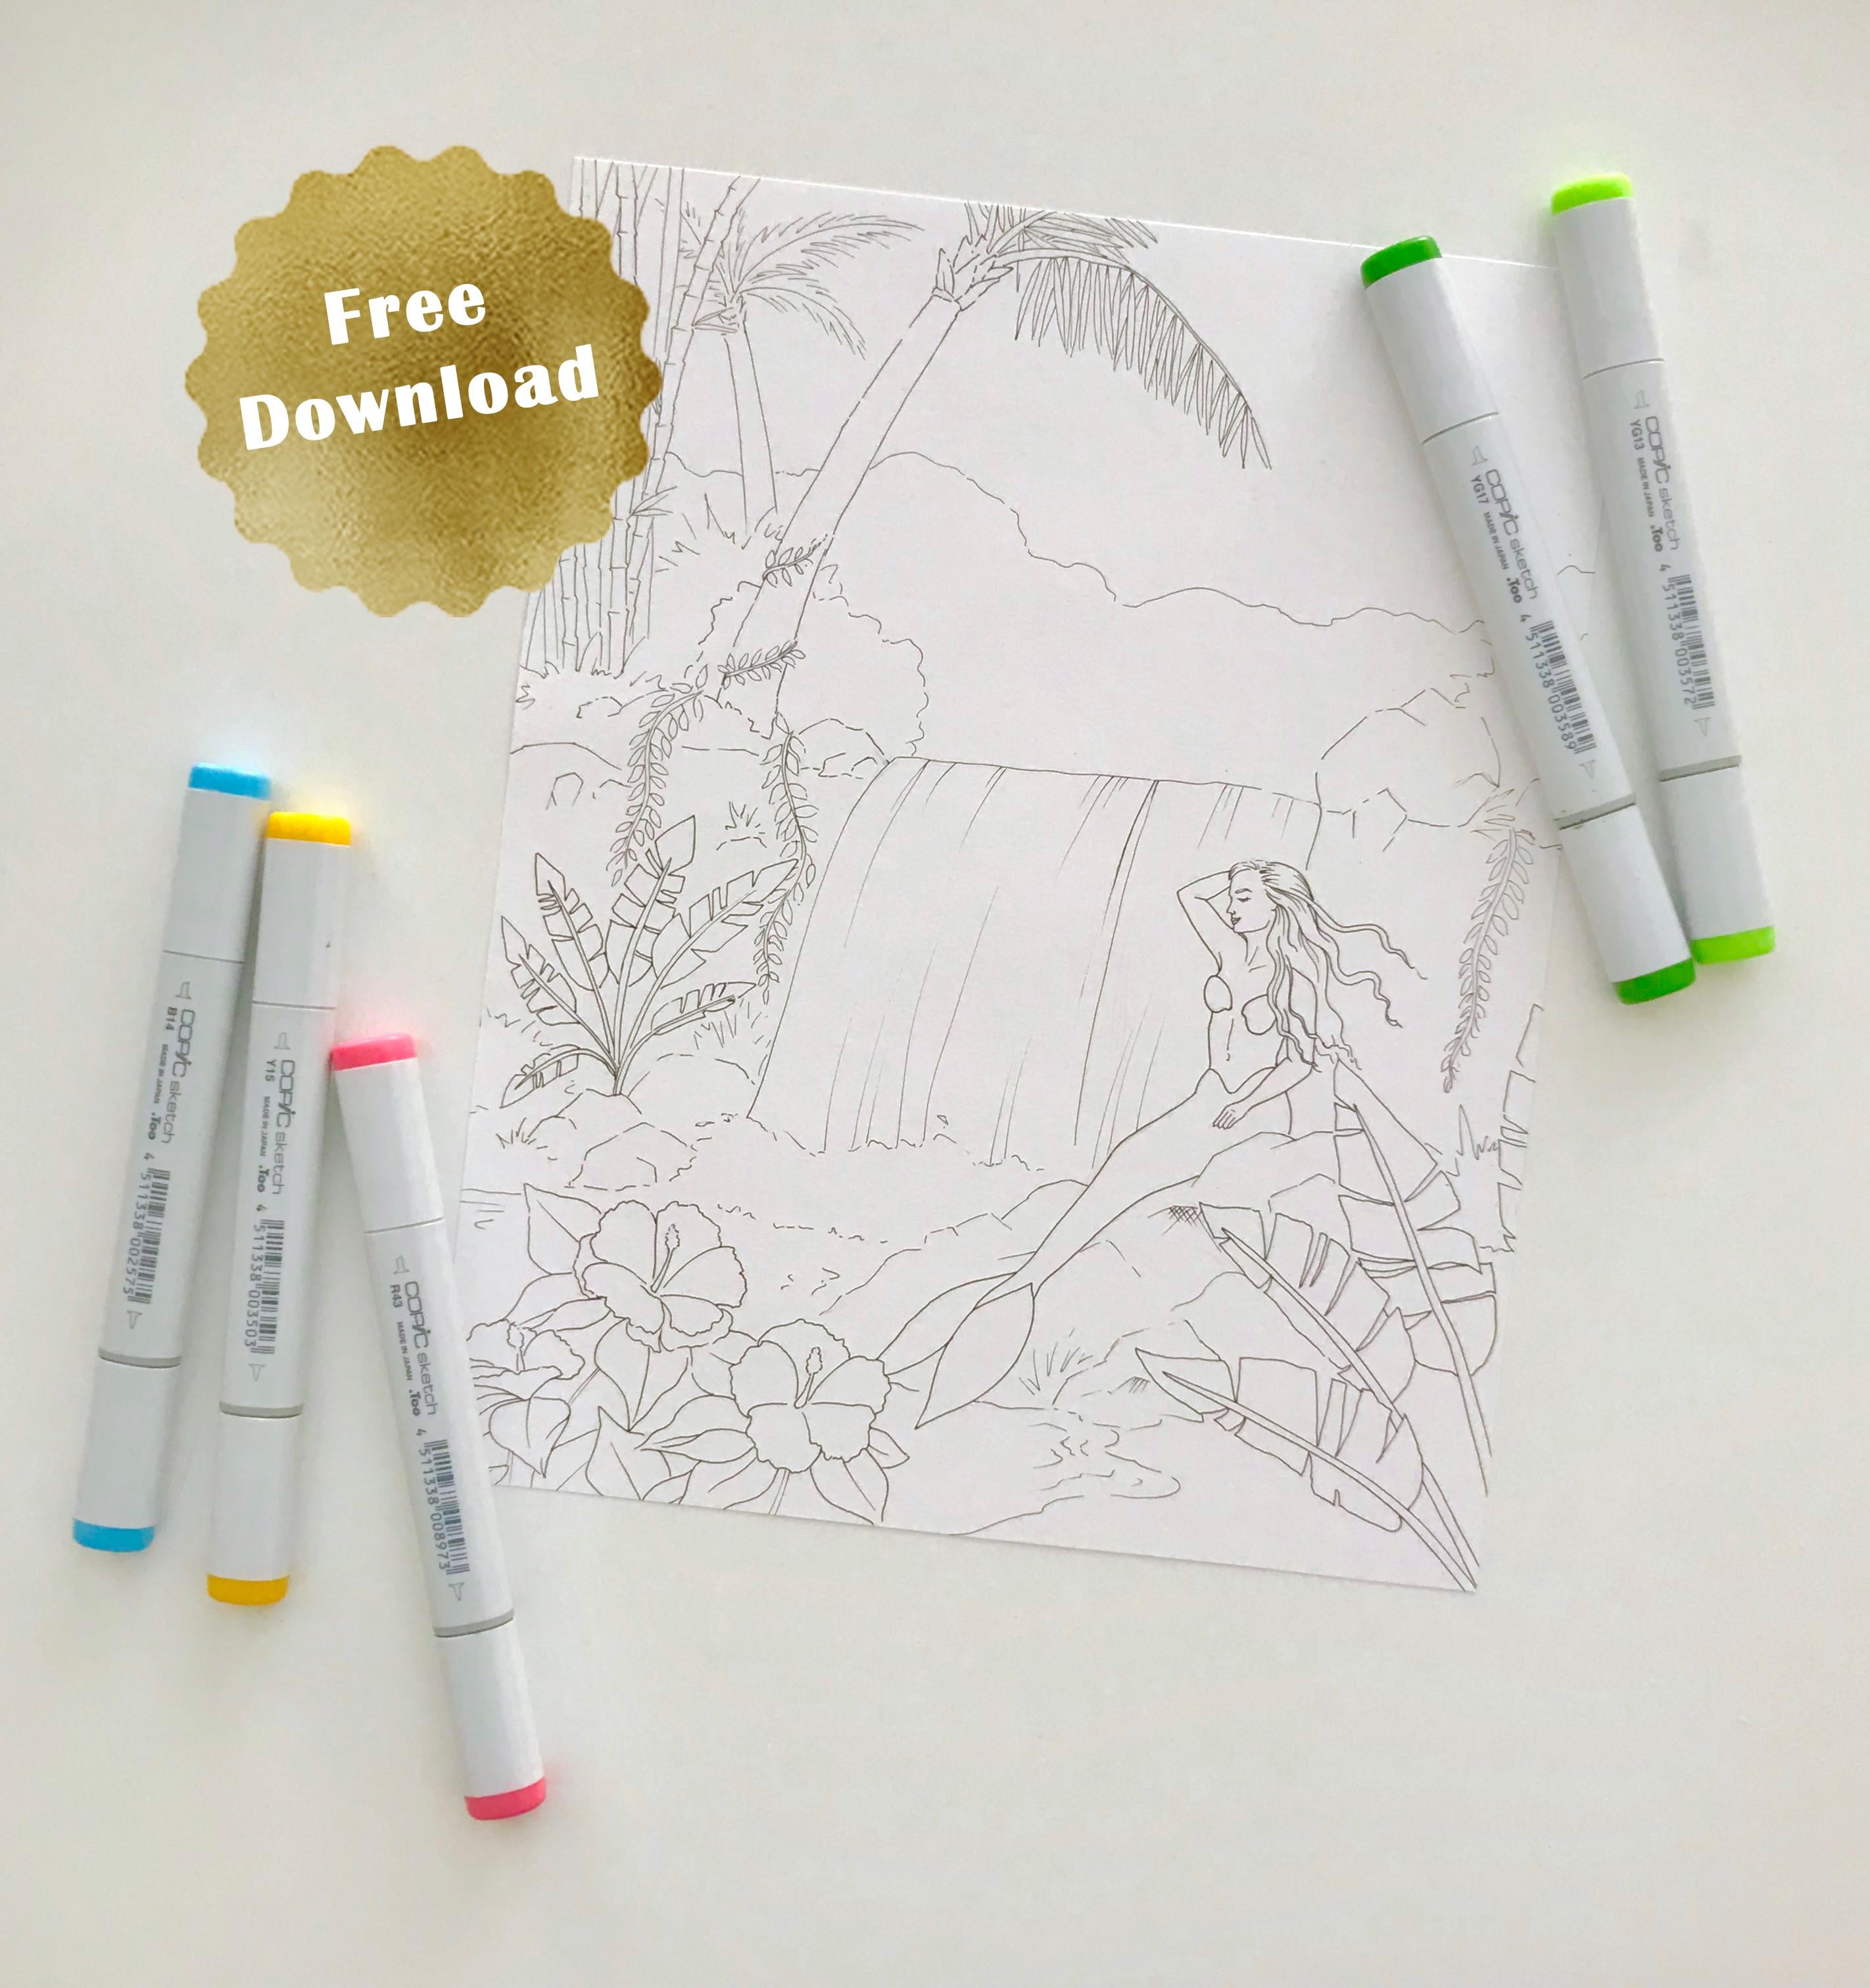
7. Class Project: OK, now it's time for a class project. You could find the class project by going to the project and resource is tab. And then on the right hand side, I have the downloadable guide that has links everything that I've talked about today, as well as the two principles. So it has the co picked hand color charts you can fill in your colors, and then it also has this little coloring page of this mermaid waterfall scene I created just for this class, so you can go ahead and print this on your printer at home. Just make sure you're putting marker paper into it and lending dry for a little bit. Or you can go ahead and trace it right from your screen. Feel free to add or remove details as you see fit or as your coloring. But this illustration not intended for distribution or resale, you're welcome to post it on social media. I would love to see your projects, So if you're posting on social media, please tag me at E. J W. Underscore Underscore Art And now let's get coloring
8. Let's Color Together: Part 1: Okay, so now we're gonna get into the actually exciting part of coloring and illustration. So, as I said, once you've printed or trace this however you want, you'll be ready to start coloring. So when I am coloring a scene like this, I always start with the more detailed parts in the foreground and tend to work backwards because you want those details to be the best that they can be. And then I once those air complete, I know that everything else is going to be fine with the drawing. I don't want to start with something basic, like just coloring the sky blue. And then the last minute, you know, ruining some other bit of my drawing and wanting to restart. So today I'm gonna start with the flowers that are over here. So feel free and a strong u concolor anything any color that you want. I'm just going to kind of go through and do what I want today. So I'm gonna start with the high biscuits flowers, so I'm going to start with some orange and yellow for their stems. Like I said, I'm gonna start the darker part little flicks there about my stems. So again, starting with that darker part and then layering lighter part over as they blend. And then I think I am going to do my flowers pink today, so I'm gonna start with this Darker are 43 and then at a lighter pink. So I'm going to start with the darker color at the edge so that outline and then pull towards the center. So I'm just gonna be using these two shades for my flower petals. You're more than welcome to use more than two. I wish I kind of had a larger selection of pinks than I do or I might be expanding my shades. But again, working in that darker color on the outside and then adding that later color and pulling towards the center is gonna create that really smooth, seamless blending. - Do the darker colors kind of on both sides? It's kind out or pedals that I added, so we'll just have a small highlight. You could totally go ahead and add a little bit of gray if you wanted to kind of emphasize some of the shadow of being under the other pedals or even add like a darker pink and again . You can go back and layer your dark color on top. If you want dark and then a little bit, or add a little extra public colors will go back and add that kind of on the edges. Introduce a little bit of that saturation, so we have our first flower. So then you go through and color the other flowers and then get into leaves. The next step is gonna be adding in some of the greenery, so I'm gonna be doing the leaves down here with the hibiscus and then these couple palm fronds in the front. So I think the hibiscus I'm gonna go kind of with more of a medium green. Leight's. So when you're thinking about a different subject matter, you want to think about doing your flicks and your shading in the direction that makes sense with what you do. What your coloring. I'm thinking about kind of the vein ing and leaves Well, that's going to kind of go together. I left these leaves pretty blank. Normally, I would add probably more detail in the fine liner pen, um, in my drawing, but like I said, I wanted to leave someone. Details out and kind of open so that you all could add your own details As you're going a little, you are here, and then maybe I'll add one shade darker as well. Just use you will be using this dark blue green 96 which is kind of one of my favorites. Shadows. So I'm actually gonna add this one here. I this medium believe this part. Believe dark. - So again, just like with the flowers, I'm working on one small area at a time to achieve that blending because I do want that kind of really smooth, nice look in the foreground. As we get into the background, I'll show you how you can kind of use the opposite technique, as I was talking about with working quickly with blending Teoh achieve certain effects. So now that I've done some of those leans, let's jump over here to these palm ease. Um get start on some of those. So I'm thinking maybe more like a darker blue green with these poems and then maybe adding some highlights with lighter green. So start with just stems here. I would only a little bit of white for the highlight on so for something like this with the palm. I do. I don't want it to blend quite a smoothly. So I'm kind of gonna go through and you one whole side of the poem at a time before I go in with my next color. So just kind of thinking about how Palm's grow that looks. And then you obviously want to think about your light to where your light is coming from. Kind of imagining ours is coming from this side from my piece, getting totally up to you. Okay, so now one palm leaf and I'm gonna use the screen from my Blix studio markers. This is kind of being more like a blue greenish grey, And then I'm gonna actually go over it all with a lighter green, which is gonna give the exact effect, but I'm looking for. And as you get to know, your color is a little bit better and kind of figure out what your style is for. With the markers, you'll be able to better kind of blend and think about which colors work together to create the, um, colors and effects that you're looking for. So it definitely takes a lot of practice to get there. So you can see how layering this on top totally changes the look of that blue green underneath. And I am evenly leaving some white spots in here. Turn. Really Emphasize and leave Some highlight. Okay. Done. One of the palm leaf. So now I'm gonna go through and add both of these into the rest of the foreground.
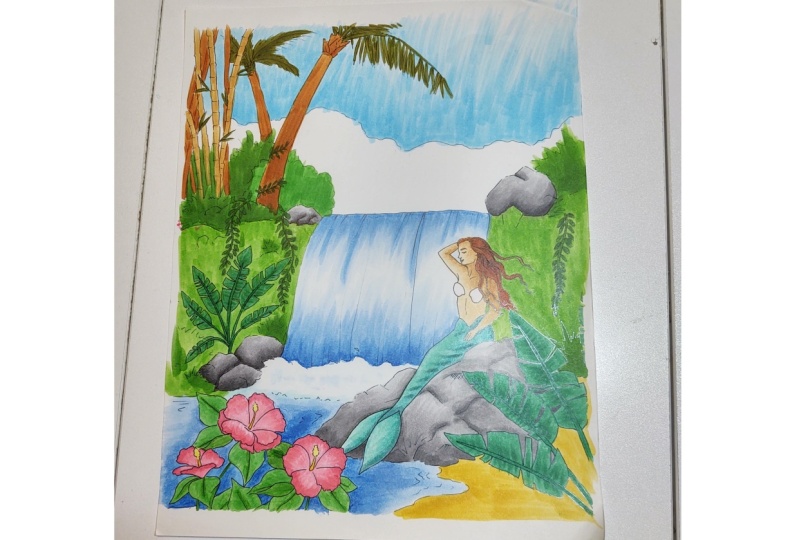
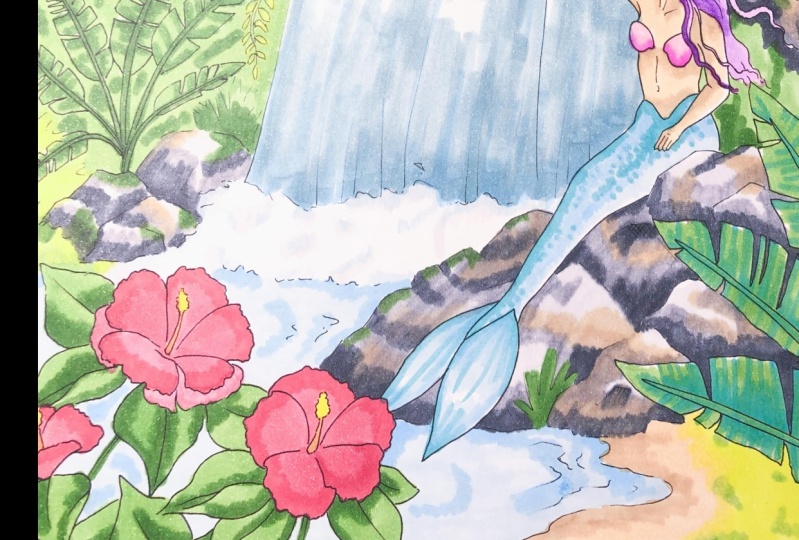
9. Let's Color Together: Part 2: Now that I've done the kind of florals and leaves and everything in the front, I want to work on the Mermaid because that's the other part of this. It's gonna be really detailed. And I want to think through that before I get into some of the background pieces. So for the mermaid and think I'm going to start with her skin, Um, for the skin. I'm gonna be using the e. I'll use the E thirties today, So I'm going to start with you 35 as my darker one will make her kind of tan. So a lot of the techniques I'm gonna use to color her I also talk about in my fashion illustration course if you want to take a look at a few of those videos So I don't like for my skin hearts to be, like quite as smooth, Which sounds kind of weird. Start with my darker color and which always looks crazy. Start on, then I'm gonna start going over this and again making sure I'm leaving some highlights. So leave that. And then I think at the end I might. That's let's keep going from here. So again, I'm thinking about that. The sun is kind of behind Keep working in our smaller areas, adding highlights and shadows. These colors are a little bit close to each other, so you're definitely welcome to have more of a contrast. Depends on which shades I use, how much I end up kind of jumping from light to dark. You 30 here, I'm gonna go through and add That was my highlight. And they actually like it. Not, uh, smoothly blended. And that's perfect. Look that I was going Excuse me going for All right, Now what I've done that I'm gonna think about her hair and for her hair. I think I'll do really dark brown. So again, I'm gonna start with the shadows. Just gonna be under her hair Brings down again. You kind of get used to coloring whatever subject matter is your favorite, and you'll learn one of the best techniques on how toe do that. I like this color is a little bit reddish. Someone use one of my other one. Leave that area white to really emphasize. Highlight from the sun. I would think there and then we'll on to well, seashell bra, for which I'm just get ad a little bit. I think she to keep that simple and then for her tail. I'm thinking you like a turquoise going to start with this BG 49 go and with shadows. And so with this because it's gonna be, you know, like mermaids scales. I'm gonna use a little bit of a deck, different technique and kind of use the side of this brush to kind of make Give it a Scalea Look for just showing you kind of one of the other ways you can use your marker shadow over here. And then, like I was saying, this is gonna be one of the techniques where I'm gonna actually let it dry because I don't want the colors to really blend smoothly together. I really want that look, of all the different scales did a little bends, just some really no loose flicks. And then we'll go in with our other colors so that I'm gonna jump from B 49 to PG 15. Yeah, okay. Sorry. My last video about a little bit cut off, but I finish up the mermaid tail with some more kind of blocks and everything with some other blue greens and then a little bit of short truce for a little bit of a green highlight eso that's all finished. So the next thing that I'm going to go in juices we've already talked about kind of greenery. Um, and the mermaid is going to be the rocks, so I put so that she's sitting on some rocks here. I have some over here and kind of up on the sides of the waterfall, so this is gonna be something that's a little bit more loose than a plant. So it's totally up to you. I normally kind of mix my cool greys with some browns and maybe even some greens to give the rocks a little bit of life. So I'm going to start with some of the rocks over here, and then we can get into the other ones. So again, we're gonna want to start with a darker color. So I'm gonna start with C seven and then again, you just want to kind of start, think about your shadows. We talked about the light kind of calling for over here. This is gonna be kind of some of the darker hurts and then the rocks again can be kind of up to you whether you want a more blended look or more of a kind of blocky rough. You know, Rocky kind of look, So that will be up to you. But again, just wiring in those colors thinking about the highlights. I had brown here just since it is by the water. So it's gonna be like more of a mossy rock. And then once you kind of established a color scheme, it it makes it easier to kind of just set that aside and get to working here, put a little year some witches, maybe at some grass growing here. I'm just thinking about more blocky rock faces just exploring that sugo. I'm kind of simplified my colors for this to just a few. Instead of doing like a whole spectrum of grays, I'm going for a little bit of a looser look for these. You can totally do a more smooth blending all of your colors together. It's now move into a tie mops as they work on my rocks. You
10. Let's Color Together: Part 3: we've done all the rocks. The next part is going to be the actual waterfall. This is gonna be one we're gonna where we're going to leave a lot of white space and kind of just use some light colors, um, for the waterfall. So I actually think I'm going to start with the blues because I think that I'm gonna go over it with grace to kind of tone it down, So it's not quite as bright. Let me start with just some Flix. This is where your actual color technique is really important because you really want those lightweight flicks, Because when you're leaving whitespace, you're not really gonna be blooding. So you want each stroke to be perfect war in the top of this just a little bit. And then I'm gonna work up from the bottom and leave a lot of this area white because that's gonna be kind of the foam and a splash from war ful and again, this is some where you can get super blue If you want to, you can make it really dark. Ray could even do some greens tone this down a touch with some grays with water. You really want kind of a loose looked to kind of give it life Leave that there for now. I add a little bit of this kind of frosty blue really like weeks flicks and then down here won't leave it white. But I'm gonna kind of do a little bit of late blue, that kind of foam look edge of the water and some ripples again the shadows on the rocks here Apple's on shoreline. That's pretty simple, I think the color of your wonderful really kind of on your own uniqueness to the peace. So I'm excited to see what everyone besides to dio that is actually everything for the water. Okay, so for the next part, I'm gonna just be going in and coloring a lot of the vegetation that I have defined so far . It's like the palm's on the vines and kind of bamboo in the trees here. And once I go through that, I'm gonna talk about coloring some of the more ambiguous areas, like kind of the what's gonna go here and then in the background on talk about techniques for that
11. Let's Color Together: Part 4: Okay, so now I can't one talk about how I tackle more of the kind of ambiguous areas that I haven't outlined. So what I do for kind of large areas of vegetation or just kind of things where things went together and you don't need a specific outlines, is I just add, like, for instance, this outline here that just gonna kind of define the forest in the background. And then when I do with my markers, as I go in and just kind of use different textures, different colors to just define different areas And then sometimes I go back at the end with an outline. So that's probably what I'll do for this whole back area and then kind of either side of the waterfall here, and then we have the ground on will be adding some grass. So that's just the easiest way when you're trying to tackle again. A bigger area that doesn't have to be is clearly defined, but you want a little bit of detail. So that's what I dio. So that'll be the last part. And then we'll do the sky and you will have finished coloring your drawing. - You okay, so now we're all finished with coloring our peace. I hope that you guys have fun coloring and upload your projects to the class Project gallery. Definitely. Tag me on social media if you want to share and I can't wait to check out your projects, have fun coloring.
 Elizabeth Weglein, Artist and designer