Transcripts
1. Introduction & What You’ll Learn : Hey guys, I'm Vinitha. I'm an illustrator and a pattern designer
based in Singapore. In this class, I'm
going to show you how I illustrate my tropical
birds in Procreate. We will be doing three
tropical birds in this class, that is, sun conure, flamingo, and kingfisher. I will be showing you
step-by-step process of illustrating these
birds starting from how I use my reference images to the default brushes I use
to illustrate these birds. They can also be done on a bigger canvas with minimum
layers in Procreate. I have these sketches in the resource section
of this class, so you can download
and follow along. I have a bonus video showing
you my other birds I have done using the same technique
as shown in this class. By the end of this class, you will have a lot
of tips and tricks while illustrating any
bird of your choice. Thank you for taking
this class with me.
2. Project & Resources: Project and resources. I have attached all three birds' sketch in the Resource
section of this class. You can download these sketches and follow along
in the class too. I will show you how
you can download them. You have to be on your web
page and not on your app. On the class page, you have to go down, tap on Project and Resources, and if you see on the right side the few attachments here, first three are the sketches and the others are
the reference images. Tap on the Sketch Attachment, tap on Download, open in Procreate, and it will open in
Procreate directly. The scanner just have
one sketch layer. If you tap on Gallery, go back. This is the first
canvas in your app. Now for the class project, you can illustrate
any tropical bird of your choice using the
techniques shown in this class. You can even use my sketches and reference images
for the project, and also I have this list of tropical birds to
help you decide.
3. Canvas & Brush Setup : Let's start with our
canvas and brush setup. I already have my
sketches ready, and these sketches are also in the resource
section of this class. You can download these
sketches and follow along, you don't have to wait
until you sketch. You can practice on
these sketches with me. Resource and projects section, you can also check the steps
to download these sketches. These are 4,000 by 4,000
pixel with 300 DPI. To create a new canvas, you can tap on the plus sign. Again, on the plus sign, these boards can also be done
on a 6,000 by 6,000 pixel, which is quite a large canvas, but it gives you only
14 layers to work on, and all of our buds
are maximum 11 layers. So you can absolutely
work on this big canvas. It is always better to
use a bigger canvas for any artwork because it is easier to scale
down then scale up. If you try to scale up, you're going to lose
a lot of quality. Now, let's move on to
our brushes setup. I will be showing
you the brushes that we're going to use
in this class. I'll go to the 'Brush Library', first we'll make the folder. I'll tap on the plus sign, that will create a new folder and I'll rename this
folder as buds. All the brushes we are going
to use in this class are the default brushes from the
procreate library itself. Now, for sketching,
you can use any of these pencil brushes
under sketching section. I've used 6B pencil
for my sketches. Anyway, we will not be using our sketch layer for
the final illustration. Now, let's move on
to our first brush that is under inking section. That is technical pen. For our basic shapes, I will swipe left, duplicate and I'll
pick this brush and drop it into our new
folder, the board folder. The second brush is also
under inking section, that is the second
last brush here. Duplicate this brush and drop it into our board folder again. The third brushes
under airbrushing, the first one that's soft brush, I will duplicate this brush
and drop it into our folder. Third is under charcoal. The second one that's 4B, duplicate this, drop it
in our folder again. Next is under materials, the short hair brush. Duplicate this brush, and drop it in our folder. I'll show you how these
brushes looks like and which part of the board
we're going to use them for. For all our basic solid shapes, we are going to
use technical pen. The second brush is the
most important brush, because for the maximum
part of the illustration, we are going to use this brush. We will be using this for most of the feather
part of the bud. Now, before you start
your illustration, you can practice with
this brush quite a few times so you can get
a good hang of it. [MUSIC] Third one is the soft brush, this I'll be using
only for the eyes. Fourth is this rough brush that we're going to
use for the beak and the feet to add some highlights
and rough edges to them. Now, the last one is
this short hair brush, which we are going to
use for the softer area, which is mostly the
belly area of the bud.
4. Sun Conure: Eyes & Beak: Let's start with our first bird, that is Sun Conure. I'll tap on my first canvas. [MUSIC] On this canvas, I have one layer, that is the sketch layer. Now our first step is to
import our reference image. For that, I'll go to action, swipe left on insert photo, insert a private photo and
you can tap on the image. I will be using this image
as my reference image. This will be for picking
up colors and also to see the features and
the texture on this bird. Next, I will be changing
my background color. While we are drawing
with a white color, we can see it clearly. I will keep the
background as light blue. Next, we'll go to layers. Now, here we have two layers with image
and sketch layer. I'll add a new layer, rename it as eyes and I'll pull it below
the sketch layer. All our illustration layer will be below the sketch layer. Now let's pick up the
brush for the eyes. I'll go to the brush library and pick up our first brush,
that's technical pen. Select white color. We'll start with this outer
ring around the eyes. [MUSIC] Now for the second
ring around the eye, I'll pick up a light brown
color from the image. Just to add a ring
following the sketch. [MUSIC] Now, next the
black area in the center, I'll select a black color. You can fill the center
area with black. All these three
colors that's white, light brown, and black can
be done on different layers. But to save my number of layers, I like to do it on one. [MUSIC] Next, I'll add a little reflection
detail to this black area. For that, I'll select my
soft brush, reduce the size. Before you add this detail, you can even refer to more reference images to
see how it falls naturally. I like to add a couple of dots that looks enough to
make it look natural. Let's move on to the beak. For that, first I'll
select my technical pen. I'll go to brushes, my first brush that's
technical pen. I'll add a new layer, pull this layer
below the eye layer, rename this layer as, beak. I'll pick up a color
from the reference image and I'll start drawing
my upper beak first. I'll be keeping both upper and lower beak with
different shades. Upper one lighter
than the lower one. Again, the upper and the lower beak both can
be on different layers, that makes your editing easier. Even while adding details, it's easier when it's
on different layers. But mine are on the
same layer again for the same reason because my
canvas mostly are larger. So I get away few number
of layers to work on. Next, to add details
to this beak, I'm going to Alpha
lock this layer, tap on the layer,
tap Alpha Lock. [MUSIC] Next, I'll
go to the brushes, select my compressed brush. Select a darker shade
from the image and I'll follow the reference image to add the shadows
and the highlights. When you're adding
these details, try to follow the
shape of the beak. [MUSIC] Next to add details around the nose and the
mouth in between, I'll select my technical pen. Select a darker color and tiny detail for the nose
and between the month. Now we're done with
our eyes and the beak. Let's move on to the feather
in the next section. [MUSIC]
5. Sun Conure: Tail, Belly & Feather: [MUSIC] Let's start with
our feather and body here. I'll go to the "Layers", add a new layer, pull this layer below
the beak layer, tap on this layer, and rename this as Tail. Next I'll select my second
brush for the feather. Try to select a darker shade
of brown from the image. We will need three
shades of brown here. We'll start with the darker, and then a medium, and then a lighter. Next try to pick up a
color which is two-shade lighter than the brown we
have already used here. Another way of selecting
a color lighter than we're already using
is from the color panel, because a lot of
time the image might not give you the
exact shade you need. Next I'll add a new layer for the greenish feather
just above the tail. I'll rename this as Upper Tail. Now, if you see this
part of the bird is more of a pale
greenish color, and I'm not getting a good shade of green from the image, so I'm going to select
from the color panel. With my feather brush again, I'm going to start adding
these tiny strokes. Once you're done with this
one layer of dark color, you can go to the color panel, select a lighter color of
the color you're using. With the same brush, just add these tiny strokes, uneven strokes that
looks like feather. If you're using my sketch, you can follow the
pencil marks that I've already made
on this sketch. Next let's move on to the wings. Go to "Layers", add a new layer on
the upper tail layer. I'll rename this
layer as Feather. With the same brush selected, I'm going to pick up a
darker shade of blue here, and add few big strokes
following the sketch. Next select a lighter
shade of the same blue, or you can even select a color
from the reference image, and add few thinner strokes so we can see the darker
shades from the back too. Let's move to the next
color, that's green. Select a shade of
green from the image. Few medium-sized strokes
following the sketch. Now, for the lighter shade I'm going to select from
the color panel. Now again, while you're
adding these strokes keep in mind to show the dark
color from the back too. Keep the strokes a little canal. Now let's move on to the
last layer of this wing. I'm going to select a yellow
color from the image, and add few strokes and cover this upper
area of the wing. Now again, selecting a lighter
color of the same shade, a lighter yellow, and few for the leg
strokes on the top. Next let's move on to the
belly area of this bird. For that we'll add a new layer between the feather
and the upper tail layer. Tap on this layer and
rename this layer as Belly. Now again, we'll start by selecting a darker shade first, and as we go up, we'll try to create
a gradient effect. We'll keep selecting
a lighter shade. Now, with the same brush, you can add these
feather-like strokes following the shape
of this bird's belly. When you're trying to find
the shade that you need and the reference image is
not giving you that shade, selecting from the color
panel can make it easier. You can just select the shade lighter from the shade
that you're already using. Selecting among
the lighter color. This is the last layer and
the lightest shade too. Now selecting the
darker shade to add few details on the upper
area, especially around neck. You can also follow
the sketch and add these details around the
sketched marks on the chest. Now selecting the
lightest shade of yellow to add highlights
on the chest area. Now this bright reddish orange to add highlights
around the tail. Now let's move on to the head, feet, and the branch
in the next section.
6. Sun Conure: Head, Feet & Branch: [MUSIC] Now for
the head let's add a new layer above
the belly layer. Tap on the Layer and
rename this as Head. Now for the head,
I'm going to use all the colors from the body. I'll be picking up
the same colors we've used in the body. That will help the
artwork look more cohesive and also it is easier for us to
pick up the colors. For the head again,
we are going to give a gradient effect but this time we'll be going from
lighter shade to the darker. Also will be starting from
the outer part of the head, going towards the eyes. You'd be starting from
the beak and going in a circular direction
for each column. Selecting our foes
darker shade from the body and adding a layer
in a circular direction, starting from the beacon
again and towards the beak. Selecting the second
darker shade from the body again and adding the third
layer of feather to the head. Now the third layer, that's been the orange color. This is our second last layer. The last one with the
orange-red color. We are done with the head here. Let's hide the sketch layer
and see how it looks. Let's move on to the
branch and the feet. Now for the branch, adding a new layer about
the feather layer, tap on this layer and rename
this layer as branch. Now for the base layer, I'll select my
technical pen brush. Select a color from the image. Try to pick up a mid-tone, which is not too
dark or too light, and following the sketch, I'll draw the shape of the branch and fill it
with the same color. Now to add details
to this branch, you can either add
clipping mask to this layer or just alpha lock. I'm going to alpha
lock this layer and select my full
B compressed brush. [MUSIC] Selecting a lighter
shade from the image. Now if you're
following the image, you can see in the reference
image the lighter area, the light is falling on the
upper area of the branch. I'm trying to follow
that and I'll add this rough strokes
on the upper part. [MUSIC] Next, select the darker shade and
add that on the lower area. [MUSIC] Now this can be done with the
technical pen tool but I'm selecting my feather brush and reduce the
size of the brush. This is to add wood
light line details. This you can also do by following the lines
done on the sketch. [MUSIC] Now with my 4B compressed brush, adding this tiny detail on
the branch to make it look more natural for
selecting a light color. Make a circle on the edge. Next, select a dark color. Again a tiny circle in-between
and again a light color. [MUSIC] Now let's move on to the feet. For that, I'll add
a new layer above the branch layer and
rename this layer as feet. [MUSIC] Now with my
technical pen brush and pick up a color from
the reference image. I'll start drawing the shape of the feet, following the sketch. Fill it with the same color. [MUSIC] I'm selecting a dark Grey more like a black
color for the nails. Nails can also be done
on a different layer, mine is on the same one. Just following the sketch and filling it with
the same color. [MUSIC] Next to add details to the feet, I'm going to alpha
lock this layer. You can also add clipping mask. I'll select my 4B
compressed brush with the dark gray color, just adding the shadows
and highlights. [MUSIC] Now with my second brush, that's the feathered brush, I reduce the size of
the brush and add these tiny lines that you
usually see on a bird's feet. [MUSIC] Here we are done with
the first board. Let's hide the sketch layer
and see how it looks. I'll hide my
reference image layer 2 and that's how
the board looks. I'll change the background
to a little darker. You can see the
bird more clearly. [MUSIC] Let's move on to
our second bird.
7. Flamingo: Eyes, Beak & Feet: Let's start with our second
board that's flamingo, I'll tap on my second canvas. Now my first step is to
insert our reference image. For that I'll go to Action, Insert a Private Photo, and I'll tap on my image. You can select any reference
image of your choice. I have few more reference images in the resource
section of this class, you can download them too. Now my first step is
to add a new layer. I'll pull this layer
below the sketch layer, and I'll rename
this layer as eyes. All our illustration layers will be below our sketch layer. I will change my background
to a little darker color. When we are using white
color to illustrate, we can see it clearly. I'll keep it as light blue. Let's start with the eyes first. I'll go to my eyes layer, select my Technical Pen. If you see it clearly, the eyes is a little pale
yellow inside the eyes. You can pick the color
from the reference image. If it looks too dull, you can just select it
from the color panel. I'll pick a little lighter
and brighter yellow. Fill the center of the
eyes with this color. Next, I'll select a little
darker color to add in the center and the
ring inside the eye. Next, we move on to the
beak of this flamingo. I'll add a new layer, I'll pull this layer
below the eyes layer, I'll rename this layer as beak. I'll cover the whole beak
with the white color. If you see in the
reference image, the white also goes
around the eyes, so I will continue
around the eyes too. Next to add details
to this beak, either you can Alpha lock this layer or add clipping mask. I'm going to Alpha
lock this layer. If you add clipping mask, it is going to help you if you have any changes in future. But with the Alpha Lock, you might not be able to do as many changes as with
the clipping mask. The benefit with
Alpha lock is you save the number of
layers you're using. Next, I'll select
my compress brush, selecting a light peachy color, and following the
reference image, I'll add this layer on the beak. Next for the black area, I'll select my technical pen, select black color, and I'll add on the beak. Next, to add detail
to this beak, I'll select my compress brush, and I'll add this
detail on the front. It gives this little shiny
rough detail to the beak. Let's move on to the feet. For that, I will
add a new layer, pull this layer below
the beak layer, and rename this layer as feet. Next, I'll go to the brushes, select my technical pen, select a color from
the reference image, and I'll start drawing my base
layer for the bird's feet. Now to add shadow and
detail to these feet, Alpha lock this layer,
select Compressed brush, select a darker color
of the same shade, I'll add shadow at the
back of this feat. This reference image
doesn't show the feet, but you can always follow
another image for this. Make selecting a lighter
shade of the same color, this will be for adding few highlights and light
falling on the feet. I feel the feet looks
too dark for me, so to make it lighter, I'll go to Adjustments, Curves. I'll pull the string up and
make it a little lighter. Here we are done with our beak, eye, and feet. Let's move on to the
feather part of this bird.
8. Flamingo: Tail, Belly, Back & Head: [MUSIC] Now here
for the feathers, we'll start with the tail first. I'll go to the layers, add a new layer, rename this layer as Tail. Next, select R the brush. Select a nice bright orange
from the reference image, and add these strokes on the
tail area of this flamingo. I'm trying to follow
the reference image to understand the shape and
the fall of these feathers. Once I'm done with
this first layer, I'm going to select
a lighter shade of the same orange color. This will be the second
layer on the same feather. If you're not able to pick
it from the reference image, you can just select
a lighter shade from the color panel and start adding these
tender brushstrokes. Make sure you don't cover
the whole base layer. You can still see the base
color between these strokes. Next, for the back
feather of this flamingo, I'm going to add a new layer and rename this
layer as Feather. This layer is about
the tail layer. I'll select a white
color for my base layer, and cover the whole back
with this white color. You have to make sure the end of each stroke looks
like a feather. If you're following
the same sketch, it will be easier for you to follow the shape of
the feather here. Now, here again, I feel the
white color looks too dull, so make it lighter. I'll go to Adjustments, Curves, and pull this string
little upward, that will make the
color lighter. Now to add my second
layer of feather, I'm going to add a clipping
mask to this layer. Add a new layer, tap on the "Layer", and
tap "Clipping Mask". Select a light peach color. With the same feather brush, I'll start adding these
strokes following the sketch. Next, selecting a darker
shade of the same color. These darker brush
strokes will also be in the same place
as the lighter one. Just make sure the strokes are little thinner and you can
see the lighter one too, very really close
to the light one. Let's hide the sketch layer
and see how it looks. I'll go to the layers, hide my sketch layer. This is how it looks
without the sketch. Now, here you can even
make your own changes like keeping the strokes a
little longer or shorter, or you can even change
the base color. Instead of white, you can keep it a little more peachy or pinkish depending on your
reference image too. Let's move on to the
belly of this board. For that, I'll add a new layer, and this layer will be
below our tail layer, and we name this as Belly. I'll select the same white
color for the belly too, and I'll cover this
whole lower area with my feather brush. Next, adding clipping
mask to this layer. Select one of the
lighter shade of the pink from the feather. I'll start adding this
feather-like detail on the belly too. If you are following
the same sketch, you can follow the pencil
marks down on the belly. Now, selecting a
darker shade to add few details around the
tail and at the bottom. Now let's move on to the head. For that, I will
add a new layer. This will be below
the beak layer, and we name this layer as Head. Select a darker
shade of this *****, cover the whole head
area until the neck. We'll create this
base layer first. This color should not be
too dark or too light. It should be around a mid-tone. Next, I'll add a clipping
mask to this head layer. Select a darker
shade of this *****, and we'll be adding
this detail layer, especially around the eyes and also where the neck has a curve. I'll select even
more darker shade. I'll start adding another layer on top of the layers
we've already done. Make sure you don't completely
cover the previous layer. Now next, selecting
a lighter layer. This color will be lighter
than your base layer. We'll add this color
to the areas we can see the light falling
in the reference image. I'm going to select
another lighter color, and this will be
the lightest one. This will be a layer we will be adding to the last
light color we did. We're done with
our flamingo here. I will hide the sketch layer so we can see the
final illustration. I'll change the
background to be a little darker so we can see
the board clearly. Hide my reference image. I feel the tail looks a
little darker than the head. I want it to be a
little lighter. I'll go to my Tail layer, go to Adjustments, Curves, and I'll pull this
string a little up. If you want to change
the color slightly, you can again go to Adjustments, go to Hue, Saturation,
and Brightness. Here under Hue, you can change the color. Mine is looking a
little orangeish. I want it to look a little pink, so I'm going to slide
it towards left. Now the tone matches the hand. We're done with this flamingo. Let's move on to our third bird.
9. Kingfisher: Eyes, Beak & Feet: Let's start with our third
bird, that's kingfisher. I'll tap on my third canvas. Right now I just have one
layer on this canvas, that is, the sketch layer. Now, my first step is to
insert our reference image. For that I'll go to Action, Insert a photo and insert
your reference image. I will be using this
reference image to pick up colors to understand the feature of this
board and also the different texture on
different parts of the body. I will be changing the
background color so when we are working with
the white color we can see it clearly. I will keep it as light blue. Next, I'll go to Layers. I'll add a new layer, pull this layer below
our sketch layer, and rename this layer as Eyes. All the layers we're using to illustrate will be
below our sketch layer. Select my technical
pen from the brushes. Select the light brown
color around the eyes. I'll fill the whole eyes
with this brown color. This will be our base layer. Next, select black color. With this, I'll fill
only the center area so the light
brown color looks like a ring around the eye. Next, I'll select my soft brush. With this, we will be adding this reflection inside the eye. I'll select white color, keep the size of
the brush smaller. I'll just add a slight
brushstroke on the black color. We are done with the eyes here. Let's move on to the beak. For that, I'll go to
Layers add a new layer, pull this layer below
our eyes layer, and rename this as beak. [MUSIC] I'll pick a light
color from the image. With the same technical brush, I'll start drawing our beak. I will be having both lower and upper part of the beak with
different color, and this will be
on the same layer, but you can also do it
on different layers. I'll keep the upper one lighter
and the lower one darker. For the lower one, I'll
select a darker shade, and I'll draw on the same layer. Next, to add details
to this beak, I'm going to Alpha
lock this layer. You can even add clipping
mask to this layer. I'll select my compressed brush, select a light color, and I'll start adding these highlights on the
upper part of this beak. I'm following the
reference image to see where the light is falling, where is the darker and where is the lighter part of this beak. [MUSIC] We're done with the beak here, let's move on to the feet. For that, I'll go to Layers, add a new layer, pull this layer below
the beak layer, and rename this layer as Feet. Selecting my technical pen, select a color from
the reference image, and I'll start drawing
the feet of this bird. [MUSIC] Next, selecting a darker shade to add nails to these feet. [MUSIC] Now to add details, I will Alpha lock this layer, select my compressed brush, select a lighter color
from the reference image, and I'll start shading
on these feet. [MUSIC] Next, selecting a darker color to add shadow in few areas. [MUSIC] Here we're done with the eyes, feet, and beak. Let's move on to the
body of this bird. [MUSIC]
10. Kingfisher: Tail, Back & Belly: [MUSIC] Let's start
illustrating the body here. We'll start with the tail first. For that, I'll add a new layer. Rename this layer as tail. This layer will be
above the feet layer. Select my second ink
brush for the feather. First, we'll create a
base layer for the tail for which we need a color which is not too dark or too light. It should be around a mid tone. Cover the whole tail
area with this color. Select a lighter
color from the image. If you're following
my sketch you can follow the sketch lines. I'm just adding these
uneven strokes, also trying to follow
the reference image. Next, selecting a darker color. This color should be darker
than our base color. Again, following
the sketch lines. Next, going to add a new layer for the back of this bird. Rename this layer as back. This should be above
our tail layer. Next select a color from
the reference image. This color should not be
too dark or too light, a mid tone, and cover the
whole back with this color. Next, to add details. I'm going to add clipping
mask to this layer. Select a lighter
color from the image. I'll start adding these
strokes following the sketch. Now selecting a
darker shade from the reference image and adding these details following
the reference image. Selecting a darker color, this is again to add this
feather light detail. I'll be repeating this
detail three times; three layers of this
featherlike detail starting with my second layer. This is the third one. If you see in the
reference image, you can see this tiny light
spots on the feather. I'll start adding them
with the lightest color. Now with the dark color, I'm going to add these shadow and darker areas
around the feather. Now moving on to the
belly of this bird, I'm going to add a new layer. Rename this layer as belly. This layer will be between
our back and tail layer. Select my short hair brush, select a color from
the reference image, and I'll start adding these tiny brush strokes and
cover the whole belly area. Next, selecting a darker shade
from the reference image. Following the reference image, I'll start adding these
darker shade around the darker and the shadow
area of the belly. Selecting a lighter shade
from the reference image. Just a few strokes like you can see in
the reference image. Now in the next section, let's move on to the head
and the branch of this bird.
11. Kingfisher: Head & Branch: Let's start with our head here. I'll add a new layer, rename this layer as head. This layer will be
below our beak layer. Next, I'll select
my second ink brush that will be use
for the feather. Select a color from
the reference image. Following the reference image, I'll cover all the area
with the blue color. Make sure this color is
more towards a mid-tone, not too dark or too light. [MUSIC] Next, adding clipping
mask to this layer. Add a new layer, tap on the layer and tap
"Clipping Mask". I'll select a light color from the feather and I'll start
adding this on the head. We'll be creating this pattern, a striped pattern that
we can see in the image. I'll keep selecting
the lighter and the darker color and try to create the stripe
pattern on the head. [MUSIC] We're done with this patch here. I'll move on to the next step. I'll select a mid-tone
from the body, and create this longer
stroke around the eyes. For here, again, I will be
using different shades of blue and try to create
a gradient effect. Every layer will keep getting shorter and going
towards the eyes. [MUSIC] We are done with the upper
part of the head here. Let's move on to the
part below the beak. Even for this bird, I'll be doing the same
thing we did near the eyes. I'll try to create
a gradient effect using few different
shades of blue. [MUSIC] Now, moving on to the
white and orange area below the eyes. For this, I will add
a new layer below our head layer and rename
this layer as head too. [MUSIC] Select my
short hair brush. Select white color from the color panel and add
the white color first. [MUSIC] To add a little shadow
and highlights, I'll select an off-white color and add just a few strokes
on the white area. Now, for the orange part, I'll select a color from the belly and start adding
orange on the face area. Same like we did on the belly, I'll select a lighter
and darker shade and add few details
on the orange part. [MUSIC] I'll go back to my back layer, the clipping mask
of my back layer, select a light color to add this highlights and few
short hair at the back. [MUSIC] Now, let's move on to
the branch of this part. I will add a new layer and put this layer below
our feet layer. Rename this layer as branch. [MUSIC] Select my
technical pen brush, select a color from
the reference image, and I'll start drawing my
base layer for the branch. Fill it with the same color. I'll Alpha lock my branch layer. Select my compress brush. Select a lighter color
from the reference image. I'll follow the image to add this lighter and darker
shade on this branch. [MUSIC] Few rough edges and the
details with the dark color. [MUSIC] Here we are done with our
third bird, that's kingfisher. I'll hide my sketch layer and
the reference image layer. This is how it looks on a
different background color. [MUSIC] In my next section, I have few more birds done
with the same technique
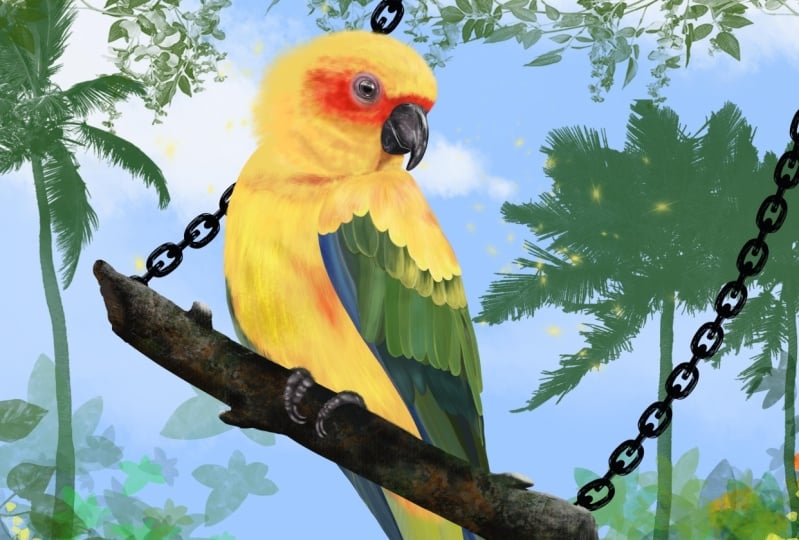
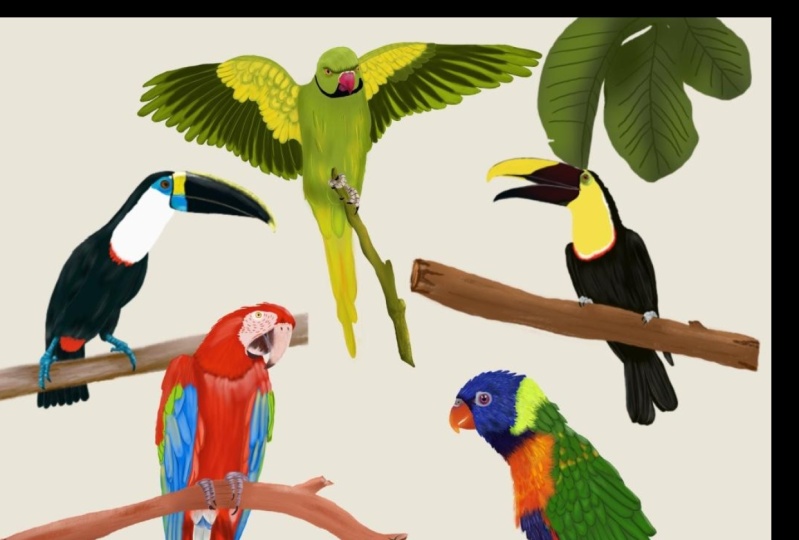
12. More Examples : I'll be showing you
more examples of birds done with the
same technique. This is the first bird That's crowned crane with some tropical
plants at the back, and this is how it
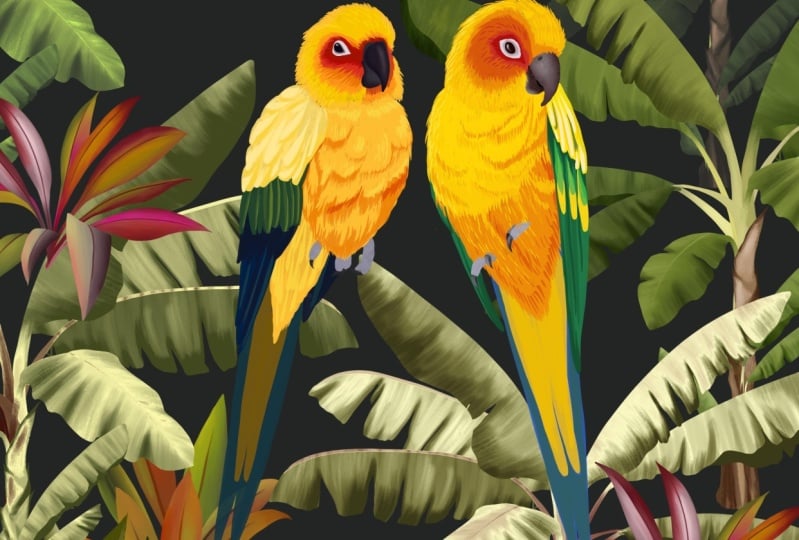
looks as an art print. This is the same sun conure we did in the class today
with the palm trees. This is how it looks as an art print and with a
different background. More examples of kingfishers with different
angles and pose. This is how they look on the product of
print-on-demand sites. This is a seamless pattern
with scarlet ibis, wrapping paper and throw
pillow with the same print. I hope this gives you a
good idea about how you can place these birds in your art prints and
your seamless patterns.
 Vinita Upadhya, Illustrator & Pattern Designer