Transcripts
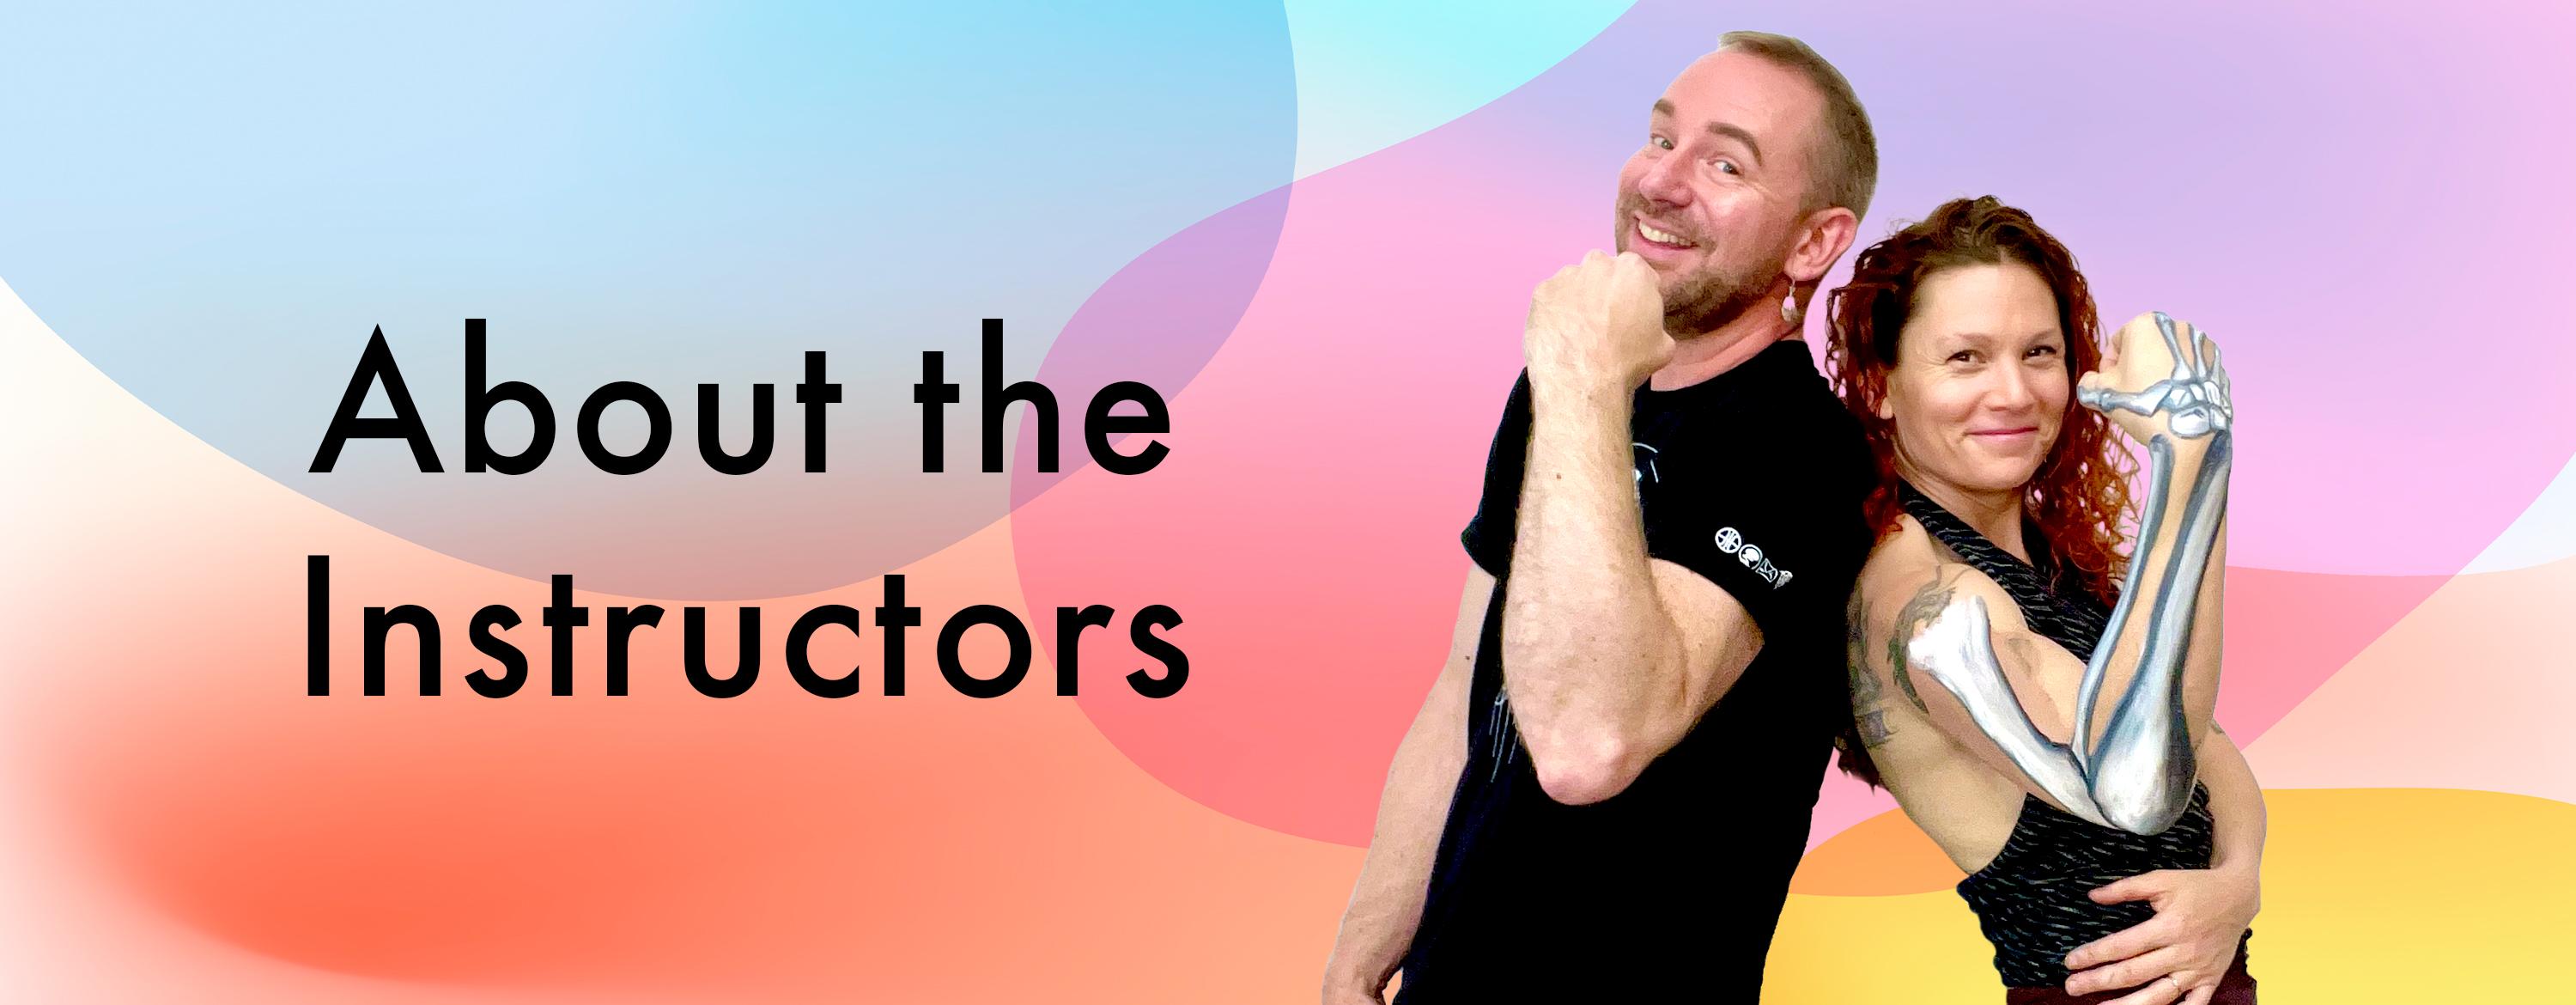
1. Introduction: Hi everyone and welcome to our
illuminated anatomy class. I'm Paul Richmond, I'm Domini an and we are going to
be co teaching this, bringing each of our own
expertise to all of you. I'm a painter and illustrator, artist and art teacher. One of the things that comes
up a lot in my class is students want to learn how
to draw hands and arms. It can be a real hang up
for a beginning artist. We decided to create a
whole course that is going to help you understand
more about hands, arms from the inside out. And this is where Dominic's
expertise comes into play. I work with bodies. I help people to fully
inhabit their bodies. I have a long background in teaching movement and a long
background in teaching. Eventually, it
turned into teaching ballet and then
teaching yoga pilates. There's a number of
movement forms I teach, but really the way that I see, my purpose is that I help people fully inhabit their bodies. Movement is the
conversation that we have with our
physical selves. I also study anatomy. I teach anatomy to teachers in the context of how
they teach movement. Dominic knows all the words and names and how things work. I know what they look like
between the two of us. We have put together a
course that will give you the opportunity to learn
more about the anatomy, but then also sketch it, or paint it, or sculpt it, or use whatever artistic medium you like in order to
capture what you're seeing. In these lessons, we really
have the right ingredients. A map that illuminates the body. If you're taking this
as a movement teacher, you're going to get the
opportunity to feel it. And to give your students experiences where
they can feel it too. Given what you saw,
maybe what you drew on your skin or
a piece of paper, or even what you traced
with your fingers. Because the brain learns in many beautiful ways
as visual artists, they always tell us,
draw what you know, learn about the subject matter and when the subject
is the body. You already have the tools
available to yourself. But this course will give you more insights into why
things do what they do. What's actually happening
beneath your skin that's causing it to look the way that it does in
different positions. That ability to intuitively see inside and know what's going
on and then illustrate it. This course is great for anyone
at any experienced level. If you are an absolute beginner, you won't have to
unlearn a lot of stuff, you can just jump right in. But also more advanced
artists who want to go back and learn some of these
foundational skills so that you can make more
convincing artwork in the human body matter if you're already experienced
anatomist or if you're just trying
to understand more about what's going
on inside your skin. Every time we hear something, we understand it more deeply. And this is a very
unique experience to bring the inside
of your body to life. You're using it as a
teacher in ways that you can also easily share
with your students. We will do some quick sketching, two minute drawings, warm up, get you into the
flow of sketching. As we're doing the
sketches, we're also taking positions that are
relevant to hand health. If you're doing this to maintain the health of your own hands, you can go back
into that video and try some of the that
we suggested and find ways to bring better
ease of motion into your hands as an artist trying
to draw those movements, getting to experience what it feels like to
have your hand in those different positions will also help you to draw
it more convincingly. We go into mapping out the skeleton, little
body painting. You can do it
yourself at home too, or you can sketch
it out on paper. Or you can just watch
and observe and feel the different parts of the arm and hand that we're
talking about. Or you can grab a friend
and make a really big map. I do recommend that
we travel through, We give a lot of love risk. We address carpal
tunnel syndrome. We explain how happens
and we give you exercises to prevent it
and also to alleviate, if you're suffering from
potentially that artists experience that a
lot because of how we keep our hands in
the same position, give a lot of the joints, the open up movement
possibilities. We look at the thumb, there's an argument that it's our opposable thumbs
that have allowed the human brains develop as they did suffer from thumb pain. We have exercises
that will help you understand why that's
happening and then also again, how to alleviate that
travel over the fingers. I have this great series
of exercises at the end. We're going to do
some longer poses with the painted arms so you can actually see
underneath the skin in different positions and get
the opportunity to draw them. Are you ready? Are you ready? All right. All
right, let's do it.
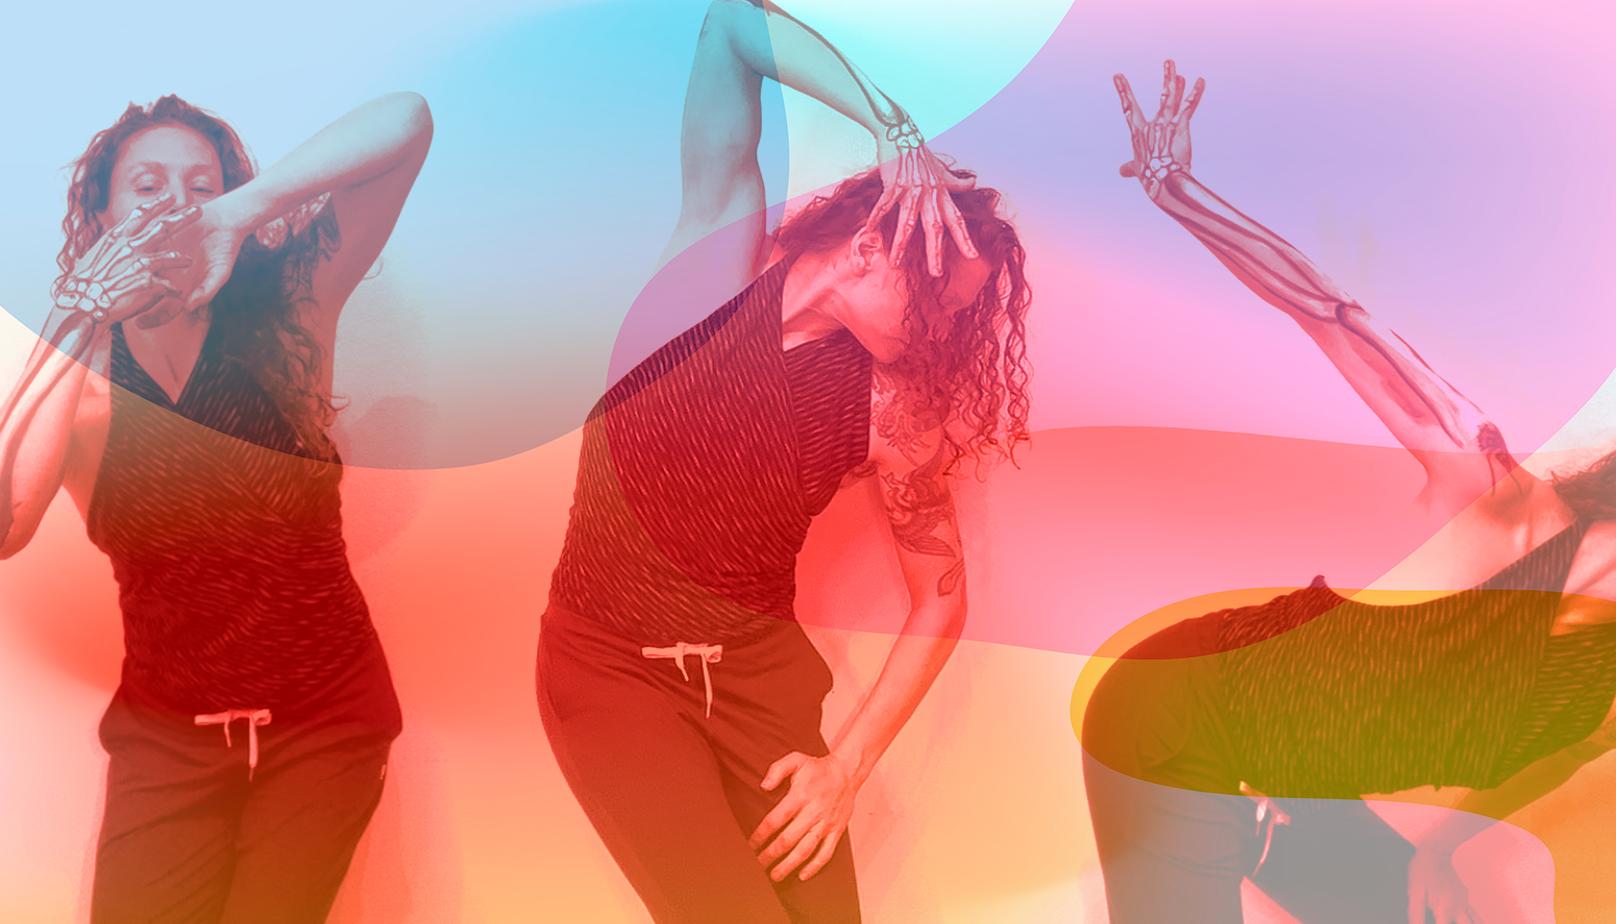
2. Projects: Let's talk about
the projects that we are going to be
doing in this course. In the beginning lessons, we'll start by making some quick gestural
drawings of hands and arms. At the same time,
you'll be invited to try some of the poses
so that you can see what it feels like to hold your arms and hands
in those positions. Where do you feel the tension? What muscles are being
activated in those poses? All of that will help you to
draw it more convincingly. Then we're going to
start illuminating some anatomy for you
with body paint. I'll be using body
paint on Dominic. Paint the bones and
then the muscles. You're welcome to get
some body paint and find somebody with a spare arm
that you can paint on two. But we've also provided you with a PDF download that you can print out showing the outline of the arm and hand
from both sides. So that you can just use
your colored pencils or your markers and draw
along with me on paper. After each body
painting session, Domini will be doing a series of poses for you so that
you can actually draw the bones and
then the muscles in various poses and
see the differences that happen as you
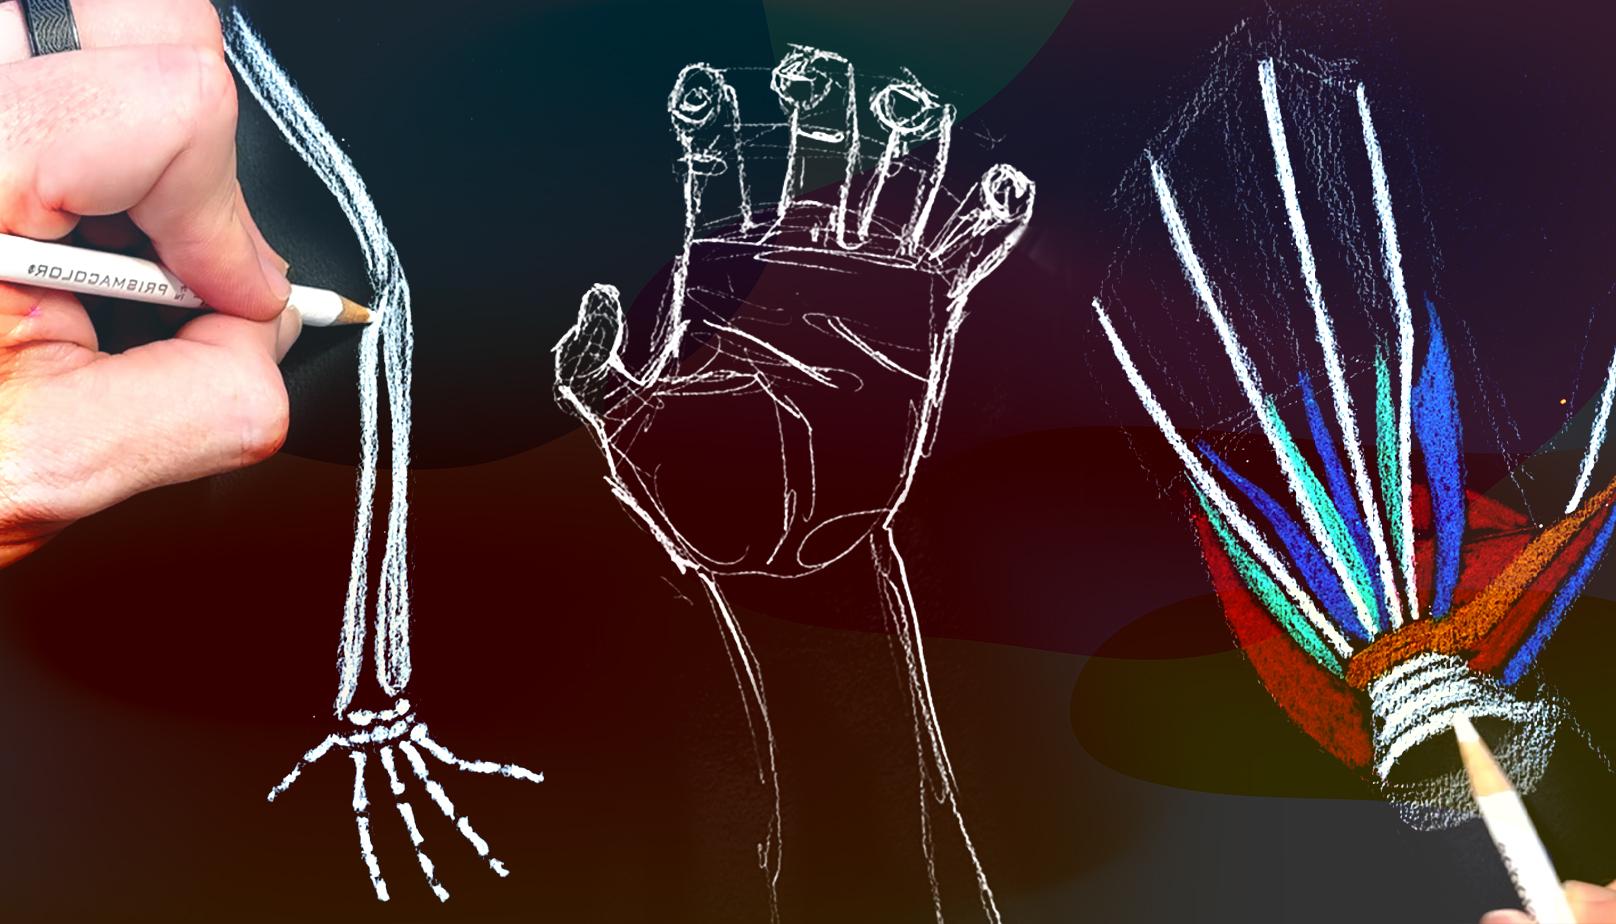
move your body around. For those drawings, I'll
be using black paper and prisma color
colored pencils, Starting just with white
when I'm drawing the bones, and then an assortment of
colors for the muscles. We're going to have
a lot of fun and I'm excited to get
started. So let's go.
3. Materials: Let's go over the materials that I'll be using
in this course. To start with, you'll just need some paper and drawing
pencils because we'll be doing some quick gesture
drawings of arms and hands. I'll be using this
mixed media sketchbook and I like a two pencil. It's got a nice soft lead, so it's easy to draw with
and notice no eraser. Because when you're
doing gesture drawings, you don't want to stop to erase. Then when it's time
to do drawings of the bones and muscles, I'll be using this black sketchbook and prisma
color colored pencils, starting with just
white for drawing the bones and then an assortment of colors for the muscles. And you can use any
colors that you want. It's not necessary that you have the exact same materials as me. Use whatever you're
comfortable with. Whatever you have
handy, no pun intended. But make sure that you draw
along with me so that you really understand these
concepts as we discussed them. Lastly, we've provided you with a PDF download
showing an outline of the arm and hand from both sides. You
can print that out. You may want to print it
a few times because there will be different layers
that you'll be drawing. And that way you can
draw along with me when I'm using body
paint on Dominic. Now you're also welcome to get some body paint yourself
and find someone with a random arm that you can paint on if you feel extra ambitious, but drawing on paper will
work just fine to you. Go gather your materials
and let's get started.
4. Gesture Drawing: Lesson 1: Hi, and welcome back to
Illuminated Anatomy. In this lesson, we are going to start doing some
gesture drawing, sharpen your pencils,
and let's get started. In addition to drawing, I also like to encourage
you to actually try out some of these movements for yourself so you can see
what it feels like. And so that you can
get the benefits of that movement and then draw it. There's also a huge level of
learning that has to do with mimicking a shape before you
see it so that you feel it, you're going to get a
better sense of what's going on in the inside
if you felt that. And then when you go back in to illustrate it with
that aspect of your mind, it sets it in just
a little deeper. Artists are always saying that hands are one of
the hardest things. This is a great opportunity for you to really study it and learn about the anatomy
in a new way and also just get more connected
with your own body. You know how it's
always hardest to write your own bio because you
know yourself so well. It's hard to define because
you could go anywhere. It's hard to rope yourself in as well as toot your own horn. But really I think it's about
this definition because our hands are the instruments through which we
influence our world. There is so much
potential that I wonder if somewhere
it's hardest to draw hands because they're the things that do
everything for us. This is a great
chance to just take that one subject and really
get comfortable with it, and learn about it with someone who is very
experienced and knowledgeable. I'm excited to learn, too. I feel like Mr. Rogers,
when he goes and visits, one of the people
in his neighborhood will listen to your. Today, we're going
to visit the handle. Try the pose first
yourself, and then draw it. So here's our first pose. It's a two minute pose. We're just going to rest the
elbow on the table and bring the hand to an at rest
position, whatever that is. What you're going to
notice is that for one, there's never an entire rest. There's always a
level of tension involved in the body
to hold any shape. Right now, my arm is
resisting gravity. The elbow is stacked with
the wrist pretty vertically, so there's not a lot
of effort there. The hand is falling
off on the side. But unless they are under
anesthetic or dead, there's still going to be
a level of tension that you can see at the wrist to
maintain a healthy bend here. In the same with the fingers,
they haven't collapsed into gravity. That's what
we're measuring. Your own level of tension
is also going to have to do with where you hold pain
or restriction in your body. We all do is what makes us, it's not that we're trying
to fix or change anything, it's just about knowing
ourselves a little drawing. Pay attention to the shapes
of the negative spaces, the spaces in between the fingers or around
the hands and the arm. Also interesting to note, do you tend to shake? We all tend to shake
whenever we're holding positions that maintain a
certain level of effort. Unless we have a
neurological condition, we don't usually shake entirely at rest,
which is what we have. But it's fun to notice
what happens as you hold any position for a
certain amount of time, because that's when the tissues begin to experience what's
called time under tension, which is actually one
of the healthy stresses that we usually put on our body. We want to make it stronger, grow and maintain mobility. Okay, you have ten more
seconds. Time's up. Great job. For this next one, I'm going to use my
non dominant hand. We always tend to
lean on one side and do all the cool stuff
with our other side. I have one client who called it the porch arm and
the grill in arm. I love it for that. We're going to
work on developing our capacity to
connect to both sides. This next pose is
all about tension. Going to start with curling in just that top joint
of my fingers, then I'm going to
curl in the next one. That next one corresponds to my thumb joint
there that goes. And then I'm going to try to
curl the next in the next. Then I'm going to
close my entire, I'm going to slowly
open this up. And then one more time, Paul is going to stop me at the best point to
illustrate tension, and we'll take a 2
minutes sketch to that. Let's right here. I love that. Before shortening
of the fingers, I'm just going to move
my head of the way. 2 minutes and keep it loose. Just start with basic
shapes, scribbly lines. We're not going for detail here, you're just trying to capture
the essence of what you see as I'm doing this. I'm feeling work in the back of my knuckles and
also in the front. Now we have a term called
co contraction that I love. What it means or
what it used to mean is that when one side of the
body is working to shorten, the other side is
being lengthened. But we've rephrased that now to say that when one side
is working to shorten, the other side is working to lengthen because
muscles are binary. They're either on
or they're off. They're either contracting
or they're at rest. There's no such thing
as one half doing one thing and the other
one taking a free ride. There's work involving the
extension of my knuckles, and there's work involving the contraction of the
front of the knuckles. I'm also beginning to feel
this contraction moving all the way up
into my upper arm. That's a term called
muscle radiation. I had 55 seconds to go. This is a 2 minutes
radiation tension you hold in a distal
area of your body. Distal is further
away from the center. Begins to connect into center. The longer you hold it
because I'm under tension, your arm's not
going to fall off. I'm telling myself this for you, Triss going to have such
great definition after this. 26, I'm going to go
ahead and put my hand on my upper arm to quell some of that tactile sensation is really great for reducing
the sensation of pain. It changes the mechano
receptors in the skin. Now my body is giving me different information
on my upper arm apart from just Jesus Christ, he 4321. If you did that, make
some wrist circles and do it on the other arm. Also, to stretch out the
tension where I felt in my fit. I'm going to hold my hand down, I'm going to push my
wrist forward to lengthen the entire line of muscle
chain. Just contracting. Beautiful. I just want to
draw all of these, that's why you case next pose under the hand
completely at rest. I know that we started also
with the hand at rest, but that was without as
what I'm looking for here. Pre game, pregame,
pregame shaking. Your body shaking is
great for increasing mobility and also changing
the nervous system sensation. Vibration is how we experience pretty much everything
in the world. It's all collisions
of vibration. We'll geek out about that some other time, over 2 minutes. Really, this is one of the most recognizable
vibrations for the body. And then when I rest my hand, now granted it's
the opposite arm, but still notice is a
different angle at the wrist, Different Drake in the fingers. Beautiful. Get my head out of
the way. Let's go. Okay, 2 minutes start drawing. And you're not
trying to get every detail in these drawings, you're just capturing
the essence of what you see and also what you felt when you did this
motion yourself. It's interesting because I can feel my tissues begin to
respond to gravity in a very different
way after both the shaking but also the
tension that was created. Just like listening
to music and how you're prepped to
appreciate a symphony. Once it starts after that first eight or
32 bars of intro. As you warm the body up and you give it a different experiences, it's able to go into
movement at a deeper level. It becomes, in the
sense, more plastic. When I'm doing a quick
gesture drawing like this, I like to hold my pencil a little farther back
away from the tip. That helps me not to overly control it or have
too tight of a grip. It just keeps the lines
a bit looser and freer. That's very helpful when
you're trying to draw quickly. Well, now you can add hand
model to that resume. Oh God, I need another job description thing
is how much body work I do. I have these like intensely
muscular climbers, hands with very short nails. I don't think
anyone's going to buy any jewelry or risk for me, but it's great for drawing oh good bodies that tell stories. Yeah, absolutely. If you start with a
looser sketchier line, then you can go back with
whatever time you have left at the end and reinforce some
of the edges with a darker, more controlled, cleaner line. I would encourage you to play around with the thickness of the line as well. Okay. Time's up to break in this one. What I'm going to do is I'm
going to hold my elbow. Just going to make
some wrist circles in either direction because
all of that prep work has got my tendons and
my ligaments really where it's a great
time to explore your range of motion. Okay. Great job, everyone.
Okay. In our next lesson, we are going to
continue doing some more drawing and posing.
I'll see you in.
5. Gesture Drawing: Lesson 2: Hi everyone, and welcome
back to Illuminated Anatomy. In this lesson, we are
going to continue doing some quick sketches
of the arm and hand. Remember, you can always pause the video if you'd like to
spend longer on your drawing. Let's get started,
get some basic moves. But if we look at the
structure of the arm, we have 12345 scenario where for the arm's
ability to move in space, the way the skeleton
built itself was with a single bone at the
upper arm called the humerus. Then we have two bones in the
forum called the ulna and the radius that allow for elbow movement and also
rotation. They're super cool. I can't wait to get into
this with you actually. This is a good time to do that. If you just put your hand
around your forearm, I want you just to rotate your wrist with a little
bit of an elbow bend. You can let your
fingers begin to guide themselves into the
crevices between your bones. You can feel how one
bone, the radius, is actually going in a diagonal
rotation over the Alma, which is the one that
connects into the elbow. That's pretty cool
because the fore arm is allowing the wrist a
whole range of motion. Then we get into the wrist, we have two different
stacks of bones, 3.4, we'll talk about
all that later. They allow us to open
and close the arm, and also different levels of a little bit of
rotation in the palm. When our fingers get involved, they're able to do more stuff
For this next exercise, which is calling
progressive figure eights. We're going to start, we're
going to hold the wrist here and we're just
going to rotate our fingers back and forth. This hand is going to
learn a whole lot about that as you're moving
your other hand. Then we'll let the forearm go. I've got my elbow resting
on the table right now, I'm seeing the possibilities of movement just from the forearm. If you have your
hand on your bicep, you're going to feel some
muscles helping you do that, but the humerus itself
is not involved. Then finally, when we begin
to straighten the elbow, that's when the upper arm of the shoulder begin to follow
the movement of the hand. That's a rule that we can
actually see anywhere. If you raise your arm up in space and your
elbow is straight, the shoulder is going to follow. If you keep your arm straight, the shoulder is going to follow the hand in its range of motion. As soon as I bend the elbow, the shoulder can move
independently at the hand. Going to go back to
making some big figures, then take it back
into smaller ones. What this is also allowing us to notice if you start to
stare at your hand, is all those
different angles that the fingers in the
palm and the wrist can take in relation to the form. Then Paul is just
going to stop me at any interesting place and
say, we're going to sketch. I have so much power,
I love it. Pause. Remember, as you draw, don't
get hung up on tiny details. Look for big shapes. Draw very loose and sketchy. If you draw a whole
bunch of lines, chances are one of
them will be right. You can see here, I'm thinking
about the dimensionality of the hand even in a very
simplified geometric way. I do find that very helpful
when I'm sketching. Every artist has a
different approach to this. Don't feel like your drawings
need to look like mine, but if you're struggling
with where to start, I would suggest trying to break the form down into
more geometric shapes, but still thinking about the fact that they are
three dimensional shapes, giving them sides or edges, or making them appear rounded. That will just help
you as you move through the sketch and start
flushing it out a bit more. You always want to keep in mind the structure of
what you're drawing. I find doing that loose
quick base sketch really helps me to solidify the structure
before I add more detail. All right, you have about
35 more seconds now. Everything you do with the
body is very shorting is cat like because there is no baseline of you
who didn't do it. You can look at progression through stretches and
through awareness, but there was never a you that hadn't done that
to try it first. You either have or you haven't. What I'm feeling now is my
hand almost feels strong, holding this shape where the
palm is resisting gravity. Do we know if that's because
I was making fists, circles. We can make up a story about that because there's
no me who didn't. We don't know. Welcome
to science, love it. And with that. One of the most common
issues that we have with our hands stems from the same problem that we have with the rest of our bodies. We forget how much potential for movement we actually have. Every single joint you have in your body is a
possibility of movement. But if we don't activate
that, we forget. Instead the movement begins to go to the more obvious places. For example, with the hands. If I'm going to make a
fist or hold something, I'm probably contracting the
big muscles in the palm. There's actually no
muscles in the fingers, those just tendons.
It's amazing. But these joints here also have a possibility
of movement, especially when you're
trying to manipulate fine instruments such as
pens, paper, knives, darts. You want to be able to have control over
all these joints. We're just going to work on restricting motion
everywhere else. I'm going to take my left hand, I'm going to hold it back. Hold my right hand back to right beneath
these joints here. And then I just contract. Don't you make me hold this post and I'm going
to take it down by one. I'm just going to try to bend that without bending
the other ones. Don't be surprised if certain fingers don't get
with the program. We're going to let
the thumb take a break here because
it's a lot to focus on. It's like you have four
delinquent children and you're asked to do chores and then you have to
keep tabs on them. Good luck palm. Let's just focus on that. You can see my thumb
really wants to help. So I just let it do that. Then if I wanted to go further, I could allow the wrist to bend. Now we can pop a wave. M I'm going to contract
my index finger joint because 2 minutes is a long time and I know my right index
finger can handle it. All right. 2 minutes, if you want
to be mean to yourself, you could try doing it with
your left ring finger. It's amazing how much. We just don't access
certain fingers. And when you start to isolate movement by inhibiting
movement in the others, like pulling one back and then just asking the ones
we don't do much with, the ones less attached
to our opposable thumbs. By the way, this is hard. Yeah. But I chose
the easier it feels like there's great tension
on that finger. Yeah. Now, I know this is
a complicated one, but don't get freaked out by it, just focus on the
shapes that you see. I find that it helps
not to even mentally label things like fingers or wrists or any of the
anatomy at this stage, when you're drawing
really quickly, just look at those shapes, let go of the mental labels
so you're not conjuring up your own image of what you think a hand or fingers
are supposed to look like. And you're just responding to the shapes that you
see in front of you. In other words,
draw what you see, not what you know, and it
will make it a lot easier. The other suggestion I
would make at this stage, since there are a lot of
interlocking fingers here, and the anatomy might appear different than how
we're used to seeing a hand. Look for the relationships, the shapes, how does one finger relate to the
one that's next to it? What is happening in those
spaces in between the fingers? Look at all of the relationships that you see and try
and capture those, rather than just drawing
the outline of the form. If you're thinking about all
of the elements as a whole, you'll have a better
sense of the big picture. A time's up, yeah. Great job everyone. Okay, we're not finished yet. In our next lesson, we are
going to do some more, just your drawings.
I'll see you then.
6. Gesture Drawing: Lesson 3: Hi everyone and welcome back to Illuminated Anatomy and
get your pencil sharpened, because we are going to continue doing some quick
sketches in this lesson. Let's go, I want you to
think about the mudras. If you haven't seen
pictures of mudras, the sacred finger positions that are related to some yoga practices
you could think of. They have meanings. I am
not well versed in those, but what I love is their shapes. And what I also love is the neurological
connection to our brain. I'm just going to
make a shape and then talk about it because
this is interesting. And then I'll try to
talk with my hands. I'm going to attach my pinkies together and my middle
finger together. And then I'm going to stretch my ring and my index
away from each other. It could be a mask
or a head piece, it could also be a goatee. But what it really is, is a fabulous stretch for
my fingers and my nurse. I'm going to hold this
shape for everyone. Let's get my head out of it. 2 minutes. This little face
inside of the window, tell you about the homunculus. The homunculus is a part of
the brain that's so cool. You should look it
up on the Internet, because the Internet
will give you some really cool pictures
of a massive pair of hands, a huge pair of feet. And that a face with the lips is the most gargantuan thing, and that is the brain
map of the homunculus. It's basically a place
in our nervous system, part of our brain, that allocates for better
mapping of our hands, our feet, and our face,
especially our lips. Because those are
the places where we need to learn the
most about the world. Interesting because they're all located as neighbors in this
conglomerate of information. That's why when you're
circling your foot, sometimes your hand
starts to go with you. If you're doing complicated things with your
feet or your hands, you may notice that your
tongue is also helping you. When we're working on these new experiences
with our fingers, our brain is lighting up
like fireworks on 4 July. It's not only activating
awareness in our fingers, it's activating awareness
in our face and our feet. One thing I want you to notice, after doing these exercises, do you feel different in your vision or in your
expression as you speak? Or are your feet more conscious of how they're
finding the ground? Because that, for me, is
the most fascinating part about mapping the body. The connectedness of everything. Yeah, you work on one piece,
you work on everything. That's cool. Yeah,
20 more seconds. And you ask like, why do we bother to define it
if it's all one? Well, for the same reasons. We have physics and we also have God. They're not separate. But by humans, we categorize things and we separate them in order to make
sense of things. We contrast one
against the other, not because they're opposites. To better understand what
makes them different, it's how we can have
conversations with our world and then begin to
manipulate and influence it. And with that, time's
up. Okay, great job. One nice thing you can
do for your hands. It just kind of ring out
each finger individually. That will erase
whatever you did. Pretty much like how
you erase the picture. Right. And you can notice that the sensations
that you give to your skin are not
that different than how you would illustrate
something on paper. We trace, we color in
a blunt, throw away. No, no. You can start again. You can have a bath shake. Now, to conclude this lesson, we're going to reinvestigate
our hand at rest. So that first
position, I'll take my original arm,
the dominant arm. And there we go. I think that's about
what we had before. That's good. Okay. The first
time that you drew the hand, you were probably just focusing
on the overall shapes, maybe the outline of the form. This time, since you've
had some practice now, trying to go a little deeper, trying to draw more
interior lines. We're not just making
an outline of the hand, but you're thinking
about what is going on inside of each
of those sections. Draw lines even if you don't
see them on the model, but if you're aware of
like where a knuckle is or where any bend or plane shift, try to draw those lines too. And that will help
you to understand the structure of
what you're seeing. Especially now that
you've been moving your own hands and getting
more connected with your body. Let all of that information come out as you draw this pose. I wonder, Paul, do you ever
have the experience of accidentally drawing
something much bigger than it is in real life? Yes, proportions
are challenging. And with hands in particular, I tend to draw them too small. And then I've seen people
who draw them too big. Everyone has their
own tendencies. It's funny, I'm
thinking too about our societal judgment
about the size of hands. And you have the typical
like sexual snarky stuff. Also something just about like a smaller personality
or bigger personality? Yes. I remember when I was
living in Israel, I also had something about
the length of your arms that had a lot to do with
how you were perceived. And there was a Prime Minister
when I was in Israel, like when I was living there and people made fun of him because
his arms were so short. Oh, wow. That's interesting. Yeah, it's just interesting
what we project on that. And then also, I was thinking
about it in the context of for body mapping. When we map a certain
place in the body, if you look at it from
the interior of yourself, it appears much larger. I'm wondering if when
people are sketching, they may wind up
drawing larger knuckles or a larger piece of the
body that they just felt. I bet especially after
doing this course, you will find yourself focusing more on the hands
in your drawings. I know a lot of
beginning artists, we draw people with their
hands behind their back or in their pockets
because they just don't even want to deal with it. But now it's all
about the hands. It's nothing to be afraid of. All right. Time's up. Great job. Okay, I think we're
all warmed up. So now in the next lesson, get ready because we
are going to actually start illuminating
some anatomy. How even
7. Bones: Lesson 1: Hi everyone and welcome back
to Illuminated Anatomy. I'm so excited because
in this lesson I get to start playing
with body paint. We're going to be
exploring the insides of our arms and hands over
the next series of lessons by painting the bones and muscles on the surface
of Dominic's skin. While I'm doing that, I'll
have a diagram off to the side so that you can see exactly what it is I'm drawing. And I want to encourage you to print out our resources, PVF, so that you can draw or
color right along with, you'll see two
different options in the PDF depending on your
comfort with drawing. The first option is literally just the outline of the
arm so that you can actually draw the bones and the muscles along with me
and then color them in. The second option already has
those elements sketched out and you can just color them as we're learning
about them in the lesson. This is sort of a choose
your own adventure course. Try it both ways if
you want to and see what works best for you.
Throughout these lessons. Domini is also going
to be sharing from her vast knowledge about
how our bodies work. And she'll be demonstrating some different movements that
you can try on your own so that you can feel these different parts of
your body and actually get a sense of what's going
on underneath the skin. Get everything
ready, and let's get started learning
about the humerus. It's time to do some painting. We're going to start with
painting the bones of the arm. We're starting with the humerus, which is bone number one. If you look at the
flow of the arm bones, it goes 12345, we're
going to cover it all. We're starting with the humerus. The single bone we have
in our upper arm starts off as a knob fitting
into a socket. Basically, it's going to
be coming down like this. Then when we get to the elbow, how you bend your
elbow and you can feel those two pieces
on either side of it. That's the edge of
the humorous joint. It's half of the saddle joint. We're also going to be drawing that when we get down to here. It's there and there. The
other piece is over here. The knobby bit, not
the elbow knob, the back of your elbow knob bit. It's amazing how much muscle and how much sposial
tissue we have packed. Our own bones
appear darn skinny, excavate all of their
exterior trappings. But what you realized is that the bones make
space in the body, but it's the muscles that make the shapes and take the force. So helpful to understand what's
happening under there as an artist so you can make the
body feel more believable. An interesting piece
about osteoporosis if you're concerned
about bone density, because as we age, some of the inevitable
deterioration of the meat car that we live in is that it begins to
disintegrate, right? That's actually a principal
tenet of typist philosophy, is just to accept
the inevitable decay of everything in life. What happens to our
bones is that the minerals that make them
begin to dissolve. But it's through lack
of stress that happens. Not moving and not moving. Our force in our body weight through the world
and interacting with gravity actually begins to deteriorate the vessel that
takes our souls around. Now, bones don't
build themselves. Your muscles aren't
overlaid over your bones, they grow into your bones. It's difficult to extricate
them from the bone. And what happens is, as they're contracting and releasing
to move us through space, they're tugging on
the bone itself. It's that stimulus, that vibration into the
bone that causes re, mineralize itself and continue
building itself as we age. Keep moving. Yeah. Just remember that even if your bones have
something going on with them, it's the muscles that move you. It's the springy, strong cells that are
contracting and pumping, and moving the
circulation through your body that
deliberate life and also get you through even if there's an issue with the
thing that makes the space, you can still make the shapes around it and probably be okay. Just do a little shadow. Okay. I like having you just draped
over my esel here because I feel like you literally are
my canvas. This is awesome. I'm enjoying it. Equally
fall, this is very fun. I like the fact 382 because we want to remember this bone
is on the interior of me. No matter what way I'm
turning my arm around. That bone is in the middle and all these muscles are
wrapping around it. Because we can't paint
all of me white. What you're seeing is
one perspective on this bone that has a
saddle joint at the top, at the top of the elbow, at
the bottom of the upper arm. Awesome work. Okay,
we're not finished yet. In our next lesson, we're
going to keep on going and learn about the
Alma and radius.
8. Bones: Lesson 2: Hi everyone, and welcome
back to Illuminated Anatomy. I hope you're enjoying this
course as much as I am. In this lesson, we
are going to learn about the humorous and the Alma. Be sure you have
your printable PDF ready if you want to draw
or color along with me. And practice the movements that Dominic will be demonstrating
throughout the. All right, let's get started. Just put your fingers
on either edge of your elbow and feel the
nobby bits right here. Those are the two edges
of what we painted, the edge of the saddle line, bend arm back and forth. The elbow bone, the one you
rest on isn't part of that. Your elbow bone is
part of your forearm. The two bones that
attached to the humerus. Every time we have a
joint in the body, it allows for more
possibilities of movement. A joint is two bones
intersecting at any level. Adding bones as possibilities
as we're going through the 12345 we're adding is more possibilities of
movement at every level. It's like when you understand
squares enough here, this elbow bone is connecting
to the big bone arm. That's called the Alma I said saddle joint
a couple of times. The Na is never part
of that saddle joint. The top of the ulna is also a U that fits in to the humerus. It allows for this movement and that movement if you just
want to put your fingers together in two saddles here
and see there's a lot of possibilities of movement
in that kind of joint. The Ma is bigger on top and
then it gets smaller as it comes down and it connects to the pinky
finger side of the wrist. Let's just trace the ulna first. If you want to take your finger wrap around the bottom bone, draw up and then get to the
edge of the elbow bone, scoop around that saddle and come back down
through the interior. It's hard to get an
accurate view of what the bone is because
like we just described, the muscles are
wrapped around it. They provide the
meat. They're like the armor in a
sense for our body. But we're still going
to get a good sense of how this bone is. I've posed for some
figure drawing classes, so I do have sympathy for
that. It is very hard. It's amazing to still. Yeah, it's amazing how
heavy your body gets. Yeah. After a time. Plus,
I'm just not good at being still regardless.
I'm always go. All right. Yeah.
You think you still like you think you
have a poker face? Yeah, I do not. We have one and then we
have one half of two. I thought we could take
a moment just to look at this saddled motion, right? The ulna is sliding inside
the saddle of the humerus. And that happens no matter
how my arm is rotated, No matter how the
joint is moving. Black can happen because of the cool
configuration radius. Think about the humerus
and how it comes down. And it's got attachment
points for two bones. One is fitting inside
and then the other one. If you could imagine what
would fit on my thumb. The shape that might fit on my thumb will be
something like this. A little bit of a cap inside that edge that could allow
a motion such as that. When you have the bone that fits inside of a cap that allows for more of
this circular motion, the radius is doing that. The radius starts up on the
other edge of the bone. You can feel in here, it's coming down to the thumb. And that's the one
that's a little more camouflaged by muscle, tons of muscle, because it's
not that big at the top. And the muscle is doing all
the work the bone is making in the space and the joints providing options of movement. But this other knob down here, the thumb part of my wrist, that's the radius ends. Bones are never
actually attached within a joint. It's
the joint capsule. The ligams, basically all
of the fascia which is like the intelligent connecting
stuff in your body that will thicken and overlay itself in various levels of
ten segrity based on the need of that area for movement and stress
around the bones. We have these tight levels
of fascia that we call tendons and ligaments
or also lab rums, connective tissue things
that keep bones together but also keep a little bit of fluid inside to provide
for easy movements. You want to consider sacks or balloons that live around the joints that keep
the lubrication there. Stuff doesn't get
like a rusty door, because we don't want to have
a rusty door. Rusty door. If you think about
the work that we do with holding things
like imagine holding a really heavy suitcase and you have to navigate
it through doorway. Say you're going through
grand scrustration, you're taking your
suitcase onto a train. The amount of work
you would have to do with a thumb edge of your hand, manipulate that suitcase while
holding something heavy. It would make sense that the bone that attaches
to the thumb side of your wrist would be
the one that provides that mobility of rotation. The baby finger edge, which we typically use for less control would be the
side that's more stabilizing. Shall we talk a
little about loop? I think we show, now we have
both bones of the fear. John, let's look at the
possibility of rotation. It's really cool is how the radius is able to
cross over the Alma, depending on the position of the wrist is what allows
for that rotation. Once we get into the wrist, we're going to see a
lot of the bones of the wrist exists to protect
the tunnel of the nerves, which is called the
carpal tunnel part of it. It's an actual tunnel inside all of these tiny
bones that allow for lateral movement
and flexion extension. But really, the
rotation is coming from these two magnificent bones here and the muscles
that surround. I just want you to imagine
two different actions. First of all, turning a
key, you're turning a key. Axis of rotation is really coming through the
middle finger. That's one way in which
these bones can rotate, another way in which
they can rotate. It's like you're flipping
the page of a book. Now, the axis of rotation
is more happening for the baby finger attached
to the al nut itself. That's two slightly different
movements of these bones. And then I also want you to remember that when the
elbow is straight, the humerus is involved. Most people have a
lot of elbow tension. For example, this pain, Tennis elbow is a big thing, pain that originates here. It's helpful to two
different body positions. Straight arms rotating. And you see how now my forearm is taking my humerus with it. That happens no matter
where I am in space. But as soon as I
found that elbow, my humerus is much more still. You can actually go
anywhere it wants. Most of our restrictions of motion happen
because we're not exploring it enough
when you just start looking at the possibilities of movement and pick a couple. I have three different
categories of exercise. One of my favorite ones
is just called Yes, this is definitely
in that category. Pick a bend, move your elbow, pick a different bend
of the arm move. And that's really all you need, to start flashing
out your movement. Great job everyone. Okay,
in our next lesson, we are going to move on to the wrist bones.
I'll see you then.
9. Bones: Lesson 3: Hi everyone and welcome back
to Illuminated Anatomy. In this lesson, we're going
to continue illuminating the anatomy by painting
the wrist bones. And you can draw
or color along on your principle resources PDF. In this lesson, we'll also be learning about
something that affects a lot of artists and people
in other professions too. And that's carpal tunnel. Okay, let's get started. Why do we have so
many bones here? Let's all this together. The finger bones
that are located inside of your palm and trace
them up to their origin. They count alone, right? Sometimes they
disappear inside of me tendons because
our body is smart, that way you can trace them. You'll notice that we have just stuck all these bones
in the sardines in a tin right up here. There's not a lot of that area. So we can feel it here, right? We can feel it here,
but they're buried. All of these different tendons that are attaching
to the bones that would allow for the
possibility of movement and the resilience in our body. Because when we were
walking on all fours were our heels transmitted
the ground forces and the information about
the ground up into our body so we knew
how to navigate. We were swinging from trees, they were traction joints. These ligaments were
holding us together because fascia is so strong you can
hang an elephant off of it. When your hands are now
your ankles in the trees, your wrists are a
big part of what's directing your motion
through everything. Although they're tiny
inside of our body, they're mighty, they're great for different hand positions. When you're drawing and
painting and sculpting too. Oh, you have the
fine motor control. A because I don't
want to overwhelm you with details because then we just forget
the bigger picture. We're not going to name
all these phones and we're not going to talk about
their individual function. Because what I want
you to stand is between Paul's and
my description of how we see our hands, they allow for really big
forces to be transmitted and the information about the
Earth to come into us. And they help us to locomote. And they are also crucial
for fine motor control, for expressing ourselves
into the world. These are like our
speakers for the world. This is an important piece of it, even though they're tiny. What I want to look at here
because we have four AK, three wrist bones, is the
possibility for space inside. What I'd like you to do is take your three fingers
underneath your wrist, above this level, and see
if you can feel spreading. May feel spread,
you could push up, but then contract your
wrist around that. Just see if you can
find motion that way. Then we'll do the easier things. Let's pull the hand
back and notice how these bones sink in because they're coming
out the other side. Then if you flex your hand, they sink in the other
way and they expand on the top that the camera
energy a little bit. See, you are a natural
born hand model. A hand fitness model. Yeah. Even better, yeah. And also there is
that possibility of space which we're going to get into in just a second after we stack up those
next four belts. It's all these multiple
joint functions. And if you consider what goes on with our
opposable thumbs, it makes sense that we've sunk the index finger
underneath there because we really want to be emphasizing the ability of the thumb
to open up and cross over. Gorgeous work. Thank you. Frustrating Wess
inside. We can, again, to spring our fingers to
the inside of our wrist and now look at the sliding
of these bones, movement back and forth. But what I really
want you to consider, I'm just going to give you
a little lateral motion here because hey,
bones are cool. You put your fingers here, what you were feeling this full time. You contract it in and out
and you move back and forth. Feel it's like a tendon. It's called the flexitarm, which basically means the thing
that flexes your fingers. Think of it as the achilles
tendon of your palm. Your flexdgtorum forms
the base of all of your wrist bones in between the flexdgatorum
and these bones. The carpal bones is
the carpal tunnel. Carpal tunnel syndrome being one of the most prevalent
sources of distress for all of us because we've got our hands in the same position
all the time. Arts pay attention to this because we definitely
are guilty of that. Yeah. And the same with writers, all your nerves
originate in your brain. They're folded up into a
little tiny nervy tree of life or at the
base of the spinal called the cerebellum through your spinal cord
and love nerves. And then they extend in between each vertebrae and the nerves for your arms come off
basically around your neck. They converge here what's
called the brachial places like the ground central station of all of your nerves
for your arms. They all have their
own little pathways through here, through the tens. And all of a sudden
everything by the hand goes through
the carpal tunnel. When that gets stuck, that's the pain that
goes in your hand, also through your
shoulders, in your neck. And it basically affects
your whole enjoyment of life and the way
to prevent against that the tunnel open and we're doing the
tunnel open, what could? We can stretch the
hand this way. We can stretch it this way. We can stretch it that way. We can add some low stretch. We can extend the ten. Remember that fist that we had, less than one, Let's
all do that right now. Curl the top of the fingers in, then the middle knuckle
and make the thumb. And then make a fist. And then
go ahead and stretch that. Feel that working?
It's good for you. Go back and forth a few times, make some wrist circles, feel the work of the flexogitalus,
the move of the bones. You can open your hand and make some figures because that's
usually a lot for us to, we can do more later. But that's what's going to
keep your carpal tunnel happy. Awesome. More. Okay,
in our next lesson, we are continuing this
journey and working on the bones of the
hand. See them.
10. Bones: Lesson 4: Hi everyone, and welcome
back to Illuminated Anatomy. In this lesson, we
are going to be illustrating the
bones of the hand. You can draw or color along in your printable resources, PPF. So let's get started. We have carpals in the hands, we have tarsals in the feet. Both of them are met
up inside the palms. They're metacarpals. If you pull them back and forth, you'll see that ten is they're
moving on top of them, but you can also feel the
rigid bones underneath. Now we're going to
paint the carpals. The knuckle is basically
just the joint where the carpal is put
into the phalanges. I love the curve of
this graceful bone. It's just really helpful
to remember that in between your bones
you have fluid. It's not water, it's snow. Fluid is a slightly
different make that, but basically this is
beyond my comprehension. But there are positive
and negative ions in the water electrical charge that basically creates enough
tension that your bones, you're never bone on bone. There's always fluid
in between the joints. In between the
bones. It's amazing. Now, when people say that it has this dire
sensibility around it, just say your bone
on bone through. Right. You could be closer to the
bone than you should be. Maybe there's ligaments
that aren't supporting it, but no, your bones aren't just grinding on
top of each other. That's good. Yeah. I always think it's interesting
to look at old from before the
Renaissance time, heads floating on top of is of fabric because they did not know what the body looked like. They weren't even allowed
to see themselves naked, let alone, you
know, someone else. Before the invention of Mertz, he certainly couldn't be
naked in front of a lake. Figured out grade
digging yet, right? It was artists who
did that, though. They had to, so they could start to
understand this stuff. And then of course,
you know, one of the most famous invention, it wasn't just an artist,
he was also an inventor. And he was really into machines
and the mechanics of it. And you could, you
could understand the fascination with
the biomechanics of the body would also be a
great jumping off point for them looking at birds and figuring out
winged flying machines to understand all of that. I mean, they were already
building buildings. They understood
structural support and fascia in the context of
how you support a building. Yeah, they just didn't know
what was going on in here. Yeah. They just apparently weren't
allowed to look at that. Now we're allowed
to look at bodies. Je, civilization. I want you to appreciate
the thing of beauty. What's really wonderful
about this is how you can see the shapes in the
space the metacarpals make. And I want you to really
appreciate the amount of space we have between the thumb
and the index finger. All of this is filled with
muscles and ligaments that allow us to have our
opposable thumbs. There we go, that's the angle
I want you to see in here. There's a thing called
the thenar eminence. And we also will
tend to refer to this whole areas like
the thenar eminence. But this is another
source of a lot of paint for people because
we looked at before. Joints can bend in all
these different ways. For the thumb, it has two
possibilities of bending. It can bend towards the index, There's one tendon
that does that. There's another one that touches towards
the middle finger that causes more of the grip of our entire opposable thumb. That's why we have so much
space in between the bones that's held together with
this fossil spider web of movement possibility. The easiest way that you can
maintain your thumb health, hold your thumb back then just
move this top joint here. You can also see this
joint works at an angle, it's not going in. The rest of the fingers
go into the palm. This one goes across the pump. Don't get frustrated. If when you bend it this
way is doing something different because then you're pulling on a different ligament. Just let the thumb bend.
Then see if you can close it towards the index and then let it come all the
way to the baby finger. Then after you do
a few of those, you can also make thumb circles that's going to help keep
the health of this area. Motion also
stretches, massaging, all of those are
really good because our opposable thumbs means
that we're gripping in, we're very rarely moving out. So we want to look at that
opposite range of motion. Remembering our 12345, well technically it's
12345554. Right. A lot of numbers,
a lot of numbers. Math much beautiful
to look at. But yeah. So your thumb also has one less piece than the
rest of your fingers. We often forget that
these joints that we have where the phalanges
intersect with the metacarpals, they're all pretty much
just hinge joints. Hinge joints have the least available range
of motion, right? It's just flexion
and extension where the metacarpals connect
to the phalanges here. There's also the possibility
of movement and rotations. There's a little more
here, but then we get into the phalanges. Just clarify, that's
where we have just the hinge
joint aspect of it. The actual shape of the joint might look
a little different. But as opposed to trying
to illustrate that, we're trying to paint
in two dimensions, a very three dimensional shape. Just remember that as we get out towards the
finger knuckles, the possibilities of
joint movement are less. To test that, all you really
have to do is see if you can move the joints of
your fingers side to side. Not so much, but they
can go forward and back. All we're saying,
drawing hands without an awareness of the structure
within the fingers, you end up with hands that
just look like they have, you know, four litle sausages
stuck on the end of them. So really thinking about that structure makes
them come to life. I tend to draw things more
geometrically at first. Straighter lines, kind of
boxier so that I don't forget about the structure that makes sense To make
convincing shapes, you would need to
start with the bones with that structure and then add the movement on top of it, which would be like
the overlay of the muscles and then the flow of the clothing on top of that. It's crazy as fingernails are just an extension
of all the fascia. They go from inside
the skin to out. It's very hard to differentiate. They also, fingernails respond
to vibration and pressure. What I learned from my third
grade sons class is that fingernails grow
faster and harder for pimple players of the vibration
that's being impacted. Wow, we can make a
correlation with that, with the impact of vibration that's necessary
to combat, again, osteoporosis that you need
forces going through the body, which is why jumping and vibration machines are
so good for bone health. Really that causes
somehow the cells to overlay themselves
more thickly. Great job. Okay, in our next lesson we're
going to take advantage of all this body paint
now and Domini is going to do a variety
of poses for you. So that you can do some,
just your drawing, but showing what the bones are doing in the various poses. The.
11. Bones: Poses: Hi everyone, and welcome
back to Illuminated Anatomy. Now you didn't think
we were going to let that beautiful body painting
go to waste, did you? In this lesson, we're going to give you the opportunity to do some drawings of the bones as we see them painted
on Domini's arm. At the beginning of the video, I'm going to demonstrate
one for you. We can draw it together. I'll be using a white prisma
color pencil on black paper, but you're welcome to use any
materials that you'd like. And then after that
demonstration, I'm going to provide
you with a bunch of other poses that you
can draw on your own. I'll freeze the video at various points and
then you can pause it. As long as you'd like to
complete your drawings, you do not need to draw
every single pose, but pick the ones that seem most interesting to you.
Let's get started. Okay, this is going to be fun. I am going right into it with my white prismacolor
colored pencil, just very lightly
sketching the lines first. It's a little bit harder to
erase with colored pencils, have a very light touch
as you're starting out. You can lift it up if you
haven't needed eraser. But again, just like the gesture
drawings we did earlier, I would recommend
just continuing on. If you make a line that isn't
exactly where you want it, just make another one next
to it, a little bit darker. But I'm giving myself some guidelines for where
I want everything to be. And then I will start filling in some of those bone
shapes a little bit more, starting with the humorous, then going down to
radius and Alna. I think it's so
interesting to look at the pose and we see Domini and her arm position and how she is standing there and
pressing her hand against the wall and the positions that each
of her fingers are in. And then being able to
look through the skin in a way and draw what are the bones actually doing
underneath all of that. This is such a great
opportunity to really do a visual dissection. I'm just going in and very roughly estimating where all
of those finger bones go. We're not trying for exact
scientific illustrations here. This is more to help you start thinking about
how all of those things that are occurring underneath the skin effect what we
see and how we move. The harder that you
press with the pencil, the lighter it will be. It's a reversal of
what we're used to when we draw with the
dark pencil on white paper. If you want to give the bones a bit of a
sense of dimensionality, you can go in and
give them a bit of a highlight by
pressing harder in some areas similar to what I did actually with the
body paint on Domini. We're just working our way up
from the dark of the paper. If you want to go in
and actually draw the outline of the arm and hand, you certainly can do that. I did not do that
here in this example. I am just wanting to focus on the skeletal
structure for my sketch. Take the time to go back and refine any of the shapes
that may need it. Then when you're ready, go
ahead and watch the rest of this video to choose a few more poses that you
can practice on your own. When you see one that
you like, pause it, hold it as long as
necessary so that you can capture everything in
your drawing. Have fun. Great job, everyone.
Now in our next lesson, we're going to keep
illuminating some more anatomy. This time painting the muscles of the arm. I'll see you then.
12. Rubber Band Exercises: Hi everyone, and welcome
back to Illuminated Anatomy. In this lesson,
we're going to take a little break from
drawing and coloring. And do some hand
exercises with Dominic. And all you'll need is a rubber
band. Let's get started. First of all, we're going to admire Paul's
beautiful handiwork. Handiwork. I like the
check out the finger away. So all of these
positions that we're making have to do with
expressions and dexterity. I'm a big fan of making exercise tools at a common
household equipment. So what we have today, which I dug out of my car, broccoli rubber band,
Asparagus rubber band, these are goals we're
ever suffering. Hand pain, Just go by
a bunch of asparagus. Leave the asparagus
at the counter, walk away with the rubber. And a scrunchy poking
is scrunchy. Thank you. I don't think you would, so
I want to look for a second. All of these are slightly
different resistances, so this is kind of a
nice medium resistance. The broccoli is stronger, this one has a lot of movement. We could also equate
this to things in the body like this could be the denser fossil tissue like a tendon or ligament. This
could be like a muscle. It's got a little more range
of motion that could be like the Pasha's bouncy resilient and makes everything
go together. Some hand exercises
for our fingers. Remember how I was talking about all these different
possibilities of movement? We're going to isolate those possibilities of movement now. Okay, We'll start
with an easy warm, I just want you to take
the spread sheet in, all of your fingers
in your thumbs, and you're going to squish it together like you're
crushing his head. You have made bed and
stretch a couple of times and feel that tension going in into the wrist and
let's go back and forth. You can make the wrist move here and then let's
do the reverse. Take the rubber band, which is called the bands
around the edge of our fingers, and we're going to
extend the fingers out. Yeah, this is where it turns
into a dinosaur puppet show. Now let's look at
some actual movement. What I want you to do is loop the band on the back
of your pinky and then take it around the
front of your thumb that's pulling these
two edges back. Remember that we had these
two different directions of movement for the thumb. We had it coming in
from the middle finger, which basically heading
towards the pink, or we have it crossing over
towards just the index. Let's separate out
both of those. Take your hand inside the
pond to keep it open. And we're just going to
do the thumb knuckle. First of all, it's nice because this is pulling it open so you can feel the joint move. And now we're going to bring
the thumb towards the index. I'm going to show you
this movement from here. And then we're going
to take it all the way to the pinky and back around is like a
little hand workout. I like this. That is the plant that is a couple of circles
and then take it out. Sets. Nice. Yeah. So now we're going to take the bat and we're going to
pull back behind the index. I just want you to move your
index finger back and forth. Separate out, this can
feel really good for you. Sometimes it feels that the
inside of your fingers are needing something. This
is what they need. And they need that
tactile stimulation, all the way to where the metacarpals turn
to the phalanges. You see that with each one. Now as you get to the
less dexterous fingers, it may be harder and harder
to control that movement. Maybe other fingers
want to help. Hm. You can do poll, hold the back and then go ahead and do that
then with the pink. Another fun thing, if your body can't do
movement in one direction. Say my pinky had a hard
time even folding in. What I can do would be change the bat and guide it
in that direction. And then have it move
back up out of it. And that will actually teach
it both ranges of motion. Go back, we're going to go to
the actual knuckle joints. Just bend your thumb back and forth and then go to the index. Same thing. I go to give you all the cold views
because I feel like I'm stealing the best views
of my hand by staring at the back of it here.
Then this one. See this one. My
middle finger has a hard time extending so I
can pull it back up with a rubber band and
then push down on it might 27 bones in the hand. A zillion. Yeah. This is the accurate number
possible join rotation. We're not going to
cover them all, but what you want to
do is cover some. Let's just end with a couple of thumb circles because
that's important for that. You can brace your hand against your knee so the palm
doesn't get involved. And then guide the thumb around with the elastic
band if you need help. It's funny because I've got a range that I don't
usually do it in. Here I go, I'm helping
my thumb right. And then after a while, you can provide it
with resistance. So your thumb pushes
into the band. And that can be so nice for your wrists now that you have
it going in one direction, change it, you can't keep it. No, staying in the
comfort zone with the S. And then finally jazz hands. We're going to do is
we're going to the band all the way through our fingers. I'm going to loop out my thumb. I'm going to cross it
to bring my index in. I'm going to cross
it again through it. Michael Jackson
gloves feeling okay. Stretch it. Yeah. And
then just to end, stands. Okay. Now that your hands
all warmed up, get ready. In our next lesson, we are
going to start exploring the muscles of the arm.
I'll see you then.
13. Arm Muscles: Lesson 1: Hi everyone, and welcome
back to Illuminated Anatomy. In this lesson, we
are going to start exploring the
muscles of the arm, beginning with the biceps. Dominees are more
pronounced than mine, so you can wait and
look at her again. You can draw or color along in our printable
resources, PBF. Gather your materials
and let's get started. We covered these landmarks, the bony landmarks
of the buttons, which is so helpful
just to understand the basics of how
our body mobilizes. I said before, the bones are space makers and the muscles
are the shape makers. Which gets complicated because there's so many
different shapes. We like shapes as
artists are helpful. So we want to just
remember as we get into these nests of
muscles that help us to do all these movements that the purpose is to make
these beautiful shapes are not going to get
too lost in what every single one is called
or exactly where it goes. Okay, let's start
again up at the top of the shoulder where
the single arm bone of the humerus connects
into our shoulders. Take your hand and put it
on the top of your shoulder for a second and see if you can let your hand fall into the topography of the
top of your shoulder. If you move your
shoulder around, you'll start to feel all these hollows developing things
pushing up for me, it always feels like I'm feeling the Lock Ness Monster, the deep. All these hollows that develop are places where the muscles are inserting as they're
activating things go in. The stuff that goes
out is the places where the muscles are flexing. They're contracting and
they're getting thicker. The shape of our muscles
change as we move them. Now, let's just let our fingers walk into some of these groups. You're going to start
the collar bone, which is this long, thin bone that comes across and this is a piece
of your shoulder joint. This want you to feel
the edge of that. There's going to be
some muscles that are coming down in
grooves beneath that. Now, if we go in and down, and then let's just move
our arm up and down, you're feeling your delfoid
muscle. It's a big one. But underneath that, can you feel how there's this action of the arm bone itself
that goes up and down? As that happens, there's
a piece that goes in and then it goes out. As it goes up and down, they may or may not be
able to catch that with your fingers and show it to you. It's doing this. And that's the place where the humerus inserts into the
shoulder socket. The shoulder socket is
coming off of our backs. Our scapula forms the other
piece of our shoulders. Here I've got this finger is my color bone and this
hand is a scapula. They're working together to allow for our arm to move
in the shoulder joint. Here are these pieces
of my scapula. This lower piece is where the socket is for the
arm bone to insert. Just feel down in here. There's like a little bit
of a dip that's about the area where your shoulder
joint lives from here. One last thing, easy. We're just going to
trace the arm bone. I want you to find the place, if you can move your arm around, you're going to find
the spot where there's a valley where
there's less muscle. If you dig in a little bit, you can start to feel something firm that's the most visible, palpable edge of your humerus. Just trace that down. Eventually it disappears into this squishy nest of these muscles that
let our elbows move. We're going to start with just painting the deepest muscle, which is not the ones
that we're familiar with. We have muscles that I call
vanity muscles in the body. They're the ones that push out. When you're training, you
feel really good about them. We have a lot in our arms also, because the first
piece of yourself, you can see the biceps triceps, which we know less of
the vanity muscle. They're big, they're
like landmarks. But there's also these
muscles that live really close to the bones that
are equally important. And this is where
we're starting. We're starting with brachialis, the major flexer for the elbow. If you just stick your hands back into where you're feeling, you're humerus and then
bend, straighten your elbow. You may feel different muscles pulling up at different times. One of these is break yells. I'm going to try
not to flex, okay? What we're wanting
to do here is keep my arm really flat
because we don't want to get confused and think that we're painting
a piece of the biceps, the exterior, more vanity based muscles
because we recognize them. This one is really flat
in against my bone. And striation's cool too. When you start looking
at they always have these lines drawn on muscles. Those are the directions of
the muscles, flex and extend. We'll cover that a little
more when we get to the hand because we have Paul painting
these lines this way. It means that this is the
direction it shortens this way. And then it stretches back out, following those
directional lines. Gorgeous. Now we're going
to go up to the big guys. All right, now we're going to
start with vanity. Why not? My breath. Let's go for biceps. We do have terms for
how many pieces of the muscle there
are with the bicep. It's like it's two parts. Sometimes they'll say it has two heads because muscles will do these things
where they originate, they all wind up attaching and then
having a unified front. On the other side, the
bicep has two heads, therefore there's two of it. It's attaching over the top of the humerus is one and then the other one is a
little behind it. They're wrapping
over the shoulder because our body
is smart, right? A lot of muscles over dos, like if you wrap a towel
around a door knob, the deli is covering
the bicep head. Imagine we've flipped up that big triangular muscle and the other one is a
little further back. I'm just going to flex
here so you can see them. They're coming down.
They're basically just inserting the same place
as the brachialis, which is why we're
going to start to cover the deeper muscle. Now they're going
underneath the Deltoy, which is basically
in the armpit. By the way, it's really
helpful to remember, skeletons don't have armpits. Armpits are comprised
of the muscles that connect the front and
back of your body to your arm. It's a big strong parachute. What do you think of
when you're drawing dynamic movement of the arm? You're painting someone
who is throwing a ball. What would you
consider? Where is the tension? Where
is the pressure? Because you can see
that. And it affects the overall shape of the form. When I am drawing and
painting figures, I will get into the poses myself so I can
see what they feel like. And then if I can feel
that movement and tension, you can illustrate it even
just by using thicker lines at the point where
maybe there is some sort of a
tension or pressure. A flex, yeah. And
also with the flex, you got a lot more
shadows going on. And if the muscle is at rest, artists had to go and
dig up bodies and study them in secret
because that was forbidden. But as soon as they
started doing that, then the artwork became
much more believable. I just always think it's amazing how all of these things
that we think are unseen really affect what
happens on the surface. And understanding that makes
your art so much better. Yeah. I just considering
Michelangelo would not have been
the artist that he is, had he not been able to go and attend these dissections that were happening
at that time, which by the way, were
happening in the candlelight, in the dark, only in the winter. A lot of their illustrations
are still used today, which is incredible and
they're incredibly accurate. There's still so much respect for Leonard Vince's
illustrations, even in the anatomy
community now as you would you feel a little
bad covering up your dragon. The dragon is so permanent. Perhaps he would like a rest being a point
of conversation. Yes. Something you realize about tattoos.
Actually, you got them. They're highly permanent
and they're forever going to be one of the first things
people need about you. You decide to cover the
learned a lot about my own arm anatomy when
I got my tattoo and how much more painful it was to have the seria
be getting to those. Yeah, When I got my tattoos, the reasons that they gave
for certain places being more excruciating than
others was that there was less fat on the skin or
it was closer to the bone. But really now that we've
been doing all this research into neurobiology
and neuro anatomy, the reasons why they're
excruciating is because these are the places where
we have a lot more nerve endings close to the skin. Think it really helps to do a
little bit of this shading. It helps me to
understand that they are three dimensional things. And not just like a
little flat shape on the, I would assume it's
almost like adding a spherical perspective
of movement to the body. Similar to how you would
have those lines called when you it's like a point of origin in the background.
Vanishing point. Yeah, vanishing point to have that with the muscles because
even as they're moving, they're flexing in
different ways. Let's just give the biceps a little moment of appreciation. Your bicep is happening from both sides of your humorous.
Letting you do that. Pulling the hand
towards the shoulder, engaging our body as
we swing from trees. Or do the everything that brings our body closer to our hand and then
pushes it further away. The biceps are going to be
involved, they're busy. Yeah. They cross over the elbow joint and
the shoulder joint. The biceps are involved in moving at the shoulder
and moving at the elbow. Okay, great job everyone. In our next lesson,
we're going to continue painting the arm
muscles. I'll see you then.
14. Arm Muscles: Lesson 2: Hi everyone and welcome back
to Illuminated Anatomy. In this lesson, we are going to continue exploring the
muscles of the arm, including the triceps, draw or color along in the
printable resources PDF. And as always, remember
to practice the movement exercises yourself that Domini is demonstrating
throughout these. All right, gather your materials and let's get started the trip. Remember, biceps
would be two of them. Triceps means they
have three heads. However, one of them
is hidden by the body, so we're going to see
two pieces of it. That's the opposite
of Amity muscle, it's still very helpful. Triceps, if you think
about tricep work, it's stuff that pulls your
arm behind your body. That's when that flexes. If I'm betting my elbow, the tricep might also be involved and it's
like much longer because that's crossing over the eight stretching the triceps. And they also extend the arm. I want you to bring your
arm above your head. I can actually do it on
my non painted arm here. And then put your hand here. Now straighten and
bend your elbow. Do you feel this muscle flexing as you
straighten the elbow? That's one action that
the triceps does, and then another one that does that moves the arm
behind the body. It's harder to get our
other hand behind our body. Just take my word. I will trip. Brings your arm
behind your body. It also serves a function
of delaying bicep movement. There's a reciprocity on either side of the
body with the muscles. And as I am
contracting my biceps, my triceps is slowing
the movement down. Or say I accidentally
smack myself face my little building. And the reverse is also true. As my trip begins to extend
the elbow or pull back, my bicep is slowing that down. If you're at all confused
where they live on your body, all I have to do
is get a couple of soup cans or some
bottle of bottles of water and start to flex your arm behind
your body a little bit. And straighten the,
bend the elbow and you will feel your triceps. I like that where you're
doing it in layers too, so that we can just do the bicep first and see
what that looks like on its own and then the
next one on top. Yeah, it's helpful when
you start getting into anatomy because the body itself doesn't need
to create separation. That's one thing. Yeah. It divides
muscles up into, I think, intentionalities
for movement. It separates itself
where it needs to, but also your body
doesn't really care which one is lying
on top of the other. It's not how it
experiences movement, experiences movement
from the inside out, and also is an impulse from your brain. It's very unified. One thing that you
learn very quickly with anatomy is in order
to see one thing, you have to remove another. And it's often where
the origins of that is. Yeah, I think just
painting the layers is really helpful for
us to at least do that thing where our brains
seek to separate and compartmentalize in order to understand that's similar to a lot of different
things in art. Really, when you are trying to understand concepts like
color theory or whatever, you are thinking about it, you're breaking things down into all these terms and
categorizing them. But it's really all just to understand something that is actually very
intuitive and natural. And when I'm painting, I'm not thinking
about those terms, I'm just using that information. But it does help
to take the time to learn what each
individual thing is and why it does what it does. Yeah, 100% I would imagine that when you're
going into color mixing, they are often very counter
intuitive combination. Oh my gosh, yes.
But understanding why that element
would be there and how it interacts
would be everything. Then you have control
over your expression. Nobody wants to
just sit around and paint color wheels and
color charts all day. But if you spend a
little time doing it, then when you're actually
painting something fun, you can do a lot more
with that information. Yeah, it's like practicing
your scales on piano or doing tiny isometric
exercises with the body. All right. We have some, right? Yeah, there's one
more muscle we're going to paint which is
the brachial radialis. It's like a longer flexer for the forearm and it originates inside that bone where we paint the brachialis
in the beginning, which is now almost disappear. There seems to be a
lot of dead space, but there's really no dead
space in the human body. Some of this is going to
wind up being covered with the muscles from the forearm that are wrapping
around the elbow, but even more so than that, we have this whole other layer
that we're not painting. It's the superficial fascia. This is our fat and
we love our fat. Our fat makes a nerves happy
and it protects our bodies. It's going to be filling in
these spaces around where the muscles are moving our bones to move
us through space. Fat responds differently to movement than muscles is
how it looks in the body. If you have someone
who has a lot more fat on their Os and less muscle, it's going to wind up being less definition than movement. There might be some
hanging folds, but it's also a
different texture. Volume is also something to think about when you're
drawing and painting. And I personally love it when I was in figure
drawing classes, when we had fuller figured
models because there's just so many more
interesting shapes to draw. I love that, I love
the whole like Rubinesque period of painting. Those models are
just so gorgeous. Rolling hills of body. Yeah, it's oh my gosh. It's all about
appreciating all bodies. I think, Yeah, I think so too. Thinking about the more
perceived darkness or shadow of a more
muscular body and how body builders oil
themselves up for more competitions so that the tract fits them
in a certain way. Yes, absolutely. Another interesting
thing to look at that I do when I'm filming
on my Galileo. Galileo is a machine that drives muscle
contractions from the outside. It's interesting to see how
the whole muscle responds. I try for side lighting
because that's the best contrast
shadow as opposed to something going above which would blend over the whole body. That's not the lighting
that tends to be used in editorial shoots
or magazines. I like that side,
dramatic lighting. When I'm painting and drawing, it just highlights everything. It makes it feel more
three dimensional shots, just really pretty to look at how they all just
weave together. Yeah, it's like leaves and
rivers inside the body. Yeah, actually get
into dissection. There's a lot of food reference. It's almost impossible to not make food reference
as much as we try to. I kept on referring to
the periosteal there, which is like the fascia that rafts are on the bone
that resembles bones. Croissant D, four. Last night of course
I had to go eat a cissanire because we
love superficial fascia. That thing. Yeah. I think what I really appreciate about
what we're doing here too, Paul, is that we're showing
up from the inside out. Much as that is challenging fire just to put on
a muscle unitard. Yeah. You basically would just
get the superficial view. It's like all the vanity. What we're able to show here is what's going
on underneath. Yes. And it all plays a part. It's not just those of us that like attention,
that are important. It's everyone. Everyone
has their role. Yeah. It's like the back
stage muscles. Right. Everyone needs to
take the bow as like me versus my husband who
likes to stay in shadows. He's that little pink. One great job, everyone. Okay. In our next lesson, Dominic is going to be
demonstrating a variety of poses that utilize the muscles that we've just learned
about. See the
15. Arm Muscles: Lesson 3: Hi everyone and welcome back
to Illuminated Anatomy. In this lesson,
Dominic is going to be demonstrating some exercises and movements that
utilize the muscles that we've already
learned about. I want to encourage you to
try some of these exercises yourself and also
pause the video whenever you see a pose
that you like and do a quick gesture drawing,
including the muscles. All right, let's get started. So we're going to
do a little bit of posing with the muscles here, see how they move. I'm going to start with
activating the triceps, pulling the arm behind the body. Let's give a couple
of these of this. Then also the triceps work
to straighten the elbow. Now the biceps are working to bring the hand closer to
the body to flex the elbow. Then also anything that activates that relationship
of hand to the body, which is an easier
way to think of it because movement isn't binary. Right? I wanted to just
do that without any load. They were to add load. Adding load means making it harder for the muscles to work. We have a frying pan here. It was basically the tool all
of us trainers were using during covid and when everybody
ordered weights at home. Right? Prison crawl weights got really expensive but they
haven't come down in price. Shocking. Anyhow, now that I'm
unfolding something heavy, we can really see some
work happen, right? Tricep extension. Tricep extension biceps. See let's get like
an inside view here. And so you see how my
biceps aren't even allowing me to release because the way the frying pan is
a lot from my arm. The hold, that distal range,
now they're released. But as soon as I
take that hand away, then again, let's do a little
tricep extension here. I just want to get
that also triceps. Then we're just going
to do some tricep dips and some push ups on the stool. Going to start with tricep
dips, that's back here. And a couple of push ups. A triceps and biceps are
both working to move my body towards and away
from my hands or the floor. Pulling down, contracting
the arm muscles to move the body
closer to the hands. And then we also have
like nice kind of arm hanging movements this way. Okay, roll the arm not and then just this
beautiful wrapping. So all of our muscles allow us to spiral through the world. Okay, great job everyone. In our next lesson,
we're going to continue painting the arm
muscles. I'll see you then.
16. Arm Muscles: Lesson 4: Hi everyone and welcome back
to Illuminated Anatomy. In this lesson, we're
going to continue working on the
muscles of the arm. I'll be using body paint. You can get some too, and paint your arm if you want
or paint a friend. But we also have the
printable resources, PDF, that you can draw or
color right along with me. Gather your materials
and let's get started. Visual aid time, bones become more as
we're going down the arm. As we've learned,
the muscles wrap to a point where we can barely
really see the bones anyhow. Plus the bones, the
forearm, right here. The Alma, we covered this in
the original bones lesson, which is like a saddle
joint and it fits in to one of the two
edges of the humerus. This is the upper arm bone here. Then we have the radius, the one that rotates, that allows us to
twist a suitcase, for example, as you're
getting through the door. Now before we even
get into the muscles, we're going to talk about this really cool thing your body does to allow movement
in between bones, where every time two bones
meet, we call it a joint. But if we're looking
at rotation, which happens here, also
happens on our lower leg. We have these two bones that are moving around each other. Basically, the body is
going to make like a pseudo joint to allow for
stabilized movement. We have in between these
two bones is something called the interome, inter, translating into, in between
the bones and membrane translating to membrane
bones, but only in one area. Because rotation is
a diagonal movement. We can see that even if I twist, you see the way the
lines wrap, right again. Paul Illustrated movement
would know all about that. Drawing those lines
when you're trying to capture movement in this
sketch is so important. One line for the whole body
and how it's turned into, yeah, the dynamic
lines, attention. We see this here and here. That's what this is doing. What way do you think the interosusbraine
would look, Paul? Probably diagonal lines. Let's draw. Yeah. Because a lot of places in
your body where this happens, the intercostals,
little muscles in between your ribs
do the same thing. Because our body is smart
and it likes to let us move. It also likes to let us move in ways where things
don't fall apart inside. You could imagine that
if we didn't have this interocous membrane that allowed for that flexibility, the bones might just
be twisting inside, which never happens in the body. It's all stable,
it's all compact. But I want you to do now is just hold your arm out and try to
relax it beneath the elbow. Then you're going to rotate
it in and then rotate it out. See if you can feel the
place where the muscles relax and where that
interocous membrane contracts. Do you feel how as the thumb
moves away from your body? There's an effort in
between the bones. As you rotate it back in, there's a release of effort. You fue, that's
the deepest layer. Now we're going to
migrate back up to the precious
nest of the elbow. We'll just pick up where we
left off with the biceps. Our biceps is primarily
a flex for the arm, for the upper arm,
for the elbow, but also it's an
external rotator based on where it attaches. You just want to put your
hand on your bicep for a second to do it with
this unpainted arm. Then turn your thumb out. You're going to, you need
to do it with your elbow. Bend for the story.
You're going to feel how the biceps flexes
to turn the rest. It's just one more function that does after it's crossed
over the joint. We already have brachialis
and brachio radialis. These guys and these guys, they're a piece of the
elbow nest in dissection. This is one of the
first but very confusing areas that you encounter because it's so
clear here what's going on. And then you get to this
double headed joint that has a saddleit
in the radius, we have this conglomerate. It's like someone took a ball of wool or a ball
of twine and went. It's very hard to take apart, but it works great for keeping your arms stable in
space, is doing its job. Let's just hold our elbows for a second and
we're going to go on the inside first.
Move it in and out. You feel the arm of the elbow where all these tendons come together to
allow for movement. And then turn it out in and maybe grab different
pieces of your elbow. You can begin to feel that there is a Rhine. For this reason. Hm. Yeah, I want you to flex
and extend your wrist. And do that while holding all these different
pieces of your form. We feel these muscles
working to move the wrist. Now, open your fingers, pull your fingers in and out. You can let your hands
just rest on the inside of your form here, can you? The muscles that are flexing
to allow a tendonous pull. Let your fingers rest right here where you see all these
lines in the veins. And then pull your fingers in and out, you feel some movement. Good. Now, flex the wrist and
you'll feel more movement. These are going to get
taught the tendons, these lines, the end points of the thicker muscles up here that are working
around your elbow. And the same thing on this side. Just let your hand rest. Move your fingers out and in just trace, can you
feel activity here? Because I can feel activity
even here for my fingers. Then we're going to
pull the wrist back. If you pull the wrist back, hold right here and here, you feel how there's activity
there for the wrist. Also for the fingers, but that's really where the
wrist is happening. What's going on with
the conglomerate is that it serves this function around the elbow to allow
for the bigger movements. And then they all turn in
to these thinner tendons, the muscle cells disappear. And that's what allows us to move our fingers back and forth. Because we are
multifunctional human beings that will hold things
and also do stuff. I'm thinking about
holding a baby, manipulating a phone or
an diapers rest a parent, it happens to you and
you have no choice. In my case, the muscles of our forearm allow us to both stabilize the wrist
and move the fingers. And we need to have separate
muscles for that to happen, because at some point the muscle can't multitask any further. Again, I'm thinking
of a woman with five children breaking down some beautiful terms
of muscles that again, are basically named
for their function. The Extensor digitorum communis, the communal muscle that has one tendon that then does
all of these things. And we get, you'll see it actually even as created bridges across all of the
different fingers to allow for very strong,
stable movements. Paul was just drawing the
tendinous extension of the extensor digitorum communis. I'm glad you're
doing the explaining and I'm doing the drawing. I don't know that I could make
a living selling my pizza. Well, we are playing
to our strength. We're going to just have
an outline for that. Helpful sensitive band,
enervated facial band. Perfect. I can feel you
doing that completely. Right. I'm thinking about
anyone who decides they want to paint someone fly fishing and how detailed their
forearms are going to be. Yeah, that's such a good
true muscle color too. I mean, the hot paint
is that's more of a emotional muscle awesome work. Okay, in our next lesson, we are going to finish up with the muscles of the arm.
I'll see you then.
17. Arm Muscles: Lesson 5: Awesome work. Okay,
in our next lesson, we are going to finish up with the muscles of the arm.
I'll see you then. Lesson bye. Hi everyone and welcome back to
Illuminated Anatomy. In this lesson, we
are going to finish up painting the
muscles of the arm. Draw or color right along with me in our printable
resources PDF. And try out some of the
different movement exercises that Domine is demonstrating
throughout the lesson. All right, let's get started. Right beside the
extensor digitorum, we have the extensor carpi, which is the one that just
flexes your wrist like when you're taking
a self, your baby. I let you, I was
not recommended. We are going to start
originating that one right here. Then it's going to go
down beside it trend, but then it's going
to hang out more towards the pinky
and end right here. You see there's
like a bony notch. I would end right inside
that bony not when you see body builders and they're
sitting there with their elbows resting on something
and they're just moving the wrist back and forth. Now you can understand
that what they're doing is they're working their forearm
and their elbow muscles. They're activating it from the wrist side as opposed to from the elbow or
the upper arm side. Right beside the
extensor for the wrist lives the flexor for the wrist for this
side of your forearm. That's called the flexor. Carpi. Carpi actually attaches to
the base of the humerus, the upper arm bone, and then it also attaches
inside the elbow. So it's got these two heads, which if you think
about the work that we do to lift heavy things, you want some pretty
stable muscles to do that. Then the flexor is attaching down on the side of
the wrist that flexes. Extension is something
that stretches the lighter colored
skin of a joint is usually how I think about it. Stretching the arm pit of the elbow is an
extension of the elbow. Flexion of the elbow is
bringing it together. It's shortening that joint. The flexors of the wrist are bringing the fingers closer
in towards the inside. It makes sense
that the flexor is attaching here, even
though it wraps. Now that we've got
the wrist movement, we're going to turn
the arm around because we're
already in flexion, which is this movement. We have two sets of super
helpful muscles that have us control our wrist
flexion and our finger flexion, both not dissimilar to the feet where you've got what they call four
layers of muscle. Although really it's
just like overlay layers of fascia on the
arch of the foot, on the bottom of the foot to cushion us and allow our feet
to repel off the surface. There's a similar action where there's so
much more that we do with our hand in this
direction than this direction, that we have two different
sets of muscles. They are called flexi
digitorum profundus. Flexor superficialis. To start with
profundus, if you take your fingers to the inside
of your forearm here, If you relax your form and
let your fingers firmly sink in deep and then move
your fingers back and forth, you might feel some movement
right up beside the ulna, beside the bones
of your forearm, That would be the
plescharm profundus. It starts up here.
It's basically like the strip that goes
down to the magic band. The muscles of my hands and forarms are feeling really
validated right now, so see, they're not used
to their moment of glory. Yeah, probably
with you they are. It really depends on how long
you spent staring at your. I wonder what a manicurists
internal version of their hands would be
versus the pianists version. Totally different. I'm sure you might be wondering what's
happening with the thumb. Thumb is so important
because it's supposable that it has
a lot more muscles, but it also does
have some tennis, of course, that attached
into a form right beside the deep flex
for the fingers. We have the flex polices longus, which basically is
the long flex for the thumb then disappears
beneath the thenar muscles, which will be covering
in the hand lesson. You could just draw a little
extension right here. The thumb flexer starts right here beside
the wrist flexer, and it goes all the way
down and out to there. Really what happens
is we just have a series of muscles that are
named for their function. And we start getting brevis and longs that they're all serving these functions of moving the fingers and
moving the wrist. We're just going to
overlay another strip here for the flexor
digitorum superficialis. And then if we want, we can
color in a little bit of other muscles that wrap to
make our forearms move. Trying to call them all by name implies a separation that the body doesn't have
naturally anyhow. Ultimately, when you start
going into the elbow, muscles just appear
out of nowhere and then grow and then
disappear into your forearm. What you meet is the
body's own intelligence that feels no need to
explain itself to you. There's a lot of
muscle in the forearm, even on people who aren't
necessarily active. Because we wind up
using our hands, especially our dominant
hands, pretty much anything. There's like muscular activity involved in bringing
a fork to your mouth. I'm just going to have
you one more time, Take one hand around. The form. Make the fist and move
your fist around, make a circle, then stretch your fingers,
move them around. We feel that higher up, all of the muscles, that symphony of movement
that you feel all around here are creating the
dexterity that you have down in your
hand, in your wrist. Why don't we make a
little bit of a rainbow here and also fills in
some of the space here. And then we'll just move around. A dance, just a river of motion. Of the ways that our body sees different
potentiality for movement, flosses it out, gives us
dexterity and articulation. Thinking about how when
you get into dissection, we have these rules
in books to say, oh, there's two of these,
there's one of these. Maybe some people will have three or four
people may not even have one. We all do just fine. It's more and brooch, which one of us is
taking off our ear? We have to leave it on at least until we decide
if we're going to do like anatomy
of that part ear. I need to hold my hair back, you're pretty rainbowed up. Great work everyone. But don't put those pencils away yet, because in our next lesson, Domini is going to be
doing some poses for you, using all of this body paint on her arm that highlights
the muscles. So you get to actually draw
those too. I'll see the.
18. Arm Muscles: Poses: Hi everyone and welcome back
to Illuminated Anatomy. In this lesson, we are going to have some beautiful
poses from Domini, where she is showing you different angles of the
musculature of the arm. Just like with the
bones, I'll be doing one demonstration
at the beginning. And then you'll
have a variety of additional poses to choose from that you can
draw on your own. I'll be using a variety of prisma color pencils
on black paper, but feel free to use any
materials that you would like. Draw as many of the poses as you want until you
feel that you have a good understanding
of how the muscles on the arms are working in
those different poses. All right, let's get
started. Let's get started. Okay, here is the pose
that I'm going to draw. And I'm going to start with
my white colored pencil and sketch out just the basic
outline of the arm. That'll make it a
little bit easier so that everything has a container. I'll do a very quick sketch
of the hand as well, just so we can see the relationship of
everything to each other. Now I'm jumping in with color. It is not necessary for you
to use the same colors as me. Use whatever you want, but see how many of those muscles you can
bring out in your drawing. Now we have a variety of additional poses for
you to choose from. Watch the rest of this video and pause when you see one
that you want to draw. Take advantage of this
opportunity to try drawing the musculature in a
variety of different poses. Happy drawing. Great job, everyone. Okay, now in our next lesson, back to Illuminating
anatomy again, and this time we are
going to be painting the muscles of the hand.
I'll see you then.
19. Hand Muscles: Lesson 1: Hi everyone and welcome back
to Illuminated Anatomy. In this lesson, I'm back to
body painting and we are going to start exploring
the muscles of the hand. Draw our color along in your
printable resources, PDF. Try out the movement
exercises for yourself and let's get started. We're just going to
meet the in here. These are the dorsal function
is to, you can see it now. To spread the fingers, they assist in flexion this joint technically
this is also extension. The wrist in the ankle get
a little weird this way. They also help us do this. They're causing all these movements on the
top of the hand. I want to take a minute just to break down a few terms
that you're going to see over and over
in anatomical names. We have flexers. Flex pull joints in. Extenders, pull joints out. Typically when something is extending, it's like the softer, the lighter color of your
skin is becoming exposed. When you're flexing,
that part is shrinking. I say this because no matter
what I'm bending my joint, this part is flexing and
this parts extending. But if I do it the other way, this part is flexing and
that parts extending. But now we have that term. Then we also have terms
like pronate, supinate. If you take your hand and just move it down by the
side of your body, pronation turns in, You'll also hear this
term with your feet. If your feet are pronated, you're walking with pigeon toes. If they're supinated,
they're turned outwards, You're going to have
a lot of muscles that are called by
their descriptions. Extensors, flexors,
Pronation, supination. We'll leave it there for now. But you're going
to get a lot more of these terms as we go through. We're going to turn
the plum around. Now I'm going to start
to draw the interior, but before we get to the muscles that
connect these bones, we're going to paint a very
important one that goes from middle finger bone
over to the thumb. It's called the
adductor abduction, which goes in abduction
which goes out. You hear a lot about
that. When you're squeezing your thighs and
you're addicting your thighs, really it's just a direction. The Addtor Police pulls the
thumb into the middle finger. It works a very deep
connection of your thumb. And when you're doing
like super grip stuff or you want to hold
something tightly, that one's going to move. Now the issue is that oftentimes if you do intense
work with your hands, like if you're a
massage therapist or probably a sculptor, you wind up relying on this muscle to do all
the work of pulling the thumb and you forget about the other
muscles that pull the thumb towards the wrist
or flex it at this joint, that's where we start getting a lot of pain around our thumbs. Basically, a muscle that also creates what we
know is the Palmer Arch, the arch of your foot, which you see,
that's the hollow, a large triangular
muscle with two heads. Two heads means that it attaches separately
to the thumb bone. It's going to come down, it attaches here and then
make that triangle. That's two heads thing. It's like two different places
where it attaches around the thumb joint which is a really heavily used joint,
this important muscle. I just want you to
place your index of the hand of whatever
hand you're not going to move on your
middle finger bone. I'm going to have
mine a little beside because I don't want
to destroy the paint. And then close your thumb around it and then pull it back open. That's what this muscle does. We don't think about our thumb connecting to our middle finger. But now if you
want to articulate your index and feel how
that can move over it, we see how we start to
get some dexterity. And then try your middle
finger and feel how that's totally different
than your index fingers ability to move
around the arch of your hand. Our bodies like
our brains are so much smarter than we are finger. Okay. Now what we're
going to do on top of this is we're going to
paint the Palmer side. Tiny little feathers
right beside the bones. And then the lumber holes, they're a little
more triangular. They connect to the outside
edge of your index, then two coming off the middle and then one going
off to the ring finger. So let's start with
painting the interci, there's a small
extension up and this is where the muscles
just turn in tendons. If I were to be
taking a hand apart, by the time I got to separating this muscle off the joint, it would be thicker. Fascia wouldn't have a
lot of red in anymore, not so much muscle cells. It's the attachment where
it turns into a tendon. First set of muscles
in between the bones, on the inside of your head. The polymer interci,
they assist in auction, pulling the hand in, and
flexion and extension. We're going to hear
these words a lot. Basically they are terms for movement which we do a lot of. They're going to go
on the lumbricals. They have a little more of a wrapping feeling
around the bones, which we just can't
paint right now. We're going to do a lumbrical
that goes on this side of the index bone and then one on either side
of the middle finger. Then another one right here
at the ring finger edge. Basically, it's friends
with the inters, right? They're performing
the same function just on different sides. And someone taking a
part of body decided to give them all different
because wow, that's hopeful. Let's make it more complicated. It's going to hold on to the
other edge of the joint. Whenever a muscle
crosses over a joint, it helps to articulate
that joint. Muscles, for the most
part in your body attach bones to bone and they'll cross over
at least one joint. It's pretty simple when
you think of it that way, because if you want to
touch any muscle in your body and follow it from wherever you find it to the end of where you can
feel it beneath your fingers. Then move that area, you'll feel how it articulates
the joint of your body. And then we add these terms. We'll call it adduction, flexion, but really
it's just movement. We just have directions for it. If you've ever looked at a really good macrame or
weaving wall hanging in here, you see how the threads
weave in and out. That's what your body
is doing all the time. We're going to see bones
emerge and disappear. And the same with
muscles, they are what allow us to
move this joint, so they're going to
attach on either side. There's a famous quote, nothing separates
anything else in the human body except
for a scalpel. Your body, it's a
complex bio organism but it moves with unity. And it doesn't separate
itself out either. We dissect, we do anatomy
in order to understand. We separate out muscles into different categories
and give them names and talk about
their functions. It's helpful to remember
that we're doing this because we
seek to understand. But if it becomes complicated, back off and go back to what's helping me move the muscles. Whenever they cross over a bone, they articulate that joy. How does that work? You can
look at it in your own body. You can put your hands
on your muscles and you can start to figure
out out for yourself. We'll close up with
the masterpiece. Here we have these muscles
that are all friends, that are helping you abduct, adduct, flex, and extend the muscles of
your fingers in your palm. And you can see that
because they're crossing over the knuckle joints. They're also assisting in
these kinds of movements, as well as these
kinds of movements. If you want to take
a moment to just maybe hold your fingers
away from each other and check out the
individual ability of each finger to move
in different directions. You can begin to feel some
of the work that happens. These are these muscles
working for you right there. If you hold your forearm for a second and you flex
your knuckles, you feel how there's
not a lot of activity that's happening
from these joints, from the muscle of the fingers. But if you hold your forearm and you bend your
fingers and extend them, can you feel this
other movement? Pretty soon we're going
to be getting into the tendons that actually
move our fingers. Just keep that in mind, there's this whole other layer of movement potential going on in your hand that isn't
muscle at all. Great work. I'm giving you a hand. Sorry, I can't help myself. All right, in our next lesson, we are going to continue working on the muscles of the
hand. I'll see you then.
20. Hand Muscles: Lesson 2: Hi everyone and welcome back
to Illuminated Anatomy. In this lesson, we are going to continue learning about
the muscles of the hand. Draw or color along in
our printable resources, PDF. Let's get started. We covered the muscles of
the bones of the fingers. Now we're going to talk about the muscles that are
closer to the wrist. Basically, your baby
finger and your thumb have a different relationship
with each other than these middle
fingers for function. And then also, as a result, for the muscular structure, we have this area that's
called the thenar eminence. It refers to the area here
in Chinese acupuncture, they'll call this like your main chee point right in there. They'll press and
activate your cheek and then you fly the
other side of it. They call it the
hypothenar muscles. And those are the ones
that go from your finger. But these are muscles
that allow you to grip. Our opposable thumb
wouldn't mean much if our hand just
hung out like that. Have to match it.
Flexor, polyss bus. Other terms that we're going
to get comfortable with, longus and brevus, they mean long muscle
and short muscle. Sometimes you'll also have a long with the same
name as the Braver. They'll just call it
by one or the other. Nice Draw a curve that goes
from the inside line of my thumb to this place where all these
muscles are ending. But this is just the outline
of our thiner muscles for our thumb because we
have three of them. We just want to give them a
little bag to hang out in. It's going to go up and
then it's going to cross over towards this edge
of the plan right there. That's a flexer, it's
going to be pulling in. Now we have the
abductor poss bits that's going to be
pulling my thumb out. It originates a
little lower down. That's like a thick one. Let's let it hang up to
the edge of the bone side. Yeah. Then we have this third muscle that
we're painting last, but it's actually
the biggest muscle for our thumb and it's called
the opponent's poless. What it does is it counteracts of the muscles of the thumb. It can open it and it
can flex it backwards. We're just going to
paint this little line here, all the way up. But just know that's
the biggest one. You wouldn't want to only be able to move in one direction. You need opposition in the body. These three muscles all working together allow you to
have a stable grip. Allow you to spread your palm. Allow you to not drop
your suitcase when you're running for the train
just before we carry on. Let's call it the thenar
crescent that pulls these together and
opens them once again. Let's just separate out, placing your index finger
at your middle finger. Pull your thumb towards the
index and then open it out. We have to place our index closer to the index
side of the hand. Just pull your thumb in from
there and open that up. Can you feel the difference? You could restrict the movement. Then you'll feel the origin. And now open your thumb away from your index and
then pull it into it. Then I want you to take your index and put
it right at the thumb, the knuckle bend and
straighten there. A few times you might notice it's very hard for your head to separate that motion because
we don't do it much. You also might notice
that the thumb knuckle, it actually rotates
in towards the index. It doesn't bend
towards your wrist. That's one of these functions
of that buried muscle. The oppositional one is that it keeps our
thumb from falling in. It rotates it out
simply to extend it. This is why civilization
is as it is today, pipe both in our muscles, which are the ones that
connect the pinky edge. Opponents digiti minimi,
What do we think this means? It's an oppositional
muscle that works. The digits mini, very tiny, tinier than brevis, maybe. I don't know. Abductor
digiti minimi, What is it going to do? Going to pull the
baby finger side of the palm in
towards the thumb. Then we have the flexer
digiti minimi brevis. That one is going to flex
this area this time. Let's start with drawing
the deepest one, which is the opponent's
digiti minimi. It's going to be going from the outside edge of this
carpool right here, crossing over towards
an attachment. At the ring finger edge, over to the outside edge. And it wraps underneath
the knuckle, all the way over the
pinky finger caple, to the ring finger caple. Technically, we're going to keep on going, but it's going
to be buried under. You could just fill in
this little tiny piece right there and
we could indicate that you see how this one originates at the outside of the
baby finger bone. It crosses over it to attach towards the
ring finger bone. I'm calling the bones are the ones that are
inside your palm. It rotates this piece of
the hand in towards center, but opposes these
spreading motions. These muscles are
going to open it, this is going to pull it in
flex digiti minimi breaths and it's located on top of
the opponents on the inside. Then see if you want to imagine that this curve ends here. This one comes down
and inserts right above that curve here. This flexor digiti minimi grabs, closes the pinky finger
edge of your palm in and down the extensors
pull it back out. Abductor Digiti Minimi, This is the one that
stretches the palm. If you want to put
your hand here and pull your pinky finger
out away from your thumb, you're going to feel
good, strong muscle. That's your abductor
Digiti Minimi. Hands are going to end here. This whole piece
is the abduector. It ends at the edge of
the knuckle muscle, right there, just
right against the. Yeah, it's like you can't
even see the opponents after it's covered by the muscles. It's going to insert here. But it's actually going
to cover this whole area. This is the extension of that thenar crescent that
I was talking about. Remember that? Fascia cancer, a function that's like Patty
hose for your muscles. It holds your muscle cells. Then when there's no
more muscle cells, it turns into a
different version of fascia pantyhose without
the leg inside of it, maybe it's old
panty hose stiffer. Either way it begins to overlay itself and it gets
stronger without those juicy muscle cells inside where we don't have
these colors here, there's still the same
fascial band that connects. We have less muscle
cells inside. Actually, it's thicker,
it's more overlaid. It feels a little more like the type of tissue that we
have around our joints here. We're going to
take a moment here to appreciate the
movements of the hand. And I'm going to flex for you. I'm going to abduct for you. I'm going to add flex. This is going to be extend. I'm going to extend for you. I am also ad getting bigger,
I'm going to get smaller. I'm going to add and
I'm going to flex. I'm going to do the same
thing on the back end here. I'm going to make it bigger. Now extending,
although technically it's flexing
backwards production. And then we'll make this side
bigger by flexing the pump. Here are the muscles
working in the pond. All right, beautiful work. We have one more lesson to go. In our next lesson,
we're going to finish up learning about the muscles of the hand. I'll see you then.
21. Hand Muscles: Lesson 3: Hi everyone and welcome back
to Illuminated Anatomy. In this lesson, we
are going to wrap up learning about the
muscles of the hand. Draw or color along with me in your printable resources, PDF. Be sure and try out some of the different movement exercises that Domine is demonstrating. And let's get
started now again to the magic and the
marionette of at all the muscles that
are actually working. All of our finger articulations are living in the forearm,
like I was talking about, those pantyhose,
we have a leg in the panty hose here and then it turns into a
marionette string. All these strings go under the hands on the
top and the bottom, they connect deeply
around your finger bones. Then we have this fascia that wraps itself in all
kinds of different ways, allowing for every
range of motion, all these fine motor
movements of the fingers, these bones you drew, it's going to make
our lives really easy because the tendons that
control our fingers basically run along the edges of our bones coming off in a mini bouquet off
of our theenar area. It's all puppet strings
coming from the form. The stems of our bouquet are
eventually going to turn into these roots of
strength as we go further. But for the moment, we're
going to end everything with a beautiful ribbon
tied around our stems. Right here, the fascia, when it thickens and
turns into tendons and ligaments in the
body, it's silver. It's like the skin of a fish. It's almost with the
silver edge to it. Set it apart from the more ivory tone of
the bone or the gold, you pick your metal. The only one that
would look a little different than the
bone itself is the baby finger tendon which is coming in because
they're all emerging. They're almost 1234 together at the base of our, the area. Fill in this bridge of the, the eminence and
hypothenar eminence here to connect this facial
bridge with the same color. You see how this piece here, the fascia itself
comes over and it widens and then it goes
up along my wrist. The lines for this piece are
going to be going this way. There'll be a little ridge of pink that continues to separate the tendons because this is a top layer that everything else is coming
up from underneath. Here we have the flexer
tendons of the pond. You'll notice my thumb
doesn't have any. There are tendons that
also control the thumb, but they're coming
from the extensor side and wrapping around the bet. That's because our thumb has so many muscles that help it do a very different job
and its finger friends. Now I just want you to
place your fingers, the interior of your wrist here, where you can start
to feel those ridges stretch and extend your fingers. This is where all the
tendons are coming from. You see how all these
beautiful colors disappear. Her body doesn't have
any vacuums in it. What happens is, at this point, the tendons go towards the bone and our body overlays
these fascial sheaths. If you had a super
neurotic ballet dancer who is ten ribbons around each
foot just to keep it in, to support her in
every which way, which actually is true. As a bald answer,
what you do is you attach an elastic
band to your heel, put that around your
ankle, and then you tie the ribbons
from your arch. We do cadaver the body
in a similar way. It's wrapped around like that. Where you see this disappearing, it turns silver,
ivory and silver. And it's wrapped around like a candlestick covered in gold, right to the palm
side of the knuckles. There are these
tendonous bridges that connect each other
because of course, the tendons are going
to be crossing over these joints in order
to articulate them. They're replacing
the function that we usually have of muscles. Disturbingly enough,
your fingernails are just growing right
out of all of that. They're coming from the
inside of your body, pushing elbows through the skin. It's amazing if you think about it before we go any further. We've now successfully
illustrated the longest pieces
of these tendons that are the
extensors of my hand. But wait, there's, there's
more hands are not simple. Now we also have
bridging connections with the tendons of the hand. If you remember, when we were doing the bones of the wrist, we had that stacking up of three plus little izzy
form. And then four. All of those bones
were connected by this network of tendons that made it look like a
Tensegrity model. If you expand in those sticks and elastic bands and beads, things you get at
science museums, it's allowing for the
structure of our wrist to also articulate because
the tendons cross over it. Even though we have these
big muscles in here, these tendons are coming
from the inside of us, connecting deeply, going to the outside, and
then going back in. Just like everything in the body overlays strength,
complexity, and dexterity. Let's go ahead and
make these bridges. Now you can see how the
fingers have a finger side, and the thumb has
almost a thumb side. This band, which I'll
get to in a second, could be divided
almost up in half. And the thumb gets one half,
the fingers get the rest. But then we have these connecting bridges
off of the index, which is a very powerful finger. It can move side to side in ways that other ones have
a harder time doing. It's going to be
having a bridging connection to help that happen. Right here, we're going to draw another little silver line. It's going to cross over that little in connection to
the thumb and hit about here we have another one that hits the middle finger and inserts deeply
inside under there. A couple of bridges, three in
fact, that would be a few. They're going to go from a
little underneath the knuckle towards their friend and up to mimic each
other like that. Then this one comes
off a branch of a tree going this
way to be different. Yes. I've told my
clients for years. Whenever they come in and confess to me that they have one leg longer than the other, I tell them that the day I made a symmetrical human is the day I know the
cyber have taken. And it's just amazing how
deeply we are asymmetrical and different because this
is how our bodies are able to move through an asymmetrical and
different world. That's a big part of
portrait painting too, because if you paint a face
two perfectly symmetrical, it never feels like a human. And finding the ways
that the differences actually really make it
feel like that person. Yeah, I think we got it. I love it. I don't know that it's necessary for us to
paint the fascia. I just want people
to imagine they have these ribbons of
dehydrated crosage, perhaps of butter on top of it, that wrap around to create the stability and dexterity
that we have in our fingers. I want to remind
you that your fat looks gold in your body. We have silver, we have
ivory, and we have gold. That is, no matter what
color of skin you have, the melanin in our skin doesn't even hit the
deepest layer of skin. If you're taking
apart someone again, I'm going back to dissection. Who's a darker color? The color is only
on the outside. The interior of their skin
looks exactly the same as the interior of the
lighter colored persons. Skin is not even skin deep, if you consider the
implications of that, is politically historically. So. Anyhow, back into that, to imagine that you have all of these colors of what we
associate with a value. Ivory, silver, and gold that are making up everything
that isn't the workers, the muscles, the
movers in our body. Then we have the ribbon that holds together our bouquet
of muscular flowers. This is a piece of fascia that wraps around everything else. In the wrist, we have a
similar one at the ankle. Originally, when people first started doing dissection
and found it, the theory was that this band
kept everything together, except the body isn't really
likely to fall apart. It keeps itself
together just fine, without tying itself up
emotionally. Maybe we need. When they started looking
at the nervous system, they discovered that this
band is highly enervated, far more than everything
else around it. More likely theory is that it allows us our appropriate asception and awareness
of where we are in space. If you're walking on your hands, if you're picking something up, it helps us to know what
our wrist is doing. What our fingers
are doing as well. We can think that band. Now I want you to
hold right above it, or even just above the band. Let's just clench and
stretch our fingers. Can you claw your knuckles? Can you move your thumb around? Can you feel how the thumb
is coming from here? What happens if you
move your index? I've got my thumb on the
interior of my arm too, so I can feel all the
different muscles. And there are
tendous connections that are helping my
fingers to move. Going back to the
gold in our body, the winning layer of fat that we tend to have so
much conflict about. But we forget that it serves
an essential purpose. Fat is like lubrication
for your nerves. We can't survive without it. The nerves live in fat, these fatty layers at
the ends of our fingers. After we finished with the
wrapped up chrysotyle fascia, we've got this layer
of butter on top. That's where all of
our nerves live. Our nerve endings, the mechano
receptors that are right beneath our skin are
living in the fat. The body abhors a vacuum. There is none another cool thing about your superficial fascia. It responds to the
needs of the body. If you want to feel
your heel for a second, squeeze around that pad there, we think of our heel
as being a bone. Now there are bones
inside the ankle, but the heel itself, if you
touch your heel, that is fat, It's supremely packed fat, very thickened to the point where it almost resembles bone, but it has more of a
bounce in a spring. There's a similar
type of action. If you start to work with your hands and dance
on the ground, you're going to wind up
creating that same resilience here because your body responds to the impact
it gets in life. I think it pretty
much covered it. All right. That was fine. Yeah. Great work, everyone. Okay. In our next lesson, Dominic is going to be doing
some hand poses for you, and I want to challenge you
to not just draw the hand, but draw the muscles, too. I'll see you then.
22. Hand Muscles: Poses: Hi everyone and welcome back
to Illuminated Anatomy. In this lesson, we are going
to get a chance to draw different poses of the hand with the muscles
painted on them. I'll be demonstrating one for you at the beginning
of the lesson, again, using my prisma color colored pencils and black paper. And then there will
be a variety of additional poses for
you to choose from. Remember, you can
pause the video as long as you want until you get all of the
details completed. You don't need to draw
every single choose, the ones that speak to you. All right, let's get started. Okay, let's do this again. Now it's your turn to draw. I'm going to sketch out a
rough outline of the hand this time just so that
it'll make it a little easier to place
everything inside of it. I'm not going very
detailed though. I don't want a lot of interior
lines that are going to interfere with where I'm
placing those muscles. I'm starting with a
white colored pencil, but then I'm going to go
into it with a variety of other colors so that I can distinguish between
the various muscles. You don't need to use the
same colors that I used either on the hand itself
or in my sketch here. Use whatever colors
you have available. Getting those tendons
sketched in kind of gives me a nice framework to build
everything else around. See how many of those details you can capture in your drawing. Now we have a variety of other hand poses for
you to choose from, so find some that speak to you, pause the video, and continue
practicing happy drawing.
23. Closing Thoughts: Thank you so much for
taking this course. We had so much fun drawing and painting and posing for you. And I hope you learned a lot that you can apply
in your future artwork. I hope that what you take away from this is a greater sense of familiarity with the jungle
that lives beneath your skin. When you think of the muscles now that you're
not just thinking of something with a Latin term that goes here and goes there. But it's more like you're
meeting a friend that helps your body move
through space and do everything that your soul
wants it to do in this life. For the artists out there, getting to know your body and getting more
comfortable with it, only improve your drawings and make your figure
drawings come to light. I want to see the dynamic
action in the poses because now you understand how the muscles
work and the power. I want to see it too. So
share your artwork with us, send it in, post it, tag us. And also any new exercises that you come up with yourself based on what you
learned in the class, we want to see it. All right? Yeah, Yeah. Especially tag us if you've learned
something about the anatomy and that inspires you to do your
practice differently. This is really just
the starting point. And from here on out, take what you have learned in this course and apply
it in your own way. Now, where can people find you online if they want to
keep learning from you? Second, start to the right part. He's Mary. I understood
that purpose. You can find me a dominant OMI on Instagram as Domin underscore and on
Facebook as the same. Paul and you can visit my
website at Paul Richmond Studio.com And I'm on
Instagram as Poly World. So come hang out with us and let us see what you've
been up to you. So next time, come back
and take more classes. Bye bye y.
 Paul Richmond, Everyone is an artist.