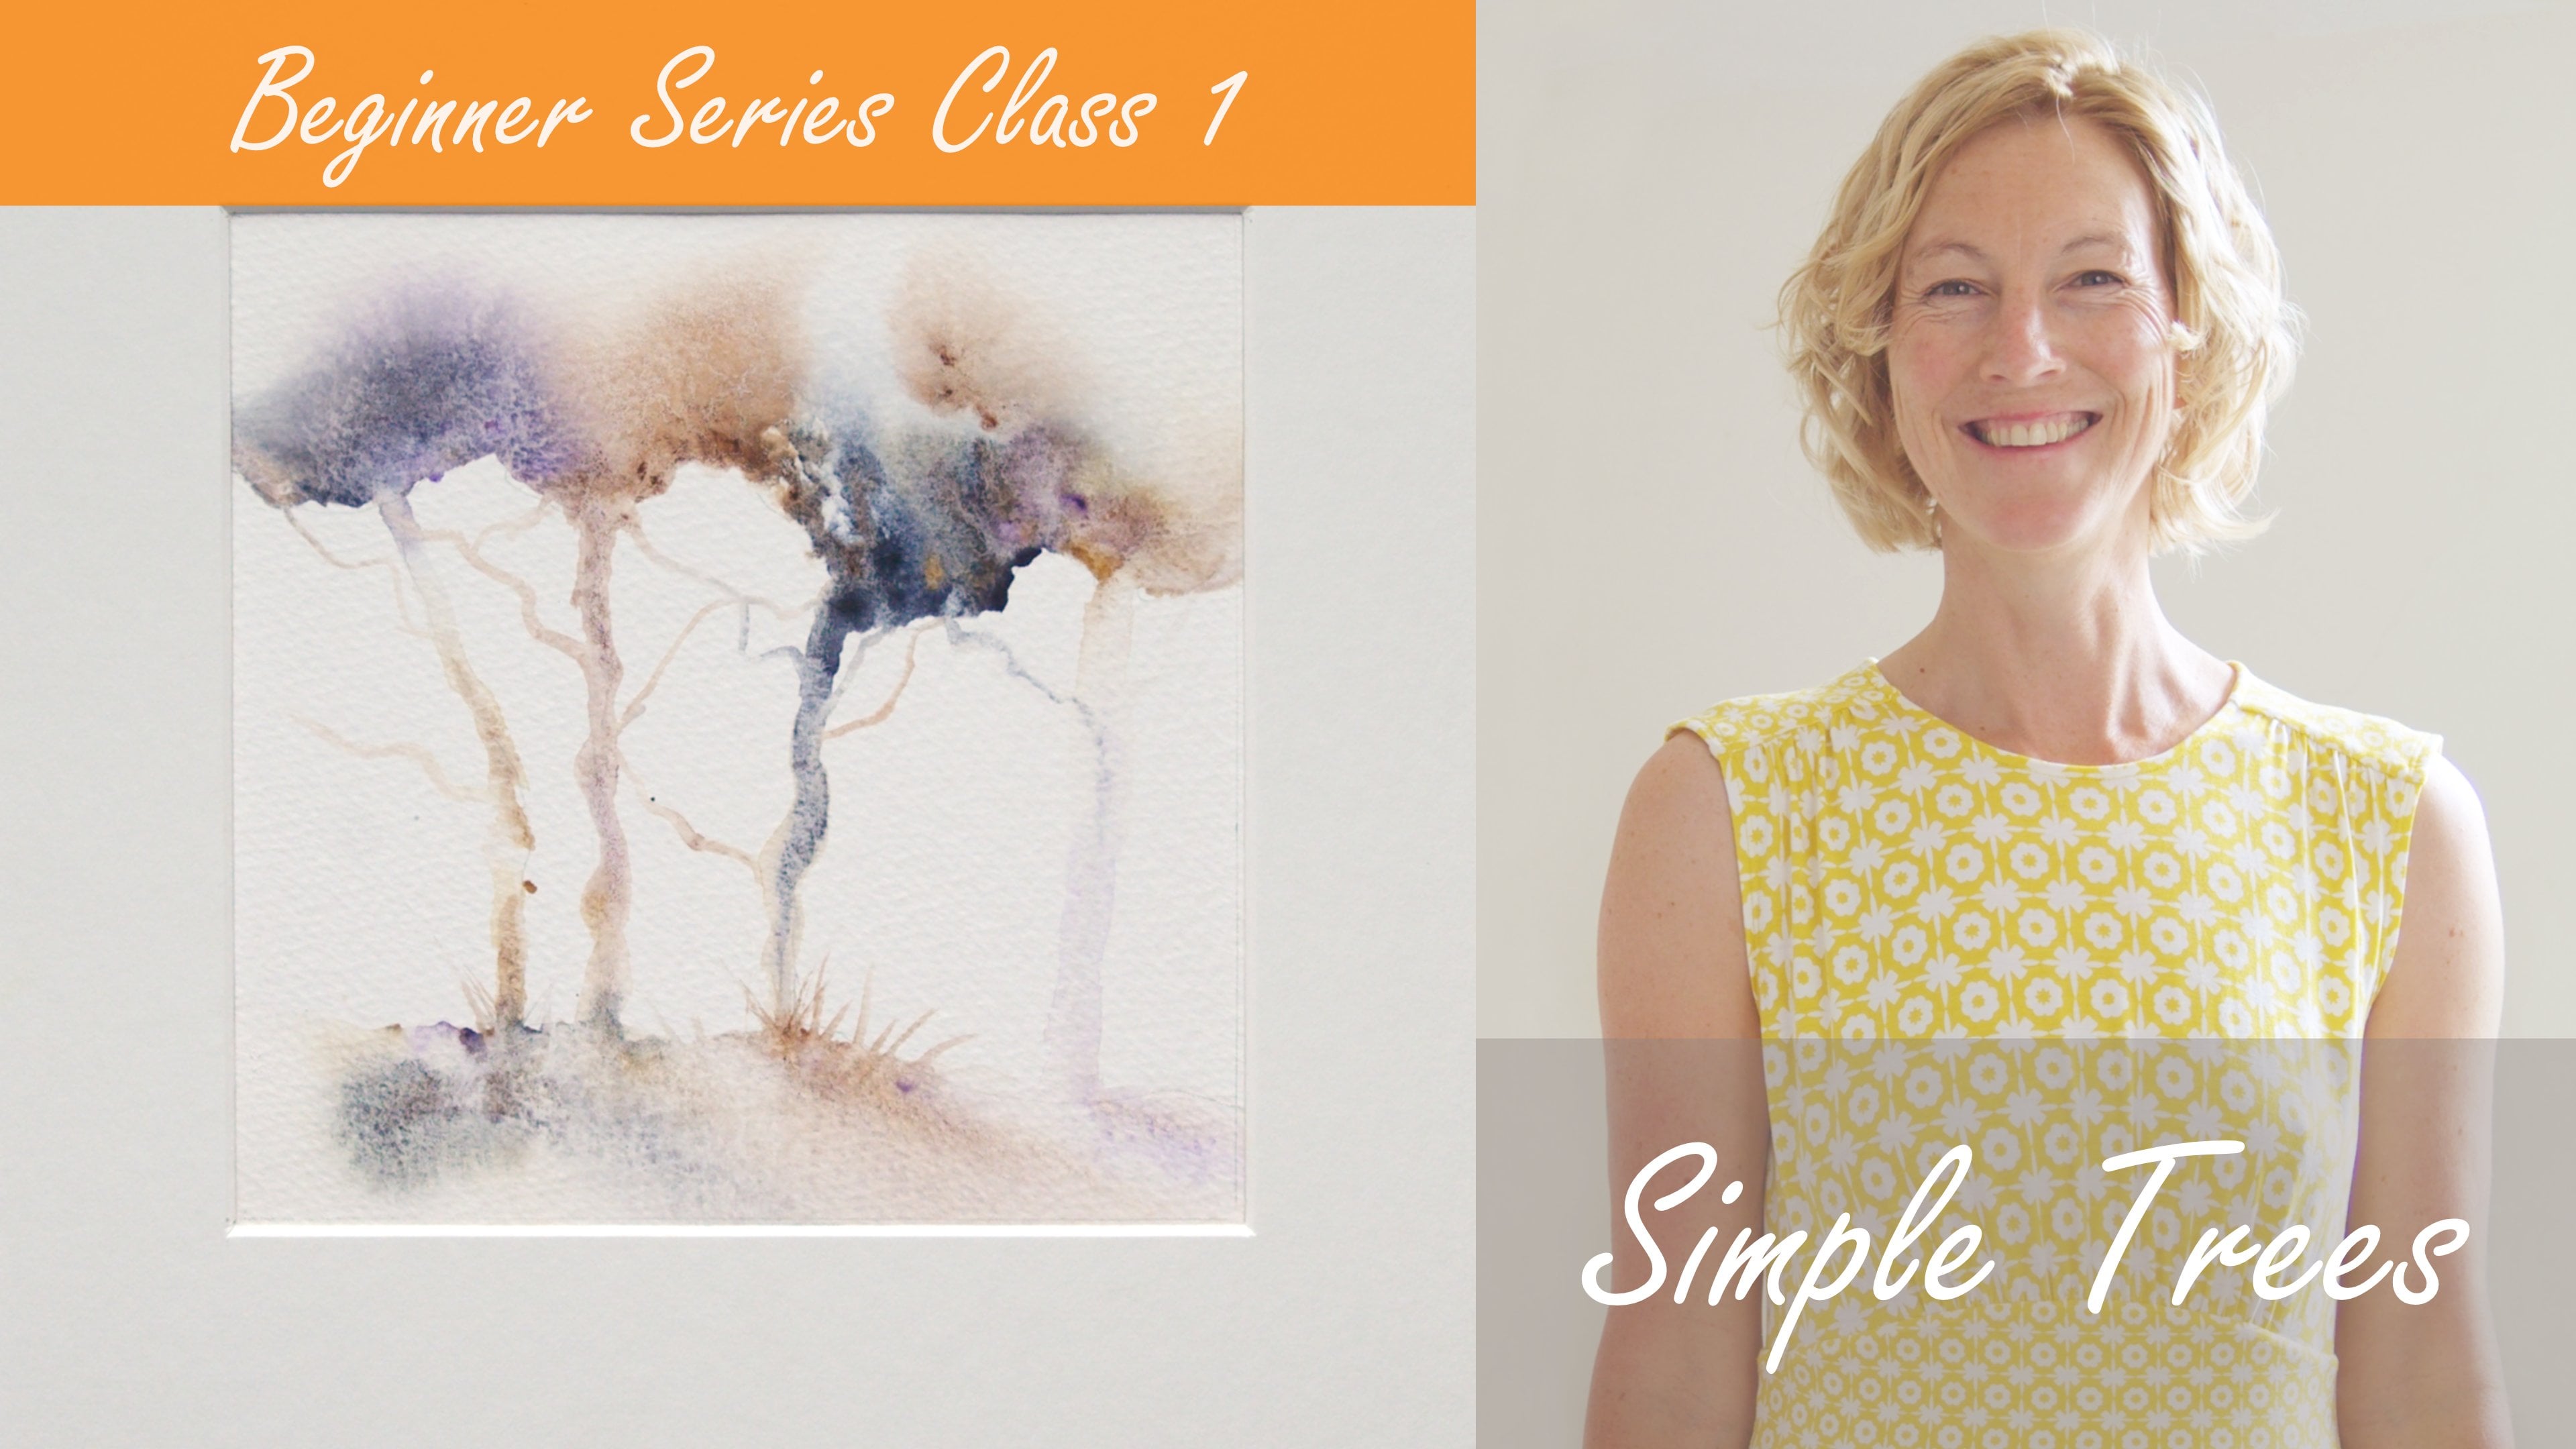
Transcripts
1. Introduction: Hello, and welcome to the
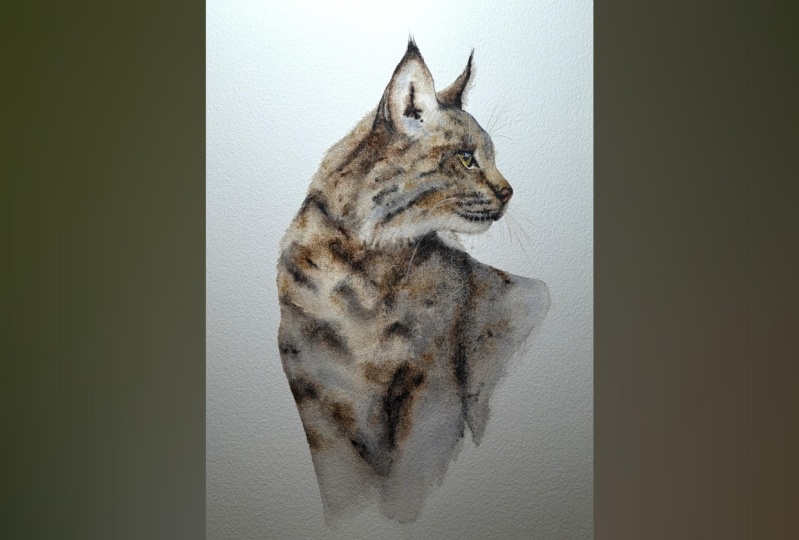
advanced watercolor class. Today, we're going
to be painting these magical Iberian
links together. It's a really interesting class, if I do say so myself. Now, I was lucky enough
to be a finalist in the David Shepherd
Wildlife Artist of the Year Competition, 2024, painting these links. And I'm going to show
you how I did it. I'm Jane Davis. I live, paint, teach, and walk my lovely spaniels in the beautiful South Downs
National Park, England. Over the last 15 years, I've taught myself the free flow technique that
you see today. Not having been to art school, finding my own way has been
fun and sometimes daunting, but has allowed me to
develop my own style. This has led me to
teaching others, either on a one to one
basis or as part of a group in a wonderful studio in the heart of the South Downs. I also run a successful
commission based business, painting pet portraits and wildlife art in my
own home studio. In all my classes, you will follow
along in real time, where I can guide you
to keeping your work loose and fresh
without over fussing. I have over 20 classes
available in skill share now. If you're just starting out, my three beginner
classes will guide you. Then you'll find over
20 master classes, covering a wide range
of beautiful subjects. In each one, I'll share the techniques that I use in
my own professional work. We'll have a lot
of fun together, and you'll gain the
understanding and confidence to
incorporate everything you learn into your own work. Plus, I'll share a few of my tips and tricks
along the way too. As ever, I provided you with
a wonderful reference photo, along with a downloadable
template for you to print out. The template will give you a stress free drawing so you
can just enjoy the painting. I'll be showing you
a great technique that I discovered while painting this Iberian linx
that allowed me to control how the paint flowed
while painting wet and wet. I'll be demonstrating
the whens, whys, and hows to painting the expressive eye with
several colors and layers. There's a wealth of other tips
and tricks I'll be sharing with you as we work our way through this
special class together. If you'd like to learn
more about me or my work, please pop over to my website at Jane Davis watercolors.uk. This can be found
on my profile page, along with links to my
Instagram and Facebook pages. I'm very active on my
social media pages, where I love sharing my art, especially on stories
with many ideas, works in progress, and
tales of studio life. I really hope you will share all your paintings on the
projects and resources pages. As I love seeing
your masterpieces. And don't forget,
I'm here to help if you get stuck or
have any questions. I want you to experience that buzz of painting
in this liberating, wet and wet, loose style.
So come and join me.
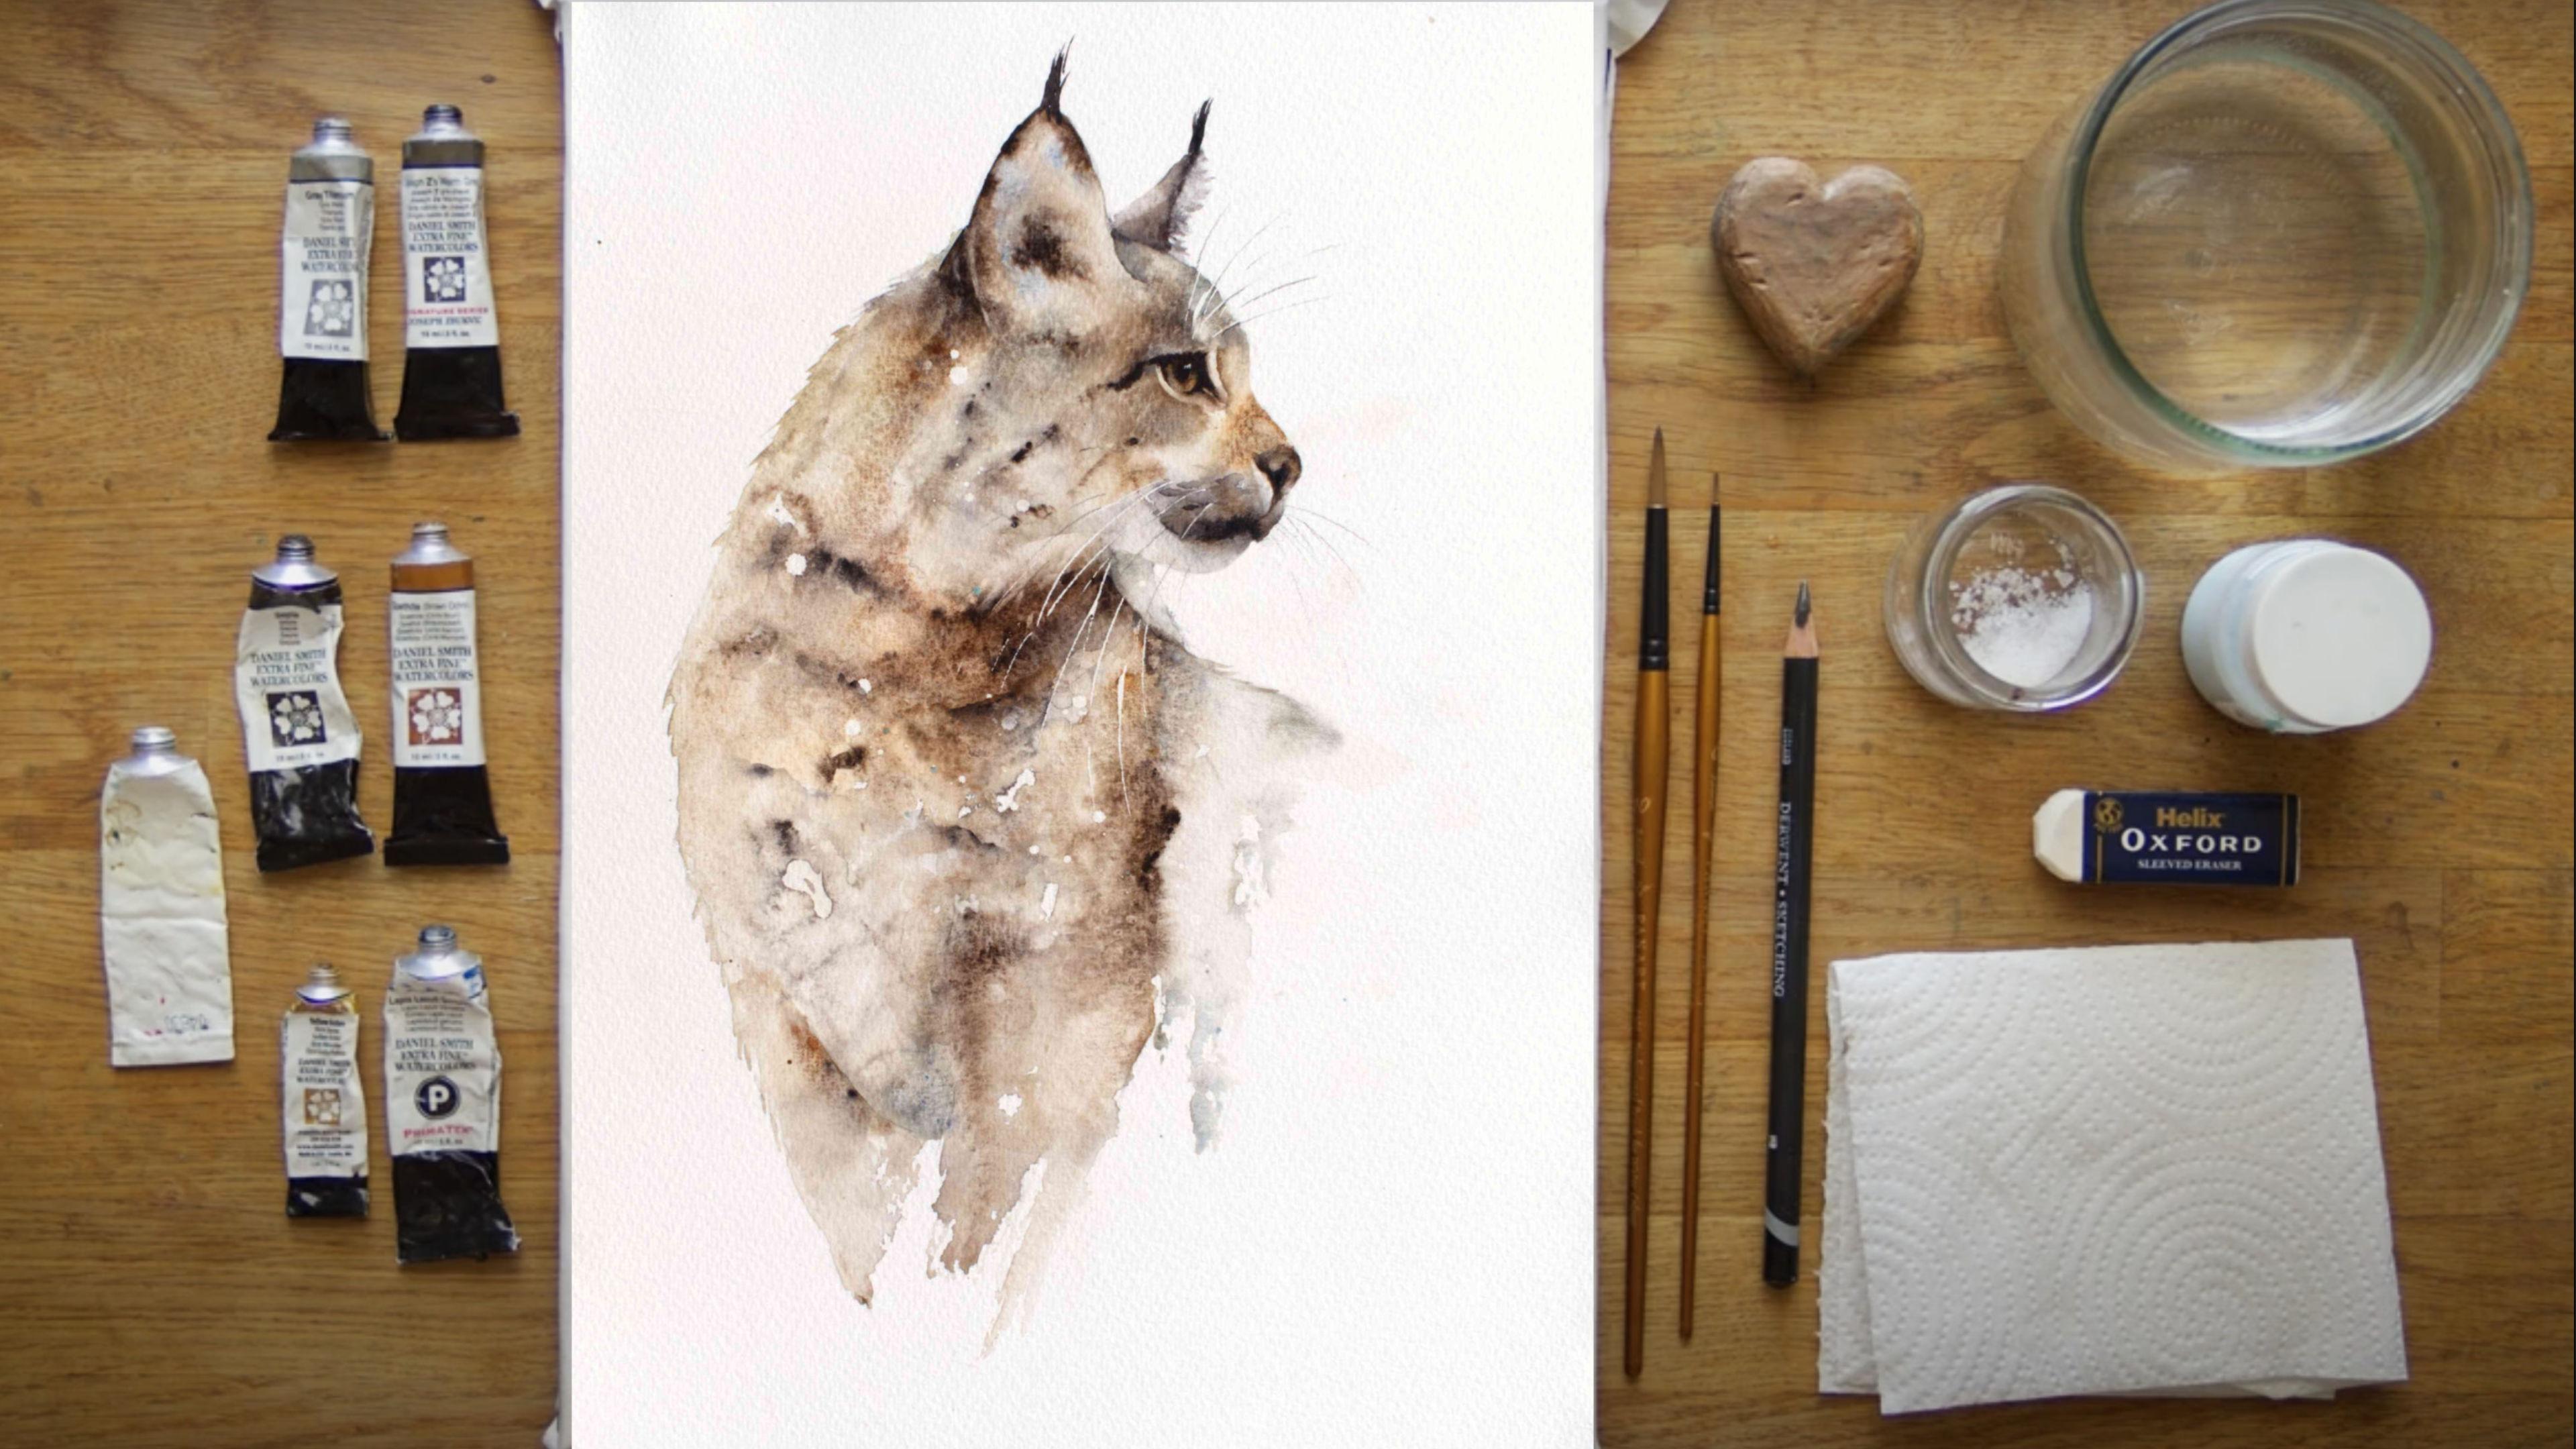
2. Materials: I'm going to run through
all the materials you need to paint this
beautiful Iberian links. Now, before I start
introducing these materials, I've popped in the projects
and resources pages, a really lovely
little short video. It's only like 8
minutes run by the BBC. And it just goes into the
story of the Iberian links. They were near to extinction. I think, if I rightly remember, there was only 25 breeding
females left in the world. So they've really they've
really come quite a journey. And I think, if I'm right
again, remember correctly, I think from June of this year, they've been taken off
the endangered list, which is astonishing and
really heartwarming, actually. Um And the other side of it, watching this video
really helps to sort of engage
with the painting. It kind of you become
involved with it. And there's such magical
sort of fluid animals, and it's just what wad color
is about, as well, isn't it? So they almost encapsulate
that lovely fluidity. So well worth a watch if you
can spare the time. Right. Down to business. Let me run through all the materials
you're going to need. Again, as ever, it's a nice collection of
Daniel Smith paints. If you haven't got
these exact colors, like I always say, choose
the nearest you can. I have there's a
little color swatch in the projects and
resources pages again, which, break down what the actual colors look
like individually. When you look at
the Iberian links, they have many sort of colors. They are mainly a
sort of sandy sandy, but I've got a few pieces I did, but were a little bit grayer. So don't feel what I'm trying to say is don't feel to a
slave to the colors. The granulating aspect I found nice gave me a nice
amount of texture. But again, that can be created
with little bits of salt, so yes, don't be too worried if you haven't
got these exact colors. Right. From the top.
I have gratitanium. I have Joseph Z W
gray. I have a sepia. I always got a sepia. And I've nearly always
got a go through it. I love this color. It always It always seems to
be the right one. I've got a tiny little
bit of yellow ocher. That is just for the eyes, so it's tiny, tiny amounts. Little bit of lazylaz. Again, there's just tiny
hints of that blue there and a rather shabby little
tube of gosh, right. And that's again just for
doing the little catchlights. The paper is Bockingford, and that's been stretched
onto a perfect paper stretch. So it's stretch
paper, and again, all these can be
found in the projects and re sources pages, and I will put a link
to this paper stretch, a real really good board. Just go and have a look. I've explained it
a couple of times, so I won't go through it again. Right, I have something that's going to tilt my
board is about an inch high. So just to say, it just gives my ball a little bit of a tilt. It can be anything.
Obviously, a pot of water. I've got some mask in fluid, which is just to do
those lovely whiskers. And I have got, which I just noticed it's
not on the board. I'm going to pop that down. I'll explain that in a second. A little bit of salt, a rubber kitchen paper
towel, kitchen roll. I obviously a pencil, and a little chappy is ascriber. And one of my lovely one
to ones that came to the studio for a lesson
suggested this game changer. It's lovely and get some really lovely fine
lines for those whiskers. So again, I will pop
a little link again. I have to admit
that's from Amazon, so nothing is too fancy. I've only two brushes. Didn't need too much to date. I've got a number aught, but that you could easily
have a one or a two, so don't worry if you
haven't got a aught, and I have a number ten. Again, the size on the pan
art is a little misleading. So that would probably be a six probably some
other manufacturers again with a number at that could well be a
number two or three. Hair dryer, which is off camera. Again, just useful just
to finish off drying, but obviously not
essential in any means. There's a lovely reference photo on the projects and
resources pages. I seem to be saying
that word a lot. But that's there for you to use along with a
downloadable ten plate. And there is. And then to pop. I've painted this. Oh,
quite a few times. I'm looking around my studio. There's so many caps or
links, should I say. So I'll pop some of the
better ones on there so you can have a look and just see how different they all turn out. The joys of Watercolor. What was the other thing
I was going to mention O. I will also put a picture
of my Finnish Iberian links, which was exhibited at the David Shepherd Artist
of the Year Competition, or Wildlife artists of
the Year Competition, this year, which is 2024,
as I'm filming this. So I'll pop that
in there as well, so you can have a
little look and I ply pop a few photos of
me there as well. Right. I think I have mentioned
everything that you need. So the next thing is to go and get this lovely
one sketched out.
3. Sketching Out: Right then, before we
can start the painting, we need to sketch this
lovely links out. So I'm going to give you
just a few hints and tips. As ever there's that
downloadable template in the projects and resources. So if you're not 100% confident of drawing these
links out correctly, I would strongly suggest using the template
because as always say, it just gives you
the right shape so you can enjoy the painting. So once you have used your template and
you sketched it out, bear in mind to try and keep your pencil marks as
light as you can. Now you might think, well, she'd done her quite strong. This is really, so you
can see what I'm doing, because I do mine as light
as I would ideally like, you may struggle to
see what I'm painting. So so keep your pencil
marks lighter than mine, especially on any top
area where in theory, the light should be
shining because it's lovely to lose those pencil
marks once it's finished. The other important
bit is the nose and obviously the eye because a lot of this is just
wonderfully loose. It's all left a lot of it
to of the imagination. But unless we have
the eye right and the nose right and to the
placement of some of the ear, then you need that focal point to really bring this
painting to life. So really take your
time with that eye. The whisk, I'll come onto
the masking fluid in a bit. Again, it's just
getting those lines in. The nice sweeps nice sort of
curve forward of this leg. A slight. You can see just coming in a little
bit to was that 7:00. And that back leg is
just moving in a bit. It just gives you that lovely
sort of sweeping shape. Masking fluid. I was going
to start with the whiskers, but that's the
masking fluid a bit. So obviously, if you, the masking fluid is fabulous for doing
whiskers, and I have got, and a lovely student
recommended this, and there's a little scriber, brilliant, really
brilliant for doing whiskers and keeping
them lovely and thin. So once you rub those out, you've got some
lovely fine whiskers. Again, the little splatters. I've just popped that scribe into the masking
fluid, and just flick. Now, some of them, I'm going to rub out in a minute,
have got too thick, too big or maybe misplaced, you may have got
one over the eye or once they've completely dried, then you
can rub them out. What I was suggested,
obviously, do you flick, do you little
whiskers, step away, give it to 10 minutes. That will allow those masking fluid drips and dribbles to dry, and you can look at your paint at your soil, your drawing. And just make sure you're happy with it before
you start the painting. So that's probably my sort of tips really for sketching it, sketching Yeah,
sketching the links out. So I would remove. So I'm just going to remove
this while I think of it now. That one's a bit chunky. Don't get rid of that. That
one again, bit chunky. I think I like the others. Just be careful if you have got spots amongst the whiskers, you don't rub the
whiskers out because then you'll have to reapply. Equally, if you've
got one of the whiskers that have
gone a bit chunky, you can take that out
and obviously reapply, you will have to allow
that to dry again. The rest I think I'm happy with, I don't like too many
around the face. It's all tracks a bit. But again, it's a little
bit of what you like. And of course, if you
don't like the splashes, that's entirely up to you.
You don't have to add them. They're just I try
and add everything so you can have the choice of
either adding or not adding. Anyway, right. I say, allow that masking fluid to dry before you start
your painting, and I'll see you in
the next lesson.
4. Body: Right. Let's get some paint
on this wonderful links. But first, I'm just going to get rid of the masking fluid. I don't need that. Don't need ascribe clear my decks a bit. Get rid of the pencil as well, so just gives me and the rubber. I don't need that. Gives
me a little bit more room. All right. Okay. So pick
up your bigger brush, get it lovely and wet, we wake it up. And we're going to add
a little bit of water. So I probably should have said this in the
sketching out bit. Make sure you got this
pencil mark here cause just it's not
incredibly important. It's going to say
it's just where we're going to add this
water now you can see, so don't panic if
you haven't got it. Okay, so we've just wet
that little patch up there, and I'm going to pick up. I'm going to pick up the gray, a little bit of blue. Let's have some of the gothit. I'm going to pop a little
bit of the gray at the top. I doesn't matter how
you do this really. We just but get a nice
amount because in theory, this has got to come
all the way down here. But of course we can't add more paint, don't
panic too much. We get a nice amount on there. So don't be afraid, you can pop the colors on top
of one another. It really doesn't matter. Let's have a little bit
of that lapsi lazo. Mike, I love this color. It's just so beautiful. And I've actually had this
tube for many, many years. I've got to be four or
five years now this tube. So although they're expensive, some things just last. Right. Put a nice amount of goth down in
this corner here. You're almost sort
of scooping it up. You're getting a real mount. You might have a little
bit of the gray as well. You can see it's quite
dark in this corner. You're coming right
up. You can see there's that little white
patch here, isn't there? So you're coming
right up to that. We're leaving the white patch clear right to the very end. So Okay. Once you've got that
little bit there, et just pop some of the
cumbers down for a second. And I'm going to give my
ball a little bit of a tilt. And ideally, I want it to
run in this direction, so it's coming across the ball, so I'm going to
pop that up there. That's allowing
that paint to flow. Clean a brush, and
we're just going to pull it down. Doesn't matter. It's not desperately important whereabouts come down the body, but just somewhere like halfway. And if you leave
little dry patches, I think that's all part of
the sort of charm of this, but be careful you don't
go over your lines. Right. Okay, as you can see, a lot of that paint has moved, so we need to add a little
bit more at this point. So I can add a little bit. G th. Whatever you think you're
missing at this point, let's say you've got
that reference vote in front of you
squint your eyes, see what you think you would like to see, a little bit more. You can see there is that
quite obvious conveniently. A lovely sort of go thy
colored u Sort of rough there. I'm only chuckling because
'cause I use go thy a lot. It always seems to
be the right color. Just a little tip of adding
more paint as you go. Now, I just did it, which made me think a bit of it. I cleaned my brush off, I came back in, and I still
had quite a wet brush. And what you can end up with, like I'm doing here
is lots of puddles. Now we need it wet and you
need to keep it all damp, but you can add end up
adding too much paint. A becomes a little bit too much. You really want to
clean your brush, dip it on a paper towel,
then go into your paint. That way, you're not adding
lots of extra water. It's very tempting
to to do that. Okay. As you stand, If you can
stand at this stage, even, if it's only just for
five, 10 minutes, it is a lovely time
to be standing. Oops. We that splattered from? Okay. If you haven't had
any splatters like this, it's always best just to
leave them completely dry and get them off
once they're dried. We've a magic sponge, which I mentioned
in the last class, which I will probably link to and see if I can find it
somewhere in my studio. It's it's actually
a cleaning product, but it's amazing for getting
things like that off. Okay. What I need to bear in mind, while this is still wet and
still running beautifully, I need to just do a few flicks. Now, flicks are always best done when the paint and
paper is nice and wet, so pick up my little brush. I can use some of the paint if you've got enough
paint on the edge, you can use the
paint on the edge. If not, you can just add a
little bit on your brush. Now go carefully with those, and I always start don't start
right on the edge because it's very easy to get
very long bits of Coat for if you do
come in a little bit, that sweep just ends up at the edge of the painting,
that kind of makes sense. I say, don't go don't go
methodically all the way down, try and do random little bits. Now, while I'm
trying to achieve, that ing, I want that
flow running downwards. It just looks like he's
just turned his neck. S So I'm just just leading
that run at the moment. I don't think I need any other
color here at the moment. But I'm just making sure
there's no extra dribble marks. No, my studio is
quite warm today. It's a really hot Summer's
Day for changing the UK. So I can see this is
drying quite quickly. Again, bear in mind, your paper will dry at
different rates in mine. So you want it, which still sort of
starting to go off. You can start to
see the very tops of the grania paper appearing. That's the perfect
sort of magic point. Now, I think I'm going to
give her a little tilt, so we're then working
our way downwards. We can always lift the board. And if you feel you're giving it a little bit more of a
tilt helps you, then do that. Any point, but I'm going to try and allow
this to run down here, and we're going to
again wet brush. I'm clean. No paint on this at the moment, and we're just going to
run it down this direction down to the There's a rather
complicated bit here. This is white fluff, and
this is the actual leg. So actually, I'm going to go
in to the edge of the leg. At this stage, I'm going to pop a little bit the laps
eye lazoi in there. Let's have a little bit of
the great detaium, as well. Because we've got
this on a tilt, we shouldn't go upwards because
we've got it on a tilt, so That's a nice way to
control some things. Okay, let's start touching some of this up here
and Allar it to run it. What we want to do
is try and leave a tiny little line here. Just a little dry line, so you're not touching
the chest area. Again, just run
that down to not. Say opposite where the
chest is. Let's go there. Again, if you have any
little dry patches, don't worry about that. I think that's
part of the charm. And again, look at
that reference photo, See what colors you see. And let's pick up the Joseph
and go the and the gray. That's how all those four. And again, keeping everything wonderfully light,
everything loose. Just just touching the paper. Don't want to put
too much pressure on and a little bit more
water if that helps. You want some nice
dribble marks. We're just after some really after some random
texture. Random marks. Sometimes the masking fluid
helps because it actually, it goes round the
little dry patches. Let's had. There's a nice lump. That looks very nice, is it? There's a nice patch of color. Just coming off this
chest, let's have a little bit of
sepia, not the gray. Let's just tap that in
and allow that to run. Okay, right. Before this completely dries
up the top here, I'm going to go
back up to the top. And when I go to wets on. I disappearing off the camera. I'm going to wet the
head. Now, don't worry because if you get any run marks that touch because you want
to touch this paint, and then hopefully, we'll encourage some funny
run marks to happen. This is all trying
to be. It's quite hard to teach randomness
and spontaneity. I've found this a
little trickier because I did this the actual
exhibition piece in Spain one afternoon. It was quite quick, and it just some paintings
just happen. So it's trying to if you could bag that confidence you have when you're
just playing, it would be a wonderful
thing, wouldn't it? Okay, so we're just
wetting round the head, not going into the eyes, just around the cheek. It
doesn't matter too much. I'm not going to put any color. What I want to do
is soften this line here and allow any
dribble marks to happen. And also, we need to try
and pop a little bit of Just come low those
stripes in as well. Before we completely
let things dry. And what I might do, again, be a gauge of how that running. If you think you need
a different angle, then pop it at a different
angle. I'm going to I'm starting to lose some of that feeling of going
coming into this edge here, so I've just popped it back at that angle I
first started with. It's coming back
down here to 7:00. And I can add again, I can add a little bit of water. This is still wetter
at the top here, so I know I'm not going
to leave any funny marks. And even if you did, I think
for this, it doesn't matter. Somehow part of the
charm of it. All right. The thing of adding
lots of extra water. Just be mindful of
any dribble marks. We want it wetter because it doesn't have to
be bone dry here, or if we have just
monitor that particle, should I say, because we're going to pull that
down in a minute. You don't want it
too dry down here, it's just just to stop them actually
physically running down. And even then you'd have
some sort of unusual ribble, so R. Let's get the stripes in before I
lose this drys on me. I quite like the spa, I quite like the goth. Although the reference photo
shows some lovely stripes, They are actually quite spotty. So, let's squint your eye. You can see there's a
lovely one coming here. And if that runs into that, that sort of middle area. That's fine if it where we
allowed this paint to run, my paper slight, even
though it's been stretched, it's slightly buckling on me, and it's actually running
down the center there. But any runs you
have, don't worry. And if they're running
into your stripes, again, let them soften and run. So let that water run
into any stripes. I can see this is slightly
being into dry on me. I'm just re wetting this. Again, be careful of
this bottom area. Stock some of that up. Okay. Back to stripes. Right. Stripes are quite hard to put on because the eve are too
wet and they disappear. It's just catching
at the right time. You got to just
that nice softness. As I say. We've lost this I've lost a stronger
mark down here as well. So just adding a little bit more water.
Stripe down there. Say, look at your own piece, look where you need
the stripe spots. As saying, I'm not sure if I've finished that
conversation, actually. They are quite spotty act
you rather than strip, though this one
looks quite stripy. They have actually. They're
actually quite spotty. A little bit of a tools if
I can get there something to. Yeah, that's nice. It's just to me, looking quite random
and interesting. That's all I'm after.
I'm after interest rather than accuracy
on spots or stripes. If something appears to be best way I can describe
it is interesting, I suppose, it's going
says to me I like that, that's doing something
a little bit different. So I picked up a little
bit of Joseph to add a bit of coolness in there trying not to touch go
into that white line. We will soften that white line down in a minute.
That little dry line. We popped in, but
the time being, because that's very wet, I
don't want to join them. What have we got? Let's see how that's a pot that you can see in my stripes
disappearing up there. It's a ling low to run. It's a nice one just there. You don't need too many,
just to give an example. So sort of we almost
have to pick up pick your favorite part you'd
like to see a stripe on. So I'm not going to get
to bogged down with adding every stripe. Slash spot. They take your
brush away, see we think say if you are sitting, did to stand up to
just for a fraction of a second, get
yourself away from it, or if you're standing,
step back a little bit, see how things are looking. I'm liking that.
That's looking right. I'm I'm tempted just to leave
that for the time being. Now, I have got some salt. So I might pop a little bit of salt because this
is starting to dry. This is still wet, and we still need to do those lower legs, but obviously because
it's on the tilt, things are dry and
quicker at the top. Again, salt is up to you. And if you're using
granulated paints like I am, to be honest with you, that
doesn't have a huge effect. So I'm just going to
pop it on there if you may be using
different paints for me. And you can see the salt defect. Okay. Let's pop that back down. Right. What we need to do. Disappearing off there.
It's just the side part. There's a lovely sweep of the back and we
can touch this again. If you get any things that are sort of running
down, don't worry. I'm just going to run
it a little bit down. To that leg. I can
touch it all way down a little bit there
along the top edge, and we're just going to add a little bit of the
grate and the lapsi las. G. Yeah, say, step away,
see what you think, A brush right on the edge right on the
s on the lane flat. I'm trying to get
some of those sort of unusual kind of dry patches. I don't want to put
too much on that back. Again, you can see I've lost that strong line
down here as well. I pop. Get this to stay.
A little bit of CPA. I don't need a lot.
It doesn't have to. Although it does run all ways
from the top to the bottom, we don't have to add
it all the way along. Sometimes just a
nice gap is nice. Alright, Let's see if we
can finish off these legs. I'm just going to suck
up some of these water, a lot of water sitting here. This is a little
saturated now, but, so I'm just putting the edge
of the kitchen roll into the corner and allowing
it to soak up. All right, let's clean bush, take the excess water off
of your kitchen roll, and we're just going
to again, like we did here. Really flat. I'm just running pulling
a little bit out. Some of these funny little
bits at the end are the hardest to do because
they're just done spontaneous. They're very spontaneous,
and they're very quick. And when you think about
them, they're harder to do. Okay, let's join this up, though it's a little bit wet. I don't want to leave that
white line sitting there. Okay, Let's take a step
back again, looking at it. Even squint your eyes. I think that's looking okay. Let's join this front leg, sorry. The forward leg. So the leg that's
actually sitting behind, so I say again, just run that down
a little away. If you get something you like, and you take your brush away and go with that I like
that, leave it. Don't do it anymore
because that's I say the hardest thing the
bottom because I'm trying to con consciously show you a technique that's
done or subconsciously. So it's one of those quick things you do
very quickly, and it works. On my little brush. Rolled underneath the
ball to grab that. I also need to do a few little flicks as well
before this dry. So again, same rules
apply from the top. Just pull those out. Just a few. Okay, I'm just going
to add a little bit of the black sy lazo underneath this on
the chest here again. I like this blue. I add
a bit b blue there. A little bit blew at the top. Now, we're coming to
quite a danger zone now. 'cause this is almost dry. This, we'd be fiddling as well. This is where you can fiddle. And then all of a
sudden fiddling is not the right thing to do. You can carry on
there's a point where carrying on working or fiddling
suddenly doesn't help. And I think I'm at it now. I've just got to allow all
those sort of things to move around and just hopefully create something interesting.
That's all I'm after. As I say, I'm not after
accuracy of the stripes spots. I want to just have a quick look before
you, you down brush. I'll tell you what I
will do, actually. I'm going to leave
this. I'm going to actually use my salt pot. I'm going to leave this to dry, and a little bit more of tilt cause I'm just
feeling wild today. And I'm just going to run a
little bit of water here. Now, what you need to do
again is to watch this. This is just right for my piece, if you feel you've got
enough runny marks and don't do it, but it can be really
mindful because they're going to start
appearing at the bottom there. What I want. I just want that sort of movement
of coming down again. Okay, right. I need to take my own advice, and
I need to leave it. But I will, you know,
while I'm Waiting, I'm going to watch this
for a little bit, say, I need to probably keep an eye on these
little bubbles that they don't suddenly collect
too much water and run off. And I won't do much else, but say, just be mindful. And this can obviously be
dry but the hair dryer. But let it Let it
dry a little bit. If you can leave it
to dry naturally after you've monitored those
bubbles, that's the best. But if you want to
get on a little bit, then you can dry it once. Things have almost gone, if that makes sense.
Okay, Happy watching.
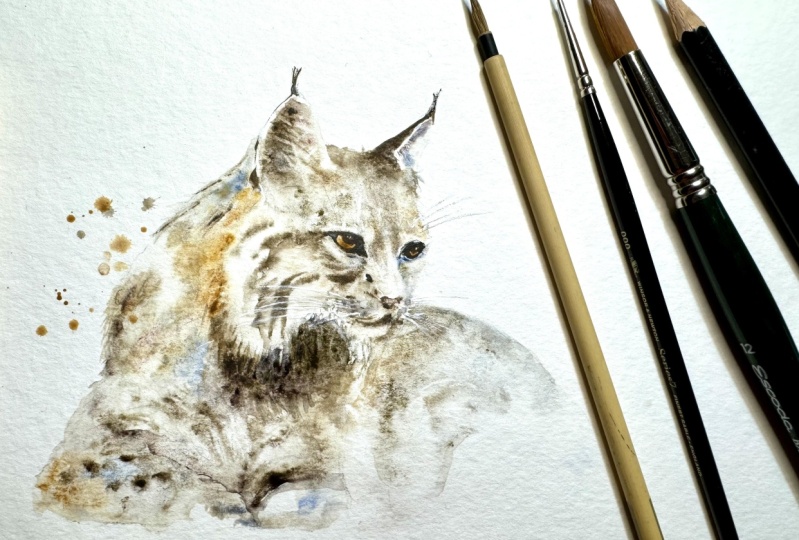
5. Head: Okay, so once it's
all thoroughly dry, we can lay this flat again. So how yours look. Are you pleased with
what you've got? I'm going, what else
have I got under here. I still got that heart termina. I do hope so, because Yeah, it's every single one
I've done of these links, and I've done quite a
few practice pieces. Every single one turns
out slightly differently. Just depends how much
water you've added. There's a lot of
randomness in there, just how the paper flows, sorry, how the paint flows,
how your water flows, and just how you're feeling
on the day sometimes. So I'm going to show
you just a couple of more favorite practice
pieces. That's a lot dark. I've used a little bit
more of the gray there. Last one. Again, it's just
turned out differently. I've let that run just a
little bit further down. As seen. You see how
different they are. Bear in mind, these
are practice pieces, so some parts have never actually been
completely finished. But I will pop these
on the projects and resources pages just for
you to refer back to. You can again see how
different each piece is. Okay. Right. Let's pop
those away for a minute. Favor on on the
stand. So I can sit. Okay, I was going to show you the magic sponge just so we can get rid of that little mark. And this is just
a portion of one. They come in little
blocks from Amazon. Co old Amazon. Again, I'm sure you can find
them other places, but they're called magic sponge. I'll pop up a little link on the projects and
resources pages. But what you do
is wet them down, wet part down and simply. Po la. Look at that.
Such a good thing. And your little mark has completely disappeared,
'cause it's quite hard. If you're working like I generally do with a
white background, you're always going to
get little splatters. So that it has been
a real game changer. I don't often use it
to take color out. It's a little bit of a
blunt tool, if I'm on it. So it's just just used for taking little marks
out and mistakes. Anyway, we are going to be
laying this flat again, so working without any tilt, and we're going to
be doing this head. So, pick up your big brush, your bigger brush, and
we're going to wet down. If I start here, just a
little bit further down, you can see on that
reference photo, I was going to say for the
salt, I will leave it on, but actually it's going
to some of it will actually still be on
the a little bit, we're going to wet down,
but don't worry too much. It doesn't matter if it's there. I'm only leaving the salt on because it can actually
still be ale bit damp right underneath
the granule, so I tend to leave them
on for as long as I can. Okay, as I was
saying, I'm going to wet down a little
bit further down. If we start if we wet
down which where you can obviously see where
we haven't painted, it just becomes a
little bit of a line. It doesn't look very soft then
it looks they disjointed. If we wet down a bit
beyond that line. But Then we can keep
it nice and soft. Go to come up to hear,
and I'm going to leave. Again, the tiniest I I've
done that tiny little line, so just so it's not joined
up here. All right. And then we're not going
to do the back ear. So miss that out. Go along top of the forehead. Again, we're missing the
eye out so go again, nice and carefully
round the eye. Just be really careful because all the lines are
really important. If you go outside, you will change the whole
sort of character and shape of them, so it's really worth taking
your time wetting stuff down. And we're only going
to go to the mouth. We're not doing
the chin. We will feel that in a
little bit later on. But just because obviously
the chin is very white, and we want to try and preserve
that as much as possible. Swing it around. I know there's a little white
***** underneath the chin. Underneath the chin.
This little area here, you can see that's
white, but we're just not going to
apply the paint there. But here there's lots of ways
you can break this down, but that seemed to be
the best way for me. And again, we're
going to miss out that little white bit
of coat that sits. Sort of underneath the
chin, that's the back. Okay, so bobble your
head up and down. Make sure it's I think it's
a nice, workable stage, where it's not
sitting in puddles, but it's almost close to it. So it's there's a nice, nice gleam to your paper. If you have it too dry, that paint won't move, and it'll just sort of stick on you. Right, I'm going to
pick up with that CP. Let's pick up a CPA. I'm
going to start on the ear. You have to start somewhere, so why not the ear. And we're just going
to very gently add that lovely sort of dark patch. Go around the ear. Only just kick it
around a little bit, but don't go all the way down. Pick up a little
bit of gratitum. I clean your brush, take the exs water off on
your kitchen roll, paper tel. Depending where you
are in the world. And then we're just
going to again tap a little blue's a little See, I've done that, haven't
I've clean my brush off, and I didn't take the
excess moist off, and you can see that's puddling, and I can if I'm not careful, I can add actually
too much water. And it's not going
to be helpful. Okay. With the pia. Just going to pop.
Again, just tapping. Just going to get
the inside here. Again, don't be
too worried about getting it in the
exact same place. A slight turn of the head and all that
could have changed. So you're just trying
to get a sense. And again, just something
that looks nice, something that
looks interesting. Yeah, that looks all
right. Let's put the spa down. And I'm
going to pick up. I've got the goth laps i laser, and the gray titanium. We just gain squint eye. We're going to start from the
top on the top of the head, so I pick up a
little bit of gray, have a little bit of the
blue at the same time. Again, nice and
light, everything. And just tap and
allow it to move. Watch how it moves. If it's too heavy, then you can always take
a little bit out. If it's gone a little heavy. But just to allow it, I would say, let things run. Don't go all the way down. Let's do a little bit on
those. See how that runs. Could pop a little bit of
the gray titanium on top. Again, being really mindful
to stay within those lines. Okay. Let's have a little
bit of the gray and a little bit of the go fit. And again, I'm going to tap
underneath that eye there. There is some lovely
white markings, but we're not going to worry. We can take those
out, so I'm not worrying about those
too much at the moment. They'll be done on the
finishing off bits. Again, take your brush away, so we think have a little
bit of go fight down here. I have to bear in mind there's that white area sheets.
Suck a little bit. My paper should be
nice and stretched, but it definitely
got a little bit of a kink in the middle here, it's puddling a bit on me. Okay, a bit of gray
here and again, just tap, a little bit of
gray, little bit of the blue. Look at that reference
photo and just tap. Put your brush away.
It's nice to have light. So it's better to add less
paint in my humble opinion, than it is to add too much
paint and lose that light. Even if the reference
photo shows more color as gained with that if
you look back at some of those show you quickly. My practice pieces. Se there's quite a lot of light there. Camera can pick that up. So don't worry. If you've
got a nice lump of light, and you think that looks
really nice, leave it. Don't fill it all in. Well, I might have it. Let's have a tiny
little bit of gray. I haven't really used
this great this piece. Have just a tiny bit. P a little bit of darker. Right underneath that eye
there. Just a tiny bit. Let me to. Now this is
beginning to dry on me. Again, be mindful that all our pieces are going
to dry at different time, so I can only
sometimes do my piece. So if this is sitting in puddles
for you, just hang fire. So you're going to
put that in there. What plenty of strength, I want it quite damp
to allow that to move. I have a bit of fight just in the middle of
the warm up a little bit. We'll be going a little
bit too high up. Suck a little bit of away again, having a look. Take
my brush away. I'm going to come over here for a minute and just add a little
bit of strength up here. Just mainly because for me, this is taking a
bit of a puddle, so I'm going to come over
here and work over here. Just add a little bit of color and strength where I think I need it after I've
just picked up the CPA. Add a little bit under here. I can add another a
little bit more depth. A little bit more color. I can even wet it down a
little bit further down. I I think you wanted a little
bit more strength then it didn't happen for you, so let's put a little bit
show you what I mean. So I can add a little
bit more umph there in that corner but
bring it down and say, if your stripes or disappeared. In theory, you could wet
the whole lot down again. I did that in some of
the practice pieces. It got a little muddled,
and I was trying to stay as true as I could to
the exhibition piece, where it was only one layer. I did two layers overhead, but definitely on the body,
it was only one layer. So I was trying to
stay as true as I could do it from
what I could recall. So I didn't want to
do another sort of layer over the entire body. But here, it just helps
to stay soften that line. Now, we need the back of the ear needs a
little bit of strength. Where we've left that little
white little dry line, we can probably fill that up. Now, fill it in. I say not up. Again, just
touch that color in, allow things to happen. Try not to control it too much. Take your brush away,
see what you think. Say if it goes git astray, or obviously astray,
bits you don't want, you can just just
very gently, again, take the excess moisture off, I can just very
gently suck it up. You have to. I'm just trying to suck
up some of my puddle. Right. We need to
get a couple of those little stripes in as well before that again
completely dry. So I'll use a little
bit of the gray, darker gray the Joseph and
a little bit of the CPA, and there's a nice one
that comes off the eye. Just tap it in. And if you feel it's that bigger
brush feels a bit chunky, you can pick up
the little brush. Sometimes it feels
a little bit more. You feel have a
bit more control. Another one that runs off here. So I'm going to screen to my
photo. One that runs here. Try not to get too line, try not to sort of
fill them all in, just do little parts of it and leave the rest of the
imagination to make up. But they can look
a little stark, if you I personally,
just what I like to see. But, I don't like them looking
too liy and too complete. Off. I just putting a little
bit more color up here. That's still damp but it's
just about workable steel, so I just want to So once
you start that again, Jay. When your paper is very wet, your color will move lots. And as it begins to dry, the same amount of paint won't move as much,
if that makes sense. So this is where you sort
of gain your control. So You can kind of work
around your painting, adding little bits
color as you go. As it begins to dry, you can add a little bit more. Little more details,
something a little bit. A little more strength
thing. Hopefully, you can see that isn't
really moving, was that if I'd put that
down when it was really wet, it would have
blended a lot more. So there is always a part to say once it starts
to go off and it, little bits begin to completely dry and little bit
there's a difficulty. It's just trial and error. You will get the hang of it. But yeah. It's just sometimes just time spent painting,
you become familiar. Yeah. Oh no, I can't do that now because that
is X is going to happen is just time spent playing with your paint,
which isn't a bad thing. Take your brush away,
see what you think. I need to again, this is be a judge
of your own piece. This little part for me
is drying quite quickly, so I want to just wet underneath that chin while
it's still a little bit damp, and that just gently blend. And I can put's got
my little brush. Again, I feel I have a
little bit more control. A little bit more. It's
quite dark there, isn't it? I had a little bit more. Strip there. And the tiniest bit of You've got the
color on the brush? Is it a tiny little
bit of the Blue. A diddy bit. Okay. I think this is
doing? Doing okay. I know what I haven't done,
which I should have done. Let's do these flicks on
the tops of the ears. So again, or should we do these? I'll tell you what we're doing
on the finishing off bits because yours may have dried
and mines almost dried. So I think some of
the pieces I did the flicks as I worked around that ear. It doesn't matter. You can do that in the
finishing off bits. Tidy that up where I
put my brush down. Okay. That's looking right. I don't think I want to do
too much more actually to it. Again, there's
always that sort of stage where you
need to leave it. You can call a fiddle
fiddle fiddle, and then you're like, No,
can't do any more fiddling. It's going to ruin it. And
I'm at that stage again. And I'm going to put these
down, clutching these. Now, again, it's just worth. Just hang it on. We'll finish up, but It's worth just standing
here for a minute or sitting when just making sure you don't get
left with a sort of a strong line where
as it begins to dry. Don't really want to watch me
just watching my painting, but just to say, just keep an eye on it, and you
can use your finger. That often quite a nice
way it squeeges the edge, moves the paint around, but doesn't sort of
soak it up better. What I would personally want
to avoid is the sort of the jagged line where
we've wet things down. But anyway, as I say,
leave this again to dry naturally, for
as long as you can. Once it begins, I don't know if you can see
that. That's almost dry. I would put a air dry over that, but there's parts that
are still really wet. So Ts, be patient.
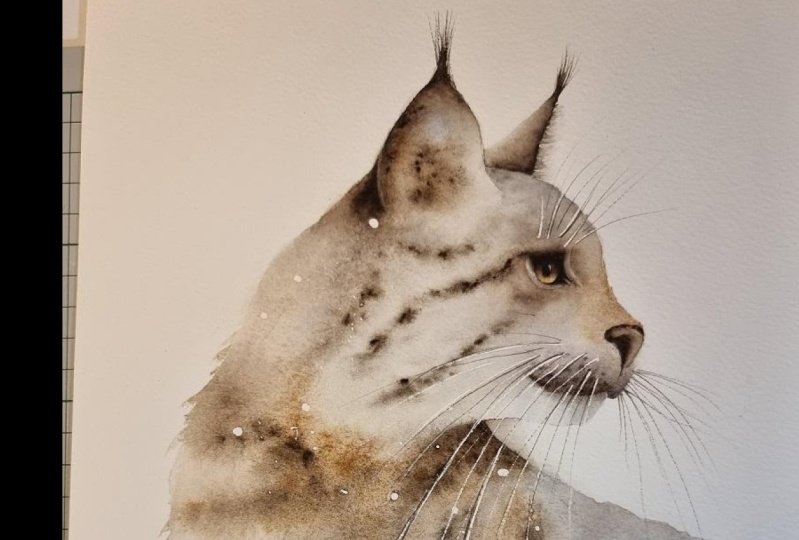
6. Eye: Okay, then, let's get
this links to life. We're obviously at this
rather ugly middle stage, where things just look, you've obviously hopefully got some nice sort of
patterns and flows, but there's no detail
at the moment. So I think we should do the eye, and it will start to bring
your painting to life. Sometimes you need
to get something sort of sharp and some
sort of detail in just to give you a bit
of a boost because it's hard to drop your head and get a bit demoralized at this stage because it all
looks a little bit mucky. Anyway, I picked up
my little brush. Yellow ocher, and
we're very simple. We're going to wet
down that eye pupil. So, pup, sorry the entire eye, the pupil, the eye,
so the eye ball, not the black marking, so we're puts on in a minute, so you're just working on the easy if I put the color
in then you love to see. You're just working on this, and we're just dropping color, not doing anything else. You could in theory
have painted this in. It doesn't necessarily need
you to wet the paper first. I suppose it's just
habit with me. Okay. And that is simple as. And We just need to allow
that to completely dry. Now again, you can pop a air dry over to speed the process along 'cause it doesn't
have to do anything fancy. I just needs to dry. So yeah. Pop a hair dry over
that if you want to get on. Okay, so once it's
thoroughly dry, we will do the next layer. Layering of eyes just
gives us more depth, and because the eye
is so important particularly on loose
pieces because we need to have that
sort of crisp detail. We're always as a human, I guess, drawn to eyes as well. So really take your time. Don't rush this
stage, I would say. We're just going
to wet that down. And if you've popped the hair
dryer over it like I have, be aware that your
paper is quite warm, so it will dry a
little bit quicker. All right, I'm going
to pick up the laps y lazari and a little
bit of the CPA, which is a p. I'm going to
start with the laps i zero. Now, they always have a shadow. It's always nice
to get a shadow. And I slightly pause because some camera angles
won't show a shadow. But I love to put a shadow underneath
the top of the eyelid. I just gives a really
nice feeling of depth. Pop a little bit of CPA. Say if you have stood, then it's quite a nice time
to sort sit down and say, just take the weight
off your feet and have a H a nice gentle. Just yes, feel very calm. Just be very gentle,
very mindful. I don it's a corny word, but it really really is right. It's just trying re look
at that reference photo, get that picture
up nice and close. So you can see the
shape of the eye. It's a little bit confusing
because obviously, she he has got a very strong sort of
eye makeup round there, so it's a little hard to see. And just watch it. Yeah, sometimes you need
to push it back up. Y color. Just be be gentle. And you can always add if if your ochre has lost a little bit of strength and always pop a little
bit of ochre in there. And again, once you're happy. We'll say, we haven't
put the pupil in, we're just putting sort
of the groundwork in, I suppose, and building
up that sort of depth. Then I'll say, Once you were sort of happy with what you got? Put put your paint down
and allow it to dry. I would I would put a hair dry of it
right at the very end. Again, what you don't
want to do is sort of disturb how that paint
is sort of laying. So just watch it
and make sure it doesn't come down to
the bottom too much. You just need to say
just a little tinker. And yeah, just be mindful
and watch it. Okay.
7. Eye Makeup: Once that little layer
is thoroughly dry, we're going to put that makeup on because then we
can reshape the eyes. It's quite a useful thing to do. If your eyes got a little
mi shape in any form, then we can close it down a little bit if
it's got a bit big, or it's harder to
make it larger, but, let me do it, and it'll be easier if I start
start and again explain. So I've picked up
the CPA and say, I've got my reference photo in front of me, it's on an iPad, so I've really pulled it up, so it's nice and large, and we're going to
start at the very top. Now, the eye I'd have said the dark eye makeup is actually almost going into the eye the
way I've sketched it out, but have a look, see
how big your eye looks. This is what I'm saying
you can sculpt your piece. Need to come in a little
bit here at the top. You can see the eyeballs
obviously round. It's a bit thick. So
I'm just painting. There's nothing
wet at the moment. It's just being a painting. Coming round, and it comes off. We can soften it. It's going to look a little
harsh at the moment. We can soften it all
down in a minute. Don't worry. Went a little bit. A little too far down.
Correct to that. That's better. And
it swings around, doesn't it? Squint your eyes. I always seems such a coy
thing to say squint your eyes, but it always gives you a nice. I gives you a nice
overview of thing. It gives you Yes,
that looks nice. Say, take your brush away. Have a look, see what you think. And it close mine
in a little bit. Yes. Squinting eye. It takes
a detail away, doesn't it? So you can just
see the main shape that you're after
rather than getting bogged down with the detail.
A little bit further out. Take brush away,
see what you think comes out here a little
bit, doesn't it? Okay. And what I
found was quite nice, which I did in a
couple of pieces. To pick up a slightly
large brush. I go to go it up again. Fan it out. Make sure
you fan it out away from your painting because you
can often get a bobble of water and then it
drips onto your painting. So yeah, it's a damp
brush that's fanned out. Very gently, you can just pull up some of that
paint really gently, though. You only want a tiny bit Well, you can end up with a rather disney like character
if you're not careful. So it's just a little bit, just to take some of
that hardness away. I liked it here in the front. We've got some nice eye lashes. Take your brush away.
That's enough for me. I don't want to get
put too much in. Pick up my little brush again. Now I can just
soften this again. We will be taking
little bits of color out here later on a later stage, the finishing off bits, but I just want to make
sure that's nice and soft. I picked up CP. P in random places. Just want a tiny little
bit up the top here. Just to make sure that
eyeballs kind of round. It would probably be squared
off at the top here. Gently bring it around. Not going to go
all the way round. You can end up
outlining it too much. It just looks a little
bit odd then, I think. I quite like how that's looking. I'm just going to
soften that damp brush, touching the edge of that spa. We've got some tinkery
little bits to do in the finishing off
bits around the eye. But It's just to get something that's starting
to look like a painting. So say, it just helps
with your general morale. I think I'm there. I can carry on fiddling
and not help at all. Right. The scary little bit
is now putting the pupil in. So again, with your CPA
and your little brush, have a good look at
that reference photo and start in the middle where
you think that pupil is. Little blop of paint, and then just gently work out. Lift your brush
away, have a look at that reference photo.
Lift you brush away. Let's call it little. So I'm just dabbing,
really. Still looks sod. This is where you will need to do a little bit
of tinkering on your own, and see how it looks, and say, pop it down. Oh. Sorry, drop of water running down my paint brush, that wouldn't have been good. Yeah that's looking okay. Desperately trying not to use my old excuse of working a little way
away from the camera, which is the case.
So I'm I can't. It's a little harder
for me to see because I'm not as close
as I'd like to be, so I'm slightly stabbing
in the dark at times. I'm just taking a
little bit of color out at the bottom of that eye. So I'm just wiping some
of that ochre away. Lifting my brush,
see what I think, think I need a tiny
bit out of here. But as say, be a guy,
look at your own piece. Eye is always a case of light.
I've got it. I've lost it. I've got it. It's just being It's just being
really quiet and mindful. I'm not panicking. And if it gets a little muddy and
you get a little bit. Oh my goodness, I can't
see what I'm doing. It's all getting a bit pear
shaped and out of control. Step away for 5 minutes. Even of just a
couple of minutes. You can always re
wet an eye down. So say if that had all
gone a little pear shaped. If I'm not ruining this,
you can wet the eye again. And then you can sort of
rework it if need be. Add a little bit more color
if you feel you needed a bit more Ochre a little
bit more of the blue. Got a loss of ochre sitting
on the end of that brush. But try not to add
too much water. You don't want to
keep working in a big puddle because that can
be a bit hard to work with. So just keep lifting your brush away and looking
at that reference photo. And suddenly I will
suddenly happen, you'll look at and
go, that's it. That's definitely time
to put your brush down. And I think I'm about there. I'm pretty
pleased with that. I will before we put that little catch
light in, it needs to dry, and I will just get a
little closer off camera once I stop the camera
and have a little look. So if it looks a bit
different when I come back, it's nothing I haven't
told you about. It's just I've been able to get a little
bit closer to it. So yeah, have a little tinker. Let it dry and we'll pop
that catch light in, and then we're almost
there with that eye.
8. Eye Catchlight: Okay, so once it's completely
dry, and you're happy, then let's add that I say the all important catchlight that makes all the difference. So a little bit of white guash. Give it a good old mix. You've got a nice,
creamy consistency. And although the reference photo shows the catch light
being a little higher, I always like to do. Let me bring back
my trusty example. I like to do them
somewhere sort of here, right at the where you
would imagine them looking. So I normally go top and a
little bit to the front. So let's see if we
can do the same. Okay, I'm going to go
somewhere just about here. That makes all the
difference, doesn't it? Really does as they say,
bring them to life. So yeah, I think I'm pleased, had a little tinker while
ourselves off camera, and I think we've got it right. We need to do other bits
and pieces as well. So obviously, we've got a
back ear to do and the nose, but they will obviously help bring the whole
painting together. So next, next lesson, we'll do the ear back of the ear and get on with
that nose as well.
9. Back Ear and Nose: R. Let's do the back of the ear. Let's work methodically from top to bottom rather than
doing the nose and then putting my hand on put my hand on the nose and smearing it around
while I do the ear. Right. Okay, so back of the ear. Bigger brush. We're
going to wet that down. We're only going to do
the ear, not the hair, so be careful you don't wet down that part, and
we're going to pick up. I'm go pick up for
spa and the gray. I'm going to put the color
right up against that edge. A little bit more strength,
just tapping and again, allowing that to find
its way across the ear. Little underneath. Pick
up my smaller brush. I get a a little
more control there. Actually, while I'm
thinking of it, I'm going to do this
flick on the ear. If I get that shape right as well it comes out ale bit here, doesn't it, maybe not
quite so much as that. Take. Take your brush away. See where you think. Right.
Let's just be cautious. If it is a little bit puddly, just hang on a little minute
because if it's very wet, it's quite easy to do
the flicks and get a little carried away because
there's a lot of water. So you want it a
nice just going off. Is taken my hand away. I reckon I'm about there. Let's hang on to that
Joseph. Darker gray. And again, start a
little way down, try not to start right on
the tip because again, it's quite easy to then do some more exaggerated
flicks. That's in bold. I think that's probably
enough, isn't it? Take your brush away. See what you think. Quite like that. I think that s okay. That right to the
that front here. Make sure you call it all in. Okay. Again, once that's
dried a little bit, we're going to flick
out some of that hair. We need to dry a little bit. F just about there. Again, very gently,
don't do too. I'm going to go
right on the edge, I don't want to pull too much
color if I just go right to starting right at the
very tip or the edges, just drag a little
bit of color out. Keep your eye that
reference photos, see where that hair goes. It comes out a little bit
more here, doesn't it? Pull a little bit too much away, so I just feel that
back in again. Quitch my finger. Let's
soften that little bit. Yeah, I think that looks. Okay. I name CP. In Lovely. Okay. O with a little nose. So really easy. We're just gain a
bit like the eye. We're just going to
let's just paint it in. We're just going to paint
a little bit of go. Just paint that nose
in. Now think fancy. Nice and easy. Make sure you get
that shape right. Again, keep eye that
reference photo and make sure it's the right shape. Yeah, that looks good.
And then with your CPA. Make sure here, it's probably. If you've painted it on,
it shouldn't be too wet. That's the joy of just painting. Is going to put. You can again draw up If
you've got a i pad, you got your reference
photo on a device. Scroll in and have
a good look at that nose. Proper water. A We're going to come in with that little nostril
comes up, doesn't it? Just do cover little
sort of spots. So they don't don't have to
get it exactly the same. The nostril again. So pick
up some of that, Joseph. Put the brush away. As I
say, see what you think. A be up here. As we work our way
through these paintings, we all start to differ
a little bit and what you need to play with. Maybe not necessarily
what I need to play with. In regards to the Yeah, that looks all right, actually. I say we need to take color out on that sort of
finishing off bits. It looks a little bit
stark at the moment, but don't worry too much
because we will need to do a little bit of
fiddling. Okay, right. We need to allow those
little bits to dry, and then we can do the last
little tinkering bits rely. We're almost done. Yeah.
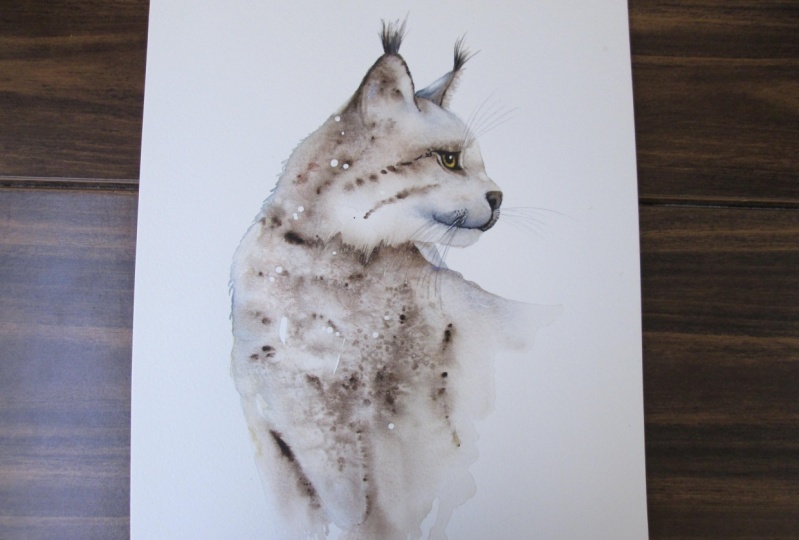
10. Finishing Off: Okay. Let's finish this
beautiful links off. So to start with, just make sure everything
is completely dry. I'm going to bruh off that's
thought from earlier. I'm also going to brush
off the masking fluid. So just gently rub it
out if you've got it. And also do the whiskers.
I love rubbing those out. I terribly satisfying, isn't it? Here. M. Fabulous. Let's see what we have
now. Look at that. Okay. And next, I'm going to so some of those pencil
marks out as well. So that's always a
nice thing to do. Hopefully, you've done
yours light enough. Mine's gonna be
ale hea, I think. Sole heavier handy so you
can see what I was doing. Gonna leave that
tiny one up there just to remind me to do that. I don't think we're
gonna forget. Okay. Fabulous. I think that's the
majority of them out. So I'm going to try
and be methodical, and let's actually start with doing that tuft
at the very top that we didn't do with the
ears when we did the ears. So I'm going to use
my little brush. I go to pick up the Joseph
gray or the darker gray. A little bit of work. And we're just going to see
drip right from the base, and then up at sweeps up. Look at that
reference photo, see the angle they're going at. If you're unsure,
pencil them in. There's no harm in doing that, if you're a little unsure. I go to I'm going to make
that back one a little more. Yes, it's a bit better.
A a little clumpy. Lovely. I'm going to leave it
at that for the time being. I it's easy to do too much. Now, I'm going to go carefully round and just
take some color out. I think is a next um job for us. I do need to remember to
do this little patch here. I mean, I'm just going to
pencil that back in actually I've rubbed that out. See
what I'm going to do. I'm gonna forget.
So I'm gonna again, start at the very top, and I'm going to just take there's a lovely line
coming off here. So I've just wet my
brush, flattened it down. I got a nice chidled, mark. Look at that
reference pot define where it's at. Where it is. Gently take some
of that color out. Again you use the kitchen roll. There's a nice Just where the ear does
that little crease. I can take a little bit. I
don't want to do it all. If you use your
finger to squid it, sometimes it doesn't
take as much paint out, it's little softer. I I get the right angle at this. I comes down a bit. Yeah, that's nice.
Again, there's another one coming here. We'll put a little bit
of darker paint in here, but let's just take
that little bit of color out to start with. And the joy with some of
these Daniel Smith paints is they lift out ever so easily. And because we've only
done we saw it one layer, that helps as well,
'cause we haven't got lots of paint to
have to go through. Also, where I've been
a little raggedy, I'm just of sneaking up
the top of the head. I can say, a lot of
these finishing off bits won't all necessarily apply to you because you may have may not have
the same issues as me. So bear that in mind. Don't just blindly follow me. If you like what you've
got at a particular say, if I take the color
out of here and you feel like you've got
enough light there, then don't follow me. Take a little light out
the back of that ear. It's going to work
all the way around. Now, there's a nice,
a little patch. Probably the bully
eyebrow is comes down. Again, a really nice little. We will put. There's going to
be a little bit of detail. We're going to
actually paint in, but I want to take the
color out first, so let's get rid of that color. A against the eye. B careful Be careful you don't go too much into this lovely
makeup. You don't want to. You probably got a
nice shape there. Equally, if it isn't
quite the right shape, you can sculpt some of this away if you want
to at this stage. I'm happy with M and how Mine looks at, so I'm not going to A that out ale bit of
paper towel. Looking nice. That's I've got a nice
bit of light there. I don't think I want to take
too much more off the top. The nose looks nice. I just take just a fraction.
Just damp to my brush. I'm just gonna let it flat. So it's very easy to
lift too much color out. I'm just going to dad
that with my finger. Probably just enough, a
little bit of relief. Again, the nose could
do with just a tiny, little bit of light take
it out at that top. All the little tiny things
that make all the difference. Yeah, that's nice. And
again, around the nose. There's a nice nice little
of light there as well. And again, you could
sort of sculpt if the nose got a little mit messy. Might actually
okay, but if it has got a little chunky
or misshaped, you can sort of shape this
at that stage as well. We will put those whisker
marks in in a minute, so I'm not going to
alter that too much. All right. The chi needs a
little bit of work there, but I'm going to try to try and stay on target
and just go around, taking color out at the moment. Otherwise, I'll get
myself sidetracked. Take a little bit at the
top here if you want. Again, bear in mind. Look at your own
piece. Be a judge. Working my way around. I need to put some
little line in here. If you squint your eye, there's a you can see that
rough where we added. That's second layer
down on the neck. I'm just going to lift a little
bit of the tines of line. Bit. Just a hint. I'm sure that's actually
come out very well. I haven't got a lot of paint here actually to
take color out of. But hopefully you
can see what I mean. If you look at that
reference photos a nice little line
of white there. Don't take it all out. Just take a little bit out, just
for the eye to see. I'm going to take a
tiny bit out here. I always like taking
a little bit out of sort of the side of the body or a little
bit of the body, just to break that line up. I like the flicks
here, so I don't want to really take
too much color there. I just take ale bit up here. Squeeze that one. I don't
want to take too much out. Yeah. I think that's
all right, actually. Stepping away, having a look, Ithing else that I'd
like to take out. By. Again, you can take if you've lost some of
this white ruff. And if you've had a
look at that video, you'll see this particular link, maybe it's a younger lynx or
a female, but they do have. This is a most amazing sort
of ruffed around their neck. And I guess this is ever say like a youngster
or a female. Maybe it's not as pronounced, but trying to if I can get a
little bit of flick of hair. Again, just a break. Break that up and give it a little
bit of interest. Just enough. Yep. That's enough. Okay, and again, a really nice
chunk underneath the eye. Should have done
that while I was doing that bit, shouldn't I? I'm not very good at
being methodical. I say, we will do some
little bit of painting. I just want to take that
out there at the moment. Yeah, that's looking nice. Okay, I think, for me,
that's enough light. You can, some of the
other practice pieces I took little bits out here, but I like how the
salt has worked here. I don't really want to
muddle that too much. So, I will think that's enough. Let's put that down, and let's
work our way round again. Oh, I tell you what I will
what's gonna do again? Yours might be absolutely fine. This got a little heavy. Probably started
painting this Earhair, a little bit too soon,
too much has come out. That. You know, when we wet
that down and pulled out, I probably probably
started a bit too soon. But I can soften
it down like that. That's fine. Alright,
let's get rid of that. Well, damp piece of paper towel. Just gonna get rid
of a fresher piece. Okay. There, I don't
need that pencil. So, the little bit of painting we're going to do. Pick up. West I'm going to use my
little brush as well. So I've got the great titanium. I'm going to use a
little bit of goth, and we're just going to
paint a little bit in. Now round round the eye here. J to kind of really give that marking round the
eye a bit of definition. So just literally painting. A bizarre concept for me. Okay. And then I will
soften just that one edge, that back switch brushes. It's a little bit too small. You can see it comes up
into a V there, doesn't it? That's roughly. Blend that down. See how that's
given a little bit of definition, a
little sharp edge. Again, I'm going to do
exactly the same underneath. Check in there's
nothing wet there. Se. That's just a really
nice little thing to put in. I like that that
bit of sharpness, a bit of contrast
between all that sort of wonderful softness we've
managed to achieve. Yeah, I think that's
enough. Right. Let's just put that down. I need to just define that chin a little bit and also
that little white area. So I'm just going to do
the chin to start with. Sort of wet down that chin area. Be careful, you can quickly
make this a bit cartoony. Just that that line
is quite important. Obviously, too much.
You've got a big grin. If it comes down,
he's going to look a bit cross or upset, so it's those little lines mouth lines really do
give give the character. So be aware of that. I just getting to
sweep that round. It comes round back, doesn't it? But the tiniest of tiniest
a little bit of gray there. To say that these little
finishing off bits are very small, minute little things that they just just pull
everything together. Say lift your brush away,
see what you think. Now I'm going to really need this to dry before
I tackle that, or is it all going to blend
a little bit too much? Now, the stripe issue, I'm happy with my stripe. I don't really want to put
any more in. But you can. So let me try and demonstrate. Let's pick up. That's how
she put a little bit softer, so we've got a great
tenia and the goth. So I'm happy with mine. I wouldn't necessarily
add them at this, for me because I
feel I have enough, but I kind of want to
be able to show you how you would add a few
more if you need to. Okay. I'll pick up the Joseph, get a little bit more strength. Just a tap. And then soften
some of those edges down. Just little tinkers. Tie it a little bit, soften it, squeeze it with your finger, take your brush
away, see we again. I see seem to be
saying that a lot. See you think. But, yeah, say, be a judge of
your own piece. What a nice one
there, isn't there? We can a soft one there. Then you just pulling it out. Be careful. I can see. I'm
starting to get a line. If I look away, there's a line going down here at the moment, so let's just cut
across that line. Obviously, we've made quite
a big effort to try it and let that run down the chest. So I don't want to lose that
sort of sense of movement. And they do have, I
hope you've managed to watch that little video. They are so they're so
agile, aren't they? They're beautiful and
their movements so lovely. So all this flow that we've managed to achieve
just gives that sort of impression of
those live creatures. They are quite
hypnotic to watch. Another one there,
say, it's tiny. Nothing I've put the minutest
bit of paint on my brush. And again, if I lift it
away, I've just enough. Okay, I think I'm gonna
leave it at that. But that's the general
which is you're just putting tiny bits down, squidging with your finger, softening it, softening
it with a brush. Let's see, a big splge there. Right. There is a nice
stripe that runs here. I think I liked that. On some of my practice pieces. We're going to try
and pop that in, so I've wet the line on the leg that this is
a chest running down, and I've just wet
underneath that line. Again, I'm going to use. W, I'm going to put that
down. I'm too strong. I'm going to stick
with the lighter gray and a little bit of the goth. Okay, I'm just going to run that along that straight edge. Obviously, it's not
going to run into the chest because we
haven't got the chest wet. So Runs out, doesn't it? She'd put a tiny bit of that
Joseph gray there. Clean my bush. She sweep
some of this down. What I don't want to do is to sort of interrupt
any of this. These marks are very really those really
spontaneous sort of marks, so I'm not careful, I can sort of ruin that. I have to try and follow roughly where I went down before and then
just watch that. A bit of a squidg. But if you take your brush away, that's just defined
that back leg. Yeah, I think it's
coming along nicely. This was quite a
important stripe. Again, you could add a little
bit more strength there. Similar to that. You
run. Let's do that. Let's demonstrate it. It's not helpful me telling
you, and not showing you. So again, I've wet
that line down there. Let's have a little bit of spa. Again, and just pop a little bit of a little bit of strength. Again, I don't want too much. I want to keep all wonderfully soft and sort of
flowing a movement. O. Let's quit it out. Yeah, I think it's
definitely enough. I say I had quite a
nice stripe already. Okay. Again, you can strengthen
a little bit of the back. I like what I've
got there. I don't really want to interrupt
that too much. I've got a nice line
down there. Be careful. If you do all these lines, it becomes a segmented. So be cautious of that. It's going to soften that a bit. It's getting a little for me because I didn't
necessarily need that. Okey doke. All right, that
should have dried now. If it's not, then just
just hold on a minute. But for me, this is this little bit of white
coat underneath the chin. I'm just going to
It wet that down. Make sure this is a
nice little sweep here, so I've got a little raggedy. It's got a little bit straight. So I'm just going to take
a little bit of color out. So I'll just try to
get that nice curve. Let's say it's all
about it just gives that impression of that
sort of say that liveness. Okay, I got to pop, a tiny little bit of gray. We're using my little brush from make sure I don't put
too much color in. 'cause obviously that's white, and we're working on a white
piece of paper as well, so we don't want
to add too much. Let's down. We get any
blue there, did I? Be brush. No to I don't want to add too
much color. Again, you. There'll be more
color underneath the chin. There we'll
be further down. So just I've added to
too much water now. Luck some of that up. Just want to add tiny bit of blue there. Just want that line to be seen. Once I've have that
pencil mark out, there's nothing for
the eye to find. So that's enough. I think. Now, I'm just having a little
look at my notes of else, I have missed out the whiskers. I'm going to bring my
pencil back in again. Now, obviously, the
whiskers are white, and we've got a
white background. So I'm going to pencil these in. You can, if you're feeling
particularly brave, you can use your little brush and pop a little
bit of paint on. I'm going to make my life a bit easier.
I'm gonna use a pencil. Again, I can do this,
and if they don't look right right, I
can just rub them out. But try and follow the line, so that you can
obviously the line here, so we're gonna follow
that. Follow that one. Follow that one. Go some
of them a little lighter. Make some of those a little
heavier. Beauty of a pencil. I'm going to rub
some of those out. Again, they don't
have to all join up. Again. Be careful of that
little wet patch there, but there's some lovely wiskers coming up here,
isn't there as well? I get the right
swing. I get my angle right so it's getting the angle of your wrist right as well. Is swing round here, don't they? Do you see either
turning your paper or turning your wrist. It might be easier
to turn your paper to want to move by board. Yeah. That's enough.
The other thing we haven't done is some
of those whisker marks. We do that pencil for a
minute. Let's pick up. Let's have a little bit of
Joseph. Just a tiny bit. I'm just going to
put a little bit of color along the bristle line. And again, make sure you
get the right angle. They are almost horizontal, actually. They just tap. They haven't got much
paint there at all. Might be enough. I'm always a little bit cautious with these. Again, that's me, so to
sometimes paint what you like, if you want to see that a
little more exaggerated, Obviously put a little
bit more paintment. Okey doke. At this is
coming on quite well. I don't Having a
look, stepping away. I think I'm nearly
there, actually. Again, it's as I always say, it's worth stepping away. If you've continuously painted this for the whole you know, if you haven't If you
haven't stopped at all, and you've just painted the
whole link without any break. It's quite a long
class, and you've probably been looking at
it for quite a long time, so it's worth stepping
away, looking at it. But with a fresh pair of eyes, I'm sounding like I'm
repeating myself so much. But it is really important. Or take a photo with your phone and look
at your phone photo. That can offer you
be sometimes be a giveaway of a little
bit you want to alter. But I will always
say, just leave it. So I'm going to do exactly that. Now, for any reason,
if I come back to this the next day
and see something I, you know, really needed
altering or changing, I will do another little lesson. But, um, I think I'm
pretty pleased aly. I think she's come
together quite well. So, I say, I hope you
enjoyed this class, and please I always
say this again, but please do share your pieces on the projects
and resources pages. It is fantastic to see
all these masterpieces. They really are brilliant
pieces that come in. And if you're stuck or you're
unsure about something, You can contact me,
where you can leave a little message in
the discussions pages, and yeah, I try I endeavor to get back to people
within a couple of days, so, yeah, don't hesitate if
you're stuck on something. Other than that, I hope you enjoyed painting this
lovely link and or, if you haven't managed to
look at that little video, well worth having having
it's only 8 minutes long, I think, but it's lovely. Yes, it's very heartwarming. Anyway, thank you
for joining me.
11. Final Thoughts: I hope you enjoyed this class. And isn't it heartwarming, knowing that we can bring
species back from the brink of extinction and put them
off the endangered list? I hope you found painting
the body a useful technique. I found it was a great way to
create movement and light, but you do have to work quite
briskly. How was the eye? Remember to take your time
and don't rush at this stage. The smallest of adjustments can change things dramatically. As I always say, it's worth stepping away and
coming back and looking at your painting
with a fresh pair of eyes and tweak, if necessary. So we look forward to seeing
you in the next class. Oh.
 Jane Davies, Professional Artist and Teacher