Transcripts
1. Introduction: Hi. In this lesson, I'm going to talk about
masking fluid, what it is, how we can use it, what tools
are best for applying it, and the techniques that can help you create different effects. I hope you find this lesson helpful and maybe even pick up some inspiration ideas to try in your own paintings.
Let's get started.
2. What is Masking Fluid: Masking fluid, also
called liquid frisket, frisket or drawing gum is a liquid latex base product used to protect certain areas of your watercolor paper that
you don't want to paint over. It's most often used to
preserve small details, highlights or intricate
shapes that would be difficult or too time
consuming to paint around. Once the masking fluid dries, it forms a rubber like layer. That resists watercolor. After you've finished painting and everything is
completely dry, you can peel off the
masking fluid to reveal the untouched
area underneath. This area can stay white or
you can paint over it later. It's entirely up to you. Masking fluid can also be applied over a dry
layer of paint. In that case, when you
remove the masking fluid, the previously painted color underneath will be preserved. There are generally three
types of masking fluid, colorless masking fluid,
and this one dries clear or white on the paper,
tinted masking fluid. It has a light color, usually yellow,
light blue or gray. That makes it easier
to see on the paper. This is useful if you have
trouble keeping edges neat or simply want to better see where you've applied
the masking fluid. The gray tinted version is the darkest one and it's
especially visible. Don't worry, the color of the masking fluid will
not stain your paper. Once you remove
the masking fluid, the paper underneath
will remain white. And there is also the third
kind of masking fluid, permanent masking fluid, and
this one is not removable. It can be used to permanently protect certain areas
of the paper and can even be mixed
with watercolor to isolate color from later layers. However, once applied,
it cannot be lifted. So use it with caution
or don't use it at all. I have never used this
type of masking fluid. Personally, I use
the second one, regular removable masking fluid, and my favorite one is
from Windsor Newton, which has a slight yellow tint.
3. Tools For Applying Masking Fluid: Let's now take a look at the tools I'll be
using in this lesson and that you can also use to apply masking fluid
in your own work. We have many possibilities. For this lesson, I'll be using my favorite masking fluid from Windsor Newton,
yellow tinted, I will also demonstrate
Canelias masking fluid which comes in a marker
with a special applicator. Another good option is the drawing gum marker
from the Pibo brand. We will take a look at that too. Other things you will need are a container
with clean water, a cup from an old masking
fluid or anything else that you can use to pour some masking fluid into
and a bar of soap. This is a must have, and I
will explain why in a moment. Then we have also
application tools. You can apply masking fluid with a wide range of tools such
as cheap synthetic brushes, a water brush filled with
soapy water, a deep pen, silicon shaper brush, embosing tools a toothbrush, a ruling pen, a toothpick, pin, paper clip or needle. There are a lot of different
tools that you can use. You'll also need a
regular eraser or a rubber masking pickup tool to remove masking fluid on dry, masking tape, cling
film, and a ruler. Now let's go one by one and explore what we can create
using masking fluid.
4. Brush, Full Shape, Precision: We'll start with the
simplest method using a regular brush to cover a
full shape with precision. Time you use masking fluid, steer it gently. Don't shake it. This helps mix in any pigment
that may have settled at the bottom if you're using
a tinted masking fluid. Steering wakes the fluid up
and ensures even application. Avoid leaving the bottle
open as exposure to air causes the fluid to dry
out and form clumps inside. I usually pour a small amount
into a separate container, and I usually use an old cup from an old bottle
of masking fluid, and then I quickly close the main bottle to
protect it from oxygen. Some artists suggest storing the battle upside
down as it seems to keep air out more effectively and helps
preserve the fluid longer. I always forget to do that
and I just keep mine upright. But it's a helpful
tip if you remember. Let's start by drawing
a quick shape. Imagine you're going to
paint something where you want to protect the shape and
begin with the background. Instead of carefully
painting around it, you can cover the shape with masking fluid and paint
freely over the rest. To do this, use an old or
inexpensive synthetic brush. Never use your good brushes. No matter how careful you
are masking fluid will eventually damage any brush
you use for application. That set, there is
a trick that will expand the life of your
brushes significantly. Before dipping your brush
into masking fluid, first, wet it with clean
water and then rub the bristles several
times on a bar of soap until they are well coated. The soap creates a protective
film over the bristles, helping to prevent
them from sticking together when the
masking fluid dries. Since masking fluid dries quickly and can glue the
bristles permanently, this step is essential. The bristles stick together, it's nearly impossible
to separate them again without
damaging the brush. Always use cheap
brushes and always use soap before
applying masking fluid. Now that the brush
is coated with soap, we can dip it into the masking fluid and begin
applying it to the paper. As you apply, try to be
very careful and precise. The shapes you create with masking fluid will be
very prominent later, and the edges will
be clearly visible. The neater and smoother
your application, the better the final
result will look. Follow your pencil lines
slowly and carefully, filling the entire shape. Be generous with the
amount of masking fluid. The layer should be thick
enough to fully cover the area. Make sure that there are no
bubbles or tiny pinholes, as watercolor could seep into those spots and stain
the paper underneath. After about a minute or two, rinse your brush in clean water, blood it on a paper towel, and repeat the soap process. Deepen water, rub
on a bar of soap, and continue applying
the masking fluid. It's important to clean your brush frequently
while working. Don't let masking fluid sit
on the bristles too long. It can start drying and
may ruin your brush. Keep working carefully and
filling the entire shape. Once you're finished, wash
your brush thoroughly in water and blood it
dry on a paper towel. If you followed the soap
and cleaning method, your brush should remain
soft and undamaged. If not, well, one bad use
is enough to ruin a brush. I have several old brushes that I use just once for
applying masking fluid, and I didn't use soap, so here is the result. But as you can see,
a few simple steps can protect your brushes easily. Once applied, allow the masking
fluid to dry completely, depending on how much you used
and the size of the area. Drying time may vary from a few minutes to
even several hours. In my case, the masking fluid
dried in about 20 minutes. Before you begin painting, gently touch the
masking fluid with your finger to make sure
it's completely dry. If it's still tacky or soft, you will feel a
slightly tender surface or it may stick to your fingers. When masking fluid is dry, will also notice a
slight color change. It usually becomes a bit darker than when it was
freshly applied. Now that everything is dry, you can start painting
around the masked shape. Since the shape is
well protected, you don't need to be careful
about painting around it. You can even paint directly over the masked area and
nothing will happen. The masking fluid will
resist the paint completely. You paint, you will notice that some pigment may sit on
top of the masking fluid. It's a good idea to remove that excess paint
while it's still wet. It's not strictly necessary, but it helps avoid unwanted
smudges. Here is why. If the masking dries on top of the masking fluid and
you later rub it off, it might smudge into the clean white area you
are trying to protect. Once your painting is dry, it's time to remove
the masking fluid. I use a rubber pickup tool
which works wonderfully. You can also use your fingers, the sticky side of masking tape, a bowl made of dried
masking fluid scraps. Whatever tool you use, make sure the background
is completely dry before removing
the masking fluid. Otherwise, you risk damaging the surface or
smearing the paint. For me, the rubber
masking pickup tool is the easiest and
cleanest method. You can see, there
is a small spot of paint on one of the leaves. I probably wasn't careful
enough or perhaps there was a tiny pinhole in the masking fluid through
which the paint seeped. When this happens, I usually
use a scrubber brush. Dip the brush in clean water, blot of the excess
water on a paper towel, and gently wrap the stained
spot to activate the paint. Then lift it with a
clean paper towel. I usually do this before I start painting the main shape
as a part of the cleanup. I also use the scrubber
brush to smooth out edges if they are too rough or not as clean as
I want them to be. For that, use a damp
scrubber brush gently rub along the rough edge and left the paint
with a paper towel. This process will
slightly blur the edges, but that's totally fine. Once you paint over the shape, the new edges will look
clean and intentional. Just remember the quality of
the masked edges entirely depends on how careful you were during the
application stage. Precision early on
makes a big difference.
5. Waterbrush, Full Shape, Careless: Let's do some masking technique, covering a full shape, but this time we will use a water brush filled
with soapy water, and we will apply it less carefully to show why
precision matters. Because the brush is already
filled with soapy water, you don't need to
use a bar of soap, although you still can
for extra protection. Before dipping the brush
into the masking fluid, squeeze the brush slightly so the soapy water
coats the bristles. This will create the same
protective layer that we applied manually with
the bar of soap earlier. The result of using
a water brush versus a regular
brush is the same. The only difference is
how we apply the soap. With a regular brush, we coat it using
the bar of soap. With a water brush, the soap is inside
the brush itself. This time, I'm applying the masking fluid
without much care, going over the pencil lines. I want to demonstrate
that this stage is crucial for creating
clean, beautiful shapes. If you're not careful enough, it will be difficult to
fix the edges later. Once you've applied the masking, squeeze the water brush
again to rinse the bristles, et everything dry completely, paint the background as before. When dry, remove
the masking fluid. Now take a look. You can clearly see every little mistake I made. I went over the pencil lines and now the shape looks messy. It will be hard to
fix because even if I try to repaint the
background around the shape, it's unlikely I will match
the color perfectly. It will be obvious that I
tried to patch something. Again, be extra mindful about clean accurate edges when
applying masking fluid.
6. Brush, Only Edges: Next, let's try another
method using a brush, but this time we will only
mask the edges of a shape. It's not always necessary to cover the entire shape
with masking fluid. If the shape is a bit larger, I often just mask
around the edges. This saves time and fluid and still protects the shape
from paint bleeding into it. Of course, with this method, you have to be a little
more careful not to let paint drip into
the unprotected middle, but it's not too difficult
with some control. Use this edge only technique mainly for medium sized shapes. If the shape is very small, I cover the whole thing, and if the shape is very large, I use another technique which I will show you at
the end of this lesson. Now that the edges
are protected and the masking fluid
is completely dry, we can go ahead and
paint the background. Once the background is dry, you can remove the masking
fluid and either paint the main shape or leave it white depending on your
original intention.
7. Masking Marker: Let's now explore a few
different tools you can use to apply masking fluid
creatively and precisely. Here we have a masking
marker from the PBO brand. It comes with a removable
tip and to use it, you simply press
the tip slightly and hold the marker
perpendicular to the paper. These markers are available
in different tip sizes. I think the one I
have is a small one. The masking fluid only flows out where the tip
touches the paper, so it's easy to create very
precise lines and dots. It works more like
a pen and isn't ideal for filling large
areas or entire shapes. Because the layer is very
thin, it dries quickly, often within a few seconds and you can paint over
it almost immediately. After removing the masking, we get a nice clean result, a great option for fine details
or even hand lettering. This tool opens up many creative possibilities
in your paintings.
8. Embossing Tools, Lines and Dots: Step, we have embosing
tools which are commonly used in nail
art and papercraft. They have small metal balls at the tip and come
in various sizes. Because they are made of metal, they are very easy to clean, even if masking
fluid dries on them. To use them, dip the tip into masking fluid and apply
directly to the paper. You can use them
to create lines, dots or other
decorative elements. In this example, the
line is wider at the beginning and becomes
thinner towards the end, a natural effect
of the bowl tip. This is perfect for things like flower stamens or shooting
stars in a night sky. Let's look at the result. Clean, elegant lines and dots.
9. Embossing Tools, Stamens: Let me show you a
quick demo using an embosing tool to
draw flower statements. I start by dipping the tool in masking fluid and I
begin with the anther, the wider top part, then draw the filament downward. Since the embosing
tool naturally creates a wider
mark at the start, it's ideal for this
kind of shape. I'm just drawing
random statements, pretending this is the
center of a flower. Once the masking
fluid is applied, I paint over it, let it dry, and then
remove the masking fluid. Can you imagine how
tricky it would be to paint around
shapes this small? That's exactly why masking
fluid is such a helpful tool. Now that the stamens are
masked and revealed in white, you can paint them with
your desired colors.
10. Embossing Tools, Shapes: Can also use embosing tools to protect entire small shapes. However, because the
tools are relatively small and only hold a bit
of masking fluid at a time, they are not ideal
for larger areas. It would simply take too long. But for small or
detailed shapes, embosing tools work wonderfully. They come in different sizes, so you can use a larger tool for slightly bigger
shapes and switch to a smaller one for tight
corners or delicate tips. In this example, I'm
applying masking fluid to a shape using both a
smaller tool for the tip, a larger tool to fill the rest. Once the masking fluid is dry, we can paint over
the area and let it dry again before
removing the mask. Once everything is dry, we can remove the masking
fluid and see the result. I can already spot some jagged
edges, so in this case, I would likely reach for my
scrubber brush to gently smooth them out. H
11. Masking Fluid with an Aplicator: Next let's take a look at the battle of masking
fluid bicenelia. It comes with a
special applicator tip similar to a very thin needle. In theory, this should allow us to create
fine clean lines. However, in practice,
the fluid is quite thin, and as soon as I turned
the battle upside down, a blob of fluid fell
onto the paper. Even without
squeezing the battle, the masking fluid flows
down irregularly, making it hard to control. The shapes I get are
random and unpredictable. There is a needle
attached under the cup, which you need to insert into the applicator when closing the battle to prevent clogging. Now that the masking
fluid is dry, I will apply some paint, maybe using a bit of
negative painting and then let it dry. As you've probably
noticed by now, this tool is quite difficult to work with for me, of course. It's unpredictable and I wouldn't use it for
regular paintings. Maybe it could be useful
for some abstract effects, but if you need
fine clean lines, there are better tools, and I will show you
one in just a moment. Everything is dry, so let's
remove the masking fluid, and as expected, the
result isn't great.
12. Dip Pen, Lines, Veins: Here is a much better way
to create fine lines. Use a deep pen. Dip the nib into masking fluid and before
applying it to your painting, test it first on a
scrap piece of paper. Sometimes the first stroke can release too much fluid
and turn into a big blob. Make sure that the masking fluid is flowing evenly from the nib. With a deep pen, you can
draw straight lines, wavy lines, even dots depending on the nib and how
much pressure you apply. The more pressure you apply,
the thicker the line. Lighter pressure gives
you finer lines. In this example, I was aiming
for even consistent lines. You could use this
technique, for instance, to preserve light
veins in a dark leaf or for any other fine
detail in your artwork. I wasn't super precise here, but I think you will agree
that the lines created with the deep pen look much neater than those made with
the ineliar applicator.
13. Silicone Shaper Brush: Other tool you can use for
applying masking fluid is a silicon shaper
or silicon brush. This tool is very easy to clean because it
has no bristles. The tip is made
entirely of silicone. To use it, simply
dip the tip into the masking fluid and
apply it to the paper. Silicon shaper brushes come
in many sizes and shapes, making them useful for
a variety of effects. After use, just let
the masking fluid dry and peel it off.
That's all it takes. In my example, the shapes are
created were quite small, and this particular brush
was a bit too large, so the edges weren't very neat, but it's still a
useful tool to have, especially for larger
shapes and bold strokes.
14. Ruling Pen, Lines: Step is the rolling
pen a fantastic tool for creating lines,
especially straight lines. A ruling pen has an
adjustment screw at the top and two metal blades that hold liquid between them. You can use the screw to adjust the width
between the blades, narrower for fine lines, and wider for thicker lines. Once you've adjusted
to your preference, dip the rolling pen in masking fluid and
you're ready to go. Always test it on
a scrap piece of paper to make sure that the flow is smooth
and consistent. You can use a ruling pen
to create wavy lines or painted with a ruler for
clean straight edges. When using a ruler, try placing small
object like a coin or eraser under each end of the ruler to slightly
raise it off the paper. This reduces the
risk of smudging if the ruler shifts while
the masking fluid is wet. Alternatively, you
can simply lift the ruler up slightly
on one side. Now, let's apply some colors
and see how it looks.
15. Masking Fluid on Dry Paint Layer: So far, we've applied masking
fluid on white paper. But did you know that
you can also use it on a dry layer of watercolor? Here's how apply
your first layer of paint and let
it dry completely. It must be bone dry. Once it's dry, apply
masking fluid over it. Here I'm using a ruling pen, but I will also switch to a deep pen and embossing
tool to create some shapes. Let's say grass. The idea is that
the masking fluid will preserve the
color underneath. So when you apply the next wash, those areas remain the color
of the previous layer. You can repeat the
process, apply the paint, let it dry, mask areas to
prevent it, apply more paint. It's a lot like
negative painting, but instead of carefully painting around the shapes,
you're masking them out. Once everything is dry, you can remove the masking and even add more
paint if needed. One thing to remember, masking fluid can lift
some paint when applied over dry layers depending on the paint and
paper you're using. So it's a bit tricky, but
it's a great technique to know about. But
16. Toothpick: Tool you can use is a toothpick. Just dip it in masking fluid and to draw directly
on the paper. It's great for creating
sharp details like, for example, cactus spikes. Admittedly, it can
be a bit tricky to create perfectly
straight lines, but with a little bit of
patience, it's totally doable. A toothpick works similarly
to an embosing tool. The line is usually thicker at the beginning and
thinner at the end. In this demo, I've imagined a simple cactus shape and use the toothpick
to draw spikes. Let's add some color. You'll notice that I'm using the same technique I showed
earlier with the fur. I leave the edge of
the cactus unpainted, and then lift some paint around it to create
a glowing edge. Once the masking fluid is removed, you can also go in and add color to the
spikes, if you wish. And that's another
great way to use masking fluid in
your paintings. B.
17. Needle, Pin, Paper Clip: Take a look at a
few more tiny tools that can be surprisingly
effective a needle, pin, and paper clip. Dip the tip of a paper clip in masking fluid and use it
to create fine lines, dots or small shapes. You can do the same with a pin. To make it easier to hold, stick the pin into an eraser and use the
eraser as a handle. The pin can help you draw delicate lines,
swirls, or highlights. A needle works similarly
perfect for tiny details. Of course, this
technique isn't meant for masking large shapes. It's best for minute
highlights like the sparkle in an animal's
eye or tiny reflections, small tools for small jobs. Now I will feel this
rectangular shape with abstract colors, and here is the result. Subtle and effective for those
little finishing touches.
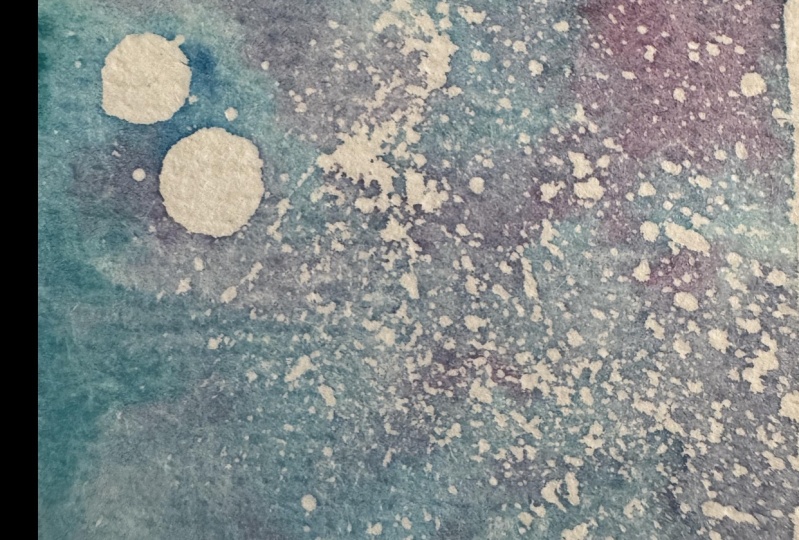
18. Splattering, Toothbrush, Brush: Let's explore how to splatter masking fluid for texture
and special effects. I'm starting with a toothbrush. Since this technique
can be messy, I protect the
surrounding area first. Dip the toothbrush
into masking fluid, then rub your thumb
across the bristles to flick the fluid onto the
paper. Test this first. You may get large blobs if there is too much masking
fluid on your brush. That happened to me here, but it's not a problem. If needed, you can always remove the unwanted blobs
after they dry. You can also use an old brush
or cheap synthetic brush, dip it in masking fluid and tap your finger
on the handle. Tap the brush on
another brush or pencil or bend the bristles back and release them
for quick flick effect. Each technique gives a
slightly different result. The toothbrush gives
you tiny grainy dots, perfect for sand like texture, and the paint brush creates larger random spots reminds me of stars in the night
sky or falling snow. Here I tried to
suggest an aurora. Once the paint is applied
and the masking removed, you can also glaze over the white spots to add
more color if needed. Here is a fan bonus. It's not about masking
fluid but masking tape. I take small pieces of tape and arrange them on the
painting to create a shape. Here I made a star. Then using a damp magic eraser, I gently lift the paint. In this example, I
used too much water, so the edges aren't very
sharp, but that's okay. It's just a playful little test. I repeated the same technique vertically to enhance
the star shape, a fun trick for your toolbox.
19. Masking Fluid on Wet Paper: Here is something unexpected using masking fluid
on wet paper. If you ask most
watercolor artists whether this is possible, many of them will
say, absolutely not. And I was one of them
for a long time. The common advice
is, don't do it. The fluid will soak into the wet paper and tear
the surface when removed. But is it true? Let's
test it ourselves. I begin by applying
a water glaze, and then I apply masking fluid directly onto the wet surface. You probably can't
see it clearly, but the masking fluid spreads in the water almost like
watercolor paint. Once it's dry, I apply a wet and wet blue
wash over the top. After drying completely, I
remove the masking fluid. Surprisingly, it
comes off cleanly, just like it would on dry paper. The effect, beautiful, soft, irregular white shapes
with fuzzy edges, they remind me of clouds. This technique is
very unpredictable, but the results can be stunning. Said, I want to warn you. This technique is
risky and may not work on all papers or with
all masking fluids. If you want to try this
in your own painting, test it first on a scrap
of your specific paper, use your usual masking fluid and be prepared
for mixed results. Success of this method seems to depend on a number of
factors, the type of paper, the brand, and thickness
of masking fluid, possibly other environmental
conditions, too. But the takeaway is it is possible to apply masking
fluid on wet paper, and sometimes the result
is really beautiful. There are some artists
who actually use this technique in
landscape paintings.
20. Leaving White Edges - NO-NO: Let's take a look
at something I've often seen in
beginner paintings. I'm sketching a quick example, a fake rose just for
the demonstration. These are the petals
and I'm applying masking fluid along the
edges of each petal. The intention here is to
protect the flower and create a kind of barrier between the flower
and the background. So far, it makes sense. The edges are protected, and now I can paint freely. I begin with the flower, then move on to the background. I don't have to worry about the petal colors bleeding
into the background or the blue green background
creeping into the petals because the masking forms a
nice clean barrier, right? Once the painting is finished, I remove the masking
fluid and alla. Beautiful painting, right? No, no, no, no, no. Unless your goal was to create
a stained glass effect, and maybe now you want to fill those white
outlines with black, or you simply like the look of white edges
around the shapes, which is totally fine
as a stylistic choice. This isn't the intended purpose
of masking petal edges. We don't mask edges to
leave a white outline. We do this so we can paint
the background freely. But then we remove the masking
and paint the full shape, including those masked edges.
21. Protecting Big Shapes: Finally, let me show you a useful technique for
protecting larger areas, a great way to save
on masking fluid. Let's say you're painting on a larger sheet and want
to preserve a big shape. Sure you could mask the
whole area with fluid, but that would take time and use a lot of product.
Here is a better way. Take a piece of cling film or plastic wrap that fits within the shape you
want to protect. This is just a demo, so my shape is small. Use masking tape to secure the plastic
wrap inside the shape. Make sure not to go over
the edges with the tape. Keep it fully
within the outline. Now, most of the shape is protected with the plastic
wrap and masking tape. Next, apply masking fluid along the edges of the shape
using an old brush. Be sure to paint over
the masking tape slightly to seal everything
and prevent leaks. Once the masking is dry, paint the background freely. When everything is dry, remove the tape and wrap, and your shape is preserved. I wasn't too careful here, so I smooth out the edges afterward with a
dump scrubber brush. Let me show you how I used
this method in a real piece, my painting a new adventure. In this painting, I needed to
protect a large butterfly. I could have masked
the whole shape, but that would have required
a lot of masking fluid. Instead, I did the following. Took a piece of
plastic wrap and cut it roughly to fit inside
the butterfly's shape. It doesn't need to be perfect, just enough to cover
the central area. Taped it down carefully
using masking tape, making sure to stay
within the pencil lines. And added an extra layer of protection using
a cutout from a sheet of copy paper
taped in the same way. Then with an old brush, I applied masking
fluid around the edges overlapping the masking tape
to fully seal the butterfly. The result, I fully protected large shape with minimal
masking fluid used.
22. Quick Summary: So to sum up, there are many ways to use
masking fluid and just as many tools
to apply it from brushes and pens to
markers or even pins. I hope this lesson gave you some new ideas and inspiration for how to incorporate masking fluid into your
watercolor paintings. Thank you very much for watching
and happy painting. Bye.
 Krzysztof Kowalski, Watercolor artist