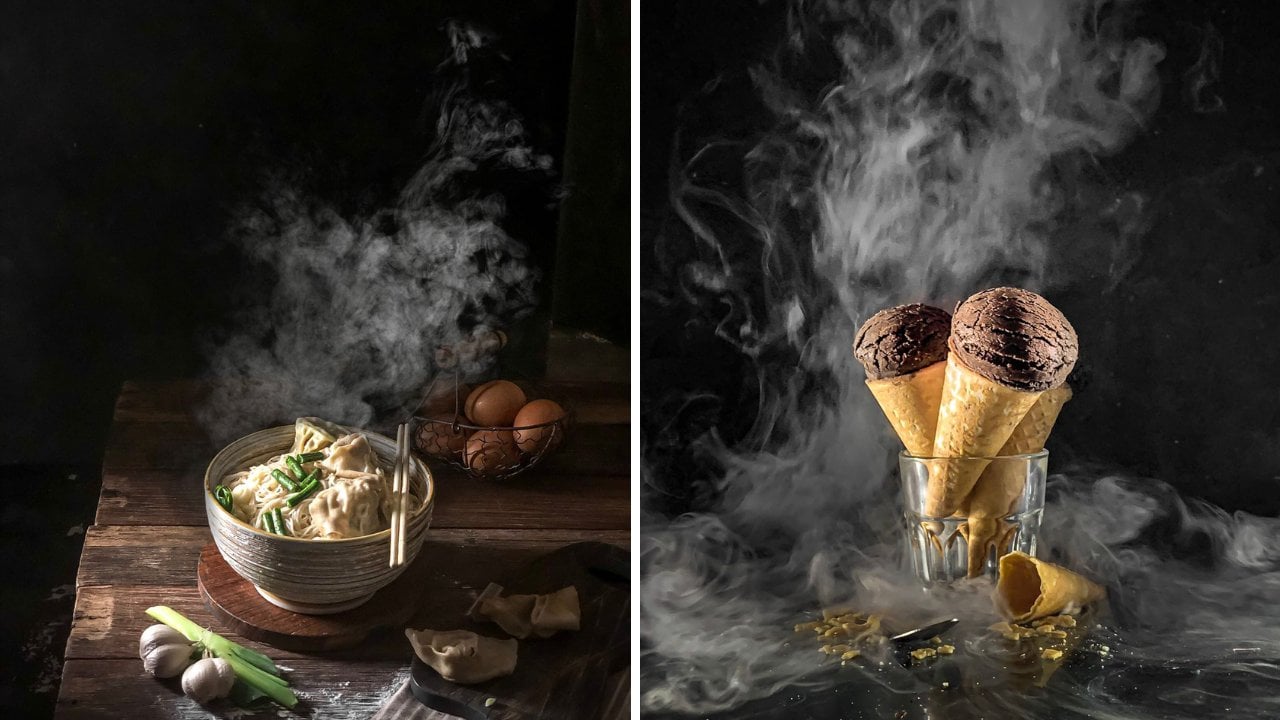
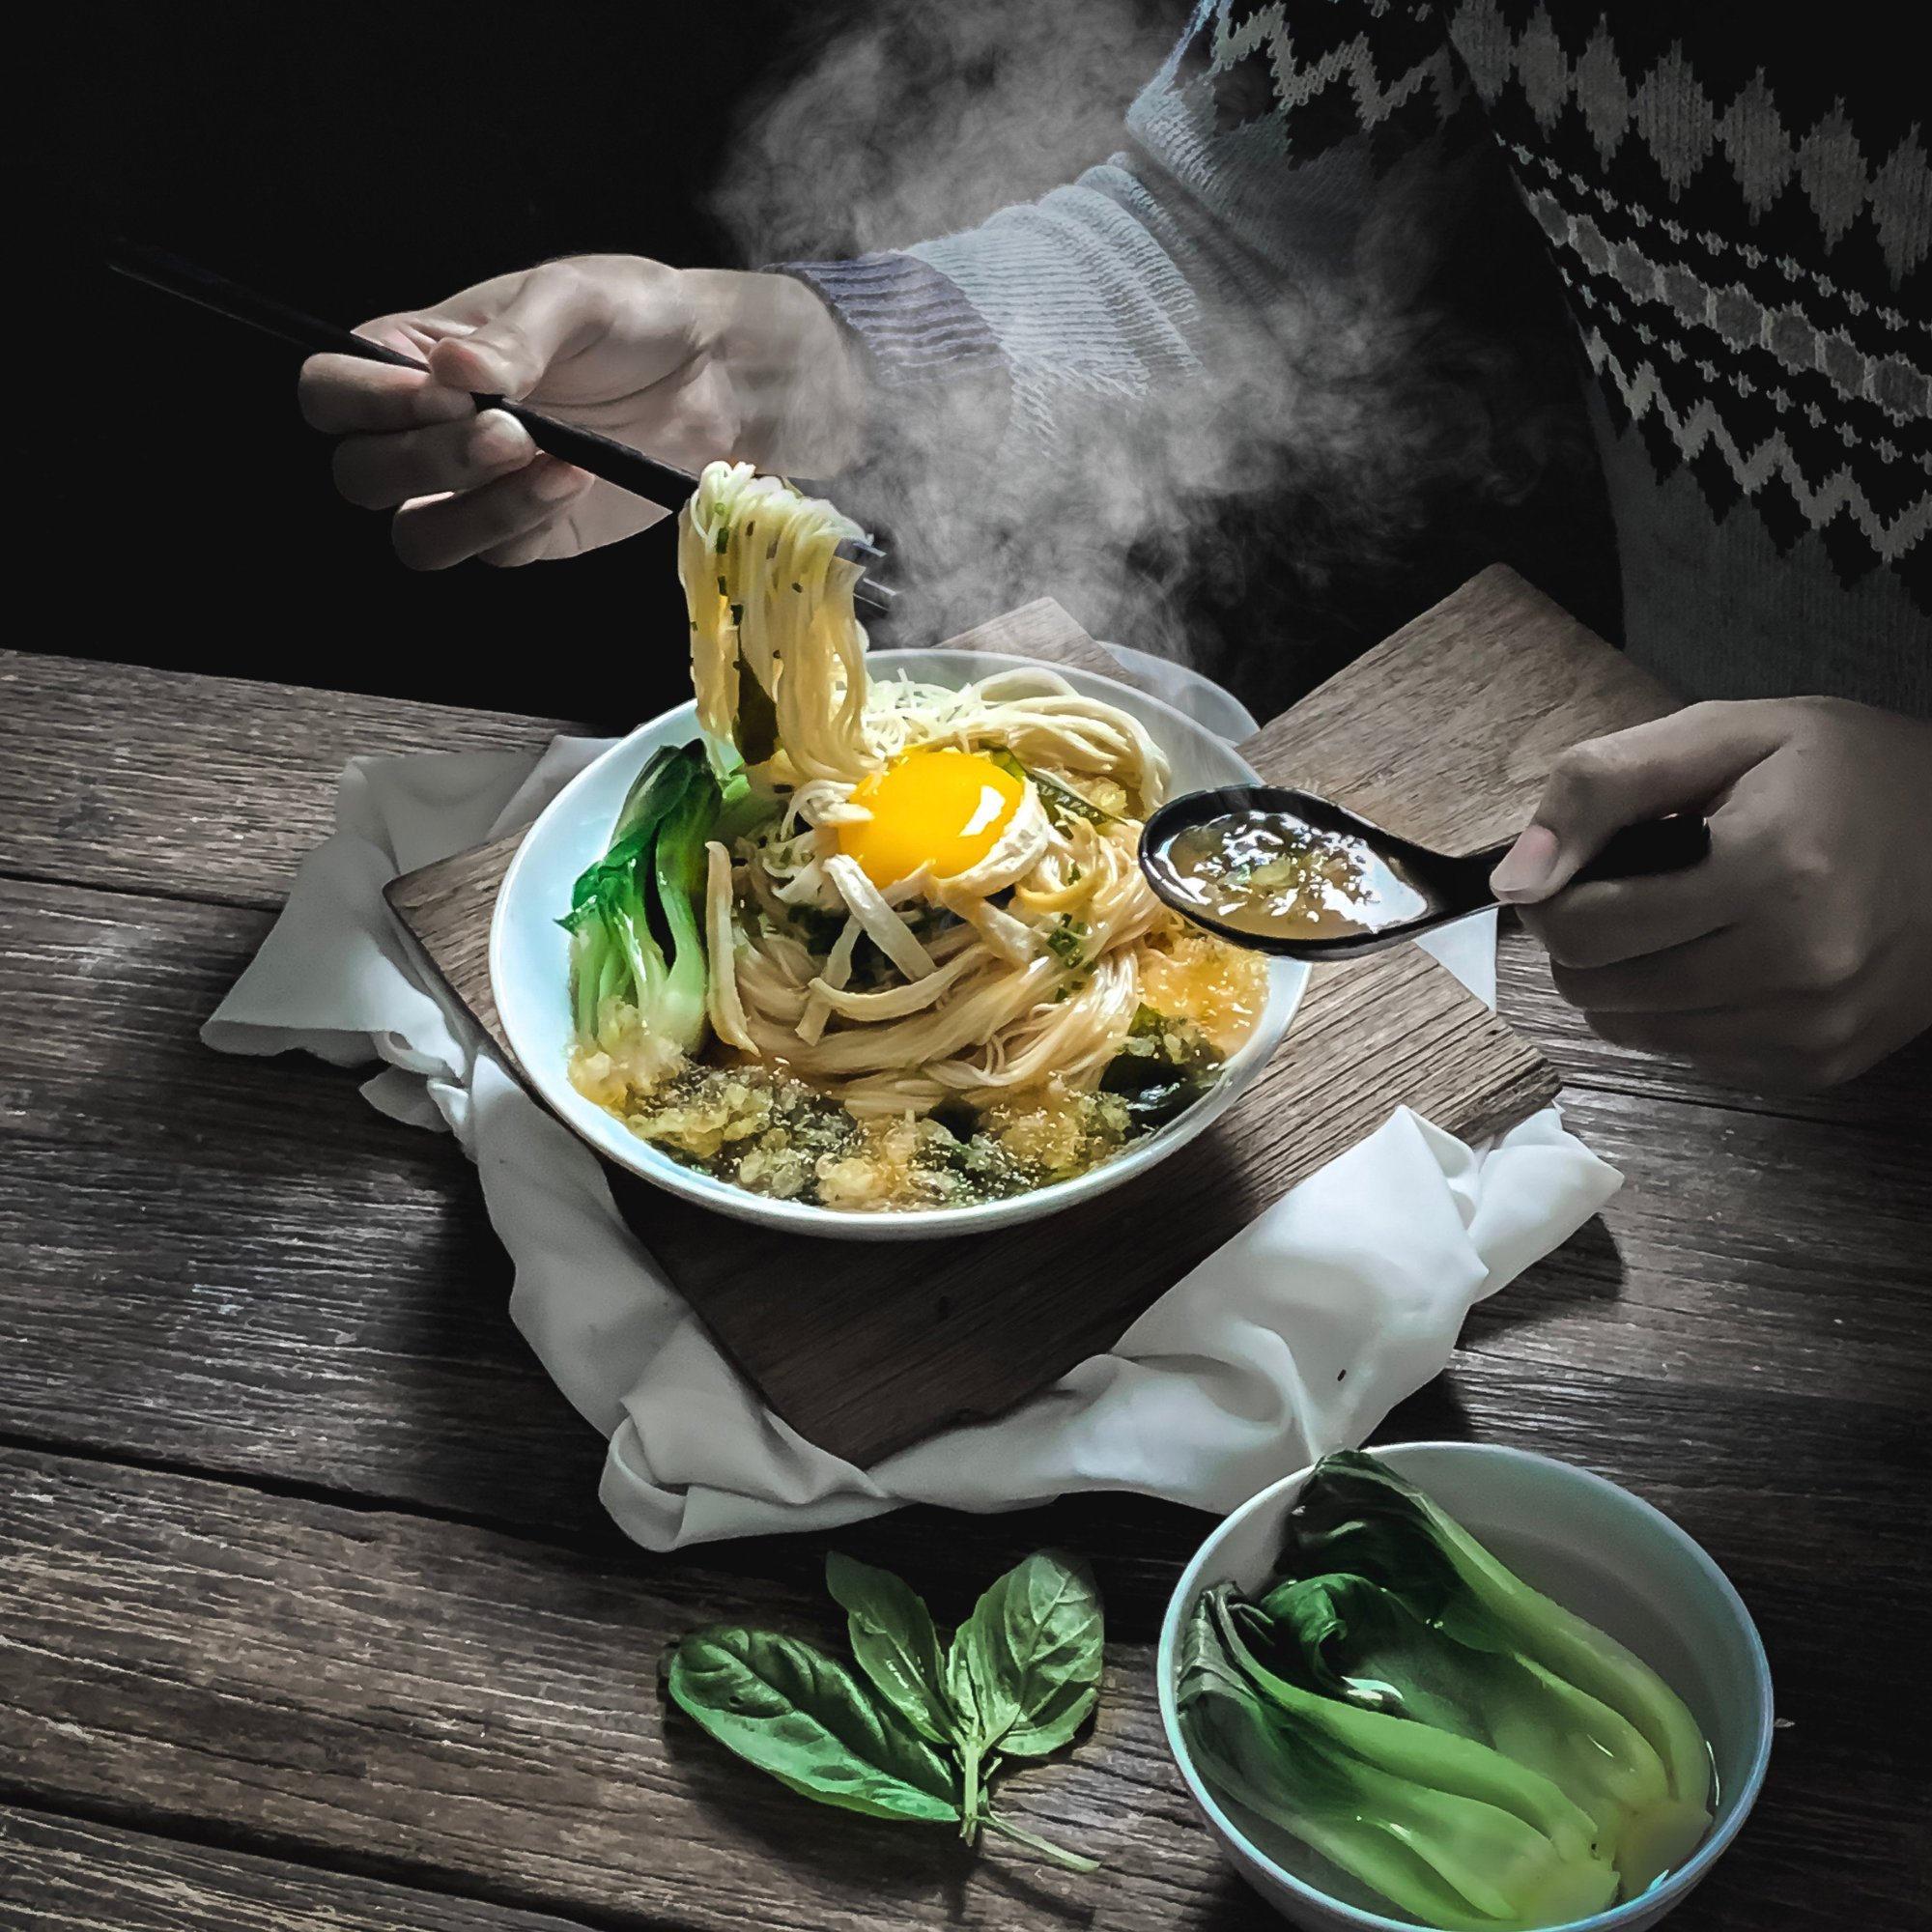
Transcripts
1. Hello!: I'll do this. Welcome to this course. Okay, I'm so excited to meet you. And in this course we will exactly explore about the Laplace or the top angle food photography. Because actually the hope and our food photography is so exciting. It's also very easy to set up how to set the lighting. So I will share all my secret about how I pick the liver and go with very easy and simple lighting but very beautiful result again. So I want to explain to you how we take it from our smart for actually the smartphone we use is only about $150 smartphones. And I'll show you that $150 smartphones can take also very beautiful picture. Okay? And also, yes, surely I will share you all my secrets about how I plan the scene and how I set up this in how I placed the light end beside. I teach you how I pick with smartphone. And then I also explained to you how I take this using my DSLR camera. Okay. With the flashlight thing and the continuous likely in so you will learn many kinds of lighting technique also that I practice all the time. Okay. So I'm saying is I did. And then let's move to the next section.
2. What Lighting do We Use?: Okay guys, In this section I will explain to you about the lighting we use when we are photographing using smartphone. Okay. Some people confuse when they want to shoot with smartphone, then what kind of lighting I have to use actually, for the graphing using the smartphone, you have two choices. The first choice is you can use the natural light from the window, but if you feel like, Okay, I don't have any windows in the room where I can set the photos. You're okay. And you didn't have to worry because you have this one. Actually, this one is not expensive at all. You only need the ordinary life walk like this. So yeah. You just put the light bulb here? Yeah. But make sure the light bulb here, you have to choose the right one. Okay. Not warm white, but the white color. Okay. So just to make sure and then I shouldn't you think of this one is very simple. There's a button here and just yeah, if you wanted to and just push the button, that's all. Okay. But this time I don't connect it with electricity, but just push this button and it works. Okay. So actually you can find this one in many marketplace in your country and you just can type convenience like thing. So that's the introduction for the library you can use if you want to shoot with Martin. Yeah, and then let's move to the next section.
3. Project 1: Choose Your Props: Okay guys, In this very amazing because I will explain to you step-by-step from 0 or how to take the flat lay photo shoot. And in this section, I will explain to you about how to apply our golden triangle in our frame. And then in this section I'll explain to you the first one about the background and props. Okay. So I'll explain to you about the PEG ground horse. Okay? So this time I used a dark background first and then the size of this background actually read about 60 centimeter here. And S9 piece and the method. Okay? But if you want to take the flat lay more comfortable. Okay. I suggest that you have two of this. But yeah, like like me, I don't have to watch the ground, but I have two similarly ground. So I put it together. Yeah. But yeah, you can see the line here. You can edit it later. But if you have the larger big gun, I suggest if you have like 120 centimeter, like like this, go there like this. The long side is 120 centimeters and the size is mine Decent, the better. I think if we put together, it will be easier if you want to ship the flat lay and go. Okay. So and then I'll explain to you about our main product here, okay? Yeah, I remember the chair is very beautiful cookies here, okay. And I purposefully set it on a smaller plate like this to make sure that the cookies as the most visible one instead of our plate again. So another tips, if you want to choose the plate, especially for they're slightly angled like this from the top angle. If you choose the very large plate, it will be very feasible. And also compared to your foot. If you choose very much plate, then your foot will less focus. Okay, and also like look very small. So I purposefully choose the small plate here and then I will explain to you about the color story, okay, the color story here, as we define what color should be on our frame. And the other don't have to be on our frame. Okay, so finishing ball for me, the maximum number of color in my frame here as four, or maybe three. If you can choose at least three maximum for the color on your frame, it will be better because the more color you add, the less focus your picture will be again. So please be careful when choosing the color because the color wheel, so the energy of your picture, okay, so if we put the consistent color story, then your cookies will be very feasible, okay? On our friend here, we only choose the brown, black, and green, okay. Only three color, okay. Yeah, even if it's male, but if you add light blue crops in your frame, even if it's just this small, but it will be very visible and then it will suck the energy, the attention from this one, we will move to another color. Okay, so please be careful when choosing the color. So we tried to be consistent with the color. Then I choose to select the Pope's with that, that is matched with my color story. Okay. So I add prompts like this. Have you ever thing that oh, okay. I have already choose the dark gray as a background, then I have to add another dark gray again. Okay, Seems it won't be very feasible. So y i, at this one, okay? The second part, after you choose the color story, less, you have to look at your texture. Okay? How many texture you can add to your frame? Can you add more texture? Yeah. Actually, yeah, yeah, the purpose of choosing these props is I want to add a texture outside of my background texture. Okay, So it add more complexity, but it won't make our product or less feasible because the corresponding is matching. Okay? So this is the very beautiful tray. Yeah. And then also my board here. Finally, for this one, it's supposed to be like wood color, but I purposefully painted by my South to make it dark gray, it pretty easy. And then also, I love it, okay, because I really match to my ground. And then I also choose this dark pebble quote here. So it will add another texture or so I plan to make the setting will be reach of texture, but for the color, it is very focused again. And then I also chose this stainless steel, but rustic. This is a glass actually, like COP. Okay. And then I also put this chocolate chip on my wooden bowl. Yeah. And Oman also. Yeah. And this dark blue. Okay. Oh, and then I also like to add more green in my frame so it will be very visible. It will add freshness in our frame, okay? Yes, that is the prop selection. Okay, It's very important you try to design your colors for a design your texture before you start composing it, okay? Because if you do it right in the front, choosing a color, choosing the texture, then it will be easier to compose with another type of composition. Yeah, many typos composition. And this time we will compose it with the golden triangle settings. Okay, so let's do the competition.
4. Project 1: Compose Your Shots!: Okay guys, we have already set our background. Then I will explain to you about our settings here, okay? So the first about our composition yet, okay, You can see that we use the golden triangle composition. You can see the main diagonal line here and then the secondary it for now. So this is called golden triangle. Okay, so true in the, our main horizontal line, we sat our main focus, our main subject here, and then we put all the ingredients on the main diagonal. So for the colors for it here we sat. We only use the brown as the main subject, and then we also use the grain to make it fresh and then black and white. Okay, That is our colors story here. So we pretty well any another color to make sure that our energy only focus on the brown and the green because our black is our playgrounds. So I also write you choose the black bold here. So all the attention goes through the brown and our green here. And then let's talk about texture. Okay, So for the colors, we make sure that we don't put too many colored deer is outside of our story. But for the texture, we made sure death, how can we add more texture or more complexity in our frame? So we add like this globe to add more texture here. And then we also used that these lectures here to add more texture in our bare ground. So it's not fully only the ground then we add this one too. Thanks. Sure. But we don't add color. Okay. Because we try to be consistent with our, our story. And then once they, I used the dark color for the prompts. Okay, so the next one I'll tell you about the layering, okay? So you can start counting how many layers you put in your frame. Okay, Let's count. I'll count from this area, okay? So if you count how many layers here, so this is our first layer. Okay? If I just put it here, then the layer is only 123. Okay? This is not enough actually, when you want you take the food photography, you can keep asking how many layers is layer right here and then how to model a year, they might frame it. So yeah, I tried to think from there slag how an I am more layer in my print. So actually I also can, instead of I am paying out my black material next to my black plague, then I can add a white layer here. So actually this is just an ordinary favor. And then I put it here. So when I make it like this there, I successfully add an underlying year and fast. Also make the variation of the colors. So is that like the line? Okay. And then yeah, I can also how it lingers here. Okay. 12. Okay. That's how, okay, this is one, this is true. And three, tree layer and for our cookies here, so I try to add more layers by adding it here. So yep. So let's come over here. Here, 123412345. Okay, so, yeah, wonderful photography. You can challenge yourself to play around for layer and the 50 year. Okay, So, yeah, this is some techniques I've put in our, I think here. So let's go to the next section.
5. Project 1: Lighting Setting for Smartphone: Okay guys, we have already set our setup here. We have already do that conversation. And then let's talk about the light thing, okay, So in this section, I use one thing, only one like being here. That's the beauty of life or the sheath because most of the time we only use one like they like this. Okay. So I'll explain to you about the position first four Hague difference between our big ground shooter like thing is about only 15 centimeters. The Hague difference in this, I think we don't send our like being too high because I want to get the contrast here. So I want to get the shadow over here. So I want to make it quite contrasts so I get lower. And then the distance here, yeah, from our main subject here to the light thing is about 120 centimeters and distance between our foot here to show our liking. Ece, about like 60 centimeters. Okay. Yeah. And then I'll explain to you about the blocking. Yeah. If we don't block our liking, then the lighting will distribute it so evenly and it's quite flat actually. So you want, you make sure in this setting, we want to make sure that our lighting there actually hit here, but doesn't go to this area and the back area. So we want you blocked the lighting in the front area and the area. Okay. So block the lighting like this and like this cake. So yeah, there's a distance here between our blocking. So the light thing will be directly heat our settings here. Okay, So yep, and that's our like these I think then let's do that for the shed.
6. Project 1 : Smartphone's Shot & Result: Okay guys, just now we haven't done the photoshoot using smartphone and then let's see how the results, okay, here's the raw photos.
7. Project 1: DSLR's Shot & Result: Okay guys, and then in this section I want to explain to you how we take this fled little bit using the SLR camera and then also we use flashlight being over there. Okay. So the first I want to explain to you about our chemists, I think so. Yeah, Here am I solving for this? You have 125 and f-number. I use 4.5 ward, the ISO I use 400. And then for the white valence, if you use the studio lighting, we use over there. So it's vapor. You have your binom as Kelvin. And here I said are white balance Kelvin 5600. So yeah, that is our cameras having. And then for our lands here, I suggest if you can use like wifi millimeter lens, it's okay, or you have 35. It's also very good. Okay. So, but in here I use like why it bands kinda wild lands. I hadn't been to war the millimeters. Okay. Maybe I used the bottling about like 35 here. So yep. And then I'll explain to you about our I think so. One of the things I think but the distance between here, our food to our lighting there is about 150 centimeters. And then more the difference between our foot here to our lighting there is about 60 centimeters. So and then the Hague difference between our base background shoe, our class there is about like 35 centimeters. Okay, I'll explain to you about the right thing we use for all I think modifier, we use the diffuser here to diffuse our light so it becomes software. If I take this out, then you can see the precision of our lightning. Okay, So here's our lighting. Okay. So it's actually it's facing to our foot there. And then please make sure you also use the standard reflector here to make sure that our lighting as contrast enough. Brand of our class. We use Go Docs as k2, a 100. I think maybe in your country, There's another brand, but yeah, you can use any type of flash you want as long as it's the difference. I think for this one is not too expensive for you, okay, and then I also use this, I'm going to draw our lighting. So actually I purposefully sent our lighting position is not too high because I want, you may contrast shadow here because actually our product here is not to write. It's quite enough like this. Cookies is quite dark, you can see. So even combine with our ground. If we don't use the contrast liking, then this shadow won't be strong enough and the roof won't be that three-dimensional. So I put it lower so I will get into contrast shadow in the from here. Okay? And then to make sure that our lighting is not too too well distributed, then I brought it here and then I've blocked it here. So the lightning will come through the middle, the distance between two blocking here. So it will come straight to our cookies here. Okay? Then, yep, we place our diffuser year. So it will diffuse my right thing to say, yeah, this is our lighting settings. Then try to fake hour shift here. Okay, guys, so we have already taken our shoot here and then here, the row picture. And then that's how we set and should our placing with what here with our cookies. And then let's move to our next section.
8. Project 1 (update): Set the Light of Your Edit!: Okay guys, now we've opened them in the Lightroom
mobile app. The guys, for those
of you who rarely edit using Lightroom mobile
or other editing app, sometimes you see below, wow, there are so
many menus, right? Well, I'm confused.
Where should I start? Right? Well guys,
the first step I usually do in editing is we can see from
the image quality, it's sharp, quite good, but the picture looks fitted. And then it's like
a normal image taken with a smartphone. The image is less attractive, the color doesn't
really lift up, then the lighting
is even or flat. Well guys, you don't
need to worry. We can make this
a better version. Well, what are the steps
of the menument use? I used to start from the
light section first, which is light here. Well then the very
first thing I usually do is reduce the highlight. The proposes highlight is
the super duper bright part. To make the bright part is not overexposed, not too bright. We still get the details I
used to reduce the highlight. The image will
tend to be darker, but you guys don't
have to worry here. We save areas that are
almost over exposed. We darken them so
that the details don't get wasted or there are no parts that turn white
really wide. We reduce it. We still get the details. Well then if we
reduce the highlight, it gets a bit dark, doesn't it? Well, to make it bright,
I rarely use exposure. Why? Because exposure
changes everything. Meanwhile, for editing,
we mostly use the four below highlight shadow,
white and black. That means if we
edit the shadow, for example, only the
half dark area changes. If we change the black only then on the black area changes. If it's white, then the area
close to white will change. That's it, well, so
it won't be affected. If for example we brighten
it using exposure. Usually the dark
ones will also be, bright ones will be bright
to all kinds of things. So everything will change. That's it. So my
editing method is, I'm using these four
sections below. Okay. Well then the second one is that we increase the white. Me, the whites proposed is
to make the image brighter. But the difference with exposure is if the white won't
change the black, gray, slightly
darker parts shadow, it won't change anything. It's more controlled
then for the white. Where will I usually increase it until the image
is bright enough? And I like the brightness level. Well, for example, for me. Okay, this much is enough. Let's see. We compare it. We compare before and after. This is before. This is after. Maybe the difference is
still visible a bit, right? I'll increase the white first. Well, then here the
next one is the shadow. Well, the shadow, I see that the image also needs a shadow. The combination of highlights, light and dark images will make the texture of the
image more visible. Well, if we want the texture of the image to be more visible, then we have to play
between dark and light. Well, I see also, indeed, if the mood I want to
make is more tre D, yeah, sometimes I even reduce
the shadow to make it more D. For example, if we increase it,
it will become flat. Yes, it will become flat. Well, for this image, I think I will try to
reduce the shadow to make the image looks
more three dimensional. There is a game between
dark and light. There is a gradation in it. And the gradation is getting
more and more obvious. Right. Well, but what's really bad is that there may be certain areas that we
need to brighten later. We will brighten it
in certain areas. But what is a thin is that
overall in terms of shadow. Maybe I'll try it here first. Later we will try to
play it for here. I don't change the black first because mostly
in the light section, I change this tree most of the time among all the settings
from exposure to black. Okay, well, and then the ritual I use often is in
the details section. Well, we'll sharpen this image. Well actually, for example, on a smartphone we can
still raise the sharpness, but how do we raise
the sharpness to make it look natural? We're going to make
it more sharpen. But this is all sharpen. Everything is sharpened among all the settings from
exposure to black. Okay. Let it sharpen only in
the important areas, then let's increase the masking. You can see the difference here. But if we don't do masking,
it will look rough. But when we do masking, it will only sharpen
in important areas, in line areas only. Now this makes the image sharp. Not too much but
in the right area, then I'm going to increase
the noise reduction. This is also good because if we take photos
using a smartphone, sometimes there is
noise in the image. I will increase the
noise reduction. To reduce the noise, it's
the noise is reduced, then we sharpen the areas
we need to sharpen only. Well, this is an important
setting for me guys to make. Food photos taken from a smartphone look like
photos taken from a DSLR. Comera, especially if you take photos with the
DSLR for example, it will look even clearer. That's why it doesn't mean that the editing is only
for smartphone users. Well, this edit also
works for DSLR users. If the smartphone can do better, what about the DSLR Comera? It will definitely
be much better. Well, okay, and then the next one is that we will
try it in the effects part. Well, the effects here, maybe I'll try to
see how to focus on this area since it's
a bit light enough. It's a bit light enough.
Maybe we'll darken the outer areas using the
vignette effect below here. If we reduce it, it will
be dark all around. Let's focus on it more. Okay. Here if I use vignette, I want it to look more natural. Because it's only visible at
the edge, not in the middle. So I used to reduce
the midpoint a lot. I will increase the feather
and roundness. So Like this. Well, I do this
almost every time. Okay, well and then
guys, now we've seen it. Yeah, here's a result. Yes. Let's try to compare
the before and after first. To compare it, to
compare the before and after is we tap in the image. Hold it for 1 second
and it will come back. That's it guys, hold
it with your finger. This is before, this is after the editing
is so fast, right? So you don't have to worry. It's going to take
a long time to it. But actually, if you
know the principle, the simple principle is
the settings we have changed just now in our
image are quite drastic. The interesting thing is
that the previous settings that we have said make
the image edited, not excessively,
not over edited. In other words, if you make
up, it's not too flashy. Well, this looks natural,
but it's good guys. The color lifts up
naturally. Okay.
9. Project 1 (update): Give the Color Effect to Your Edit!: Which area do we
want to edit again? Well, there are actually
a lot of effects here. Okay, I'll try to explore guys to give you some knowledge, we'll try to increase
the texture. Well, the texture is
also interesting guys, for those of you who
like texture images, you can try increasing
the texture here because the texture can
make the texture in our image appear again. Well, for those of you
who like textured images, you can increase the texture. Okay, well maybe for cropping next I'll try to
go into the cropping area. Just see a crop here, and then I'll try cropping
the unnecessary areas. I don't think this
area is needed. I'll crop it and then
maybe I'll crop it a bit. Well, okay. Yes. Well, this is a pretty
significant change guys. We only use the free
features of light room. We do not use the pit features. Well, for those of you who, for example use
the free feature, then you guys can already
use the previous settings. But if you want to
use the pay features, here are some more
menus that we can use. For example, we can use the
healing to remove the line. Then the selective menu, we can use it to
brighten the dark areas. But because we are using a free feature to
brighten this area, I'll move to another
app called Snaps, because the Snapset
app can cover the pad areas of light room. Okay, the selective menu
is free on Snap set, then the healing is
also free on Snap sit. Well, if all menus are
already in Snapseed, why do we have to edit
them in light room? Well, this is actually
a preference as for me. Why do I like editing
in light room? Because light room app
on smartphones have exactly the same technology
as light room on computers. Guys, when you sing or purchase the light room app and then sing with the
one on your computer, this image will be exactly the same as it appears
on your computer. If we use the cloud, that's it. This app has the same technology as light room on a computer. That's what makes
me more happy using light room then in terms of color and other
things, I prefer it. And the editing method is also faster for you guys who
want to save the preset. We can save the preset, we select it here, and
then we can create preset. Well, when we create
a preset here, then when one day
we want to edit a dark moot, flat lay image. Again like this, we just
choose here create preset. For example, if I like, only the general ones are tick. For example, we save it
with flat dark mood. Well, what we save now later. For example, if you see the same editing again
for flat lay dark mood, maybe you can try
this preset first. Well, here I don't
want to teach you guys to just use presets, because if you can edit it, then you just can make a preset. When we make presets,
we use presets, surely not all images will
have the same results. You know how to edit the touch up even though you are
already using precept. Well, that's why I don't
teach and don't recommend using presets without
knowing how to edit them. Because the one who can make the better or
the best preset is the preset maker itself.
That's my opinion. Guys accept that you
use people's presets, but you also know
how to edit it. The editing points here
are very important, and then I suggest that
you have to understand the editing lesson before
you use presets, okay? Because if you overdo it, you'll know where you want
to change it later, okay?
10. Project 1 (update): Adjust the Color to Your Edit!: Okay, well, before I continue, here are some other features
that I think are important. It's in the color section
Here we can open it, Now we can adjust
the white balance. So here is the image. Coincidentally the white
balance is quite correct. Indeed, sometimes overall,
it can be a bit yellow, or the whole color
is a bit blue. Well, coincidentally the
color is just right. But if, for example, in white balance the
image is too blue, we have to move it to
yellow to neutralize it. Or conversely, when the
picture is too yellowish, we have to slide
the temperature to blue so the color will
return to normal. Okay, well it is also
the mixed feature, while the mix here can only
change certain colors. For example, the green color. I want to make the green
color slightly yellowish. So we just choose green then. Well, there are three choices. No need to worry guys. I'll explain it in a very simple and easy
way to understand. If, for example, we want to make the green into light
green or dark green, this is like the lumin, we mix the green
with white paint. We mix it with black paint. If, for example we
reduce the luminins, it means that we mix
the green with black. That's how it is here. We mix the green with white. Okay, well here the green is going to be whiter or the
green is going to be blacker. Well, if for example, you feel that the green
is a bit too dark, you can increase the
luminance, okay? And then what is saturation? Saturation is like painting guys painting a
white wall, okay? For example, if the
saturation is low, then you only paint it once. Only one using a
brush, for example. If the saturation is high, then during the
painting process, we use a brush many times. The green is a bit
semi transparent. The green is like, the
lowest one is gray, the middle one is green
according to the picture. The one at the edge, the
green is multiplied. See, well that's it. If it's green,
it's really tacky. Well here if you want to
play, if you want to reduce. Well, saturation
is important guys. What for? It's important
for us to reduce the colors with the one
in the image. That's it. Then if the hue is, if for example it's green, if you want to
slide it to yellow, or if you want the green
to get even greener to blue, that's how it is. So we can slide it for me. Coincidentally, the green
color is just right. I want slide it well here to make the
picture more focused. I'll try here. This image guys, what I want to edit is I want this image to look neutral for this image because there is no blue color. Then I want this image, maybe we'll move to blue. Then I'll try to turn
off the blue color. Sometimes with the naked eye, we don't see the blue actually. However, in this image, it contains blue for some areas because in food there is also very
rarely blue color. In some editing to
neutralize the color, one way is I like to
turn off the blue color, that the blue color that is not unnecessary will not come out. That's it because sometimes our eyes don't see
the color blue. But in terms of data, the color is there
so we get rid of it. Sometimes I like to remove
the purple color too. I also remove this
purple and pink so that the image
becomes more neutral. Okay, well, because the color of food is important for me to have food photos that are
neutral in color. Apart from it, you want to have a slightly purplish filter
and all kinds of things. But for me, we should be able to make food with neutral colors. Well, because we want the color of the food to
be something we can eat, something delicious
for us to eat. Okay, sometimes for example, the color is to pink to purple, if that's not the original
color of the food. Well, sometimes from a
psychological point of view, we sometimes feel disconnected. Don't you think so? Well,
that's my personal opinion. Okay. And then there's maybe
nothing else I change. Well, the interesting thing is if we have
clothes, for example, the cloth is blue or maybe the cloth is dark but
hit the lighting, so it's a little bluish. Well, we can also remove that so that the cloth becomes gray. So if we turn off unnecessary
colors indirectly, the image becomes more focused. Where is the focus? The
focus is on yellow, green. The image is more
focused in comparison. If you don't turn it
off, for example, the unnecessary colors
are still there, right? But sometimes it's in our
eyes we won't notice it. But if you try to turn off
unnecessary colors, oh, it turns out that
after turning it off, the color becomes more focused. That's it. Okay.
Here we select Done. And then there's one more
setting I want to teach you. It's in the light section, and then here there's a
section called the curve. Well guys, the curve here is, if I define it, this
line is our image. Well the bottom one is the
black area of our image. The top one is the white
area of our image. It's getting wider and wider. Here, it's getting
darker backwards. See, it's a dark area. Well guys, usually if we
want to brighten the black, for example, we just
need to increase it. Well, the black area
will be bright. So this is our image, this line. Okay. But why did
everything change? Yeah. Because all
the lines moved. Okay. Well, if we lift it
up, everything turns white. That's it. Because of this, the top line is the white line. Well, yeah, including
the opposite. This is the brightest line. If we reduce it, it's
all going to be dark. Okay, well, to use this curve, my habit is you tap three
times here, here, and here. Taps 123. Later there will
be three points like this. What are these three dots for? So if we lift the bottom one, for example, it
becomes the nail. That's how it is.
So it won't shake. That's it. So the above
one will not change. The only thing that changes
is this part, okay? So it's like if I
raise the curve up, the black one will change. But it will nail its position
so it doesn't slide well. So for example, the effect that you want to make is
not to contrasting. So we can adjust the black
area into a bit of gray. For those of you who like images that don't have
too much contrast, we can adjust it here. I prefer to change it on
curve because it's free guys, and I used to adjust
it in this area only. Okay, well this
area on the rest, we have covered everything
with our edits earlier. Well guys, if you look at it, the contrast has reduced, right? So it depends on what you want. As for me, actually, I prefer this version.
Well, that's it. Okay. But for those of you who want the
contrast to be less, you can use the
previous technique. Okay? Okay, well that's about the editing process that I often use in light
room mobile guys. As simple as that guys. So knowledge doesn't need to
be as complicated, right? If indeed we can make good
photos in the fast time, why do we have to
spend so much time? That's it. In my opinion, lightroom is already very
sophisticated to use. Okay, well, and the interesting thing is that light room also has help. That's a tutorial too. So if you subscribe, there are also some
tutorials we can learn too. That's it. Well, that's why light room is
interesting in my opinion. Okay. And then for the next one, I'm going to move to
the snapst app for me to brighten the
area here and here. Then I'm going to
remove the lines from this background,
okay? Okay guys. Well, I need to remind you before we move
to the next section, I have to export or save
the image first, right? How do you export the image so that it goes
into your gallery? Let's choose this one, Okay? Okay, and then we just select Export to Camera roll. Okay.
11. Project 1 (update): Erase the Dirty Area on Your Edit!: Okay guys. Well, it's really
interesting and earlier we edited in light room and then now we'll edit in
snaps It actually, I already like the image.
It's already good. The color is impressive
and it's very different from the image we
have not edited yet, guys. Well then I just tried to
make this area brighter. This area is getting lighter, and a bit of this area is
getting lighter. That's it. So it focuses on the
scene in our image. Then I'm going to
remove this line. Well, how to do it after
we go into the snap set. Then we'll select tools. And then in Snapset there
are also a lot of tools. In my opinion, if you are quite
familiar with light room, actually the menus
in light room are similarly the same
with Snapsetll. We'll just use the
menu we only need. Well, the first step is we
choose the selective part. Now for example, in light room, if it's not premium, the selective menu
cannot be used. Well, in Snapset, the selective
menu can still be used. Well guys, let's
choose the selective. Okay, well then you just need to tap once in the area
we want to brighten, we tap once, and then here
there's a B button. Okay. Well, here in the button B guys, you can swipe up and down. If the B button is blue, it means that we
have selected it. If it's not blue
yet, it means you need to tap once
until it turns blue. And guys, you can swipe
up and down to adjust it. Well, here I don't
want to change the contrast, saturation
and structure. I want to change the brightness. Okay, So just stay at B, because if I move it here, it will become C, okay? It will become like that. So I'm going to stick with B. And how to make
this area brighter is guys, there's a bar here. You guys just swipe right
and left using your fingers. Okay, well, I will
try to swipe right. Well guys, you can see here. Yeah, it will increase.
Well, that's it. So the image more
brighter too, Right? I'll swipe and then
while it's lighter guys, so it's not as dark as before. And then for the
next I'm going to make another one
over here as well. Okay, just hold it. Tap here to copy. Well guys, you can copy. And then can we paste it? Well, well guys, tap
one more to paste. Well, if you try it, but I think it's complicated, just add more. Just select this and tap
one to add another B. But if you can copy and paste, then it's already automatic
with the settings above. Okay, so I'll make this
area brighter as well. So I'm going to pick this again, and then it's already blue. I will tap here then. Well, we can do this too, guys. When they're blue, you
just use two fingers. And you seem to
want to zoom in and zoom out the image
like that here. The reds are the areas. We're going to
lighten the color. See, I'm going to put it in the dark area and then make sure that the dark
area is affected. Well, I think the
red one has been affected by the dark
area. The red one. Right. I'm going to
slide the brightness to the front the picture. The dark area becomes lighter. Okay. I'll choose a thick Yes, so the image is not
as dark as before. Well, for this one,
the site area is minor then I use the setting. If for example I want to
brighten certain areas and then the next is here
I'll try to use the healing. Okay, Well, healing in
lightroom is also paid. Right. So that's why
we use snapseed guys. I use snap set first. For those of you who don't
have lightroom premium yet, just use snapseed. You
don't have to worry. Well, this is how to, I
suggest if you want to use the healing brush in snaps
to make it more precise, you can zoom in as
much as possible. Now after you zooming,
you just have to rub it. Just rub it like a gini bottle. Then the magic comes out guys. Okay, well look,
it's directly clean, but slowly we'll double
check and swipe again. And then well I can
honestly say that actually. For example, for
the healing brush, it's better on snaps guys. If you find the healing
brush really difficult. My advice is the
healing brush in snaps, it is easier to use than
in lightroom. Okay. It's simpler, although
sometimes it might be, wow, this is wrong guys. We have to go back
this way, we go back. Okay. Sometimes there's just
a little mistake, right? Well, sometimes it's like
this, so I'll be back. We are trying our best guys. Well, um, the important thing is that we have zoomed in to the maximum. Okay. It looks like
it's been a bit difficult. Okay, let's see. Well, actually it's
not visible from afar, so we'll tidy it up
as much as possible. Actually, if you want
it to be more tidy, you can also use a
computer for editing. That result will be much okay, but I know that not all of us also have time to sit in
front of the computer. Sometimes we're on the road, sometimes we're just
having fun, right? So we still can do
this editing well. Okay. Yes. Let's maximize
it from the features, okay? Mm hmm. Okay. Mm hmm. My advice is you have to
zoom the most guys because when you
zoom at the maximum, the results will
be more accurate. That's it. Well then you
can check the dirty areas. Well, if you swipe wrong,
just go back again. Do okay? Okay. What
do you want to clean? Well, it's dirty. Clean it up. Okay. Well, actually
it's really easy guys. Just swipe a little, just
wrap it around a bit. Now, it's like magic, isn't it? So in my opinion,
when we clean up, this is what makes the
image Different people won't know that this image was taken using a smartphone guys. See, because our editing
is pretty detailed too. Well, I also don't use
very heavy editing, right. At least we clean
the dirty areas. Well, then what? I shouldn't be here. Well, okay. Well our
pictures are need guys and then we just
have to select the pick. Yes, it's done guys. We've touched upon it and here we're going
to select Export. I'll just save a copy. Well, to let the new image
come out, I'll save a copy. Yes. And then you can
access the image in your gallery guys
on your smartphone. Okay, well that's
how we touch up this image guys and I'll see
you in the next section.
12. Project 2: Choose Your Props!: Okay guys, In this section we'll also the flatly frame. Then we have a very beautiful AIG here. So this is very simple this time. And I'll show you how we can shoot the symbol dish become very beautiful picture again. So at the first, please remember before we directly plan what kind of composition we want to take. And then before we arrange our props, then the first we have to ask ourselves, what is the color story we want to plan? Okay, so in this program, the cost story we want to plan if white background and we want you at the yellow or orange color. So the last one is the green colors. So we don't have another color outside this tree color. So the color will be very consistent. Okay. And yeah, please done. I don't know about I prevent plan more than four color in my frame because it will be very complex and very hard to focus on our main subject. But if our column is very consistent, then it very easy to recognize where is our main subject? And then the picture will be very harmonious. Okay? So, and then the second question is, above the texture, what kind of texture we want to add to our frame, and then what is the props that can add the texture, okay, So the prompts to add the texture, this one is the small chopping board here. Actually for the chopping board, I prefer to use the small one like this. Okay. So I think the size for DES AES about like 1300 until 15 centimeters only. So if you choose that these kind of small shoving work, you will be very easy to use because if you're a troubling one is too big. And then you take from the top angle like this are flat lay angle, then it will make our hood look small, so at least be careful. That's my opinion. Okay, So another texture I want to add as I want you to add the linen cloth like this. So that's an app, another color because it looks similar with my background. So this is just to add a texture. And then another picture I want to add is this is like white bowl like this. So it add another texture. So I want to blend that my frame is very rich of texture, but very consistent in terms of the color. Okay. Then yep. I also at this one, the small bowl of breath. Okay. And then to have another picture, I put a here. So it's very broadly because it's so small and yeah, it gives like different texture in our brain, but it doesn't add too many colours because most of it as white and black, so the color is still neutral. Okay? And then, yeah, actually, if you see our ingredients here, is so some ball and maybe sometimes you will get confused, like, what can I do with this simple thing? Okay? So actually, you can try to change the form of your subject, okay? Because an egg, for example, if you shoot for an ape, and then instead of using this whole lake like this, I tried to change its form. Okay. So you can try to cut the cake and then so from the top angle you can see inside the a. So try to creatively, to do the different things of your object. Okay? I'll do the same with the egg also. And then I also tried to use the part of the egg and then yeah, eggshells I gave. So eggshell also can add more texture in our frame. And I also have that parsley powder here because one of our colors story is green. And then I also add some Herb here. Yep, there is our props and our color story planning. So in the next section, we will do the composition again. See you in the next section.
13. Project 2: Compose Your Shots!: Okay, guys, you can see my hand here. So this time we will do that opposition that have assume we want to do as the golden ratio, okay? If you look at the golden ratio composition, It's like spiral. Okay, so let's do the composition and I'll explain to you later. Okay guys, we have already done the composition and then as you can see, I have seen in the camera yet, but yeah, I strictly imaging that there's a spiral here. So for the golden ratio. So when I'm doing a photo shoot may be again see from our frame. And also finally, when you are editing and cropping the picture, you can also set from the light probe to see the golden ratio cropping who make it more precise about your golden ratio compensation. Okay, So, and then for the Aegina, I will explain to you about the layers again. So if you already set up, then you can ask yourself how many layer and how to add more layers in your first year. For this one, actually, I am more than a year to make it more rich. So the first layer is the plate, and the second layer you can see the parsley here on top of the plate. And then the third one as the mole and our rosemary herb year. So the third one, the fourth one is our a, the fifth one as our Like I also pepper and also the greens here. So F3 player here, I think it's enough. But if you think when your photoshoot, it's also, I will keep reminding you that important in ask yourself how many layers you already have. If you think that your friend is still very simple, then you can ask yourself, is there any additional texture like this you can, you want to add to your frame or how many layers you have in your frame. And also to add more colors because our color story is green. Then I spread the parse tree here, the parsley chop here. And also I put some greens to match our color story. Okay, So this is our sapping and then let's move to the next section.
14. Project 2: Lighting Setting for Smartphone: Okay guys, yes, we have already done our composition and then I'll explain a bit about our writing position here. So for the lighting, we set our continuous slide. The distance between our main subject here to our lighting is about 90 centimeters. And then the distance between here should be liking bit there. Yeah, it's one meter. So the Hague difference with a big gun to our liking there. Yeah, it's about like 45 centimeters. Then, because we want you to make our writing as false. So it put this board here to bounce our lighting. So the shadow one be very harsh from here because the lighting is bonds by this board, okay? Okay. I have thinks more you, when you are trying your overshoot. Ok. Maybe you have some up right? Position, right? Do I do my lighting too high? And another questions, okay, come to your head. And then actually this is quite normal. And then the one thing I have to remind you, yes, rightly is also an exploration. Okay. So just be adventurous, don't be afraid, shoe like is it right or wrong, but just be adventurous. So when you're fasting, you're lighting, it's very important to like make many alternative, okay, So you can try this one and then you can move the lighting higher and you take another picture and then use this bouncing. And without the bouncing, you also pay its alternative so you can find which one you like, okay? So it'll be afraid and be a friend Turas. Okay. So it's our symbolizing, yes, how they're flat lays, I think it's where is involved. And then for the writing, it's also very applicable for you. And of course you can set it in your home. Okay, So let's move to the next section and we will do the photo shoot.
15. Project 2: Smartphone's Shot & Result: I guess we have done their photos. And then I'll show you there is out there. Okay. So and this is the raw picture.
16. Project 2: DSLR's Shot & Result: Okay guys, In this section I'll explain how we pick it on our DSLR camera. Okay, So I'll explain to you first about our cameras having here, we use a speed of 125 and then our ethanol buddies for our ISO is 250. So the white balance, we use Kelvin 5600, okay? And then this time I use the cannon 50 millimeters here. Yeah. Then it's wrong. I was typing and then I'll explain to you about our flight things set up here. Actually, one of the likely set up, the position is rarely see me latitude to set up before, before reuse that continuous like thing. And then this time we use the Flash, okay? Precision is, does the same. Okay? And then I will explain to you about the difference is with this like thing we use the diffuser, okay? This is our lighting here. Okay? This one. And then we put the diffusive above 35 centimeters in front of our Flash. Okay. To make sure that the lighting as software bad. Yeah, but we still have lion's share though, all four here. Okay, So actually for our saving here, by showing for the bride, looked like this, we don't use the blocking at all. So I just want to make this clean and then like evenly, right? Okay. So that is our writings I think. And then let's do that for the ship. Okay guys, we have done our photo shoot and then here's our preview for the row picture. As you can see that our settings here from using a smartphone photography using continuous line, and then compared to our troubleshoot using DSLR camera using the Flask, liking this sad things of the likely is quite similar and then the new files yeah. I just change where everything looks pretty similar. So yeah, that's how simple we pick our flat lay photo shoot. Yeah. Okay. Discourse now you'll have freedom to choose which defies you have. The, the, you want to your smartphone, either you want to use the SLR camera, it's still possible and then there's no reason that you have to like, compensate about the quality even if you use the microphone. But yeah, you use Theo can get a beautiful image even if you are using smartphone or the as our camera. So now you have a freedom again. So let's move to the next section.
17. Project 2 (update): Set the Light of Your Edit!: Hello guys, Welcome back
to the editing section. Well, we took the picture
earlier and then we'll immediately proceed to
the editing process guys. Well, okay, and then what
are we going to do first? Let's guess first, what
are you going to do? The menu is a lot, it's dizzy. Well, for those of you who
are already in the section, you definitely know what to do. First, we'll try to edit directly with the
previous technique. Yes, even though
earlier the image was dark and now the
image is bright. We edited with the
same principle. Okay, in the light part. And then here, the
very first thing we do is we lower the highlight. We increase the white until the brightness we
think is pretty good. Well, in a bright mood image
like this, my tendency is. But for me to create
a bright mood, I usually increase the shadow. Yes guys, well, well here when we
raise the shadow, the image is getting brighter. Well, from here, let's try to compare with the
previous image guys. We tap then. This is the after image. The image is so much
brighter, guys. Well, this is because
we increase the shadow, but the dark area
is a bit reduced. Although there may be
highlights and shadows here, but for me, it's still a
bit less obvious because the black area is reduced as a result of
increasing the shadow. Let's try to reduce
the black because black and white still
need to be balanced. We cannot make
everything bright. Well, let's try to
lower this plaque so that there is still
a little dark area. The purpose is to make
the image uneven. Well, let's stop here
first and then here. It's a bit annoying because the picture is tilted guys here, I'll try to straighten it out. First we're going to go into
crop and then we can rotate. You just tap here and just
swipe right and left. Well, here I'll make
it more to the center, it will not disturb guys. For those of you who have a tendency to see things neatly, you might be a bit
disturbed because the lines are tilted right next, where are we going first? I often go to details
first because almost certainly for
all the images I edit, I will go to details first. It's just that
sometimes I forget, That's why I prefer to use this. First I'll go to the sharpening. Well, I used to increase
the sharpening not to the maximum because it's
not very influential. Usually I'll just
increase this much for the sharpening and then I'll
increase the masking too, so the image looks
sharp but not too much. For example, if the sharpeners
is a bit too sharp, you see, wow, how sharp is this? Just try to increase
the masking more. That's it. Well, I
think it's enough. Well, from here, just
try to see this image. Maybe you've started to be full. Is this a picture taken
from a DSLR or smartphone? Well, yes. Whoa.
Okay. Very good. And then don't forget
the noise reduction, I like to increase
it a little because indeed the image is
taken from smartphones. Sometimes the result is
not always perfect either. So I increase the noise
reduction so that the image with noise can
be improved in quality. Well, the interesting thing
is that in my opinion, the noise reduction in light remobile is very sophisticated. These three areas, sharpening, masking, and noise
reduction, in my opinion, are things that
we can do to make the images taken from
smartphones look sharp, sharp as photos from DSLR cameras when seen on
the smartphone screen. Of course, we can
see if it's printed. It's certain that the
photos from a DSLR are much more printable
for large sizes. Even though, in fact, I've also printed the image taken
from my smartphone in large sizes and
the results are pretty good guys. Well, okay.
18. Project 2 (update): Give the Color Effect to Your Edit!: Next. After that,
what, what else? Okay, now here, this is actually from the
side of the picture. It's also pretty and
the colors are good. Then let's try to go into
the effect section first. Well, here is one
effect that I haven't told you about, it's dehaze. I think the dehaze
is also interesting. It's just that this dehaze will make the image has a contrast. However, I think it
looks more natural than if you use the
contrast in the light menu. It has contrast, right? Well, I don't like using this. I personally prefer that if
I increase the contrast, I increase it in the effects
and the hay section. I think it makes the color
of the image more pop, but still looks natural as
long as you don't overdo it. If it's too much, it
will look a bit dark. For those of you who
have raised the shadow, it's like the colors are good. But why is the color
not obvious yet? How come it lacks shadow? Try not only reducing
the previous black, you can also leave the dehaze so that the shadow part
becomes a little darker and the image becomes
more treaty guys. For those of you who
like textured images, you can also increase
the texture. Okay, well here. Okay. I'll go back to
the light section. Maybe I'll try to make
the image a little brighter. Well, here guys. The picture at the edge
is a bit over, isn't it? So we must also pay attention
to the areas of our image. Which ones are under
which ones are over. The under was too
dark and over is when suddenly there is an
area that is too sharp. What's this for?
Because our lights are in the top right corner, you can see the shadow
is on the bottom left. It means that the lighting is in the top right corner and
the object is white too. How to darken it? We
can repeat the process. In the previous editing, we go to snap set or well, in this picture I'll
try to demo it guys. If for example you
use premium features, then here we can
choose Selective. And then here my friends just select the
plus button above. While we can use several modes, this mode, if we
brush it like this, has a round shape,
we'll just try it. I'll choose this
first. And then guys, this button will appear. Then guys, just tap
here while tabbing you. Swipe up and down. Okay, I'll try tabs then. Well, swipe, swipe down. Just tap here in the round part, guys, this is for the
size of the brush. And then we tap here up and down is to show it's
solid or blurry on the sides. Well, I like that the
color is a bit blurry, so it's not too feasible. Well, this is just the brush. Later when we rub it,
the effect will appear. Maybe it's a little too big. So I'm going to scale
it down a little bit because the object area
is really small here. When we're done, let's wrap over here, there will be redness. That's a sign that
only that area will have an impact on
the settings will use. Well, after selecting
these guys, then the options
will appear below. For the options
below, we can adjust the brightness only
in this pink area. We choose light here. Don't rush to use the
exposure just yet, because if we use
the exposure first, all the dark areas
will be darker. While we only want to darken
the super bright areas, what should we
reduce first, guys? Well, yeah, Which one do we
reduce, The highlight guys? The highlight is what
we lower first so that only the brightest areas are
affected. Let's try this. But I think the area is
too large because it hits the cutting board while I think the cutting board
is not too bright. Let's just delete
that setting first. The trick we tap here, we hold, then we
select remove brush. And then we brush more. Well here, maybe I'll
use an even smaller one. I'll just wrap it in this area. It just hits here, then
we select light below. And then let's lower
the high light. Well, that's it guys. The good thing is that we can
edit it more precisely too. I see we make sure because the previous
part was too bright. People's eyes get used to seeing something
different first. What's the most different?
The brightest part was quite interesting
to our eyes. We make it timer so that the
focus returns to the foot. Okay, well then we
select the thick again. Okay. Then for example, for those of you who feel that, oh, this picture in this
part is still a bit dark. I want it to be a
little lighter. It's the same as the others. How to do it, which
is selective again. Then we select the
plus sign above. Well, here is the second weapon. We select it, then we just
have to tap to this area. Well, you can zoom it. Maybe we just fit it right here. After that, you just
need to select light. In this part, we
already brighten it. Well, if we want to
brighten overall, then it's okay to use
exposure. No problem. Well, yes, Then we
select the thick, We select the tick here. Okay, well, it's brighter. Okay. Then maybe in this area, if we want to brighten it, we can just choose selective again. Then we select plus,
and then we select the middle one which is here. We select light and
we brighten again. Okay. Yes guys. And then the next one is that we'll remove
the middle line by using the healing well
here so you can see it. What's the difference between the healing in light
room and snap set? If it was in snap set, it's already made automatically, so you can just
brush right away. But if we are here, we have
to set it up a bit first. If, for example you
want to change it, well guys, you can
change it like before. How big is the brush size? If it's in snap set, it's
automatically set from there. Well, my device is, try not to make it to big guys. The bigger it is, the
clean it will be. So just make it as large
as possible. A little B. Well, like this. Oops. Well, how come the editing
process with light room can create a shadowy
image like this? Well, you have to pay
attention. Try to check again. Here in the middle, the
opacity is already 100. It means that the intensity
is at its maximum. Maybe here, well the feather isn't 100 so we
have to lower it. Maybe it's 20, so the transparent
area becomes minimal. Well, look, the line
immediately disappeared. Okay, let's l the thick
and then we just have to carry on guys because we
already made the settings. Right? So we choose healing, then we just need to crush. Okay, well let's clean up the dirty areas so that
the image is cleaner. Okay, wow, this is so messy. We can go back sometimes. Not always. Okay.
Then we zoom it. Well, maybe you can make it
even smaller if possible. And then maybe try not to
be too solid. That's okay. Well, okay. Yeah. Okay.
And then we try again. Well, in light room, indeed. It can be more precise guys. Okay, maybe I'll
smoot it out a bit in this part so it's
not so visible. Okay, let's move on. Well, if you want to
get rid of this line, you must be patient. So just be patient. Well, for example, if you don't want to
bother removing this line, then I suggest you use a large
background so it won't be disturbed by these lines. Okay.
19. Project 2 (update): Crop the Area on Your Edit!: Well guys, we've already tied it again with the
healing brush earlier. Slowly the images
are finally need. Then we need to crop this. We crop it so that its position forms the
golden ratio composition. Guys, it has a spiral shaped
guys from here to here. Yes, we edit this and then I also brighten
it a little more. This is the result guys. Then guys, we just
have to export this. To export the file, you just
have to select it here. Then select Export
to Camera role. Here. If we have used
the premium features, you don't need to edit it more. On snaps guys. Yes, this is when
exporting the file. After the export is complete, the images can be directly
accessed in your gallery.
20. Project 3: Choose Your Props!: Okay guys, welcome to the section. I'm so excited with this section because in this section I will do a photo shoot just using fresh ingredients in your home. Okay? So if you want a challenge, using anything in your home and in fresh fruit in your home, then how you make it beautiful. Okay, So in this section, I will try to show you, okay, so we will only shoot orange, okay, in this action though. And the first, we will plan about the color story. Okay, so in this frame, the colored stony we want to create ES. First we use the dark background and then for the color we use the orange color, green color, and also the dark brown. Okay. I can see there have been quite similar with our background. So if you technically it's around three or four color, okay? So if you are asked to choose should only orange, then actually, you have to ask yourself, is orange is only one texture or you can create another texture of an orange. Okay? So even if it's only an orange, but you can actually can create many texture of an orange. Okay, So this is the first texture, orange. And then to create another one, maybe I tried to slice an orange like this. So this is the second texture of an orange. Okay, So actually you spill can try to make the another person like I tried to cut it half. So this is the third form of the texture of the orange. And then finally, I tried to think that what can I do to make another picture of an orange? Then finally I tried to squeeze the orange, so it looks like this. So yeah, you can creatively asked about with yourself that what can I do to create another texture of my subject here? Okay, so this is Word form of the texture of our orange. Say in one place I arrange Orin and small orange here. So and also the combine all the texture of the orange. So the, our furniture is where we reach of the form and texture of our orange. And then we also put our leap year Greenleaf's in our brain. It look like this. And then I'll explain to you another one. Also prepare the smaller plate like this and then add more texture. I also use the darker like this. I want to explain to you a bit about how to fall. Pebble code like this, okay? Sometimes if you want you all imaginary in the end, it doesn't match at all again, have you ever find that if you want to draw the clock line with them? Oh, okay, There is my beautiful. And then especially for the flatly angle, if you should run the top pumping it looks upward. So I will help you explain how to fall that this is so it looks natural, okay? Instead of holding like this, holding like this. If you hold like this and then you drop the closed, then it will be in rectangular form like this. So it looks unnatural for me. So instead of holding like this, I hope another angles, so it will be like this. And then I shake it a little bit and then yeah. Okay. Okay. Okay. I'll do it once again and then let's share. Yep. Okay. Like this, so it can be more natural and easily. Wow. Maybe you can try a couple of time until you get one that you want, but the probability of using light, this is higher, okay? That is how to create a texture from our pebble quote. And then I also add texture to my Big John using the spoon like this. Okay, yeah, I use the dark moon so it add texture, but it doesn't anymore colors, so it's still match our color story. And then I also put some breath here just to add more texture in our frame. And also I put some cinnamon powder here. That is our big unzipping, hello planning and also texture planning. And then let's do the composition part.
21. Project 3: Compose Your Shots!: Okay guys, In this section I will try to make the S curve composition. So our props, we are arranged like as letter here. So let's look at composition.
22. Project 3: Lighting Setting for Smartphone: Okay guys. Okay. We have already knew the set off and composition and then I'll explain to you about piping position. Okay? So more than likely position for the distance between our center here to our liking, the distance here is about one meter, and then the distance between our center of our frame here to the lighting is about 90 centimeters. Okay. So and then the Hague difference between our base becomes virtue. The lighting position there is about like 35 centimeters. Okay. So once again, I purposefully don't make the lighting too high because I want to create the highlight here and the shadow here. So there's the gradation between the highlight on the left side of the orange and the shadow on the right side of the orange because our subject is round like this, so I make, the lighting is lower, so it is more beautiful. The result will be more beautiful because there's a gradation between the highlight and the shadow. Okay? And then I'll explain to you about the blocking, okay. So I also if I don't use the blocking here, the lighting will be very flat and then not dramatic enough. Okay, So I used to walking here. I brought the first blocking I block in this position. So in the front area over here is will be darker. The main area is still get the direct flight from our light source. And then the second locking is over here. So I have made sure that the upper area of our frame is also darker so perfectly, then the lightning will directly hit our main subject and Aberdeen elements object will be a little bit darker and that's the I think. And then let's do the for the ship.
23. Project 3: Smartphone's Shot & Result: Okay guys, just now we have already done the photos yet. I'm so excited with the results. So our worst about the row picture, okay, this is the aerobic type using smartphones.
24. Project 3: DSLR's Shot & Result: Okay, Nice. Yeah. I will explain to you, extract how to take it from the SLR camera. Okay. So, okay, I will explain to you about our cameras. I think my shutter speed is 125 and then I use F number is five, yeah, 5 and then my ISO is 100. So I use the same Kelvin all the time, 5600 for this, I think, yeah, most of the time I use 5600 Kelvin. You can also address it with your and so maybe for your writing or your flashlight, maybe the f-number will be different, so yeah, you can try it. But most of the time I start with 5600. Okay, so the next I will explain to you about our writing position here. Maybe I want to like put it here first so you can see the position of our lighting? Yeah. There is the position of our leggings, Sorry. Yeah. Okay. It's facing straight to our main subject here. Okay. And then as you can see, let me explain to you about the distance here. The distance between here, our center of our subject to the light thing is about 130 centimeters. And then from here to the likely position here is about one meter or 100 centimeters. Okay. And then the Hague different between our base background here to the lighting is about 45 centimeters. Okay. Yeah. And then we also use the blocking here to block the light thing. So actually with the blocking, it will straight to our subject here. Okay, The Right Thing and the insignificant area like your hours, the big ground will be darker because it's blocked with our blocking here. So I'll explain to you about the distance between our BPS or to the right thing here, okay? The distance between our lighting to our diffuser here is about 30 centimeters. Okay? So it really fills our lighting so that I think will be very beautiful if you don't use business actually this is a very VCM, both tools, but yeah, it's very powerful. Actually. I often use this one instead of using soft box because I can control the distance between the flesh and the diffuser. So yeah, I think I enjoy taking shipped with this. I think more portable than the soft rock, So yeah. Yeah. Can you also make sure that the distance between the lightning and this is also methods. Okay. So yeah, that's the explanation about the lighting. Then let's do the photo shoot.
25. Project 3 (update): Edit Your Image in Lightroom!: Okay guys, I'm really excited
to edit this image guys. Why? Because this
frame is quite fun. And also cool guys, when taking pictures
using a smartphone, sometimes the image
looks faded a bit pale. Then how to make this
image more commercial? Well, here we'll
immediately prove that this image can be repaired. Guys, here, you might
be confused too. Oh, it turns out the editing
technique is simple, right? What do you think
guys? Let's just light first and then as usual we're going to reduce
the highlights. We'll increase the white guys. Well, here's the white. When we increase the white, what I noticed was
in my foot area, the most important thing is in the foot area first is the
color of the foot, correct? The brightness is
already proper yet. I'll adjust the brightness
until it's just right. Well, I think this is
enough here for the shadow. Shall we rise or
lower the shadow? In my opinion, here
maybe I'll lower the shadow so that it will
be more three dimensional. I'll leave the shadow first, then later we'll try
to see after this. For the next, I'll start
from the detail first. Just try not to forget this. Okay. Noise reduction increase the sharpening and the masking increase the noise reduction? Yes. Okay. Well then we'll
go to the next part. Now, the outer area
is too bright. While I want to focus
to be in the middle, so I darken all this outer area. We're going to use vignette. We're going to go
to the effect part. And then we're going
to play the fine, let's get the get down as usual. We mute the midpoint, we maximize the feather
and the roundness. Well now you can see this, wow, this image has changed
quite drastically, guys. Well, from here let's
try to compare before. After now, the image has
started to focus on the center. And then here guys, I'll try to crop the image first because we determine what
our frame will look like. I'll try cropping first here. I'll set the cropping so that we'll get rid of
the unnecessary parts. Maybe I'll set it.
The composition is at this intersection point. It will be hit by
our main object, well in this line, at the
meeting point of this and this. Okay, I'll choose first. Yes. And then here we'll try
to go into the effect menu. And then I'll try to
increase the texture to make it real well. Here you can see that the
texture is more real guys. Well when we zoom in it
looks really sharp guys. Then I'll try to increase
the dehaze so that the contrast goes up here. The, if I conclude, I use the dehaze quite
often when editing dark mood photos because
the color becomes more pop. It's like if you like chili
then you don't eat with it. It won't taste delicious. That's it, Yeah, I added haze. Maybe you'll see that.
Oh my, It's really dark. It's okay. We can brighten
certain areas later. What's important is
the whole image is a tre D. Well, that's
also important. Well, when I add it like this, I'll see the main object. The important thing is
that our main object is texture and the shadow is proper to make the
image look treed. Well, for the others, we can brighten the dark areas later. Okay, we'll try, if we
increase it, how good is it? Okay, I think this
image is really cool. The next one is that we'll
make the area here brighter. Well, earlier I didn't
explain one thing. For example, if you edit
the image on snap set, you just need to brush the
area that you want to darken. But here I'll try
to use another one. The area called selective, we haven't discussed
this before. It is here. There's such a
menu called gradient here. The gradient is the part
that you can slide to here. Well, the red area is the
area we want to darken. I want to make the area here D that the light seems
to focus on this part. Only here in light, I'm going to lower the exposure. It's really focused here, guys, this area
will not interfere. Then we'll brighten the area
over here, how to do it. We chose selective, and we
choose this and this one here. We zoom in more and we
just brush in these areas. We just then here
we choose light, and then I choose exposure. I increase it a little bit. For example, if there are
still really dark areas, maybe we can increase
the shadow to, then we select the thick, we'll see for example, it's already bright enough, but this part is still
very dark black. Maybe we can brush once
more to enhance the shadow. We choose selective.
We choose plus sign. And then we select
this. We chose, let's brush more in
the dark areas then. Here we select light. Then we increase the shadow. Maybe it's not so visible,
but it's pretty good. But wait, this is a bit lacking. I'll try to increase
the exposure. Oops, too much. Okay, well, wow, that's really
interesting, right? Well, for those of you who don't like it because
it's too dark here, Wait a minute, here,
there's one bright spot. We'll try to fix it more. Maybe I'll create a
little gradient here. I turn off the high light, I lower the exposure. It flat, well it's right, it's right at the bottom part. Then maybe for those of you who feel that at the
bottom is too black, let's try to choose
the selective. We choose this, we choose this, and then we create
the gradient more. But in this part we'll
brighten a bit. We is light. We lighten it a bit.
The important thing is the color doesn't turn black. Well, okay, we select the thick. Okay, Well, let the
color be normal, so it's not too dark. But here, there is
one more thing that burns us after we
light it up earlier. It's too bright. So if
we look at the image, this part is the
most different part. Well guys, if you want
to evaluate the image, you take a short break and
after that you see it again. Do you think there
are extra objects that are too much or not? Well, I think this
is a bit redundant. I choose the selective
again, no problem. There are many things
we must do guys, but no problem here. We just select the plus sign
and we choose the middle. If the object is round, I prefer to use this one. Then we just select
the light over here, and then we make it darker. Now, we'll continue this and then here we've written
a bit in this area, guys, so that it is lighter. Then as I explained
earlier, we recheck again. We choose color
and we choose mix. Here. If there's no blue
and purple in the image, I usually turn off
the blue and purple. We choose this, we turn it off. The purple two, yeah,
we turn it off. Yeah, the color
looks more focused. Well, guys, here we can see that if we look at
the comparison, this is before and this
is after we guys here, you can see that the difference
is very significant. Well, here, maybe in this
area, it is a bit too bright. I'll try once more to choose selective with the brush
only in this area. Wait, I'll zoom in then with
the brush only in this area, maybe I lower the high light
so it looks more neutral. Okay, very good. Very good. Then wait, there's still
a bit of the edge. I'm going to brush a
little on the edge. I'll lower the highlight. Oops. Okay, I'll
use the gradient. Well, so we darken. Okay. Yes, you can
see this before. After. Okay, and then
now here we'll directly export it guys guys, this time for the
editing process. It looks like why it's really complex for us to and so on. It turns out that there
are many things we must do. Well, that's okay. Actually what you
need to remember is the principle that when we edit, we bring back the focus
from the foot here. We return the focus
to the center, so that the unimportant areas we change become more
insignificant. It was very bright here, so that's why we
darken it to make the focus return to
our main object. Then we'll export. We choose
Save the Camera role, and then we can open the
image in our gallery guise.
26. Project 4: Choose Your Props!: Hey guys, Welcome to this section. In this section we will also do the flood level, Does youth and then, and this action, we will also use the ingredients that is ready in your home. Okay? So we try how to make the simple thing into a beautiful picture. Okay, So all we know, I'm sure that you have this item in your home that is fake. Okay. So sometimes it will work that if you wonder, should take like the form is very simple. The current is very simple. So how the combos this into a viewer of opaque chair. Okay, So actually it's not only works for that, yeah, this technique will also be applicable with another ingredients in your home. Okay, So the first, I will explain to you about the prompts we use in this section. And the first, I choose the dark blue cloth year. So actually, if you have the cloth with dark blue color or purple color like this, actually, because there's not much for, that is half this type of color, then if you want to transform this color into dark gray. So in Lightroom is very simple and very easy. So you don't have to worry if you don't have like very large grain growth. So you can just use dark blue like this and then you just knit like for until five seconds in adequate room to transform this one into gray. Okay? One is also one of my favorite because I buy this one. I may very much of the year. So yup, I can cut this anytime when I need smaller pieces. So I just cut this one into small pieces. So yeah. This is the texture I want to app. And then I also, yeah, prepare some kind of AIG here. So I also used the plate like this. I spec it together to add more texture in our frame. And then I also have this, a container like this. And then I also have quite a moral one. And then also I use with the dark bowl like this. So the column there is excess in our VM is only the color of a. And then there is no other color, but just another texture of this one. Okay, so it seems quite simple, but I'm pretty sure we can compose a beautiful picture from this one. Okay, so let's do the composition.
27. Project 4: Compose Your Shots!: Okay guys, now we want to apply a technique called leading lines. Okay, so we make, we set our props in SILAC bar like this. Yeah. So we may, our viewer of this picture see the lines of our ingredients unit. Okay, so the lines is letter C. Okay, so let's start doing it.
28. Project 4: Lighting Setting for Smartphone: You guys, we have already done with the composition and then I will explain to you about the lighting setting here. Yeah, depend from the setting we do before in disarming, we do the straight back life. Okay? So the settings here from the distance between the center or our frame to our liking, there is about 70 centimeters. The distance between here to our liking is about one meter. And then the Hague different between our base by going to our lighting there is about 30 centimeters. Okay. So This is straight, so it's called a callback, like being okay. And then I also hope the lighting here, so they likely will straight from year two, our frame. So there will be beautiful lighting direction and also the gradation between the dark area here into the light area here. So it will be quite beautiful. Okay. So yeah, that's an explanation about the lighting. And then I have another tips for you about taking real smartphone. Sometimes when you pick with smartphone, there's a condition when the lighting directly hit our lens. It will be like our lens flare, but it will affect the color of our picture. The color won't be that sharp. So sometimes when I set the light being this low, then the Liping will come through the lens directly, okay, So it will affect our picture. Then what the trick to prevent them. Then sometimes when I take the picture, I put my hand here. So the lighting non Bagley heap ions. Okay. Yeah. The lighting we catch is the light thing that come through the back ground and bounce back to our lens. But the light finger is directly come to our lens will be a lens flare gun it Long be that good for the quality of the picture. Okay. So yep, that's the pips. And then Yup, we have already done with the writing. Then let's do the for the ship.
29. Project 4: Smartphone's Shot & Result: Hello. I'm so excited. And this is the result of aerobic care.
30. Project 4: DSLR's Shot & Result: Okay guys, Now I'll try to stimulate, okay, let's try to take using DSLR camera, okay. At first, I will explain to you about the cameras are being okay in our cameras, I think, yes, I saw 100 and then I use aperture for 4.5 and the shutter speed is 125. Okay, So because I want to capture a larger area of this frame, then I use the wide lens here, okay? And then I'll explain to you about the lighting there. Okay. I'll move this diffuser so you can see the liking that actually, okay, the distance between the center here to our liking as about one meter and in the Hague, different between the lightning and our beggar here is about 35 centimeter okay. To make our Liping soft, then we use the diffuser and then the flash power. Setting off less power. Yes. Okay. So that's the explanation about the lighting. Okay. So let's do the photoshoot. Once the database details of these nerves.
31. Project 4 (update): Edit Your Image in Lightroom!: Okay guys, we've come
to the next image will actually when taking
pictures using a smartphone, if we pay attention to it, actually the blue
color is a bit flashy. Then it's a bit lacking
the rustic side because I think the
blue looks more like satin compared to rustic. How to fix it? If you guys have blue
clothes like this, don't throw it away,
because this blue color can also be changed to
a more neutral color. And we will discuss
it this time. We'll try to edit it here, since this image is quite messy. First we'll crop it, I'll crop it first to
the right position. We throw it away. Okay, first we crop to
the position we won. The image will be much
better first. Okay. Yes, let's try cropping it more. Maybe I'll make it
more portrayed. Well, that's it. Okay, let's try to
crop it a bit more. Yes, we try to crop like this. And then what should we do guys? Now we'll do basic editing. First, we'll choose light, lower the high light,
and increase the white. Okay, here I'll try to decide whether I'll increase
or decrease the shadow. Maybe here I'll
increase the shadow a bit because the shadow
is already too rich. What's important is that it's
still three dimensional. There's a transition
between light and dark. Well, in my opinion,
if you redo it, there will be too many
black ones later. Well, okay, because I
see it from this side. If we lower the shadow, it becomes really plaque,
The details disappear. Well, that's why we
increase the shadow a bit. Okay. And then don't forget, we go into the detailed part. And here we increase
the sharpening the masking and we also
increase the noise reduction. Yes. Next we will go
into the effect section. While the effect here,
if the image is dark, let's try it first,
we increase the haze. Is it much better? It
hasn't changed much, but I'll just try to
increase it a bit here. I'll try to increase
the texture so that the texture of the foot
looks more obvious. Well, here I'll try
to play on Fig. I'll reduce the fignette. I mute the midpoint, then we increase the feather,
and the roundness too. Okay, Will the result be good? Not too bad here guys. If you've done the
basic editing, let's go to the color
section here like this. What I want to sell
here are the eggs. I'll try to reduce
this blue color, try to make it more neutral. Let the color match
the background so that the color of the
egg comes out more. We'll choose in
the mixed section, we'll choose the
blue. We'll mute it. Okay. We'll also
mute the blue one. We'll also mute the purple
and the pink color. Yeah, we'll mute it all. Yeah, the blue cloth
turns gray, right? Well, here maybe for those of you who don't
really like gray, you can adjust it a bit so as
not to lose the gray color. Yeah. And then, yeah, well then maybe in this
area it's a bit too bright, while down below
it's a bit too dark. Well, maybe here
is the last time. If for example I
want to reduce it, the contrast is just right. If I want to brighten or darken it while
it's already right, maybe I'll just lower the
exposure a bit later. For the part that is a bit
dark, we can brighten it. Okay, Well here I'll try
to select the curve. We'll try to play it. We give three dots. Okay. Then here I'll try to increase it a bit so that the image is not
too contrast it, especially for this one. Just a little bit.
Yes, very good. Then we select done. Okay, well here maybe I'll
try to compare it again. Yeah, let's check it again. Here the green is a bit
less intense, right? Well, here the green
is a bit faded. Here, we can select
the color part and we select the mixed part. And then we can
increase the green. We increase the
saturation a bit, because it turns out
that the color of the salted egg is also affected. So let's increase it a bit. Okay, here we tried to play the white
balance because I think the picture
is a bit yellow. So we tried to move it
to blue a little bit. Oh yeah. Because we've
lowered the blue to gray, so we won't be able
to shift it to blue. The blue color is
a bit lost, right? So if you slide it here, it's not blue, it's
actually gray. That's it guys. Okay we, but here it seems the
texture is a bit too much, guys, maybe here I'll go
back to the effect section. Let's try to reduce the
texture. It's not too flashy. Okay, let's try to recheck it. If we crop to
lengthen the image. Yeah, at the edge
there's something disturbing because it was
hit by the band text. We'll fix it on snaps guys. After this we'll try, we retouch more in snaps. Well, okay, we're going to
darken the area here later in snaps to make it
more palant so it's not over or suddenly
under in the bottom part. We're going to fix
this on snaps too. Okay? Of course, we'll also remove this
line in snaps guys. Okay? Yes, that's it. Let's try to compare
before and after guys. This is before. Let's look at the before
picture for a while. We this is before, then this is the
after guys, okay? Okay. Well, I want to tell you here in the version section here,
we can add version. We just click Create
Version here. Then we, since this is
for an online course, I'll name it with course. Okay, here we can go back
to the original two guys, we can select the
original version, and this is the original version and this is what
we edited earlier. We select Apply. Well,
let's try to test it again. My advice is when do
you use this version? When you've edited one
but still want to try another version of editing guys. You can create
version first and we can edit it again later. You can save it again and
give it the name again. Well, like that. Okay, well, we'll try to get into
the light part again. We just raise the shadow, right? Let's try to lower
the shadow now. Does the picture pop out more? Okay, let's try to
choose the effect part. Well, to make it more
three dimensional guys. Well, it's just that this
is a bit too bright. Later we can darken it in. Snaps it before Yes,
the previous image. The lighting looks a bit, even guys, while for the after
it becomes more textured. Right. The bright dark area
also looks clearer here. If we increase the texture, it's a bit too much. Okay, well that's more or less. And then we'll move
to snaps it guys. Before that we say first
we choose here and then we choose export to
Camerra rule, then yes. Now the image can
be accessed from your gallery and then let's
move to the next section.
32. Project 4 (update): Edit Your Image in Snapseed!: Okay guys, we've come to the snap set application and now what are we going to do
with the image guys? We want to fix it a bit. We're going to delete the lines. And then we're also
going to darken a bit on the areas
that are too light, areas that are too dark. Well, lighten them up a bit. This area is a bit too bright, this area is a bit too dark. See, so we're going to do that
and you just select tools. And here we'll choose selective. And then we'll tap in the
areas that are too bright. Well, then we'll
use two fingers. Okay, well, these red areas are the areas that will
darken later. Okay. Well here guys, just swipe left, swipe left to darken it a bit. My advice is place it
in a bright area too, so it's going to seek
the same color, right? Well, maybe this, well, we're going to
darken it up a bit. Then in another area, okay, we select the plus sign. And in the area here, we want to brighten it too, but we should not place
it in a very black area. Okay, maybe here
we're going to swipe right to make it brighter. Well, after it's too bright. And the guys, if you feel maybe the contrast is reduced here, there is also the
structure menu, which serves to
increase the contrast. I prefer to use structure. If I use the contrast,
sometimes the color changes. Oh, this is pretty
good too, Not bad. Well, we'll still
get the contrast. Okay, we choose
the thick and yes, it's more balance here guys. It's also quite
bright here Here. We dim it a bit. Okay,
It's more balance. And then we'll select tools again and we choose the healing. Let's fix the
details again guys. Actually a river healing on
snaps it because it's better. Not complicated. It
was straightforward. Oh, but you have to be
careful guys. Okay. If you can zoom in
at the maximum, it's better to do
it because it's safer then at the top area, this is Yeah, this area. Okay. Very nice. This side. Maybe we can just
clean it up sometimes. Maybe we must be patient guys because sometimes
when we're brushing, it's not always net. Okay. Yes. Well, sometimes we really need to try guys
until it's really well, sometimes it seems
a bit messy too. For those of you who
have premium light room, you can also try it
because who knows if the premium light room
can be neither, right? But what we can do is we do the best from the
resources we have. That's my advice guys. Sometimes not all the resources we have today can
be used maximally. That's all we, I'll try this. Oh, it turns out it can't we. Not too bad. There are
annoying black spots, the white areas to maybe to make a texture
image like this. You can do the best or you can also clone
and stamp if for example you do the
editing on the computer. Okay, But what is certain is that we make
sure that the part of the object that we shoot
is more balance, okay. Well, in my opinion, if for example this bothers
you, we can tidy up. Again, If you have the
premium light room, you can also try using
the premium light room. But here I try to explain that you don't need to
have premium software, even the free ones
can actually be used.
33. Project 5: Choose Your Props!: Okay. We have already through the competition for ministry, I mean cookies. And then we have already done with the symbol thing in your home, using like a cake or using throats. And then, okay, we will do some exploration again. So now we will try to show the process of past by making, okay, and then this time we will try to construct the FASTA or spaghetti making. Okay, so I prepared a spaghetti here, the row one, and then also the bow here. So this scene, we will try to make the viewer of this picture feel about the process of pasta making, okay? And then the color story in this scene is we chose to have the dark mid ground. And then we also, one of the main color is this color, this light yellow color of the FASFA. And then we also put the floor here. Yeah. To app the contrasts are gay, so it's also important to plan that contrast in your frame, okay? Sometimes you can add the contrast by adding floor on the dark bag gum. Also use like the salt here to also add the contrast, okay, it will make our product even more pop out. So and the props we use in this frame, we also use the, mostly the dot one, so it only add the texture in our frame. But the main subject here is the pasta dough here. So we will put this main subject and exactly golden ratio composition. Okay, So let's move to the next section. We will do the composition for this part.
34. Project 5: Compose Your Shots!: Okay guys, now we will start to do our composition. So our plan is we want you do the golden ratio, like the pepper is parallel like this. So the main object will be here. The planning is we want you to hold my spaghetti note here that if we put it like depths, then the head will be shown wearing so many hands in the frame. So we plan of Chu most like this. So there's not many hands in our frame then in focus on the ingredients. I'll try Ukraine, Okay? So yeah, the planning, we use the golden ratio and then left due to competition.
35. Project 5: Lighting Setting for Smartphone: Okay guys, we have done with the composition and then I'll explain to you about the lighting settings we use for this frame. Okay. So the lighting position with far as the distance between here to our lighting position, yeah. The distance here is about 130000. The metals and the distance between here to the lighting is about 90 centimeters. Okay. So the heck different between the background, should the lighting there is about 40 centimeter? Yeah. Bears the position of our lighting. If you see that there's a pattern guys. Okay. There's a buy them because the lighting we said is that simple? Okay. So I'm pretty sure that you can also practice this one at your home. Okay. So yeah, that's the lighting introduction. And then let's do the photo shoot.
36. Project 5: Smartphone's Shot & Result: Okay guys, I'm going to get back into Photoshop. I am so excited. And then here's the result from our phone.
37. Project 5: DSLR's Shot & Result: Okay guys. We will try to shoot with our DSLR camera and then I will explain to you about the settings. So this I think is still the same guys. Okay, so our shutter speed is 125 and the aperture is 4.5 and the ISO is 100. Okay? So that's all cameras, I think. And then I still use the wide lens Canon 17 through 40 millimeter again. So our likely position here, so the distance between our main subject to our lighting is about 1.3 meters or 130 centimeter. Okay. Then the distance between the alive in here to our subject there is about nine feet and the metric and then assemble as you just put your diffuser in front of your liking, about 95, send him at the integral of your Liping again, so it will mutate freely, diffuse our subject there, okay. The Hague difference between the lighting to our subject is about 25 centimeter also. Okay, so that's the simple I think we use for this platelet. And then let's do the Photoshop.
38. Project 5 (update): Edit Your Image in Lightroom!: Okay guys, welcome to the
editing section again. Well, here guys. Well, I want to edit more for this one then. How can we make this
picture dramatic again? Okay, well, as usual, if we take it with a smartphone, the picture might
be a bit faded. The colors and all kinds
that we want to lift. If we look at the
details when we zoom in, the picture also
has a lot of noise. Sometimes the quality, yeah, especially when we shoot
in the dark like this, the quality is a bit reduced. You don't need to
worry. And then what we want to do first, as usual, is let's all
memorize this, okay? We lower the highlight,
increase the white. Then here, yes, I'll increase
the white to moderate. And then maybe the shadow here, I'll try to lower it. Okay. Yes, I'll try
to lower it a bit. It still has a degradation
from light to dark here. Don't forget, maybe
I'll drop it first. Okay, I'm going to frame the image that it's
more pleasing to the eye. Here, maybe I'll make the
image more portrayed. Well, yes, here I'll try
to use the healing first. We delete first the areas
that are not hoops. It's small, right? So here we are going to enlarge
the brush a bit. Well, we'll clean up
the unnecessary areas. Okay. Okay. Well, it's clean guys. And then here we're going to start again in the
detail section. We're going to increase
the sharpening and the masking and then we
adjust the noise reduction. Here, this image
is improving guys, compare it to the previous one, but if you want it to be even smoother actually you can
increase the noise reduction. The image is much better
compared to the previous image. Let's look at the
previous image. Well, as you can
see in the image, the noise is pretty bad. But when it's increased, the image becomes smoother. Right? Here we go. Maybe we'll compare. The four after is also pretty
good in color, right? The color is still consistent
but more pop out, right? Okay, here we'll try to
select in the effect section, then I'll try to
increase the haze. Just try to increase the
contrast of the image. Maybe I'll increase
the texture a bit too. Okay, well here
we'll try to play the vignette to make
the surrounding image a bit dark, just a little bit. Okay, very good. Here we're going to go to
the color section guys. Well, here we choose mix. Then maybe I'll try turning
off the saturation for all the blues and purples in this image to neutralize them. Then maybe I'll try to
reduce the yellow color. It's not too much well, so that the color
is not too strong. Maybe the yellow color is a bit less than
normal, isn't it? We're going to reduce
the yellow a little bit. It's less intense. Well, from here we
can compare guys. The contrast is still the same, but we reduce the color a bit. Well, this is before pale
and this is the after guys. Wow, okay, maybe idly, we try to test, we
add a gradient here. Maybe we should try here. The importance of
the editing process is we're also exploring guys. It cannot be all like, oh, it should be like this,
then it should be like that. Okay guys, is also important
for us to explore. And maybe the area here
is a bit too dark. Maybe I'll increase it a bit. We're going to brush
here in this area. We, I'll try it in
the light section, then I'll increase the
white to make it a bit brighter, but not all of it. For the dark area,
I'll leave it first. Well, okay guys, pay attention. This is actually in the dark. There is cove. Well, we
can also leave this guys. The trick is we use selective
and then we choose this. Okay. I'll demote this if
we use the premium feature. If you use Snapseed, it
means the same thing, you just need to brush
using Snapseed, okay? For example, if you use the premium one, you can
use this method. If not, you can move to snaps. Just use the features
I've explained. On Snapp, it has the
same function guys. Okay, well here I'll
increase the shadow and then I'll increase the
exposure a little bit. It's a little pick. Okay. Well, look at
the details guys. For those of you who see that, maybe here the area is a bit too dark to be
very black. Right? If it's possible. I'd
rather avoid areas that, if possible, don't
get too black. Because when the
image is printed, the result will be very
black and blocked. Well, here we can we
increase the exposure, maybe the shadow first, but if you increase the shadow, it's not too visible. So we need to increase
the exposure too. Okay. And then maybe I'll add some more here because
it's still a bit black. Well, indeed, no
details are lost. The shadow and all the stuffs is still pop out. That's it guys. Yes. Okay. Well, maybe when we mute a color
or remove a color, the color we reduce will make the existing
color brighter. Well, that's also one way to increase the focus of our image. For example, there is
no blue in this image, so we turn off the blue. But remember that this setting does not apply to all
types of editing. For those of you who
want the background to look a bit blue, no problem. But in this image, what is highlighted is the noodles,
the making process. Then the yellow looks
natural, right? That's what we did guys. And just for the option, for those of you who want to use the curve, just go for it. For example, if you want
to make the image more, well, it's more
like less contrast. Okay, Well, but for me, I prefer this image
incidentally. At least what is really
important for you to understand is that
like the previous, if we make something too dark, I try to don't leave
too much black area. Okay. So sometimes I can lift it up again so that
I can still get the details. If it's become plain black,
it's a shame, right? Because indeed it has
texture and detail too. The detail is still
visible even though it's a little bit,
but still visible. Don't let it get black. That's it. Okay. Yes. And then we try to compare the image. This is before and
this is after guys, well, the color, sharpness
and others have improved. And finally we're
going to remove the line. We choose the healing. And then, whoa, this is huge. We're going to undo. First click back here and we're
going to minimize this. And then we're going to brush, let's first. Well, sometimes it often
slides to the wrong place. Guys like this, it took
the sample from here. We can slide this up. Yes, it will take a
sample from it, guys. Okay, let's add more. Yes. Okay. It's a bit
challenging, isn't it? But we'll try it in the past. Editing like this couldn't be
done on a smartphone guys. Well, nowadays it's pretty easy to edit it on a smartphone. So we accept the
challenge, okay? Whoa. Wow. Okay. Sim cell beam and the magic happened,
it's gone, right? And then you can
see a, well, the, the colors and all sorts of beam actually if you look at
it with the naked eye, if you say it's very different, no, it's not really. But there are areas that make the color and the
image quality improve. This editing method makes
the colors less distorted. Because if, for example the
color is very distorted, well, sometimes the color of the foot becomes
unnatural like that. Well, in my opinion, it is
important for us to muster editing to make the foot
stay in its natural color. Because the foot will instantly, when we see a foot photo, our brain will immediately
remember memories when we're eating the food, for example. If the color shifts too much, it will make the process
seem longer, right? The process of our brain, when we see that color, it doesn't look attractive. The thoughts from our
subconscious about the taste of the food is
getting harder to express. Well, that's it guys. The editing process
for this image, and we immediately move
to the next section.
39. Closing: I'm so excited to see you this long video, okay, from the first of the course until the last of the scores. Okay, this is the last section of our course, and then I'll give you some reminder. Okay, the first one is, if you are practicing this course, if you find that, well, I think this picture, I do extract this picture. I don't think it is quite good enough, then you don't have to worry because usually when practicing, I suggest you to open our course in your sites so you practice our while you're watching our course. So you can compare the lighting setting, you can compare about the conversation, okay, so I suggest you can also open this course in anytime. And I always how to our students around the world. Okay, so, and then maybe you can open the cause also more than one time to get another insight with different perspective or different condition. Because maybe you are watching this course who while not doing a photo shoot, but while doing the photoshoot, maybe you can apply it precisely step-by-step. Okay. And then the next one is, if you feel that you are not confident enough for the result, you don't have to worry because even if I'm the one who are doing the food photography almost every single day from the start of my career until now, I consistently doing the food photography, but I don't get even I don't get the result that I want in the first shot. So it's very understandable. If you are first taking the shot, then you like, I still don't like this big. Okay. It's very okay. Even the professional also fell dead. But all you have to do is that's not good or bad picture, but you can also improve it by adding the alternative. Again. So I always see the improvement as the alternative. So instead of I pick five picture, I feel I don't like it and I leave the photos Asian or end of the session, but I'll try to find more and more alternative, okay, So you can be adventurous and play around the composition. Okay, we didn't the same dish or we did the same a foot. You can explore some kind of conversation, even if just the same, but you can get the different feeling, you can get the different composition, and you can get a different result. And then you can also explore about the light thing. You can change the lighting position, and then you can put the blocking and then take out the blocking so you will get more and more alternative may be the best picture will come with the fifth or pants or 20 years. So you don't have to worry because you can keep progressing by adding more alternative. Okay, So I think that's the session for this course. And then I am very happy if you someday, you can leave a comment with us and then maybe we can keep in touch with you wherever you are around the world. I'm so happy to see you and then I'll see you in the next course, maybe in the future. Okay, See you.
 Foodior Class, Professional Food Photography Trainer