Transcripts
1. Introduction: Do you ever get a pot full
of inspirational ideas? Just pop corning
all over the place. Great and wonderful and you
don't want to forget them. So you write them down
somewhere, anywhere, maybe in a random notebook or on a piece of paper, on a post-it. Or maybe you typed them up on your computer or you dictate
them onto your phone. And so later when you have a spare moment to work on
one of those grand ideas. Well, you can't
find it anywhere. What was that idea again, or where did I put it? What file or folder? What book or paper? Hi there. I'm an
yesterday snack, an artist from France. Apart from doing
art and teaching, something within me,
loves to organize, plan, and set things up. So this is the part
of me that you'll get to see today in this class. But I also got into a
chaotic mess once upon a time with all
those great ideas flying all over the place. Until I realized that
all that just took up so much mental
space and brain energy that I could be instead
using up on focusing on those creative ideas or on the project that
needed to get done. Today. I work very differently, of course, after many trials
and fails on the way. But I think that's
what's led me to so crazy about organization. And so today I'm going
to share with you one cool organizational tip that has worked really well for me and still continues
to work for me today. As I create courses
or maybe start on a book project or
illustrate a children's book. I might even use these ideas for a big home project or renovating project, a
decluttering project. Most of all is just categorizing
all those wonderful, great ideas and inspirations. Having a place where you
can put it all and see it, visualize it all into one place. Instead of my mind
going a little bit all over the place with just a little time of planning and organizing and prioritizing. You'll notice that you'll
get all those ideas just working in perfect harmony. So let's get started on this
colorful, artsy organizing. I'll see you in class.
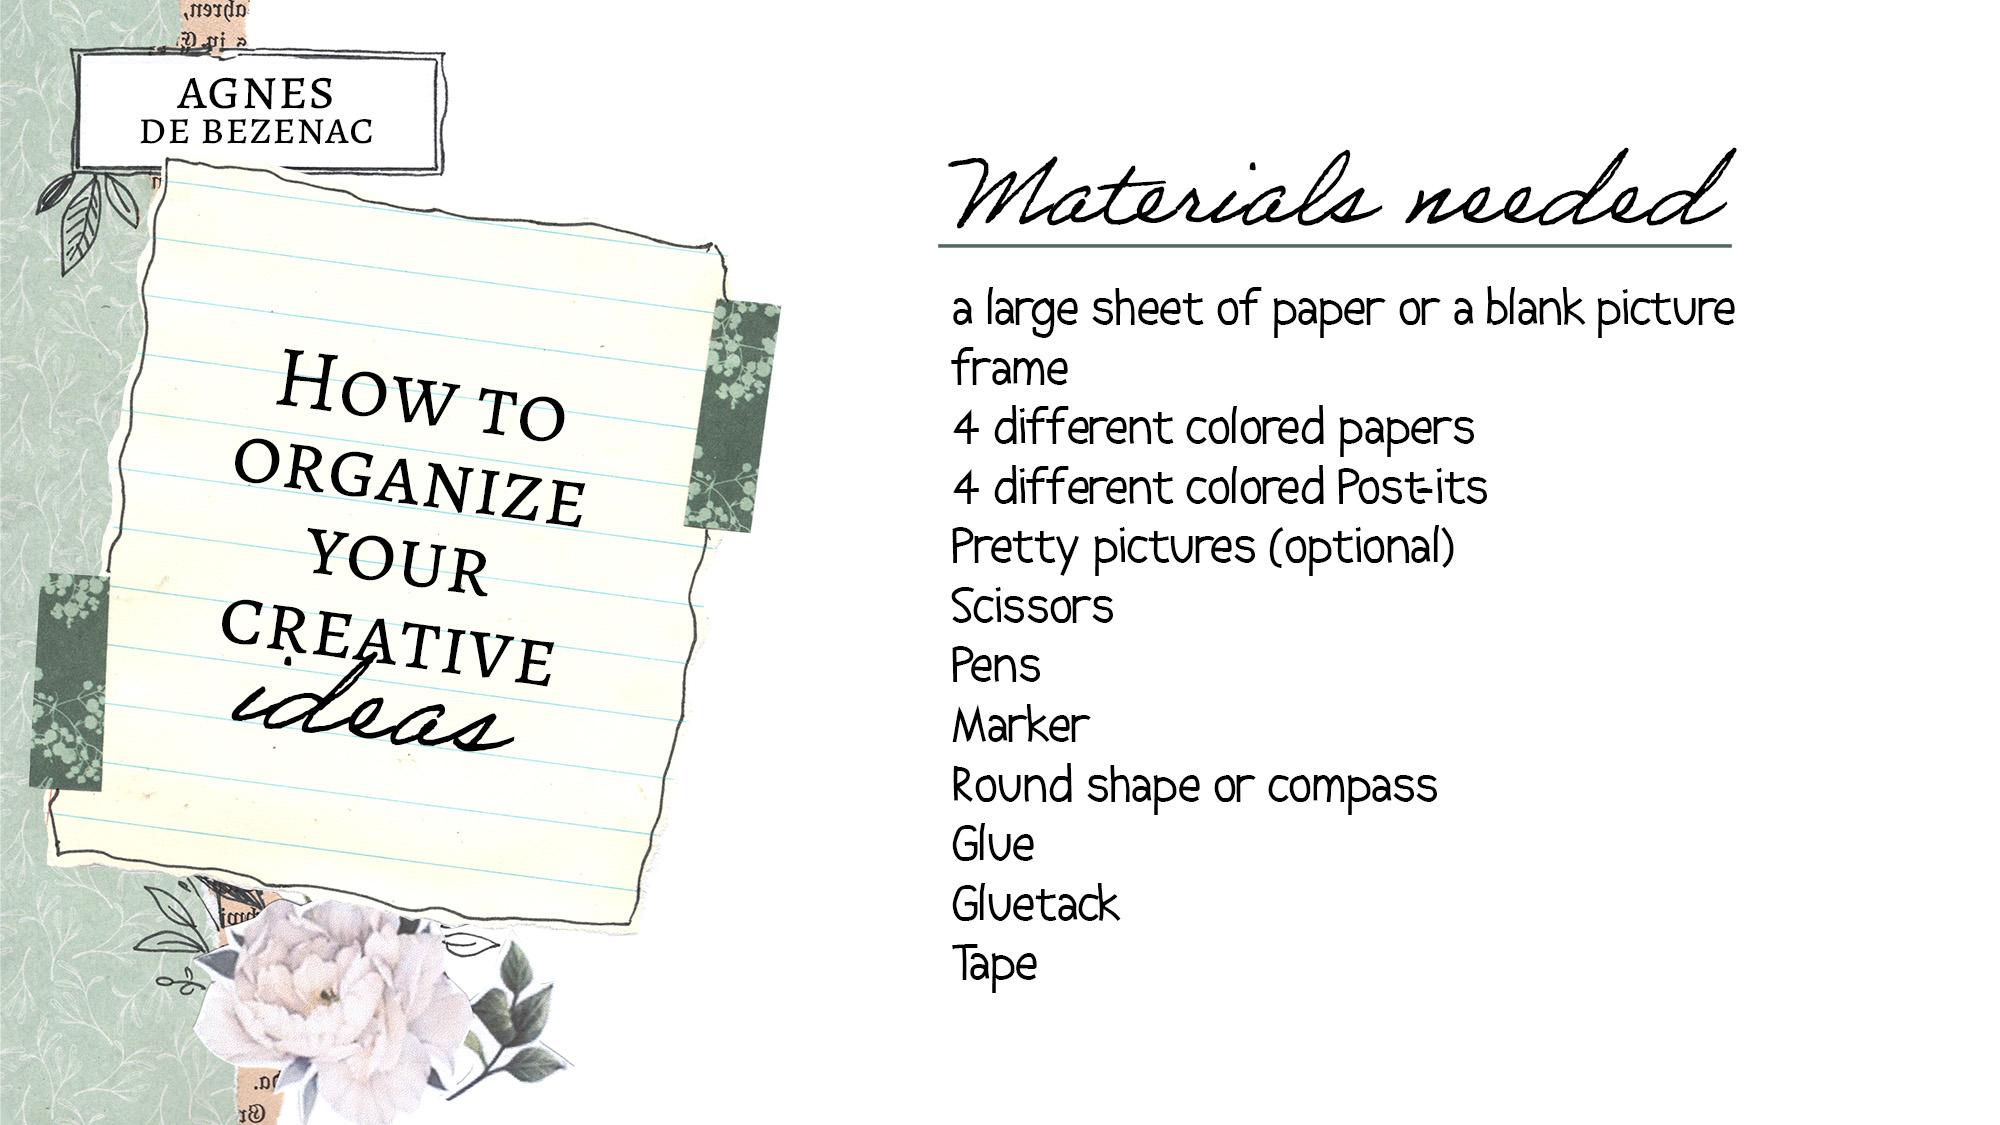
2. Materials Needed: Here are the materials
that I use for creating my organizational plan. I chose to work with a picture frame with just
a plain white background. Quite big because that's the
size that I wanted to work with and it's the size that
I want to post on my wall. If you don't have
a picture frame or if you want
something smaller, you could also use just a
regular piece of paper. This is an A3 sheet of paper. Next, I will be using four
different colored papers. So I've picked out green, yellow, pink, and blue. Since I didn't have blue, I'm just using a vellum paper. But go ahead and choose any four colors that
you would like, or as many as you will need. You can start with Ford. And as you go
through the course, you can decide if you want
to use more colors or less. It's really up to you. Next, I will choose four
colors of post-its. So again, I'm going with the
four colors of my papers. Just a different
shade of that color. Dislike everything
color coordinated. As you can see. I've picked these
four colors and to go along with my four different
colors of post-its. I like the variety in colors, but at the same time, they're each a little
different shade of that color. So that's it for my materials. Now, moving on to the
supplies that I use. You will need some scissors, some tape, some glue. And I have a little
piece of glue tack here. You will also need a
pencil and some pens. See either a ballpoint
pen or an ink pen. And if you would like a permanent marker just for
something to stand out more. And you'll also need something
round or different shapes. So I'm just using this candle. I'm just going to use the MID. If you have a compass, you can use that instead. Or maybe a cup or bowl.
3. Simplify Your Life: So in case you're like me, sometimes you just
have an overload of ideas in your notebooks. Notepads, have another notebook and tons of papers or maybe
post it's all over the place. Then I have to-dos and
ideas on my phone. Then I have files
on my computer. And I'm just getting
an overload for my poor little brain and with ideas all over the
place that get lost, I get forgotten about. Well, I don't need to tell
you more of the problems because that's the reason you're here in the first
place, I'm guessing. So let's move on
to some solutions. Firstly, why do we want
to get better organized? So for me, I like to ask
myself those why questions? Because it keeps me
motivated and it keeps me persevering to continuing
on with my project. So you can get your little
note pad or a piece of paper and start writing
down the Y for you. What's your purpose? What's your name? So for me, I think my biggest
y's are just as reminders. So I don't forget, important things are
important ideas, inspirational ideas, because I feel that ideas are so
quick to come and go. Also as a way to
simplify my life, to sort and organize
my ideas and to get it down on paper so it doesn't take up
space in my mind. So I am pretty good at getting it down on
paper as you saw in all my notebooks and papers. Problem with that is I couldn't find where I placed
those papers or I didn't know which ideas were
on which book or which patient zero or was it
on my computer or my phone. I had a hard time remembering
where I put those ideas. I think another big
reason for me is that it improves productivity. I know exactly where I'm
going with my goals. It definitely saves my time
and energy from finding notes all over the place or
trying to remember something. I guess the great thing about it is it also gets my mind thinking creatively with colors,
shapes, and patterns.
4. Main Goal: We're going to move
on to our main goal. And just before I get
started with that, I just wanted to remind myself, remind you why I
make time for this. Because you might
just think, Oh, now it's taking time from, I could be working on a project or working on this
particular idea. And yes, it's true it
does take a bit of time. Planning, preparation,
organization, it does take time, but in the end, you'll also see
how it saves time. It saves energy time planning and organizing
is not time wasted. So now, to get started
with my main goal, I'm going to take my four different colored
sheets of paper and also the lid of my
candle, the circle shape. I'm going to draw that
shape out using my pencil. And I'm going to do it twice. One on this color as well. I'm just going to cut them out two-by-two just to
save a little time. First, I cut shape out to make it a little
easier for myself. And then I'm cutting
out a circle. These days are so many ways
to get organized online. There's so many apps which can be very
handy, very useful. Even I use some of them. But somehow having
things on paper right in front of me just seems to
do something to my brain. Not only is it bright
and bold and clear, What I love about it is it
also gives me the big picture. Because I get to
see all of my ideas all in one, go one place. So I have my four circles. And the reason I'm using a different shape
than a square is because I already have the
square for my post-its. So I like it to stand out a little bit more and
be very clear because these will be my
main goals and how I will categorize all my ideas. So I'm just going to
give you an example here of what I'm going
to use these four. But of course, feel
free to personalize it for you and write down on your papers what you
would like to use them for. I asked myself, what
is that main goal? What is the reason
for categorizing, organizing all those
inspirational ideas? Are you writing a book? Are you creating a course? You illustrating a book? Are you organizing
your creative space? So in line with that, you can refer back to that
project that you want to do. For me. I'm going to go back to my business plan just to
remind myself of my mission, my purpose, my
vision, and my goals, and see if these ideas tie
along with my business plan. I think that's the
first important step. Just so you can
kind of narrow down your ideas and you're not just
going all over the place. And so you can stay true to
yourself to who you are. If I go back to the process
for each thing that I've decided to create as
part of my business.
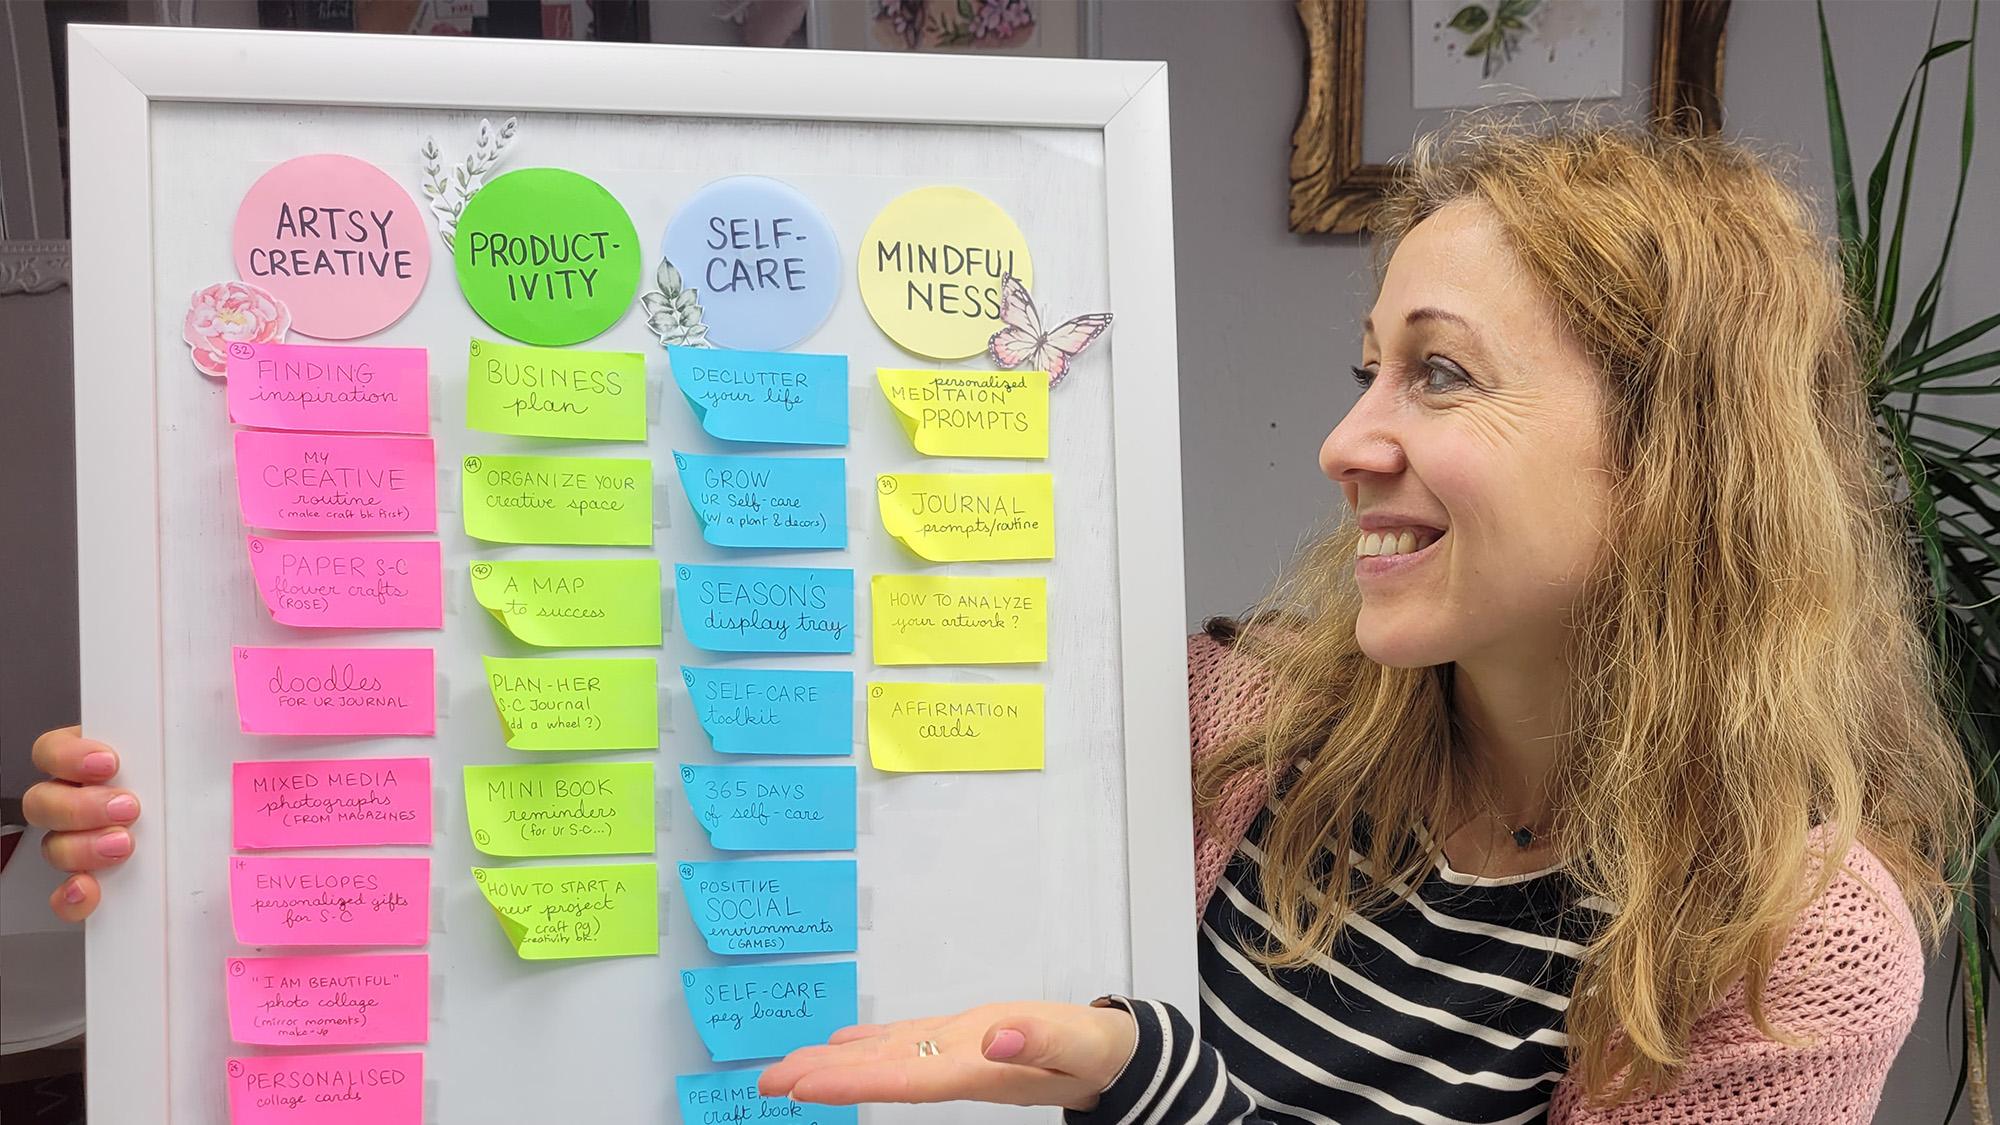
5. Create Your Ideas: Alright, so now we're going
to categorize our ideas. What I like to do is
to break them down. We have our main ideas. So my main idea is
creating a course. And because I have
so many ideas all in one go and they're all
pop corning everywhere. I'm just going to narrow
them down a little bit. So that's the reason I've
created these four circles. And I'm going to break them down all my ideas into four
different categories. So again, you do this project
for you in a way that is personalized to you
and your goal at hat. And I'm going to
use my marker to label each one. Productivity. Summer on the topic
of self-care. Some are more mindfulness, and some are just artsy and creative. So I love to break them down
into smaller goals because that just helps me to clarify
them even more for myself. And why do I use circle shapes? Well, just because it's
something different than the square root post-its. So again, it helps my eyes to focus on something different. And I used the different colors just as a clear overview to me, it just seeing the big
picture, all colorful visual. It adds contrast to my white
paper and the colors just pop out to the brain and gives me a reminder signal to look. I think that's why
they came up with post-its really bright
and fluorescent colors.
6. List Your Ideas: So now that I have
my four categories, then we can go to
the next section, which is listing or ideas. So now I'm going to
gather all my notes, all my ideas from my notebook, my phone, my papers, and this is where
I'm going to put them all together
into one place. Again, making sure
they're all in line with my purpose and my
goals and my mission. So that's when the
post-its come into place. So I can put these away for now. And I'm going to
take my four colors. And I'm just going to
take a few of each. I think for space sake, I'm going to cut them in half. So depending on your piece of paper or your picture frame, you could cut them in half. Or maybe depending on
how many ideas you have, you could even cut them in fourths and quarters
if you wanted to. I love post-its because depending on what
you need to write, their space to write a sentence, a phrase, or word. You can even draw a picture. And if you don't
want them as big, then you can just cut
them out like this. I'm just going to place
each color together. I just doing a couple for now. And I can always cut more to size later on if I need them. With blue, pink,
green, and yellow. So they stand out enough, but at the same
time they each have a different shade of that
color, which is what I love. So you start with one
that you would like. Thank you. Gather all your ideas that would fall into this topic. So I've already made
a list for myself. And now all I have to do is just write each idea
down on my post-it. And for that, I'm going to use either my pink pen
or my ballpoint pen. It doesn't have to be as bold as my title, as my main goal. So this is anything related
to artsy and creative. So I might be the only
one to understand what it is or what it means,
what it relates to. But that's okay because that's really what
it needs to be. Needs to be clear to you, doesn't have to be
clear to anybody else. As an example, I'm
just going to do one of each idea related
to self-care. So I'm going to take
post-its footstep cover. My very last one. Alright, so I have one of each ideas just to
give you an example, but feel free to add in
as many as you need to, as many as you want to. And then we're ready to
move on to the next class.
7. Prioritize: So now I will show you
how I set up my board. So here I have my picture frame. I'm not sure if you can
see the whole thing. It's too big to show on camera. So I will just show you the top. So you will need
your little circles. And this is where
my a little piece of glue Taq comes in handy. So I'll just place a tiny
little piece in the back, like lose using glue tab
because it doesn't mess up. If I'm doing this on paper. I'm going to place my
circles on the top. So each of my main
topics, my main goals. So you can do this
on your paper. You can do this on
a bulletin board. You can do this on your frame, just putting them on the top, evening them out nicely. Then I can put my little
post-its down right underneath. And it's so easy because
they're all color coordinated. And what's great about these
Post-its is that they just can easily come off and
you can move them around. You can dispose of
them when you need to. You can add new ones. So I'm going to add in here some other ones that I've made. Sometimes my post-its
don't stay down, especially if I've
moved them a lot. So I just take a little
piece of tape and I added to the other side or to the top, either way, whatever
way you would like. And because it's on a
picture frame and it's glass than it works really
well in a few more. Just so you can see
how beautiful it can look and what you
can make of those crazy, chaotic, creative ideas
all over the place. If you don't have enough
space on your paper, you can even put a couple on
top of each other like this. Alright, so now we have our board filled
up full of ideas. Look how organized they are. And now, once I'm done putting
them all down on my board, I think about prioritizing them. So I might move them around. And this is the wonderful
thing about the post-its and also the glass board. You can just move them around. Oh, I would like to
work on this one or however you feel the
need to prioritize. And just as a little
recap, a little review. Here are some of the
ways that I think about prioritizing my
projects and my ideas. First, I see all the tasks in one place like
we're doing now. Review your purpose and values. Figure out what's most
important to you. Understand your true goals. Ask yourself how
you feel about it. Consider the effort it takes, and the time it takes. What's your inspiration level? And of course be flexible, changes along the way. It's okay to change your mind or to change your priorities. And that's the wonderful
thing about these post-its. They can be moved around
from place to place. I think your priorities determine your next
steps of action. So I usually put the top
ones as my top priorities. And further down they go
the less priority they are. Sometimes it's because
of inspiration or what I feel like doing or as
I mentioned before, all those other reasons. And so now it'd be
the time to move them around and place them,
prioritize them. Think about what is
your top priority, and that's how you would display it on your
board or your paper. If you're doing this on paper. Another really fun idea, which I kind of do
once in a while. So I'm going to give
you an example here with my artsy creative ideas. So you take those same papers and you can have a piece
of paper for each color, for each main goal, and you just place them
into different patterns. So sometimes I do this for variety and I'll
just place them on my paper or on my board as a flower or as a
son and the rays. So you can work
that way as well. If some patterns
speaks to you at some point that feel
free to work that way. And depending on my priorities, I put the top ones, top priority, the bottom
one's lower priority. Or if you have a lot of ideas, then you can even make these
centred ones your priority. And then your next line
would be your less priority. You would just move
them lower down or further out from the center. So that's another little idea. Or if I, again use my
whole sheet of paper, I would list my
top priorities on one side and my lease
priorities on the other side. Again, this is really helpful to simplify your life and
organize all those ideas. So Priorities, priorities to feel free to
move them around as you wish. So those were the three
different ideas of how I like to prioritize
all my ideas.
8. Touch of decor: In this class we're going to
add a little touch of decor. I'm just curious here, but does decor matter to you? Is it important to you
just as much as it? It's important to me. When do you take time
to add a little fun and artsy stuff on your page? Even in your organization. I think I get a bit
decor crazy sometimes. Maybe that's just because I'm an artist and I like everything looking
beautiful and pretty. So I have my organizational
board here Full of Colors. And I can't forget to add
in some extra pictures. It just calls out
to me whether it's flowers or something from
nature's some leaves. So I'm going to keep
it very simple. They just add in a few little
touches like that of decor. It just makes me happy. Maybe something personal to me, an object or something
that brings meaning to me. Something that creates
a beautiful Logan invites me to come
back and look at it. Any little thing
or object, item, sticker or a piece
of paper that I can use as a little extra
decor on my board. I think it adds some fun play. That's where my artists can come out and get creative
and playful. You can also use some
meaningful items. For me, leaves and flowers, they just make me happy. Remind me that this
is my journey. We're all on a growing
journey, evolving, changing, and something from nature just reminds me that I
can be patient. These really colorful
post-its already stand out. So I think these
touches of decor just make it all blend
together nicely. They don't distract from my
planning and ideas and goals, but just kind of brings it all together
in a beautiful way. And of course it motivates
me to come back to it. Remind myself of these goals, of these ideas and
of my priorities.
9. More Details: So this class, we're
going to delve a little bit more into the details. As you may notice,
some of my papers have little numbers
on each side. And the reason for that is, once I've gotten the general
ideas all prioritized and organized into categories,
into top priorities. Then my next step is to
get more into the details. Of course, there are
many ways you can do it, but this is just one way
that I've done is I've listed all these ideas on
another piece of paper. These are related to my courses, and I've numbered them. So that's the reason
for these numbers. So I'll take you through
my process of how I go about getting more into details. I'm going to take this
one as an example, since it doesn't
have a number yet. And we can do it together. So I'll go through my
list and I'll number it. The next one in line
would be number 49. So I'll add a little
49 on the corner of my post it and then I can
put it back on my board. And I'm also going to
list here the title. So it said business plan. This is just so I know my ideas. Just the title the same, that's on my board. Then in order to
get more detailed, I've taken those ideas and I have another sheet of paper
for each one of them. So if you'd like, you can
also do this in a notebook. I find it handy to just do
it on a piece of paper. Because it that way when I want to do is
just one of them. I just take my
paper along with me and I don't have to
take my whole notebook. But of course, if you'd like
to keep them all together in one place and feel
free to do that. I like to keep mine all
inside this one paper. Sometimes I just find it's
nice to work off the computer offers screen because I do
most of my work on a screen. So having just that
planning time away from the screen is I find a
lot of benefit to that. And it helps me organize my
ideas a little differently. So what I do is I first
start with my number, so it's number 49. I just give it a circle
and I put the title, which was business plan. And I might underline it. And then this is when I will go and list a few more details. This is related to my courses, so I might list some of the ideas I would like to
include in my course, e.g. I'd like to include
part about my mission, my vision for my business plan, my purpose, my goals,
customers, marketing. So this is what I would do. And of course, you can
get even more detailed if you want it to go into
each of those points. So when I create my class, I would take this paper
and then I would go to my computer and list
even more ideas, maybe write a clear outline, but at least I have somewhat
of an idea on paper, so I can always
refer back to it. So that's just the way I
delve a little bit into the details of my
creative ideas. So thank you again
for joining me on this organizational journey
for all your creative ideas. And last but not least, congratulations for
finishing this course.
 Agnes De Bezenac, Designer of Tools for Wellbeing