Transcripts
1. Introduction: Creating complex
continuous trail patterns might look a bit
tricky at first. But once you get the hang
of the technical side, it's just about practicing and finding a process that
feels natural to you. Hi, everyone. I'm
Giangl an artist, illustrator, surface
pattern designer, and fanka painter
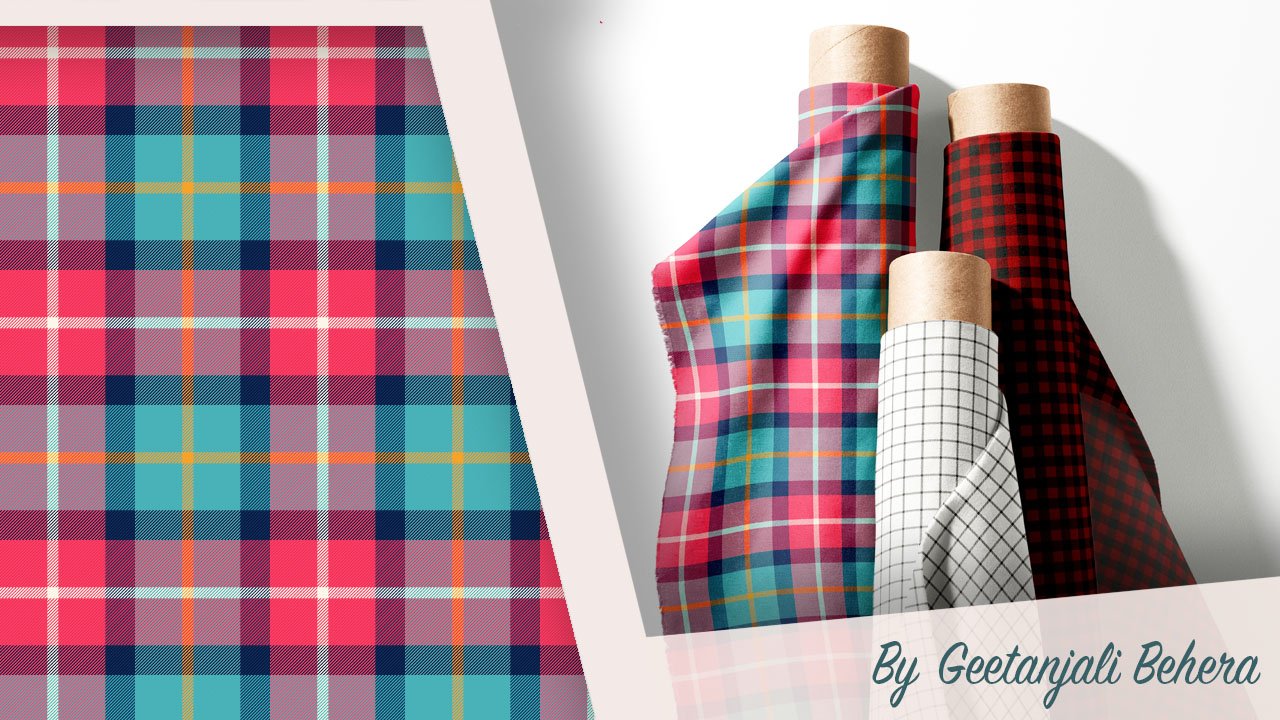
based in India. Over the past eight years, I have created
patterns for clients, licensed collection
to fabric companies, and sold my designs on print on demand site
like Spoonflower. If you joined me in the first
workflow class, you know, we explored an unusual way
of combining Procreate and Adobe Illustrator to create tossed repeat patterns
using rastro motifs. In this second class, I'm
really excited to share another one of my favorite workflows
using the same two programs. We will start by building
a simple structure or template for a continuous
trail pattern in Illustrator, and then explore three
different workflows to transform it into
a seamless pattern, both in raster and
vector formats. This class is designed for intermediate and
advanced level students, having prior knowledge of Adobe Illustrator and
Procreate is important. By the end of this class, you will feel confident about the technical side of creating
continuous trail patterns, and you will have
three different workflows you can rely on. I'm really looking forward to seeing what you come up with. Let's dive in and get started.
2. Class Overview and Project: In this class, I will walk
you through how to create a seamless continuous
trail pattern using a combination of
two fantastic softwares, Adobe Illustrator and Procreate. This method comes with
some awesome perks. First off, you get to choose your repeat type and size from a bunch of options without stressing over the
complicated math. It also lets you see the overall flow of
your pattern early on. So it's super easy to tweak things before you dive
into the final design. The best part, these
templates can be used for everything from
detailed hero patterns to simpler blenders. Here is what we will explore
together in this class. We will start by laying down the basic structure or pattern template in
Adobe Illustrator. Then we will get the
patent tile ready to use and propate next, we will draw the motives in
propriate In workflow one, we will bring the artwork from Procreate into
Adobe Illustrator, vectorize it, and
build the pattern. In workflow two, we will skip the vectorizing part and create a raster pattern using
the propriate motives. And I workflow three,
we will take it a step further and create the final
pattern entirely Ipropriate. To make things easier, I have also included three basic trail
structure templates. If you are not sure
where to start, feel free to use those
as a starting guide. For your class project, create a continuous
trail pattern template using any free hand
tool in Illustrator. Or feel free to use
the templates I have provided in the
resources section. Use the template as a base and draw your motives
in Procreate. Choose any of the
three workflows we covered in the class to
finish your pattern. It's totally up to you
whether you want to create a vector pattern
or a raster pattern. Export your final
artwork as a JPEG file. Share your pattern templates and your final designs in the
student Project Gallery. I'm so excited to see what you come up with. Let's get started.
3. Creating the Pattern Template in Illustrator: To start with, let's
lay the foundation for our pattern by creating the base structure in
Adobe Illustrator. We will begin by
creating a new file. Let's set the Adbood
size to ten by 10 " the resolution to 300 DPI and choose any color
profile you prefer. Just make sure to
use the same one in both Adobe
Illustrator and Pfiate. Enter a name for your file. I will name it as trail
pattern template. Keeping the size, resolution
and color profile consistent is super important when switching between
the two programs. Now we will sketch
our initial idea. We have two options here. We can use a free hand
tool in Illustrator, like the paintbrush
or pencil tool with a pen tablet
to sketch directly. Or we can import a rough
sketch from a sketchbook or another app and trace
over it in Illustrator. If you're not sure where
to start, don't worry. I have included
three trail patterns in the resources section. One follows a grid repeat and the other two use half
drop and brick layouts. If you would prefer
to use a template, I recommend starting
with a grid repeat. It is simple and
easiest to begin with. Just open the template in Illustrator and follow
along from there. I will be drawing
one from scratch, feel free to draw along with me. For this demo, I will be using the brush tool to create
a simple freehand sketch. I will start with a basic
drawing that's versatile. I'm planning to make
a square template, so I will draw a square
first to use as a grid. It could be any size. Begin by sketching
a simple circle to represent your
largest motives. This could be a flower, fruit, or any other main element
you would like to feature. Next, draw a line extending downward to act as the branch
that holds this element. Next, sketch a S shaped branch extending from the main stem to support the
second large motif. Notice how the two main
elements are placed diagonally. This layout creates balance and natural flow when
the pattern repeats. Try and reach the corners of the square as this will
be repeating as a grid. Make sure you don't overlap
elements on the edges. If there is too much empty
space on either side, you will have to make the
template a rectangle, or it will resemble
a stripe pattern. To add more rhythm and harmony, draw two gentle curved
branches on either side. This will guide the eyes of the viewer and anchor
the composition. Finally, add a few smaller
motives towards the top. These can later become
buds, tiny flowers, or other supporting elements
to complete the structure. You can delete this square now. Don't worry about getting
the sizes perfect right now. We are keeping things flexible. I will show you how to adjust and refine proportions later on. It might seem a little
confusing in the beginning, but with a bit of practice, you will be able to
plan this better. Once you're happy
with your sketch, select all the motifs and go to Object Pattern and choose M. This will open the
Pattern Options window. Give your pattern a name, I will call Min Trail pattern. In the pattern
option tool window, I'm choosing basic grid repeat
for this demonstration. It's a great starting point, especially if you
are still getting comfortable with the
pattern option tool. But if you are
confident, feel free to experiment with other
options like brick by row or brick by column to add more rhythm and
flow to your pattern. Next, adjust the tile
width and height. I recommend rounding off the numbers for
cleaner calculations. I will keep it 6 " for the width and the same
for the height as well. You can also resize or rotate
individual elements to fit within the tile size and fine tune the balance
and flow of the design. If you feel something is missing or want to refine
things further, use the same free hand tune to edit or add elements directly within the
pattern editing mode. I will add a few more
curved lines which can be later replaced with
leaves or other elements. This is the fun part, and since it will be a
versatile template, which will be used
multiple times, take your time to get it right. This is going to
be the foundation for your future patterns. If you want, you can convert
the circles into black fill. It will help you visualize and get better balance
in the pattern. Since the brushtkes are expanded to shapes in
the pattern option tool, I'm using the Unite Pathfinder and then deleting
the inside circle. Which leaves me with the
circles with a black fill. Once you are happy
with the layout, click Done to save
the pattern template into the swatches panel. In the next lesson, we will look at how to extract and export the pattern tile so we can start sketching our
motives in Procreate.
4. Preparing the Pattern Tile for Grid Repeat: Now it's time to extract the pattern tile from the
swatch we created earlier, prepare it as a template, and export it for
use in Procreate. For this demonstration, I have used the basic grid repeat. As explained in my
earlier lessons, when using the basic grid, the patent tile and swatch
are exactly the same size. If you're using other repeats
like half drop or brick, the pattern tile and swatch will have different dimensions. Keep in mind that we only
need to draw one tile, follow the next
steps considering you need to extract
just one tile. Start by double clicking on
the swatch in the panel. Make sure the show
tile edge option is checked in in the
previous section. Press to select the
rectangle tool, then click once on the
hardboard and enter the width and height to match the tile size from
the swat settings. Click Okay to create
the rectangle. Apply a fill color to the rectangle and make sure
there is no stroke color. Align it with the tile edge, reduce its opacity to 50%. And send it to the
back of the motives. Now choose save a copy to save it as a new pattern swatch. Select Okay, and you will see the new swatch here in
the Swatches panel. Now choose cancel to
close this window. Now we will see how we
can resize our template. Create a new layer and then drag the pattern swatch from the swatches panel
onto the artboard. Select everything
and ungroup once. And while holding Shift, click once at the center to
deselect the center tile. Now reduce the opacity of all the surrounding
tiles to 25%. This will be your master tile. It will stand out clearly and act as your base
guide inappropriate. The surrounding tiles
will help guide you with the alignment of your
motives during composition. Now use the direct
selection tool and click to select the tile
bound of the master tile. Go to Object, Artboard and
choose Fit to Selected art. This is our final pattern tile. It is currently
the same size that we put in our pattern
option tool window, which is 65 6 ". I'm excited to share about
the recent update from Adobe Illustrator
that makes it super easy to rescale artwork
along with the artboard. For example, if
you are designing a complex hero pattern and you want your largest motif
to be around 3 ", use the direct selection
tool to click on the circle and check its current size in
the properties panel. Then click on the
hardboard tool. In the Control panel, turn on the icon that says
scale artwork with hardboard. This is a recent feature
in Adobe Illustrator. Now lock the proportions
for width and height and enter the new
value for the width. I will make it around eight since we need to make
the circle bigger. And here you have the updated
size for your patent tile. Click on the circle to
check its new size. Let's make it a little bigger. S 10 ". And now we will check the size
of the circle again. It's almost 3 ". But if you want, you can
make updates as required. Similarly, for a
minimalistic blender pattern with small motifs, for example, 1 " for the largest motif, scale the hardboard size down until the motif fits
the desired size. For this demonstration, I will keep the artboard
size at eight by 8 ". Once you're happy with the size, using the artboard tool again, uncheck the box that says
state artwork with artboard, resize the artboard so the master tile sits
comfortably within it. Here I will make
it 12 by 12 " and move the artwork a bit to
center the master tile. Oh leaving a bit of negative
space around the edges. This will also allow us
to see the other tiles and use the space for testing
our pattern in Procreate. This is a temporary step. Our final pattern tile will have the same dimensions
that is eight by 8 ". To export the template, go to File Export As. Choose PNG or JPEG format. Check use dboard, set the resolution to 300
DPI and click Okay to save. In the next lesson, I will
share how to extract, resize and save the template for other repeats like half
drop, break, and hexagon.
5. Preparing the Pattern Tile for Half Drop and Brick Repeat: H, let's see how we can extract, resize and export the template
for the half drop repeat. Open the trail pattern template
two from the resources. Now repeat the same steps. Open the swatches panel and double click on
the pattern swatch. You can see the tile edge is different than the pattern
swatch bound in this case. Select the rectangle tool
or press on your keyboard. Now enter the values of the tile dimension
and select Okay. Apply a fill color to the rectangle and make sure
there is no stroke color. Align it with the tile edge, reduce its opacity to 50% and send it to the back of the
motives. Save a copy. And now cancel to
close this window. Rack the swatch
onto the hardboard. You will notice this
template looks more complex than the grid
repeat template, but we only need to
extract one tile. Select everything
and ungroup once. And while holding Shift, click once at the center to
deselect the center tile. Reduce the opacity of the
surrounding tiles to 25%. Now choose the direct
selection tool and click on on the
center rectangle. Go to Object, choose Artboard, and select fit to selected art. This is your master tile, and the size is
currently six by 6 ". Let's see how we can
resize the template. But before doing that, we
will add a stroke color to the rectangle so the repeat is clearly visible
in the template. Go to select, choose
same fill color, and this will select all the squares with the
same fill color. Apply a stroke color, so the repeat is
clearly visible. To resize, select
the Artboard tool, check the scale artwork with Rdboard option and lock the
width and height proportion. Enter the new value, and you might notice that
some elements did not scale. It is because they
are placed outside the artboard and not group to anything that is
on the artboard. The simplest way to fix
this is undo this step, select everything
and press Command or Control G to make a
group of everything. Now when you scale, it
will scale everything. And here is your new
pattern template with the updated size. Now the last step is to extend the hardboard so the master tile fits perfectly within
the hardboard. Select the hardboard tool and
uncheck the scale option. Now update the hardboard size. Place your tile
at the center and export this file
as a JPED or PNG. You can follow the same
process for brick, hexagon, or other repeats. In the next lesson, we will
take our template file to procreate and start
sketching our motives.
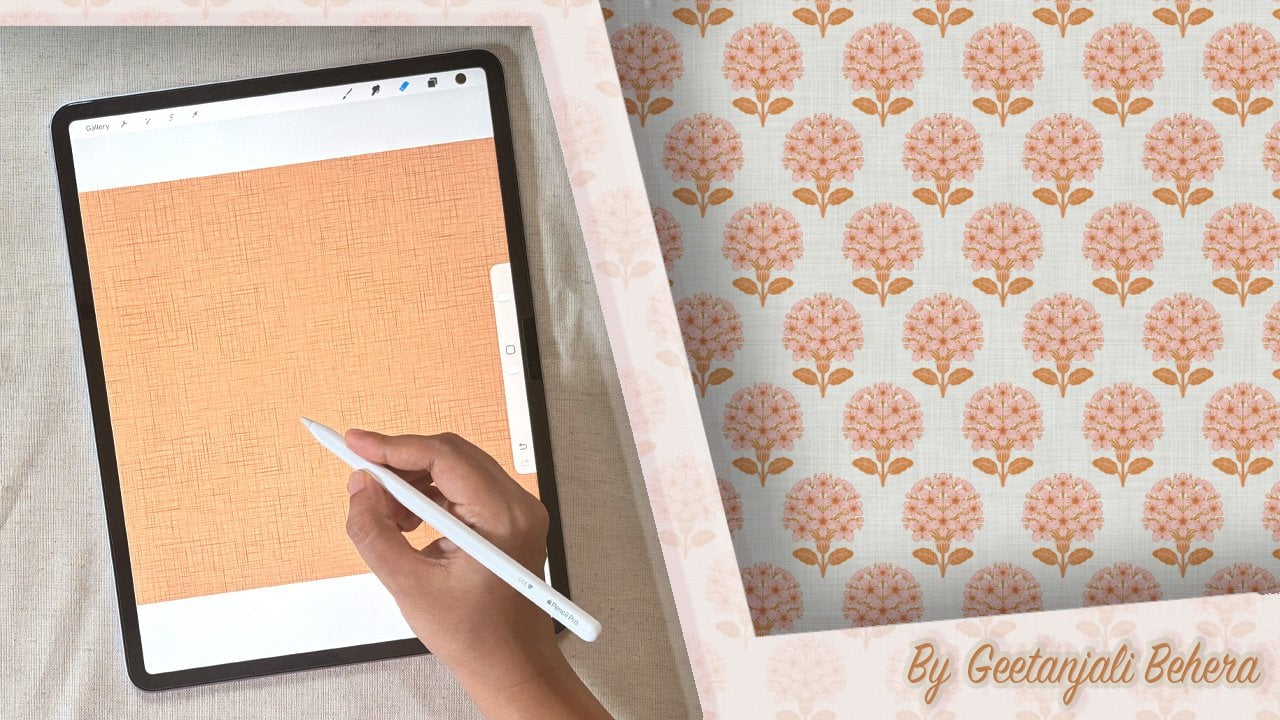
6. Drawings Motifs in Procreate: The next step is to transfer the template file to your iPad. I'm using a MacBook, so I will simply
air drop the file, but feel free to use any method
that works best for you, like email ICloud or
a file sharing app. Open photos, locate the
exported template file, click the Share icon and
select Open Inpropate. The file will automatically
open Inpropriate. Before you begin, check the Canvas properties by
tapping on the wrench icon. And navigating to Canvas
then Canvas information. This section shows the size, resolution and color profile, along with the available layers, which depends on the file size and your device's limitation. Reviewing this information helps plan your layers efficiently. This template can be used to
create multiple patterns. For this lesson, I
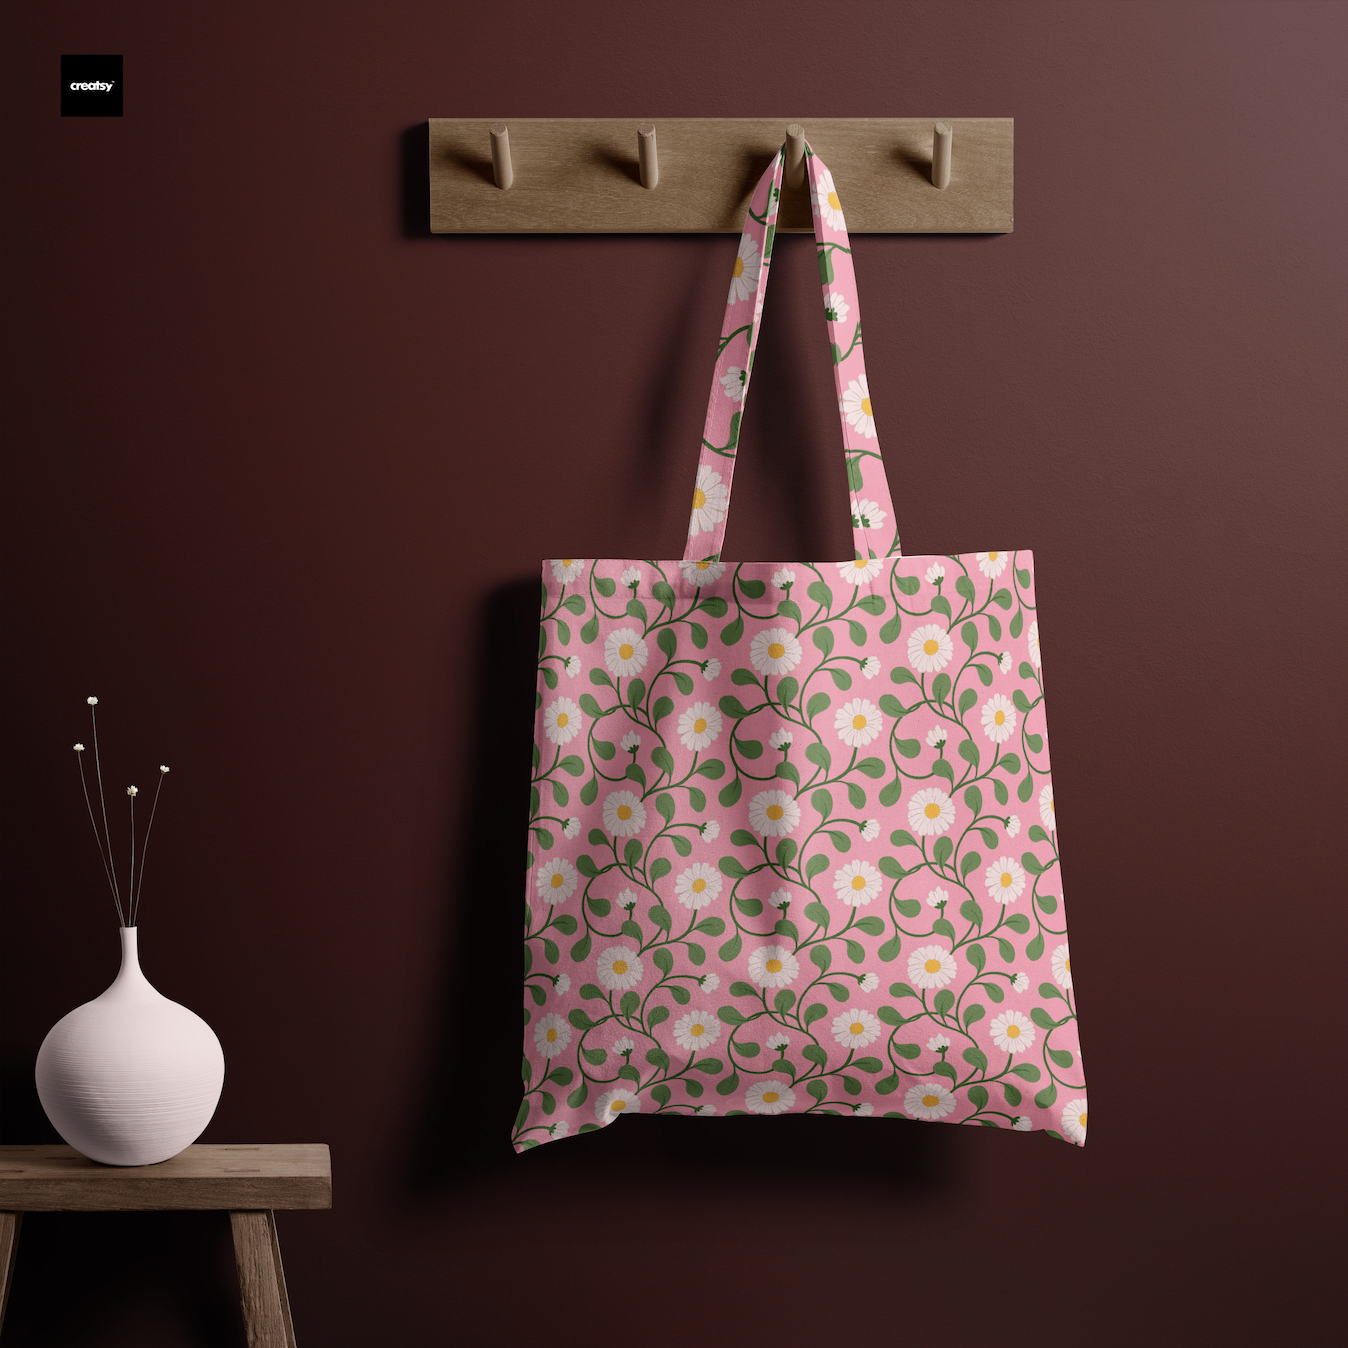
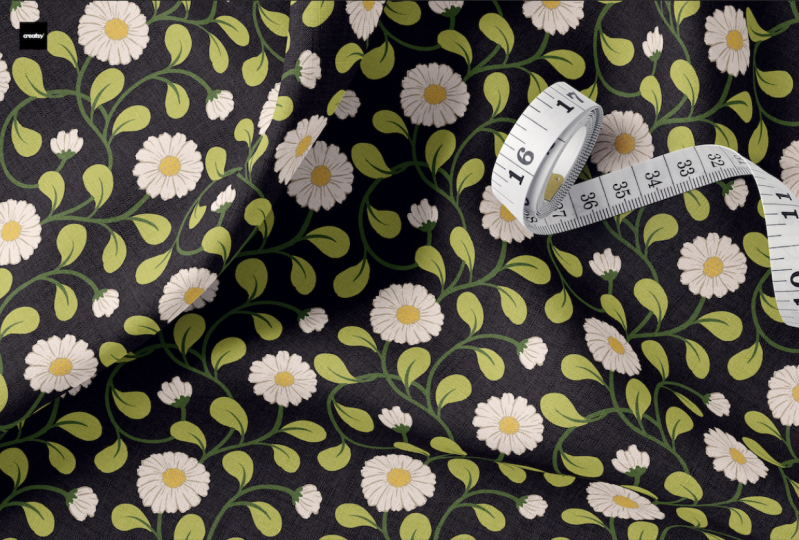
will demonstrate by designing a daisy floral
trail with leaves. I will start drawing
the motives. First, I will reduce the
opacity of the template layer, and now on a new layer, I will draw the motives. I'm using the basic
procreate pencil here. Since the main motif here
is the daisy flower, I will sketch the flowers
where I drew the circles. Feel free to adjust your
design to suit your subject. After sketching the two
flowers for the main motifs, I will add the
secondary motives, which are birds, leaves. And then finish it
with the branches. Once the basic sketch is ready, we will do a quick test to check the alignment
of the motives. Duplicate the sketch
layer and select the transform tool to ensure the transform
settings are set to uniform with snapping
and magnetics turned on. Move the duplicate
layer to the right, align it with the
template tile copy. This is why we left some negative space
around the master tile. If you notice any motives
overlap or require adjustments, edit them in the
original sketch layer at the center and
not the duplicate. Repeat this process
for the left, right, top and bottom tiles. If you spot any empty areas
or overlapping elements, edit them in the
original sketch layer at the center and
not the duplicate. Editing at the sketch stage is easier than modifying
the final motives. Spend some time and make
sure your sketch is final. Once you're satisfied
with the sketch, we will do a final check. To do that, keep
the original aside, M three copies, and move one copy to each
side of the tile. Now merge the three
layers and make two more copies and place
them on the top and bottom. This way, we can
check the corners as well and get a better picture
of the overall pattern. After finalizing the sketch, merge all the duplicate layers except the original
sketch we kept aside. You can reduce its
opacity and topple its visibility as needed if you want to keep
it as a reference. Now we will start coloring
and finalizing the motifs. Add a new layer above the sketch layer and choose a brush that
suits your style. For this demonstration,
I'm using a chalk brush that is under
the calligraphy section. Next, I will create a color
palette for my pattern. I will keep it simple by using two shades of green for
the leaves and branches. A light pink, yellow, and beige for the flowers. I have added one dark
color for the background. You can make your own palette, but I recommend
keeping it limited to two to six color
to start with. Since I will be
vectorizing the motifs in Adobe Illustrator for
the first workflow, it's helpful to
keep each color on a separate layer for
easier image tracing. Using the light green color, I will draw the leaves first. On a separate layer, I will use the second shade of green
and broaden branches. For the flowers, I will use the three colours pink for
the petals on one layer. Yellow for the
center on another. And bait to add some details
on a separate layer. If you would like to keep
your pattern raster, feel free to use any
texture brush you like. I'm using the chop brush here. So after vectorizing, we
will lose the texture, but we will get some nice
uneven edges around the motifs. The level of details and
the number of colors you choose depends
entirely on your style. While I'm sharing my process, feel free to skip any part that doesn't align
with your workflow. Finalize your motives. M once your drawing is complete, repeat the pattern
test if you want. Hide the background
and reference layer, then swipe down on the
canvas with three fingers to bring up the copy paste
menu and select copy all. Create a new layer, swipe again with three fingers
and choose paste. This action combines all your visible layers
into a single layer, which we will use to
test the pattern. Make two more copies of
the layer and place it on both sides using the
template as reference. Merge the three layers,
M two more copies, place it on top and bottom. And here you can see how your final pattern
is going to look. In the next lesson,
we will explore the first workflow for vectorizing these motives and creating the pattern
in Adobe Illustrator.
7. Workflow 1: Vectorise Motifs and Build the Pattern: In this lesson, we will
create a pattern by vectorizing the motifs
drawn in Procreate. First, duplicate
the pattern file, open the copied file and select the layers with motifs
to make them into a group. Delete all the other layers, including the
template and sketch. Now open the layers panel within the group and select
the top layer, hide the other layers. Now click on adjustments and then click on hue saturation
brightness settings. Reduce the saturation to zero and bring the
brightness to zero as well. This will make the
elements all black. Repeat the same steps
for all the layers. This step will simplify the vectorization and
recoloring process. Save the file in PSD format in Procreate to preserve
the layer properties. Then transfer the PSD
file to your computer. I'm using a MRP so
I will air drop it, but you can use any other
method that works best for you. Next, open the PSD
file in Illustrator. In the Photoshop import options, select convert layers to objects to retain each
layer as a separate object. Once the file is open, check the layers panel, verify that each design
element is on its own layer. The next step is to create a color palette for
recoloring the motives. Since I used only six
different colors, it was easy to recreate
the same swatches in Illustrative by simply
using the hex codes. Be sure to save the colors
into a swatch group. To vectorize the motives, start by selecting the
elements on a single layer. Hide the other layers. Click on the top layer
to select the elements. Open the image tracing window by going to Window and
choose Image trace. Use the black and
white logo preset. Keep the preview on. Now adjust the threshold
and other settings until the traced design closely matches your
original drawing. We will definitely lose
the texture in this case, choose your brush wisely. Open the advanced settings and enable the
ignore white option. Since we will be tracing
multiple layers, I will save these settings
as a preset for consistency. I will name it Daisy. Apply the trace and then click Expand to convert the
layers into vector shapes. Hide this layer and
open the next one. Choose image trace and select
the preset named Daisy. If you would like to make
further adjustments, open the settings and continue. Once done, click Expand and repeat this process for
the other layers as well. Once all the shapes
are expanded, zoom in and check thoroughly and edit the shapes if needed. Now recolor each layer to match the colors
from the pattern. Select all the
elements of a layer, then click on the swatch
to apply the fill color. With the motives ready, it's time to create the pattern. Select everything and go
to object, choose pattern, and select M. In the
pattern option tool window, set the repeat type to grid. Adjust the tile size based on the dimensions
you decided earlier, which in this case is eight by 8 " and tweak the overlap
settings as needed. Once satisfied, click Done to save the pattern in
the Swatches panel. You now have a vector
based pattern that is easy to recolor and edit. In the next lesson,
we will explore another workflow
where we will skip the vectorization
process and use the appropriate
motives to create a raster pattern in Illustrator.
8. Workflow 2: Using Raster Motifs to Build the Pattern: In this lesson, we
will explore one of my favorite workflows where
we take the motifs created in Appropriate and turn them into a pattern in raster format
using Adobe Illustrator. To begin with, export
your file from Procreate. Since we won't be
using image tracing, you don't need to separate layers or to change
colors for this workflow. Feel free to use any texture, effects, or brushes
in Procreate. Hide the background layer, Emlate and sketch layers. Then export your artwork as a PNG file with a
transparent background. Open Illustrator and place your transparent PNG
file into the hardboard. If there is excessive blank
space around your motives, crop the file which will
automatically embed it. Alternatively, you
can manually embed the image to link it
directly to the document. Once the file is embedded, you can start creating
your pattern. Select the artwork
and go to Object, choose pattern, and select Me. Name your pattern and choose
the repeat type as grid, adjust the tile size to match the width and height
we decided earlier, which will be eight
by 8 " in this case. Next, adjust the
overlap settings and experiment with
the preview options. When you are happy
with the result, click Done to save the pattern
to your swatches panel. Though this is a raster pattern, it can be used as a pattern swatch just like
any vector pattern. You can edit it in the
pattern option tool. And scale it up or down. You can also export it as a
hi ras JAPIC or PNG file. To do that, draw a rectangle
with the tiles width and height and fill it
with the pattern. Finally, add a background color of your choice to the pattern. Now go to Object, choose artboard, and choose
fit to selected art. Export it as a Hiras
JAPIC or PNG file. If you want to make further
adjustments to the pattern, export the tile
back to Propiate as a PNG using the
hardboard settings. Open the file in Procreate
and make edits as needed. You can add subtle patterns or textures to the background. While it might feel a
bit confusing at first, once you get the hang of it, this workflow will
save you a lot of time and the results
will always be precise. In the next lesson,
we will create the final pattern
entirely Ipropriate. O.
9. Workflow 3: Creating the Grid Repeat Pattern Entirely in Procreate: Finalizing the
pattern inappropriate begins by duplicating
your motifs file. Since the hardboard size we are using is larger
than the tile size, we will need to
crop the hardboard. While we could copy and paste the artwork onto a new
artboard with a new size, Procreate automatically
reduces the artwork size to maintain proportions instead of keeping the original
pixel dimension. For example, if I
save this file, which is 12 by 12 " in
dimension as a PNG, and then create a new
file which is eight by 8 " and paste this
PNG file into it, you will notice that Procreate automatically reduces
the size of the artwork. To avoid this, we will use
the cropping method instead. Open the motifs file and
group the layers together. Delete the template
and sketch layer. Next, drop a rectangle
that is eight by 8 ". To do that, create a new layer and fill it with a dark color. Tap on any of the blue
dots around the rectangle, then enter the new dimensions, which is 2,400 pixels
by 2,400 pixels, which is also eight by 8 ", tap again on the transform tool, and now you have the rectangle
set to eight by 8 ". Next, open the Canvas settings
and enable drawing guides. Then select Edit drawing guides and set the opacity
and thickness to 50%. Then set the grid
size to maximum. What now select the rectangle and position it at the center, aligning it with the grid. Do the same for
the motifs group. Place this rectangle below the motifs layer and
reduce its opacity to 50%. Check if the edge pixel of
the rectangle is still 100%. Sometimes after resizing,
you can get a blood edge. In that case,
duplicate the layer a few times and merge
them together. Now create a set of the motives
group and the rectangle. Turn off the motives layer, make four copies of this set. Now we will place the sets in the four sections
of the grid. Let me explain the logic
behind this process. Initially, we have one
tile with motives. Behind that is our
patent tile to fill up the patentile while keeping
the center motives in place, we need to repeat it at the
top, bottom, left, right, and all four corners, resulting in eight
copies and eight steps. Let's create the bounding
box with no fill and stroke. Send it to back
and now save it in the swatches panel
here is our pattern. Alternatively, by copying
this tile just four times and moving the tile
bound to the center, we only need four
copies and four steps. In this case, we will
keep our tile at place and move the sets
to match the center. And then crop it to
match the swatch bound. Select the first set. Now you can turn off the
magnetics and snapping, so it will be easier
to move it around. Place this set in the
top left section, bring it close to the grid line, and now hold the transform tool and zoom in to get
a closer view. This will keep the
object in place. Now match the edge
to the grid line. Zoom in to double
check the alignment. Since the tile will
be centered later, it's okay if a few
pixels get trimmed at the edges as long as the
alignment is correct. Now move the second
set to the top right, again, aligning the
rectangle edges to the grid. The rectangles 50%
opacity helps you spot any overlaps between
the tiles more easily. Repeat this process for
the remaining two sets, placing one in the bottom left And the other one in
the bottom right. After confirming all
the sets are in place, you can turn the
motifs layer back on. Turn off the grid and rectangle layers to inspect for
any misalignment. Once all the motifs are
aligned, check the layer order. Rearrange them if any sets
are overlapping incorrectly. You can delete the
rectangle layers now and turn the grid back on. After confirming
everything looks clean, it's time to crop the
canvas to exact tile size. Cap the wrench icon, go to Canvas settings, and choose crop and resize. Enter the tile width and height, which is eight by
8 " in this case, and keep the DPI at 300. Move the highlighted crop
area to the center of your artwork using the
grid for alignment. It doesn't need to
be pixel perfect, but try and get it as
close as possible. Once you're happy with
the placement, tap done. This cropped canvas is
now your final patentle. To check the repeat, swipe
down on the canvas with three fingers to bring up the copy paste menu
and select copy all. Swipe again with three
fingers and choose paste. Now make three more
copies of this layer. Select all the four copies
and scale them down by half. Place each copy on one corner. Add a background
layer of your choice. When all the edges are aligned, you will see the pattern
repeat seamlessly. You can choose to stop here
and merge everything into a single layer or take it a step further by preparing the final file with
separate layers. Keeping layers separate
gives you the flexibility to change colors or edit
individual motives later. To do this, first ungroup all the elements until each
layer stands on its own. Next, select the layers
with similar elements. For example, all the
details layer and stack them together.
Merge them into one. Do the same for
the center layers. Then for the petals,
branches and leaves. This way, each element remains neatly organized
and fully editable, making future changes
quick and easy. Group everything back
into one folder. Add a background layer of your choice and export
it as a PNG or JPXFle. In the next lesson, we will
explore how we can use this same workflow for other repeats like
half drop and rig.
10. Workflow 3: Creating the Half Drop Repeat Pattern Entirely in Procreate: For repeats like
half drop and red, the workflow is a little different from the
standard red repeat. Let me show you an example using the half drop
repeat template. Here you can see
the template with the tile bounds
marked as reference. You can download this
template from the resources. For this demonstration,
I have already sketched some daisy motifs using the same theme and color
palette as before. First, draw a rectangle
with the tile dimension, create a new layer,
select any dark color. And drag to fill the artboard. Now tap on any of the blue
dots and enter the dimension. 2,400 by 2,400 pixels
or eight by 8 ". Then open the canvas settings, turn on the drawing guides, and tap edit drawing guides. Select both opacity
and thickness to 50% and slide the
grid size to maximum. Now with snapping on, select the rectangle and align it to the
center of the canvas. Using the drawing
guide as reference. Do the same with
the motifs layer. Then place the rectangle below the moti layer and reduce
its opacity to 50%. Group these two layers together. Turn off the tiflayer. Next, make four more
copies of this group. Unlike the grid repeat where
we only needed four copies, the half drop needs at least five copies
to build the tile. Here is how we
will arrange them. Place the first two sets in the top left and
bottom left quadrants. The remaining three sets will be shifted by half
the tiles height. Position the third set in the center right
area and place the last two in the top right and bottom right aligned
with the center set. Finally, move the tile
bound to the center. Turn off magnetics and snapping. Move the first set to
the top left corner, aligning the rectangle
edges with the guide. While zooming in, hold the transform tool to keep
the object fixed in place. This prevents it from shifting
as you adjust the view. Zoom in to double check. Repeat the step for
the bottom left set. With the rectangle
at 50% opacity, it is easier to
spot any overlaps. Now turn snapping back on. The orange guideline
will help with the alignment as you place the third set
at the center right. Then position the fourth
set at the top right. And the fifth at
the bottom right. Once everything is in place, turn the motif layer back on and hide the
rectangle layers. Turn off the grid to inspect
for any misalignment. Check the layer order so the
motifs overlap correctly. If everything is fine,
delete the rectangle layers. And merge the five
groups into one. When everything looks clean, prop the canvas to
exact tile size. Go to Canvas, turn the
drawing guides on. Now choose crop and resize. Select settings and enter
2,400 by 2,400 pixels, which is also eight
by 8 " at 300 DPI. Align the cropped
area as close to the center as possible.
Now tap done. This is your final
pattern tile which will repeat seamlessly in
a half drop layout. To make it a pattern swatch, which will also repeat
in a standard grid, take one extra step. Go to crop and resize
settings again. Double the width of the canvas while keeping the
height the same. Then make two more
copies of the tile, place them to the right
and offset by half. This creates your
final pattern swatch that will repeat
seamlessly as a grid. You can follow the same workflow for brick repeat as well. In the next lesson, we will learn about the versatility of
11. Versatility of the Workflow: Let's take a moment to recap and appreciate the versatility
of this workflow. I think one of the
biggest advantages of working this way is that
nothing is accidental. You have full control
over the entire process. You get multiple
opportunities to adjust and refine your pattern to ensure it feels
seamless and cohesive. This approach allows
you to create both raster and vector patterns, giving you the flexibility to choose what's best
for your project. Whether you are working
with a simple grid, half drop or a more
complex custom repeat, this method easily adapts
to all repeat types. It also supports any tile size, making it suitable
for everything from intricate hero patterns
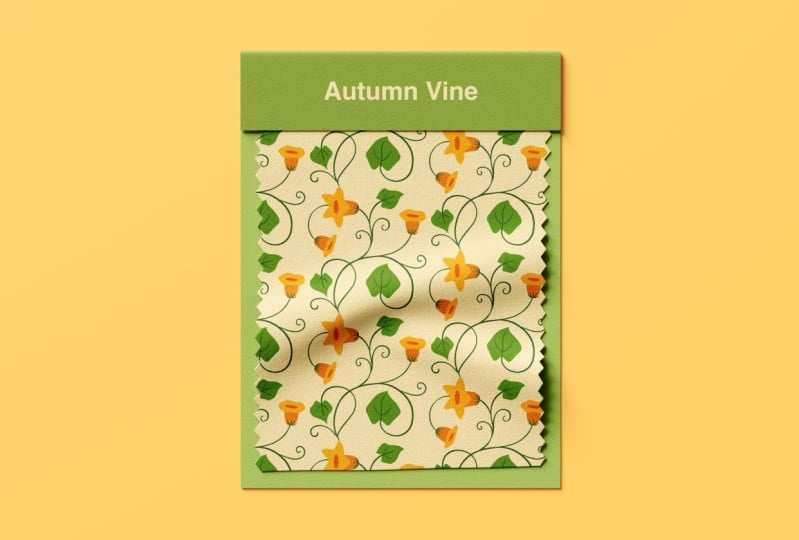
to simpler blender designs. The true beauty of this workflow lies in its adaptability. For example, I used the same
base template to create this colorful strawberry and floral trail pattern and a much simpler
floral wine pattern. Once you have your
template setup, you can use it to create multiple variations by
simply changing the theme, subject or level of detail. I understand that this process might feel a bit
overwhelming at first, but once you grasp the basics, it becomes so much easier. That's why I highly recommend mastering the
fundamentals first. If you're just starting out, check out my fundamental
series classes where I break everything
down step by step. Once you're confident
with the workflow, feel free to experiment, layer and play to create patterns that are
truly your own. Thank you so much for joining this class. Keep practicing. Say creative, and I can't wait to see the
beautiful patterns you create.
12. Final Thoughts: Thank you so much for
joining me in this class. I hope learning these three
workflows for creating continuous trail
patterns has inspired you to explore and experiment
with your own designs. If you have any
questions or doubts, feel free to drop them
in the discussions page, and I will be happy to help. Don't forget to share your projects in the
students gallery. I would love to see
what you create. If you enjoyed this class, please leave a review and follow me on Skillshare to stay updated on my
upcoming classes. You can also connect with me
on Instagram at Gitang dot p. Thank you once
again for being here. I can't wait to see your
beautiful trail patterns. See you in my next class
until then happy creating. No.
 Geetanjali Behera, Surface Pattern Designer | Illustrator