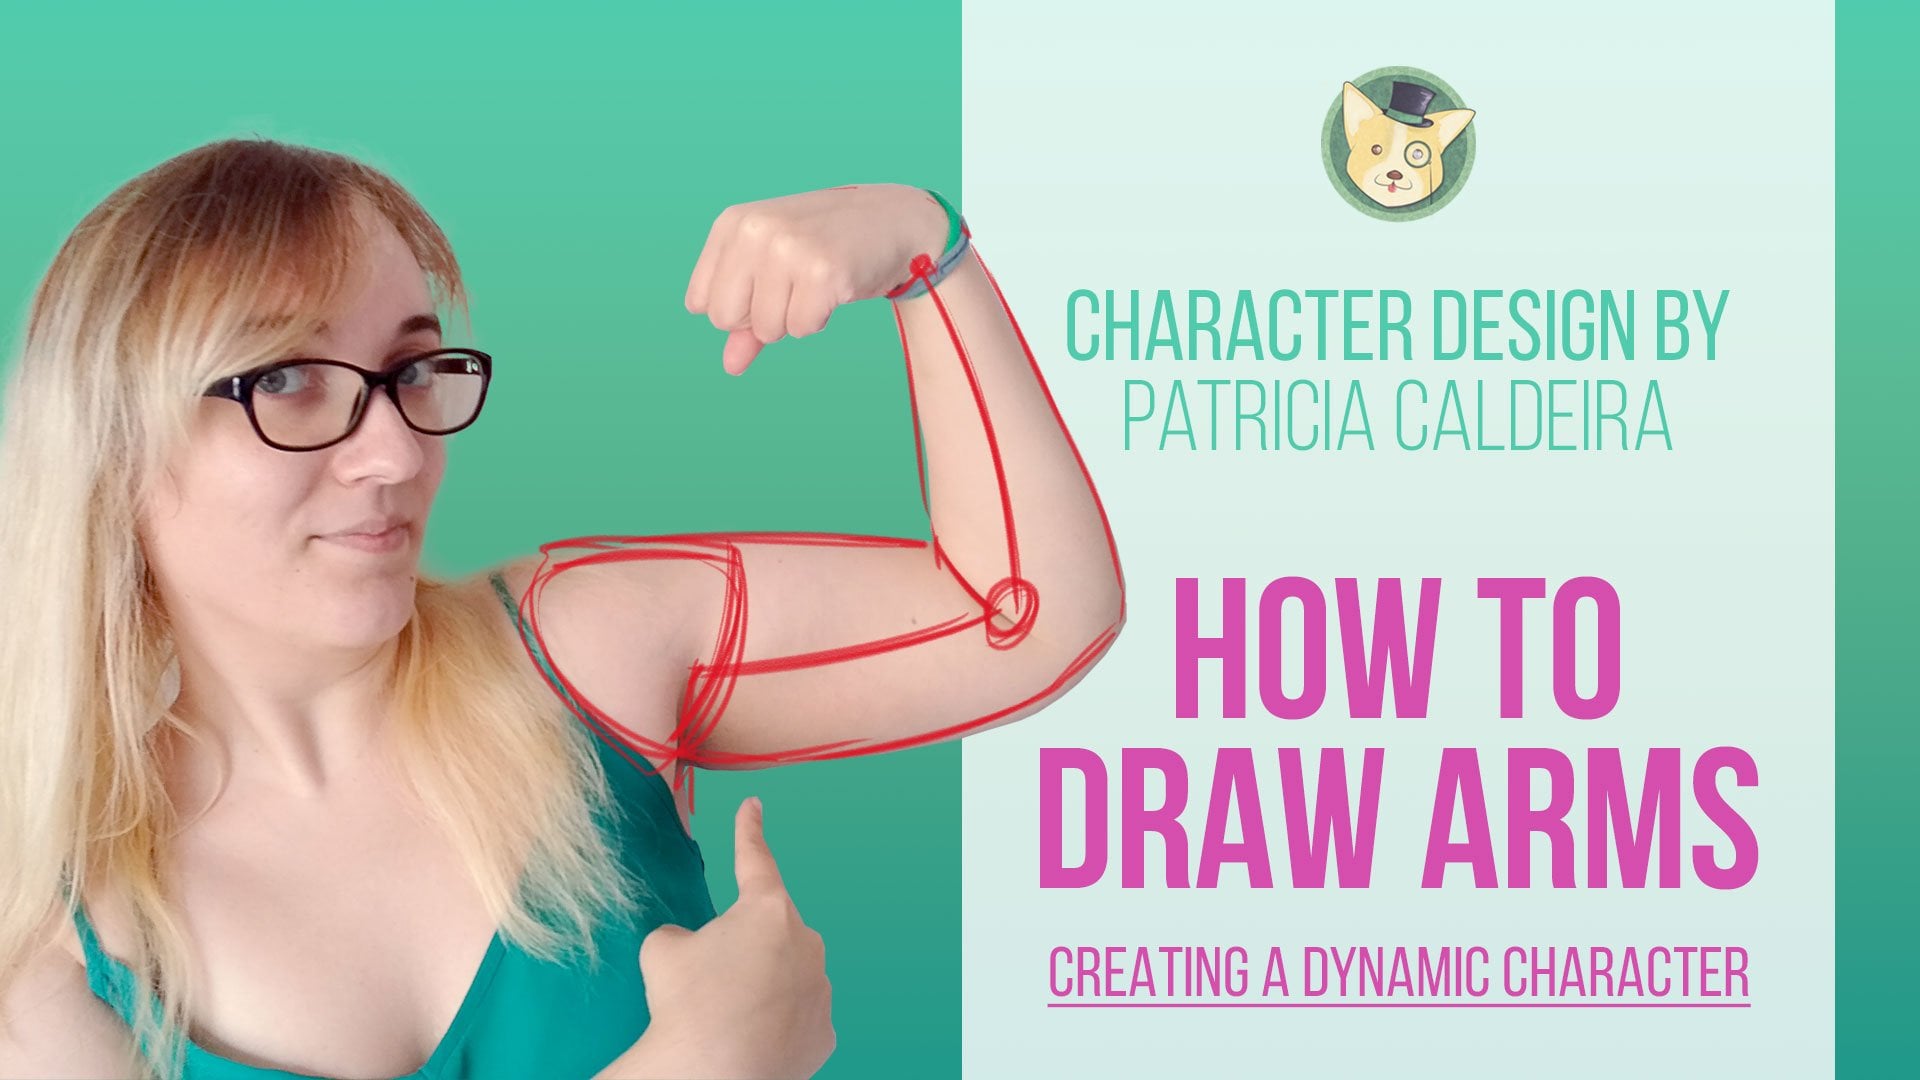
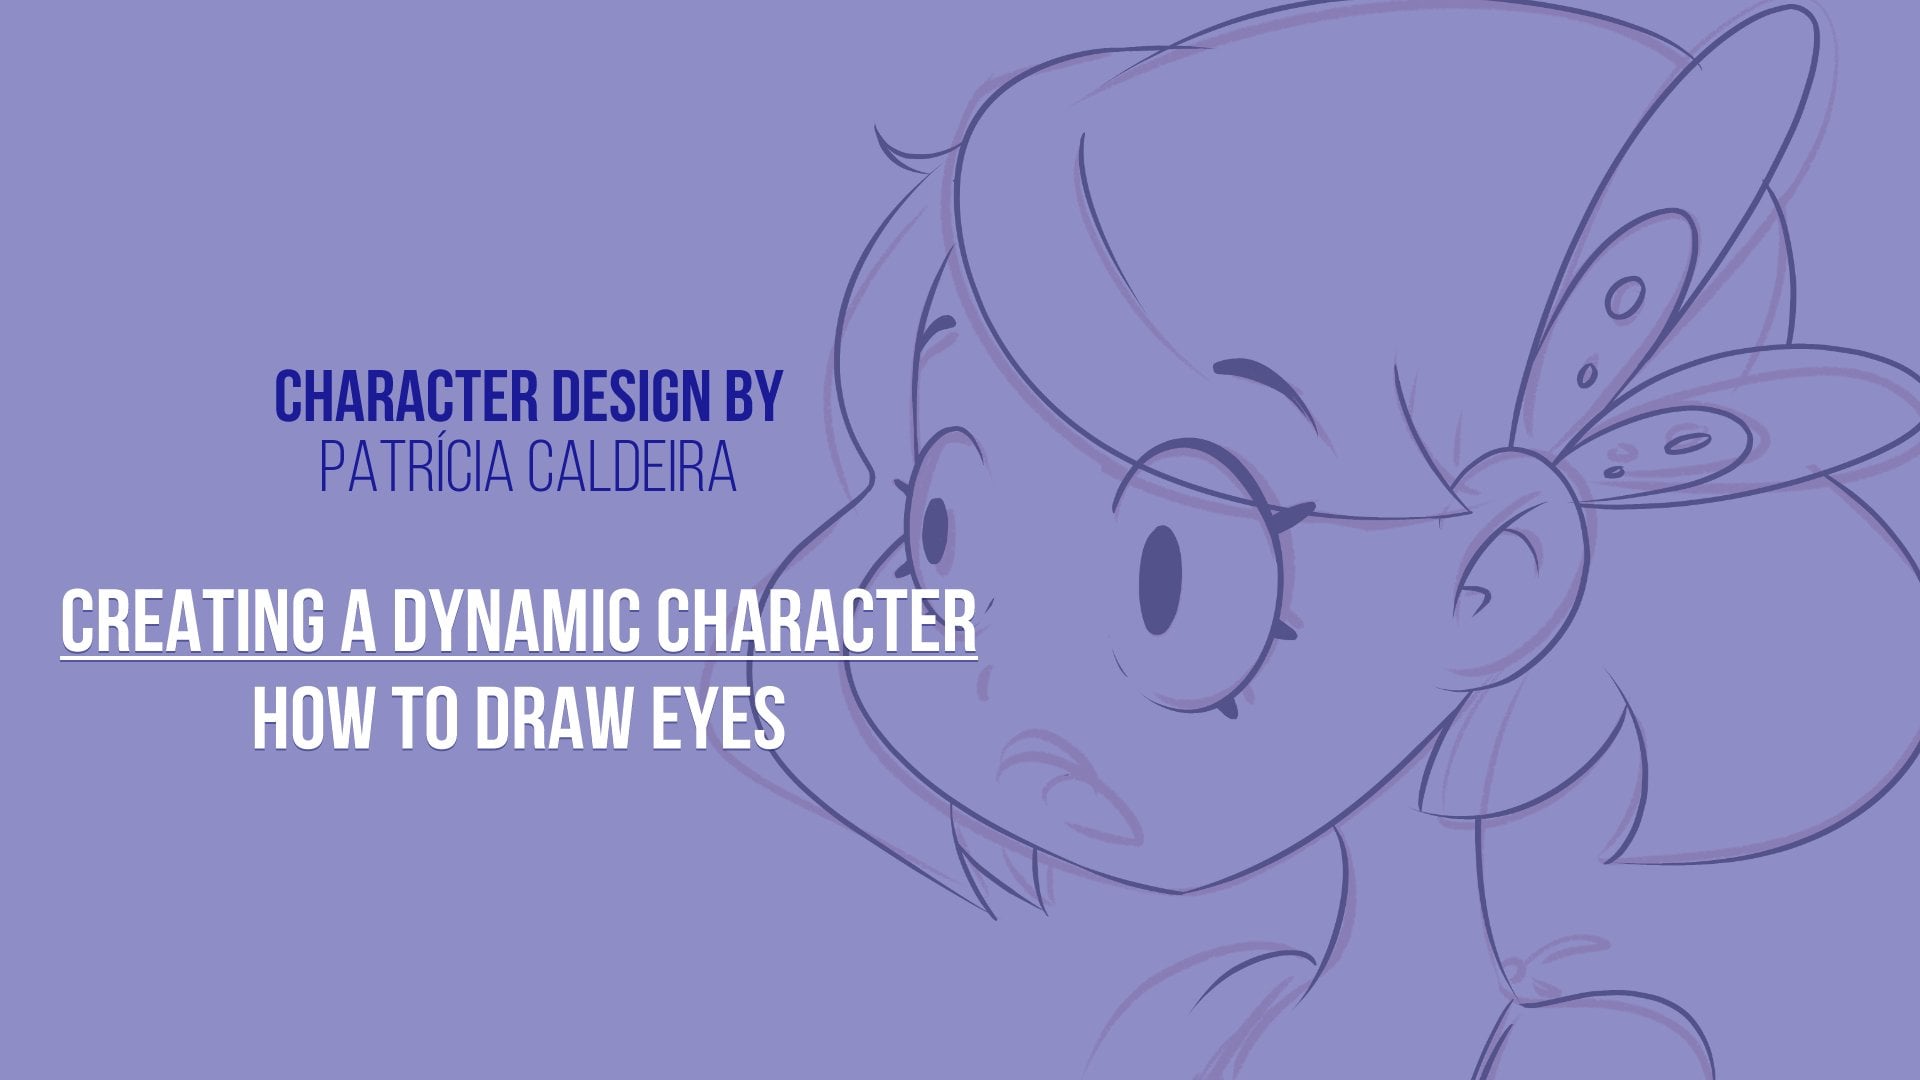
Transcripts
1. Introduction: Hi. Would you like to draw amazing clothes for your characters? Do you want to learn how to draw folds and cloth in several ways? Then this is the class for you. Drying clothing can seem like a tough skill to learn, but it doesn't have to be in this introductory class. You'll be drunk, folds in no time. We'll start with very basics. First, we'll be checking out the different times of fabric and holly behave when being pulled or dropped. Then we're going to be drawing each type of fabric one step at a time. You're going to start your practice right away. This is an introductory class with clear, straight forward and helpful contents. And since this is a class for beginners, there's nothing that you need to know beforehand. You want to be just listening to me talk. I'll give you personalized references and resource is that you'll be using throughout the class. Not only that, but you also have a practical assignment in the class to put your skills to test right away and see what you've learned. But who am I? I'm Patricia, an illustrator and online teacher that has been teaching people like you how to draw. For years I've worked for many companies and clients drug my life and then mouth 100% dedicated to give you the best content possible and to make you a better artist to achieve your dreams. Also, if you have any question, I'll be right here with you, ready to give you feedback and to make you improve your artwork. There's no reason to hesitate. Jump on in and I'll see you in the next video.
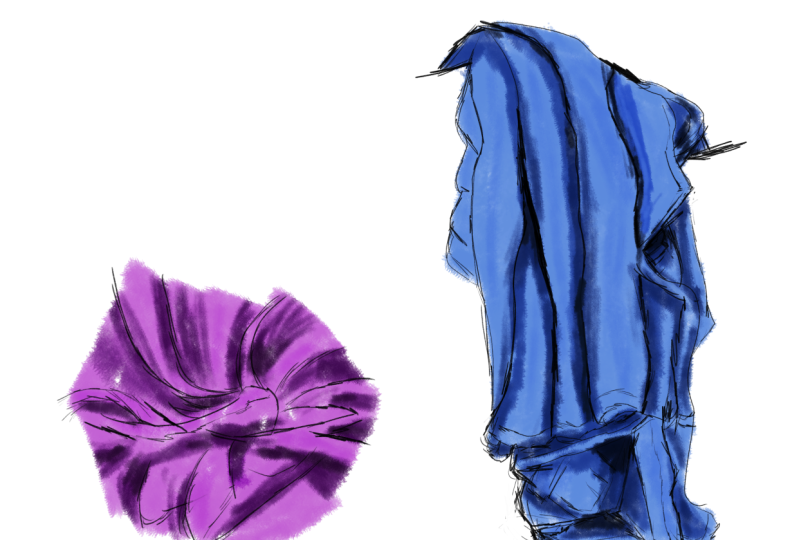
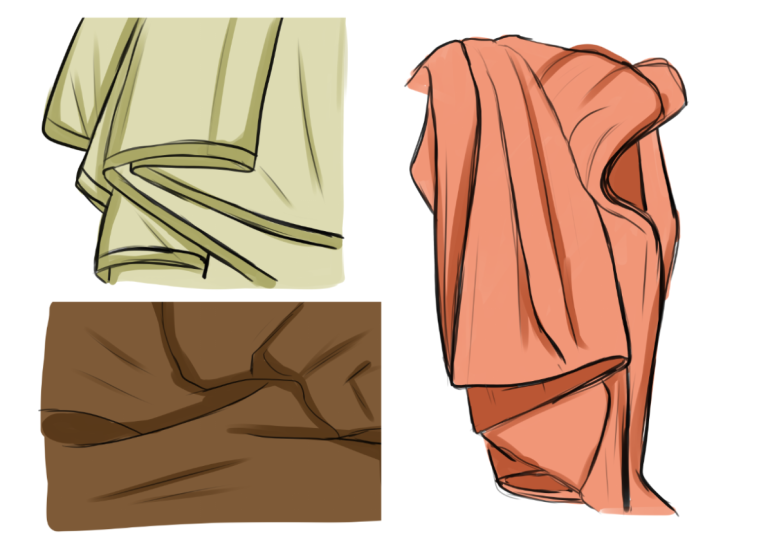
2. Different Fabric = Different Folds: hello and welcome. Usually drawing clothes can be a pit hards understanding the folds and the wrinkles. It's not as easy as it seems sometimes, and to do this, we need to understand how fabrics and different clots will behave. So that's what we'll be doing here. We try to understand how different types of fabrics behave, so you can understand how to draw them. Now I have here this picture and let's look at the scarf. You. This is a kind off everything fabric, and as you can see, it will creates a lot of folds. There's a lot of full Serie, a lot of wrinkles that we can draw as opposed to a very sick material. So we have here again the scarf. But this time it's made of wall, so it's thicker than the one before. And as you can see, we have less faults. He doesn't have as much fold as the other, and the force themselves look thicker as well. They have more space between them. So when drawing, closing or any kind of fabric, pay attention to the kind off fabric it is. So is it thin or sick? So with thick fabric, you'll have less folds and there's going to be more space between them. With 10 fabric, however, you have a lot more false and he'll, as you can see with our examples here and there's also going to be unless placed between them. So this is something you have to have in account when drawing their clothing or just a piece of fabric. Now, when you're drying clothes or any kind of fabric, there's something else you need to have in accounts. Which is, is the material site or is it close? So we have here this dress. This is a very low stress, something for some off resemble very flowy. So something was will create a lot of wrinkles and folds, especially if it's a scene fabric. But let's is something else. So now we have here a very tight stress. It's fabric is also somewhat scene, but we do have let a bit less off faults. There's still quite a lot off them here, and as you can see, they're very close together. So that's the thing we saw about teen fabrics. And another thing that I want you to pay attention here is that a tight fabric will show some tensions, so we see a lot of tension in our wrinkles and folds here as opposed toe the one before. It's very flowy, and here it's a bit more tensed, and the are focused in certain places off the body now, not an example. This time we have a sick kind of fabric, but loose. So let's see where our folds are. So as you can see, it has way less fold. Stand a thin fabric, but it is still have some, Since it's a loose, kind off fabric, they are bigger or they are secret of folds and that are less off them. They have more space between them and finally, again, a thicker material but tight again. We'll see way less fold Stan we saw before with the thin material with a thin fabric. But they are also focused on specific places, and again they show much more tension than when we're drawing something looser. Then the previous example. So loose clothes. We'll have lots of folds and wrinkles, and they're very flowing. We see the flow in them. The falls in the rig in the wrinkles will show the flow of are trying, however tight clothes will have fewer folds and they will show a lot of tension. The clothes are very tight. The February who will cling toe our body and the tension in the folds will show in specific places of our body. So I have here some cloth and we will be using this one's for our drawings next. Because before we jump to close, we have to understand and to practice false first. So here you can see something very loose and something very tighter. You can see the tension right away. So on the left side there's lots of wrinkles there, lots off folds. It's actually very flowy as well. We can see the movement in in there. It's very interesting, but on the right, all we can see his tension. We just have a few folds, not even folds. Let's say they're more like wrinkles, and they're very test. Now. I have your this pictures, and we're going to use this for our practices, and I'm also going to give this pictures for you so you can don't know them, and so you can use in your practices well. So first we're going to practice some basic faults so we can understand them and know how to draw them. So I'll see you in the next video
3. Drawing Hanging Folds: All right. Welcome back. Now we're going to start drawing. All the teary is on a previous video, and from now on, we're only going to be drawing. So as I said before you start drawing clothes, you need to learn the basics. And the best way for it is to start drawing with simple fabrics. I'm sure you have something at home. Some, even if it's a cleaning cloths, something like that, you can take some pictures off it. You can try out different positions with with your cloth and practice your faults. Now I have Here are first a much again you can all off the images I'm using here you can download them and use for your own practices. And first we're going to draw just simple folds. So I have here my close, and now the first thing we're going to do is find our shapes. This is always the process I use when drawing something new, something that I have no idea yet how to draw. The first thing is to find my shapes. So the first thing when I look at the image is that I see a lot of triangles here, So let's find them. So we have here one triangle, then here, mother and the smaller one here. Then another one here. Now we go a bit lower and there's something else here. Not quite a triangle, But still it is a similar shape. And now again, we have another triangle here and we finished right here. So simply enough we picked our object or our image. And we're going to simply fight by drawing simple shapes. And these will make everything much easier when drawing. Now. Another thing that I want to note here is when drying clothes. We need to find the point where all our falls are coming from in this guy's it's right here . This is where our faults and or our main falls are coming from. So you see, right here there's one here. They all come from thes specific place. The al com come from the same direction and finding this points it can be more than one, and we'll see that later will help you immensely when drying your folds in the peace. Of course, even with closing. So I'm going to try this one here. So as you can see, just with our simple shapes we can already see are close here. It is already very similar to what our image is looking like. But let's do more. So I'm going to create here another lawyer, and I'm going to draw our sketch. So now we're going to give a bit more detail, toe our drawing. So we start from here we go, Tom, and there's here a curve. So I'm drying dis curse here. So there's a curve. And because Alta can and then inside and out and inside again. All right, now from here we have this falls. All right. Now here connects to this one and then this one connects here Not we can adhere. This big fold we have in here. And now we can even heads this car. Remember to keep yourself your hands and your arms very relaxed so you can draw the fabric smoothly. The more relaxed you are, the better your lines will look. They will look very smooth and natural. So there we go. Now we have here. This piece is well, so we're going to do that. It comes from here and goes inside, and then we have here. All right, Now you see here. There's another tiny folding here. It's almost invisible, but it's there so we can draw it as well. Another curfew. So there's a lot off course when doing when drawing folds and clothes. So this is a very good time for to practice your curved lines. And now we have this beat going here, and it does a bit of a curve off course you don't need Teoh co p exactly what you see. Feel free to exaggerate some lines to make it your drawing more dynamic and what interesting. Even so, these side is done. Now I want to pay it for you to pay attention to this part here and here We have a pillow fold here it is very lights. You can't. You almost can see it, but it's there so we can make a very thin line to show it. There we go. And now all you're missing is this side here? So we're going to start from here, and then we could down work with your arm, not Onley, your hand and wrist. It's important to work a whole arm when drawing or else you can start damaging your wrists and your hands and It's not good to take it from me. It's always important to move your whole your whole arm when drawing your line, especially long lines. So there we go. We have here going to give a bit more thickness here to this line and this is it. And now we can all also draw the this seems here of our fabric. We can add this tour sketch or if before you can just add it later. When you're clinging in the lines, we're into it now. It also helps seeing the movement off the fabric. So very likely Relax. This can be very fun to do. So I really recommend you to relax and just have fun. Let yourself go and you'll see that it will work much better. So there we go. We have our sketch, and now the only thing that we need to do now is our clean lines. So going to give some conspiracy here, a new layer effect earlier, usually use vector layers in manga studio or clips to you because it will help with the stabilization over lines. And now we can do our lines or final lines and all we have to do now is draw. The lines were adjusted just with the cleaner look. And, of course, if there's something you feel you should change, go ahead. Now it's the right time for it. For example, I'm giving it beat more. Um, I'm changing the direction off this lines a bit. Like I said, our faults come from Theis Point, so maybe they should be towards that point instead, off vertically. Take your time. There's no need to rush is practice your lines and repeat them as much as you need. You just see me erasing and between my lines a lot of times. So it's normal. That's how it works. A lot of people work like this, so just take your time until you're happy with the result. So as you can see, I'm just here redoing my lines. Your future is in clips studio, and you did effectually like I just did. There a very easy way to we raise pictures off your lines is using the factory razor. You just need to a tick here, victory reason and choose how you wanted to you raise your minds and it makes it much quicker. Otherwise, you can just use the a normally razor and into its social nice exercise, and we'll help you gain control off your lines and how you raise them. So so as you can see, I went to beat out here, but I don't really mind it. ICUs sits. There's no need to replicate replicates. Exactly What's the picture is joining you. I think it looks better like this, so I'm going to leave it like this. All right, So the main folds are done, and I'm just going to adds the other lines or seems there and a wrinkle or another, just like we did before. So this one state they're not as noticeable as all are other lines. And so I'm using less pressure when drawing them so they look thinner and not as visible as all our other wines. Off course. If you want to be even more, uh, really stick with your lines. Here, you can make just tiny lines showing each stitch off the cloth. It's totally up to you and your own style. All right, so our final lines are ton at me. Hide this one's There we go. We have here our drawing, our piece off course Don and Now we just need Teoh ads, some color and some shadows. So let's get to it. So four days to make it quicker, I'm going to grab here. My paint buckets. I choose a color. Let's choose maybe a cream tone. There we have it. Or, of course, you can just pick up your brush and cholera IDs slowly. All you're trying. Now here we have our based color. Now the way I do my shadows is I usually create a new layer. I change a change. It's styled to multiply over here, and then I give it some conspiracy. Now we just need to pick the same based only used. We look at a reference image to see where our shadows are, and we draw them all right. It's a bit too light, so I'm going to keep it up a bit more capacity to our lawyer here. Remember that this layer needs to be on top of your color layer or base your base color. So there we go. Another best advice I have for shadows is for you to again. Just relax and have fun with it. Don't worry too much. Just go with it. Look at your image, draw them. They can look Massey. If it's your style, I tend to let my shadows look very messy. That's why I like them all right now, this part seriously, insides are very dark, As you can see here, they are full of shadow that don't have any lights going on them. And also here, where the fabric overlaps other pieces of fabric. We have some shadows as well. So we have here some bits off shadow. And now here, as you can see, this whole side is and shadows as well. So and there we go. We have our cloth or folds. Very basic floats, Fold drawn. Now, another thing that you can do since we have all our shadows have the same tone and as you can see, there some parts that are darker than the other, so you can ads darker tones to certain areas. If you wish to just toe to make it to have some more contrast in your drawing, it helps. They're ago. I'm very happy. Read the final result. So we drew very basic false, and now next we're going to draw loose or a simulation off loose fabric self. Follow me to the next video and let's start drawing again
4. Drawing Loose Fabric: All right. Welcome back. Now we're going to draw more Feyerick. Very simple. We're still learning about faults. We true? Something very simple. Very basic. And now we're going to simulate loose fabric. We have two examples. Here we have this one and then we have this one. So one of them is just hanging and the other is a piece of fabric or cloth dropping above an object. This is a round object, so you can see very clearly the shape above, and then the rest will full very flow Lee and created different faults. You can try this out at home. You can pick up a piece of fabric you have pick up different objects even and drop the cloth on top off them, take pictures and see how they behave. They are great for practice. So try this at home and relax. I know this might seem very hard, but trust me, we're going to make this very simple and very easy, and it's going to be very fun. We made it simple weight are less example, and we're going to do the same right now, so we're going to start with the hanging fabric. It's more simple. So we were mop to its and then we'll go to the other one. So I'm going to just add a little bit of conspiracy Here, add a new layer and as always, I'm going to pick my pencil a red tone here and I'm going to find my shapes. So let's do this. So first thing first, where is or where our faults coming from And we can see here our points. So, as I said before, you don't necessarily have just one point from what folks come. You can have more than one, which is the case here. So from here we go down and we do the same on the other side. Now, let's close this ship. There we go. So there's ah fold here. You can see it very clearly enough from here. As you can see, the the fabric will also fold. So let's draw that. It's almost like a triangle triangle shape. And the same thing happens here. So, huh, we can't go down here and here this time the fault goes above our fabric as opposed to this side here. All right, so now here we have this big girl. So we're going to draw it. There we go. And now we can draw our mind. Folds. We have one here. Another here. One going down right here. And the same thing here to go from him. And now we have another mine. One right here. Now the thing I want you to notice here is the faults never meets on the same point. So this one goes on this direction. Well, this one goes here. So they didn't do not meet halfway. We don't have a line doing this. A curved line. Let me just hide this one. We don't have this. We never have this. You don't make it look less naturally feel. Do it like this. So instead they do this. They go this way. This one will go this way. This one here and here and so on. So take this into consideration when looking at your fabric. Uh, any piece off coursing? Just a simple square of fabric ends Pay attention to the folds and their direction. They will never meet one side from to the other. They will always be on different places and it will make everything much more interesting. But here ago we have here are my in shape so we can bring this to the side. And now, as always, we're going to draw or sketch. So again, as you can see it just with simple shapes, we can already see our fabric here very perfectly. The folds, everything. That there's already something here just a bit messy. So now we're going to make our sketch and then clean everything up. All right? So I'm just going to I could hear this little basis just to simulate here the hanging off our fabric. And I'm going to start here with our car. So goes down this way. You can do this very slowly. Don't worry too much if it looks messy right now, it's not the final version of your drawing. So we have here are curve than here because a bit outs and an insider can that. And now, as you can see, there's a bit off Feyerick showing up here. So it's draw that as well. There we go. All right. Now, before we go into all those folds inside our fair piece of fabric here, that's dio everything that goes outside. So we have this, Then it goes aunt way goes inside, and then the be it out again. All right, now, this piece going out here always keep your image. Besides, your sketch show can keep looking at it while the drawing reference images are very important. And I privately advise you to use them. You can't know how to draw something without looking at it. So there we go. Not we have here. This full. All right, This one here. Now there's a one. Another one. Here. It's smaller, but it's here. Then we're going to draw drawn men once here. So there's very noticeable one coming from here and going down here. Then from this side, we have another one doing the same here. Then we have this one here. Now, another one here, this side. And finally this line over here, just terrorist. This part here. I went to be too low. All right, so we are mostly done with our sketch here. Now, all we were missing is a sense of our fabric here. So there's some here and here. All right, so I think we are done with our sketch, and now we can do our final line. So let's see that. So again, a new layer this time a vector layer going to pick up here My brush, my my pen brush And now we can start drawing are clean lines again. Just take your time. You're just redrawing what you've already true before. So this is now a good time for you to relax. Practice your minds and your line knocked in general, it's done. Now again, we just need to add some color and shading. I'm going to pick your cream tone again My paint buckets and I'm going toe ads My base caller, You can choose any color you you want just going to change this line here because it goes much lower than lower than that so of it. I like it better this way. So we are done here and now once again, all we are missing is our shadows. So a new layer I'm going to put a small supply bit off conspiracies, same tone we had before. And now we add our shadows again, just relaxed and go with its We'll get your image and tried to recreate the places where you have your shadows. So there we go. I think we are done with this one work on the shadows or even the coloring as much as you want. Um, everyone has a difference way of working their shadows. I like to make them very messy. Practice. This beats as well as your lines so you can find out your own style and how you like your drawings toe look like now after this one. As I said, we have another example. So let's do that one right now.
5. Drawing Loose Fabric Covering A Ball: So we have here this one also. Let me know if you think it was easy on our knots. I hope I made it easier for you to draw your fabrics and folds. And after drawing our second version here, tell me, which one did you prefer? So shapes we have here quite beat off a curve, almost like a mountain lying like shape. And then we codes on Let me hear Give you a bit more. Yes. Now you can see better. And now we have here some fold starting to show up right here and now we draw the bottom of her fabric here. So we also show some fault in here. Very interesting ones. Even so, this is it we have here mind shape. And now let's ads some more that we see. So there's this triangle shape going on here, fold behind our main fabric. This here would also go insides and create some very interesting folds here. Then we have here another one that we can see very clearly from here. This mother fold. This is just a matter of finding them and trying them right away. So then you can just draw our sketch to have here one and then again, another one here and here. So as you can see, we can make this very simply, We already have a good chunk off are drawing mate. I really like how it's looking right now, So let's do our sketch. I really like to divide my things between the shapes and then the sketch and final final your line out. Because as we do this as we do these steps, we are also practicing our lines and the subject itself. So as much as repeats and practice, the better you will be a drawing a certain object, be it Feyerick, a mug, flowers, scenery. Ah, person. Anything you'll get. Federated's The more you practice, so always practice as much as you can, and you'll notice that with its drawing, you get better at it. So drying our sketch here, just adding some details and again practicing our subject. And, as you can see that are different types off faults. So we have this curve here, going side on its off itself, a straight line or even just an L shape almost right here. These are different types, off fold said you confined when drawing any kind of fabric. So there we have with our sketch is done, and now we can do our final line. So again, factor layer my pen brush and now we can start redrawing our lines. For me, this one is much more exciting to draw. It's there's a lot of faults. It's very different, and it can be very fun. I know it might seem very scary to draw, but it is very fun. As long as you learn how true simplify and bring it down into simple shapes. Anything you're drawing will be much more exciting and fun. So remember any subject you want to draw start with chips. You'll see that everything will be much more easier. Then it looks like All right, you it is done. And now again, our colors So but its color first, very simple. And now, finally, our shadows. So I'm going to create a new layer, multiply a bit of conspiracy, and we have here the same tone. And now we can start going wild with its again. Shadows can also be very fun to do as long as we try ends. Um, turn off that part of her brain that wants to control everything. If we just relax, stop thinking about how shadows work. We just let ourselves go with it and have some fun. As I said, I like to promesse you with my shallows, but it's totally up to you and to figure out how you like toe work with them. The trick is always to relax and have fun. The most important thing in drawing is to have fun. You're not doing this to get angry or get frustrated. Wants to start getting frustrated with something while drawing take a pause, just goes, do something else for a bid or even just stop for a day, the day and start again tomorrow. There's no need for you to get angry at drawing. I know sometimes it can be frustrating, but just take a break and pick it up a can the next day. Now again, we have here this very dark spots here. There's even some, of course, our fabric discussing some shadows so we can also draw that. All right. I'm very happy with this. I hope you had fun. Tell me which one do you think it was? More difficult, This one? Oh, are hanging hanging fabric and have fun without practices. Now we are done with the hard part. And next we're going to draw tight fabric so it will be easier than anything we've done so far, so else you next.
6. Drawing Tight Fabric: Hello and welcome back here, er, and as promised, we're going to do something more simple this time. We're going to draw tight fabric, and as we talked about already, it has less false than a loose fabric. So this is going to be easier. We're now relaxing with then the difficult parts, and now we can relax a bit more. So we have here hanging one like before and then we have our other example. It's the same type of examples as our previous video, but this time it's a tight material. So let's start. Swedes are hanging fabric again. I'm going toe grab here, my pencil, a red color and the new layer. And while the first thing you can see is that it's a very simple squared shape. So that part is out off the way. And now again, where are our points right here. And this is where our folds are coming from. So we can see here one and little one here and another one going down and pretty much the same thing on the other side. One here, a big one here and another one here as well. So this is pretty much it So we're going to bring this to the side. And now we can still do our sketch if you feel it Don't need Teoh. I mean, we already have everything here. You can skip the sketch and go for the final lines right away. I'm just going to do it very quickly, because again, you might still prefer to practice a bit more. Take some time, get used to the shapes and the lines, and we can still the bit off time to have a bit off details here. So there's a beautiful curve here, and we can use that. There we go. And now we do. How folds. And here, as you can see, they are not as this think, that we can see them as easily as wheat, a loose fabric. And now that we're done, we're going to drawer final lines. So I'm gonna bring my brush a new factor, layer on top off everything else. And now we can start drawing our final lines. So remember, smooth lines work with your whole arm. When drawing your lines, not just your wrist in your hand, you'll be hurting yourself. With that, you'll be damaging your wrists and your hands, so try to get used to use your role hard your whole arm when drawing special menu doing this long lines. There we go. Now all we were missing again is those lines for Seems that we see right here. One here. I'm not the one here, all right? And now, like, Nope. Here. All right. Looks good. And now, lastly, but not least, our colony off course. If you just want to practice your folds, you can leave the coloring for another time. Just practice your lines. For now, though, the shading off Eric is very important because as you shade you'll the the folds will pop up more. You can see with a reference images that they the shadows will bring up are full. So that is always important. So when you get used to your lines in the shapes, try to practice the shading Israel. So I'm going to live it just like this. Very simple. There we go. We have our first example done, as you can see, took us last time than the examples before. So now let's go to our second example. I'm going to hide this once, and let's look up to our second example. So again, you layer my pants ill and the red color so you can see it very clearly again, As you can see, you have. We have a very clear curve here telling us that the object underneath it is round. If you use other objects, the shape above will look different as well. So, like I said, take some pictures and see how the cloth will behave. It can be very interesting to draw now. As you can see here, our main shape here is pretty much a triangle, almost like withdrawing in pyramid here. All right, and again, almost no false. And here we can just see very clearly can only see two folds going on here, and even those are very, very soft. So this is basically it's for our shape. Here, let's bring this down. So this is what we have, and we can do our sketch now. Now, as you can see, there's a bit off, um, fooling happen here and we can do that in our sketch. So we start your above with our ground with the curve, and then we go down the straight line going down and now we start coming here and there's a curve here, then right in the middle. We have another car, a bit more off. Another one here, then the bit of a curve and not another one here. Okay, that's cool. And now we have Here are bits of folds. We have another one showing up here, and this is all we are that all the details. But we can add some more details if you wish to. I like to think to keep my drawing simple and a little details will look better by doing them with the coloring and not the the lines with the lineup. So for now, this is it. And we're going to do our final lines. So a curve right here, then we go down. This is the third time we're doing this movements, this line. So by now, I'm sure you seen quite a difference between each example and it's try. No, we cause or shape right here. All right, so now our folds very simple. That don't show a lot. So we try to keep our lines very smooth and the in Israel thinner than the rest of our off our lines. So I think I'm happy with this. So this is it. And no, which is Nick to color. So we grew up here a bass tone and the color that you wish. And then we add some shadows again, like before, like our previous example that are not a lot of them here, So we'll keep this very simple. So we have here a little bit of Sharlow or right side has less shadow than the left side, as you can see here from our image. So let's do the same here. We see a lot more shadows in this side than the other, and this is it. We are done. And I hope you liked it. And I hope I'm made drawing folds easier for you. But don't leave yet because next you have your assignment and you'll put all your skills to practice. So follow me to the next video.
7. Assignment - Time To Practice!: Hi again. You've learned a lot of things so far, so it's come to do a quick, practical assignment. This way you'll be able to put your skills to the test and really improve your skills at drying folds and clothing. For this assignment. I just want you to do a very simple thing. Choose one off the reference images that I'm giving you. And joints. Some are harder to draw than the others. So pick the one you want and just go for it, then posted up so I can see it. All right. I can't wait to see your work. So go do it. I will see you in the next video.
8. Conclusion: Hello and congratulations. You've finished the class. You learn a lot about fabric and fold ings. And I hope you had fun while doing so. What do you think? Did I make this easier for you? I hope I did. And as always, if there's something I can do to make this class better for you to let me know and do consider living a review so other people can find this class as well. This is all for now. If you're interested in drawing other subjects, people, animals are even drawing some Aikens to check my other classes. And hopefully I will see you soon I buy.
 Patricia Caldeira, Illustrator | Digital Artist | Designer