Transcripts
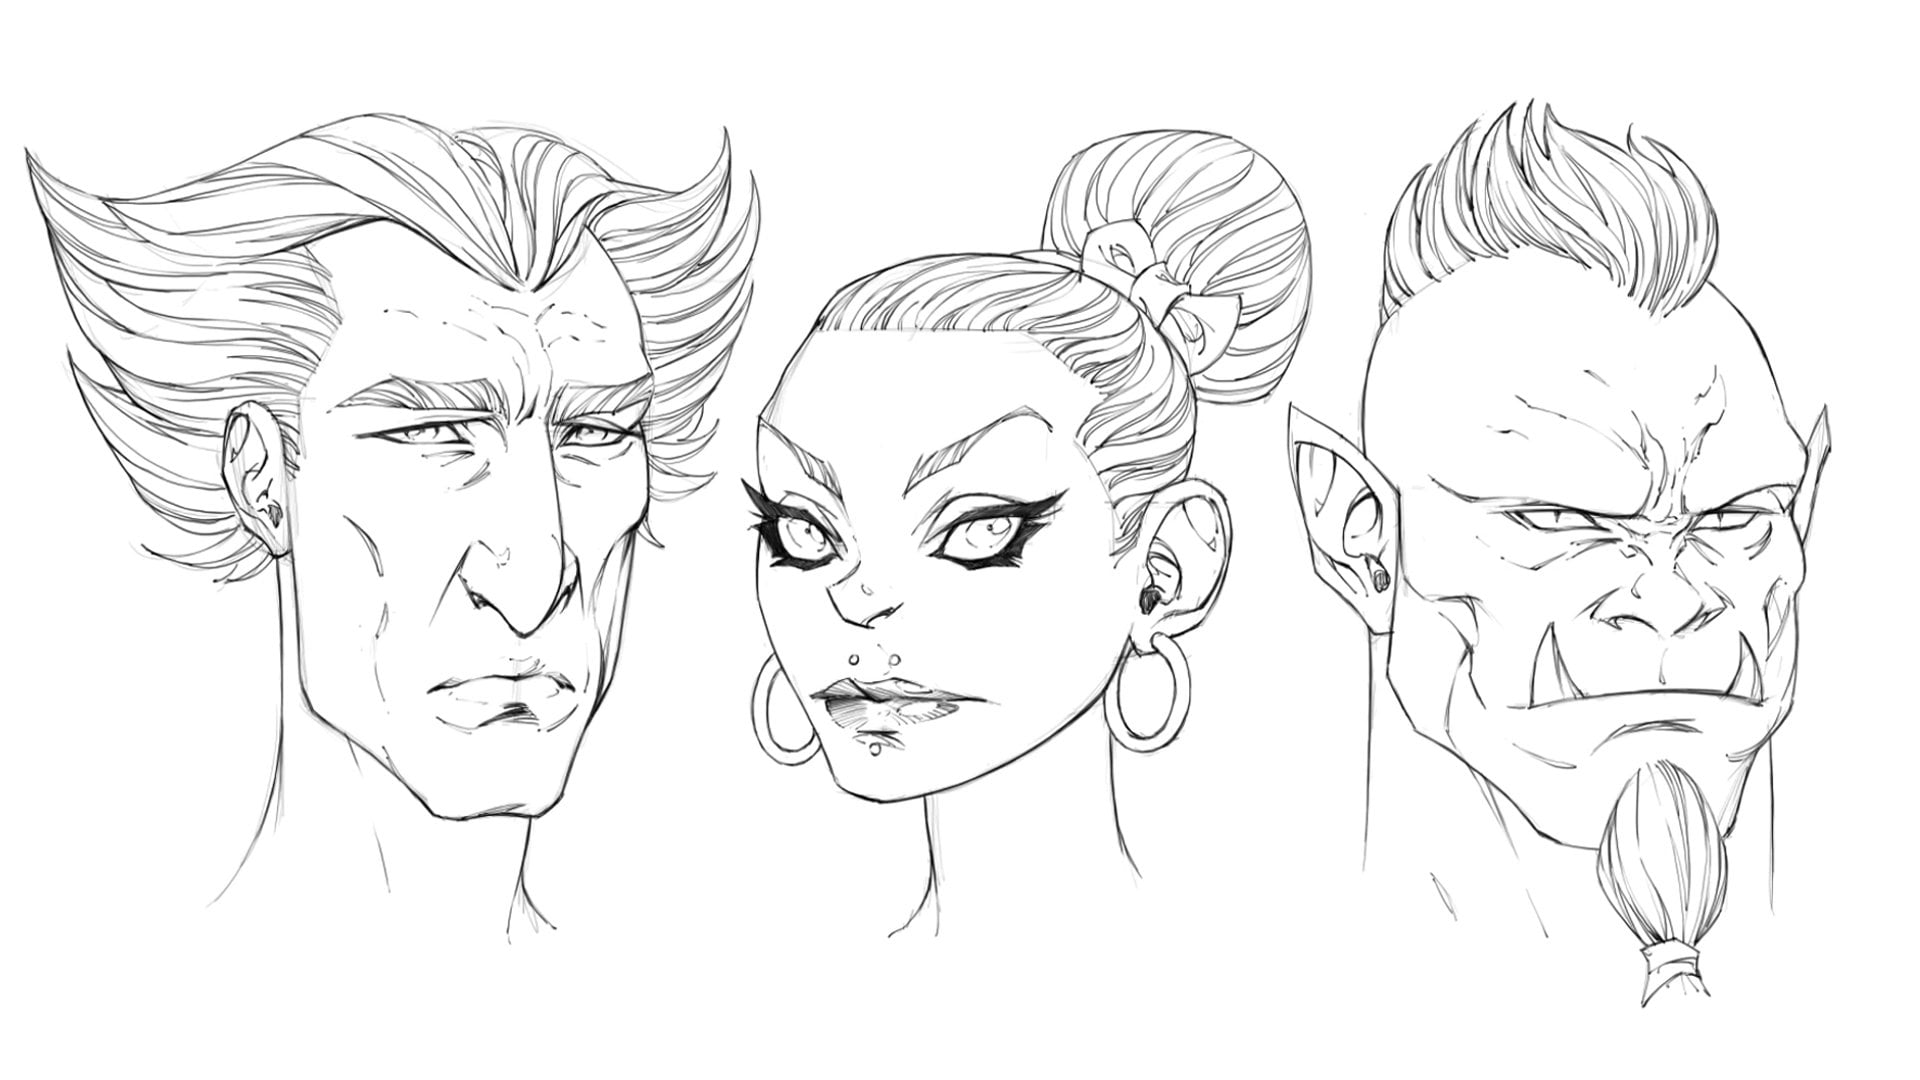
1. Introduction to drawing the head: Hi, my name is Dion Hamill. I'm an illustrator. Offer argument
straighter, maker. In this class, I'm going
to show you how you can create amazing
looking heads from your imagination
that will help you bring interesting looking
characters to your projects. I'm often tasked with
the job to create characters for projects and have no reference in real life, whether it be for concept art, book covers or comics. I worked out that using
this method allow me a quick template that I could
apply to really any face. And with a few adjustments, I could easily create a realistic portrait
from our imagination. And if you've been
struggling with your head drawing or even portraiture, I want to share this
method with you because I believe truly benefit
your artistic skill. From this class,
you'll be learning simplified construction
of the head that can be used as a
template for any design. My drawing important
landmarks of the phase. Differences in male and
female head proportions, shading techniques to create
dynamic looking kids. And in the final class project, you'll be making your
own character head using the techniques
that you've learned and can be used time and time again for your next
character illustration. This class would see anyone
interested in illustration, portraiture, character design, concept art, and comic book art. This class can be done with
traditional drawing supplies, but you can use drawing
software on a computer or tablet and create
the same effects. Okay, So I'm really excited for you to
join me in this class. And I'm really looking
forward to seeing what your imagination can
produce. Let's get started.
2. Lesson 1 - Drawing the basic shape: Okay, let's begin
with lesson one. I'm using an H pencil and first fallen going to
draw a square shape. So I can begin the
template for this head. Let's draw a square shape. It doesn't have to
be a perfect square. You could use a ruler for
this if that would be easier. And I'm just going to
freehand draw a square. And again, you get better at this than we
practice it as well. Now I'm going to
divide my square into top and bottom and two sides straight down the middle to find the middle
of the square. The easiest method is to find the corner points
opposite top and bottom and draw a diagonal
line through those. And that's gonna
give me the center. It's roughly the center. Draw a vertical line
straight through the middle, and a horizontal line
straight through the middle. Now, I've got four quadrants. Within those four quadrants, I'm going to do a curved line, getting some perfect circle, but it's pretty close. Now this plot represents
the top of the cranium. To get the top of the head coming down to the science here. What we need now is
the area of the face. So the bottom half of
the face is going to be about another quarter
length of the total square. So to find the quarter length, I could find the
center is box shape here by drawing a diagonal
line straight through there, giving me sent a halfway point. Now if I draw another line
straight through there and continue it until
it reach this line, that's going to give me an equal distance from here to here. That is here and here to
draw a line straight across. Continue. My center line for this part represents bottom of the chin. And this is the very
top of the head. This line represent
the brown line ahead. And find the nodes. Generally, generally
the noise will be halfway between the
brown and the chin area. So to find that halfway point, I'm going to take a mine
from this box here. And the top corner,
the bottom corner, straight through about midway, cutting us the
base of the nodes. And I don't need to draw this
line all the way across. But if it helps, you can draw it all
the way across. And I'll just put a
note saying the nose. And this line has intersected. As you see these corners here. That's very useful because
this is going to be the side of the head and the
sign of the head. The distance from the center
to the side of the hand is generally the same as from the center of the brow line
to the base of the nose. So he can draw a
line straight up. You could eyeball
this distance here. Well, you can see where
this line crosses through a circle and draw a line that
connects the two points. I'm going to take
the line all the way down the sides of the head. Now, this also gives us an
equal distance from here to here from the base of the
nose to the top of the brown. The equal distance from
here to this point, which will be the ham on. And that breaks our face
down into three equal parts. Generally, a rule of thumb is that the face proportions with a little bit extra for
the top of the cranium. Not everyone's faces. Boss. That's a general
template to work from. The forehead, equals the space between the brown and
noise equals the space between the bottom of the nose
to the signs of our head. I'm not going to go
all the way down. We have the corner of the jaw that will then transfer
down to the chin space. I'm going to make the corner of the jaw halfway between the base of the
nose and the chin. Again, to find that space, I can take a line from this
corner to this corner. Confident enough to eyeball. You could hold this Monaco Mike. So don't take my line
straight across. Try and keep it as
straight as possible. This is about corner
the jaw line from the side of my head
would come down here to the corner of the jaw. This jaw line, I'm going
to make it 45 degrees. Now it could be a
much harder angle creating a much smaller
joule. What scenario? Could be wider. But I'm going to make it 45
degrees in this point. And we'll say it's about 45
degrees on the other side. This is the overall outside of the head was created. Now we need one more feature
and that will be the island. The island will generally sit halfway between the top
of the head and the chin. To find that space, I can take a line from
this point to this point. For me, corners of my rectangular shape
here, straight through. And where that line intersects
with the horizontal line. I have found the
middle of the head. And then I can draw a
line straight across. And that will be stuck in these lines. So we can see the brown, oh, nice chain. And then we have the
beginning of alphas template. And less than 2, we'll begin to look at where
the features are placed within this space.
So we'll see you then.
3. Lesson 2 - Placement of the features: Hi, Welcome to the
second lesson. In this lesson we're going to be positioning the
features of the face. First, we'll be
looking at the eyes, the nose, and the mouth. This will not be
detailed features. We're just looking
at the positions of these features to use later as indicators for FH is when
we're adding the details. So first, let's work out
where the eyes will go.
4. Placement of the eyes: So the eyes on this story, I'm going to have them
sit on the eye line, which we've already created
in the first lesson. This eyeline will
dissect the eye socket. Right through the middle. The eyes will generally said, halfway between the center
line and the side of the head. And to find that spot, I can divide this space here into and then divide
each side into again. This gives me two points here, which will show me where the edge of that the
eye socket will sit. Now I'm going to draw a circle. Then that space to
represent the eye socket. And I'll do the same again. On this side. Again, it doesn't have to
be perfect at this stage. These are just markers
to use as references guides for later when I
begin to add the details. Now more often than not, the space between
the eyes will be equivalent to the eye width. So that space there equals the distance from one side of the eye
socket to the other. Now within the eye, I'm just going to draw a circle
that's going to represent the pupil to sign in to
an idea of the features. I'm going to make it
three circles wine. So if I was to have
another circle there and then I can fit three
circles within it. But I'm going to put it
in the center for now. These are going
to help us later. It's important to add things in.
5. Placement of the ears: The next feature we're
going to add the ears. The ears will generally sit in between the brow line and
the base of the nodes. Within that space. I've
already got a triangular space here that I can use to fit
the placement of the ear. Now I'm just going
to curve a line. So I won't make any
rectangular or square lines or two spec a curved line to
indicate the year like so. Starting maybe midway between
the eye line and the brown, going outwards towards
the edge Kermit back down until it reaches beyond that, the line that
indicates the nose. And then I'll repeat the
same step on the other side. These can be adjusted any
point during this process. So at this point they
don't have to be perfect. They just hear as
indicators to help us know where we're going
to place the features. So these will be the ears, and now I've got the eyes. Let's move on next
to doing the nose.
6. Placement of the nose: So to add in the nose, I'm going to drop a line from the inside
of each eye socket, straight down towards the line that represents the
base of the nose. This is the outermost
parts of the nodes. We're not adding any
details at this point. Just basic structures that will help indicate where
the details will go later.
7. Placement of the mouth: For the final part
of this process, we'll be putting in the mouth. And we've already got a line indicating where the jaw meets the side of the head and transfers down to the chin. That same line can be used as
the top of the chin and is a good indication of where the
bottom lip is represented. It's not always the
case in every mouth. It could be higher,
it could be lower. It could depend on how fat the Olympians
or how thin the lipids. At this point. We'll
use it as a guide, as a reference and say that
the bottom of the bottom lip. To find the top of the top lip, I'm going to find
the corner where the side of my head
meets the island. I'm going to draw a
line straight down. It's going to intersect
with the side of the nose and meet
the center line. I'm gonna do the same
thing on the other side. Creating this triangular shape. This will be useful later on, so it's important to put it in. It'll give us this
intersecting point, which is the top of the top lip. Directly in the middle,
will be the mouth. So I'll draw a line
that goes across. Generally in a male mouth, be width is wider than a female. Well, so at this point, I'm going to make it reach about here to where it meets
the inside of the pupil. Again, this is just
a basic template, almost a standard type of phase. So this line could be wider or shorter in both
male and females. But for now, we're going to make it reach this point here. Giving us an indication
of where the mouth is. And as you can see, it's already starting to look like a face. But we're not there yet.
8. Lesson 3 - Defining the facial features: And listen to it. We saw how we could put in the structures as templates
for our features. In lesson 3. We're
going to be adding in the details for the brow, the eyes, the nose and the ears. These won't be
extremely detailed, but there'll be more detailed than what
we're up to this point. And so we'll be
getting closer to a more realistic flight phase before we start add
shadows and lighting. So this is a really fun part. I really enjoyed
this part because it's when you can
really start to see realistic face or
interpretation of a face coming through that you've
created totally from scratch. Okay, let's get started.
9. Defining the Brow line: Let's begin by
defining the features. Will be defining the
brow line and the eyes. My first step is to find a midpoint between the eye socket and the side of the head. It's quite easy to find
only a narrow gap. So I'm going to eyeball this
and put in a line here. I've already got a line that goes straight up
from the edge of the eye towards the brown line. I'm going to connect
those two lines together with a
straight line here. Why am I using straight lines? Because they are
far easier to draw them curved lines as you can. It's difficult to get
an accurate curb line. So if I'm using curved
lines on either side, they may not be the same, but it's far easier to just draw a straight line
that intersects with another existing line to
get my placements correct. The next step is to
find the internal part of this brow here where it meets the rigid top
ridge of the nodes. I've already got a
line that goes up from the inside of the eye
socket and makes the brow. And now I want a line to come
down towards the middle. There'll be a middle
section here. Specific width. How do we find that?
When the easiest way I find is to draw a line from the base of
the center of the base of the nose toward, towards each edge of the chin. So each side of
the chin like so. Just a straight line. And where I've got my top lip. Let's try and get that
be more accurate. Where I've got my top lip. Draw a line straight across. These two points here will represent the
side of the nose. And you can draw
them straight up, like so until they
intersect with the middle. Now, I can draw two lines that represent
the top ridge of the nodes. Okay, so we're gonna
eyebrow line is there. Next? You can put in the knowns.
10. Defining the eyes: Next, let's put it in the
ice, the actual eyes. So I know this is
the outside edge of the eye and the inside edge. Outside, inside, and
this is my eye pupil. Most ions are curved. Some people have wider eyes, shorter eyes, eyes and slope
in different directions. Eyes that are very narrow, that are not spaced as far apart or are
spaced further apart. But in this case, we're going to just make them
just an oval shape, pretty narrow, oval
shaped like so. Just as an indicator of where the eyelids will sit
around the actual eyeball. And I'm going to draw another little simple line just above. Just for that skinfold, above the top eyelid. And inside. Got that
position just there. You don't have to add
that in right now. I always just like to add it in just as a nice little feature just so I can get the idea
that yes, these are the eyes.
11. Defining the Nose: Next part, the nose. Noses can often be a
bit tricky for people to draw eyes to struggle
with it greatly. But I found a simple
technique that I think will be really beneficial
to your drawing as well, especially from this
front view angle. So I've already determined with the signs of the nodes are. Now I wanted to determine when the underside of the noisy, some noses point up
more than others. Predominantly in a
female face the noise, the nose will point upwards more slightly and not
project out as far. In this case, I'm
just gonna do a standard noise where the noise is just up with slightly so
you can see the nostrils. To begin with, I'm going to
draw a slice of semicircle starting from the base line
connecting each side like so. Then starting from
the top of that art, I'm going to draw a
circle that was touched the both sides of the
bridge of the nose. Now on either side, I'm going to put
two semi-circles. They're going to
go about halfway up the side of the
center circle. And they're going to
portray the nostrils. So this is the tip
of the nose and these are the knots nostrils. And this is not a completed
version of the bones. This is just an indication of where the predominant or dominant features
are going to go. All right, the next
step with the mouth.
12. Defining the Mouth: For the mouth, I've
already got the top of the top lip and
I've got the bottom of the bottom lip and a center line to indicate where the actual
mouth opening is. For the signs of the top lip. I'm going to draw a nice
little curved line. Or it could go
straight to that point and then dip down in the middle. No mouth tends to have a straight line across
this part here. You could do that for your
character if you wanted to, but it looks much nicer. Just have a little
dip in the middle. And lets people
know that this is the mouth and do the
same on the other side. Now for the bottom lip, we've got our two lines coming out
from the base of the nose, passing through the mouth
towards the chin where the bottom lip or
the line indicating the bottom lip passes
through that line. That's the edge of the most
bottom part of the lip. And then that's
going to curve back up sharply towards the sides. And then we haven't, we've got a basic
structure for the mouth.
13. Defining the Ears: The next feature
we're going to start adding some details to the ears. Now again, we're not meant
adding in full details, just indicators of where
basic structures are. So in this part we've already
got shape of the ear. Now we're going to add
some form to it by placing a line that will indicate
the outer edge of the ear. I like it to just appear where your eyeline
meets the side of the head. Almost parallel to the outer
line, will curve outwards. Just a little bit
more on the edge. I'm not going to add
a lot of detail to the ER because I
don't want it to detract from the rest of
the features of the face. Next, I'm going to put a small market indicate
just the middle point. I'm going to find
the midpoint between the top of the e in the base just remains the
side of the head. Now that midpoint, I'll just put a little circle on either side. And then within the ear itself, just a couple of, a couple
of little indication lines. Just to show us there are
those folds within the year. As I said before, I'm not
adding in a lot of details. Just basic structures, so I know where things will
be positioned later.
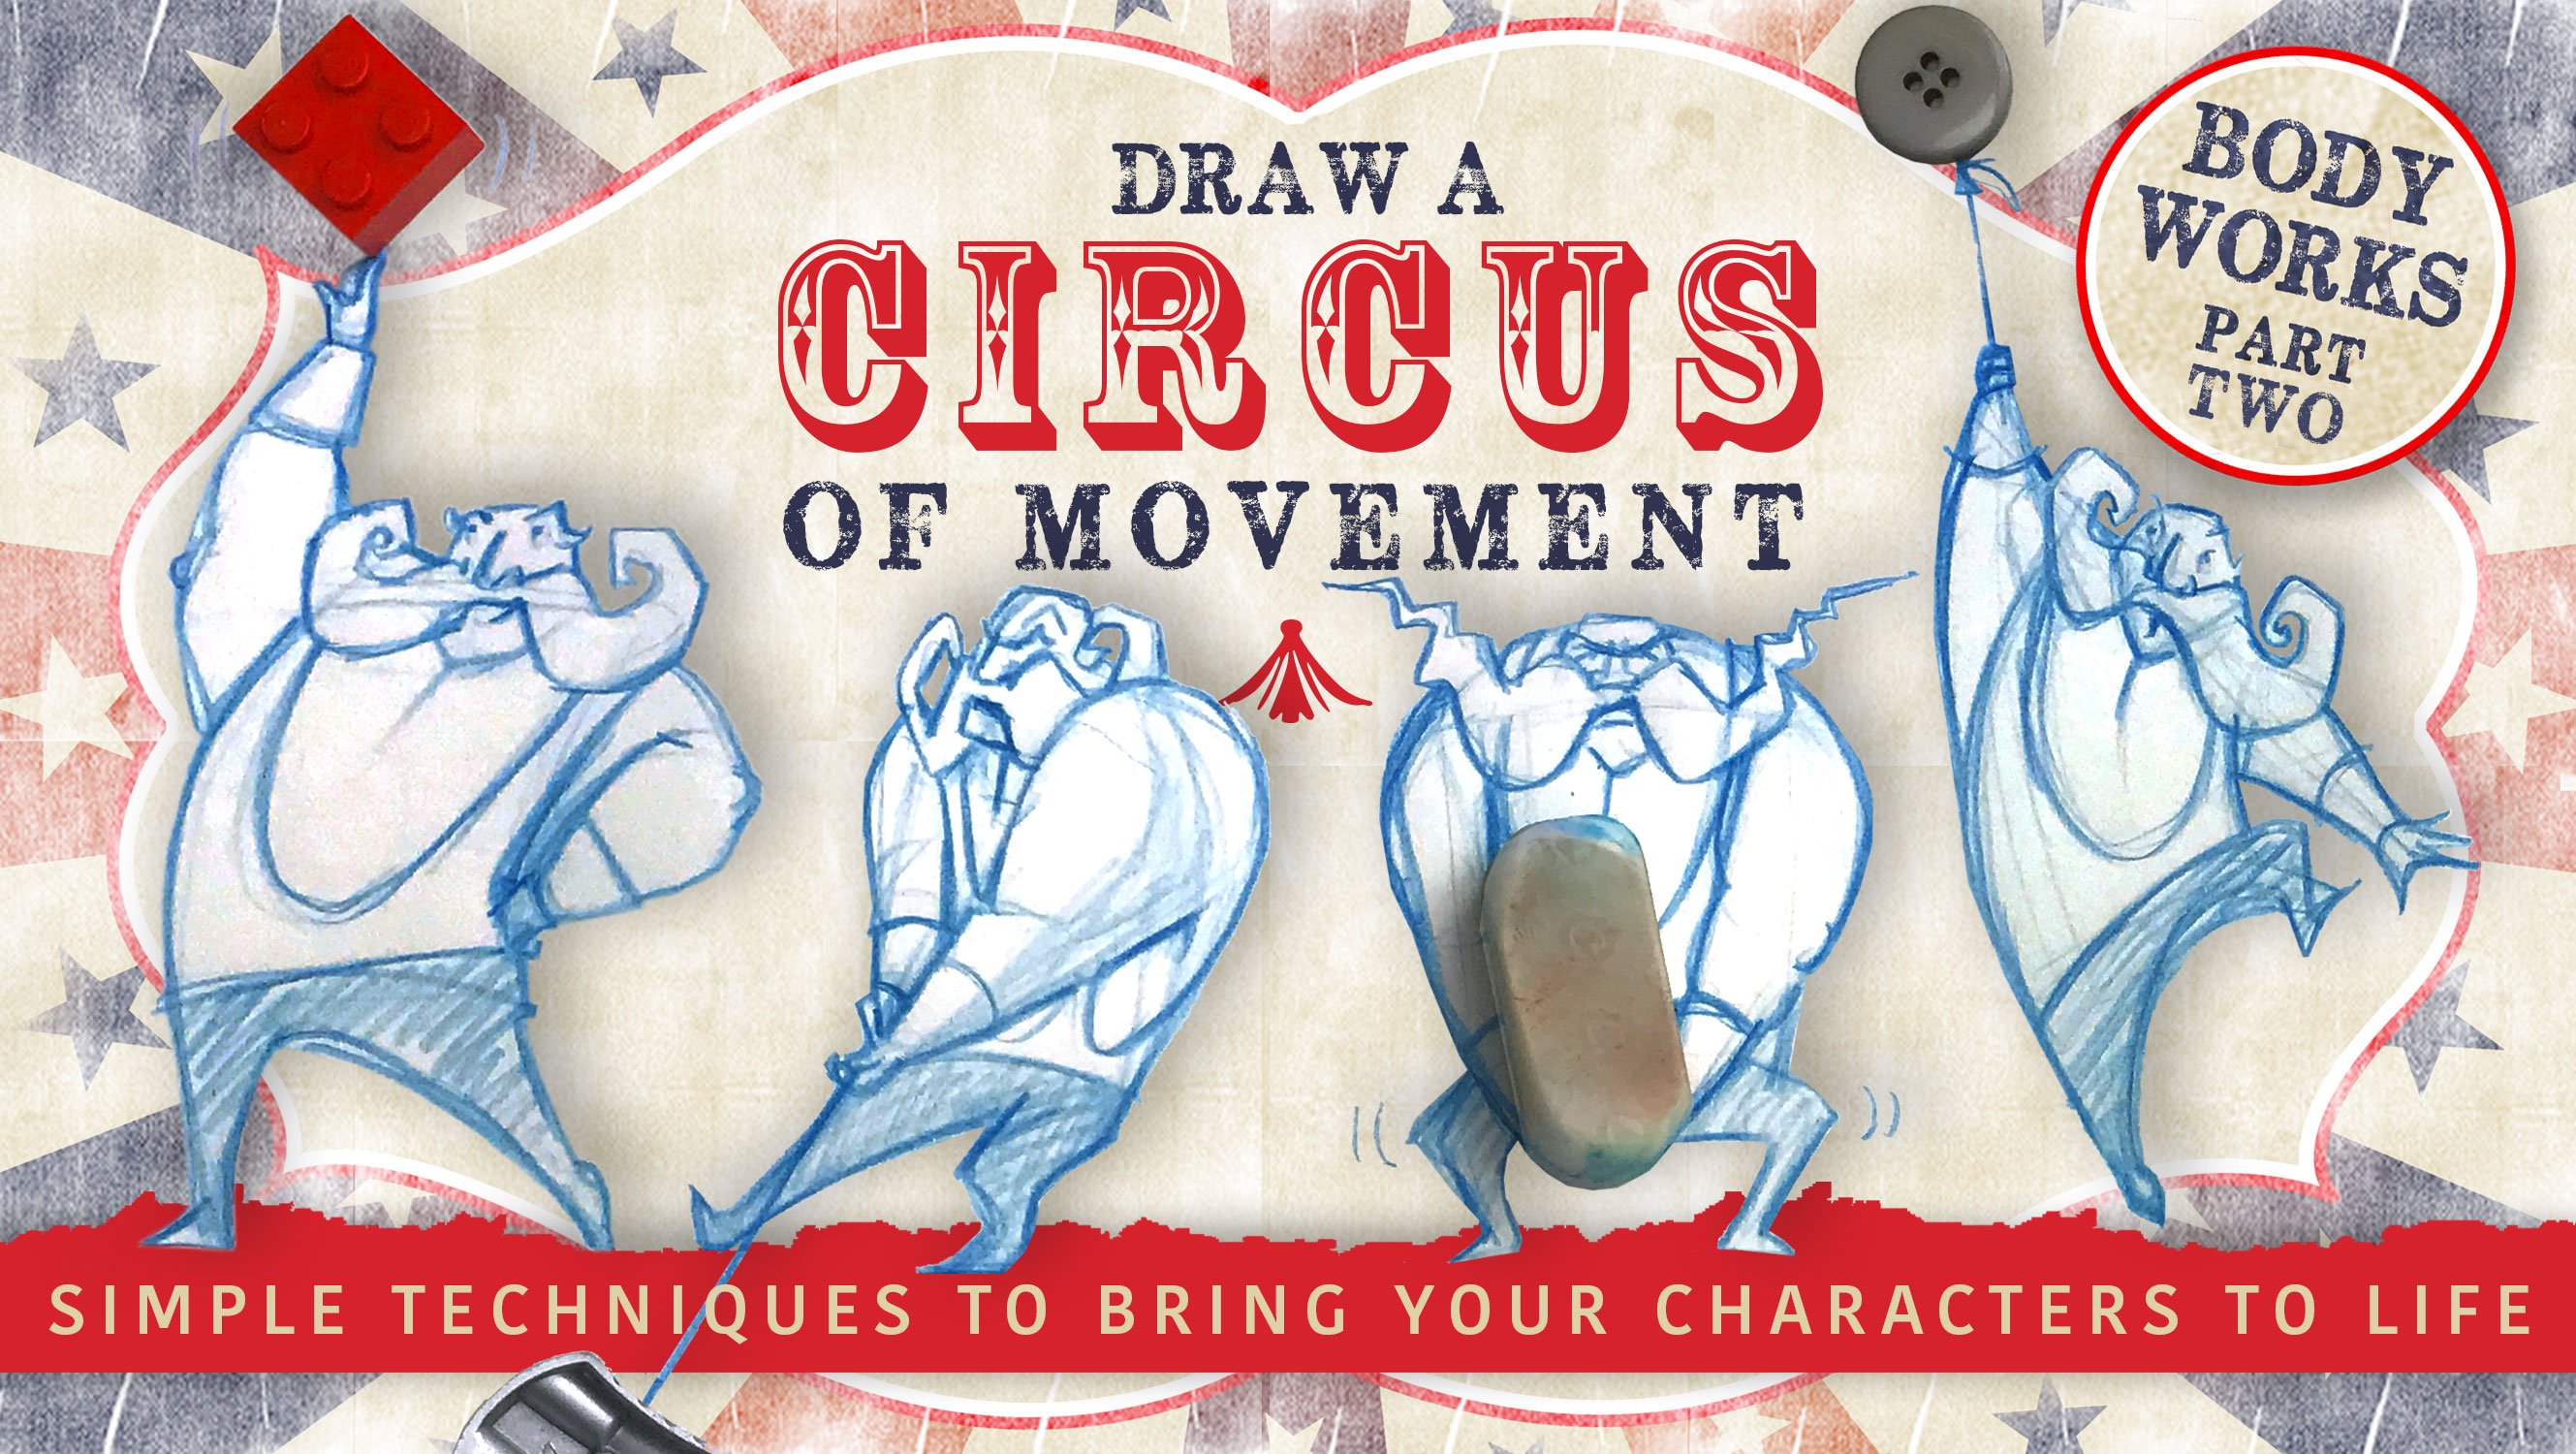
14. Lesson 4 - Form and shadows: Hi, welcome to lesson 4. Now we're onto a really
fun part of the class. We're adding shadows and contours to create
the final form of our character design. And I really enjoyed this
part because you can start to see the life of the character
really come through. Again, it points within this, you can still change the form because we're using a
very light pencil stroke. With a to H pencil, we can add and remove
things as needed. And the sketches a
very quick and loose, so we're not beholden to any particular
line at this point. So follow along with me. And let's finish off our character face
and see how it looks.
15. Form and shadows - Face shape : Okay, I'm going to start
with a face shape. At this 0.3 square, very blocky. This almost looks like a robot, not a human face. So for a start, I'm going
to begin with the cranium. Generally, if this
was a male face, will be much broader cranium, not always but
square and broader. A female cranium tends to be
much narrower and rounder. So let's just do a
generic male sort of structure at this point and then we'll do a
female one to this. So I'm going to
round off the sides, curving the head back down
towards the top of the ears. With this point meets the
edge of that triangle. I'm going to start to
taper in that line. Too narrow. We just
slide angular features. It doesn't have to be, it
could just be straight down. Some people do have very, very straight sides of the head. But I want this to be
a bit more realistic. So I'm going to just angle it
down slightly until I reach this line here where the
jaw line meets the side. Then I'm going to curve my line at another angle
back towards the chin. We'll give it a slight curve. Again. The jaw line
isn't just a straight, very straight line,
slightly curved. I'm just going to use my eraser. Just to thin out these lines. Be easier for you to see. Jetsons.
16. Form and shadows - Eyes : Now that I've put
it in overall shape of the face that I'm happy with. The next step I'm going
to put in the eyes. I like to put in the eyes
next because they're really something which embodies the full sense of the character. So the eyes are a really
important feature. May not always be the
case for a character, but I feel that the eyes really set off
the character well, one to get the eyes right, then the rest of the
character will start to flow. So I'm looking at the left eye first
because I'm right-handed. I'm going to start with
the left side first. That's the right
eye of this face. So on the left side and then I can copy it by
working over here. That way I'm not I don't
have my hand in the way. It's far easier for
me to work that way. So always start
on the left side. So first, we'll begin
with the top lid. Now. Just narrow during this
area back down here on the pupil. Small iris. Make it a bit more realistic. And where the outer edge, It's the corner of
the eye socket. I'm going to turn it up slightly and then drive it back
up towards the brown. Using this template here, I'm going to curve
it back in towards the very narrow line, starting curving it back around, following the top
brow in towards the center of the nose
and the eye socket, just under the skin. And I can start to lighten
some of these features. I'm liking the way. It's going to lightly
add in a shadow there. Now I'm going to do
the same on this side, following the same line. They're on this side going up the same direction. On the other side. The eye socket, top eyelid plus the small skinfold at the top
eyelid skinfold. Define the pupil. Is my ours. Bring the sign bit more
tapered in a bit more. Enlightening some of
these features in here. Let's add a little shadow just underneath the brown shadow. On the bottom lid. The pupil where it won't be
visible anymore, it'll just be behind the eyelid. And the center line. We can get rid of that. Okay, already Eisenstein to look a little bit more defined.
17. Form and shadows - Nose: Let's move on to the nodes. We've already
defined the nostrils and the tip of the nose. Now we're going to work
on the internal features. So the nostril holes
underneath here. And to find that no nostril doesn't have
this small septum here. As far as I know,
I've never seen one. And then we can make a
small circle with fans out, meets the edge of
this semicircle here. And then comes back in. Small circle. Fans out on the
other side, comes back in. Now we're going to
start to remove some of the lines
that we don't need, giving you a bit more
realism to anodes. So we've already created the basic shape. We
can start adding. Shadow would be much
darker in the nostrils. And a little drop shadow
for the underside. The ancient denies. We can. Finally, it could be very straight or it could
even be broader. Going to make this
very straight nose. Just remove some of these
construction lines. So we can see what we're doing. Shadow, just to create a form. Lines. The lines
more unrealistic, I find the noise looks. So I'm going to keep my
lines very, very soft. And the edge of the nose here, It's going to create
a shadow here. Just when the skin
begins to fold outwards. The top of the cheek. These construction lines, 00, 00, 00, 00, 00, 00, 00, 00. Can say fictive. This technique is helping the placement of the features,
especially the noise.
18. Form and shadows - Mouth: In the next part, we will
be working on the mouth. At the moment, we've got very, very basic lines for the mouth. But the mouth is
a little bit more curved and then a
little bit softer. And generally there's
not a lot of hard edges, more lines to
represent the mouth. It's mostly represented
by shadows. So where we've got outlines, the top lip will
be going inwards, so that will be in shadow. So I'll just darken that area. And the edges meet, I'm going to round those are slightly creating a
more sense of realism. With the top lip begins to
go into the mouth is a lot darker to where it
meets the mouth and going to dark in that line
just ever so slightly. Just lightly going
over the bottom lip underneath the bottom loop is probably the most dark as part where it's sitting
just above the chin. It's all dark in that
line a bit more and also dark and slightly at the base of the liver as it curves up towards the edges
of document again. And dark on the other side. 0, 0, 0, 0, 0 inches. Darkening. The edges.
Can begin to see. That creates a bit of
a sense of realism in the face and the
lips, nose and mouth.
19. Forms and shadows - Ears: Next I'm going to be
looking at the ears. I don't want to add
too much detail into the ears because I
don't want it to detract from the rest of
the features of the face. But what I can do is
add more shading, shading to give a
representation of contours within the years
as it's a cone shape. And as you go into
that contract, it's going to create more
shadow in the center. So around this area here, I can start to shade outwards. And at the base I'd like to show the base just meets
the side of the head. Covid in slightly going on the other side
and at the base. Now this small line
here is the skinfold. So as it moves outwards, I'm just ever so
slightly on either side. And the top skin far, it's casting a shadow downwards on the inside of the year. All right.
20. Form and shadows - Temples, cheeks and chin: All right. I'm just going to start
fleshing in the bone structure around the temples and the
cheeks. To work that out. This area here, I'm going to take a line
that we started from the center of the ear towards
the mouth, straight line. And where it would intersect
with the outside pupil. I'm going to bring that down. Towards the corner of the chin. Can be slightly curved. It doesn't have to be
extremely straight. In fact, at this point, you're going to
find that to keep the features looking
more human-like, more organic, you'll want
to just slightly curved. I'm just going to lightly
put them in as an indicator. That line. All right. These are the signs
of the cheeks. I'm going just begin to
start adding in some shadow. Under the mouth. Now just here under the
mouth, the chin area. So I could curve. The project outwards. Under the mouth is like a
small shape, a rounded shape. Nice. You've got a rounded shape here. The underside of
that round shape, almost like a part of
a bone sticking out. The underside of
that being shadow. So I'm going to just
create small shading. Semicircle shadow. Can keep your shadows light. That way. Your line meets the end
of the side of the head. In the middle of the E
towards the eye socket. There's a little
reach their bump. Bump where the bone
is sticking out. It's where the outermost part
of the bone is sticking, so it's not a lot of fat there. Keep that a little curve. That'll create more
realism in your features. And the top. But the brow
with the outside line meet, project upwards
towards the corner of the head where it meets
the top of the dome. And that's where the head
starts to taper backwards. The skull is not
perfectly round shape. You've got reach there. And that again is
where the skulls, it's very, very close
up against the skin. There's no lot of fat there. But we won't be adding any. I'll just give a little
indication of where that can sit. And I find this hand is
probably beat 2 square. So I'm going to round
it off slightly. Easy to do with pencil underneath the eye socket and
be a little bit of shadow. Skin begins to fold up and downwards on the
outside of that socket, there's a little bit
of shadow there. I'll remove my
construction line. Center of the eyes or the brown line here,
there's another shadow. It's very, very slight. With this part dips in inwards. Okay. Just keep adding shadows. Just darkening areas
where I think there'll be more encountering happening. And that will create a 3D representation of the
face from a frontal view. Islands. Because the impression that
light is coming from above. Yes, you can start to see
how effective this method is for representing a
face from the front. If you want to keep
your proportions. And you want to
replicate the image later again and again. You just have to follow
your basic proportions. Kept the shadow under the brow, but I want to add
in some eyebrows. I know we said we're not
going to add in hair. But I feel like the eyebrows
would finish it off nicely. So the eyebrows are
going to make them sit just underneath that line. Imagine that line
is the brown line, but the brow itself is
not a square shape. It's more of a curved line
where this line is coming in and had the eyebrows
just underneath. Pointing upwards
towards the outside slightly can keep them
generally a little bit messy. Strands of hair and just
gives the indication that there's all sorts of
different directions. And then we have a basic
facial structure for a male.
21. Review and female face example: Okay, Let's run through
all those steps again that we completed in
the earlier lessons. From start to finish. This time I'm going to draw a completely different
character from imagination. And let's see what
we can come up with. Feel free to follow
along with me. Or have a go at manipulating the template as you go and see what else
you can come up with. All right, let's get started. Start off with my square. The upper part of the head. I can draw a circle
within that square. As I said before, I can circle through the middle, finding the middle line,
horizontal and vertical. And then complete my circle. This already gives
me the center. The circle, horizontally
and vertically. Carry the vertical line down. Now we've got a chin. This is going to be
a female characters. I may know what the
chin to be as well. I'm going to put here 0, 0. Let's find the noise. Now. Notice would be midway
between the brow, chin, sides of the head plus the hairline. The eyes. Midway between the chin and the
top of the hand, are going to be about there. Are the eyes. So
we've got to have ground line, nose, chin, her the eyes on the
sides of the hand. I'll drop those down. Make them about midway. My line seems to intersect
with our circle. Spring aligning, make
the chin a bit narrower. The eye to bind to two again. Circle right into, to divide it in half again. And so circle. The center of that, put our coupon, drop a
line down to the nodes. This 0 is going to make the chest a little bit
smaller within the space. And then I'm going
to stick out as far to the end of the circle. Top of the mouth, passing
through the corner of the nose. Hitting that center line. Repeat on the other side. Midway is the opening
of the mouth. I'm going to make it go just
to the edge of the nose. And I want it to be too wide. Contour of the head, tapering a bit smaller. And a Mayo head comes
to the center line. And again, matching
the distances. We can keep it consistent. Again towards the center, 0, 0. Now the brown middle between the eye and
the side, the head, towards the line
that meets the brow, where it meets the
size of the pupil. Need to find the middle line. Find the width of the
bridge of the nose. And the center here.
Towards the chin. Chin is much narrower. So that's going to create
a Paris space here. A narrower, narrower. Looking good or any
flesh out, some lips. Just quickly. Those two lines slide semicircle, semicircular bit bigger,
so they're a bit wider. Okay? The nodes, the nodes semicircle going
upwards, point here. And the previous
nodes just to add variation above that semicircle. Another circle,
two circles below. We can start to add some forms. Quite good. Let's add in
some shadow around the eyes. Female. They won't be as much. Definition in the brown. Soften the brow bit. My eraser, I can start to take some of these
construction lines the way down into the noise. From the center. Make my nostril shapes. 00 00 00 00 00 00 00 00 00 00 00 00 00 00 00, 00, 00 00 00 00. Looking good. So far. Let's add some more contour to the side. Midway between the
what's the mouth? Just drops down from
the outside of the eye. The chin. The same step and took
down towards the chin. The ancient the head. And this is going to be
quite a few younger face. There won't be as much
shadows in the face. Generally gives the impression
that the person is older than some of these
construction lines. Type is in slightly
then goes back out. 00 00, 00, 00, 00, 00, 00. Dark skin fold just a little bit darker. A little bit darker.
Skin phone just to me. It just makes the skinfold
pushing up a little bit. Can we make this character a little bit better? Top lip will be
darker because that's receding backwards
towards the inside of the mouth opening. The most bottom lip
a little bit darker. Towards the science,
I start to get darker as it recedes back in with underneath the bottom
there where it meets the chin. Just a little bit
of shadow there. Signs of the cheekbones. Little bit darker, darker. Three-dimensional look. 0, 0, 0 is not as pronounced. Put in shadow and all
the top of the nodes. What I'm going to add in some high Brown's, another male face. Just touch-up areas where I believe it should
be a bit darker. 0, 0, 0, 0, 0. We have it. It's a very basic design, very simplified
and easy to draw. I can manipulate
anything within this easily because it's very
symmetrical as well. But if I want to lengthen side the jaw line or
short-lived can just already worked out where
I need to go because I've got my construction lines
lightly in the background. If I felt that the eyes weren't quite
position quite right, I could erase them and start again without having to
change anything else. And the phase, if the nodes, I didn't feel like
it was quite right, I can keep working into it. Oh, remember that
completely and start again. But I think works out quite well for a basic
structure of the female face. And again, you can
apply this technique to any type of face. So as you can see,
it works quite well.
22. Conclusion and class project: Thanks for spending the time
with me to learn some of the techniques I use for
drawing heads from imagination. I recommend going
over the videos again and following
along with each step, making variations when
you feel confident. These steps will
help you improve your ability to draw a basic
shape to use as a template. Ability to draw the features
of the face in position and proportion and add light and shadow to create
form and features. And then for your class project. And really like to see you
create a character head drawing from your imagination. You could use a character
you've created in the past. Or you could even base them on an existing character or person that you
would like to draw. The objective is to exercise your creativity and
work from imagination. Remember to start off with the overall structure first using the process
outlined in this course. Working your way to
the smaller details. And finally the shadows
and lighting to create form and breathe
life into your character. She your final results with the class in the your
project section. I'm really looking forward to seeing what you are
able to create. And please don't hesitate to ask any questions as I'm
always here to help. I hope you've gained some
valuable knowledge to add to your skills as we
all progress on our creative journey.
Thanks for joining me.
 Dion Hamill, Artist, illustrator, author