Transcripts
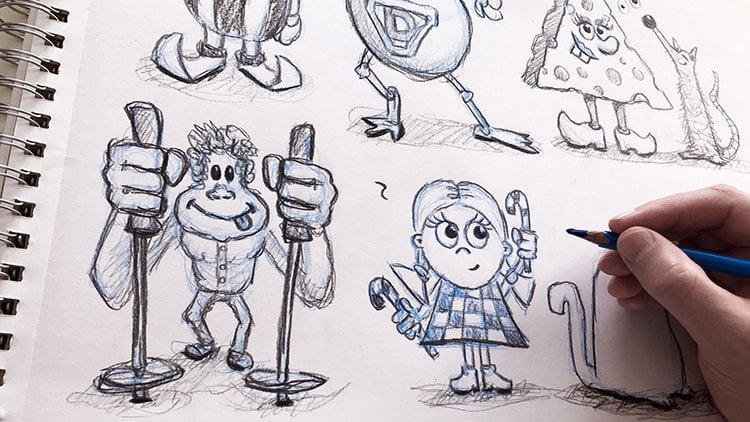
1. Introduction: Hello and welcome to easy Drawing Cute
Animals in costumes. My name is christer and I made it easy and
phon course for you. Here are some of the things you how to draw
using basic shapes. How to make animals
cute and stylish. How to relax and be playful. Draw six animals in
different outfits and poses. How to enhance your drawing
skills in easy way. And Tips for developing
your confidence. Also, drawing cute animals in
costumes is like two gifts in learning a new skill and be very happy
at the same time. That is hard to beat
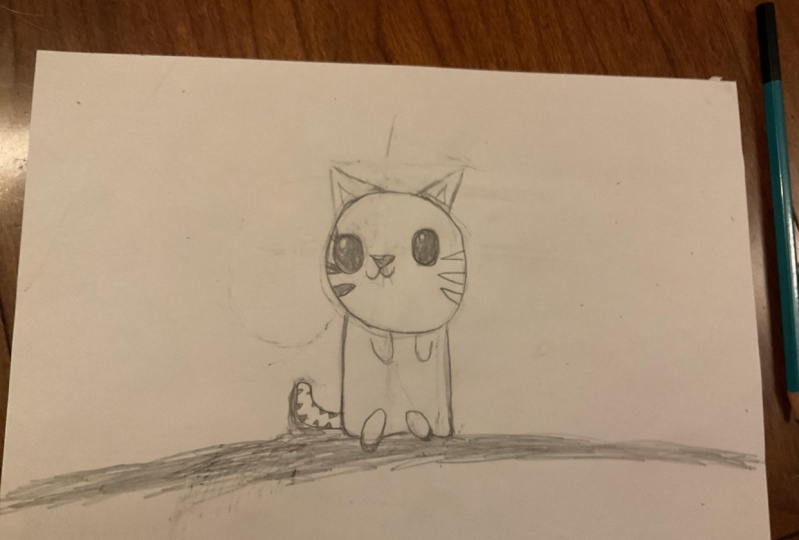
2. Cat in a Hat: So I thought it was stopped
by drawing a little cat. We will do so by doing
some basic shapes. Every a rough circle. And as you'll see, I'm
very, very rough, ER, starting to find
mice wrong shape. Then we're going to
draw some guidelines. Why we are drawing guidelines
is that it's easier to place things in your drawing, my mouth, nose,
and ice, etcetera. The circle is going to be the head and I'm
going to draw a body. I'm taking my Sherman terror
that half of the circle. Will it be about where
we will place the body? The body will be formed on a
little box shaped like this. There's a little bit
smaller than the head. Slightly. There you have the hat and the
body, very simple. Then we will place the nose and it will
be a little triangle. And we're going to use
this, these guidelines. So there you have
them, Cute nose. Then we will have a mouth. Will be two lines
going up like that. And it'll happy cat. Then we will have two
big eyes like this. And as you'll see, it's easier when you
have guidelines to place the eyes approximate
the same place on both sides. And ice are a little bit more above the
guideline down below. To be awful shapes like this. Don't worry if things
are not hundred percent symmetrical,
it doesn't matter. When you finalize the drawing. It will look very good. And in the eyes, I would like to leave a
little bit of lights, so I draw two smears like that. Why I do that is because when
you leave a little bit of light in the eyes of a
character, look more alive. There we have two
beautiful eyes. Now we can go ahead and draw the the hat using
the bowl shape here. Don't worry about
that your lines are going to be
perfect or anything. It doesn't matter. They can
be as crooked as you want to. And why I'm not
drawing them all the way up over draw air some here at Level use a guideline
going out like this. So you just imagine that you
have two lines like that. And from there you can draw pointy ears looking
something like this. And then you can do the
same on either side down. If you feel that you have drawn this slide a little bit too low, it doesn't matter, you
just use your eraser. Your best friend. You have to. Nice ears here. You can draw the
inner ear-shaped to following the outside lines and then you can use
the headline there. Very nice. I will draw the top line quite
soft because we'd go, go back here and put a
little hat on the chat. But before that, we
will draw the rest of the body and we'll start by doing coming out
from the corner here. Yes, draw nice round shape. Going up into the guideline
that is touching the head. And then it can
do the same here. Find in the corner some nice round shape going up into a box meant that weirdo. The guideline is touching. And error is the thing. If you have lines that are
going on topics of each other, try not to try to avoid
these situations. I will just erase
this a little bit. Because when your drawing, you have something
that looks like this. It's a little bit hard to read. So in this case it's better
that it looks like this. That you know that the head
is on top of the body. Try to avoid too many
shapes looking like that. It's okay if you do it, but just try to avoid them. And now we're going to
draw the front paws. I'm going to place two
meals a little bit further down than the bottom line here. And then I will make two rounds. Bumps going up into the body. Looking like this. You
have your frog pulse. Now you can close this line
where the cat is sitting. Yes. Don't worry if data
are not time to present the same size,
it doesn't matter. We'll draw some lines here, two on each place. There we have a little
cute cat sitting. And of course the cat should
have a little bit of a tail. So from this side, not all the way down
to the bottom line, they also little bit higher. You can draw out the big
nice curved line like this. The wrong top. And then
going back into the body. Usually when I draw
tails for cats, I like to have them quite
fluffy and I make them Aosta little bit bigger
in the end of the Taylor. Just a little bit like this. If you feel that your
lines are getting a bit to go back and erase them and clear them up and draw a little
bit thinner line. To take advantages of
your eraser there. Of course, to catch it,
have some whiskers. Should draw them. Maybe
three on each side. The top part being the biggest. Yeah, something like
that. Looks good. Maybe have wondered why
using a blue pencil to start with is that I like to be very rough with
the blue pencil. I can draw as many
guidelines I want to. And later all I will go undefined drawing with
the black pencil. And I will just leave
everything that is blue because it's under
reminder of what I've been doing in the drawing. If you don't have
a colored pencil and if you don't want to do it, It's totally up to you. But I can recommend that
you're trying it at least. And since this is cute
animals in costumes, I thought we will
start with a very, very simple thing
in the beginning. So we will erase the top
line a little bit there. And another draw, a little
bit of a top hat here. A little bit of a bumped line there to bump lines
coming out like this. And this hat can be as
Crockett as you want to. Then we will have a
little bit of a line here to shade this slide diblock. Yes, I think it looks very
fanciful and Cute is cat. So let's go ahead and define the lines
for the black pencil. We're going to
start with the eyes will do some shading here. What do you can do?
You can do a bit of a cross shading if
you have problem getting the the shade, even. Just imagine that you're shading into different directions. Make sure that you're leaving
that little spot of light. Let's go ahead and do the other I leaving that little light. When it comes to things, why it looks cute
is that if you're using big round shapes, you are having very big eyes. You have usually your head that is quite big
compared to the body. All of the things, all of these things
makes animals cute. He also tried to keep
these proportions. We can do the nose. And as you see, I'm not 100%
slave to the blue lines. If If I do the lines later on the little bit
different, it doesn't matter. Let's go ahead and do
the outer line with the same on either side here. As you see, you can
use a single ops. Got away, they're a little bit, you can use single line, long line like that, or it can use a lot
of different lines. When you're sketching.
You should try both. But what I can do recommend in the beginning is
that you're using a lot of lines just following the shape
you're looking for. It is a little bit simple. It's a little bit simpler, and it works a little bit better in the beginning when
you're learning to draw. As you see, I also
make mistakes, but I'm not freaking out because learning is
about this actually. It's very good that you're
making social cold mistakes. Of course, that's the
best way to find out that something you about
being drawing is not hundred percent what
you're looking for. And you will remember that you can go back and redo the line
or whatever you're doing, the correct ways of say. As you see, I've made a little
shade here for the hat, but I'm not making
that shader strongest is because it's quite important that we
keep the focus here. And dark and high
contrast areas. This is where the eyes drawn to. So yes, keep the
ice the strongest. The doctest. Whiskers. You can make them as crooked
as you want to. Do last livers and do the body. Following this long lines up. Just making sure that we are not overlapping too much
with the lines. But if that happens,
don't worry. Erase them or leave them
there as a reminder. And the next time you're
doing this exercise, you will remember not to do
so many overlapping lines. Lastly, we will have
the little tail here. Yes. And here's a little
thing we can do is to add strings to the lines where the cat is
touching the ground. When you're draw strong
lines like this, you can see that it's
attaching to the ground. And the same thing goes
with if you're draw a little bit stronger
lines for the pulse here, there are popping up a
little bit from the body. This is a way to
work with contrast. You can attach things to
the ground and you can lift up things out from things
that are in the background. We can draw us a little bit tostring something nice
to tail or not so much. Also the constraint from the
lineup here a little bit. This see that the bodies
on top of the tail now we can do the same here also just a
little bit to strength. No other bodies on
top of the head is on top of the body.
So it looks good. And I think we will add just a little
bit of a shade also. It's nice way to Tasha character to the ground to use to blue pencil
and very lightly. Draw a little bit
of a shade here. Doesn't have to be a
lot, just a little bit. Low-level used.
The black pencil. I'm very, very ugly. Draw a little bit of a shade. And don't worry if
the shade lines are going to talk or into the
cat. It doesn't matter. It's all about
training your eye, your eye and hand coordination. It's okay to make mistakes. There's no need to freak out. Because when it
comes to drawing, the best way to learn
is actually to do it. It doesn't have to be
perfect every time. It's not necessarily as long as you're draw a little
bit every day. And there's a thing
also I like to do. The last thing I do
is to go back to the eyes and just add a little bit more strength
to them to make sure that we are looking into
this big, beautiful ice. So there you go. Your
first cat in a Hat. Looks very cute. Good work, and see you in the next lesson.
3. Royal Cat: The next cat we will do
is the standing one. And we will start
without the cat. We will do circle. Finding. Real nice shape here. Something like this. And
we will have a guideline. So things like that. And another guideline
for the hat there. And since this cat, the styling, we will have a little bit
more room for the body. So it will be the
whole circle to make a rough
measurement down here. And I will make another box to have a little bit on
guidance to where the bodies. And we can start by doing most for this one,
also, another triangle. And then we will have to
lyse rounded lines here. Because it's always nice
to draw a happy Character. Makes you happy to. This cat will be having a big, big open mouth but a time there. And then we will also make
a little bit of a shade. When it comes to the eyes. This cat will have round eyes that is just a little bit higher than the guidelines when it comes to the middle of I will be us
completely black like that. So very have a very nice
happy smile, smiling face. Erase a little bit of
a line there and then we will have hat. That's going to draw
a line saltier. I'm not going to go all the
way in the middle when you will find out why quite soon. And as with other wall, we will use guidelines
going out like that. And then we will have set
of ears or pair of ears. Maybe you called it
using the outer lines. Stay around. Headline,
very happy to cute ears. And I think this cat
will be a king or queen. It's up to you to decide what kind of title
the cat house, but it will have a crown. So let's go ahead and make
a nice big crowd here. I think I will make
four crusts solid. And it can be quite
crooked. It doesn't matter. Don't have to be super even. Something like that. You will
understand that is a crowd. And you can also make some
small ball stereo on the hand, on the top there. Very nice. And then when it
comes to the body, we will draw a line
coming in from here. I have a lot. Draw it completely because we will draw a cheap, very soft line going
down like this. Here in the middle.
Between these two lines, you will have the little legs on both sides, quite
round in that. And then we can do the same
here on the other side. To make the other one
may be a little bit thicker, slightly like that. Then there will be
around a nice belly. So there we have
the cat standing. And we can make a little bit of a bowl
maybe here in the middle. So just make a round circle on top where all the
guidelines are meeting. Some nice round shapes
going out from that. Circle. The beaten-up, two
lines going down like that Now we can complete had
to go in into the bot. And from that though, we will have a cape. And just imagine that you will do about half of this circle. Somewhere around here is
where the cape is going to go out around the back
of the body, so to say. So you have to make it
very nice line up here. Nice thrown around
line like this. Yes. And, um, we will have a
long flowing, flowing cape, but it will not go below
the leg lines and it shouldn't go into
the belly because it will be two-minute lines
in the same place. So just a little bit further up. On both sides, like this. Can be a nice little
round shape there. And, and you can make shape looking like this and
going back into the body of the same all the other side, that's a little bit abound in towards the body it out again. And then going back in. Then don't have to be looking
to same on both sides. That doesn't matter. Sometimes in the drawing, a bit of asymmetry is
actually quite good. Because this is what I feel is that if a Drawing
is too symmetrical, it gets a bit
boring, a bit stiff. And sometimes it's nice to do a little bit of solving
that is crooked. So don't freak out if things
are not super symmetrical. So it's actually good for you. We will have some small frog
pose, something like this. They can be being a bit
same size as the back legs. You can do the same
model, decide like that. Of course you can
do guidelines as much as you want to see that you have them
about the same size. And that's why it's very good. The blue Pencil because
you can always draw quite soft lines and try things out and
place things around. And it's also easier for you to erase the line like that
instead of a black line. Lastly, we will whiskers. I can make three lines
like that on each side. Just make sure that top
line is the longest. And then the other ones can
be whatever size you want to. Very happy, very good.
Beginning. And let's go ahead and define the
lines for the black pencil. I will start with the ice. Do some shading
them across to us. You see, it doesn't matter
if some of the lines are coming outside of
the line there. Don't freak out about it. It's totally okay. It
will look good in them. So there you have to round. Cute is that we can do. Now fellow knows, I
will shade the mouth. Makes sure that the shading
is not the strongest shade of the eye. Like that. That we can draw
all the headlines. We can also do the crown. You can also start to Imodium, the name of this cat. I know cats. All of them are kings
and queens of the world. But what is the
name of this Cat? Because it's always good to imagine a backstory
for a character. You will find out
things that are helping you to draw things in your
drawing, to add things. And at least for me, it helps
me stay with the character. When I know a little
bit of the name and maybe a little bit of a
personality, etcetera. So there we have a nice bow. We can draw the cape. Draw it on both sides. Like that. Little do the body make sure that legs are quite round? Yes. Yes. Like that. Why not add the detail
to this drawing is that I think there's too
much going on anyway. Would you have your leg standing up and you have
your butts up draw. So sometimes this nicely us to take something away to keep
it a little bit more clean. Lastly, we can do a
little bit of a shader to making sure that we feel that the characters standing
on the ground. That's been quite
rough finish shave, they're able to use
the black pencil. We're not adding a little
bit more pressure over time. Passover. And also make sure that the strongest
shade is here in the middle. And also we can add a little
bit more of a strength down here underneath the feet so we collect them
to the ground. There you have a
very cute royal Cat. Good work and see you
in the next lesson.
4. Cat Detective: I thought we will
draw another cats and will start as we're
done with other ones. Draw a circle for the head. You're searching for a rough you searching for a
rough shape bear. We will have the guidelines. As with other things, the guideline doesn't have
to be super straight. That can be a little bit
belt or crooked or whatever. It's all about.
Training your eye and starting to learn
things when it comes to placing guidelines like this. So eventually when you have
drawn this so many times, these guidelines will already be in your high, in your head. You can place all the things that you want to
place in a drawing in the perfect place.
To start somewhere. This is a good way to do it. So we have had and
will have a body, just cat, they'll
be sitting down. So we'll use half of the goal. Then make a little bit of
a body and the living, this little box that is
smaller than the wide. So there you have the beginning. Then we will place a row. Knows this time. Of course the cat
should be happy. So let's go ahead and
do smiley bank lines, going out like this. And then we will
have two big eyes will make them quite round
and I will make them. So the bottom half of the eyes are
touching the guideline? Yep. Sort of route. Yes. There we have two
big nice shapes. We will go back and draw some light in the
I and I thought we will draw like this that we have big circle up there and below there we
will have a smaller circle. Do the same here. A big
wrong and smaller one. Then there will be some shading. We will of course go back and
use the black pencil later. All what I usually do it
with a blue pencil also, it's a little bit of a reminder. I know that I will go back
and shade those places. So there we have another way of doing ice and
reflection in them. And I thought we will do
a little cat Detective. So before we will
draw the rest of hat, I will draw a little cap. Let's go ahead and do
a little half circle here on top. Goal. A little bit further down than the sarcomere
withdrawal will do. A little bit of a band here. We will have this little part of the cap and we can make it
a little bit crooked so it's tilted just a
little bit to one side. I think this part is
called the screen solving. For the, for the
hat, for the cap. We will make two lines
going up like that. This is going to be a little
bit like Sherlock Holmes. Some, here are the hat with some little things sticking
out like that. Then we will have some textures, folder hat to some patterns. And it looks
something like this. It doesn't matter if
they're looking crooked. It can look quite cute. There we have the Hat today, cap of the Character, and now we can start
to draw the headlines. They're the same year over
a little bit for the, Here's something else going
to draw the sides first. When it comes two lines. I try always to do like this, that I don't try to draw too many lines going
to the same place. It's a little bit hard to read. In this case, I believe most
draw the headline there. And on behalf of the
cap, looking like this, sort of there's
just a little bit of gap between there,
just a little bit. And then we will make a little bit smaller ears than last time.
And there will be Maybe a little bit more round. The same for the inner ear. And number can go and
do the same data side. Slightly smaller,
slightly more old. And it doesn't matter if they're all hundred percent
the same size or form, it will look good in
them. So no worries. Because when it
comes to drawing, just tried to be as
relaxed as possible. Theme that field
and the pressure. Just trying to imagine that the outcome of
everything will be very funny and exciting. The most important
thing what you're doing today is that your drawing more good it is at this stage just that you're sick thing drawing and having FUN. So now we can go ahead
and focus on the body. And we will have here at the bottom some pause,
the back pause. And I will be angled
slightly towards the middle here. Something like that. If you get too
many double lines, you can always go back and
use your friend eraser. Else, draw the line again. Now it looks better. Then we can use this corner
here to make a softer bands. We can also draw the
bottom half here and softer burned
near to God, nothing. The line going up a
little bit, not too long. Too long. I think I made this corner
a little bit too sharp, so I'm going back. Making it longer belt. Yes. That looks much better.
And as you see, I'm not freaking out. I'm redoing things. And the US continued drawing. And we will have a
bit of a key pair on the side with a bit of a band going up
to that line there. It will go off to beat. And I'm going back
to that line again. These cape is not as long
as for the royal one. Type will have the same
sort of pattern as the Hat. Some simple lines like this, and makes sure that this line on this slide are not
touching each other. So you just leave a
little bit of room there. We can do the same odor decide. Little bit of a bump line here. If you want to, you can have
a guideline across here. So you get the cables
about the same height. Another band line out
there. And under pattern. Yes, it looks good. And what we will do here
when we did spouse, I thought it will be
holding a magnifying glass. So that's imagined that I'm a from poor
growing up like this. Quite a soft shape there. Then we have will have the
other poor or other arm during the same
something like that. Maybe a little bit too much
of a double line there. We will have something that is tilted a little
bit like this. Now, we can have the round shape here for wear the glasses, the magnifying glass, like that. Then we can have a little
bit of a thicker Chef, Tara. Yes. We can estimate you a
little bit of a mark. Firstly, we should do the
inner in their shape here. You have a circle
within the circle Like that. And then McKinney us to
make a little bit of a like a half-moon shape
here, like if crest. As a symbol for
wear the glasses. We will have some
whiskers to here. I thought we will have them. Altair again. You can of course draw them
in the face also. But when you have a detail that is here inside the
body and you draw, the whiskers is get
a bit too cluttered. So sometimes it's good to just move the shapes a
little bit outwards. And let's go ahead and do some whiskers that are
Wilding crooked like that. This time we will do a low
vowel, short dwell below. Well, yes, there you have him. Charlotte, meow, maybe. Let's go ahead and define the
lines with a black pencil. Starting with ice and making
sure that they are black, but saving those two
spots for the ice. Hello, you have three ways of drawing eyes so you can
mix and match them as much as you want to
see what works best for the character that your
drawing at the moment. Let's go ahead and
do the other way. While you're drawing, you
can start to think about, well, the name of the character. I'm also what kind of assignment this Detective
as, what kind of mission? It's all going on a mission to find some
missing missing cat food, maybe making sure to save those places. So and then go ahead and do the nose. Then we can do though. And don't worry about how
the lines are looking. Can be as rough as,
as you want to. Try to draw with different kinds of
lines every time you're drawing a character. And see what works best for the drawing you are
doing at the moment. When it comes to these patterns, I will draw them a
little bit softer. Not as much pressure
as the outer line. And why am I doing this? Is that I don't want to pat them to be the
most important. It's better that the outer lines are stronger, showing better. We can do the whiskers. Long, short, long,
long, short, long. We can do the back posterior. And it's the same here. You can of course draw two
lines here to show the toes. But when you have a
lot of details on the rest of the drawing can be quite good to leave some of the areas a
little bit more clean. But please try both. So you can see the difference. Because when you're
practicing this drawings, the best thing you can do is to try things out.
Don't think about it. Just try to see
what works for you. Because it can be
quite easy to just think, theorize about things, but it's not until
you actually have drawn it that you will really understand what's going on here. So you also feel free to
experiment and try things out to different poles. The magnifying glass and
I will shade is just gently doing this metal frame That little symbol
for the bumped gloss. I'm not throwing
this as strongly as the other line side or is the same principle as
with the patterns. I don't want these small
things to overpower Drawing. Yes, I think this
looks very good. But didn't go back strengthening the ice a little bit better. Making sure that the focus of the drawing is up
here with the ice. And one more thing
I want to tell you is that a very
good thing to do? From the beginning is
to Show your drawings. You can start by
showing it maybe to a friend or someone
in the family. It's very good start. But eventually I think
it's very good for you to show your drawing and post it and share with your
fellow students online. Because it's a
very, very good way to grow your confidence. When you get more confident, you will be much more relaxed
and it will be muscle much easier for you to draw and
develop your drawing skills. So please go ahead and
start to show your work. I'm going to touch the
cat to the ground again. So I'm adding more strength
here for a little, but will also have strengthened the lines around defeat for
them to pop out a little bit. I will do the same
here with the frog, falls to a little
bit more string. Now there's a little bit
more strength also to the, also to the to the mouth. And also I will try this also. I will just make it a
little LED light shade here. For the kth. Very slight shade. It's
even lighted older one on the magnifying glass. And don't worry about
the lines going outside. One is going to notice
that what you indent. Why am I doing this is the, I want to connect
these three shapes. Really feel that it is a cape hanging on dish, cats shoulder, and it has this very nice
Detective hat on its head. Lastly, let's go ahead
and do a little bit of shadow here
underneath the body. Just a little bit
of a shade here. With a black pencil. Adding a little bit more
pressure every time I pass. I'm also making sure that the strongest part of the shadow is underneath
the body here. Also, there is
something I like to do. I like to add these
little wobbly lines. It's just the thing I've always been doing as long as
I've been drawing. For me, it feels
very nice to do it. For me. It gets gifts. The drawing, a little bit
more of a life, playful. This. You can try it out and see
if do something for you. If you'd like it, you
don't have to do it. Because you should see
all of these exercises as something that you
can put in your toolbox. And if you want it, you can use it later
on. So there you go. Sherlock Holmes in
cat form. Good work. I'll see you in the next lesson.
5. Puppy Police: So next I thought we
will draw a little dog. We will start by drawing. During that circle.
Big rows are. Then we will have a guideline. The guideline. And then we're going to draw some
guidelines for the body. The body will be quite wide, so it will be quite close. So being the same, width, just going to be the
same with us to Hat. Before we draw exactly how
long the body is going to be, we will do some facial features. We will start by
drawing two squares. Something in the middle there. Well square on each side of the guideline. And I'm in color. Have they used a guideline like this and I'm able make round
corners, the square root. So these are going
to be glosses. So this was going to beat
losses for a police dog. Costumes. Dog is going
to look quite cool. So there we have the
outlines for the glosses. We will make a little bit of reflection in the
glasses and LV be a bit like little star like that. So go ahead and do that. Little star in the
corner of each class. Then of course, we will
shade them black later on. Let me just shading
them slightly now so we know approximately
how they look. And also I will close
disliked a little bit. Now we can put the nose and
it will be below the glosses. So it will be about
like a triangle, but it will have soft corners. And then I'm going to
leave the top half here. It's always nice when you draw a little nodes to leave a little bit of
Glimmer on top there. And it's always nice to have
a smiling police officer. So let's go ahead and
make a big smile. That is a little bit
to one side there. We can draw the headline here, but not all the way up. We're going to leave a little
bit of space on top for the police hat,
something like that. And we will align. So wear around their number. Want to draw a
line up like this. We will add a line, go up to the guideline there. So there you have the the big your shape for
the police cap. And then we will also draw a
little bit of a screen here. And it can be just a slight, don't lie like that. Up here we can draw a little shield looking
a bit like this. And now we can have the
measurement for the body, and it will be from this line, dog to the end of the circle. So the end of the body
will be down here. Can complete the
box of the body. And in down here, I will draw foods that is a little bit further
out than the corner there. And then it will do the
same on either side. Something like this. And don't be shy if
you need to draw some more guidelines to see where you're able to
place the other foot. Can go ahead. Undefined.
Just a little bit better. Say my dad decide
when behalf these will start by this corner and
then we will draw a line, but it will be going in a little bit before
dislike towards the head. Now we can do the
same old data side. Dumbbell the team more. Yes, that looks good. While doing this is because
I want to have room for the arms here on both sides. So now we can go ahead and define this line just
a little bit better. Now we can go ahead
and do the arm, and it's about halfway between. These two points are
somewhere around here. You have a little soft arm growing up to the
guideline there. Almost like a little sausage darren them it was do
the same odor decide. Soft shape. Yes. We can do the belt here for
the police officer. And I will draw a line
on both sides here. Yes. Drawing a line on both sides
of that middle guideline. You can be as rough
as you all to. Maybe this line is
a little bit up, a little bit too much
like this and go back and redraw the line. Yes, I think does looks better. The only thing I'm going
to avoid is to draw a bear gliders going
out into the arm here. That are meant between
these two lines. Then we're going to
put the belt buckle. I think it's called somewhere
here in the middle. It will be a little bit
wider than the belts. And her birth,
slightly soft edges. Something like that. Yes. We can draw the pants. And they will also come
up from the fruit, of course, going up
towards the middle here. The same without a site
that's building up slightly like this and then we will have abandoned
going like this. Yes. There we have the pants. Now we can draw the color
of the police uniform, looking something like this. And as we have
discussed earlier, if you get to beat too many
double lines just to go back, erase a little bit, puts
a single line bear. And there will be a little
bit of a middle line here. Go up in the middle. And I think it will be
a short sleeved shirt. So we're going to
put two lines here. The same here. We
don't want to put them straight up into the color, so just a little
bit further down. Yes, it looks pretty cool. And we can also put the same
symbol that we have up here, just doing a smaller version
of it, a little shield. So he's an official
police officer. And lastly, we
should have a pair, a pair of ears for him. And they can be quite droopy. So let's go ahead and
draw some true peers. Somebody will have
them going further down than the guideline. There will be around here going back up into
the police hat. And also they will
be a little bit thinner on the top
dumb down here. Let's go ahead and do the same. And they will be about
the same height, a little bit higher
than this line Your field, where your
line is going to be. You will find it. Looks good. There you have him a
call puppy Police maybe, or a dog in police uniform. And when it comes to
police around the world, you can of course,
exchange this symbol for whatever the
police is having. In your area. Maybe it's a
star, something like that. Just a simple store or whatever other symbol
you want to have. But I encourage you to have
them both up here, down here. And I think we're quite
happy with this celebrating. Go ahead and define the
lines with the black pencil, starting with the glasses. So when it comes to police
officers here in Sweden, you see the police with
some bosses all that often. Maybe it's a little bit
more of an American thing. Where you have a
little bit more, some little bit warmer. Then we will do some shading. And I was thought by doing
the shade here in the middle, drawing it a little bit black, but luck to black. Because I volts glasses to be more black than
the friends of to say. Don't worry if the shading
is going outside of the lines will look
okay eventually, when you have
complete all Drawing, do some cross shredding as well. When you're doing
shading on the surface. The surfer is not
hundred percent. Even. Of course you will get a
little bit of petals into your shading areas below. Worry about that is probably only do those
going to see that. So let's go ahead and do the other side. To say that when I grew up a small town in the
northern part of Sweden, and we had three families of law enforcement on my street. They were always
very friendly to suddenly they didn't
have any K9 units. So I didn't see so many
police dogs were about books. There were always
super friendly and the It's just sit told the
police, multi-cycle, etcetera. They played sports with us
and everything like that. So the only thing that we're missing most
maybe this Police Dog. Let's go ahead and do the nose and leaving that
little sparkle up there. Like this. Number
mouth. We can do. Drawing me some
quite rough lines. Police hat. When you're
redoing this drawing, please change to Hat and
the uniform a little bit. Maybe the police uniform is from a cold areas and
maybe has some kind of thick winter hat and stood. Who knows? Just use
your imagination Here's some kind of fluffy, fluffy ears there. Now we can do the body. And as you see, draw in, lapping, overlapping,
I mean, flying. I'm just going to erase that. As we discussed earlier at all. Don't freak out if something
is not going your way. Just take a few breaths
and has continued drawing. They're not looking
for perfection. We're looking for having
a good time learning. So let's go ahead
and do the feet. Maybe there are actually
more like their shoes. I'm not going to draw
on at Towson, this one. The parents were making draw the color the to lineup. Not forgetting about the
little shield there. We can go ahead and do the belt. So that looks good. Maybe we should do
just a little bit of, a little bit of a shade
there from the Hat. Just to give a little
bit of variation to destroy the slight shade. And we can do the same with
the screen or the hat. Like that. Since it's an uniform. Should probably do the
same with the short to the light shader. And the parents should
probably also shaded. I think it'd be even can go unshared the boots
a little bit on. This will be a little
bit stronger than the shaded will be a
little bit stronger than the patents have a uniform. A little bit. You get a little bit of variation
into the, into the drawing. Now I think just looks good. Lastly, we should do a
little bit of shadow here to just a little bit. It will be mainly asked
underneath the body, they're going forth and back. A little bit more pressure. If you feel that something
is a bit too strong, else use your eraser and
remove whatever lines. You don't feel comfortable
and then just go back and redraw it a little bit. Of course, they should add some extra strength
underneath the boot, sell the shoes to collect
dog to the ground. Maybe it's actually able
to police officers, there may be easiest to dog who is going to costume party, dressed as a police officer. There you go. Officer puppy. Good work, and see you
in the next lesson.
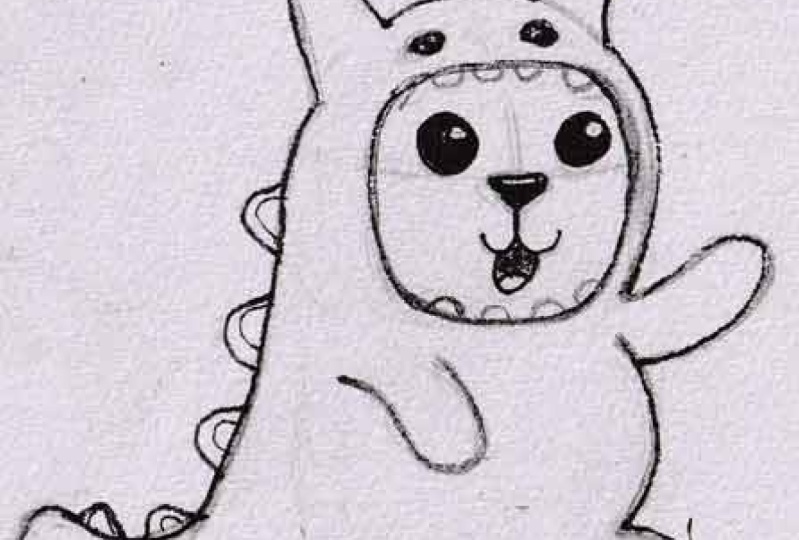
6. Dino Dog: I thought we will
draw another dog, and this time we will turn to
Character Aosta little bit. The other drawings have
been from the front and our beliefs do it
slightly from the side. But we will start as
we've done before. Just doing a circle
for the head. Something like that. Will from this circle
box, like this. It will be almost
the same length. Vesta gifts, maybe a
little bit shorter. Little bit shorter.
So there you have a ball and then you have
a little box there. Well, I thought we will draw
a little dog who was wearing a dinosaur outfits,
little dinosaur costume. Imagine that we have the
guidelines like we usually do, but since it's a little
bit slightly turned, the phase will be going
in this direction. So we will move the
whole guidelines likely to ban slavery. And it will be round instead of just the light seems proceed seeing it slightly
from the side. And wonder what kind of face
we should do for this one. I think we will
continue to do that. Triangle would round edges and leaving a little spot
there from the top. Then we can do fingers
should be a happy face. So let's go ahead and do that. Maybe were a little
bit of a time. I'm using this guideline to put all the features
so the middle of the time will be
following the line. Will be also in the middle. We can draw the
opening that is a little bit smaller than
the big yellow circle. This is the opening
for the costume. Going. Altair constraints
a little angle slightly. And then we can draw two eyes. I think they will
be quite round. Number believe, sunlight
dare up in the corner. It's the same on this side and this I will
not be completely round because it's slightly on the backside of the
character, on the face. So it will be a little bit
more like an oval shape. We get a little bit of a
perspective for the face. Now we can also
draw an afterlife. The costume there. And then we will draw some ears. The ears will be inside
of the costumer, will be not on the backs or anything that
will be inside of costume. Then we can draw some here. So this side to to happy ears, coating your dander and what's going to draw everything
complete yet? Because I will want to sketch
out a bit of a tail here. So let's imagine that you have a tail with a little points. To remember soft line going back up being
to the headlight. Just like that. We can draw the tail and we
will have a big belly. I think. Somewhere around here. I'm going to leave a
little bit of room here because we're going to
draw the arm later on. We'll just imagine that you
have around fat belly there. Then we can have alarm that
is bent slightly upwards. So it's waving a little bit. It's not a scary dinosaur. This one, it's a happy one. And from around following
the guidelines out there A big oval, little line going up there towards the belly, but not all the way. So we'll leaving a little
space between there. And we will have another oval shape here
looking something like this. So there you have
the other folks. Then we can have a little
line going up like this. There's just a little bit of
a bump here from the tail. A little bump there, a little bump there
and then back, foot and other arm, I think cooking,
draw it slightly. Vento are told like that. Let me can use this guideline
to find how big it is. One arm is resting
and other one is waving. It looks good. Then we will draw
some shapes here. I don't know what this
is in English actually. Let's call to some
small triangles are called maybe shields. So something like that. I don't want them
to be very pointy. There should be quite round. So they don't look too
much like two ear. Let's go ahead and
draw a few of them. We can have lost one here. Yes. If you have a problem that these lines are going maybe a bit too
close to each other. Redraw the air slightly. There's a little bit
of breathing space there and then you
can draw the hair up. Yesterday. You don't get yes. So you don't get too many lines going up into the same place. I think he's a good
beginning this. Let's go ahead and define the
lines for the black pencil. You can start by
drawing the nose. Leaving that little
light on top. We can do the eyes remembering
and delight their two, making sure that the
ice are quite dark. We can do the other, I like that and then we
can do the happy mouth. It will show you the mouth, but it will not be
a strongest knows, sell, ice, motor, steal away
anything from those areas. Can do the opening
of the costume. When it comes to this
design, you can, of course, draw a little teeth showing that it's maybe
inside of the dinosaur, but I prefer not to put
teeth on drawing like that. Get a little bit
too cluttered and also look maybe a
bit scary alone. I prefer this to be a
very happy drawing. This is totally up to
you and I encourage you to experimental trial
or kind of things. See what works for you. Let's go ahead and do
the little legs there. And as you see a lot
following the blue lines, hundred percent or more like guidelines to relax and that your Pencil take you wherever it's going. There. We have the ears.
We can do the tail and underside there,
and then we can do the little back shields or whatever it might be called. Amanda percent sure
that you're better with dinosaur thermistor me. So I think this looks good. I think we should also do a little bit of
shade for this one. I like to connect the
character to the ground. Just have to be very
big shade just a little ball like that. We can use the black
pencil and just with a lighter shade. Just going back and
forth and adding a little bit more
strength it each time. As I usually do IOS dabbling
a little bit, wobbly lines. We can add of course, some strengths there
to make sure that it's seated towards the ground. Can draw salt strength to
some other lines here to making sure that we
go back to the face. Give some more
strength to the ice and other facial features. It, it'll disappear
into the drawing. We can do a little
bit on the bacteria to cause I want this
line to be stronger than the shield lines showing that they are on the
backside of the drawing. And as I said earlier, I believe show you
how it can draw a little bit dog
teeth to destroying. And I prefer to do them quite round so they
don't block. So scary. Yes, go ahead and draw maybe for round teeth on the top and a few role teeth
on the bottom error. Let's make sure that you
don't draw them too close to the eyes and mouth, etcetera. Now the dog looks like it's
looking outside of the mouth. You can also draw
some eyes, CO2. Draw some black eyes. Not really looks like the
dog is inside the dinosaur. Just a little bit more strength from that underneath there. Slightly. A little
bit on the top. Yes. So there we go. You got one little
dinosaur dorky, good work, and see you
in the next lesson.
7. Astronaut Pig: So the next animal with
withdrawal is a pig. A pig in the space suits. And we will start by
drawing. A big circle. Will have the guideline. Was draw another guideline
for the middle here. And when it comes to the body, I think it will make
it almost as long as the almost as long as
stuff circle there. So I think we have
a good start here. And we will do a little bit of a line here going from that
corner up to this corner. And do the same old data side. Something like that. And done down here, we will draw a foot covering
this corner there. Then we can do to
say modal decide. Then they can go back and
erase these other lines. So there we have 2 ft or maybe
to space shoes like that. Now when behalf of
the body we can draw the draw the arms. Can you also define the
lower part of the space? Whole material from the circle. We will have while
arm on this side will be bent inward studies. This space. The astral pig has his
or her hand on the hip. The little bit showing
all the hand, arm. And then you can draw
a little bit of a line showing that the
astronaut gloves on. Also to find out the line
a little bit better. Most of the shoes. New disabled, other
side here also. As you show up, don't
worry if something is little belt Jim Crow Kids. Don't worry if your guidelines
are a little bit tilted. It doesn't matter. When you completed the whole
drawing. It will look okay. And we can go ahead
and draw the legs to two bent lines
going up like this. About line going down
to meet the leg lines. If you get to beat
two-minute double lines, just go back and
erase a little bit. If you want to see a little bit clearer
what you're doing. And of course be sure to
have some kind of gadgets on the spacesuits. So
let's go ahead. Draw one rectangle here. The chest or belly. With slightly rounded corners. One side we can draw
little circles. Not in the middle, just a
little bit to one side. We can draw two lines
going vertical. And I'll decide we can draw another set of bottles a little bit smaller. Like that. Now we have some kind of thing you there,
some kind of gadget. It should be touched
with a belt. Let's go ahead and
draw a belt here. And the US makes sure
that you don't draw these lines into one of the arm or hand lines So try to get a little bit
of room between barrel. And then we can do the same
because we're draw them. All told all decide. Yes, I think this looks good. Can maybe make it up
or top line there. We can maybe make
the top line there a little bit higher, slightly. And then we can draw the
other arm and it should be held out slightly
bent downwards. Let's do a little bit.
Something like this. The re-add the other glove. We can also draw a
little bit of a thumb, something like that
under the arm. And the same here. Don't put the arm lining to the belt line, give some breathing room there. And then we can also do a
little glove line there. And what the space Pig
is holding is a flag. So let's go ahead. Draw a line up here. Not completely touching
the the shoe there. It doesn't have to
be very, very thick. It could be quite the theme. Flag pole. Either left to go up here
to the guideline there. So you smell, make a little
bit of a rounded edge there. Then we will have a flag. And what you can do
is if you want to, if it's a little bit easier, can draw off flag that is
very straight like this. Can do that to start with. Feel it's maybe a
little bit easier. Let's drawing some lines on top of the flag pole or flag stick. So the rehab one,
proud straight flag. If you want to do it straight, you can do it this way. Instead. We ask draw
another emotional top here. You can make it a
little bit more wavy. Slightly. Will do the
same. Another side. Up, toe up. Something like
that. Yes. Go ahead and erase and alliance that
you are not comfortable with. What I want you to do here is to place your country's flag. Or if you prefer to
do some other flag, maybe it's your favorite team or maybe it's some kind of symbol
that you enjoy drawing. Maybe it's a cat face
or whatever it is. Used your imagination
and play around with it. I'm going to leave it open
as it is at the moment. And I'm making go ahead and
finalize the space helmet. Nice round shape. Then we're going to draw a little bit of a color
for the spacesuits. Will be slightly
wider than where the arms are,
slightly like that. Now we can go ahead
and draw the peak. And it will be a
little bit wider here. We did cheeks and then go up. Quite nice round shape,
something like that. Then we can go ahead and draw a nice oval here for the snout. It's a little bit further down. The guideline bedroom
in the beginning, I got to beat too many
double lines there. So let's just go back and define the lines
a little bit better. Then we will have two
ovals for the nostrils. Yes. Number will have two eyes. Quite wrong wells and they will the top will be touching
the guideline there. I want to have you still
little bit of light in them. Leave just a little
bit of space there. Yes. We will make your mouth and it will be another oval shape. Coming down from the snout. Then we can draw a little
bit to the tongue. So the pig is both happy and maybe a
little bit surprised. Maybe it's the first
peak landing on the strange alien planet. Lastly, we should
have some pig ears. I think I will use little
guideline like this in somewhere in the
middle there we will draw some years
overlapping aside there. Go ahead and define the
heaviest a little bit better, the same and not decide wrong shapes and
then a little bit of overlap them back up again. Maybe will evolve
to have this here, to point to just a
little bit rounded up slightly and make
it a little bit wider. Yes. That looks better. We can also strengthen the lines
slightly for the ice also, even though I'm
going to go back, I'm going to use the
back Pencil by CSU and it's nice just to see what you're going to place the
definitions later on. Yes, I think this looks good. So let's start by
using a black pencils, older ice, making sure to leave
that little spot there. Giving the space Pig some life due to other I. So maybe it is Pig is related to miss piggy from the Muppets. Remember when I was a
kid and I've watched, I think it was called
peaks in space, Star Wars parody
with the Muppets. And it was really, really funny. There you have the nostrils,
the mouth, tongue, and remember not to put too much pressure
there when you're shadowing those
shading the mouse cannot a little
bit more strength. Sandinista, snow terrible. Can go ahead and do
the rest of the head. A little ears. As you see, I'm not freaking out if I make any strange lines
like I did there, I got to double line. I can always go back
and just erase it. And also don't
worry about if you have smudge marks
in your drawing. It's just an exercise is not
a complete work of March. So having some smudge and strange lines
is just part of it. It's a reminder that you're you're working with an
exercise on your learning. And I do hope you have
a lot of farming that you're laughing and playing
around with these exercises. So there we have
this space helmets. Let's go ahead and do the
rest of the space suit. Her arms, boots, being as rough as L12. And the only thing
I'm trying to avoid these overlapping lines and too many lines going
into the same place. And also it's okay to draw somewhere where
the blue lines are not. You don't have to follow them. Precisely the guidelines. The flag under straight flag. I think it's like
that in vacuum. If you have an octet, like if flag and you will straighten it out and
leave it as a DCS, will you stay like that since
there's no wind in space? I guess this Pig have ironed artists flag to very,
very straightforward. It's probably a
very precise pig. The gadget with the bottles. Yes. It looks very good. Let's go ahead and do a little
bit of shading. A little bit around the flag, not the lungs that make can use. Like Pencil. Very
enlightened the beginning. Being a little bit stronger. Closer to the feet, the end of the flag pole there. Underneath the body. We can also strengthen
their lines. So we see that astronaut
to styling on the ground. They're probably on
some alien planet. Or maybe it's the
Moon. Who knows? I lost loveliest. Make a little, little symbol here on the flag. I'm just going to make
the symbol of the note. And maybe with some
arrows around it. Something like this. I have
no idea why I drew this. It's still something that
popped up and it's almost like there's It's not
the nozzle symbol. Per say. It's not quite the
recycling symbol. So maybe the
astronauts space suit or maybe it's a
costume that is made out of recycled material. Who knows? There you go. An astronaut pig. A little piglet in
astronaut costume. Good work and see you
in the next lesson.
8. Princess Pig: So the next pig I
thought we will draw, will be adults in one sort
of a princess outfit. Let's go ahead and do a
little bit of a different, different shape this time. So let's go ahead and do
a long bone like this. The logo back. There we have the start of the body will still only use a little bit
of a guideline here. The also follow those curves. I think we will start by
placing a little leg down here, looking something like this. And then we can take dislike
even a bit further out. Like this. I'm pleased
to other leg there. Just a little round shape. I think there's princess is
going to have address all. So let's go ahead and
draw a waistline, little belt line like that, and that would allow them
another one underneath it. There we have the waist. And then we're going to draw flowing skirt from this place. Just draw a nice
curve out like that. From this line goes through
a nice curve out like this. Then we will have a long
flowing curved line or in between those outer edges. I think this will
look quite pretty. And then we can go back and erase a little bit
of the leg lines. So they're not too
disturbing when you go to continue drawing this little princess Pig. A little pig. Let
I think I will, due to face for lost mesh order to have a very nice
round shape here. First. Then we can draw
outstretched arm here. Maybe a little bit more round. Is the youngest
going forth and back and searching for a nice shape. Yes, I think does it looks good. Then we can do the
same old other side. Somewhere around here. We can have a line going down towards the
dress but not touching it. Also making sure that it's surrounded. Yes. Looks good. Thank you. We got to bear a nice
flow into to destroy. Going to define the lines
a little bit better. It's easier to see
what we're doing here. Now we can pray, please do this now than
it's going to be a little bit higher up the arms. And it can be quite a big snout. Something like this. Set of
oval shapes for the nostrils. Let's go back and remove
that little rogue line. Then we can have to round eyes slightly above here,
making them black. And of course the Princess
is going to be happy. So let's go ahead and
make a big smile here. I want to have it all
the side here because the whole drawing is
quite symmetrical. And let's go ahead and
continue in that direction. We can draw a little
tongue on this one to shade the mouth. So it's a super happy peach from Altair to be
able have some years. Now I'm just going to draw them. Draw would be like this. I
will make them more pointy. Looking for something like that. A number of withdrawal
the inner ear shape two. Then we can do the
same old on his side. So somewhere out from here. They don't have to
be in the same size or under present the same shape. They will look good anyway. And now we're going to place
princess crown or two. Or you could also
be a guy princess. So let's go ahead and
make a line like that. We will draw two lines coming out like this
is quite a big crowd. It will have three points. And that's with the
rest of the body can be quite symmetrical. Yes, I think that looks good. And since this is sort
of a fairy princess, I thought we will draw a
little evolved in their hand. And just continue with
the flow of this motion. We will draw the slightly
leaning to one side there. You have the start of the bond. Then we can make
nice big star here. Yes, I think just looks cute. That's going to say something. Is that when you have a drawing and you're
draw a bear a lot of lines going vertical
and horizontal, Drawing gets very stable. But as soon as you
start to draw things diagonally and the curves, you get a little bit more
action in your drawing. It can be good to mix and match. These things would have
been the same here. So we fellow angled
out the flag quite a lot of will get a little
bit more of a dramatic line. There's no right or wrong. This is just good to know that these kinds of lines make the drawing a
little bit more dramatic. Lines like this,
make it more stable. And wondering if you
should have a little bit of a pattern here for the dress. Make sure that I don't throw any of the
lines down into the legs. Ableton to be separated. Possible. Then maybe we can shade little bit of the patterns here so we
get some variations. So let's go ahead and define the lines for the black pencil. And I want to start
with the snout to the eyes. Make sure that there are very, very black, very
strong contrast. Our focus goes up
here into the face. This very happy dancing Pig. Do some shading for the mouth and make sure
that it's not too strong. And don't worry about
if the lines are going outside air will look good. For new finalized to Drawing Because there's this very
good thing that you start to have as an experience that you maybe think that
you have a line that is very crooked or an area
that you think is perfect. But when you have completed the, completed the drawing, you will not actually notice
those details so much. It's a bit when you
have a very blank, a blank paper, you draw
one line, of course, deadline will be very, very significant and
you will spot it. But when you have a lot of lines and a lot of
things going on, all those little details
fade away into the whole. So you also to relax and play
around with that farmer. Let's go ahead and draw
them. Warmed here. Quite symmetrical. Star. We can do the other arm. Do the dress. Quite rough lines
here on the skirt. Well done before. I will draw the lines
for the pattern. Softer. So they don't
dominate the picture so much. Then we can do the dancing legs and then go back and shades. She the skirt, something
that's being very, you can add a little bit
more pressure here. Little bit more black, so we lift the skirt
up above the legs. There's also something
you can do is you can do a little bit of shade. Hold the object
that is underneath something to give
it even a bit more. So there's a shadow costs
from the skirt on the legs. We can do a little
bit of shade here. And as we discussed before also, I'm just going to force
you to do the shade. If your shadow, if you feel your drawing
looks much better without it, you just leave it like that. But as want to
encourage you to try it out and experiment with shading underneath your
characters to see if there's something that
you're able to use later on. There's just a tool
for your toolbox. Some strength for
where the pig is attached to the to the ground? Yes. Looks good. One wild,
happy, dancing piglet. Maybe these two guys
are actually on the same planet or maybe
they are all the same party. Who knows? The same
costume party. So good work. I'll see
you in the next lesson.
9. Super Bunny: So next I thought we would draw abundant in the
superhero outfit. We will start by drawing a Hat. You know the drill by now. Circle. You can make it
as rough as you want to. A guideline. The guideline there in the middle
of the circle. Something like that. The length of the body will be almost as big as the circle, the Austin little bit shorter. So somewhere around there. Draw our little
box for the body. Let's go ahead and draw the feet first
for this character. Yes, continue on the line. Altair. Both directions. A little bit outside of
the head on both sides. And do a little soft curve and then go back into the body. We can have a little guideline
here for the other side. A little occur there
and then back into the body. Something like that. Now from this corner, we can draw a little
bend upwards, going almost all the way
up into the head there. Let's do the same odor decide. Almost all the way up into
the other side there? Into the head? Yes. Then we believe we will
do a little bit of gap pair between the legs. Just a little while. Then we will end it in a
little curved line. Bear. No, it can go ahead and sign defeat just
a little bit better. So we see what we're doing. Yes. We can. Go ahead, we're going to put some lead
taught on this little bunny. So do a little
angled line up here. Then we will have line going across something like this.
And then another line. You have the little belt there. You can go ahead. Find the
heaviest a little bit better. The lower part here. Yes. Another can put arm salt. Why I drew the body, etcetera first is
that Putin some lines here and I don't want them to collide with the best line on the little
underwear line there. So we're going to draw a Honda distorting as lower
than this line, will follow this belt
line up into the Hood. The armies laying
against the body there. Then we will have another
line here for the sleeve. Know we can do the
same without Design, Yes, a little bit
lower than this line. Number line that follows the curve body line
up into the header. And also put out
the sleeve line. Yes. Looks good. I think we can also draw a line for the, this
little creature And it will be slight
angle like this, not all the way into the
corner there skills leave a little bit of room
between those two lines. Line up like that and
I wind up like that. Now we can also draw
super hero symbol here. Going to draw all classes. Classic icon there,
the Superman. But I've been locked, draw
it completely as it is. Everybody else leave it with that outer shape and then I
will put a B inside of here. Since it's a super Bunny. You can of course put your
initials in this symbol or whatever you feel is
fitting this character. Maybe, maybe it's a
carrot or something. So now we'll dump the body and then we can
go ahead and do the eyes. And I will use this
guideline here to put the top of the two big eyes. Touching the guideline there. Also Seminar decide
two big eyes. Looking like that. The slice, I thought it will have pupils. So go ahead and draw some big, nice round circles within the
circle, ice, ice circles. We've got a bit of a
tongue twister there. And I know it of course leave
a little bit of light and the pupils giving the character a little bit more
life, a little bit more. So there's two big ice
somewhere in middle, somewhere along the middle from the lower line here we
will put a little nose, just a little, a little
triangles that we will. Shade black. Will
be a little mouth. Two curves going up like that. A little oval shape here. We see the mouth is open
and unshaded, slightly. Quite happy little superhero. And then we will have some ears. We're going to place
them somewhere around the middle
between these two lines. And these two lines
make them a little bit, droopy, little
bit, a little bit, make them quite big.
Something like this. To be gears. Can go ahead and complete a circle little
bit better there. Then another set though,
here's another ear here. To complete, to set. Looking something like this. Don't worry if the
results similar, if it look good anyway. We will also do the inner
ear little shape going up. Following the How to shape. How we can do the
same odor, decide. Yes, There you go. To beat years. And we should also have a
Kp for this hero. And I think we will
place it on this side. So go ahead and draw
a line, Altair. It's not going to
follow this line completely Seville
bit straighter, going down a little bit, and then around to hand it
will go out a little bit. Something like this. And
then it will clear this up. Slightly lower part of the cape will not be all
the way to level the shoes, so it will be just a little bit higher up and I was
going to connect it into that band
there somewhere. Don't have any to many
interconnecting licensing place Yes, I think dislikes cute and then we can do the same here. Draw a little bit of a
line between the shoes. Though you have a nice Keep. It looks good. We
can also shade it a little bit. A little. Some silhouette to the character will always see the bodies
popping up a little bit. Yes, it looks good. Let's go ahead and define the
lines with a black pencil. And I will start with the eyes, making sure that I leave
that little spot there. A glimmer in the ice
shaded properly, making sure it's a very black. Do the other, I know you have a lot of different ways of
drawing eyes and now we can mix and match them
between your drawings and see what is fitting best for the Character
you're working with. So I encourage you
to experimenting with different looks when
it comes to the ice. So there's quite black. Then we can do the little nose and young cliched
the Monstera stroke. We can complete to have been quite rough with my lines. When you make lines
that are very, very rough like that, it almost looks like
yes. He's very fluffy. It's almost like this, like
hair lines sticking out. And I think we will
add a few more things. It will be nice
if this character has a little bit of a hairdo. Somebody else to add a
few Harris here. On top. We should also maybe have
some whiskers for him or her. Level. Draw two
lines of each side. They can be as crooked
as you want to. Yes. Good head. And then we can
continue with the body. If you're wondering why. A lot of the older superheroes, this design that they
are wearing, Leah Todd, something like underwear
outside of the parents etc. is because the design came from strong bones from the
circus circus world. So even be, if we feel that they look a little
bit strange today, look really cool to
people back in the day. Somehow this Design
us stuck around. I know they have made a few
updates in modern spot. Some of the characters have
quite the same base Design. And undo those little boots. Lines to the dollar symbol. Super be. The capes. No, we can also shade
the cheaper the black. Also. You see that this contrasts the
body is popping out. Since we get this slice. Darker field in the background. Yes. Let's go back to beat too, carried away with a line. Sara. Clean it up slightly. It looks a little bit cleaner. Can also strengthen
the bud license. So what also the underside on giving it a little
bit more strength, a little bit more straight on the nice big rabbit tariff
has really big boots. Yes, it looks good. Lastly, we will add
a little bit of shade to see what happens
with the Character. Attaching it to the ground. I live in mostly focused
shade here around the feet, not so much around the cake because it doesn't
have so much weight. And also it's shaded so I don't want it to
be too cluttered. So it's better to
focus. The shadow here. Yes, the role defeat low lights. We can know the LSA little bit of odd line here and there. Yes, That looks good. I
will also encourage you to think a little bit about the backstory
for this character. Maybe this characteristic
bit like Clark Kent, that he's working as a reporter somewhere or maybe
or some kind of other professional is
always good to add a little bit extra detail
for the background, for the character because
it will help you envision your character and add various sudden denser pricing
details to your drawing. There you go, super Bunny. Good work. I'll see you
in the next lesson.
10. Bunny Mechanic: The next bunny we will draw. We'll be a mechanic,
a repair bunny. As with other characters, start with a circle, a very simple round form. Then we're going to
draw a guideline As we discussed earlier. Also, don't worry if it's
a little bit bobbly tilt, it will look good anyway. We will also, since
it's standing, have the length
of the body to be almost the same length
as, as the head. Then draw a little box
that is slightly smaller than the width of
the head as we can. Go ahead and do another
guideline there. Yes, that's a good start. This time we will start with
the details for the face. We're going to draw eyes that are half oval shapes,
looking like this. Then there will be a
little bit bent down here. We can draw a little
nose triangle. Then the other eye and can draw guideline over
there to see that you approximately
in the same place as the last one saying
the same height. Then they can put a
little light there, tube in the eyes and have
a little bit of a shade. Of course, this under
will also be smiling. It's always nice to
draw smiling animals. I think this one will
going to show the teeth. Go ahead and draw to
be front teeth there. We can also have a half
beneath it and a little shape, it has his mouth open too. As you see, when you
draw eyes like this, you really feel that
the eyes are smiling. You get these small
bumps underneath there. We draw the circle here,
not all the way up, because we're going to draw
the ears up there later on, Something like that. Then we will just, using the usual guidelines, approximate where the
ears are going to be, somewhere around there. They will go up first, but then we will have
them droopy in the end, looking a bit like this
first and then drop. Then we will draw the
inner ears like that. I think I drew this
line slightly too long that there we have one ear. And then we can go ahead
and do the other one. And I think I've done
the same on this side. Got to be too eager
to draw the circles, go back and draw the ear up. And you can have another
guideline here if you want to. Then the drop side down
and then back up again. Then we can have the inner
ear shape looking like that. Looks good. When you draw this line, just make sure that this line and that line is not
going into each other, so this one is on top
of the rest of the air. You can really feel
it looks good. Let's go ahead and
draw the body. And we will start by drawing
a curved line out from the corner there going up towards the body,
but not all the way. It's going to leave
a little bit of room there in the end here we will. Just a little round shape for
legs going back up again. And then we can do the
same on the other side. That's the round shape, leaving some room up there. And then the round
shape down here. Then we will have a long line, curb line for the
belly is quite round. This little rabbit or bummy. Yes, I think this we're going to draw
some worku pants here. It will have braces. Let's go ahead and draw two
quite big buttons here, one on each side. From there, we will
draw two lines up there, we have the braces. Then we will have a guide
line coming up from here. Another line going between these and another line going
slightly down again. There you have the work
pants. That looks good. Now we can draw the arms. The arms will be angled out slightly downwards, like this. And then we will
put a sleeve here. We can bend the
line a little bit. Also in the, the
bond will be holding a screw driver with a quite big handle,
something like this. And then it will be a little
top there for the handle. From here we will
have the metal part for the screwdriver. And then you can also add a little bit of
line on the top there. There you have a screwdriver
that is holding. As you see, you don't
always have to draw a complete hand that is holding
something, grappling it. You can just leave
it like this and we will understand that the
character is holding something. It's just your brain helping you completing and understanding
what the drawing, what is going on in the drawing. You can do the same
on the other side, draw another arm if you want to. You can just check that they are about the same as the other one. And also the same with
where you put sleeve. Don't be shy of
putting out a lot of guidelines. They're
there to help you. In this hand, we will put 100% It's called
schifikl and Swedish, it's actually a
Swedish invention. I think it's called
maybe a spanner wrench. But you will understand
what I'm talking about when I've
completed to draw it. There's a handle, then there is the spanner part of this instrument
looking like this. Now I'm going to put
out this little wheel that is inside here is
the Swedish invention, where you can make the
spanner smaller or bigger still in Swedish, it probably sounds very funny in your language if you're
not from Scandinavia. I think this one should also. I wonder we should put
a cap on or hat on it. It looks better if you say
something is missing up here. Let's go ahead and put the hat on him or her and
a little screen. I also want to tell you,
my father is very handy. He's worked as a
welder his whole life, and there's almost nothing
mechanical that he can't fix. And he has this old
hat from the '60s. He still swears, I
don't know how it's still able to wear it because it should be so worn down,
but it's still there. And he loves this
hat quite a lot. I mean, it's over 60 years old. Hat. It's been a it's
been for a long ride. This had probably seen a lot
of repairing and welding. There you go. It
looks much better. With a little hat there, Maybe we should put some
whiskers on this one also. This is a, a lot of things
going on outside here. Maybe we should try to put the whiskers inside
the face instead. I will make them a
little bit smaller. Also making sure that I
leave a little bit of room for up to the eyes there. Yeah, I think this
character looks quite cute. Let's go ahead and define the lines with the black pencil. I'm draw the mouth and making sure that the strength of the shade there
is not too much. And I'm not going to make
a black nose this time. It will be open like this. No shading and then the happy, laughing eyes and some shading. I'm doing a little
bit of cross shading here and making sure to leave that little spot and then
going over to the other side. I don't know if you
know anyone who is very good at repairing things. Try to search your mind and if you have such a
person in your life, please see if you can add
something from that person into destroying like what I told about my
father and his head. It's always nice to add something personal to
what you're drawing, especially since it's a
very happy character. Let's go ahead and draw the head with a very
big and droopy ears. I can tell you that my
father tried to teach me quite a lot about repairing
and especially welding. And I tried it out, but it wasn't really my thing. I was more interesting
into drawing, but at least I tried it. It was very fun, but it
is quite hard to master. I have very much respect for people who are repairing things. It was actually my father that
got me into drawing also, he was sitting with me from
where I'm quite young, and he was sitting and
drawing very simple shapes and he was having a
good time together. It was very nice. I encourage you to, when you have learned to
draw these characters, to teach another
person how to draw, it's a very nice feeling. It's always nice to spread some joy, drawing
happy characters. Maybe learning a few Swedish
words like Shivnikl. Let's go ahead and
strengthen some of the lines here under the head body. I think we can also add
a little bit of shade to the work pants. I think that's what they
are called in general, at least the hangs biker
in Swedish Brac pants, if I translated
straight to English, but it probably sounds
a little bit strange. Let's go with work pants. Shade also slightly. When you do that,
you see you get a connection between these
two fields immediately. That can also be a very
nice way to tie a drawing together that looks very nice. Let's go ahead and draw a
little bit of a shade too or shadows slight one. Just making sure that the shadow is mostly under the
character here, the, underneath the
work pant area. This is how I'm actually, I'm a very giggly
person and I make a lot of stupid wordplay things. Quite a lot of people compare me to Chandler in
the TV show Friends. I hope you can bear with me. So there you have
a little shadow there You get your
mechanic bunny, ready to fix whatever
problems you have. Good work and see you
in the next lesson.
11. Bear Chef: So next I thought we will draw
a bear dressed as a chef. And we will start. You Show me the circle. Drawing the head shape, round, rough shape like this. Then we will have the guideline. And don't worry if it's
a little bit crooked. If will look good
in down Dunaway. So and then we will have a body. The body will be about the same size to just
a little bit shorter. So about those
quite hold a spot. They're actually
somewhere around here. And then we will have a body
that is little less wide. Circle, something like this. And we will have a guideline
for the hat again. Horizontally. We're going
to start by drawing two. All the lies there will be placed in the
middle of the guideline. The same odor decide number will have a little
bit of light and I, they're shaded a
little bit slightly. Somewhere else to below the eyes there we will
have a little nose, a triangle with soft corners. And of course a big smile. Something like this.
Various big smile. Super happy meals put a little bit more
definition to the ice. They're slightly. And then we can draw
the outer shape of the Hat leaving the
top Popov course, we're going to draw
some round ears. At the top here, the chef hat. So that's going to draw a little bit of a
thing guideline out here. Then we will have
two big round ears. There will be just a little bit more up than the guideline, slightly in their ear-shaped. Let me go complete
the top half there. If you want to just
add another guideline. Non-neutral, the other ear. The inner ear. Yes, I
think does looks good. Now we can draw a
big fluffy chef hat the level draw some slightly curved
lines up like this. On top here we will have a little belt
oval shape like this. Then we will have the same odor decide curved line
going up like that. Don't even like this. App's gotten a bit
too crooked there. There you have a
very fluffy hat. Looks almost like
a piece of dough. And then we can do the body. And we will have starting us a little bit
from inside that corner. Soft going, going up like
this and going up to that point where the guideline
is meeting the Hood, let me can do the same odor. Decide. Big, nice round shape. Going up into that point. Number, build, draw. Some
little legs here like that. And then we will have
slightly curved line down here where the chef outfit is
something that looks good. And then they can go ahead
and draw a waistline. I also bought this line
to be a little bit curved because I'm thumb. If you draw a character for straight ahead on all
your lines are really, really, really
straight like that. It looks a little bit stiff. So what you can do is just to curvier lines still slightly. And you get a little bit
more life into your drawing. Just a little bit.
So there you have a little waistline,
a little belt. And we should have hijack get. It will be, I suppose this
is a bit of a French style, so you have a bit
of a Hat share, and then we'll have the
two bottles to close the the chef jacket. Yes, I think this looks good. And we should have two arms. And I think this bear is really busy cooking
at the moment. So let's go ahead and draw the arms out from each
side and they are slightly Bunny and ending
with a quite big hand, just a circle like that. And I'm not going to draw the
line all the way in here. So I believe little
bit of space there. And from here we will
draw a soup ladle. Withdrawal the pedal bone, they're going back up. You see the little handle is covering the the
arm you slightly. This is why duties
is just not to have too many lines going into the same place as we
discussed earlier. We can have up here where the
guideline is an oval shape. The big don't For
the for the soup. Yes, it looks good
for a soup ladle. We can also shade
this little bit. To give it to some variation. You feel that there's some
depth going in there. That looks good. Let me can
do it as a model decide. Disarmed can be maybe going a little bit more
upwards, slightly. And then another 44. And we will also draw, now actually draw the line
all the way into the hands. So you can see what I'm
doing here is that I will draw a handle here for a spatula and I will
make it covering that part. I think we will draw
draw the handle just a little bit shorter, slightly. And also I can erase
the arm line there. So this line is breaking
up the ARB line number. We'll do the little metal
part here and under spatula, I suppose it's called. And we can draw
three lines here. So there we have
a little spatula. But I think there's something
missing for this bear. I think he's a little
bit mischievous, maybe. Maybe a little bit
into his his craft, some drawing, little
tongue going out there. Maybe his very concentrated
doing his ship stuff. Nobody can go ahead and
define the lines with the black pencil
starting with the eyes. Making sure to leave
a little rule there. The lights drawing
where two black eyes. To also do. So strengthened
Delta Psi there. We go ahead and
do the other eye. When you're drawing this bear, I want to think, oh, what the bear is specialized in. What kind of food is very good, or she's very good at cooking. When it comes to bears, maybe it really loves honey. So it's very specialized in the cooking. We will draw the Bullock knows. Go ahead and do the little tank me Jimmy also shaded
very unclear, not a lot, just a little bit. Something like that. Yes.
Don't draw the hair. Big round ears. Complete the circle
for the chef hat. I don't know if you
only had like this. I actually have one almost
using it to all that much. It was a thing that
I bought at Ikea. Yes, that's a funny thing. I like cooking and
especially baking. Went over me and my
brother was small Kids. My mother was always
cooking and baking with us. It was a lot of fund alone, quite a lot from
her she ever learn from her mother
and it's a trust. So we have some family recipes
that we are still using. And I think I will just erase a little bit tear
of the home asleep. I got bit too much
of a double line. I don't know how it is for you. If you like cooking and baking. If you do, or there's some dish that you
really, really love. I encourage you to
incorporate it into, into destroying, making it
a little bit more personal. You can maybe draw the
dish next to the bear, or maybe you can
change the tools the bear is using for
cooking your special dish. I saw I got a little
overlapping line there, so I'm just going to
go back and erase it. As you see, there's
no freaking out. You just go back and
reduce something. And the US continuing
with the drawing. Because I hope that when you're taking this course that
you are having FUN, but also that you learn to be relaxed and enjoying
what you're doing. I'm just going to show you that everything is
possible to change. Its all that I draw this a little bit too much to the left, so I'm just going to redraw the whole spatula ahead and I'm just will make it
just a little bit wider. So I still can keep the
lines out on this side. Now let me just add a little bit more space to the other side. Draw. Instead of three lines that would have
four lines instead. If you make a little mistake, you can always go back
and you can actually use that little mistake
to redraw your, your character and
whatever the characters up to the else. Be very playful when
you're doing it. This is not something
super serious. It's more about having
found and playing around. There. We have one
happy Chef bear. Yes, I usually do in down that is going
to add a little bit of shade on one
fifth him or her. Some lines with the black Pencil being gentle in the
beginning as new show. Strengthening the lines. Especially or in the middle
with a darker spots, we supposed to be
entered a bear to the ground with some
strengthening of the lights. And I also want to strengthen
the hand slightly also so it pops out a little
bit from the body. So there you go. One
happy bear Chef, good work and see you
in the next lesson.
12. Hamster Hood: The last time but we will
do is a little hamster. And we're going to
start by drawing very soft form
looking like this. A little bit flat
tear on the bottom. Almost like an oval shaped top. Instead of doing a guideline
in the middle like this, the character will be turned
slightly to one side. Lost, draw a little guideline, little bit to the side
and also a little bit. Don't like that. And we are going to start to
define this little lump mine drawing round corners and add a little bit more
room to one side here. And ongoing in the top of the head will be
a little bit flat. Like this. We're going
down and else to add a little bit of room here
to one side down here. It is a little bit
of a wobbly shaped. Instead of just having
a straight line here, we will have a little down
there in towards the body. So it's almost like a
hint of too little legs. Whilst we don't here we can draw some small feat to small
oval shapes like this. There you have your
little hamster standing. I can go back up here and
draw some facial features. We can use this, use this
guideline to place them. It can start by
doing a little nose and it will be
somewhere around here. And instead of having
nulls looking like this, it will be a little bit
of a belt line like this. There we have the most. And then we can draw the
rest of the mouth will be two lines like that. And a little oval
shape. Shade above. If you get too
many double lines, just go back and erase a
little bit, clean it up. Can draw these lines just a little bit longer,
also, slightly. So very ago. Going back
to the same line there. And as you see, I'm
not freaking out, I'm just laughing
at what I'm doing. There. You have a little
hamster, nose, the mouth, ligament I'm gonna place
to small eyes and there will be too small circles
here on each side. Looking something
like that and they will be completely black. Is done from out
from this corner. We will have an ear and it
will be covering both sides. Let's go ahead and draw. That is sort of looks completely maybe a little
bit on that stair. And then we will draw a line here for the thicker
part of their. And now we can draw the
How to line up here. We'll just leave a little
bit of a round corner. They're going back up here. They have a little ear.
This little hamster will be addressed as Robinhood. So we're going to
draw a Hat for it. You can start by doing v-shape coming up from
the ear like this. Sharp corner. And then we will have another
line going. Dog hair. So sharp corner they're
going down into the body. Then we can draw the
headline like deaths. Now we can continue
the house that is will be a little bit of a band
going out like this. Don't be a feather here. Let's go ahead and do it
almost like an oval shape. Like this. And it's
bending in before the line goes down into the how there will be a little
bit of a middle line. There we have the feather and we will shaded a little bit so it's more distinct
from this feather. We will have another line
that is going up like this and a line going down in a sharp angle and
then it will be going on. Tours to add showed the Hat. Quick this yes. Nobody 2 mol of draw the rest of the ultra low in for the
body on the other side. Just to, to play potato shaped. November, have that little bit
too much trouble is there. So let's go ahead and
erase a little bit. November, have the hat. We can draw the other ear and
will come out around here. A little IID random variables
to draw the secure portal. So there you have your
little Robin Hood hat. Since it's Robinhood. Hamster will be holding a bow. Let's go ahead and
draw a little arm here that is slightly curved. Will have to round lines here forming the Bot going
in under the arm there. And then in the edge
there will be a little oval-shaped to each side. And then we can draw a little
string here, bolstering. So there you have a little boat. It looks very cute.
And down we will have, I will have a little dress all. So let's go draw
a line like this. Then we can have a little
bit of a sleeve here. And I'm just going to draw out a little bit more
line to pull up to one side and add a little
bit more to the arm there. So he has a little
bit of asleep. We can also add just a
little bit a rule there. If you feel that this is a
bit too close to that line, go back, erase the line,
move it a little bit, you can draw it maybe
a little bit higher up and maybe with not as much as shapes. So just remember that you
can always go back in one drawing and redo
whatever you want to. Nothing is fixed. Yes, I think that looks better. Now we can draw
some small sleeves, so we're going to use
the guideline there to find the middle points. So here's a little scared. Scared, a sharp,
sorry about that. That will be going down here and then there will
be two lines crossing it showing that the
shirt is close to yes. Looks good. And of course you should
have a little bit of a belt tear and we can
draw another line here. Just making sure not getting
too close to the bone. Making a slight bend. Then another line beneath it. Like this. And not worry if the lines What believe it will look good when you find
a nice to drawing. Here in the middle, we
should have a belt buckle. So let's go draw a rectangle that is a little
bit wider than the belt Yes. Looks good. Since
we have a bot here. I will turn to present. Happy with disliked by the way. I think we can
actually draw it the hasta little bit further down. Slightly like this. Let me can I go luck. Dislike. Also. It looks better for me.
Since I have a bowl. Richard have where
to place the arrows. I don't know this
word in English. Sorry about that,
but I think you know what I'm, I'm drawing. I will call this, call
it the arrow case, is where you place
your railroads. It's called Core getting Swedish probably doesn't
mean anything to you. We're going to draw
a little arrow here. We start with a line
and then we will have to shapes on each side. And some more lines
going out there. They obviously a little
little arrow waiting for for the hamster. And finally, on the other side, I think we should know
what's going on right now. Making a little bit
two-minute a double lines. On the other side
here we will have another arm going out like this. I thought we were
holding a little sword. So let's go ahead
and draw the heel, toe, the sword, handle. I'm just making sure
that we don't have too many interconnecting lines. The bar there. We can hurt a little
bit of a blade. I probably, this sort
is not a real sword. It's probably made of wood.
There we have the blade. So there is fencing around a little bit with
this little thought. Yes, I think this
is a good start. So let's go ahead and define the drawing with
the black pencil. Starting with eyes,
making them nice around a black little round nose. And I'm going to make a little
bit thicker line there. So it doesn't look completely
like the mouth lines. Open. Happy, happy mouth and
a little bit of shade. Lot to strongly. Just a little bit of shade. Yes. We can draw
the back line here. Going off into the very iconic Cat. Think. Caller of this
feather is always read the contrast to the rest of outfits
that is usually green. We're gonna shade is
just a little bit. So it pops out a little bit
and destroying the other ear. We can also
strengthening the line on top of the are
here to show that the Hat is closer to you than they continue to be
this potato sack form. Very wobbly. Here by the small fee. You can of course
leave them like this. Or you can add those two lines showing some small toes there. This Robinhood, this barefoot. Then we can do the arrow holder
and a little arrow here. Drawing those little
lines inside, not the strongest
otherwise altered mice. And most of this, while we
can use shapes, likely. Yes And now we can go ahead and
do the short line here. You can be as rough as you
want to with your lines. Short this closed. And I think in the original
design to have some leather, what is called leather strings probably that is
tying them together. We're going to do a simplified version
with just two lights. We can have it
will sleeve there. The little arm. Don't do that. Very, very tiny. Tiny bow. He has very small arms or she. So it's probably not so good
type of too big of a bow. Then we can go ahead
and do the other arm. We can actually do
a little bit to the sleeve line here to just make sure that you leave a
little bit of room so it doesn't interconnect too
many lines together there. Hello, I'm that little sword. Yes. We have the belt. That's probably to be very
low belt to able to reach around this very broad figure. Yes. It looks good. I'm just
going to strengthen this line. This line also. We can see that the body is
on top of the arm there. Yes, I think this
looks very good. Very cute little Robinhood. Maybe the hamster things
is quite dangerous when he's walking around and
maybe not robbing people. Maybe just asking for money
and giving to the poor. Or maybe easiest
keeping the money and buying hamster food. Who knows? That's the backstory. You
can think about what kind of characterised behind
this. We'll figure out. Let's go ahead and do a
little bit of a shade. Making sure that strongest part is close to the
body in the middle. Let's go ahead and draw a little bit more
string stone here, making sure that the feet are
connecting to the ground. Can add a little
bit more strength around the mouth to and also little bit
tear. The neck line. Yes. I think it looks very good. So there you have hamster Hood or whatever this
character is called. And this is the last lessons I want to thank you for
taking this course. I hope you had a
lot of FUN that you learned a lot and
smile a lot them feel much more relaxed. And finally, I want to ask
you to Show your drawings. It is the best way to
grow your confidence. So Show your work to
friends and family. So post and share your drawings with your fellow students. It will help to grow
your confidence. And then your confidence. It will be so much easier for you to grow your drawing skills
 Christer Hägglund, Illustrator / Author / Game Developer