Transcripts
1. Intro: Hi, everybody. Welcome back
to the class, Stella here. So I want to take a moment to thank you all
for responding to my e mail requesting what type of lesson you guys
would like to learn. Majority of you guys
wrote back to me saying that you would like
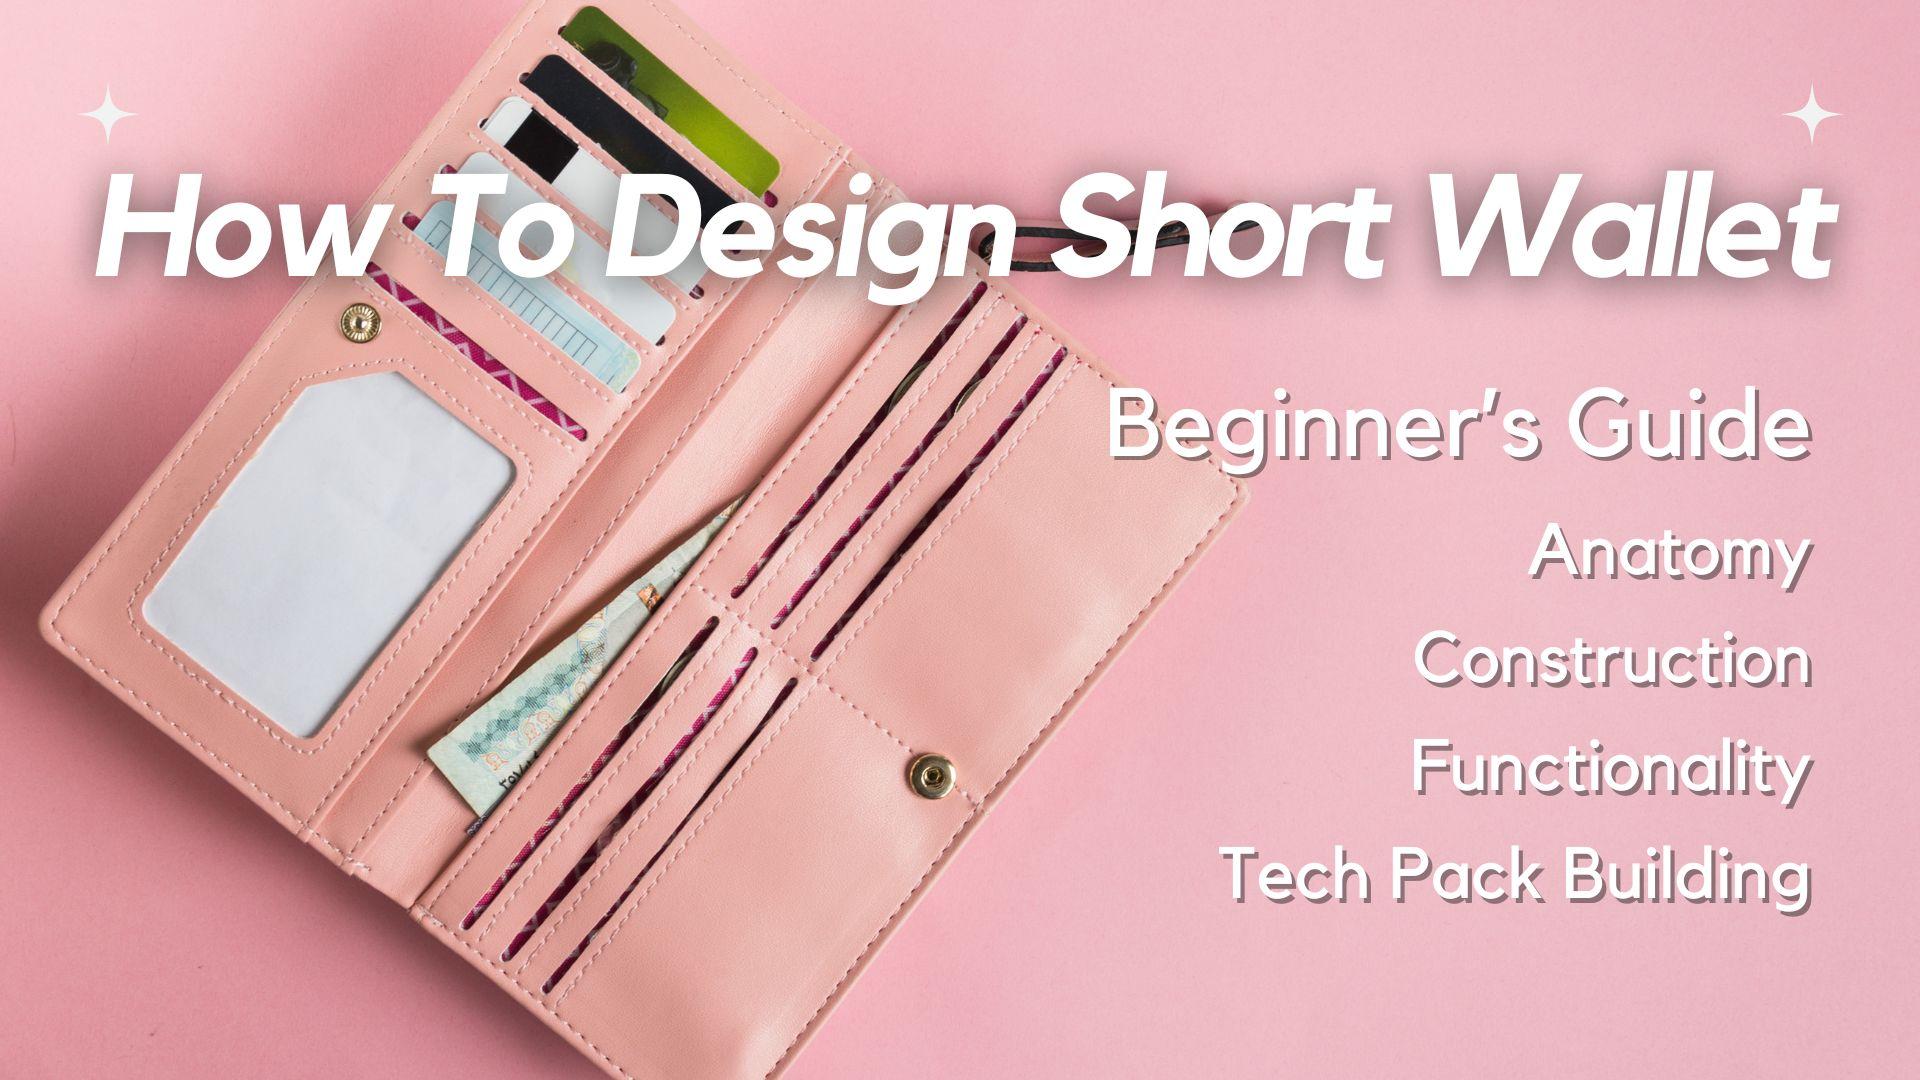
to learn about wallet. It's anatomy, construction, and how to create TPAC for it. So without further delay, let's start with short wallets. I have two in front of me. This one is designed by me, and this one is designed by my friend who owns
his own brand, M Mont in New York City. How awesome. So let's
get this started.
2. Anatomy & Construction: First thing, first, let's
talk about construction. So in short wallets, it doesn't matter what
type of design it is. Usually, we have it
made as a bifold. So what's a bifold bf literally means when
you open it up, there are two panels for
your credit card slats, and when you open
up the whole thing, the total lens can actually
put your dollar bills in it. So this is called a bf
It folds onto itself. This particular wallet
is also a bi f. However, It has this flap on the side. We don't count this as a
functional piece in the sense, so we can't really put
any credit cards in it. So the bifold part
will be this panel and that panel fall onto
each other, like that. Now, the second thing let's
talk about is the closure. For this particular wallet, we use a snap
closure snapping it. And on a piece of tab, some people call
this the tongue. It's the same thing. It's a leather tab
with snap closure. This one also uses
a snap closure. You can't really feel it, but just trust me
when I tell you, this is actually magnetic snap. So It will have a very
nice and I can close this. It will have a very
nice snap like that. So this is the closure. Next, let's talk about the most important
part of the wallet, which is the interior. This is pretty much where
we put our credit cards, our dollar bills,
and some of this will also have a coin
pouch on the inside. This particular design, I
basically decimated one, two, three credit card
slots over here, one, two, three, credit
card slots over here. Usually, if you open
up your own wallet, you will see some sort of logo, either debas like this one, or it will be using
gold stamping or silver stamping or
some people just put a tiny piece
of logo hardware. So You can put it on this side. You can put it on that side. It does not matter.
It's a choice you as a designer can make. Now, another thing I want to talk about is that
for the most part, there's really no standard as to how many credit card slots
you should designate. Just know that majority of the brands and wallet
designs that you will find, they do offer at least six. So it's three on this
side, three on that side. And I don't know if
you guys notice There are another py credit
card slot over here. There's another one over here. Some people put
their credit cards, some people put their ID, some people put their receipts. So these are just
two extra slots for people to put whatever
it is they want to put. There's another one over here. Now, the reason why
I'm going over this in such a detail is that I want you to take a look
at the construction. If you really look at it, they are stacked on top of each other in
terms of the credit card. This sorry. This is may stack on top of that on top of that
on top of that. So the reason why you
need to know this is because when you stack
one, two, three, four pieces of leather plus
lining towards the bag, and then put it on
the sewing machine, you need to make sure that
the leather is soft enough, sin enough for the needle
to actually go through. Not a joke we have
broken up needles before because the
leather chosen by a designer is so thick. I literally broke the needle
and the needle was like when flying off the sewing machine
it was very dangerous, so don't do that to yourself. If you really like
a piece of leather, but it's a little bit too thick, you can always request the manufacturers
to sky it thinner. Any experienced manufacturer
will feel the leather and tell you it needs to be done before you even tell them. If it's not done or they didn't even bother
to ask you about it, then maybe they're not the
right factory for you. Anyway, that's a
total site topic. Another important feature of
the interior is obviously, where do you put your dollar
bills or your $100 bills? Usually, you need a full length. Of the bifold wallet
to open up straight, and then you put inserted
right over here. Now, you can see it's
fully lined with polyester lining or it could also be cut
twel doesn't matter. But we always add this
piece of leather color. So when you close it up, it looks like it's also made out of leather
unless you do this, then you see the
lining on the inside. It's one of those really
silly optical illusions that we learn to make so that it offers that really finished look to the customers and make them feel like this is
worth their money. Another important thing is that, how do you measure the width of the credit card slot to
actually fit the credit card? Well, first of
all, make sure you understand which country
you're selling it to. If it's in the United States, whip out your own credit
card, measure the width, and then you have to
add enough extra room. I usually like to add an additional two to
three millimeter on top of the actual width
of the credit card, plus 2.5 millimeter in
width over here. That 2.5 is actually accounting for the width from the
edge of the leather to where the thread
will actually go to another 2.5 over here. And so total will be five
millimeter. Why is that? Your credit card sits right
here and a lot of times, designer forgot to add the 2.5 millimeter room for the
stitch line over here. And another 2.5 over here, your credit card can't
even go through. It literally eats up
that tiny little space, and next thing you
know something a thing is your credit
card is getting stuck. So be sure you add that. If you don't know how
to work with metric, just Google inches to metric
and type 2.5 millimeter, it will tell you exactly
how many inch that is. Now, the third most
important component is where do I put my coins? I know it's like most people don't even use coins anymore, but, you know, some people
still do like myself. So let's start with
this wallet again. As you can see, when
you open it up, there are no places to put
coins unless you don't mind putting it in the
bill slot over here. I hate that because
half of the time when I open this up too quickly, my coins flew out, you know? And so usually
what we do is that we create a separate
compartment, a zip compartment, most of the time where you can
actually put your coins here. And I don't know if you notice. So this thing is supposed to close like this a
bifo like this. When you open it up, the coin
is actually on the scene. Of this panel. Personally, I
think this is really smart. Oh, see, I got coison there. The reason why this is
smart is that Okay. This actually gives
you a lot of room. So even when it's full and then you close it
with the max snap, the max snap will still
be able to catch it, and then you probably can
put at least three or $5 worth of coins here without the things
start to bulge out. So that is pretty smart, and that's the reason why
even with my own wallet, I usually put the
coin compartment on the outside away
from the slots, and I use what I
call a zip around. Closure so that the coins really do not come out
because I hate flying coins. When you open it up, oh,
guess what happened. I added something called the accordion vent or gust and there is a
center zip divider. It's all fully lined. It's basically a
piece of cardboard or sometimes a very thin piece of plastic, wrapped in lining, they actually glue it down, and then they use the leather on the outside of the
vent inside line. So it looks like again, It's worth your
money because you think it's fully line
with leather but's not. And this also allows that extra volume to carry
more coins for you. Now, now you know I
really am a coin girl, so let's zip this up again. So let's recap. So this is called a
bifol short wallet. The three major components
you need to have is credit card slots and your
dollar bill compartment. And then, before we
go to extra room, and the third thing
is obviously, where do you put your coins? You can make it into
a zip coin pouch on the outside like these two. Some people actually like
to put it over here, but honestly, I find that
totally functioning. And then you can also offer extra pockets or slots underneath your usual
credit card slots. Now, some designers who
are over achievers, they also like to
create a bad pocket. I basically model this
after your gene pocket. What do you put in there?
If you live in a big city, you had to take, let's say, subways or buses. This
is where that goes. Some people like to put their quick receipts
or one or two change, you know, over here,
it doesn't matter. It's just one of those things
where you as a designer, you can figure out how you
want to make this different from all the other wallet
competitions in the market.
3. Design Technical Details: In terms of adding logo, for me, this one is a very standard
debas logo on the tab. You can choose to put it here. You can also choose to
put it on the interior. For me, I put it on
this panel, also debas. But you can also choose
to put it over here. Now, if we look at this
particular wallet, Look, you can do a
unicorn if you want. You can just put it on the flap or you can put it
on the front panel, or you can also
add this is called a silver foil stamping
right over here, he decides to put it this way, but you can also put it under nee orientation like
that or on this side. It doesn't matter.
It's your brand. You can choose whatever
you want to do. A couple of more design details I want to point out to you, I don't know if you
guys can see this, but there's like
a super thin line running across the opening
of the credit card slot. This is actually
called heat crease. So there's a heating tool
that looks like it all, and all you do is
that you heat it up, and it will literally
slightly burn through the lesser itself to create
this very nice line. Does it have a function?
Absolutely not. But it's an aesthetic thing that makes people feel like, Oh, this is a luxury, you know, brand because if you look at it, it's mostly luxury
brands who will do that. Completely extra
human labor that serves no purpose except
it's aesthetically pleasing. I also added over here. It doesn't matter the length. You know, you could
just do it, make sure it's a very nice
piece of leather, so you can see that nice little
he crease running across. Now, the way we finish the
closure is we actually turn. I don't know if
you guys can see. We turn the edge, we glue it down to the inside, and then we add a very thin. You probably cannot see it. Oh, we didn't even add it. So yes, we simply glue it down, and then we connect it to
the lining on the inside. So this way, all
the way up to here, even When you try to open the credit card
slot and look as though the inside is lined with leather until you really
start to look at it. So this isn't usually
how we do it. Some people call
this the turn edge. Some people call it the
row edge, either way. This is a very thin piece
of leather right there, and then we literally just use the glue glue down and connect to the lining, and
then we go from there. Now, this one is very different because this
is literally a piece of metal knife that just cuts right through
the leather die cut. So if you look at it, the rot edge part
is not painted. I don't know if you can see the little tissue right over here, little tissue that's coming out. And then, but the backside, is basically connected
to the lining directly. Obviously, with an
unfinished edge, when you start to use this wallet extensively
like the way I have, it starts to peel off on the edge and you can
totally see that. And sometimes the stitching
will also start to come off and then even this
tiny bit of opening, the circle opening start to tear because I'm constantly
grabbing my card out. This is just regular
wear and tear, but just know that this
type of design using dicot compared to this
type of design, you know, using a traditional stitching
to finish the edge, or if not, we just
rolled it over, you know, and we glue it down. This is sturdier than
this type of design. Okay, now we're really
going to talk about the construction as if we weren't for the last 15 minutes. Anyway, so one thing I want to show you that I think
my friend did brilliantly, you see this He actually
cut notches all the little corners
that need to bend and fold over here as well. So if you have ever taken a pail one on one or
pattern making one one, why do we cut notches
so that there won't be any excessive fabric when
you try to fold anything. Clearly, I did not
do that over here. So you see what happened. You don't see this in fabric, but you definitely
see this on leather. It started to crease, right? The excess leather being
pushed increasing Um, if this wallet were
brand new, honestly, it wouldn't be that bad, but after a year's time you
start to see it do that. It's very wrinkly. It's creasy. You know, maybe I should have caught a notch over
here, but I didn't. So there's that. Now, let's
talk about third design. I also worked on this.
So this is a by fo, but did you see what I have? I actually have this
one single piece. Extra piece for your ID. This is a ID window, and then I'm using
clear PVC over here. So this piece, normally, you will see people
make it over here, but you can almost created like a leather insert in
between the bifo. Some people actually made this detachable mine is completely sewn down so you
can't really take it out. So the whole point I'm
showing you this is because I want you guys to
understand that as a designer, when it comes to designing
small leather goods, especially wallet,
function comes first. You have to figure out How many cards do
you want to hold, you know, so that
your customer will feel like this is worth
their money and time. And how many, you know, dollar bills compartments
like this one actually has a divider
in the center as well, so then you can actually put two you have $102
bill compartments. Why would people do that?
Some people travel. You know, they might put
foreign currencies here, and then they're regular
American dollars here. Some people use this
extra compartment for receipts or whatever
it is that they use. So the more function you can give to this design so the customers can
use it, the better. Then you have to figure
out the aesthetics. So you have to
marry the function, balance it out with
the aesthetics, because there's no point of
creating a very ugly wallet, even though it can carry
20 cards under the sun. If it's so ugly, no one wants to buy it, then why
bother with it? Now, again, this one,
I decided to use the debas logo over here and then use a tiny
little tab to close it. Oh, now, I make
on the back side. I don't know if you
guys can see this. I made the coin pouch using a
flap with snap closure, da. But then maybe me, I'm worried that well, what if I turn my
wallet this way, the coins will literally
fall off of it from this tiny little hole. So I said, Let me just make everyone's life hell
mostly factories. Let's add a tiny
little zip pocket over here so that the smaller, like the pennies or the dimes, you know when I just fly off the little coin
pouch compartment. So now imagine this
type of design, when I put all my bills, credit cards, plus
the coins there, it will become really
bulky. Is that a bad thing? No. Some people love it.
Some people hate it. So again, as a designer, these are all the decisions
that you had to make sure the aesthetics is totally balanced
with the function. Another thing I want to show you guys is what
we call the spine. So this is actually
the depth of how wide or deep your
wallet is going to be. Usually, I like to kind of
like the spine of your book. Usually, I like to give
it at least an inch. Unless it's a very,
very thin wallet, I don't want people
to put coins in it, then maybe I'll go
down to half an inch. Yes, I'm switching back to
the imperial measuring again. I'm sorry about
that. So one thing I will caution is that if you're
going to use painted edge, Just know that if this spine, this arch is very, very sharp and narrow. You see how the pain is starting to crack and
literally fall off, that's what will happen because
you keep opening closing, opening closing,
opening closing. Eventually, the pain will
just get chipped off. This side is a little bit better because this arch is
actually a little bit wider, so it's not that
drastic of a bend when you try to open
it. Look at that again. Yeah, I see that. So these are things that you
have to keep in mind. This one doesn't really apply because I'm actually
using fabrication, and this is actually
a denim fabric I'm using and this
is a Italian tw. So it's all turned edges. And the thing with fabric is that it has better flexibility. So I can move, whereas leather doesn't
move as much unless you get super supple
leather to work with. This one is somewhere
in between. It is also painted. You can see the wrinkle
is starting to show. It hasn't really cracked it because it hasn't
been used often yet. But eventually, I'll give it maybe like a year
to two years time. It will also start to crack. Now, these two are
real genuine leather, I golf on Germany and Italy. Now imagine using PU PVC or I hate to say
a vegan leather. The crack will show within probably three to
six months time because they are synthetic. They don't have natural
skin breathability or the flexibility
to move around. And so they're very what's what I'm looking
for. They're not rubbery. They're very stiff. So the crack will show pretty much within three
to six months time. All that being said, Designing a long wallet is the same as
designing a short wallet. The only difference is,
you make it longer. That's really it. Everything else construction
anatomy seems to watch out for how to add
the stitch using dicot, where to add the coin
pouch, where not to. All of that is exactly
the same. All right. Thank you, guys.
Now, let's get to the TPA demonstration
section. See you there.
4. Short wallet Tech Pack Building: Hello, everybody. Welcome
back to the class. So let's get the TPAC started. R right in front of you is a classic short wallet that I've created for somebody else. If you have no idea what
this is even about, please go back to my TPAC one oh one class where I teach
you how to actually create a full size up to scale TPA before you come
back to this class because instead of
showing you how to the wallet from the ground, I'm actually just going
to walk you through the important aspects of the
design and construction, how to denote everything
on a te pax so that the manufacturer
understands how to create a pattern and then how to
create the sample accurately. So the first thing you have
to do is on the color chart, you have to show the front
view of your wallet closed, and then a back view
of your wallet. Typically, I like to only show the material and colors
on the front view, but you can totally do
that for the back view. It does not even matter. Here is the BOM. You have to show what
your body material is. If there's any trim trim one, some people even have
trim number two. What type of hardware
are we talking about? Is it gold finish anti gold finish gun metal
finish or even nickel finish. Does your wallet have any exterior zipper
pole or zipper tape? Does it have any interior
zipper pole, zipper tape? In our case, yes, we have both. The exterior is a zip around, which I showed you in
my previous class. Does it have lining? Is it a painted raw edge
or is it a turn edge? What is it? You have
to denote all of it. So let's go to page number two. Just like a tap path
for a regular handbag, obviously, you have
to have what I call the material
distribution listed. Body material is all in white. If there's any trim, it's
going to be in gray, if there's any x ray view, which I will explain
what it means, then it will be painted
or denoted in blue. So now, this is the meat
and bone of everything. First of all, because
wallet is small. If you use the 11
by 17 inch paper, also known as tid paper, you should draw
this full size and fit it onto this
single piece of paper. If you need to create an extra ard board,
go ahead and do it. All right, so let me explain to you why I am not drawing this from scratch to show you because when it comes to
wallet, guess what? They're only two sizes. You either have a square, or you have a rectangle for
the continental long wallet. So you really don't need me
to show you how to do that. You know how to do that. So if you do a square like this, all you need to do is to make sure this is the
size that you want. Again, we'll draw
this full size. So let's say in terms of the overall width,
when it's closed, you want it to be 12, and then let's say the overall
height when it's close, you want it to be 10.5. So that's how you do it. Now, you may ask, what
about the corners? Okay, go to shape, select it again, go to shape, and literally just like
let's say here is one, A one, 1 centimeter radius. If you want this side to be one, but that side to be rounder. So let's say this is a
three centimeter radio, so you simply just change it. This will be a
very weird wallet, but you get the gist. So in addition to drawing
in squares and rectangles. Next thing you know is
that you're literally just drawing straight lines for
the credit card slides. You may actually do this nice little curve for some sort of a
design aesthetics, but for the most part, it
just really straight lines, maybe some semicircles
and rectangles is square. That's why I'm not going
to show you how to do this because you already
know how to do this. Now, there is a lot going
on on this artboard, so let me go to layers and let me just turn
our measurement. So it's not too much,
and let's leave it here. The most important thing about a full size tap pad for a wallet of any size shape and design is you have to
show the front view, which we talked about already, then you had to
show the back view. Now, the most important view
is the interior open view. This is where you
show the factory, how many credit card
slots you want. Is there any bill compartment? I hope there is. That's the
whole point of a wallet. And where is your coin pouch. For this particular design, it was actually at the request
of the customer that I put the coin pouch as
a tiny little flap. Pocket with magnetic snap. You know, from the
previous lesson. I'm not a big fan
of this because it would make the wallet
very, very bulky. As a result, I added
the zip around closure to contain the coins
to avoid the spillage. You mean, I hate spilling. Now, because I added the zip
around closure, you need A zipper pole. So I also give you a
zipper pole design, and this is something
as a designer you can have some fun with. The zipper pole design
can relate back to your brand's DNA or if
you're working with a client, talk with a client
and then, you know, come up with some sort
of unique design that really represents
the client's brand. Okay, so when you look
at all these views, the first thing you
have to explain to the factory is how many
bill slots are here. Right now, you can see one. Let me turn on the measurement again so you can
see very clearly. There's one single
bills compartment. Over here, a real
currency pocket. I think because I
was working with an overseas client and
that's how they call it. So I'm like, Okay, no problem. That's what I'm going
to call it too. Usually, I'd like to give
it at least 1.5 to 1.1 0.7 centimeter from measure from top to bottom to open
up this bill currency. Simply because if you made this bill compartment a
little bit too high up, your, this happened before. Some people don't push the
dollar bills or whatever, all the way down to the
deepest part of the pocket, and then the zipper
actually breaks your money. Yes, I know. Don't even ask how if it even happened.
I have no idea. So on top of this
bill compartment, I gave it one, two, two credit card slides. So the space between
the credit card slides. Usually, I like to give it
minimum 1 centimeter apart. So that's just enough space
for your fingers to go, grab your credit card and take it out without any problem. Sometimes I will
also give it 1.2. I see the widest I've ever
given was 1.5 centimeter. And that only happens
when I'm working with bigger wallets like
the continental wallet, the long wallet, or
wallet on the stream, basically anything bigger
than a short wallet. Now, do you see a
lovely heat crease? Again, this is something that you can add to really
elevate your wallet design. As you can tell, for
the heat crease brush, I use a sinner brush. So just come over here,
pick a thinner brush to differentiate itself
from the edge of the credit card opening. Because if, you know, I ran into the problem
before where I worked with a junior pattern maker and I used the same brush
and he got confused. He would just say,
Wait, am I is this the he crease or is
this the heat crease. Again, don't even as once you start working
with the factory, all sorts of crazy happens. Now, logo placement. Again, for this
particular design, I'd like to put it here. You can decide wherever you
want to put. Doesn't matter. You can also decide if you
want to use embossing, de bossing hardware or stamping, we cover all of this in
the previous lesson. If you have no idea
what I'm talking about, please go to the previous video of the say class, this class. Now, Again, you have to make sure the credit card slot is we enough for the
credit card to put it. The difference is for
this particular bag, the credit card it actually goes in in its regular orientation. So let me just use it
really in your face, blue So let's pretend
this is your credit card. Obviously, the
shape is all wrong. I know. So let's
bring it down to one. Okay. So let's say usually
the credit card it's a I think nine
centimeter? Oh no. Yeah, nine centimeter is
definitely not that tall. Sorry. I did the nine
wrong, nine centimeter. I think seven or was it 6.5? Okay. Let's just pretend this is the size of
your credit card. So this goes in just like that. So wallet, they
do it vertically. So you just need to let me vertically oriented
this. There we go. If this is the case,
if this is how you want your credit
card to be inserted, then obviously you
can afford to shorten the total width of your
credit card slots. So let's just put
it this way. Okay. The next important
thing I'd like to talk about is this coin pouch. Now, again, this
is not my type of coin pouch design because I don't like
spillage on my coin. And when you put a coin pouch within the wallet inside the bifo when you
fill it together, it gets super bulky,
what's the coinide in it. So that's the reason
why, like I said before, I added the zip
around closure to make sure nothing gets
out of that wallet. Now, because this is
made inside the bifol, I added what I call
a retractable vent. This is not exactly accordion, because usually accordion
will have two pieces of vent. This is one single piece. And so I did a three quarter view of how this coin pouch is
supposed to look like. This is not drawn up to scale. When you do very, kind of, like what I call
construction explanation CD, you don't normally need
to do it up to scale, but if you want to,
that's totally fine. The gist is to make sure the pattern maker
understand that when they look at this coin pouch from the side, they should add A vent or gas it, however, you call it using
the snack closure. And if you read it, I say, photo gas it on both sides,
what does that mean? On this side and this side, they each have their own gusset. You may have seen wallets where
only one side has gossip. The other side is
completely flat. That's one single
gas on one side, but one on both sides. That's why you had
to explain it. Now, let's talk about
this dotted blue circle. This is actually very important. If you recall, let me just delete this
vertical credit card. Over here at the material
distribution chart, I actually have something called the x ray view. What
does that even mean? It basically means that
your eyes is seeing something underneath or behind a piece of leather that
you're not supposed to see. And behind underneath
this leather flop, there is a what's number a. Not number eight. What's
number eight? What is A? It is a ten millimeter
snap button. So underneath this flap, your eyes have has
x ray view that you can see a ten
millimeter snap button. This is how we tell the factory that on the
outside, you can see it. But once you open up this flat, you will see this ten
millimeter snap button, and on a three quarter view, when the flap is open, you will definitely see it. We do not draw this solid. We do it.it and some
company does it in blue, some company does it in green, or some company even, you know, does it in red. Doesn't matter. Just
follow your company's, you know, guidelines or you
create your own guideline. Just make sure you
actually communicate that thoroughly
with the factory. The next thing I'd like to
talk about is the spine, the depth of this wallet, because I am adding a zipper
zipper around closure. The zipper tape itself will have width or depth
in this case. So I give it two centimeter. That is enough of a depth for everything
to close up nicely, and also to give enough room
for this coin pouch gate to expand and hold
as much coins as possible without
looking super bulky. Now, as you may recall
from the previous video, I talked about how my friend's
wallet was really smart. He actually cut
notches over here. So when you fold the wallet up, when you close it up, there is minimal wrinkling
increasing of the leather. In my case, in this
particular design, instead of cutting
like a square notch, I actually just kind of
redesign it so there's a very nice curve going
up and down the spine. I do it on both sides. So, yes, so this is something as a designer you can also
take into consideration. So, unfortunately,
I no longer have a sample of this wallet,
I wish I kept it, but it has a very smooth
opening enclosure when you zip it up
and when you open it up because we took
into consideration of making sure that the leather over here
doesn't bundled up, bunched up when you close it. Now, let's talk about
the zipper pole design. So this is actually what I designed for this
particular client. It was a lot of fun. If you want to go into
zipper pole design, because it's very much part
of the brand recognition. Your logo, your zipper pole, should represent your brand. This is where you can put
a lot of brand DNA to it. For this particular client, I decided to do a folded zipper pole tails
with a little stop. This is how detailed
you need to show it. You need to show the front view. You need to show the back view. The last design
feature I added is this back pocket
with a thumb hold. So what does that mean? This is literally
where your thumb were going and then dragged out that subway metro car or your bus pass or whatever it is that you will
put it in here. If you just made this
all the way across, if you cut this
piece of leather, just straight cut, it's fine. But adding the thumb pole, it's just a nice little touch that will set the wallet apart. Okay. Next, let us talk about
how to add measurements. This is very important. Obviously, you have to
give it the height, the width, when it's closed. The total width, when it's open, we talked about this before. We also talked about the spacing between the credit card slots
and the bill compartment. But there's another thing
you have to talk about. If you add any pocket, you have to tell them the
placement of the pocket. And how far down from the top edge or how far
up from the bottom edge. Usually, you only need to give one measurement either
this one or this one. In this case, I don't know
why I gave it to you, but I did say. It is what it is. If you have anything that's circle based, like
the stump hole, you have to give it like
the radius or you had to give it diameter however you measure it,
keep a consistent. If there is any
interesting stitching. Like for instance,
the tax stitch, then you have to add that. I normally do not repeat
things like, for instance, if I already have the
height over here, I usually don't do it over here. Again, I think I was being
over zealous because this was a brand new customer
I was working with and then a brand
new manufacturer. So I just want to make sure
they don't miss anything. So yes, so there is that.
5. Long Wallet Tech Pack BUilding: Last one, at least, this is actually a long wallet, also known as a classic
continental wallet that I did for another customer. So I did it at a
three quarter view as per day request because
on the line sheet, everything is drawn three
quarter view. No problem. This is also done up to scale, and the color chart
denotes the body material, which is black pepper leather. And the lining material, which is not pallet, you'll
see in the next page. They wanted to use their signature metal zipper
polar. That's their design. Absolutely, no problem. And then they wanted
the logo to be at the bottom corner.
Absolutely no problem. And then they just wanted me
to write like a generalized, you know, simple dimension
for the wallet here it is. It's also zip around.
There's that. They have a very
specific way of putting together a bill of
materials, BOM. So I pretty much follow There's specs and went
through all of this. So body material, like we talked about black
pebble leather, and then lining material is
actually leather itself. It is not in any
fabrication. It is leather. So in order to
differentiate that from, let's say, you know, the usual you know this dotted line that we
use for fabric lining. In this case, I just basically assigned these this
particular orange color. Now, the hardware finished, they wanted it to
be shiny nickel, so that's why that's
a shiny nickel. There are three
different types of hardware they will be
using local plaque, media exterior zippo, and a
small interior zippo pole. So this is the medium
size one. All right. So don't worry about the
tooling that basically means that they will be opening
modes for these two. They need the sample ASAP. In terms of stitching, thread, color, it's all
regular, regular DTM. If you have seen my
class number one, ten pack design, ten pack one
one or something like that. I can't remember the
name. It literally means dye to match. So you die the color to match, whatever it is, you
want them to match. Last one, at least, usually for the main closure,
exterior zipper. If you work with zipper, you know zipper comes in sizes, basically how big the zipper
track is going to be. For the main closure, we want to use a number
that they assign, which is T five,
number five zipper, and the interior we'll use
something small, number three. Edge finish, it will be
painted, not turned, and then it will
be died to match the body color. All right. So first of all, the first view you do is
from view. It's very simple. You have to give it the full
length when it's closed, zipped all the way
up, the height. You also have to know what is the corner radius over here. Some people like it very round. Some people like it
just a tiny bit curved. You should show the side view, what is the depth of the wallet when it's
zipped together. You notice that I actually put the indication line towards the inside of where the
wallet actually starts. I didn't put it from the
edge of the block line. Reason being that this
edge from here to here, that's literally the sickness
of the leather itself. So depending on what
type of leather you use, this sickness will change. So you shouldn't
measure from there. You should actually measure
from the total width of the zipper tape that's
going to give you the actual depth of your wallet. So now, this is the bottom view of this wallet when it's closed. Now, so the bad view is the
same without the logo place. Sometimes the front
and the back is literally the same that
I don't want to waste paper because I'm drawing all of this all of this up to scale. So I basically just say that bad view is the same just
don't at the logo please. Finally, we made it
onto the last page. Now, we're talking about
the interior open view, the most important view. This is also drawn full size, so then the factory can
literally just print it out and then start making
their paper pattern as is. They don't even
need to resize it. The first thing you'll
notice is that the lining is nape in this
orange red color. Because it is completely
made in napa leather, it will be expensive. As a result, I decided I don't
want to paint any edges on the interior to save on the paint cost and
also the labor costs. So I said all turn edges unless otherwise
instructed on the inside. If you ever see anyone painting the raw edges
of a piece of leather, it's a very labor
intensive process. It's literally a
guy sitting there, either using a paint
machine or a roller or even a brush to paint the thinnest part of
the leather edge. And because this whole thing is already costing so much money, I'm just trying to help
save a buck for my client. Now, we have this entire
length to work with. So I assign a credit card slots, one, two, three, four, five, six, seven, eight. This one is where you can
actually put your photo ID. There is a silver foil
local stamp over here, but I took it out, you know, to protect the privacy. And because we have so
much lengths to work with, all the credit card will
be going down vertically. The first slot happens 2.5 centimeter drop
from the top edge, and then I space it out
by 1.5 centimeter each. So there's a lot of funny little algebra math
going on here. I also said, please add he crease 1 milliliter
from the edge. Now, at this point, you may ask, where do I put my dollar
bills. Very simple. Sideways. So there are one, you can go underneath
this entire panel or two, you can go underneath here. And there's another one
behind this z coin pouch. Remember, I was telling you
for the Zig coin pouch. I hate putting it on the inside, but everybody seems to
like it, so here it is. I put it on the inside at
the request of the customer. But it is such a low coin pouch. I realized that I need to control how much coin
people can put into it. I don't want it to be so bulky because there's so much room. So what I did was I
literally only added one single retractable
gast here. I did not add it here. So
this is literally flat, but this will open up when
you unzip the coin pouch. So all your coins will basically majority of them will sit over here and some of them
will sit over there. So it's like I give you not
volume, but at the same time, I restrict how much
coins you can put in there so that it doesn't make this long wallet so
bulky when you zip the whole thing up and it can
get really heavy as well. I just, you know, as a designer, you had to think
through, you know, the entire functionality,
and then you also have to think through
all the possible problems that could happen. When you have a wallet
that can hold a lot, that wallet is the
first one to go. It will die within a
year's time because men and women will fit
their entire life into it. So you just have
to think through. Now, another thing is
that, as you can see, I did cut notch on this one. But I redesigned the
shape of the notch. So there's a nice little curve where the zipper tape ends, and then you give it a
bit of a straight edge width so that it
can close nicely and then the zipper
tape continues again. So this just goes
all the way around. Now, another key point
that you should remember is when you give the
width of the spine, which is two centimeter here. So two centimeter over here. If you decide to add any
type of compartments, it could be credit card slots, it could be build compartments, make sure you give it
a tiny bit more root. You need to reseat
a little bit more. It could be five millimeter, eight millimeter, 1 centimeter. Then you start your slots, then you start your
built compartment. Do not ever make a pocket literally right on the
edge of the width, the depth, I'm sorry, the
depth of your wallet. Because when you
close this wallet, whatever you put over
here is going to start pushing
against your spine. If you look at a
horribly made wallet, you sometimes will see literally sees pushing through over here. That's because they make whatever compartment pocket
too closely to the spine. So however, however,
deep your spine is, if it's two centimeter, start the pockets, the slots, maybe receding another five
millimeter or even better receding another 1 centimeter or eight millimeter to
avoid that problem.
 Stella Chang, Retired Handbag Design Director