Transcripts
1. Intro: Good morning, good afternoon,
good evening, everybody. Welcome back to my
class, Stella, here. So today I would like
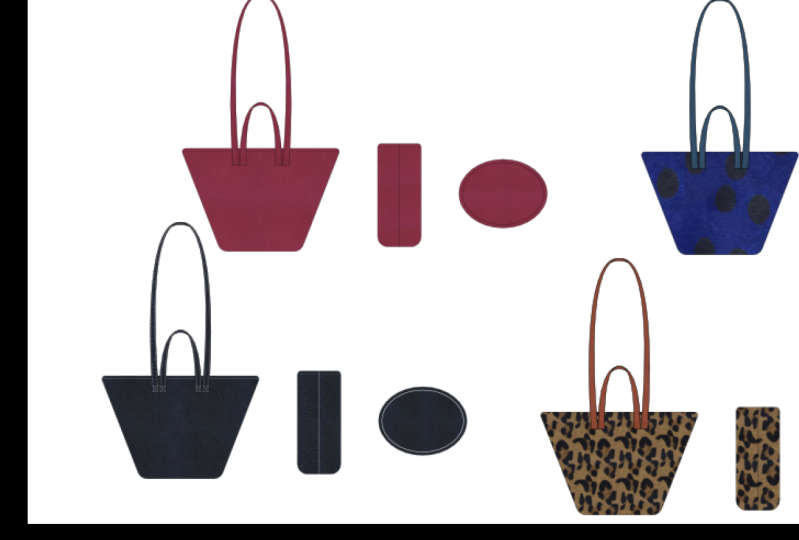
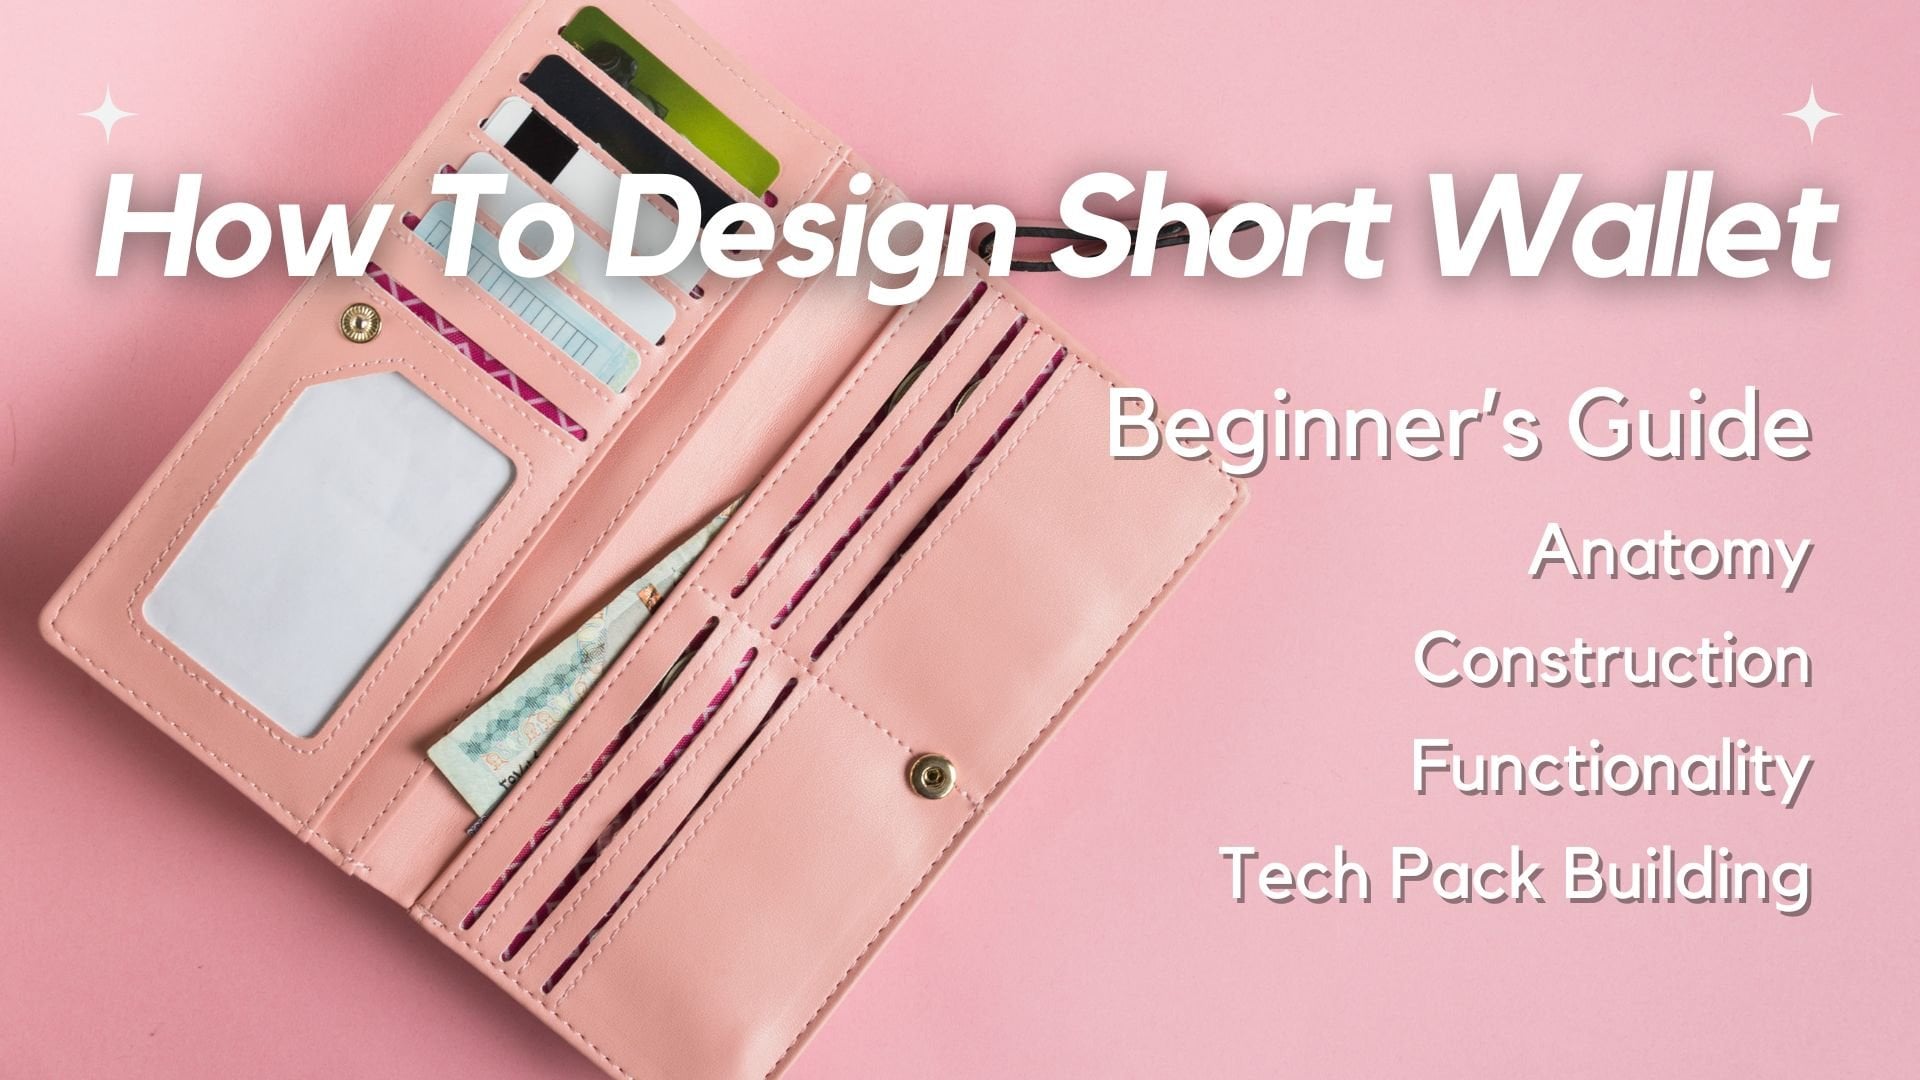
to show you how to create full-size concept cat. And there are four silhouettes
right in front of me. Tote bag number one. Number two, a straw
bag number three, which is essentially
a tote bag as well. And lastly is the cosmetic bag. So very often the type
of design requests you will receive is literally what you see right
in front of you. Someone will send
you an email or memo memo and says, Okay, so I would like to see
how bag number one and number two will look
like at its full size value. And then they will
give you some sort of a sigh and bottom construction so you know
how to create them. So right here for bank 1.2, we have a t seem, so basically T
bottom construction, which I will show
you how to do that. And some sort of a size
of reference that we can scale the actual cat
up to this size, which I will also show you how
to do that if you haven't. There is another video where I show you how to
draw a full-size. Please look that up before
watching this video, it will make so much more sense. In that video. You will also learn how
to set up everything in metric, not Imperial inches. We do not draw in
Imperial inches. And in that video, I also explain why
that is the case. This is pretty much
the industry standard. So we measure in metrics. We also draw in metrics. And how did I set up
the toolbars here? All the panels over here
is all in that video. How to draw a full-size TO
please watch that first. Now, for this one, this is all I got. Apparently this is
a reference size. A team member fam on eBay with the link plus in
centimeter is this tall? And top basically means in
this case the top width. So from here to here
is 55 centimeter Y. So which basically means I will have to
proportionally figure out what the bottom width
and the depth well-being. Now lastly, the cosmetic
bag is fairly simple. All we need to do
is just follow the 9.75 inch to 7.25 inch. And I think this one
I want to say she said There are no
GSA is a flat base, which means that there's
no bottom as well, which means that it
will be insane insane, insane construction
or around the front and the back panels as sewn
together and that's it. And turn inside out, just like sewing a
piece of Garmin. So, okay, let's get started.
2. How To Interpret Reference Image & United Conversion: So the first thing
we're going to do is convert inches to centimeters. So open up your Google and
just type inches, two cm. Alright, here is
your calculator, so it's not that hard, is it? The first thing I
need to do is typing the number 12.25 is the height. So let's do this trial. 0.25 is the highest, so that's about 31.115. Honestly, the 115, so little. I'll just keep it at 30, 1 cm. So this is actually
what I'm going to do. I'm going to copy,
paste this on the side. And I'm going to do, sorry, 1 cm height times 11. 11 ". That'll be 27.94. Obviously,
27.9 is very close to 28, so I'm actually going
to change this to 28. Don't always have to
work in full numbers. There's no such a rule. It really depends on the type of design and the proportion
that we're talking about. In this case,
working whole number might be easier for the total. So that's the reason why
I'm rounding things up. So the next one, the debt
will be 5.25, okay, 5.25. That will be searching
pints three. So let me leave
this three because 0.3 is obviously
larger than 0.1, so you will visibly
see it with your eye. The points 313.3 cm. Perfect. So let's read this back. 1.2 shall have generally the
same size, so same thing. Okay, both TC, alright, Okay, so we got this done. This is 35 in metric
already 55 cm. So I don't have to do conversion of this null as to conversion of this little cosmetic
bag knife 0.759, 0.75, that will be 24.7. Do I want to run off
the 24 by seven to 24, find a you know what, let us do that 24.8 and then 7.25, 18.4. So that's 2.4 centimeter. Okay, So this is
actually the width. And then, whoops, sorry, this is actually the height. Okay? So generally the rule of sum when it comes to
creating full-size cat is you don't have to overdraw all the views as compared to
creating a technical spec. Because in technical
spec you actually have to draw everything
out like top view, bottom view, side view,
three-quarter views. So the pattern maker
can actually see how every panel is so as
connector stitch together. In this case, the
purpose of using a concept cat is really
for the rest of the team, the sales team to merge
team to production team, to kind of get an idea on how this bag is going to look like. How big is it gonna be, how small is it gonna be, and how well can they sit together with the rest
of the collection. So it's really like a first-stage initial impression for the whole team to start, to have a discussion
about it and to decide if this is the right
style, the right size, the right silhouette they
want to move forward with before you start
the technical sketch. On this note, I
will have to say, and I said this in
the other video. Not every single company bothers
to create full-size CAD, but it is a very
good skill to have. Because what has happened
a lot in the past is, let's say the designer
created this toe just literally free hand with zero regards to the
actual size of it. And then what ends
up happening is, let's say the sales
than the merge, the cytokine will make the pocket bigger,
smaller at this. And then once you go into the technical specking or the tech pack making
development stage, people start to notice
they couldn't fit, let's say the pocket
on the front because the front in reality is
actually too short to Y2. This today, It's
always good that you start the whole
design process. Full size scalp value, you draw everything up
to scale so you can really see how this bag
is going to be light. And when you start
to make changes and revisions, you know, your arm pointing
versus everything looks gray with zero regard to, let's say, gravity and what's
the Edison proportion? And how things will
sit on your shoulder, blah, blah, blah, blah, blah.
3. Tote 1 Tutorial : Okay, so let's
start with bag one. So drag everything
out of the art board. So it's not in our way. Let me just put a here. And if you don't know
how to resize our board, just basically select
the art board, go to Documents setup, and go to Edit Artboard, and you see the bounding
box and then you can make this as big, as small as needed. So right now, I'm just
going to keep it like this. And then we'll go from there. Make sure you have
your ruler out along the sides of
this workstation. So the hotkey for that is hold
down command and press R. So Command R comma r. So it will go away and
it will come right back. Right away. I'm
using a MacBook Pro, so maybe for PCs, different. I'm sorry, I don't know
what the Cauchy is for PC, so you will have
to find that out. Alright, so let's how we actually create full-size
CAD using a reference photo. I'm not really sure where
the reference photo is from, but the first thing I would
do is I will scaled it up. This is the right
scale, most likely not. After I scaled it up, what I would do is I will try to find a bounding box for 30, 1 cm in height and
28 cm in width. Okay? So just by
looking at it, 30, 1 cm height most likely includes drop length
of the shoulder bag. So it's this entire height. We're talking about. The way. Here's the thing. Most company measures from the top width then followed
by the bottom width. So right now, I don't know if the 20th centimeter is at the top with what talking
about or the bottom was. So what I'm actually going to
do is to do some guesswork. Either way, let me
create a box in red. My apology, my hand hit
something on the table. So let's create this in red. Let's also make the
stroke kind of sex so it's easier for
us to see it 0.07. Okay, so next thing
we're gonna do is I just zoom out so I can see
the entirety of the images. I'm using a standing desk. That's the sound you're
hearing when I'm moving my desktop and now, alright, so here is the width. When you create a box, go up here, right next
to the shape type. What was plenty a, and the height is 31. Alrighty then, so you
can see the shape. Most likely 28 centimeter, will be the top width. Because if it's
the bottom width, that means the top
width has to be even longer than 20, which is fine. If you're trying to make a
ginormous bag, then go for it. But looking at measuring
tape in real life, which you can't
really see it here. 28 centimeter looks more
probable as the top width. So yes. So as you, you are deciphering
the dimension of your bag. You also had to use a
measuring tape in real life. And just kinda I it to see, does that make sense for
the 20th centimeters to be a top width
or the bottle was. Alright, that being said this I learned when
I first started, is when you have a
reference photo, and that's a
relatively good photo, you literally line it
up to the bounding box. I'm going to lock
the bounding box so I don't select
it by accident. So the way you line it up is you select the bounding
box and then you press and hold Command plus
2k and then you lock it. So what happened is
all I can do is drag this reference image
back-and-forth. But I can't select this bounding box because
it's being locked. If you want to unlock anything, just go to Object, Unlock All. And you can unlock
everything anyway. So let's come back to
this and let's make sure the edge oh, the side and the bottom
are just sitting on top of the red box and I'm
going to just hit it. There we go. Okay. So now we are going
to press Shift, hold it down, and we're going
to drag and enlarge it. I will explain them,
Momo, what I'm doing. So I'm proportionally,
now's the moment. I am proportionally
enlarging this. So at the bottom and
the side of the bag, what touch the bounding box. Right. Let's just make sure I will
touch as much as we can. Okay? Yep. That looks right. Now.
I'm going to lock this. So again, select
the entire image, hold down command and
press number two. There we go. Alright, what do you see? Almost right off the back. You realize the top part of the shoulder strap exceeds the height of this
red bounding box. Why is that? When you measure a bag, some people prop up
the bag so much. So the leathers, in this case, I think this is swayed. So whether you're working
with swayed or leather, there is flexibility and
elasticity to that material. So a lot of times, depending on how
many times does bag has been propped up
to be photographed. The leather and the Sway
will start to expand. And this is what you see. And also don't forget if
you ask some fillers to the bags body to prop it up so that it can
stand on its own. That will also affect how the strap is being warped and photograph
at the same time. So what we have found is that 80% of the time
the measurement in the overall size
of the bag listed on the website
never really match. So this is when you, as a designer, had
to sink us through. How do I do this and make
the right judgment call.
4. Tote 1 Tutorial Continued + T Bottom Construction: Alrighty. So the next thing I'm going
to do is I just zoom in. Make sure you use the
pen tool and make sure that it is not
filled in black. Let's make this unfilled
with black line. You don't want to know,
let's make this into a really nauseous green lines
so you can actually see it. And let's also make
this like that. So this is the first
thing I'm going to do. I'm going to copy. I'm only
going to draw half of this if you've watched my
other video about how to draw a full-size TO, you'll see why we only do half. So let's just start right here. Let's just kinda follow through. So I just I all right. Can we see? Yes, we can see. Let's make this brighter
so you can see better. It's like a Christmas tote Right now we're looking at alright, so do you see I just copy and
traced half of the shape. It's okay if this line a little bit wider than the
actual photo itself, because this is only for your visual reference of how the Sway will
eventually drape. So let's select this, press down Option and hold. And you see the
double arrow showing us that basically
means duplicate. And I do apologize in
my previous video, I keep saying that word wrong for some
reason I was tired. Now, drag it out. Now. Do the hockey oh, and then flip it. So this is mirroring
and measure. This side touches
a bounding box and just measure because
I'm paranoid that this is fully aligned
on top and bottom. Next thing you do is you
select this press Command, hold it down and j, it will close the
two holes on top. And then also select
these two points, 0.10 point to select both. And then press Command, hold it down and press J. You see how it close it up. Now, do you see these
two little circles? So the double circles
basically means corner. So you see corners right here. Now there's no corner
radius is at zero. To happen. If I change this
to one, it rounded up. Some companies, they
want the cat to be as realistically
drawn as possible. And as we know that
when you sold leather, cloth or anything, there's no such thing as straight edge. There's always a slight corner. That's just how
the machines bill, how you turn in the
material will look once the stitch goes down. So as a result, I always measure my corner
is not 90 degrees sharp. I always round it up. In this case, we're going to
do exactly the same thing. Okay, So now the next thing is, I am going to fill
this up there. You just got your
very first from body. Now, we need to do
something about the straps. And I realized there is actually
a note about the strap. Replace above straps with
flat straps should be large. Ish. Large ish. Okay. So they didn't send
me a size reference. So I am assuming large ish is
probably larger than this. Slightly smaller than that
or about the same size? Honestly, a flat
strap is very hard to wear on your
shoulder and stay there when they are very wide. Anything beyond like
a five centimeter gets difficult to stay
on your shoulder straps. They just kinda keeps sliding
off of your shoulder. So I'm gonna go with
my better judgment. I'm gonna make a
five centimeter. I feel like that's
kinda like a mask. Unless the customer tells you now make a wider than
you did your part, just let them know, Okay, It
will slide up more easily, but if that's what they
want, you'll do it for them. So this is already
like four centimeter. Maybe I will stick
to a four because phi will be so much
larger than that. Okay? You know what, I'm just
going to go with this. But instead of pinching
it on the top like this, I'm not going to pinch it. I'm going to make a flat. Now, remember how we were
saying that the strap kinda goes beyond the bounding box according to the
size that is given. From here to here
is only 30, 1 cm. Clearly the strap
goes beyond that. So this is what you need to do. Next. First, you, let's measure. The actual drop length on
the top edge of the bag. So from here to the bottom
edge of the straps. So this is how we
actually measure a strap, which is called a drop. And this is about there. So select this
ruler or guideline, whatever you call
it, while 13.4. So now I'm going to
rummage and look at my actual measuring tape. Okay. So it's a small bag. I'm going to make a
judgment call here. I am actually going to
lengthen this to 15. Okay. And this is actually
a good time up. You see what just happened? I add it to 15, but then the guideline actually extended at the bottom, but not the top. So I'm going to backspace, which is Command Z. And then I'm going to come
to this little grid and I'm going to lock the center
bottom this little part. What it would do is if you have watched my first
video while you type 15 because the bottom is
lock on the I'm sorry, the guideline will extend to the top versus
towards the bottom. So now this is the drop, the total drop my bag. So now the next thing
I'm going to show you is how do you draw this? So now let me actually make
sure this is centered. Alright, center. I'm also going to lock this. Now. A way to do. It ends here, ends here four
centimeter. You see that? When you have a
pen tool selected, when you line up, when you have the pen tool selected,
let me repeat that. Make sure you go to View, make sure you select Smart
Guides, snap to point. In a smart guy, you will actually see
when the points align. Illustrator will automatically
show you where it intersects the
line, center line. So this is what I'm doing now. So right here is
four centimeter. Then I'm going to match
it right here, here. And then pull inside the arch. We go, See that. Okay? So we'll do the same. Here is about, here you go. And then I'm going to oh, sorry, let me do a
slightly above that point. Okay. Then let me just adjust the
shape of the arch so it looks more realistic versus
strangely sticking out. That happens a lot. Okay, That looks
about right to me. Now, I'm going to
connect these two. So drag this down. And then remember
we talked about select those two endpoints and hold down command and
press and j. There we go. So they are closed. Now here I will have to do
a bit of, you know what? No, I could just
connect it like that. Easy now. And then you can see that the strap is being
overlapped by the body. So you have to do
is select the body, arrange, bring to front. There. You can see it anymore. Now let's fill this
up and see how it looks like Philadelphia. Okay. Let me actually oh, sorry. I just realized I left
the guideline back there. So let's just delete
that because I don't like random floating lines
and points everywhere. It actually slows
down your files, especially when your file
starts to get pretty made. So I wouldn't do it. Looks about right, but
something's not right, is this little bump,
if you remember, this little bump is the result
of the reference photo of this bag whose strap
is actually so into the forearm between the
front panel and the lining. So it's kinda like and obviously the thickness of the strap will push the front panel forward. That's why you see this
little almost like a little while not fall
like bump drilling. So in this case, what I'm actually
going to do a slightly adjust the bump so it matches the placement aware
strap actually is me. Just bring this down slightly. So then let's add a bit freehand drawing
or that looks awful. My apologies. I'm not using my stylus, I'm using my mouse to do this. So it's not as, as precise as the way
I like to do freehand. Freehand is brush. The hockey is be
just the letter B. Paintbrush tool you
see to be right here. So when you use a brush tool, pen brush tool, go to brushes. And then it has many different
types of brush styles. Because select, Let's do this one. I like
this one better. So what this actually is, it indicates to the factory and to the people that do a bit of a wrinkle going up on
the surface of this bag. Now, let us also fixed the arch. There we go. Okay. I personally like to make a strap a little bit thicker
than the rest of the body. So it stands out more. Some people don't like to do
that, that's totally fine. So what am I doing now? Holding down option
Duplicate and then leave it, select it, press 0, which is to mirror. We go and then let us put a Misha will meet in the center. Now, let's also do the
fixing of where the bomb is. One other wrinkle,
whatever you wanna call it, is going to be, let's just lower this a bit more so it doesn't look
so exaggerated. And then saying with
this duplicate mirror, when a factory sees this day
on the standing leg is soft because only soft material
will create wrinkles. It is not so structured. Alright? You just state
your first silhouette, but what are we missing? Stitch lines. Okay. When it comes to stitch
lines, oh, actually, my apology doula allow me to backtrack because see
what's happening here. You're supposed to the
underside of the strap. And I didn't draw it because
I forgot. That's okay. Come back here. Do a straight line. Come back here. And because this is the on the site when the strap is turn, it does not need to be drawn exactly accurate mean that it doesn't have to be drawn exactly four centimeter because
when you tried to do that, it becomes let me add it. It becomes like this, like that, really sick. And then visually it just, it just doesn't make any sense. Unless your company
tells you to be 100% accurate, then, okay, fine. Give them what they want. So in our case, what you do is a line that makes sure it looks like this and then
you can make this. Alright, good. So
that's good enough. You can see that's clearly
the underside of the strap. And then you give
shoe that depths that three-dimensionality of the strapping turn on the other side when your
hand is holding it. Amazing. Now coming back to
adding stitch line, this is extremely important. It drives me insane
when people don't do this while it
drives the factoring. Same because again, even
though this is a concept cat, in such a stage, you'll need to be able to
effectively communicate all the right information that will eventually be approved, confirmed by your team before
sending it to the factory. So the way to determine the stitch line is you need to understand why material
I will be working with. Original reference image
shows a sway back. But if you look at the
note that is given to me, shape as above in Canvas. So it's actually canvas fabric. It is not leather. So what that means is all
the edges that you see here, we turn edges like how you turn the edge when you saw a
piece of cloth together. So we don't see the edge of
the cloth and the fibro, the class does not fray
when you don't turn it. That's how we finished the edge. When you work with any fabric, you can always add
leather binding. But in this case, I didn't see any requests for
leather binding. I didn't see any added knows about they going
to use leather trims. So I'm going to assume
this has gotta be a completely canvas fabric bag. So the first thing you do is
you select this entire body. And then you had to
add the stitch line by going to Object Path. And then you need
to do offset path. You see what happened. You offset the past by
0.3 528 centimeter. Does this with default,
Illustrator has, I don't know why
they sent us this. You don't have to worry about. It just joins I'm
meter, leave as is. Watch my other video
on how to draw a full-size TO where I explain the gauge distance
between the needle. And the foot of the
sewing machine is about 0.25 centimeter or
2.5 millimeter. Did you see what just happened? So let's do this again. So this is the original
silhouette of your bag. And then when you
added the offset 0, this is not a St. it creates
a line on the outside, this secondary line on
the outside of your bag, but this is actually wrong. The secondary line
is supposed to go onto the inside of your bag. Because as you stitch
to stitch line onto the bag now on the outside of the value
doesn't work like that. So how do you bring the secondary line onto
the inside of the bag? You add a minus. So
anything that has a minus, that means the offset line, the path goes onto the insect, anything that's a positive, it goes on the outside. There we go. Now
it's on the inside. Great. So what do you do? You go to Stroke. You go to dashed line. Okay. And then you look, the stitch line looks
very long, very big. It doesn't look realistic. The SPI would do is about six. That's the standard for bags, but we sometimes will make it larger or
smaller or whatever. So visually you just add it. Let me bring this down to 0.3. Okay, it looks a
bit more realistic. What about the gap
in-between each stitch? Let's try 0.2. Okay. I'm, I think I'm
liking a Bezier points three still looks a
bit too long for me. So let's do 0.25. Now, we're talking. They show the cap and corner is rounded because if you look at any of the stitches that you have on your clothing, your NO. Your bag usually has around. That's because you use
a ROM point needle. You can use the sharper one, which is a whole another class
we'll talk about before. Now, does it not look
more like a bat? But here's the problem. This stitch line goes all
the way around the back. But anyone who has any
sewing experience, you know, that's
not How back is. So unless you purposely wanted to design the construction
that looks like this. In our case, that's
not what we want because let me just unfilled
this so you can see it. Let me also on fill
them up silhouette. If you look at the
original design, they are no stitch line
around it except on the top. Because you are stitching
the psi as the insane. Which I will show
you in a moment because we're going
to draw the sides. So this is all you need to keep. So what I just did
was me backtrack. I use the scissor, which is the Cut tool. So the hotkey for
that I see press C, cut the anchor, cut it
already cut that one. Just delete the rest
that you don't meet. Their perfect. We're gonna do the same
with the shoulder strap. Now, with the shoulder strap, we selected this
particular brush. Let's go back to the basic, so it's easier to
create the offset path. Now you can select all three. So this, this and then
go to Object Path, Offset Path, say that
zero prime to phi. So mimicking the distance
from the edge that will actually happen when you put that piece of fabric
on a sewing machine. That's how far the foot
the fabric will be. Alright, So I'm cutting all
these anchors open. Again. The hotkey for cutting, see, I'm cutting open. And I'm going to mention
none of them fell. So I'm selecting this
and then I'll fill them. Okay, you can do the
same as Y on Fill. Fill. Perfect. Okay. This one is still. Oh, no, this one is still. Okay. So we do exactly the same go to stroke, select dashed line. Okay. We don't need the bottom part because this strap is
inserted into the bags. So let's get rid of that. So select, press down, Shift to do multiple select. And then you can do eye drop hockey for that
is the letter I. And just click on this. There we go. Now we're going
to fix this part. What's happening
here is that because this twist and turn the strap. So technically this this part of the strap goes
towards the back. So you won't see the
stitch line because the stitch line will literally
go towards the back. But you will see the stitch line because it stays in the front. So you just had to kinda make it look like
it's continuous. So now there we go. Just had to clean
it up a little bit. Devil's in the detail, isn't it? Now we go same with this. You got to bring this to
the back because that's where visually your
strap is going. So what's happening
is this is too long. Let me just delete this, okay, so this technically is
this, this technically. So there is a perspective
going on here. That's all I'm trying to say. Now, let's just select it. The silhouette of the strap. Let me go back to
brushes and make it, Was it this one that I select or was it this one? Was
actually this one. Yeah. Now if you look at it, you got your first
from Look done. Now let's clean this
up a little bit. Let's go to Object Unlock. All right, now let's just drag this somewhere else
outside of the art board. Let us also get
rid of this drop. Let us get rid of
this bounding box. Let us also make
this a little bit. There we go, more visible. So now when the rest of the
team looks at the sober that, Oh, this is so cool. Let's try go to swatch. What would it look like in this color while what I
look like in that color, you guys can even add textures. So that's how you do it.
Now, usually in concept cat, let me actually just type this. I should have typed
this cat for size. There we go. That's made this huge, just so no one
will mistake this. There we go. Now
we're in business. Let's lock this first. So select everything. Right-click Group. Okay, let's put it here. How do you create a
backside? Okay, hold on. Option. Duplicate your doc. Unless you want to add
a pocket or anything, then you can just
add the pocket on the back or anything
else you want on a bat, but pretty much
this is your back. I'm going to drag the size
here so everybody can see it. I'm also going up, sorry. I'm also going to
give it a title. So this is the Fromm. Let me make this bold. So no mistaking if
the system back. Alright. So I also got a
request saying that I want to see the psi
because remember, it's a T C. Alright, so side, how are we
going to do this? This is where we need this
measurement searching 0.3. We already have the
highest speaking out, which we only have
the total height, which already went beyond 31. So let's redo this. So this is, you select the body. This is, let me see 28
top width, That's right. 17.6. Alright, so technically
the height is 17.6. Oh, sorry. Body height. Okay. Well then I add the drop. I should not have deleted
a guideline, but I did. It's okay. We'll
create another one. So the bottom most part of the strap on to the top
most part on back, 15.3. See this? 15.3? So I will write it like this. Shoulder drop, 13.6 centimeter. So this is the final dimension that you will update
for your team. So no one is
confused about this. I will also just
double-check bread. So remember this has to
go on to your shoulder. If not, they should've
let me know. So the way we measure
spread is from the center of the strap to
the center of the other side. So that looks like
about the center. So we're looking at 14.64, 14.6. So the spread is 14.6. So this is when you need to use your measuring tape in real
life to measure all the 14.6. Why did it not to go
onto the arm hole? Just like closing. If it's not wide enough, then you had to just make it wider or you can make
the drop longer. The rule of thumb, again, watch my other video
how to draw a toe full-size is that if
the spread is not enough to go onto the shoulder
Alice made to drop longer because when as longer is further away from
the rest of the bag. So then there's a greater
chance that your arm hole can go through by if the
spread is wide enough, you can afford to have to drop a little bit shorter anyway. So that is what it is. So now we had to do this. Okay? That's all. Some people get a little bit confused when you start to
change the sizing like this. So if they're comfortable, if they want to know
the total length, just select all,
see, top to bottom. Now we have 32.5, so we really just
increased it by 1.5 cm. So you can do total height. Social profiles, CM, That's it. So you have all your
measurements perfectly done. Next thing we're gonna do is. A side view so we
know this height. So what I'm going to do is
to use the guideline from your rulers on the side
of your workstation. So basically select anywhere
over here on a ruler, whole drag, you just see
that line, that dotted line. I just dragged them a measure. You match it right in the
center of the top edge. I can't see the
Zooming. There we go. So it's aligned with
the top edge of your bag and lock it,
Command, hold it. Plus two. There we go. We're gonna do exactly
the same thing. For the bottom. Let me just, okay, that looks match. Lock it. Now this is the
height of the bag. Next place of your bag. Now we're going to find
the depths, which is 13.3. So in this case, I'm going to do my
manual guideline. So just do a line tool. This one is aligned
to all you can do. A pen tool doesn't matter. Okay? So this is 18 point to a which
is too long, we need it. So take 0.3 centimeter. So that's how why the side of your bag is
going to be. Alright. We're gonna do a t
seem right here. Tc. I could do I like this, okay? And then I can actually lock, kinda zoom in so we can see if it's intersecting
was the anchor point. Okay. If you do go to
View Snap to Point, you drive this guideline is just snap it to that
point automatically, which is stillness or lock it, Command, hold it, plus two. There we go. Alright. So now a TC, basically it looks like this. Use a pen tool here. And I don't really know how wide the top width of the
gas is going to be. So I'm going to use
my better judgment. I'm gonna give a two. If you look at those
bags, it's about that. So let's make sure these two
guidelines are centered. So I just centered it. Now, use the pen tool, the hotkey for that is P, as in pen tool literally. Then I made a mistake,
sorry to zoom in. I'm supposed to this
down there we go. Intersect because
that's how height. Okay. Okay. Yeah. That is your sign. A triangle or a
trapezoid really bought. It looks horrible and ugly because they're looking
at these sharp corners. They don't exist. Remember? So what we're
gonna do is fix the corners. So use this wide
Direct Selection tool. And the hotkey for that is a, and let's select this anchor. And then the double
so-called will show up. You click on the double circle, the corners, show up
and then that's 211. Seems pretty drastic. Let's do 0.5. Still two dresses you
apply three, okay? Now we're talking, what
about zero find true. Okay, so that looks better. We'll do the same
dress selection tool, select a double
circles, go to corner. Now at this point you
will be like, hey Stella, but then it's not
really touching a, you're losing the
depths you right? So what you do is select all, just drag it so that it
touches the guideline. Perfect. I'm even larger, create
a slight corner here. One. There we go. So it looks
more realistic in real life. Okay? Uh, take Gaza. Well, have a center in sync. So you sold the front and the back panel from
the inside out. After you finish
sewing together, you turn it over. Right? And then GST, it's a TCP. So which means that
there will be this a little at the bottom. Oh my goodness, my
freehand is so ugly today. My apologies. Okay. So it will look like that. Don't know what a T C or
T bottom construction is. Or if you'd have zero idea
about handbag construction, highly recommend you to look at my other class where I talk
about the handbag anatomy. And honestly, if you
have some old bags, just cut it open and
see how sewn together. So very quickly, I just want to freehand this is
going to look for, as you know, I'm not
going to France. So when you have
a T Gaza bottom, it literally means this. Okay, just give me a second. So this is a T bottom
T bottom construction. This is how the flat
pattern will look like. Okay. This whole thing is
this whole thing. This whole thing is
this whole thing. So this part with let's say this is the front panel you saw
with the system back panel, the bad parvo here. So you saw this, this together, you saw this and this together. And this little square
part is to T-shape. So you will fold this
bottom panel inward. And then you will so
this edge together to create this funny little fold
that you are seeing here. So in a nutshell, the pattern, the two flat pattern pieces basically will make a back
that looks like this. Now, watch my other video about the handbag anatomy
to learn more. But what I'm trying to say is that when we
create a concept cat, which will then lead to
a technical tech pack, which will then lead
to a pattern be created when a pattern maker looks at a concept
cat like this, they know, oh, okay, So this is a T
bottom construction. This is how I create
a bottom side. So one more time, you'd get, you know, you will get this top width. Top width, okay? Psi, psi. Let's say this is
the front panel, this is a fat panel. You sold this side. Together with that psi, you create this
insane on the side. This so-called master
called the square cut. You sold this to that
because so this two that, which will then create a bottom, was this funny little full. That's called a T
bottom construction. Already dead. So that's not a point
when doing this. It is the point actually. Next thing I want to show you
is this thick. There we go. So we can see, usually when
we do this side panel, we don't we don't draw
the straps again because all the information you need
for the strap is already done on the front
and back panel, especially for flatworm. If your strap is
actually cylindrical, has sickness or some sort of
interesting embellishment, then that's when you need
to draw the strap again. But some company they
expect you choose. So what do you do fairly simple. You could just do Literally, Sorry, the line, line
up and make us sick. How sick do you make it to be? The width, the fabric and
the width of the lessor will usually keep it
around 0.20, 250 until a. And this is a representation
of the side view of a strap. And now you're done
with the side. Usually for concept cat, we only do from backside. Sometimes we do
three-quarter view. But in this case,
this is good enough. So we're done with this bag. Yay.
5. Tote 2 Tutorial: Okay, Let's do back number two. But let's clean up the
workstation first. Very important. So let's
go to Object Unlock All. Now, do you see what
happened to the guidelines? Now they're movable. Just delete them. Delete them. We don't need
anything more than that. Now we need another art
board for bad number two. So you can go to art board panel if you don't have that panel
for some reason, go to Windows and go to
visual art board is selected. If you deselect, it disappears. So Mesha, There we go. So just go here, see this plus sign, just add an art board,
then you're done. Now, this is a cell
reference image. Let me also just concept cat. I mean, actually Jonas TO one concept is very
important as you work. You also stay very organized. Your label, everything so
you don't get confused. If your goal is to become a full-time professional
handbag designer, you probably will be working on, Who knows I 1020 bags at a time. So staying organized, this
is extremely important. So the notes I got for this
particular shopper bag, let's say pocket
only on one side. Okay, So we're talking
about this big pocket. Full leather strap is
about Canvas backing. Okay. So this is fall as a
strap, Canvas backing. Okay. I could do that. Inner lip was fresh
logo like okay, so this is, we call
this actually the zipper bridge is not
so much in inner loop. So a lot of times you
will work with people whose expertise is nine handbags
and that's totally fine. You just had to do a bit of a deciphering and ask
the right question. So this is actually
the zipper bridge, okay, So they want to
add their own logo. Should be large age. So again, in this
particular concept cat, I will create a time for
you to add the logo. Just see how big the logo can get before we run out of space. And the logo looks size is, it's like a D boss, a blind foil, Debussy. So yeah. Now another thing I
remember was when they said the size or back
2.1 are about the same. So I'm gonna come over here. And then I'm going to make this big so I can see what is size 0. And then I deleted that
bounding box. Oops, my bad. The strap is definitely a
lot longer than the 30, 1 cm we've been working with. So this is what I'm going to do. I'm going to copy
this, paste it here. I am going to delete the straps. And then I'm going to duplicate this
right out of the bag. I'm going to enlarge this. So at least height
wise is all the same. Now use the guideline. I'm going to speed up a
little bit as I work because a lot of the steps I'm doing
now will just be a repeat. Okay? So when you have two bags
and your client tells you they want it
relatively the same size, but clearly the shapes
are completely different. This is when you
really have to use your judgment call and then have to open up the dialogue with your customers so then
you keep them informed. This is clearly a east, west TO this is a
North South taught. So what I'm going
to try to get is at least the top with
relatively the same. So I'm just eyeing it. I'm overlapping. Okay. So right about that. I actually think this is going
to be a pretty good size. I don t think I'll make it
any bigger or smaller because most people carried
north-south toe to really put stuff in it. That's why this is
called shopper toe. So if I were to make this tow, let's say trying to fit the height just like
that east-west one, or trying to match the width, it might be too big. So I'm actually like this. And then I'm going to figure out what's the size of this and have a conversation with my client to see if that
makes sense to you. No matter what I do the height
of this TO will always be longer than that toe and they they kind of need
to understand that. Oh, I wonder if I were to match the top width
to 28 centimeter. How large would the top be? Too big? So I'm just matching
the top with us. Ginormous 20 a tiny a. Think about this at
this point, because. Shape is not the same. And I'm trying to
match the top width of this toe to this east-west tote. I don't know if
this toe is gonna be way too big
compared to that toe. So the next best thing
you should do as a professional designer as
you trace a fair quickly, which is what I'm
doing now, okay? And make sure you select this. And there's a reason
why I'm doing this. I will explain in a moment. You see how the toe is not
evenly drawn perfectly. I mean, photograph perfectly. I meant okay. So let's just close to
talk close to bottom. Okay. So let's just drag it
out a little bit longer. So let's see what's
the size of this? 28.2 is too big. Let's make a Tony, hey, by 23.28, 23.4. Okay, now you can't really
see me through the screen, but pick up your measuring tape. Now let's look at 28
centimeter top width. In this case, the bottom
is about the, say, 28 and the height is 23.4. 23.4. This is actually a pretty good medium-sized, sharper tone. So I am actually going to keep it because n is
smaller than this, it will be kinda hard to put a magazine in a better
way, a top light. This is also called magazine TO, it's funny how I literally
just mentioned magazine. I'm going to keep the sizes
this and I'm going to have a conversation
with a client and then we'll go from there. So I just very quickly
trace the silhouette. Next thing I need to do, let me just line it up properly. And let's also fix
the corners because the corners are a
little bit too sharp, which I don't like. That. I don't want oh, no,
I didn't want them to. So a lot of these is as you're designing your thinking
through the whole process, you're evaluating the size, you're making sure the
proportions right? You also think
about the function of this particular design. If you don't do this full size, That's when you run into
trouble because you didn't go through any of these
mental exercises. You're not avoiding problems. You're actually leaving
the problems to come help you during the technical spec in
development process. Alright, so let's
read this again. Shape is about shape as above. Pocket only on one side, only on the front of the bag. Folded the strap. Okay,
pretty much as that. Alright, cool. So I'm going to lock
this reference photo. I'm going to make us sick so I can actually see what I'm doing. Alright? So the first thing
it looks like, okay, So the packet
goes all the way down. Perfect, so I'm
literally just going to trace it because
this is already, the reference image is
already scaled full-size. So I can literally
trace it as is. I don't have to do anything. Don't worry about this fabric. You know, kinda like
tapering, drooping downward. When we cut the
pattern will straight. And I will just
let the weight of the fabric to drag
it down naturally, unless you purposely wanted
to cut a draping shape, then that's when
you had to redraw the size of the top of the
pocket to create a curve. But in our case,
we're not doing that. Now the first thing
I would like to do is fill this up so you
can see the pocket. Pocket goes all the
way to the bottom. And I do apologize for how pixelated images
when I scaled it up, but it looks like the pocket
has a role edge to us. Okay, So this is how
you create a row edge. First, direct selection
tool, select this corner. So 0.2 is too little. Let's do this. Might be too big. Let's do 0.5. Perfect. Let's do the same here. And then let's do this. One's quite true
because like I said, there's no such thing as
a straight edge when it, when it comes to sewing
fabrics, leathers. So now you have
created a little roll. Next thing we're gonna do
is we're gonna go to Path, Offset Path at the top
stitch and negative one. Yes. Perfect. And remember you
can do eye dropper. I'm going fast now because I'm literally repeating
everything that we just did with
total number one. I deleted that because
when you roll the die, your stitch line
will go with it. So much just make him around. So when I experienced
Pattern, Make a look at this. They know exactly they know exactly how to sell this pocket. This is a patch pocket
because it's like a patch. And then the bottom row
with the create that depth. Uh, so it onto the front panel, not before I felt this. Let's do the strap. Okay. So I just want to do my due diligence to see when
I scaled up this top image, how why does the strap
now? Why does that? I totally dismiss this. 2.82, 0.1. Let's make it three. That's totally make it three. Yeah. Okay. So I'm going to
lock this so it's not connecting with my
points when I draw. So literally at this point
you just go ahead and do a straight line and then just trace as
wide as you can. Know. This a little angle as bad. So I'm gonna just Oh, I caught up by accident. No. Daily goal. Now that's more like it. Also select this circle. There we go. Round that off. Close it, close it. J. Alright, so I'm
going to duplicate, which is hold down
your Option drag, drop and then press 0, which is mirror, knowing
all flip around. And then okay, I can see this size a little
bit taller than that strap, so I'm going to line
it up, select both. And this little lightning
tool will show up. Align Tool, sorry, not
aligning align tool. And then let's add a
line at the bottom. There we go. Remember what I said? It doesn't look like. There we go. The spread is enough. So now you have a
tiny little gap. What do you do? Easy. Let's do flip side the
strap and close it up. There we go. I just
elongate a line to the center to close
up that gap there. No one is the wiser. Yeah. Let me delete this. I locked it. Okay. I'll delete that later. After I unlock everything. At this point, I don't
need a reference images, so I'm going to fill up the bag. Now let's do stitch lines. Select all Object Path, Offset, Path measure
is negative 0.25. So the path shows up on the inside versus the outside
of your selected object. Now the first thing I'm going
to do is press C is caught. I'm going to cut open all
the anchor points here. Here. Here. Well, actually, my bad, I forgot how this is. They don't have a box stitch. I don't know if you can
see that, but okay. I still kept this open. When you have work
on this for years, it's like you can actually
look at the pixel later image and you know how
to interpret it. So it will come just with lots of practice,
you'll get there. Alright, so let's go close this up because it's distracting me. Now, I'm going to select all the stitch line that's
on the inside of the strap. And then do a select I, which is the eyedropper
tool I as in the letter i. Now we know. Now we just had to fix it. Remember, we talked about illustrator is really smart way back when and
when I first started. I don't even think there
was the Offset Path Tool, so I literally had to do all
the stitch line by hand. And let's just say,
I'm so grateful. The city has updated. Yeah. Sorry. Now, you know, I've been around enough of that. Let's come over here. Now. Let's unlock, object,
unlock all so I can get rid of that
little guiding line. Not me. Also select. Nfl does build up the straps. They get sicker. Now
you can really see it. Let's do the box stitch. So the way you do backstitch, how big do you want it to be on? Let's do. We Can I just 1.5
is pretty good. Then let's just
do an eyedropper. Just do it. And then it's literally
do a cross. We go. Okay, we'll do the
same over here. Make sure we use a ruler to make sure we
know where it starts. So it starts right here. Right hands just
go to the corner. Go to the corner. And I see that this one's a
little bit too long, so much spring back. You have your front view. Now let's do it, the backfill
and also delete this. Okay, so this is show from, I'm going to grow
the system back. We're gonna be working on. So it says, let me see. Pocket only on one side. It looks like it's
gonna be the France. So let's delete it and done. But not quite. Because remember,
this actually finishes. Like that. Needs to go. If you look at any bags you
have that has backstitch. Look at how it's done and
you'll see why I'm doing this. There we go. This
is your backside. That's also okay. Now I'm gonna make this
smaller so I have more space. So the next two
views we had to do, let me do the top view first because you have not seen it. Oh my goodness, I have
not saved any of this. This is quite dangerous. So let's just save it. I'm saving this on my desktop. You should do always save, just in case anything crashes. You don't want to cry over
it, you really don't. Okay, So the next thing we're
gonna do is we're going to show this blind DeVos of
logo on the zipper edge. So the first thing we are
going to do is we had to evaluate how y is the
top opening gonna be. We know the length is
fine here to here. How, why? So in
order to find out, we had to look at how wide the
bottom depths actually is, in our case is 13 by three. So I'm going to borrow this. I'm going to drag it here, which just let me
select so I can drag. I'm not going to
even take the strap because there's no ray. So you can see almost immediately
a line at the bottom. Lock it. Alright. Select all and then line it up. Okay, cool. Okay. So right off the
back, this is 13.3, which we established
was bag number one, and the height is nine. So what I would do is
I am going to drag, I'm going to cut this. I'm going to delete
the top part. So I have this line free
and this line free. And now what I'm going
to do is drag it up to match the top height. It's not really aligning with this one thing
while I go Lockett. Okay, Oh, it is a line. Alright, so if this bag, because I can see what's
happening on the side because there are no pictures to show me what's happening on the side. If this bag, the top and the bottom depths
are both searching pi3, it will look like this. But because I can't see it, I can only use my best judgment. So look how your toe how
does that really look like? I know for sure I had to have enough depths for me to add two pieces of the zipper bridge. So maybe instead of
searching 0.3 on the top, maybe I'll scale it down just enough for me to add
the zipper bridge. So what would that be? Now, look at your
measuring tape and see a number that
makes sense to you. I think I might
do ten, actually. Ten, yeah, let's do ten. There's no right or wrong. What does top depths
is going to be. It just has to look proportional
and it has to be able to fit a functional zipper
bridge and zipper tape. So let me just do this so
I can see, let's do ten. Perfect. Oh, let me just make
sure this is actually because I grew up so I can actually center
align everything. Now this is center. Next
thing I need to do is bring this sound touching the
height of that guideline. And then there, join the
points, the anchor points. So select the two points. Command, hold it down plus J. Command J. Now move this, select
the silhouette, move it to the back. Okay, and then you
just have to elongate this insane so it
doesn't look like it's floating the
middle of nowhere. Okay. So that is dumped.
Oh, one thing I also realized I did not add is this. You just say this stitch line which is further from the edge. So usually when that
happens it's about 1 cm. It's like a pretty standard with so I'm gonna go with 1
cm on until they tell me no, that's we want it to be
closer or further away. And that's totally cool. So what I did was I just
double-click to tie-ins to get into the group TO and
isolate the front. And let me just do it. I mean, just, I drop this. There we go and make
sure you laid down. Alrighty. Alrighty. Okay. Let's do exactly the same. You can just leave Up to go. Immediately. I noticed something it's
crossing over the strap. So what you do is drag, select all the strap. Alright? And then right-click, arrange, bring to front and on the snow. I'm also going to group
the strap buy-sell. So Rebecca, There we go. Alright, so this is done. Next thing I need to figure out. Oh, before that, I also need to add this to that because it
goes all the way, right? So now I can just align it. You see how easy it is once you draw
everything full-size. It's automatic. You don't have to measure obsessively while I
do it no matter what, but you don't have to keep doing it because they already
set everything up. Okay, so now we establish
the top. Update this. So 28 centimeter,
top width, right? I mean, just arrange. Pop with time. 23.3. Hi, I'm searching 0.3 depths and then the
drop is the drop. Yeah. Use the line tool, top edge of the bag all
the way to top edge, bottom edge of the strap. And this is 20 point for a, I'm going to round
that up to 25. 25, 25 dropped one. Perfect. Now we established
the top depths. Ten. Bottom remains Searching
0.3, so it's gonna be here. Therefore, when we
create this top view, it's going to look like this. Let's use a rounded
rectangle tool. I sit out a line, drag a line. Okay, So if you press, hold, hold, press and hold
your arrow key up. And now you press the up key, the arrow key, it rounded up the corner more and more
and more and more and more. So I'm going to
start right there. I'm also going to
do this line felt. So now I had to
make sure this is definitely 28 centimeter long. But in terms of the the depths, it should be ten, like
we talked about before. So now this is actually
the top view of this. You can make the smaller
or larger, doesn't matter. I can talk with a client
to see if they want it to be more narrow or
even wider than that. So it's up to you, but this will get the
conversation started. So the next thing we
need to do is we need to create a zipper track. Usually a zipper tape. Depending on how
large the bag is, it can go anywhere from 1 cm to two centimeter
events, three centimeter y. So in this case, how wide this is about
to, you know what? Let's keep it too. Yeah. Let's center this. So select both Center or fit. If you have seen any bags with this type of a
zipper bridge designed, a zipper tape is very low. So let's do that to
align to the left side. There we go. How long is this now? The total length
37.8. Nice to hear. I would like to give
it a whole number. So the first thing I would
do is not the shape. Let me select this. I will come to the grid, goes to transform and lock the left side because I
don't want this to move. I only want the tail to move in. A tail is on the right side. So let me bring this
down to, let's say 37. There we go. Oh, my apologies. Do not lock dimension,
your proportion. I want the height, in this case, the width of the zipper tape still to react to centimeter. So I don't want to change that. I just want the total lengths
to be changed. It's 37. Okay, perfect. So now what, what do we do next? Very simple. You need to draw. You'll branch. So the branch basically
is the piece of panel. This panel, It's
also called color. You add to catch the
zipper tape itself. So here's your tape,
Here's your branch. So how wide is this? Let's start here. This is actually maybe
it's 3.7 on each rule. I want us to catch the
beginning of this. And now I want us to
go all the way to the end of the bag opening. So immediately you will ask me, this is not around there. Is enough. Come here. Around the corner. I think it was three. Yeah. I think it was three. Definitely three. Do
the same over here. Okay, so just direct selection tool click on the
double circles, change your corners to three. And then in this case, let's add the Path, Offset Path, the
stitch line first. So I don't have to get myself confused is that it looks a
little bit different, so let's just drop it. There we go. Alright, so this is
bird's-eye view. Now you're looking from the top down at your bag. Alright. You see why the problem is? I know what a problem is. Let me just show you
what just happened. I drew the zipper bridge and
I realized, wait a minute, when I catch the zipper
tape, There's a gap here. What's going on? Well, this is what
happened when you did not do center line. Center alignment
is very important. You have to select these. Stay with all centralized,
see what happened. It wasn't the zipper tape
was neither in the center. So when I drew the
zipper bridge, it was the wrong width. There we go. So now
I sent her a lot. Yeah, it happens. You had to catch yourself
and it's totally fine as part of the process. Yeah. So my corners or
wrong basically. So let me redo this. Just use a regular rectangle, match the height and
the total length. Well the bag. And
then just make sure when you go to corners. Three. There we go. Sorry, there we go. And then we'll just
do the Object Path, Offset Path to add
the top stitch. And then we'll just
eyedrop this there. We just fix the problem. Now, group it and
then duplicate, which is hold down
your Option and drag. And then let's do
I've just press E. E basically just means
a free transform tool, but it also gives
you a rotation. I'm just rotating this. So e as in the letter E.
Let me show this is okay. So let's get rid of this. We need to add the zipper track. So here is a tiny zipper
track that I have. If you look at your
assignments box, there should be a free
downloadable file for you with lots of
zipper oxygens in it. But this is the
most generic one. It will show up under your
brush because it is a brush. And all you have to do is
just draw a straight line. May show Center, and
then click on the brush. It looks tiny, so let us. There we go. There you have it. Now the one last thing
you need to do is this. You had to close up
the zipper tape. If you look at any
of your bags that has a zipper tail like this, you'll notice that there's
a piece of leather that is added to finish
up the zipper. So we're going to
do exactly that. So let's see how wide is this. Let's just make a happy
little two-by-two centimeters square. There we go. There we go. Let's just measure. We add our stitch line. What happened to Object
Path, Offset Path. Alright, and I made sure
this is caught like this. Perfect. Now this is your top view. But let's not forget
the whole point of us doing that is because
we need to determine how large the logo can
actually go on here because it says the inner live with fresh logo like Clarence
image should be large. Ish. Okay. Since I never
got the logo, what I wanted to do is
do a logo placement. I'm going to type
logo there literally. And then I'm actually
going to use some sort of serif fonts, so it looks more ornate and
I forgot to select that. 2222. Looks fine. Okay. So clearly that's huge. This is at 7.42 pi. I have never seen anyone's
local that huge before. So let's lock the proportion
and let us bring this down. You know what, let
me just type fresh. I think our goal, so it's more realistic. And now let's do, okay, does this when you need your
measuring tape again in real life, Let's just look, I think six centimeter in
length is actually six. Okay, let's link this because it looks a
little bit too tall. So I will suggest to them, try to keep your logo
with a two by 66 by two. So six centimeter in length
and two centimeter in height. So I will just not catching
the oldest, right? Because now I go, I'm going to center the logo. Okay. So center it, see
it's not center. In case you didn't notice. I did not select the zipper tape. I only selected the
opening and center it. This is Nyman centric. We go. Now it's perfect. So let's go over
here a little bit. If I selected the zipper tail than the center of this
entire tail will be way off. So that's the reason why I
only selected the opening. Now, let's do that
and let's go pass. This bag is done. So you have the front, back side and the top view. Again, like I said, we need to be very organized. So let me copy and
paste data from psi. Here we go. Then this is the top. Then let's actually delete this. Put this down here as
a reference image, and let's unlock the guidelines so that not in no way and safe.
6. Tote 3 Tutorial: Next, bag number three is this beautiful woven straw back. So let's do exactly
the same thing. Let's add another artboard. It's very close to the edge now. So what I'm actually going
to do is Document Setup, Edit R4, drag it down. You see what happens
when I drag it. All the images on the art board. Basically, move, just swell because I
selected the symbol. Move copy artwork with artboard. If you deselect it, you just drag the r bar, the images will
stay where it's at. So let's just select this symbol again and
drag it and line it up. Right here. There is really no
standardized way of where you want to
put the art board. So it's totally up to you. I like to keep it here
just so that I could see the other two bags very clearly right above
me by some people like to work at
sideways, horizontally. I have seen people
working only vertically. So it's up to you how
you'd like to work. There we go. Oops, sorry. Okay. So because this
is our third bag now, I'm literally repeating
everything I've just shown you. So I'm just going to really speed through the whole process. I will only call out certain points that I have not done before in
the previous two bags. So let's get this. Baby started saying bag as
picture was saying materials, paul, new straw
and full leather. Alright, so sorry if
I see I'm taller, 55. Alright. So I don't really think I
need to see the website, but shifts and giggles. Let's just do it. Oh, hey, activate later. Sorry. Yeah, it doesn't really give me any more information than
what is already there. So here's the thing
about straw bags. It's a woven together by hand. And there's a very
specific way and pattern to straws can
be woven together. And usually as a designer, it is not all place to tell the weaver how to do it
because we don't know they do. And so what we would do
is that for the concept, we were literally just
create a silhouette. And then we'll
indicate that this is actually a straw bag. And then in terms
of the patterns, we can cut reference photos
for the weavers to see in terms of actually how to weave it honestly, when no clue. Unless we're trying as
a waiver, which one? So yeah, so that's just
my $0.02 right there. So I'm just gonna go
ahead and undo this. 55 cm. Tom's top means top width. Height is 35. Okay? So this is actually a good exercise for you to see how we make judgment calls. Obviously, this is the
upside-down trapezoid. The top is wider
than the bottom. So this is what I'm looking at. Top is 50, 55. So I feel like has
to be a lot smaller. Considering the shape, how much tapering There is going
on from what I can see, I'm going to try a couple of adjustments to see
which one makes most sense visually.
So that's 32.5. So I also use draw a guideline. Oh, sorry, my apologies.
Draw a guideline. So 2.5 and just center both center alignment.
There we go. It looks a bit tiny in terms of the bottom with
let's make a 35. Oh, sorry, you see
what happened? I have the left side side locks, so let me lock the
center so that the line works then on both
sides versus just one side. There we go. Then because I'm paranoid, I always sent her alive again. Now, let's select this corner. Let your students and see. Okay. Okay, alright, so
let's go back to, is there like a front image? No. Everything's
slightly slanted. I was hoping that I can get
like a full frontal image. This might be the closest. Really. See if I get the tapering
proportion right? Maybe 32 is right. 32, there we go. Yeah. Things like this. You just have to I it
unless you're able to get your hands on a
actual sample. Okay. Now I feel like, so what I'm looking
at is I'm comparing this visual image and
looking at a slant. I think this is more
like it. Okay, cool. Alright, next thing
I'm going to do, again, round off the corners. You should know
the drill by now. I will not even add
any stitch line on the body silhouette
because this is weaving. There's no stitch line on the only stitch par
will be the straps. So when we get there, we'll have a full
conversation about it. Okay. Actually, you see
how this is like around like an oval bottom. So I feel like my
corners are not round and numbness tried to
three, there we go. Some companies don't care
about corners at all. But remember, you are creating this as a concept cat
that will have colors, textures, everything
added for people to discuss if this is a right
bag to go forward with. So I always like to suggest
to people that it will be great if you can mimic if
there's a reference image, if now a reference bag as
closely as possible and make the drawing as
realistic as possible. Because a lot of people
merged sales production t. Now everyone's a visual
person like a designer. Sometimes they really
had to see things. So realistic drawing
in front of them to actually get it If I may
be perfectly honest. So yeah. Okay. I'm liking it. So the next
thing I need to figure out is, what about the strap? Do we even have
that information? I want to say probably not
because it wasn't even written in an e-mail back. Oh, we did get the depths. This is good. So this is 7.5 depth. Size large. That's
helpful. Is helpful. Yeah. Okay. Okay. I'm gonna just go
by my experience. Let's just put this here. I need to make the art board larger to
accommodate for the straps. Because it's got
that most straps. I actually don't
need this anymore. Oh kiddos. So what am I looking at? Let's come back to this. Okay, So, oh, oh, wow,
that's interesting. Oh, they literally just
stitch it up like that. That's cool. Okay. So I'm going to take a
close up image of this. So I remember going to take, you know, what one is enough. I'm going to drag the
screenshot over here. I can see exactly how it's done. Alright, so this is when you have to use your
own judgment call. But let's get the spread
first and then a draw for. So there are two handles. One is very small, as you can see, just by in
proportion to the hand. It's probably only the drop is probably long enough for
the hand to go through, not over your shoulder. Then there's a second
strap that's definitely a shoulder strap with
no adjustability. I don't see any buckles, I don't see anything. Then the common, I gotta send
the same bag as pictured. Okay, so that means
I had to design a straps as they are as seen
on the reference images. So now this is actually a good lesson on finding
the dimension on the strap. I like to start with a spread. So let ours centered this. Right now I just
randomly draw a line. The spread is 19. Let's make it, let me see
in proportion to the hand. And so women's hands, so it should be
about a sad smile, slightly bigger because
my hand is quite small. And then take out your why do you call it a measuring tape and take a look at this
nitrogen makes sense. Then next thing you need to
look at is on the image, is why, like what? What's the spread in
proportion to the top width? It looks a little bit
narrow, to be honest. So 19 might be to why? Yeah, 19 is definitely to why? I might ask you tone
it down to 15 or 16. Let's try 15. So 15. Yeah, because think about it. If you do 15 here, remember it has a
secondary shoulder strap on the outside of the
the top handle strap. So I may even tone it
down to 12, to be honest, because we're measuring
from the center of the strap nut at, from the edge. You know what I'm gonna do? I'm gonna do center. I know Center, but I'm
just paranoid and, you know, I'm paranoid
at this point. Then one-twelfth maybe
to little my apologies. Let's do 13. Lock everything. So I just select it
and lock everything. The next thing you
need to establish is how far down do you
want to anchor to be? So what does the anchor? This is the anchor
where the attachment begins life from the top edge all the way back to
where it starts. So it's up to you. I'm going to itis
looking at let's say, how far down when I do this. Right now, 6.7 looks
a bit too far down. Oh, sorry. I should walk the top
because I don't want to talk to yeah, I think five is
good. Let's do 4.5. Okay. So I'm going to actually
use a guideline does ties, so I differentiate
that from my drawing. All these black client is going to get me
confused eventually. Just make sure Snap to Point. If you don't know, just zoom
in and zooming is hold down command and then do the
plus or plus signs. Just keep pressing the plus sign repeatedly and then
you'll zoom on away. Then let me just unlock
all and then get rid of this men manual guideline
is what I call in it. Let me lock the body again. Right. So it looks like a pretty long looks like a three
centimeter or longer anchor. So let's just how long is that? 04. Okay, for? I don't want to round yet. Mistake my par center like that. Come down. And then when the handle
or strap is just handheld, it's not going to go
onto your shoulder. You can afford to have the
drop like about three or 4 ". So that's about between a
centimeter to ten centimeter. So in our case, I'm going to try a ten centimeter first and see if proportionally matches
back to the image more. Now, lock the bottom of the grids so it doesn't
extend to the bottom. I only want the top to go. So now it's had 12
is too high up. Let's bring it down to ten. Okay. Then I felt like there should
be no wow, it's funny. Sometimes I come up with
the numbers that work if the first time I am not changing
it and they didn't work. Let's try my apologies. 12. And then let's use this
guideline and then zoom in. Just touching the edge. Yeah, there we go. Okay, I'll click OK. So lot EIS also may
show wave fine. Whereas the central office. So the thing about
drawing full sizes, it looks very redundant, labor-intensive, it really is. But that's because
you're going through the entire mentor and design exercises to root out,
well, first of all, discover all the
potential problems in terms of construction
proportion everything, and then literally
double-checking, triple checking everything
before you go into developing that tip has to
be sent to the factory. If you go to the video
that talks about why do we use it a tap
pack. The advantages. I actually explain
the problem when you don't draw foci at
full size value. So definitely check
out that video. Okay, so I just
cut open the top. I got rid of it because
so that I can extend it. Okay. So I liked that arch. I'm just going to
leave it there. I'm gonna do okay. It's a fast straps,
so that's fine. So I want to just
duplicate mirror case. You haven't noticed. You can do it both ways. Right, right to left,
doesn't matter. Top-down came and do that. Make sure this is
centered. Centered. Make sure again, I'm paranoid. Make sure you align
on top. Select both. Amazing. Okay. Okay. So I just did the
shorter hand on the inside. And I just realized
possibly made the, the spread of this smaller. I just totally realized. Interesting, let
me say how wide is this first choke point to? They made that was
what the problem is. Let's make this tool. I might be to y as to why
things happens. And so we'll just redo it. It's not a big deal. I'm going to delete this. I'm going to unlock the guides. Because I realized
that this spread, which we have as a way to y, Let's bring it down to 13, Let's bring it down to 12. We should bring it down to 11. Let's see. Yeah, let's bring it down to 11. So now I had to move this
guy inward to the locket. See I'm already problem-solving. If I didn't draw
this proportional, guess, what will happen? Things will come out
looking gray until you, when you make a, you realize
why, What's going on. Okay, so let's do this notion. I do 2.2 before, you know what? Let's do 2.2 when
a strap is very narrow, actually hearts away. That's too fat. Doesn't make any
sense. That's true. Shouldn't be like Oh, actually, yes, it makes sense. My apologies. Then
let me just make sure I delete this was
cut open the top, like what we've done before. I'm just thinking if
that makes any sense. You know what? No, it does not. Something else I just
noticed is how far down do I want the anchor to me? And I realize it's a little
bit too far up when I look back at the
reference image. So I'm going to lock the top. Do I want to go down to 77? Yeah, I think it's fine. Ok. Realize this this actually shows parenting kids so quick to step. Can get right on this and
make sure you lock these again because it's a new marker. Dan. Hey, that's a little bit. And then I think she
wants to open leather. You see how there's a
letter doesn't really have any top stitch because I seem
this is one single piece, maybe a cow hide that
they just cut it as is. So if they're not bonding two pieces of center
leathers together. But cow hike, it depends on what type you buy a can
be quite expensive. So I'm just gonna go ahead
and act stitching for the client unless she
tells me she is using cow high and she doesn't
want any top stitching. Again, that's another
conversation. You should be happy. I'm sorry. I'm trying to find
where exactly is my top stitch that I can copy. This is another reason why
doing things full-size is so useful because as you are
going sue it, drawing it out, you'll also encountering
all sorts of problems that you can actually have a conversation
with the rest of the team in events
to try to fix it. I don't really know
if she wants these. Hence stitching. So this is actually
real hands stitching. It will add to the labor cost, not by a lot, but it is. Instead she goes No, you
know, labor-intensive. So I'm gonna do a
simple box stitch. Now I'm going to have another conversation
with the client. And unless I'm gonna keep the box stitch
until she tells me no, I really wanted us
to be hence this. Then I will add that
beautiful hence stitch. Look for her. Yeah. Summation this and that. I grouped them. Uh-huh. So let's
go down a little. And then let's do the
underside that you'll see. Are we getting a hang of this? It's pretty much
the same process that we do for all
the bags here. Honestly, I'm not even
going to care about if it's like 0.25 centimeter
away from the edge. Because at this point, no one measures that
little on this. Anyways. So this is just
representational, So it looks good on paper. And a pattern maker knows, you know what you're doing. Oh, here's another thing
that I explained in how to draw a
full-size tote video, that there are more brands
than factories nowadays. So if you don't know
what you're doing, it, it will show through on your concept cats and
on your test packs. And when a factory
receives doesn't matter concept cat or tech
pack and looked at it, they will make a split-second
decision if they want to take you on
as a client or not. Because if you don't
know what you're doing, if you can do the basics, then you're just
wasting their time. They might as well go with
someone who knows their stuff. And at this point, because there are
more of us than them. So they are in demand. They have every
right and they well, to drop you as a client
if you don't send them a qualified professionally
done cause a cat or alright, That's my $0.02 right there. Let me unlock all
the guidelines. To object. Unlock all. Let me delete it. Let me actually group this
whole thing and bring it down because I'm going to
do the cross body strap. Now because this cross body, I do not see any buckles, so there is no adjustability. As a result, I had to find a flat drop links that
show work for everybody. So the way you do, I
wish I can show you it. Maybe I'll fill this later. Yeah. You know what?
Let me do that. You look at the drop lanes by placing it on your shoulder and then bring it down to
the side of your body. See what drop length
actually feels comfortable. Comfortable. I liked the
top of the bag to be kinda around my waist area. And I'm a small person. So I probably would do a 40 centimeter drop which
is about 16 inch drop. Let's see. I may want to adjust
it to 20 inch. So for now, let's lock
the bottom 40 inch. And I just want to double
check when I bring it to 20 inch drop,
50.8 centimeter. Now, use that 20 inch or 50.8 centimeter around your body and see if that's too high
to low, just right. I'm gonna do 45 somewhere
in the middle there. So 45 centimeter is about 17.7. Again, if you are
designing for plus size brand or if your brand
provides plus size sizes, You definitely had to
find a happy number. If you work, obviously, for smaller boutiques that provide extra small sizes than
this droplets can go down. So I'm going to take this to 45. And then how would I do this? Where's that image? So if you look at it, this is a line. The outer strap and the
top handle strap is literally a line
song being sung. One next to next, one next to each other.
What am I talking about? So I'm going to do just that. They look like the same
width too. Perfect. So I am going to lock, I'm going to zoom in again. It's hold down command and
then just press the plus key. If you want to zoom out. It's the minus key. Snap Locke, Locke is
come in plus two. Number two. Then I can, I need to
center guideline locket. I'm gonna do it right here. No, I didn't catch it. Right here. Is that gap between the two? No, it's literally bought it. Okay. So I'm gonna do that too. She decided she wanted to be exactly the same as the image. Center pole, pole pulpal. Ok, that looks right now. I just made sure I need a
colorist heart can see it. Then. It was what was it true? Oh, so close. You know
what? That's too. And when that happens, just go from the other anchor. We go. There we go. All right. Now, that's awesome. Do that. Again. Yeah, I'm gonna do this
until they tell me they need actual hand stitch, those decorative stitch lines that you see in the
reference photo. For now, I'm just going
to add the box stitch. Another reason why I'm
doing a back stitch is because it sits
well with this one. So this will become all these bags will become
the same collection. But what she wants,
I'll give it to her. I'll make her happy. Now, I'm grouping everything. Sorry, my mouse is
acting up a little bit. You can't really
select that group. Then. You should really know
the hockey by now, I've been saying that for
the last hour and a half. And it makes sure
there's a line on top. And then, you know, the drill. Open, cut open so we can individually whereas the
stitch line fixer visually. There we go. There we go. I drag it too low, so it looks kinda funny. We go. And then that's truly undoes. Yeah, feel free to skip
through this part. And next time when you
see a technical designer. Now you know why they
all look kinda jaded, exhausted as well. We do day in and day out for
hours and hours and hours, multiple bags at the same time. And so a lot of people asked me, why do we need to do this? If we have a pattern
maker, again, I highly recommend you to
go watch my other video where I talked about why
do we need a handbag? Sorry. Why do we need we
know why we need him. That's why do we need tech pack? Why is it important?
How do we use it? What are the advantages? Just watch it, explains it. Friday, I think what done
however, some people, you see how like there's
a bit the weight of the straw is kinda making this
side a little bit rounded. So a lot of times what I will do is after
I get the shape, I kinda cut this open a
little bit like that. I create. Let me just move. Let me group this. Let me slightly shift
that line back. And then what I do is I
create a very gentle curve. So visually it matches
the reference image. A lot more. In tech pack development, I will not do that because I had to show the pattern maker that we're not
cutting a curve here. It's just the way of the
material weighing down the size. You know, it's gonna
be a straight cut. I'm gonna do the same over here. Not all the company
asks you to be so accurately
representing an image. But it's always
good that you know how to do this because it does open up a lot of door and a
lot of oh, what's the word? I'm looking for a job options? Because not every
designer is take the time to really figure
out the details like that. One other designers who
do then go for you. You won't be there. Consideration. Alright. So now it mimics this little roundedness
of the straw back. So this is actually the front and the back
because they didn't make any specific requests
for the backside. So I just finished the
front and the back. And the back. Back, let me just
capitalize every thing. Alright. What I want do is creating the bottom because
the bottom is oval. I can tell as oval because of the circular corner that
I'm currently seeing here. So I remember it was
said on the website. What is it? 7.5 depths. Okay. Go to your interests.
A centimeter. Type 7.5. So that'll
be 19 centimeter. Okay. So all you had to do, go to your Eclipse
tool and just do that. Okay. The way I will match is the oval starch from right
here or you know what, or you can even
start right here. Right here. Now, the first thing we need
to establish is to make sure that the depth is 19. So it's much more overly
than what I had originally. And just tone it down. Usually it's an insane because
that's how they waive it. So what I would do is
I will do offset path. This time we're going to
mention a line goes outward. So let's try 1 cm.
Okay, that looks good. So what I actually just
did is your bottom panel, this part actually goes from here all the way down to here. This outer line I just created is actually
a visual few of this little corner of your front and back panel that you will see when
you flip the bag apart. This front and back
panel will connect to this bottom part by being
woven together. I don't know. I think it's most likely
from the inside out. I just Weaver from the outside. It really depends on the type of pattern we're
talking about here. So I can't really
tell at this point. Now the next thing I
need to figure out is, is this a single wave? Yeah, it looks like I see
there's no broken up in C. So I don't even need to
do a style does decide, well actually I can do a
side what the psi will literally look like this, like because there's no insane. And then I just need to
round up the corners. That may actually. And I do the top. My apology, That's my kitty cat is bored because I've been
doing this for hours now. Alright, so what was it? This one was 19. So this needs to be 19 at the bottom to right
now is only 14.4. So yeah, so it really
looks like that. And then we add this line to represent how long
something I forgot. I need to make sure this is set. Bottom-line. Yes, it is. So this there we go. Let's make it thicker. So yeah. Let's also make this thicker. I just did. The bottom. Let me make
the art board a little bit longer to accommodate
for that side view. So back psi. And then you've got
your bottom panel. And you're done. All righty then congrats, oh wait, we have one more
little cosmetic back.
7. Cosmetic Pouch Tutorial: Welcome back again. So this is the last bag will be doing
the little cosmetic pouch. So the size we have
found is 24.8 by 1854. So I'm literally
just going to create a rectangular box
and go from there. So let's do this. Let me see 24.8. And then 18 point for men, I was way off. So good. So let's make this thicker so we can
actually see what we're doing. And then the next
thing we need to do is I just literally
got a text message saying that this should have
a T Gaza as well as insulin, insulin, insulin anymore,
that's totally fine. So the first thing I want to
do is one of the corners. We can actually know what
let's do the bottom one. Yeah, perfect one. And in this regard, we can just keep
the top like that. Then at this point I
can kinda, I think so. I know where the stitch
line needs to go. We go. Now. Usually when you have a pouch
like this was a T Gaza, the top width is usually the
width of the zipper tape. The bottom width will
be a little bit wider, so it's a trapezoid shape. So now let's do that. So usually the top width, I will keep it about 1.5. Let me see. 1.5. Yeah, that should be good. So I've shown you before
do a guideline to have to maybe two
or more to why? What's this right now? This is 2.9, so about three. So let's make it three
and let's make it 1.5. Oh wait, no. And then we need to
center align people. Like That looks fine. So now let's make this around the corner because
it's supposed to be. Why might reach Let's
do this tour around. Oh, sorry my mistake. I was going to time 0.5. There we go. Now we're talking my fine. Yeah. And they're
going down like and so I'm gonna do my
little squiggly freehand. And that looks almost perfect. Yeah, I still got it. Alright, This is it. We are done. The front and the
back is the same.
8. How To Add Material Swatches & Colors: So what's next? What's next is
actually the fun part. A lot of the companies, they will look at
these line drawings and they will say, well, I can't really picture it without the materials
and the colors. So what we're gonna do
is we are going to eye drop these core colors
materials, these esophageal. And then plus the
trendy body material, the horse hairs, one is in blue, are more like hobo, one is in the cornea
color as well. So in the next video, the next class, actually, I will show you how to create a repeat swatch cards like these that you can
use over here. But in this video,
I'm just going to do very quick eyedropper tutorials, so then we can just
fly through it. Now, the whole reason why we need to add
colors and material, as you may have imagined by now, is because you had to show these concept cats
to the rest of your team. I'm not just talking
about the design team, I'm talking about the
production team of PD, the sales team, the
marketing team, how the bag will actually look like in font there
you guys will have a meaningful conversation
about what to change one not to change
what to keep what to drop, so on and so forth. So let's get this started. So let's focus on this
tote bag number one. The front and back
is exactly the same. So that's why I'm only including one single view of
it because it's the same depending on what type
of trend we're talking about. Let's just say we want the
strap to be our core colors. Let's do cognac. So let's select all
and then click cognac. Okay, it looks quite nice. Now this is where you
can have some fun. You can decide,
do I want to show the sales team
this cognac strap, soft piano strap is gonna go
with the cornea horsehair, or is it going to go with
the cobalt horse hair? So let's try this. Okay, I can see this happening. One thing I don't know
if you noticed this, that once I've filled up the silhouette with
the repeat a swatch, you can't really see
the photos anymore. So what I will suggest is
a select these lines and then come here and let's
change it to a lighter color, like maybe not that
more light gray. Let's do it. I was wondering why
that wasn't showing up. Okay. Do it here or maybe
we can select this gray and make it
a really uniform. And what this does is you
have to understand you, you're gonna show this to
a lot of people who are not artists or who
are not artistic. So if you end up
having some sort of a line that means something
disappearing on people, it can actually confuse people
and they happens a lot. To us. This is kinda like a no-brainer, but to a non-autistic person, try to measure all the
information you create. It does not get lost when you add colors and materials to it. Alright, so here
is our little toe. It looks kinda cute. But let's say you are that super over achieving
artists who thinks, wait too much or
designer, I'm sorry. Let's give a different option. So another purpose or
creating the concept cat is that we give a lot
of options for this merge and the
sales team to decide what option to actually go
into production for me, what I'm doing now is
I'm moving this to the side to create
more room over here. And then let me zoom
in and then duplicate. At this point, you
should know what the hotkey for duplicate is, which is hold down option. Select the bag and drag. So let me change this to cobalt. Oh, sorry, I didn't
realize I need to select a fill the
body first. Okay. So cobalt. Yeah, it's not working because we want the body
to be in cobol horsehair. The strap is kinda jarring. Now let's change it should TO, and just to see what happens,
Does it look better? Doesn't that look better? It looks a lot better.
So it's more tonal now. And just push it and giggles, what will happen if I
also offer an option where we stick to this
cognac horsehair body, but we changed the strap to. Okay, that's actually
interesting. Now, we have three options
that we can show it to. Your sales and merch table. Let me move this and then make more room because
I wanted to add more option where let
me drag this here. So this actually opens up
a conversation between you and the rest of the
company of all three styles, which one is more
soluble and why? Which one will sit well together with the rest
of the collection and y. But without doing
the concept cat, you can't really have a meaningful conversation
because you're literally asking
people to imagine it. It's hard to trust me. Now the fourth option I like to offer is something
a bit more classy. So instead of this
slide TO trending color that's probably only
going to last for season, maybe made this black. And see what happens. Did you see what happens when
I made this black? All the stitch lines
disappeared on me. So like what we did, I'm going to select
a line, go away. I think this was the gray. I decide to use. There we go. Now you can see it. Again. I know this is kinda silly. Like why do I need to do this? Trust me, you will have to do this because you're
not just talking to people who can figure things
out aesthetically, okay? So now you have option 1234 and chances are you may go for it was
only two options. First, one, whatever, depending on what your company is looking for and what the season is, and what a selling point is. So whichever select an option. And this may take multiple
rounds of discussions, conversations we usually call
this Product Design Review. Once you consult the Lassa, I want to go forward
with this one. And this one, this is when you put this concept cat and this constant cap into the
tub pack for this bag. I usually put it in page one. So I will show that
later on so you can see the concept cap, put it in the tech
pack is also for the factory to see what the finished look is
supposed to look like. So like I said, this concept cap just
like to tap back in the previous classes
I've been teaching. Basically, it's a documentation, a data that goes beyond you, that lives beyond
the design stage. It goes into production, it goes into sales, it goes into marketing. We even sent concept
kept booklet. Sometimes we call it like
a review book or pamphlet to the marketing
team so they know what is coming and they will
give you the input as well. So not bad, I actually
kinda like it. Alright, so I'm just going to
quickly finish up the rest, the remaining three styles. So let me just drag this here. Alright, and that point
of the cons of cat is to show the rest
of the company, like I said before,
construction, how will the from the bag, the sign look why certain
companies don't really care. They just want to see what
we call the front face. This is the front face. And usually during the initial
product review meeting. If this is a
well-established company, the designers will be
asked to actually print out each of these
constant cow with color, with texture printed
out up to scale. So pho size value and literally standing in front of everybody and do a
presentation of it. And that's when people
will literally whip up there markers and
start adding, okay, maybe the top needs to be wider and then maybe the
bottom needs to be narrower. So as more of a trapezoidal
shape, blah, blah, blah. But again, this is where
the conversation starts. That's my concept. Cat in full-size value
is so important. So a lot of times, if this is a collection that's
supposed to sit together, basically, it will, I will be using exactly the
same color value, this color combo right
here and here, here, here. And I will just apply
to the next bag. But this to me when I
got the directions, this is not supposed
to be a collection. This is supposed to be individual one-off item that
they will put on shelves. So I'm going to have
something I'm a little bit. For instance, let's say I want to look
for shifts and giggles. Let's do the body. Thank
you for getting this. I'm sorry. Let's do the body in
his cornea color. How wonderful. Why not made this? What do we call
that a hot selling, kinda like a super
fashion piece where I made the front
pocket and the cobalt. Interesting. Now, what about the strap? Well, I have many options. Let's see, does the cornea the cornea definitely
works because the TO work. Okay, actually the teal I personally feel
like works better. The black will always
work as a core color. The red, I don t know, not so much unless
you want to go color block because it
is very colored block. But for now, let us put
it Cognac and make sure, because the cobol is so dark, always make sure
whatever line that disappears into that darkness
goes into the darkness. I'm just going to eye drop. I'm sorry. This light gray. So now you can see the
stitch line showing through. And obviously the backside of this combination
will look like this. Okay, so some people
asked me what happens if I find a soft piano to be too like the graininess
of the Saviour, this texture to either
too large or too small. So what you do is
you use the Y arrow, you select this trap where the soft piano
swatch card is used. You right-click. Go to transform,
you go to scale. Okay? So the value that
we set this at, the way you see how large
it is now is set at 100%. This is just automate
default setting. Illustrator has. The
first thing I want you to do is uncheck Transform objects because we're not
trying to reset the scale of the
size of the strap. We're only trying
to reset the scale, the size of the repeat patterns. So we made sure the transform
patterns is selected. Scale corners, scale strokes and effect leave them as they are. So now, let's say you feel like the soft Nano texture
is too small. Let's make a bigger, alright, let's do 150 so you can
really see it or friends, you'll have well,
nothing happened. Yeah, well, do the
preview uncheck. They just sit up
and check it again. But the first thing that
happened is because I did have the scale
stroke effects selected. You see how the stroke line got really sick because it
also went up 50 per cent. So if I unselect
that, there we go. And let's just say this
is how we want it. Okay, so let's click. Okay. Let's say you show this to
your boss and your boss say, this side looks more realistic. That's how it looks,
kinda faking out of proportion compared to
the rest of the bag. It looks more like
an elephant texture versus soft piano texture. Can you dislike? Make it smaller again? So then you go Back, Select the object,
right-click Transform Scale. And let's go back to 100
and see what happens. Did you see what just happened? It didn't go back to that size. Why did it not go
back to stack size? Because every time
when you reset this, Let's say, Where do you
made this 50% bigger? And then when you open it up, this size now the
50% bigger sizes of reset as the Hundred percent. So the only way for you to
bring this back down to that size is you have
to minus another 50. See if this works. Okay,
It's a little bit too small. That's interesting. So this is the part that gets a little bit okay, that
looks about right. This is the part that looks at that is a little bit tricky now. So every time when you
make it bigger or smaller, when you open up the
scale browser again, it will basically reset
that enlarge or decreased size as 100% again. So then you had to sink that. Okay, if I want to
make it go back to the original is literally
100% -50% -40%. But as you have seen just now, even what I know, I literally just went
off 50 per cent, so I use 100% -50. The texture itself actually was a lot smaller
than this size. So that's a reason why you
kinda had to fiddle with it. I added another ten per cent, so you only went down 40%. Now, 100 -16 is 40, went down 40 per cent. Then now you can see that the texture is still a
little bit too small. So let's go up. Okay, now we're
talking about this is more along the same line. So just play around
with it and then you will get it as kinda
clunky in the sense, but it's just one of the things you have
to get used to it. Now the psi, we know this is just a front and back panel sewn together doing a
T gossip construction. So it's the same material. All right, so this is actually your concept
cat color combo. Number one for this
top, like I said, you can create multiple
color combinations and see how your boss or and the rest
of the team respond to it. I'm just selecting. All. There we go. Let me go. Let's say, let's switch it
back there from as this. And then let's say the
merge merchandising team or the PD team comes back and tells you this is
way too expensive. We can't afford two
different kinds, two different types of
horse hair on the same bag. So you being a Studios designer, you say, Okay, fine. And I'll just change it back to you guys liked us know. Okay. Let's do this. Okay. Maybe you'll live with it. No. Okay. Fine. I'll go back to this and
people that okay, I love it. So each concept
can you create for one single style
will literally go through rounds and
rounds of revisions. For people to figure
out the pricing, for people to figure out the
feasibility of making it, and how it will
look at how it will sit with the rest
of the collection. So lastly, you know what, let us do this little
baby actually. So let's say the front. You want to do this horse hair. So people get their
money's worth. And let's say some amazing
person in your team said, Well, Stella, I mean, this is kinda like
a novelty item. We want to sell it
as a novelty item. Can you make the backside? I thought that's a
great link to symbol, which I will talk
about in a moment. Can we make the backside over different horse
hair colors so that it's almost like a what
would you call this? Like a a two tone back and
you're like, sure, no problem. But then let's just
say we're gonna go to, you know, let's say
we'll go with the Konya. But then very quickly
you realize, Oh, no, the front is correct, the back is correct, but the Psi is not correct. If this side is the front, the backside supposed to
be cobalt, what do you do? Again, this is when
you have to go into the revision though. Let's just made this into an enclosed object and
then make it hello blue. And then let's just make sure
we give it a nice corner. I forgot what the corner
that out there we go. 0.5. Perfect. That's it. Animation will bring up this little foes so people can see it because it's so dark. So let's change it to that. There we go. So people can see as
saying with that. Now, that looks kinda cool. So yes. Oh, and in case you
haven't noticed, I did add the zipper
polar design. This, the hardware design will
be another class that will come after how the how to
create a repeat swatch class. Actually expected of a designer, a handbag designer to
know how to do hardware. Now it's always a plus. And so yeah, so this
is a company sino, we'll come back to it
in the next class. But for now, just know
that you will learn how to create hardware pieces
up to scale as well. Alright, yeah. So let's say there's
a combo one, then you'll do
another combo too. I'm just going to
fly through this. People were saying
that this will be a novelty item that will come up that we will promote
during holiday seasons. And let's say for this one, it will be my mother statement
to say let's make it red in the body and slightly cheaper because horsehair costs a lot more money than
real soft piano. And then we're not
doing anything fancy, like a two tone whatever. So let's delete that. Oh, actually, I
need to cut this. So let's just make this. Here we go. The backside will be the same. Okay. Maybe I'll give mom
a slight co-owners with the handle that goes across the backside of the
cloche to be in horsehair, could be cornea, it
can be blue, which, whichever one cobra,
whichever one that your team decide to
go forward with that. So I don't know if you
notice what I just said. What I just said was this one
will be for holiday season. This one will be
for Mother's Day. Holiday season
basically starts we literally leading up to
Thanksgiving like two weeks, three weeks leading
up to Thanksgiving. Then we'll go heavy into a between Thanksgiving all the way to the NL, Christmas
Mother's Day. Obviously, we'll start
selling it a month ago. All the products need
to hit the store liters by April and then someone
Mother's Day comes, they already have
at least four weeks on a floor being promoted. So now, what all that men is, we just use your concept cat
to do calendar planning. When we know everything
needs to be in the store for Mother's
Day by a pro, then that's when the
rest of the tina, the PD-L1 merge wall, go back to the factory and issue the PO purchase order for Mother's Day clutch
six to nine months before a pore I'm
sorry, before April. And so you can see how
important concept cat is because this is really the starting point where
all the conversation, all the decisions for
sales, for pricing, for production, for calendar
planning start to happen. Remember, majority of
the fashion brands still have their
production overseas, so they had to plan the whole calendar
out one year ahead. And the whole conversation
starts during this process. You don't want to, since
I have this back here, I might as well
just do something. So let's see. We just want a black, no, let's not do
that with a red bag. A some sort of Bohemia
and rusty, oh, you know what, if it's Bohemia were really should do this. But then let's say your merch team comes back
with the sample and tells you. This bag is so hard and stiff because soft
piano leathers very stiff. Can we'd like soften it
and make it more Bohemia, romantic unit, okay,
horsehair it is. And this is you as a
very astute designer that you had to remind
a merge that just know that this bag is a
huge, what's the size? Select this. Can we see the size here? Do am I covering up the sizes? Oh, yeah, I see. Sita's this bag itself
is 30.7 centimeter. Why? Okay. And then 48 points of practically 50
centimeter, like long. Okay. So I'm sorry, tall. So I'm sorry. It's the other way
around. My goodness. Let's do this again. Okay. So 30.7 cm tall and then
almost 50 centimeter. Why? That's a lot of horse
hair you had to bite into just to
make this one bag. And again, when I
look at this drawing, this concept cat, because
it is drawn off to scale. The first thing I notice
is the look kind of like too much close to each other because this is the
actual size of the pattern. And so these are things you kinda had to bring it up to
your margin PD and just say, Are you guys okay with this, that the spots themselves will be kinda closely
packed simply because that's just how the horse hair material
is made and printed. If everyone's on board, great. If you told and
you call you call the problems and
everyone is not okay, That's when you tried to find out then what's the solution? Do we really still wanna do it? Is this, a supplier
has a different type. A horse hair pattern
does slightly bigger and more spaced out
versus so tightly packed. Now you see how
important it is to actually do the concept
cat up to scale, because I cannot tell you how
much money we have wasted. Because we ordered
a bunch of samples. Thinking the bag is
absolutely amazing. And what the samples came, we realize the spots are so tightly pack is
giving people a headache. So then we then had to
restart the whole process. So talking to supply and trying to figure out if
they have anything available in stock with the spots that are
more spaced apart, if not, how long would
it take to custom? Make one? How much
would it cost? Blah, blah, blah, blah, blah. And next thing you know, you
miss the shipping deadlines. That happens all the time. Alright, so because
I changed this, I need to change that. The bottom part,
let's say you had a conversation with your
merch and emergency. We want this bag to be
able to stand on its own. We want to put it on tables
because it's so big. We don't want to
hang it on hangers, It's just going to
get covered up. So you again, as asked you
and experienced designer, then you said, Okay, no problem. There at the bottom, I'm going to ask soft piano, what did we just
established before? Soft piano is a very
stiff material. So this will actually help the
bag stent up a little bit. And now we may even go back to the tech
pack and then just let the factory now for
the rest of the bag body, like the front and
the back panel, you may need to add
a bit of a filler to prop it up so it does
not completely collapse. Horsehair, ISAF, trust me. So yeah, you need
something to prop it up. Alright. Alright guys, there you have it. This is how you do concept cat. Alright, I will see
you in the next video. Ciao.
9. Final Step - Adding BOM & Integrating Concept CAD with Tech Pack (Mass Production): Hi guys, Welcome back. I promise we are almost done. We're literally towards the
end of this entire class. So what I did is I open up the actual tech pack for this little tote
we have created. So now I'm going to show
you the next step is, let's say the merchant a PD. Finally, everybody
is in agreement. These are the four
options, okay? We're gonna go for a width. So now you can drop them into the tub pack
by creating a page, call the color chart page. Some people call
this the SKU page, which is totally fine, is
essentially the same thing. Now, the step we're
going to take is first, you group every single cat
that you just created. And then you right-click, go to transform,
you go to scale. We're now changing, making
the small, Not yet. And then make sure you select Scale Strokes and
Effects scale corner. Everything is selected
and just click Okay, make sure everything
is selected. Then we're gonna do
something called a symbol. We're going to create
this into a symbol. If you don't have
this drop-down menu, go to Window and scroll
all the way down. It should be right here
and just check it. Now in case you have never
worked with symbol before. In class one, I actually
went into detail showing you how to use symbol
and why we use it. Here. I'm not going to go into detail. Just go back to class
one and watch it. So the way you create symbol
is literally click and drag. And you can name
it doesn't matter. Make sure you are export movie clip in reality does is
really no difference. The only differences
illustrator says here, movie clip graph it
attacks will flash import. We're not doing flashing puzzle. It doesn't mean anything. So just make sure
as movie click, Make sure it's dynamic symbol. That just means that
we can actually make changes to it afterwards. So click, Okay, here it is. Now let's do the
same with the rest. Let's do it like that. Let's do it like that. Alright, so now I'm
going to zoom out. I'm going to scale, Select All and scale
everything down. Right, Eden. Absolutely beautiful. So I'm going to drag it
here so we can scale, increase the size just a bit more so you can see it better. I'm also going to reduce the
size of the reference image. Because what's more
important now is the information that we
see on these four options. And instead of
calling them options, I'm actually going
to call them skews, because at this point, this will become one. This is what will
go into the store. And from this moment forward, every information you
put on this page, color chart page, as
well as the rest of the tech pack will be forwarded to the
sample room overseas. Or if you work locally,
doesn't matter. It will be copy and made produce into actual
physical product. So this is the part
point of no return. And make sure you don't make any mistakes because
one single mistake, basically it will be
reproduced 3,000 times into 33000 bags with all the
mistakes or 1,000 or 500. And let me tell you,
you'll be the one crying. You know, let's say
it doesn't mistake being reproduced 3,000 times. Alright, so let me
make a line up nicely. Remember, let me also
just open this up. All the color material
inflammation that we see here needs to
be reflected here. This is called a
bill of materials. Again, in class one, I went into detail
explaining why does the salt important actually is, it's a very short explanation. I might as well tell you now, we actually send this
to the factory for them to source
the right material due to costing and
make the right bag. So if this bill
of materials does not reflect the color chart
that we just create it, you literally will create a huge email chain of
factory asking you on, this is not matching
bad, too bad. What's going on? Can you explain blah,
blah, blah, blah, blah. Yeah, you don't want
that to happen. So now let's also scale this
down and then drag it here. So the sourcing
team can see very clearly these are the materials
that we will be using. Now a little bit, just a tiny bit about symbols. We create a here. If you double-click
on any one of it, the full sized drawing shows up. And you can actually
go in Changes. And let's say at the
very last minute, right before you
send the tech pack, the merchant say
that, hey, you know, red is really not
selling now can we change it to something
else like a block. You're like, Okay, no problem. R2 to black suits you to back. And then you just click anywhere
outside of this object. So I'm going to click right
here, just double-click it. It jumps out and
guess what happened? The same became black. And you know,
what's really cool? If I duplicate this
on a different page, and I duplicate this. And I duplicate this. And then let's say
I go back again, I get another report
saying that let's us know. And make black. Let's make it like
I don't know, T0. Okay. You're like, Okay, it's T on page one, is T0 on this page, is teal on that page. So a symbol has the ability
to capture your data. And then just like made the
changes across the board. So you don't have to go into
individual concert CAD and then trying to change this
to the strap to teal. So that's what we
use symbol for. Unless say, right-click, you
can reset transformation. This will make it go back
to its original size. And when you do
right-click again, do break link to symbol. You basically go back to
the drawing functions. So there's no more
symbol in this. But if you go to the
symbol drop-down menu is still safe here. And let's say we want to do something that is
completely different, like a black soft piano
body with the teal strap. And then you can save this
as a separate symbol. But let's say your
boss hates it. She's like, I'm just not
feeling does Let's go back to the original then you know why It's
already saving symbol, you just drag it out On page. So that's how you
play with symbols. Now that being said, let's talk about BOM. So you have the skews. This is a color combination. The first thing you need
to do is, what's the body? Body? We have two. We have, the body will be
symbolized by this white body, body, the white
square over here, it is no longer Canvas. We're going to call this
the boars hair as 449. And then you go to swatch. You drag your little cobalt, pause here, way too
big. Make it small. You know how to do this? Make it varies. I can put it
underneath or on top. It doesn't matter as
long as you know what you're doing and then
you stay consistent. It's all good. Then the second horse hair, Let's just say this is the
swatches are the same size. Is it good? It defined. So trim what is soft
piano, leather? And you can do the same. You can literally
just duplicate all of these and drag over
here right next to it. We actually don't
have a trend to so trend number one,
there's no trim. Number two. Let me just sorry, I just realized this
is not matching. Well, technically, you can also do the underside of the strap, a completely different color, but that's not the point here. So because there's no trim too, That's when you need to
delete this, you know, and you need to also figure out what the lining is
that you guys want to use. And do we have exterior zipper? No, we don't. Back panel ZOPA. No. So we could actually
delete this as well. So you see what I'm doing? I'm customizing and building up the bill material to reflect
what we are doing here. Okay. So let me just get
rid of the ugly gap. Okay, TDB, that's how
we really don't know. Alternate edges. Okay. Sorry my mistake. We go regular DTM, no hardware and let's just
make sure this matches. Alright, so we're
done with that. We can see it, it
looks like this. And if you like, Let's make this smaller and then we'll create more room by moving this down
here, the reference image. You can do a lighter. Perfect. So this is a color chart. It shows the factory, the rest of the team
what color combinations, so skew options we're
going to go forward with. We have 12344 skews. So what factor will do is
that on this page alone, they'll print out this page. They'll go source all the
materials and they will start making samples based
off of your constant Cat. Now, in order for them to
create the paper pattern, they need to, obviously you need to do
to tap back full-size. And I have like two full classes teaching
you how to do that. So I'm not gonna go
into detail over here. But this is the actual tech
pack for this little toe. I don't know if you notice
the body, I leave it. Why? Because we have
trained a factory to look at these technical
drawings and figure out material
distribution anywhere. That's why they understand they need to use body material, which is both the horse
hair or the horsehair, cobalt horse hair or
otoconia horse hair. They understand anywhere
they see the gray over here that will be trimmed number one material
which is soft piano leather. Anywhere they see the block they understand the edge
finish will be turned edges anywhere they see the stitch line they understand
and use a regular stitch. Probably SPS six DTM
basically means dy to match. So basically what that is telling your factory
isn't die the color of the stitch to match
whatever the body colors are, the stroke color and hardware. Overhear. You could do shiny go finish or whatever standard finish your company uses
just right over here. So this is how you do it. These color distribution chips that I have created
body is why is pretty much a universal
by interests I'll trim some people use like orange. I have seen company using green. I've seen company using blue. So just follow whatever your company's standard
is just due to. So let's say your
company does Bu. So remember I was just
like raving about the, the advantage of using symbols. This is what you are like. Oh great, now I have to
change everything into blue. But do you, maybe
all you had to do is less a double-click the symbol, select the gray because that's trimmed number one
into the blue you want. Let's just pretend this blue. Actually it's a Small Pastel. Okay, that looks will happen
being a creative person, you just want to make sure
you match the colors. Anyways, let's just
say this blue is dark blue and you click anywhere
else out the object in a U, out of the symbol Mo. Anywhere that has this
particular symbol, the strap will automatically
change it to blue. And you do exactly the
same for the back. There. There we go. Oh, yeah. That was the blue. I said why didn't I
just select that? Sorry. Everything matches. Then you do exactly the same
for the top view, right? Yeah, perfect. So now you see over here, remember I said lining every time they see this
daughters slanted lines, a bias cut line does what I
call it, is basically lining. So when they see a view like to stay on and
so they're looking in and this bag is going
to be fully aligned. And what would that line be
right now, we don't know. It could be polyester. It could be cut into
it can be anything, whatever the standard lining
material your company uses. So coming back to here, this is also a symbol. I create it. Remember we talked about we don't have trimmed number two, so I'm actually going to
delete this because I don't want to confuse the factory. Alright, so I just
deleted trim number two so that we're not
confusing the factory. So I'm moving out lining. Alright, Everything
looks allying, perfect. Click anything outside
of the symbol like that? Guess what? Across all the pages, term number two has disappeared. Symbol is one of the most amazing creation Illustrator has
ever come up with, just in my humble
opinion, already done. So let's say this is done. So together as a package, you will send us
over to everybody, the factory, the
sample room, your PDT. We'll definitely
have a copy of this and some merchandise
merchandiser just need page one. Sam wanted the whole package, so we'll export it as a PDF
and then send everything to everybody so that everyone
is on the same page. So like I said, the concept cat, it's always better to create a full size value so you can make the right
decision in terms of size, proportion, colors,
materials, everything, get all of the problems
out of the way. Then you build an
entire tech pack. You drag the color chart
into the tub pack, create a FirstPage
based on that. And then you make sure
you create a bill of materials based off
of your concept cat. And then for the rest
of the tech pack, made sure that the what I call
the material distribution phase fully reflects correctly reflects what your
bill materials are, which basically corresponds back to the concept cat you have created for this
one single tote. I hope that is helpful. Thank you so much for taking your time to
learn about this. I believe that you will become a very successful designer once you put your mind
to it and practice, practice, practice,
any questions, just leave a common for me and I'll be more
than happy to answer them. Yeah. And like I said before, I will create two more classes. One specifically talking about how to create repeat
swatch cards. And the other one is how to create full-size scale hardware. I hate to say it not to digress, but just to let you know, most of fashion him back. Companies do expect the
bag designer to do this. They no longer have
the budget to hire hardware designer by
themselves, unfortunately. All right, Take care. Ciao.
 Stella Chang, Retired Handbag Design Director