Transcripts
1. Intro: Friends, are you tired of paying big money for birthday
cards, sympathy cards? Get well cards in the store? Today, I'm going to teach
you how to make some simple, easy peasy perfectionism free 'cause we don't need
that junk in our life. Lovely cards that you can mail out to someone
that you can learn how to make your own style
and sell them in your etsy shop or
somewhere else. Just some watercolor
cards that are simple, easy to achieve,
but so beautiful. And so I'm going to share
with you my process today on how I like to make
watercolor floral cards. Take a breath because
I'm going to remind you, they don't have to be perfect. They just have to
be soothing because the second reason
why we're doing this is for our own
good, our own self care. And as a mental
health therapist, I encourage you guys
to let go, breathe, just enjoy the process, make something for yourself, and enjoy the process, not just the end result. So, friends, let's
get to painting, and I'm so excited to spend
a few minutes with you.
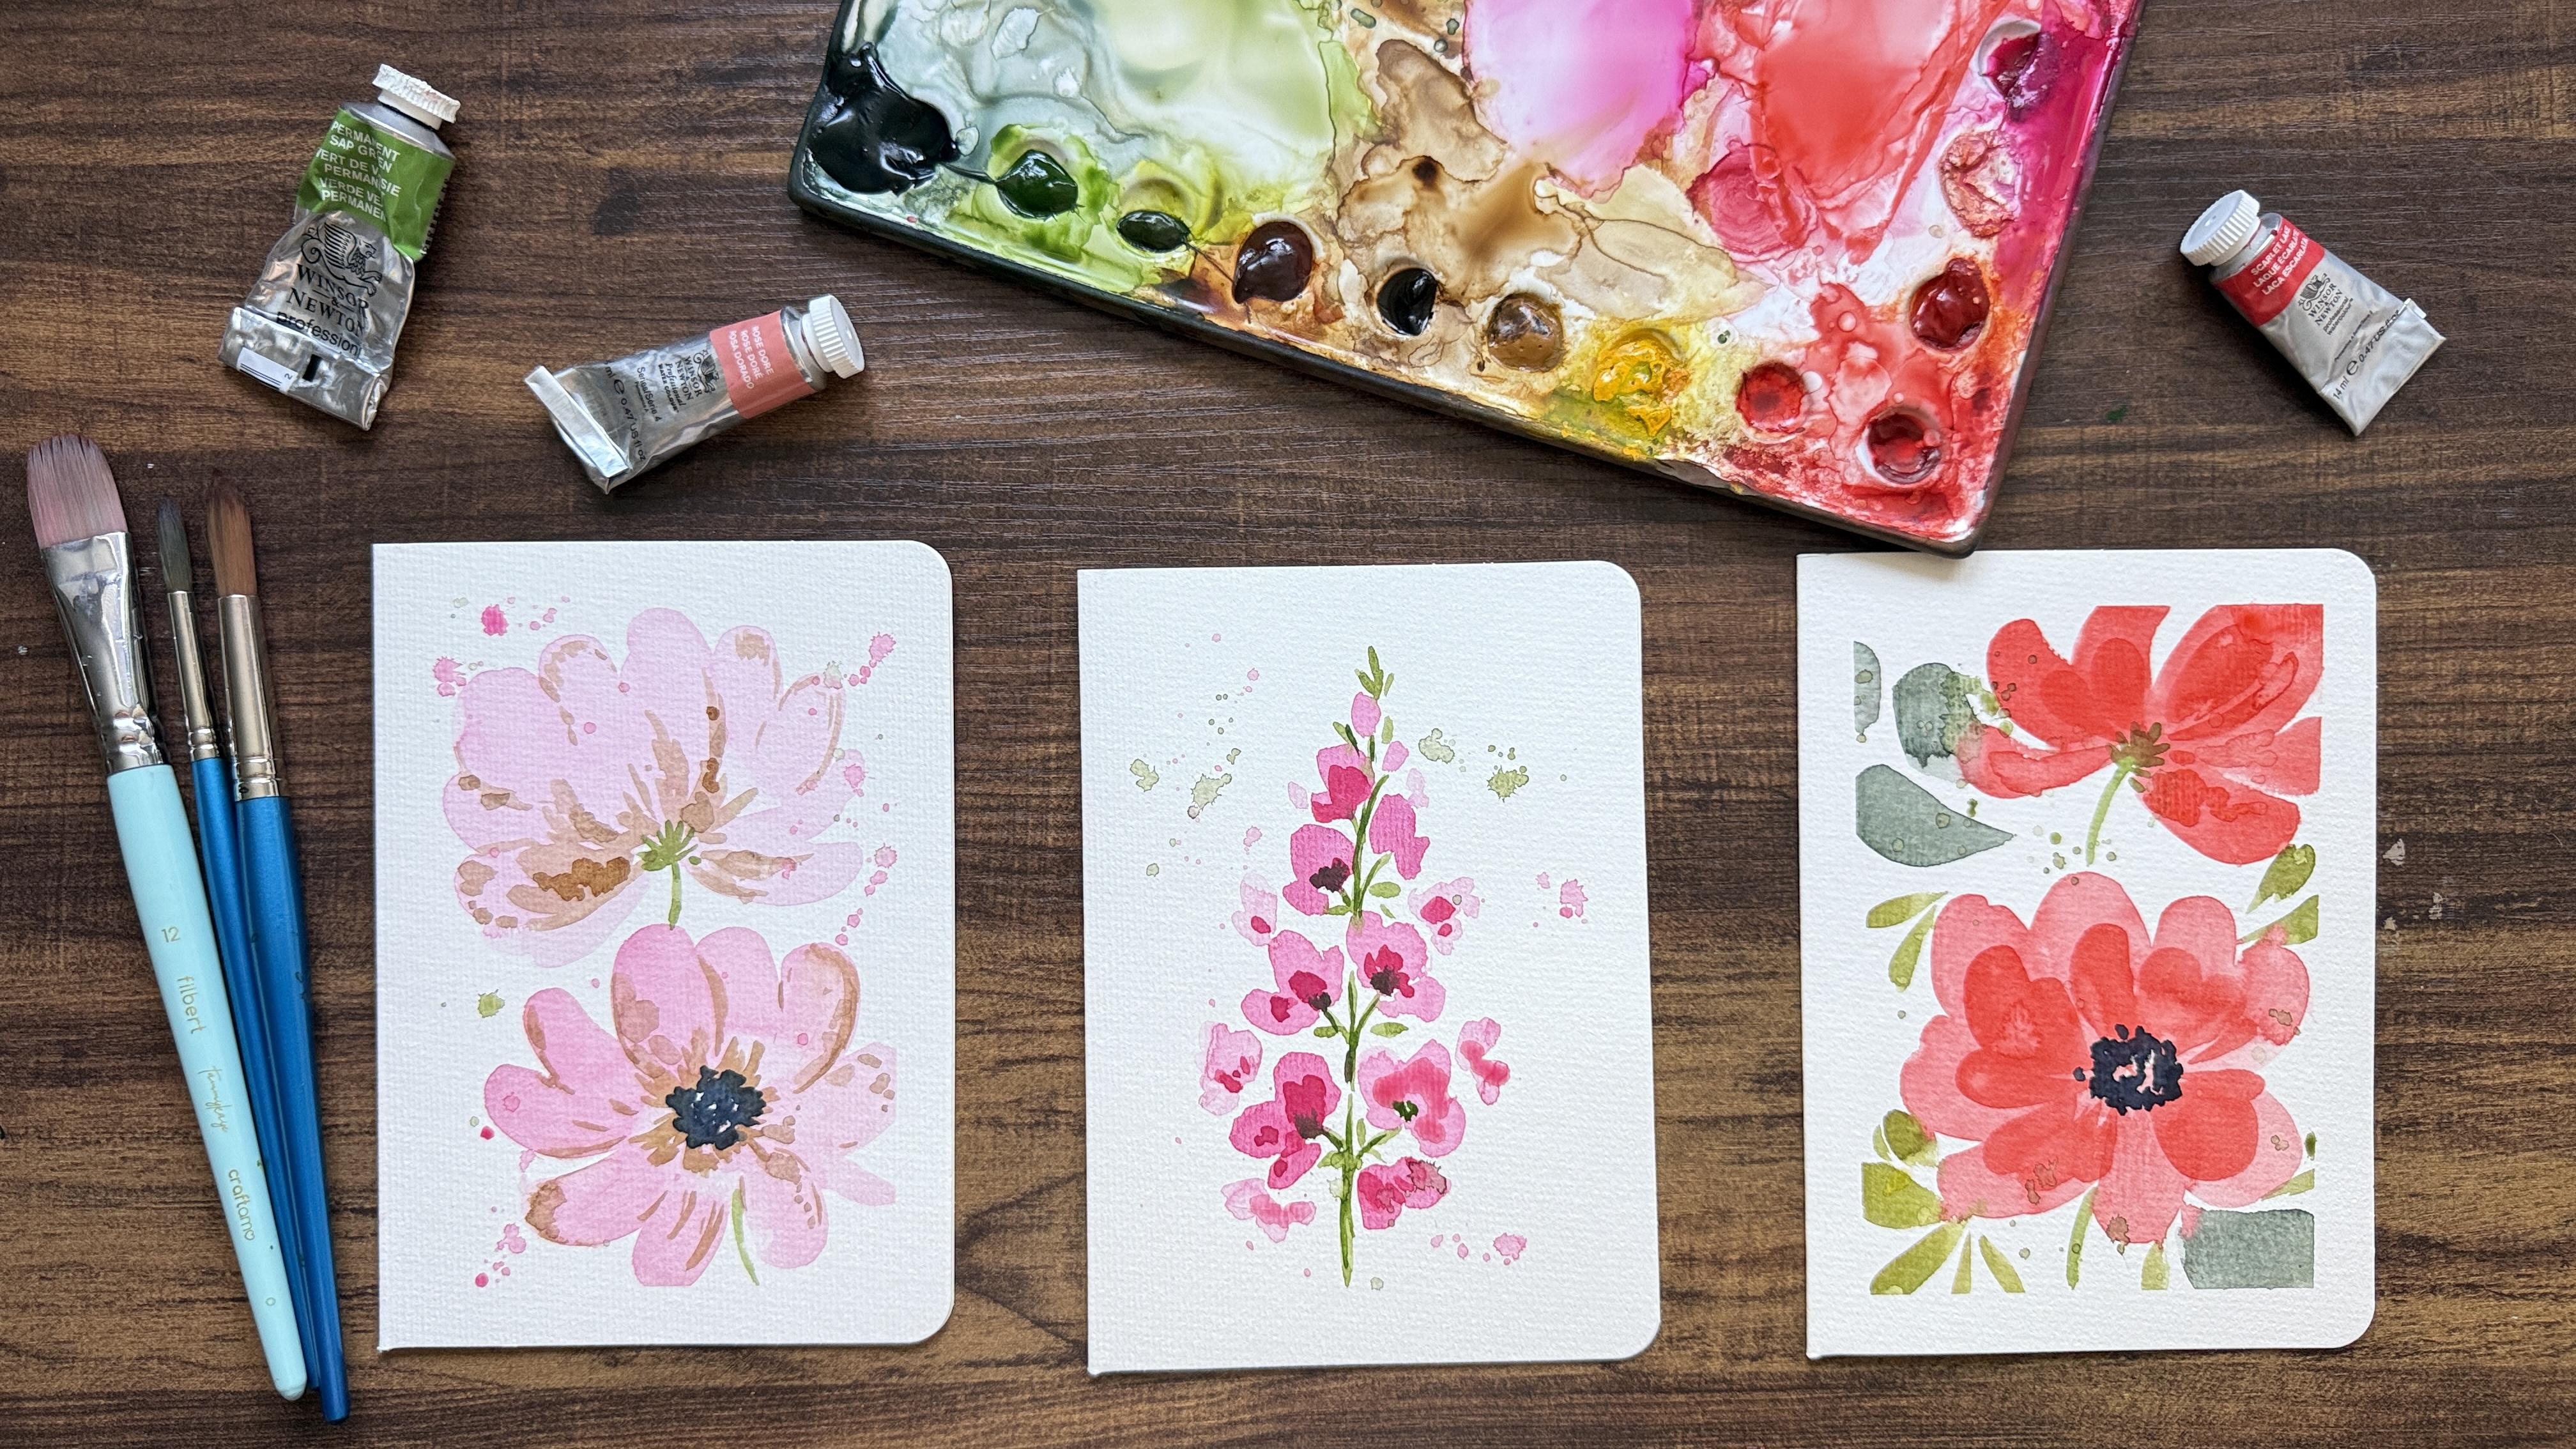
2. Supplies: So here are the supplies that you'll need for these cards. Obviously, you'll need
some type of card stock. So this is the card
sack that I have. It's 150 pounds. It's a nice thick card stock. It is a watercolor paper,
and it has texture. So it's going to hold up to that watercolor paint,
the water, and all that. And then, of course,
these envelopes. Now, these five by seven, you could work on a four
by six if you want to look on any online store
for some card stock, and there's some great
deals out there. Of course, you're gonna
need some tape because we're going to tape our
cards down to the table. That's gonna give us
a beautiful border and also keep things
from warping, keep the paper from just flipping up when the
water's on there. I also like to let them dry. While they're taped down, it just allows them to dry flat, and then you can
remove the tape. Alright, so for the brushes, I recommend two brushes. Now, if you don't have a Filbert, then you
can use a round, but this is a beautiful
Filbert brush from my brush
collection, actually. It's a number 12, and that's
great for the petals. If you don't have
that, you can use this number 12 round
brush, and it's great. I'm going to be
using the Filbert today. And this is
a number eight. You can use a six or eight
just for smaller details. Of course, you're going to need a paper towel for dabbing
your brush just to get off excess water some type of a jar or container
for your water. And then your watercolor paints. If you have a spray
bottle to spray down everything, that's
fine. If you don't. You can always use a brush to just tap some water all around. That's all you need
for this project, it is pretty straightforward.
3. Setting up: I we're going to start
setting up our cards here. And so I'm just going to
line them up fairly close. I mean, these are
touching. And, you know, this is just how I'm doing it, but I like to just
tape them all in a line so that I
can I don't know, it's just easier that way. I actually sometimes
like to like, you know, eight or ten and
get to it just like that. So I can make a lot of
cards really quickly. And then I'm looking
through the tape, just trying to find the middle
of where to place this, so that it's fairly, you know, in between, like in the middle between this and the table. And then I just tape
it down just like sew. And once that first
line of tape is down, it's a lot easier to keep going. I like to show the whole process so that you can see what I do, what to expect, all
that fun stuff. Alright. Getting that
going. Rip that off. And, you know, once
you have your setup, you're feeling all confident and excited to start your journey. But before you're doing
this, I want you guys to remember that it is
not about perfection. And the therapist in me is going to remind you of that
hopefully during the process, because this is about creating
some cards that you know, will be stress free and
not perfect in nature, but that will bring joy
to someone else, right? Because I mean, unless
you're selling these, like, I sell these
on my Etsy shop. But I also give away
a lot of them, too, and people always get excited about homemade
stuff, right? And just think
about when someone makes something for you
with their own hands, it's a little bit
trickier to see through here, do your best. That's what I'm telling myself. Just do your best, Tammy. The rest will figure itself out. But, you know, I like getting stuff that people have
taken the time to make, especially when my
kids make stuff. It's just so fun. So, you know, think about that.
You're saving some money. You're practicing some
joy and self care, and you're making someone smile. So there we go. We're
all set up here. And now we're gonna get
our supplies in order. I think I'll just keep
my palette like this. And then you guys can see,
you know, part of that. I'm gonna be doing a
lot of pinks here. And then I've got my jar. I'm gonna go fill up with water, get myself situated, then
we're gonna get to painting.
4. First Layer: I got my brushes over here with my paper so I can
do some dabbing. And, you know, we're just going to go from here and
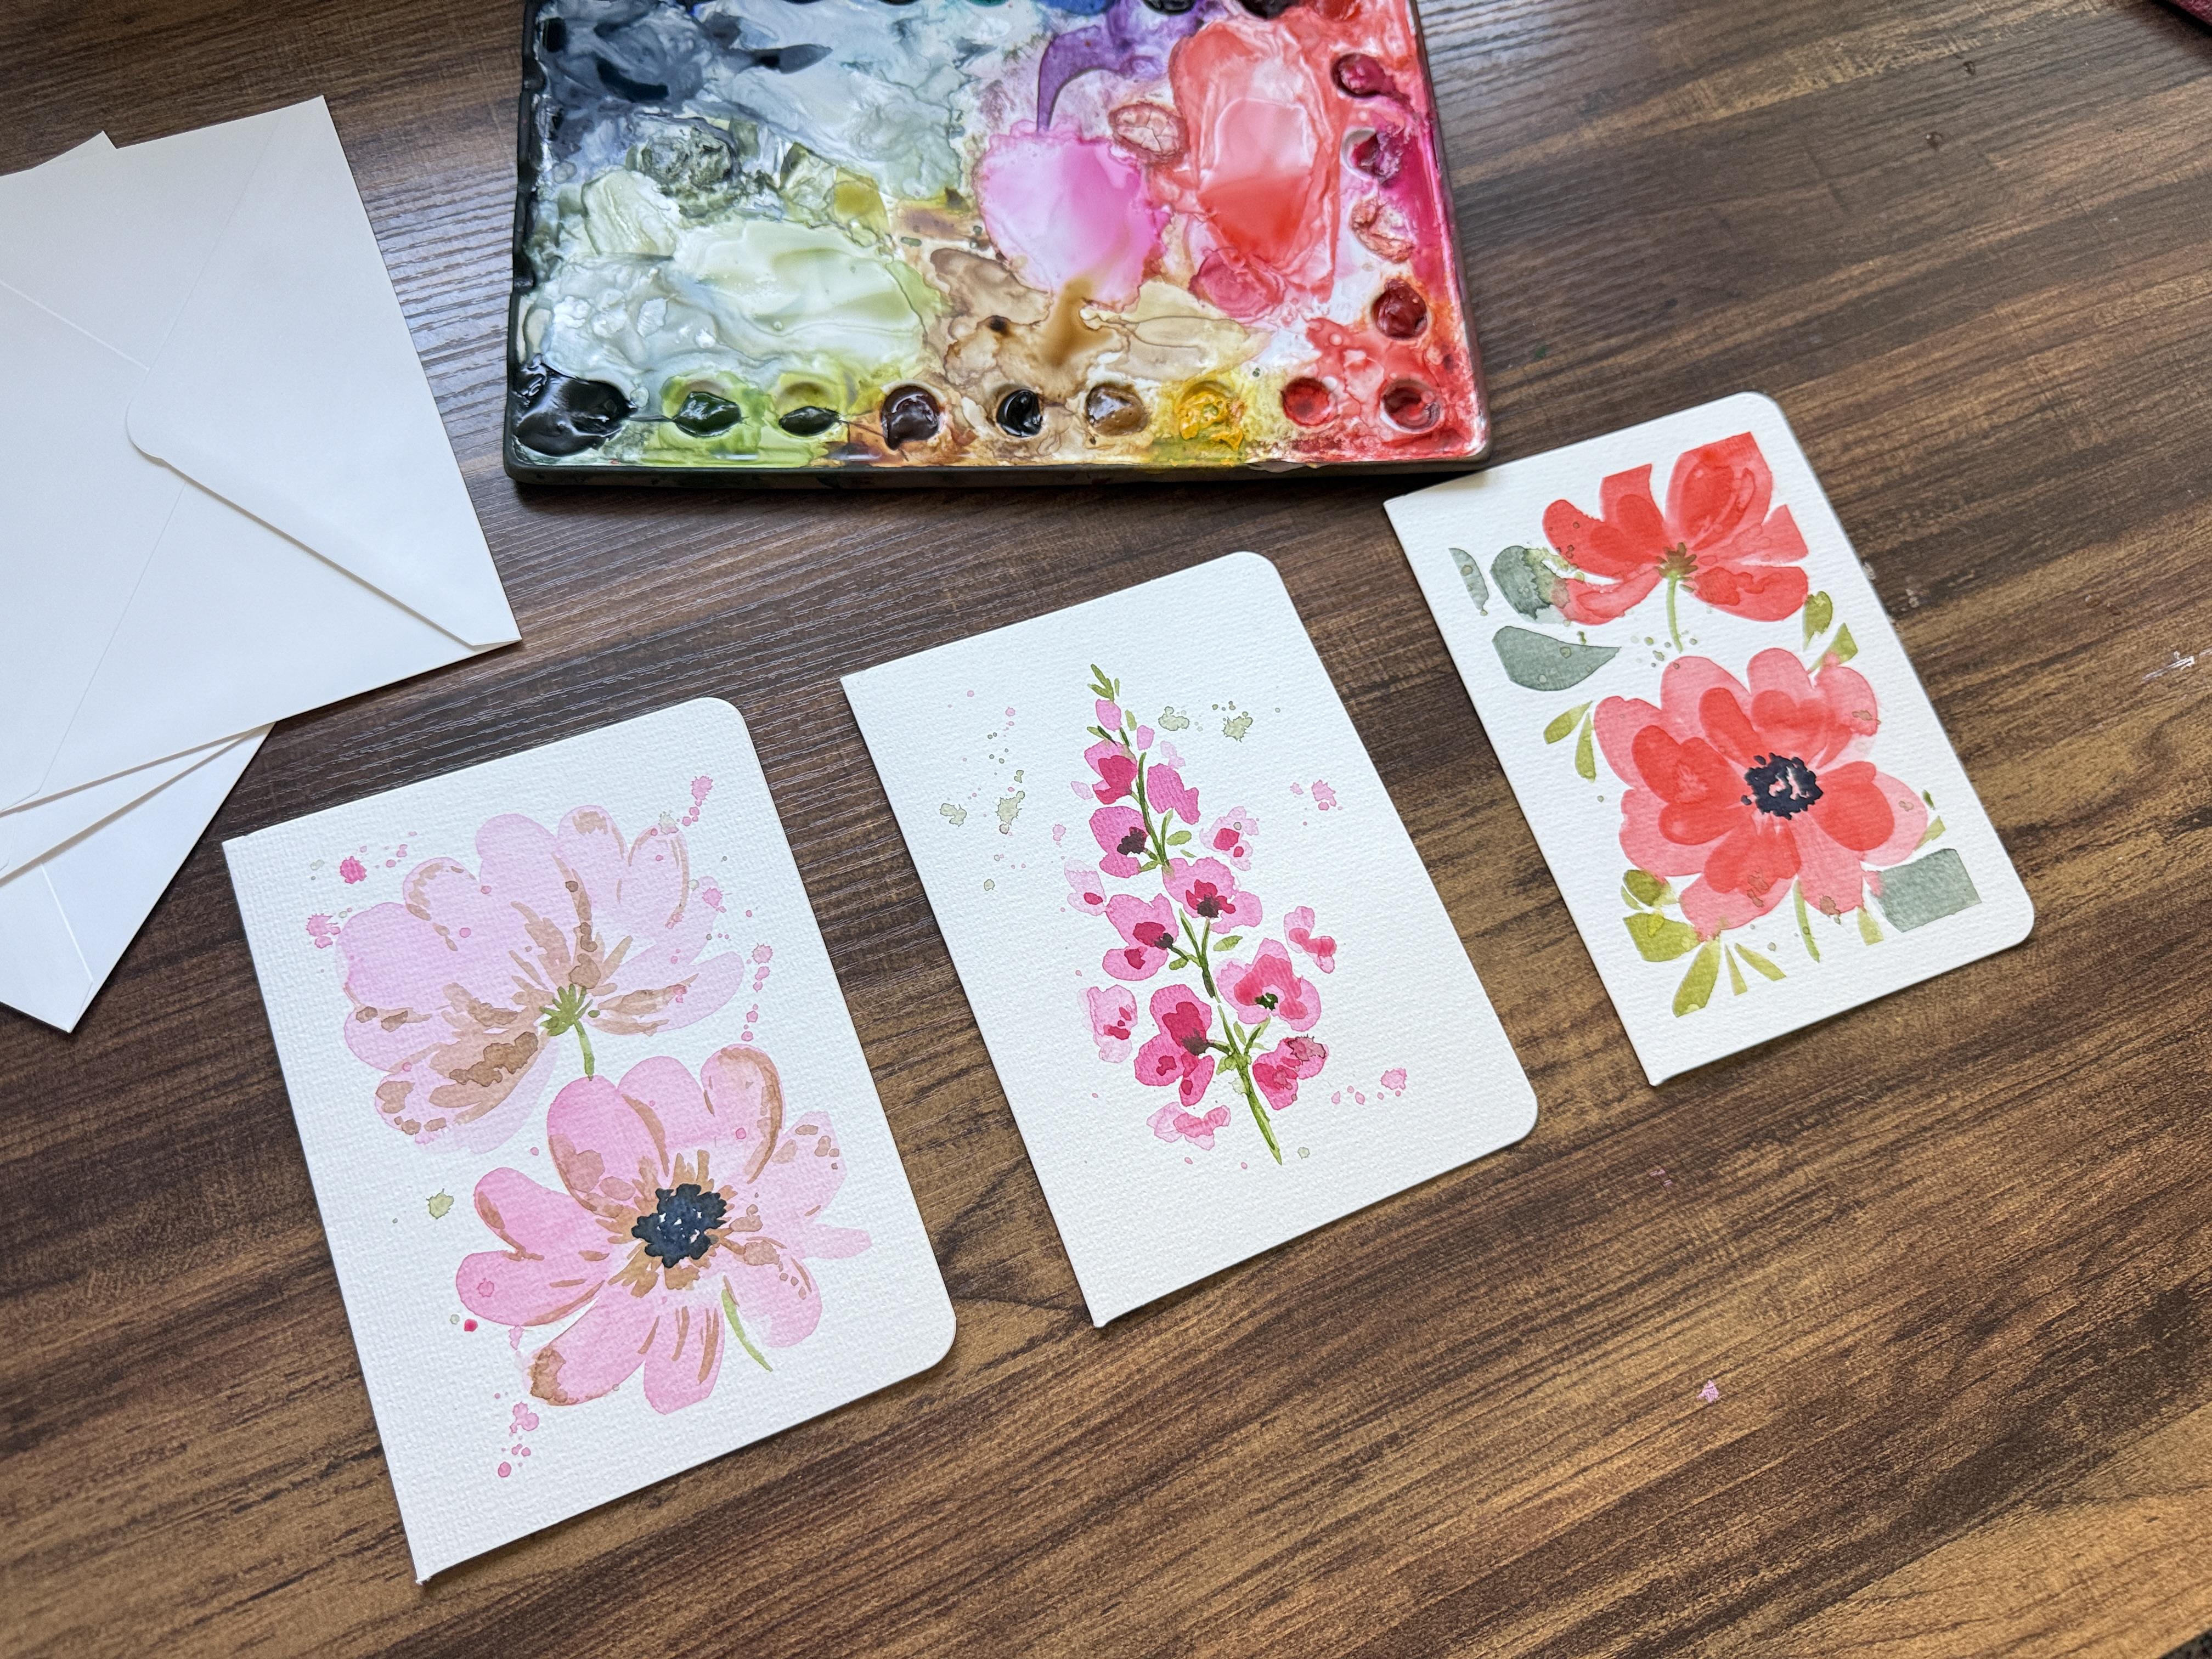
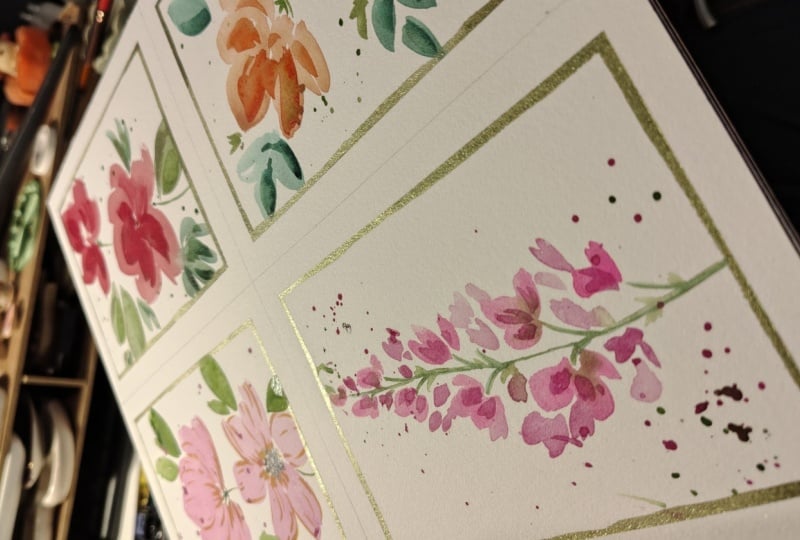
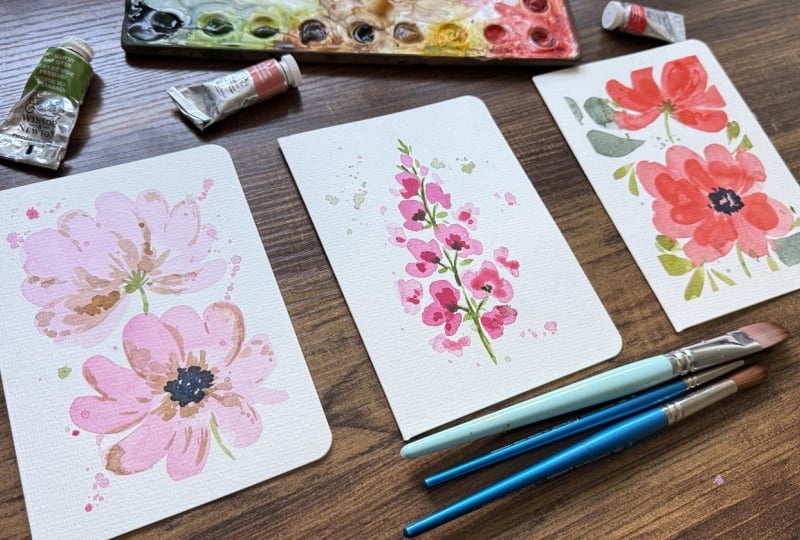
have such a great time. So here are those card packs that I'm just
basing this off of. So, you know, the
different designs that I have done
that I really like, especially like all
the greens here. This one is very simple with
side facing, forward facing, and this one with this
lovely stem of florals. So quite fun. I enjoyed these, and we're
just going to set these off to the side to use as
reference photos. So, you know, feel free to
use your own type of thing or feel free to use
exactly what I'm doing. But this is a class. You can go over it over
and over and just find so much fun and joy with it and always trying new
designs, which is the best. Okay, so in this first layer, I'm starting with the
large number 12 Filbert. Woof. Again, you can use the number 12 round if you
want. It's really up to you. And if you don't
have a spray bottle, you just dip your brush, and you just tap tap water
into the different wells. And voila, it's so easy. So I'm not using
all of these wells. You know, you can do a
blue theme if you want it, or even brown flowers
for the fall. You can do red and
green for Christmas. I mean, it's just limitless what you can do, but
it's so much fun. So we're going to start with
some light layers of paint. I've got some paint
already here. There's a lot of red. Yes, I was painting some red things. And so I'm just going to
go over here with a pink. And just swirl my brush, make a nice gooey, ooey gooey petal puddle, puddle petal, puddle
for the petals. And that's really
nice and juicy here. And we're just going to
start over here with those brushstrokes for
that side facing flour. So I like to do a brush stroke this way here, kind
of straight down. This will be the bottom
where the stem is pointing, and then we're going
to soop Alright, try to kind of swoop
it towards the center. It's this brushstrokes, the flick of the wrist that
helps you achieve that. I know it's easier
said than done, but it's a great
little practice. You can even flip your
wrist here and swoop it. You just want when you swoop it, you're not doing a
stick straight pedal. You are curving it
towards the center. And if you don't like a shape, you can go over it
a little bit more and clean it up a little bit. But that's going
to be good for a purpose of what we're making. For this pink, I'm
just going to add a little bit more pink over here, just to change it up a tiny bit. But I still want
really light layers. And then I'm going to
do take off the hair. I'm going to do a forward
facing. So a swoop there. So around here, swooping around. So I'm going to go down here
this way and over this way, we're getting all the angles, a little bit more paint. We're going to go around this
way, a couple more petals. And try to get it
to swoop in there. You can go upside down
like this if it helps. And so we've got
our two flowers. We're gonna let those dry. We are going to put down
this brush for now. Actually, you know what? We won't, since we
want to be productive, we're going to go with
this third one over here first or second, I should say. So this red is already here. It's a beautiful orangy red. Use the red that
you have, though. And we're going to
do this same type of flour, but right here. So, friends, let's get to it. So we're just getting a
lot of practice today. It can do a little brush
stroke to the left, a little bit to the right. And that's a bit of a thicker
one than we did over here. And then swooping over this way, swooping that way, a
little bit more paint. We're just doing a little bit of a swoop motion
towards the center, grabbing a little more
paint on this side, too, swooping, swooping, twisting
and turning our brush. Now, if we did stick straight
petals, it's not so great. I like to just curve it in and that's going
to look more natural. I'm going to grab
a little bit more of this beautiful red. And that's going to
be for a side facing, which is going over
here in the corner. So let's do that right now. A little bit to the left,
a little to the right. And then swooping swooping, swooping and upside down,
swooping right there. One more right here. So those are going to be
connected with stems. They're gonna look so great. Let's go ahead and
clean the brush. For now, and since we
still have that big brush, I want to put in a few of
the greenery right now. So with that water, I'm
going to swirl my brush. I'm just going to grab whatever green I want whatever
is on my palate. So swirling the brush, getting some of that beautiful green. This is a very dark green. If you don't have dark green,
you can add a dark blue to your green and
darken it up that way. And it's just rich and lovely. And then I'm just going to use this same brush to make
these leaf shapes. Alright, one there, one there, and then just a little
one right here. We will connect
those with stems. They will make sense later. A little bit more
paint, and I'm just going to put a leaf right here, curving to the left,
curving to the right. I can also just use
the side of the brush, maybe change up my green, grab something different, grab what you want, grab
what you have. And side of the brush, just little swoopy
marks for my leaves. Boop. Can go very fast. It helps you not to
overthink the process. And you sometimes end up with some interesting marks
you did not expect. Alright, so we'll
clean that brush. I want to put that down
and grab my number eight. And at this point, I'm going
to do that stem of flowers. So what I'm going
to start with would be the pinks that I'm using. So it's beautiful pink here, adding that to my petal
puddle. We're doing now. I'm just going to think of doing little kind of like
blobs of color. So using the side of that brush, just pressing down, just
kind of going like this, just dabbing, little
loose shapes for flowers. They're loose, right?
So they do not have to be perfect.
Grab more paint. We're going to go up a little
bit higher, a little bit. We're going to do more
of that cone shape. Again, looking at this one. That's what we're doing,
something like that. So then another one here.
A little bit there. And it'll all make
sense once we get the stem in there and
then just pressing. See how I'm just really
working quickly. And it's not a perfect shape. I think right here, I'd like
to add a little bit more, so I'm just going to add
just a couple little dabs. And then going up a
little bit higher, a little bit smaller amount. And then if we need to
cover, you know, more space, like add in some more
in the white space, we can do that once
it's all put together. We will know what we need, but just another little boop
and right there at the top. So again, very loose, very interpretive
cleaning that brush, dab it so it's not so gooey. And then I'm just going to
grab whatever green for these. I'll do the green
last on this one, but I want to start with
these since they're drying. So I've got a sap green. This is that medium kind
of grassy green color. I like it not too running, not too thick,
something like that. That looks good to me.
So we're just going to use light pressure
with this brush. And I'm just going to do a
stem that's slightly curved. And then some little
tiny marks here to connect the stem right here with the base,
just like that. And then I'm going to put
another stem right here. But it's a front facing so
you wouldn't see these marks here you'll see the
center in just a minute. And then over here, we're going
to do a stem also curved. And those same little marks. And if you're holding
your breath in any way, there's little stem here. Remind yourself
to breathe. Okay? If you hold your
breath too much, it's just I tenses up your body. It makes this whole process
a lot more challenging. So now what we're gonna do is try to do a little thin stem all the way down the middle
ish of these flowers. A little bit thicker
here at the bottom. And then what I want to do is some diagonal lines connecting the bloom to the main stem. So really light pressure,
connecting those together. And this is where you're
starting to see this really come to life looking
more realistic. And you can also see
where you need to add in some more pink just to
fluff it out a bit. I'm also going to put a
little bit of green right here at the top for some
buds that haven't opened. We can also add
some little buds, use the belly of
the brush to create these little marks to kind of fill those in wherever you
think would look good. Lot of the way I
paint is intuitive, so I encourage you guys to instead of just trying
to copy what I'm doing, actually try to just
intuitively decide, where do I want to put stuff? Let's add some more pink. It really adds to
your confidence. Right now, I'm just going
to do some more fluffing out of this stem of flowers. So see how I'm just
going boop boop, and boop boop kind of thing. Wherever I want it to be, I want these to
kind of stick out. I don't want everything
to look so perfect, 'cause nothing is truly perfect. It can be good
enough. You can make good enough art,
and it's fantastic. Alright, so we are
going to let this dry. We'll come back with
our second layer.
5. Second layer: Okay, everything is dry now. I actually made mine
dry with a heat gun, but, you know, you
don't always have to speed it up, enjoy your process. So, for these elements, we want to add in just a
little bit more pizzaz, some splatter, maybe
just some cool elements to brighten up any
little texture or shadow that you
wanted to add in. I'm actually going to go for
the brown today with these just to add in some
interest for shadow line. So I'm going to grab this
is my Vandyke brown, just a brown, whatever
brown you got. And I don't want
it to be too dark. But it is fairly dark. I'm just I'm aware that it is a little bit running with
water, and that's good. I'm going to dab my brush on the paper towel just to
take off some of excess. And then what I
want to do is just start putting in some
little little lines. I'm actually going to make
a dark center for these. But for this flower, I just want to start adding
in some brown to the center. The sent the surrounding
part of the center. The actual center will
be a darker color. But for this, too, I wanted
to just do a little bit of, you know, some little lines, so just kind of going
over the light touch, adding in some maybe, you know, outlining part of the petal. We're going to blend it
later, so don't even worry. Just trying to add in
some texture and shadow. So I'm being very kind of intuitive about it just
going around where I feel like I'd want some
of this texture to be it's quite a process when
you're trying to do it on your own because sometimes
it feels like it's like, What are we actually doing here? You know? It's
really hard to know. So it's a thing where you
start to, you know, practice. You put some marks down
thicker or thinner, you may be darker and lighter. Let's clean your brush, dab it on your paper towel,
and then we'll be spreading. And you get an idea, sense of, you know, what look
you like best. So I can actually go
in here and smooth out some of these harsher
lines, but actually like them. It's a light color I use, and I'm liking the style. We're going to do something
like that with this one, too. If you want to use a different
color than Brown, go for. So I got this brown on my brush. I'm going to dab it
on the paper towel again get the excess off. And then I'm just going to some little lines here,
curving them around. Of course, you can always pause the video if you
need to catch up, I know sometimes it feels
like things go too quickly. You can slow it
down if you'd like. But I'm just, you know,
same thing going around, kind of dabbing marks. Maybe some of these lines
go up a little bit higher. And this is just giving some pretty texture
and some pretty veins, marks, whatever you'd
say to our flour. Sometimes brown is a
surprising color to use. You could use pink, you know,
if you want to you could always try this again
and do it differently. You can even use the side of the brush and do more
of a thicker mark. Kind of like you're
filling in the petal more. So just play around with it, but try to make sure
that these marks are curved with the
curvature of the petals, and it's going to look
a lot more realistic more realistic,
more flower like. So we'll let those dry. We're going to head
over to this side. Now I'm going to
use that filbert again, grabbing the red, but I'm going to go a little
bit more concentrated for the purpose of
this experiment, I guess, a little more water. So I can get a little
more paint on my brush. I am going to dab
it on the paper towel as we have been doing, and then we're just going to do these little swoopy
marks over the top, so you don't have to cover
every single bit of it. But it's just to create
a little emphasis. And then we'll put in
a dark center, too. I want these to go a
little bit farther down. And then also with
this one here, a little bit of extra
pizzaz on these petals. And I'm only doing
it in a few places, helping it to stay a little
bit more artistic and uneven. Asymmetrical is the idea. And then for this one,
we've got some light bits, we've got some medium bits. And let's go a
little bit darker. So I'm just going
to take some of this beautiful pinky color. It's a little bit of white
that's coming out here, and I'm just going to dab some
little marks. Easy, peasy. Now, I'm not going to
put marks everywhere, but I'm just adding that
same interest, that texture. Once you start to do
this with your cards, you're just going to
have so much fun with it that you're gonna want
to make cards all the time. It's going to save
you a lot of money. Alright, really watery paint, we're going to go
for some splatter. So grab watery paint. Tap it a little bit, and then
you're just going to tap, tap, and just tap you a
brush to add some splatter. This one also is going
to need that color. And for this one here, I'm going to do some
green splatter, but it needs to be
fairly runny paint. So a little bit of splatter
there. And just like that. I don't want to forget about
the finishing touches here. So I'm going to
take a dark color you could take black or navy, darker brown, green,
whatever you like. I go for the dark one here. And I'm just going
to dab my brush. And make this circle
for my center, leaving a little white
space where I was dabbing. And I think this one, too, we're going to do the dark. It might spread a little
bit because of the red. I'm fully embracing that. Watercolor spreads, and it's just part
of the whole thing. Leaving a lot of white space. And I'm allowing my
brush to go outside that circle just to
keep a little wonky. I like a good wonky circle, middle. I like it. Alright. This one feels like it needs a little
bit more wonky now, like it's too perfect. Yes, more uneven. So take a look at your cards at your flowers and see if there's anything else
you want to change. I do want to add some green. So I'm going to do,
like, that medium green, the sap green for the
centers of my flowers here. So I'm just going to dab
again on the paper towel. We always dab when
we're trying to water control and add in
little centers. If you can, it's gonna
probably spread, and that's okay.
It's really okay. And a little bit of little bit of that green here and the stem, just to darken it
up. If you'd like. And I'm not even attach those little loose blobs
to stems because I think they're just pretty being loose and just kind of
floating out there. So there we are a little bit of green for
splatter on this, too. And why not? Let's just
go everywhere with this. A little more green. I did say that we were going
to add some stems, but I'm almost feeling okay with it being just very
loose like this. So here we are. At this point, you can
take off the tape. You have to be very careful. I mean, I told you to dry it, but honestly, I love doing
this process with my students, so we're just going
to go for it. So I like to pull away so
that I don't rip the paper. Some of this tape can be a little too sticky and it can
pull off some of the paper, which you don't want, obviously. If that's happening,
then you can simply take your heat gun and warm up the
adhesive on the tape first, and then it's gonna peel
off a lot easier for you. Be a bit more protective for your little flowers, your cards. Alright. Okay, let's keep going. We still have more to go. So, you know, this
process is fairly simple, especially if you do
multiples at one time. And, you know, I find myself. I think I've done ten at once.
That's the most I've done. It's just the more you do,
the quicker you can go, you're doing the same motions over and over if you're doing, like, similar designs
or the same one. And it's just quite fun. Make sure to sign your
card on the back, too, that you've created this. And, of course, just that
quick copyright law that, you know, these are my designs. These are the designs
I came up with. And if you ever wanted to make
these cards and sell them, that wouldn't be legal because I have created these designs. And if you create
your own designs, once you finish making them, they are under copyright
law, and they are yours, and no one can copy
them and say it's their work or sell
it under their name. So, but if you want to
give them away to someone, and, of course, let them know where you got the
design, it's fantastic. I encourage you to make up your own too. It's so much fun. Thank you so much for
painting this with me today. It's been a pleasure.
6. Final thoughts: So, friends, I really hope
that you enjoyed making watercolor flower
cards with me today. I hope that the process was fun, relaxing. You found some joy. You found some peace,
and you didn't worry about perfection because
that's not what this is about. We paint, we create so that
not only can we experience joy in that moment of making something
with our own hands, but then we can extend
that joy to someone else. When we share our artwork with somebody that we love,
that we care about, I want to remind you that when you are
done with your project, to upload a photo
or photos of your at the project gallery so that you can share
what you've done. We can offer feedback,
support you, and also learn from your
process because your cards are going to be different than
mine and someone else's. It's exciting to share and be part of that
community together. Also, if you've
enjoyed the class, I really ask you to
consider leaving a review. It just lets the
world out there. People that are looking into the class know what
the class was about, what your experience was like. I want to hear from you
what you enjoyed and what you learned and how you
grew by taking this class. Last but not least, if you are interested in purchasing
some watercolor cards, I do have an Etsy shop, and you can find the link in the description of this class. Friends, thank you so
much for being here. Happy painting,
happy mental health. Check out some of
my other classes, and I'll see you soon in
the next one. Bye guys.
 Tammy Kaye, Artist and Mental Health Therapist