Transcripts
1. Introduction: Hi guys. Hello everyone. During my today's class, I will teach you how to
animate your illustration. And you're going to start
with small, cute objects. And then you're going to move to a big project where we can
illustrates the whole art. My name is, I'm an artist, illustrator and I'm
obsessed with watercolor, magic of themes and cute art. And during my classes, I constantly shares
and knowledge that I have about
as a procreate. I share some useful
tips and tricks. How to use Procreate and how to simplify your painting
process a lot. If you don't want to
me is my classes, please hit the subscribe button. And guys, your opinion is very important to me
because thanks to you, I create my classes. I think about the topics that
you might like that I like. So if you want to share
with me your opinion, please do it in
discussion section. And also you can share your
own projects with me and you can do it in projects
and resources section. So guys, today, I hope that it goes through
the whole journey, my whole creative process. First of all, I'll
show you where to find and how to export
all my freebies. And then we will animate,
smoke your objects. And after that, we'll move
to the big projects where biggest paint and illustration
was cute character. Then we're going to animate it. And guys, I will show a
step-by-step process, create an animation. What we should do
in order animate some parts of our
object or objects. Then I will show you
there's a process how to create an illustration, how to add colors, how to add shades
and highlights. I will tell you what
is clipping mask, how to use layers
and blending modes, and also how to scores and hue
saturation and brightness. And in the end, we will create lovely illustration and
we're going to animate it. I'm going to focus on
painting cute illustration. And then we're going to animate some of the elements from set the illustration and z will
be our final projects. Your project will be same,
create, lovely illustration. It can be the whole composition. So whole illustration
or just some elements, skewed elements like exercises that we had at the
beginning of our class. That's totally fine and
please share that with me. I will help you to see what
you're going to create and I will be happy to
share my own feedback. And guys, as a bonus, I will share it with
your color palettes of time using the practice
of time using. And also I will add the
illustration that I created. Please feel free to use it
for your own art projects. And guys, this class is great
for intermediate level. Also, it can be useful for beginners if you watched
my previous classes. Maybe experienced artists
also find it useful because here you will find a way how
I animate my illustrations. And I really want
you guys to join me. I tried my best to make this
tutorial, fun and creative. Completing this
class will help you to learn what is animation, how to animate your
whole illustration or just tiny objects. And also it will give you some information
about Procreate, how to use its features, and how to paint in
fast and easy way. Guys, I can't wait to start
this class and definitely I can't wait to see what you
upload the project section. Please feel free to
enroll and let's enjoy painting process together.
2. Getting Ready: What is Animation: So I think we're
ready to get started. And during this
part of our class, I'll tell you what
is an animation, how to find and where to find the tools that will help us
to animate our illustration. And also in this
part of the class, I will share this user ways
how to export my freebies, where to find them, how to export them into the Procreate watercolor
palette do we have, and what brushes I am using
in order to create an art. So I think we're
ready to get started and you might grab your
Apple pencil, iPad. Let's start to paint. I think we're ready to start. And we open Procreate. And I've said we need
to create a campus. So we need to, to plus, and then we need
to choose square. And here we have
2000, 2000 pixels. And we're going to use rectangular shape
for our test class. And then we need to export also free pizza.
So how to dose it? When you open my class, please do it in browser. It can be Chrome or Safari. Why we should open my
class and browser, because if we do that
in Skillshare app, my freebies might
not be visible. You opened my class and
after that you go to Projects and Resources section. And in the right corner under
the headline resources, you can find all my freebies. This class will be a
little bit different compared to my previous classes, because usually I
paint in watercolor. And one of the
parts of our class is we're going to create
texture paper, but not today. But don't worry, even though we don't have the part
where I show you, where I tell you how to
create texture paper. And in the end, we still have our watercolor
illustration. I will show you one magic tricks that will help us to dose it. You opened my freebies after
that, your downloads them. And then you need
to go to Files, app, downloads folder, all
my free bus will be there. After that, you need to split
the screen on your iPad. Yeah. So as you see from the
right side we have Procreate and from the left side
we have a file's app. So sketch, drag and drop it. And let's create one more here. We can write paint here and less the same vis
the rest of the freebies. Now let's make it
invisible. New layer. Let's make it invisible. Same, we have color palette that is called
animation swatches. And guys, you also need
to drag and drop it into the procreate brush set, which is called animation. You just need to drag and
drop it into the procreate. And guys, we will not use
texture paper and actual paper, like what we usually did
during my previous classes. But thanks to my brush, which is called Bu
watercolor paper, we will have watercolor texture. I'll show you some magic
trick that will help us to do was speaking about color
palettes, that animation. This is a color palette
that we're going to use during our today's class. I decided to grab
pretty muted colors. Mostly going to use
today procreate brushes. You're going to
use to my brushes, which is called boot and
book, watercolor paper. And I think that's it. Now let's go to the next part where either tell
you about animation, about the basic tools
that we're going to use. We're ready to start
exploring animation process. So we open Procreate. Then when you go
to Actions button, you go to Canvas. And here we have an option which is called Animation Assist. So when we press
it, we turn it on. We automatically enters
the animation process. Here we have some frames. The first three frames are empty because when
you go to layers, you see we have three layers
that are actually empty. If you don't want to
have them on the panel, we just need to turn it off. And you see
automatically we remove the frame from this timeline. After that, if you want
to add some frames, you might add frame here. And as you might see, we have the new layer. You don't need it,
you can delete it and automatically z will be deleted
from the panel as well. Guys, because our animation
Guides is turned on, you see our layers, they don't interfere
with each other. Because if it turn it off, I'll tell you, you see, we have also layers setup visible and you see
it's a little bit mess. You turn on animation assist and here you might switch
between the frames. Also, what else do we have in this animation assist panel? We have Settings and
as you might see, if we can add frame
and we can remove it, you already know how
to dose it, just tab. And here we have
delete or duplicate. And speaking about settings. And guys, the first
three options, they will define how your animation will
look like here also, we have frames per seconds. That means how fast
our animation will go. And I tend to have like three
or four frames per second. The more frames you have, the faster your animation will
be. Thanks to onion skin. We can see previous frames and
I think it's time to move, to jump to the next
part of our class where we actually going to explore, try on our own animation, all those features, Let's do it.
3. Animation Exercises: During this part of the class, we will have some small
exercises where we will practice how to animate
our illustration. And we're going to start
with some simple art. Guys. You might find all
the illustrations that I created,
Emmons of freebies. You might export them in users in order to create
your animation. Or if you want, you might
create your own art. Once again, it's all up to you. The most important things that I want you to feel
during my classes is coziness and that you might get some knowledge
about animation art. So let's not wait, and let's get started painting. And guys, before we
start animation process, I want to tell you
that yard animates a whole object like
the whole art, e.g. this lovely rabbit. Or you can animate
just part of your art. So you actually can
draw the illustration. And then maybe you want
the leaves to move or you want to see
is it clouds float? And yeah, you can do it. In once again is a picture
that I added to the freebies. You might use them or you
might draw your own art. That's totally fine. I just
wanted to save you time. So we have rapid, I have two frames. As you see, I paint
the first art. We'll existence
the first rabbit. And I draw the pole
of rabbit next to the belly and our next frame, this one, I decided to
make him even happier. So you see, he is
jumping a little bit and he changed the
position of his pulse. And guys, when we
go to Settings, our frames per second is four, and I have loop options. So let's see what we have. So praise a lovely
rabbit who is jumping. If you want to have
more smooth art, you might create one
more frame in-between. I can show it. E.g. we have
our Lambda rabbits at one. We can duplicate it and move
it a little bit higher. Just a little bit. 1231234. Let's try plate. You see it's like he's
jumping in the air. Yeah, guys, you might
play with settings. And guys, if you increase
frames per second, you see the speed is faster. And the guys here we have the options how our
animation will look like. If it's been born, you see
he's jumping up and down. If it's loop, you just
repeat it like in a circles. If it's one shot, you just have your animation ends at
it and it will stop. I prefer to have loop option. Guys, if you want to save
your art, what should we do? In this case? It's
good that we don't have any background for our art. If you want, you can turn
off the background option. And when you export your art, when you export your animation, you can export it to be as
transparent background. So in this case, you just turn off
our background color and after that you
go to Share option. And here we have options. What should we do? Here we have animated GIF, and this option will let us save our art with
transparent background. Alpha threshold helps us to control the transparency
of our rabbit. So as the motor told you have the more transparent
derivatives guys here we have an option
transparent background. But because I turned off
the background option, we automatically have
our Art transparent. And guys, here we also
have frames per second. So you can increase your
art if you want to. You can lower the amount of frames per second
so it's up to you. And then you go expert. And your art will be
exported in GIF format. We use transparent background. So once again, if it doesn't
turn off background color, you go to our Actions button. We go to animated GIF. Here, we can turn on
transparent background. And guys in Max resolution, size of your art, of your animations, you'll get pretty much beak, almost 8 mb. And guys Web Ready
will reduce the size, the quality of your art. I usually save it as a max resolution
because in this case, I will keep quality of my art. And after that I export
it into my files app. I'll give you guys
another option as a thing that you need, you might need to do. When we go to background color, we might go to green
color. Why we do that? Because one more option how
to save this art is MP4. You go to Actions button, you go to animated MP4. And here you might experts is largely rabbit in video format. Why it's important and who
might need it if you create some video content
that might be useful because you might use a
stickers when you edit video. You might add them
into your video. And when you add is
this lovely rabbit, you still keep this
green background. But thanks to some
video editing apps like Final Cut Pro
or luma fusion, you might use some tools
that will help you to remove this green
FXS transparency. You still can use gifts
that we just saved, but the length of your GIF, in this case will be shorter. If you have video, you can
extend your animation. If you select all the
rabbits and you group them, you will have just one frame. So if you group all
our layers and it will turn into just
one frame, that's it. Let's turn it off. And let's turn on another
art that we have. This is our lovely cat. When it's been born. It's pretty good because
you feel the flow it does. This is a second art and what I did in order to
reach this effect, I will show you our first frame. So if you have a cup
and inside the cup, we have hot chocolate
ways lovely cat. So what I did in this case, I just changed her eyes and
I just changed the heart. You might sit here. And also I shows the flow of our hot chocolate and that's it. So what should we do in
order to reach that? What I did, I pains a
base like I paint cat, I paint mark on a new layer. I drew the heart and I drew
the elements set movable yet. So I drew hot chocolate and I draw eyes on you there as well. So guys, let me briefly show you what I was talking about. So like I told you,
I paint this mark, this cat as a base here, and I duplicated it. So as you might see, I have two max equals as same, but also what I did originally, I also change the position
of our hot chocolate, so you also need to do it. Here's one position and you move it a little
bit to the right. You might show it
thanks to the strokes. So we have our base, we have
our lovely kids in Mark. And like I told you, I paint heart and one face
expressions, this one. And as you might see, I
did it on a new layer. Why I did it on a
new layer because I want to change this first
expression and heart. And if I do it, if I draw it on the same layer where we have our mark and cat, we can change it later. We need to redraw it completely. And I want to save some time. And after that, I
decided to draw another face expression
and bigger heart. So I create a new layer and I drew this lovely ice and Islam, the heart likes it. And I edited to the second duplicated
layer with our base. Yeah, these are kid
in a mock this one. And after that,
when I was pretty much satisfied with the result, I just merge it together. Like I said, I returned to the original to our first
illustration yet, where we draw the
first face expression of a cat and I merge
it together as well. So now we have two
different layers with different face
expression and varies. A little bit bigger eyes and with a little
bit bigger heart. After that, I go to
animation assist guys, make sure that your layer
is turned on, it's visible. I just can press Play. If you want. You
can duplicate it. In order to extend the time, the length of your art. You might do it again, duplicate first layer
and move it to the top. Duplicate second, and
move it to the top. Here is our lovely cat. And guys. Now I want to show you how to make background and foreground. And for that, make sure that all your layers that are from the top and the
bottom are visible. So that's why I moved. You see our rabbit
and I moved our base, our sketch to the middle. You can see it here. It won't appear on our panel. It's fine. But if you keep it on
a places where it was, you might not use background
and foreground option. So now it's in the middle
and we have our first frame. And guys, when you
go to the panel and you press the frame, you have the foreground option. It means that when you
press it foreground, so this slide will stay like that the whole duration
of your animation. On the contrary, if you go to the first frame
and you press it, you have background option. If you turn it on, you will have your background
option on and n guys now, I will tell you what
might happen if you keep your sketch invisible on
a top of layer panel. If you keep this group layer invisible as well on a button. So when you go to
our animation panel and we press our cat, yes, the first slide here, we don't have the
background option. When we go to the
last slide where we previously had
foreground option, we don't have this
option as well. So make sure that your first
and last slide is visible. Again, I think this is everything that you need
to know about animation. And let's move to our last final part where we're going to create lovely art and
animate some of the objects.
4. Painting Illustration: Finally, we move to our next
part and during this class, we're going to learn how to
create lovely illustration. We will add some color, shades and highlights
to our character. We will not devote thoughts
of time on painting process. We're going to add some basic color shades and highlights. Of course, if you want,
if you have time, you might devote all your
time to your illustration, or you might just create some
simple art. It's up to you. Once again, our most
important thing is to animate our illustration. So let's not wait, and let's keep drawing. We're going to create
phrase and Ned brush. This brush is semi-transparent, is very looks like watercolor, but it's a little
bit more opaque and I like the
texture that it has. So now let's start adding
colors to our lovely pancreas. And I'm going to grab
a bright blue color. And I will move to my
main object layer. I created a few new
layers and I named them. So we have the sketch layer, we have moving objects. This is the object set
will change its position. We have foreground.
In the foreground, you have our leafs, backgrounds. We will have water, we
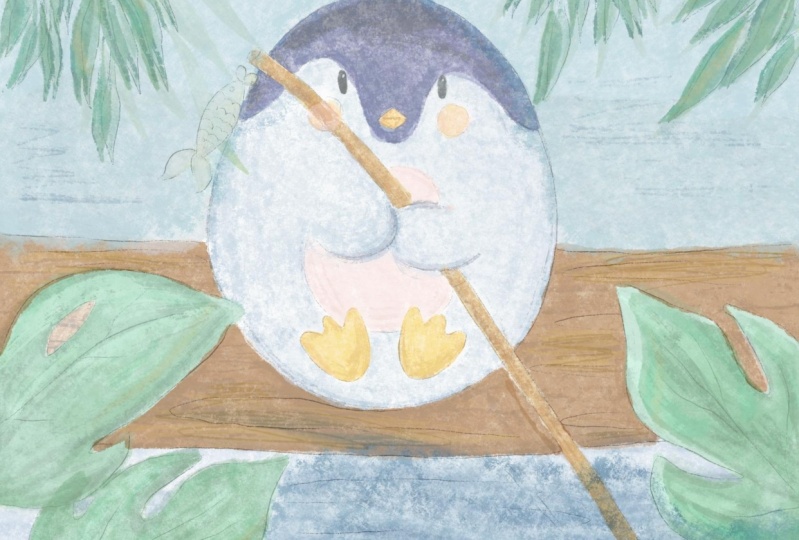
will have this tree trunk, and we have some kind of air. And our main object is this
lovely pinwheel. By the way. Before we start, I want to tell you what we're
going to animate. And that will be this lovely
fish, this lovely feet. And also I want to show
the flow of water. So as you see, I'm not going to animate the whole illustration, just some elements from set. So main object,
phrasing it brush. Now a little bit darker color. Change the size, make it
a little bit smaller. And guys, like I told you, this class is not
about painting, it's more about
creating an animation. So we're going to draw, but we want a put lots of efforts in our
painting process. We just need to show pretty
lovely penguin and that's it. So of course, if
you have more time, you might spend more time
adding details to our art, illustrating it in
a way you like. I decided to pick
pretty harmonious, a little bit childish
colors because our art is very cartoony. And I want to add some
childish wife to eat alkene. Next. We need to add some
color to this wooden stick. And as you might see, I paint
everything on one layer, not everything, just
our main object. And then another part of our illustration will
be on new layers. Now I want to duplicate it
and remove the transparency. So a duplicate as a layer. Then I went to hue
saturation and brightness. And I will move the brightness
to maximum to 100%, and I will merge it together. Now let's go to
background and let's keep adding colors
little by little. Now it's time for
the tree trunk. And I will place our background
behind our main object. Let's create one more layer. And I just want to
add some water and sky behind our lovely a penguin and water. Okay, we've
done with this part. Now let's go to foreground, and here we have lovely leaves. And guys for the leaves, I'm going to change
the brush tool. Blackburn controls the size. And I liked that. It has different texture. I can actually show
you one magic trick, what you can do in
order to save the time. Like sad. And here I'm going to go and
grab a darker color. Lovers the size of ZBrush. Okay, what else should we do? We can duplicate this layer, this foreground
layer, and move it. Selection tool, flip
horizontal or vertical. It will cover our lovely
pen been just a little bit. And it's totally fine
because I'm going to show you how this foreground
option works. Actually, I decided to make this side a
little bit bigger. Like I show you. I put it here and I will cover our lovely
fish little bit. That's important
because I'm going to make this object movable. So then I'll put it here. Maybe increase a little bit. Duplicate one of the leaves, leave horizontal,
increase their size. Duplicate our original picture. Make it smaller. Duplicate our original
picture, make it visible. Lipid a little bit. And you can change
some of the leaves. Now let's merge together. Of foreground leaves. Merge together. Now let's draw those leaves,
create one more layer. Also rename and
call it foreground. I'm going to change the color
a little bit. Same brush. I like that. It has its rough
edges. That's what we need. We can love ourselves. Sketch layer, create
one more layer. So I'm going to draw is
just as true leaves. And after that I will duplicate them and just saying what we did with our three. Now, duplicated. And flip horizontal. Maybe move it here,
merge together. The horizontal, make it smaller. We're done with those parts. Now, it's time to add some
colors to movable objects. And we're going to merge together our
foreground like that. Lead and we don't
use this foreground. Turn it up, delete. Go to moving objects.
Phrase in it. If you don't like phrasing
that you might use qual brush, they're
very similar. Wall is pressure sensitive. Pink cheeks are key, law versus kitchen layer. Even more. Guys, it's time to
add some shades. And after that, we're going to animate some of the elements.
5. Adding Shades and Highlights: Okay, next step, I
know is that phrasing, it is pretty much
our buck brush, but still it just in case
let's remove the transparency, go to the background, go to the lower layer,
adjustments, hue, saturation and
brightness and move maximum to 100 per cent. Sam visit tree trunk. Moving objects
should be very open. They shouldn't be
transparent at all. Foreground, you don't need to remove the transparency because Blackburn brush is very dark. So great. Now I will show you
the magic trick, how you can add shapes without
going beyond the lines. First option is to
use Alpha Lock. So when you just
press alpha lock on our leafs layer and
you start adding shades, this is one option and nasa one, you might create one more layer above your breast clipping mask, move, multiply,
blend layer mode. You can start and
shades as well, Lexis, and you also don't
go beyond the lines. And we have one more
way, one more option. So what should we do?
E.g. if you go to the foreground and we
need to select it. Select, after that, you see
our leaves are selected. We need to create one layer above and we need to press mask. And after make sure that you are on a layer where
we're going to draw. Grab color, same
Blackburn brush. And you see when you draw, you don't go beyond the lines. That's very convenient. So this is a third way
how you can add shapes. Choose the size that you like. I just decided to
use this option because usually we
use clipping mask. And I know people who
are watching my class, who are watching my
previous classes, they already know
what I'm doing. So I decided to show
you a new tricks. You can edge. So I'm trying to make
edges pretty dark. Now, what about highlights? Let's grab brighter color and add a couple of strokes that will help us
to add some highlights. This brush is very textured, like I told you, it's very
suitable for our art. It doesn't require you
to spend lots of time adding details about
sausage leaves. I'm not going to add
lots of shades because I don't want to distort
people's attention from how main object from our
lovely cute penguin. Now, let's add some highlights. Not everywhere, just some
main leaves. Thanks. Okay, we've done
with XOS shading. Now let's move to next part. And if you like everything, you can just merge it together. And those same with background. Select New Layer, Mask, original layer, little bit
darker color, same brush. Don't forget, you need to
show shades from leaves. She's froms a wooden
stick here, of course. And edges also will
be in a shadow. Then also you have
one more option. You can add Bu would follow
the direction of the brush. And now it looks like
real tree trunk. Great. Now let's go to the background. For water, we also have
one very cool option. Select mask, Blackburn, grab
little bit darker color. To show some, just a
little bit of texture. I don't want to add too much. And you guys now
you're corrupt oceans brush and guys to
be on mask layer. And we just add some water. It looks very
realistic like that. And I forgot about
how lovely Pangaea. So let's merge it together. Select Mask, go to original layer,
Blackburn, more texture. Let's add to the main
body some shades as well. It says brushes, very textured. Cool too little bit darker
shades and go to the edges. We need to show this
is bamboo tree. And now are moving objects. If you'd like everything, just merge it together. Select mask, some highlights. And lovely fish. Mercury brush. Finally, Dan is all shades. So that's our lovely
illustration. And then we need to
merge it together. And guys, like I told you, if you also can add some
watercolor texture, here is a trick how
we're going to dose it. We don't need our
sketch anymore, so we're going to turn it off and we can actually delete it. I have to say it when you
go to the foreground, we need to use
Clipping Mask and then move to multiply
blend layer mode. After that, we need to grab
pretty beige color prepped, broke the dark page and go to
BU watercolor paper brush. After that, you just
need to add some fields. That area of our
lives, We ZBrush. Now, I'll show you
the magic trick. So you see now it's barely seen that we have watercolor texture. But when we duplicate this
layer, little by little, you might see if you start having this watercolor
texture paper. And it's very loudly,
That's what we have and what we like. So I'm going to
keep it that way. You might just say on
this pen V and I think also clip it, moved to color, burn. Then duplicate it. And you will have this lovely watercolor texture
merged together. Same visit tree trunk
lipid, Color Burn. Now it also has a
watercolor texture. And what else should we add? And also our background
create one layer above, clip it, Color, Burn, replicate, merge together. Then guys, you feel
like everything. If you want to
keep this texture, I can show it to you. So without texture, texture, you might just merge all
the layers together, like what we did before. So merge together,
merge together, merge, merge and merge that they've
done with this part. Now I think it's time to
animate our illustration.
6. Animation Process : Finally, we move to our last part about vegan
start animation process. So we have our illustration. We already had some
exercises that help us to understand how
to animate our art. And now we are ready
for our big project, where we're going to animate
our big illustration. Once again, grab your iPad, Apple pencil, and let's
finish our project. Okay, So what should they do
in order to animate our art? Once again, what
we will animate. First of all, this is
lovely feed also cheeks and this lovely fish
also want to show some water movement and
such will be the end. Once again, adds a foreground. We will have our lovely leaves. And as you see, this leaf is
covering this lovely fish. And as a background
we have tree trunk of water and some kind of air. And our lovely penguin
is our main object. First of all, I'm going to
duplicate our moving objects. And then I will go to Actions and I will press
Animation Assist on. So here we have our
lovely objects. So I will go to this
object like that. And I just want to select it and move it a little
bit to this side. Say I'm going to do is feed. Now, I will duplicate
this layer one more time and I will keep
moving our objects. You see it, thanks
to the onion skin, will see what is
going on where we have our first layer,
second and third. Now, we shouldn't
forget about cheeks. Selection tool. Bigger. So now you can see
original one, bigger, bigger. And here he sees a movement
of our lovely fish. What else? What's your movement? Yeah, this is our way. Guys. I'm going to merge this part. We use a tree trunk. Why we should do it? Because when we use
animation drawing guide, those parts are on separate layers and
we don't need that. So I'm gonna go to this part and merge it together
with tree trunk. And same I'm going to
do with our pancreas. Because our pen been also should be part of
the background. And this is foreground leaves
and this is background. Last part, we actually need
to add some flow of water. And I'm going to
use backward brush. Now our aim is to move it
a little bit to the sides. Does the right side, you see? Now what we're going to do. We will duplicate it the second layer and
move it further. Let's see what perfect. Okay guys, what
I'm gonna do next. I have those layers. He has a duplicated waves
layers on separate layers. Now I'm going to
merge it together with the rest of moving objects. So if you have three different
layers of moving objects, I can rename it, say moving object one. Rename it moving object to
rename moving object three. So you see it on a first
moving object one. We already have this waves. So I'm going to merge moving objects to this
second selection. So I'm going to select
moving object three and merge it together
with the rest of waves. Now I'm going to show
you this magic trick, how we can set background
and foreground. As you might see, all
the layers are visible. So when we go to the foreground, we need to make it visible. We need to make it on. So it means it's foreground
will be always on. You can see, you
see no matter what, the foreground stays
untouched, match. We also need to do
same as background. So what should we do if we go to the background and
also set it on? A background option,
always will be on. You might see. So now you see is a waterflow. You see is it our pen Venus? So lovely. Guys, if you want to
extend our animation, if you want to make duration
a little bit longer, you can just duplicate moving
object one and move it above our moving
object three layer does same with a second object. Move it above moving object one. Wk is a third moving object, and move it on the top of moving object tool. Let's check it. In a settings, if
you would like, you might move to the ping-pong. Here. This lovely pen going to be skewed cheeks
is just fishing. And I think that's it guys. Now you know how to
animate your art, how to animate the
whole illustration, how to animate in
different objects, and how to add
watercolor texture, even without watercolor
texture paper. So guys, let's see
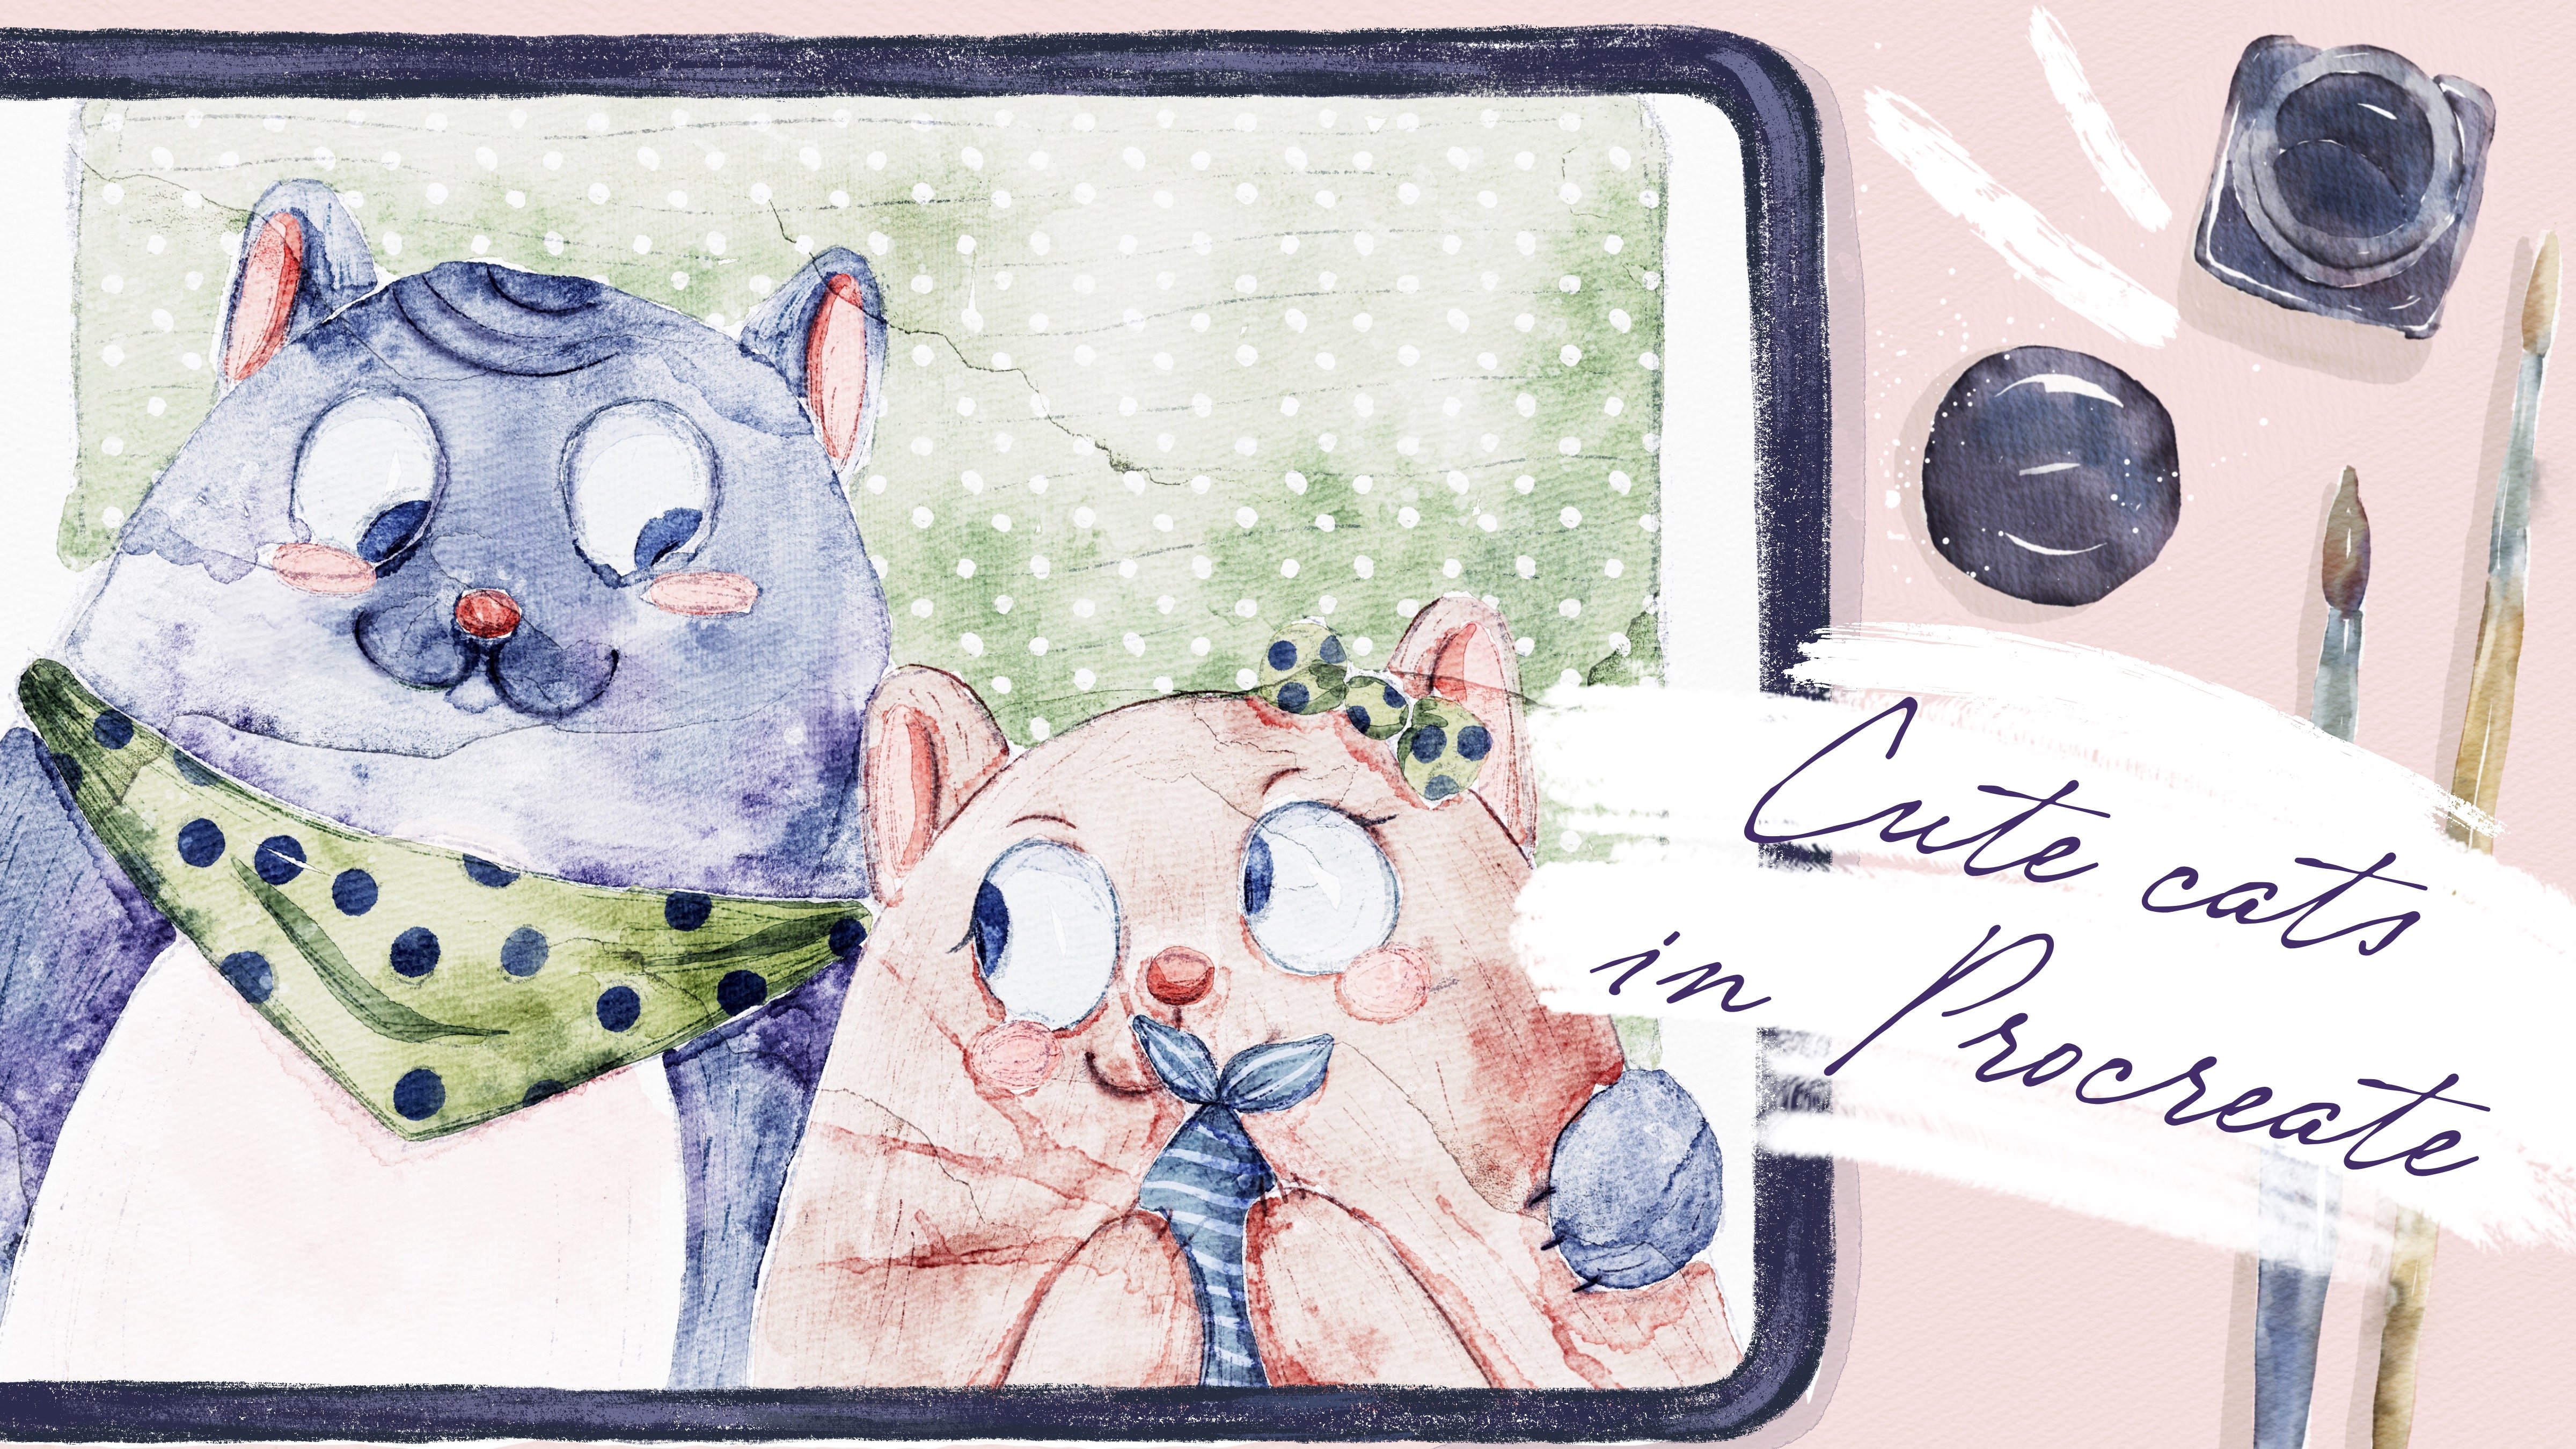
Charles in next class. And during our next class
we are going to paint two lovely cats in
watercolor style. I will be very happy to see
all your artworks though, give my own feedback. And I would be very
glad if you could leave your comments in
the review section. So let's see each other. Very, very son. That was the end for
our today's class. And now you know
what does animation, how to use some
tools in Procreate. It will help you to animate your art in a fast and easy way. Guys, I wish you luck and inspiration because
all your artworks, and let's see jazzy
and next class.
 Inga Yoon, Digital illustrator and teacher