Transcripts
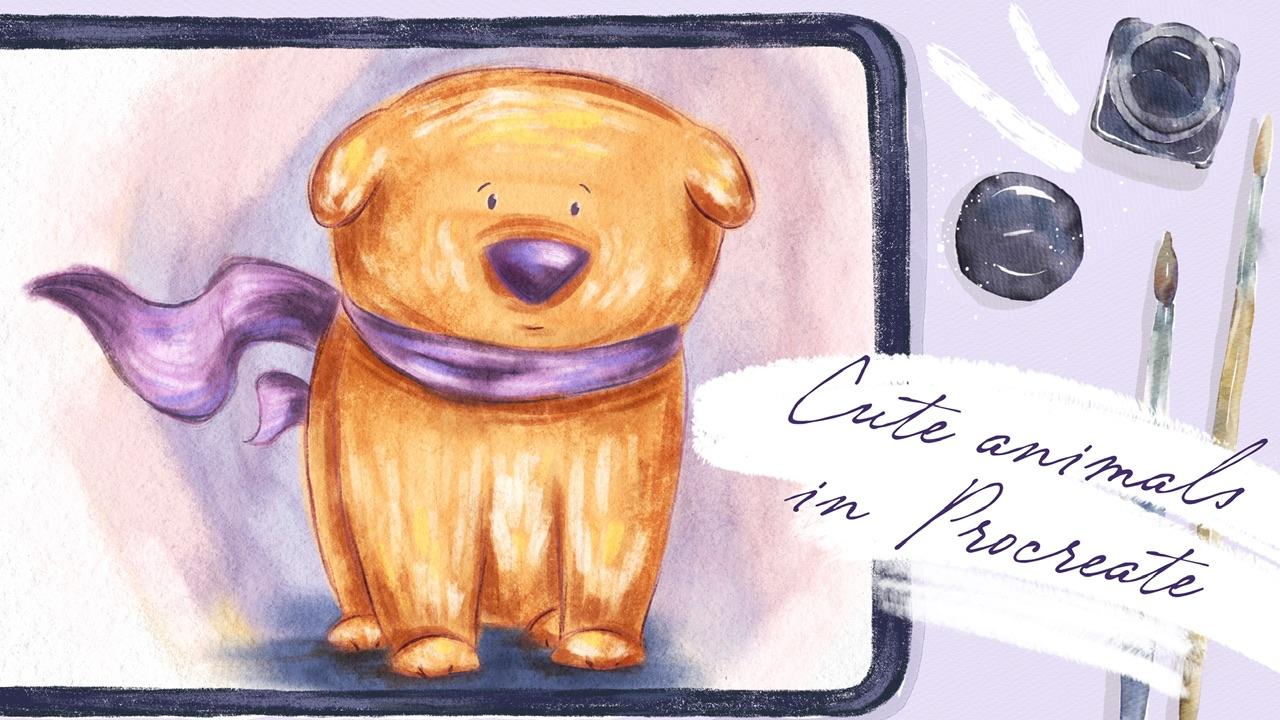
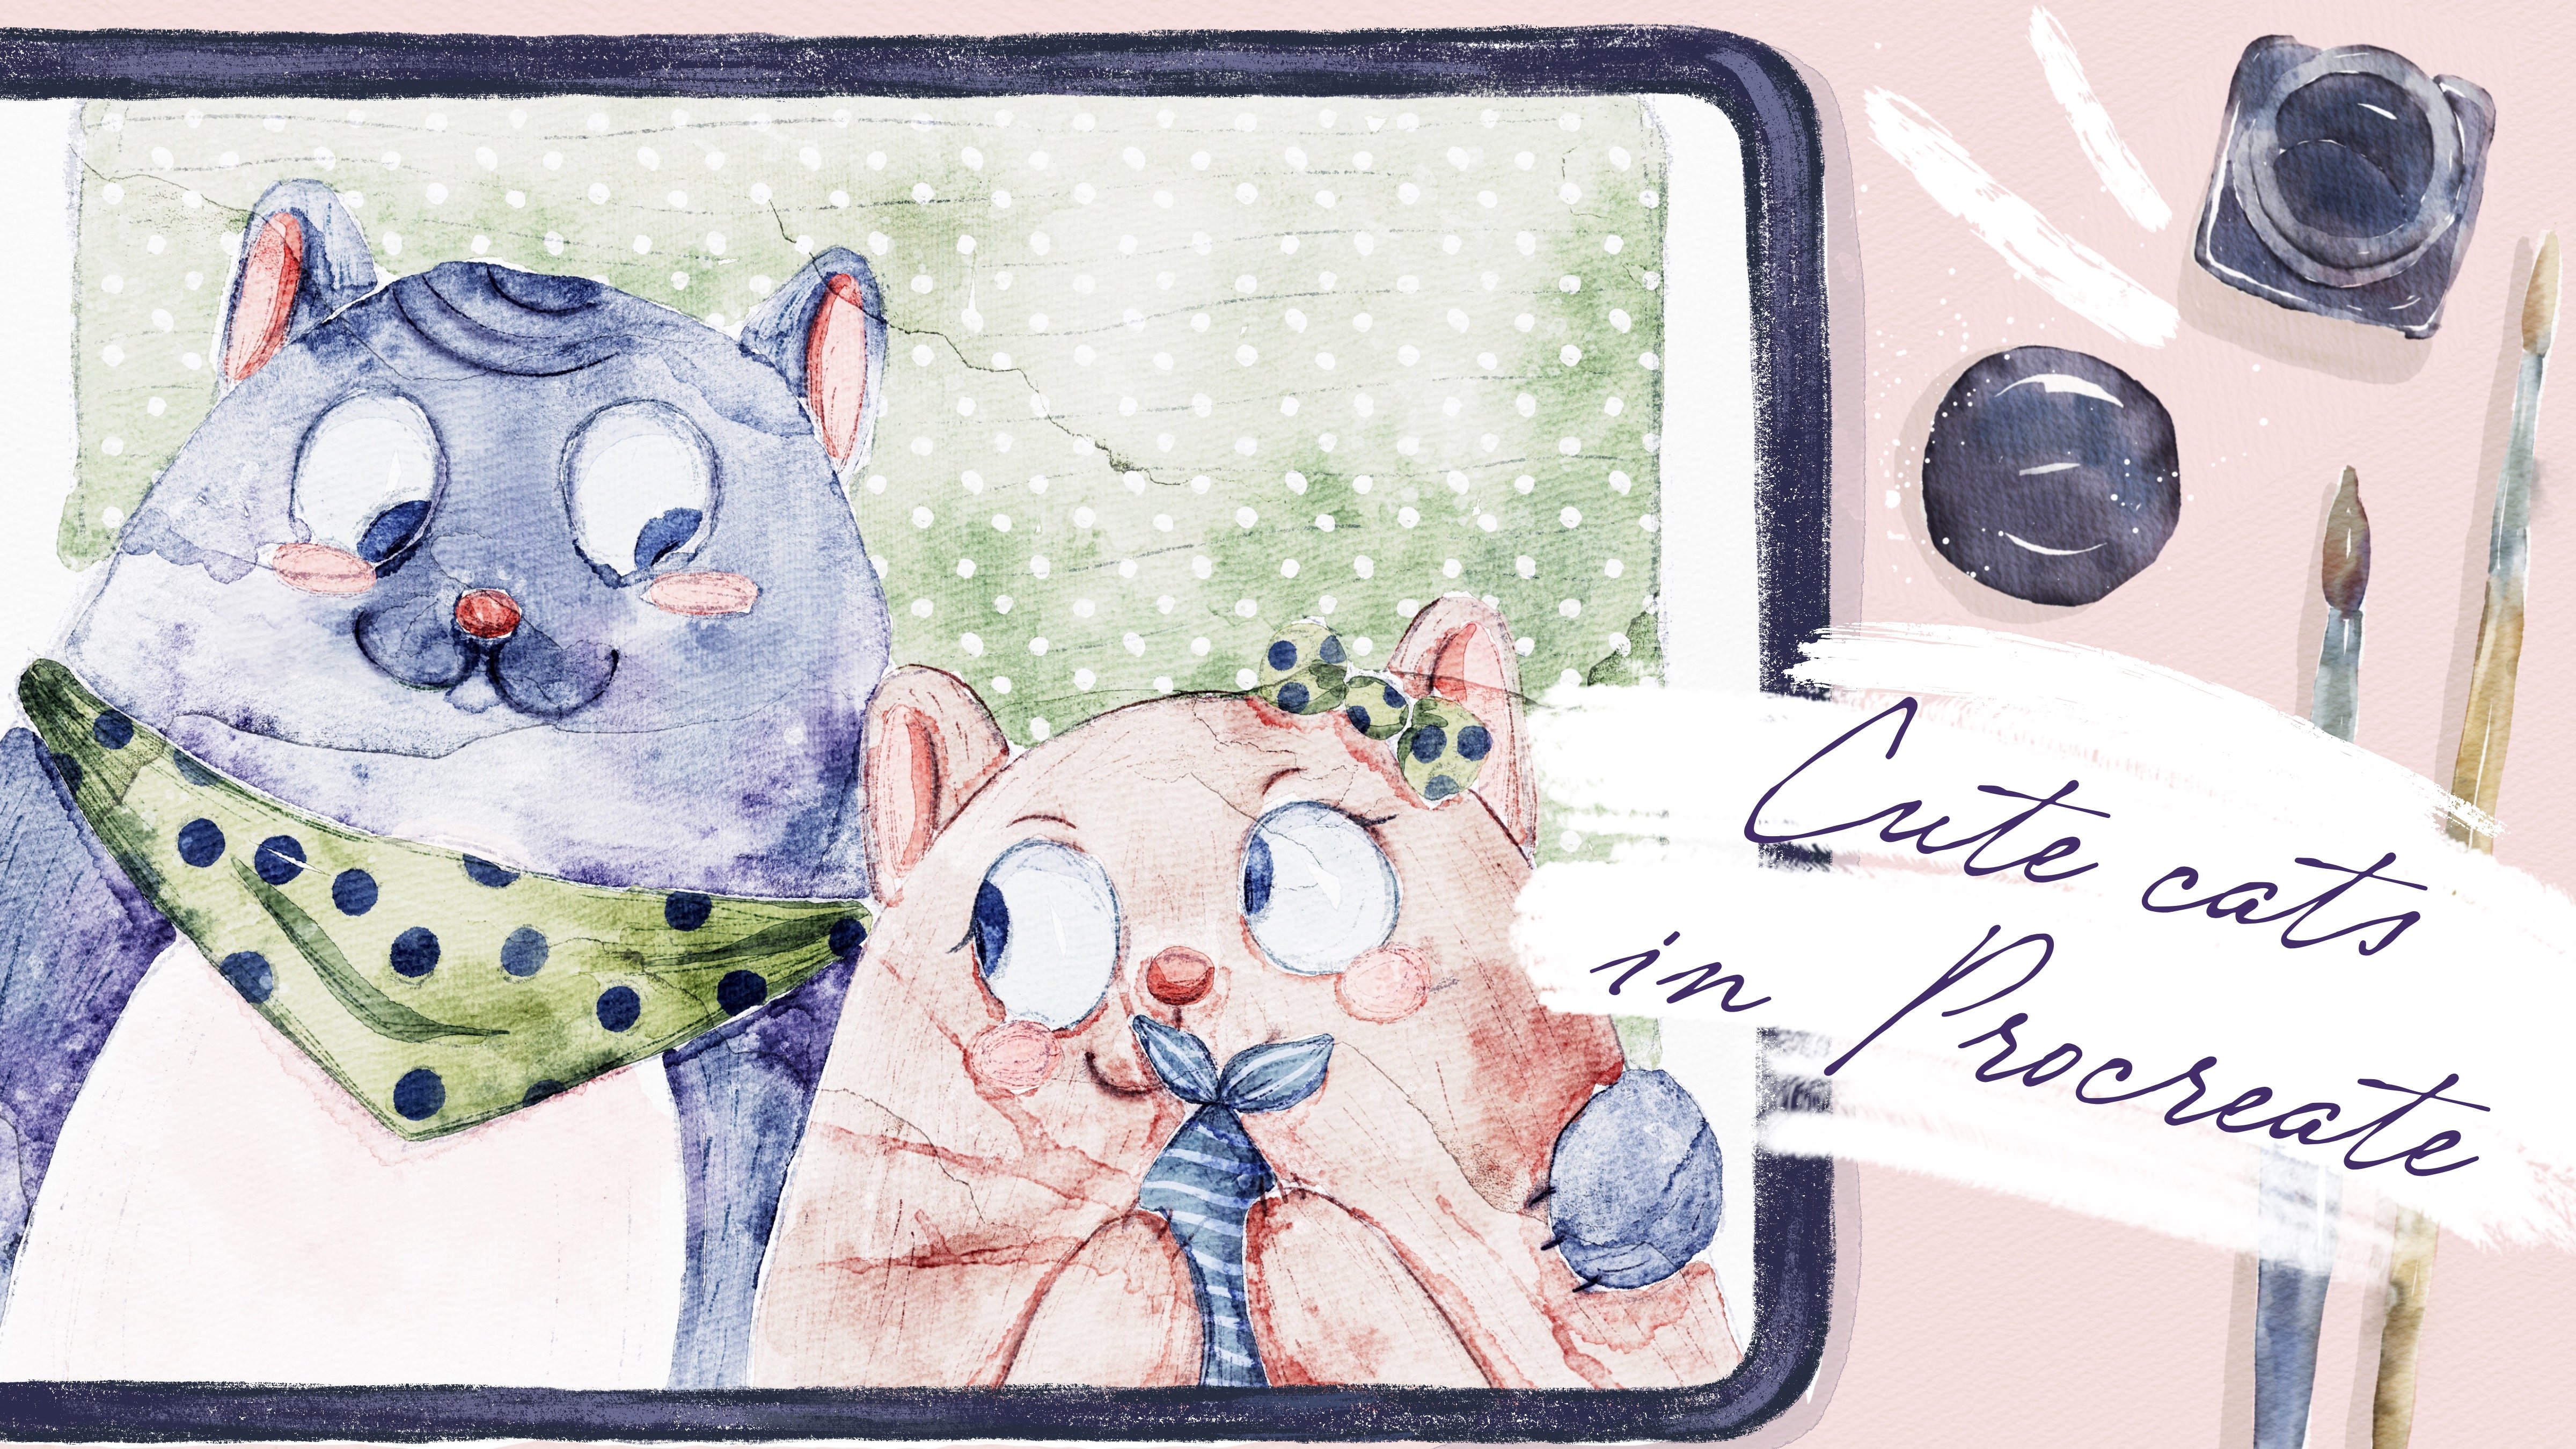
1. Introduction : Hello, my dear art
fellows. My name is Zynga. You on and during
our today's class, I'm going to show
you how to paint cute animals in Procreate. I prepared for your loss of useful tips and tricks
how to use Procreate. And I prepared for
your new brushes, new techniques
that will help you to enjoy our time together. And your opinion is
also very important to me because it helps
me to become better. It helps me to choose
the topics that I liked, that you like as well. And let's get started. Once again during our class, I'm going to take you
through the whole journey, my whole creative process. We'll start with expert in all our previous
into the Procreate. Then I'll show you
how to create sketch, how to create animals, cute animals in a simple way. And then we're going
to start painting. I will show you step-by-step
process creating cute animals in three
different styles. Gouache, watercolor and pastel, and the process of adding
colors, shades, and highlights. Also, we will explore
what is clipping mask, how to use layers
and blending modes. Also how to scores and hue saturation and
brightness tools. And in the end we will create lovely illustration
to be skewed animals in totally different styles. So you can experiment and choose the style that you like most. I'm going to focus on paint
in three lovely animals in three different styles in a
center as a final project. And your project will be same. To create an illustration
with lovely animal, you might add some surroundings, whatever will cause warm oceans, and they will bring joy
to your art process. And as a bonus, I will share with you
my textured paper, your custom brush set, new stem brushes, color
palettes that I created. I will also add file of
my pictures that I drew. Feel free to use it for
your own art projects. This class is great for
intermediate level, also can be useful
for beginners. If you've watched
my previous classes and experienced artists, probably here you can
find an inspiration and your ways how to create animal illustrations in
three different styles. I really want you
guys to join me. I tried my best to make this
tutorial, fun and creative. Completing this class
will help you to learn how to paint in different styles on iPad and get general knowledge how to
paint lovely animals, how to choose colors properly, and how to use some
procreate or so in order to create
lovely illustrations. I can't wait to start
this class and I can't wait to see what you
upload to project section. Please feel free
to enroll and less enjoy painting process together.
2. Getting Ready: So guys, let's get started. And now I will tell you
what we call an adult. So first of all, I divided our class
in some parts, and at first, I will tell you how to export. All are freebies. After that, I'll show you
how to create texture paper. And after that, I'll
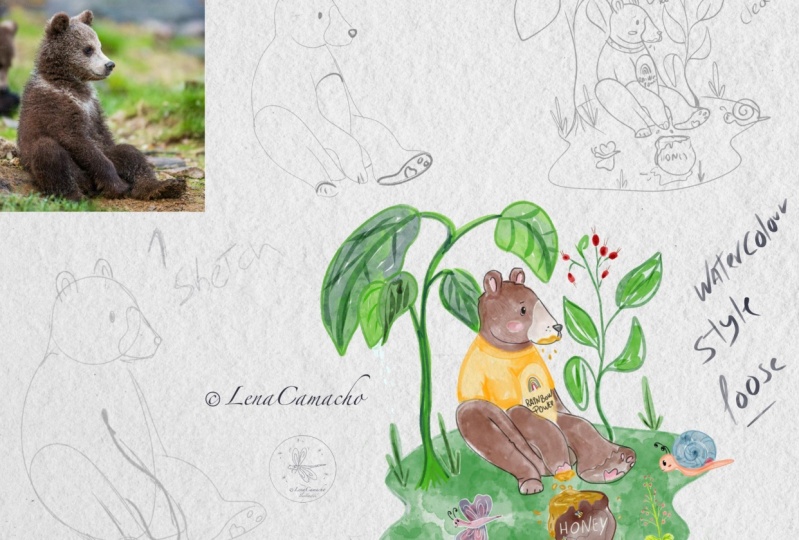
show you how I draw animals thanks to some
reference pictures. And after that, you
will see how I turned like realistic illustrations
into cartoon styled wants. And after that, I'll show
you how to create lovely, cute animal illustration
in three different styles. The first one will be goulash. After that, we will draw
in a watercolor style. And the third one
will be pastel style. And that'll be the end
for our today's class. So if you're ready, grab iPad, Apple pencil, and
let's get started. So first of all, when you opened my class, please do it in browser. It can be Chrome or Safari. Why I asked you to do that, because if you open my
class in Skillshare app, my freebies might
not be visible. You go to Safari or Chrome. After that, you open my class. And in a projects and resources section in
the right corner, you will have the
headline resources. And under those resources you
can find all my freebies. So speaking about Freebase, I'll tell you
briefly about them. And after that, we're
going to create texture paper for today's class I prepared for your
new brush set. I prepare for your
color palette. And some PDF file will be step-by-step explanation how I create a lovely
animal illustrations. There's a brief
summary what we have. And here I decided to
choose six animals. And I show you things
to reference pictures that I found on a
website, unsplash.com. I'll show you how I create some lovely animal
illustrations is actually a three-step process. We have bear, we have
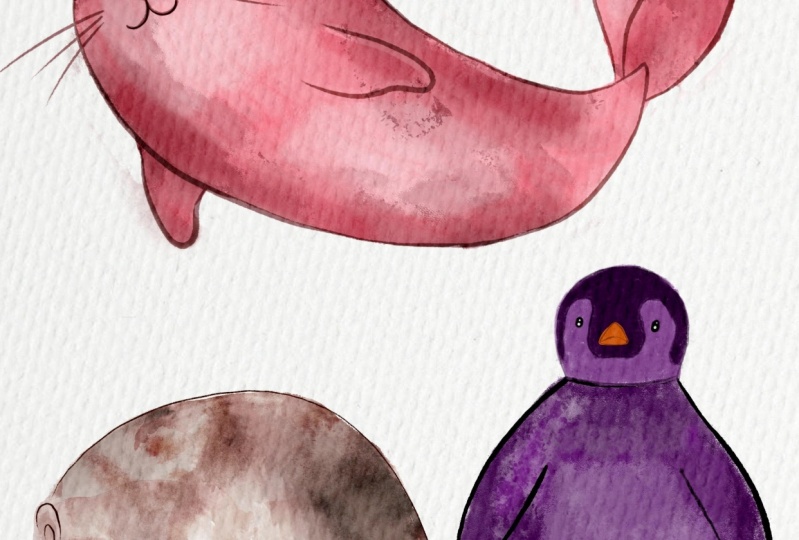
lovely seal, that one. Now let's move from
the first one. First one will be Rabbit. This lovely illustration. After that we have all
this globular one. We have dog, we have hedgehog, and we have bare be sealed. Okay. Is this our
PDF format file? And you can export it
into the procreate. When you download
all the freebies, you will find them in files,
app downloads folder. After that, you need to split
the screen into two parts. And from the right side, I have Procreate app. From the left side
I have files app. And after that you can
grab all my brushes, color palette paper, and drag and drop it
into the Procreate. And I've just asked you
just opened this file. We have my new brushes. We have some pastel brushes
and new ones that I created. Also have some
watercolor brushes, and I have native
Procreate brushes and I'm going to use for our gouache painting
that truly calls those are all Beach
sticks and evolve. And we have so many
stamp brushes. We have some handwriting stamps, we have some patterns,
stems, some hatches. So you might, you
might check my brush set and use it in any
way you like as well. Create lovely illustrations. And also another one is
called cute animals. Okay guys to be experts at our
PDF format file is at one, and I'll show you
what we have here. All our files because
this is PDF format file, all our pages, they're on
different layers here. And you see we have page
Assisted turned on here. And you might see the way
how I created illustrations. And guys, also speaking
about color palette, we have cute animals,
color palette. I tried to divide this
color palette into parts. So actually, the first part is expand its pastel
style illustration. The middle one, we're going to draw illustration in gouache. And the last one
is for watercolor. As you see, the colors are
pretty muted because I didn't want to create
bright illustration. You have to brush sets. One is cute animals
with lovely animals. I turned XOS illustrations
into cartoon style. Once you can see it here. You have seal, we
have lovely dog. And later I'll show
you the comparison with the original one. We have, our owl and you
see I decided to draw it in some kind of Harry
Potter themed style. So it has cute head
and Hogwart's letter, invitation letter. Hedgehog. Also, I tried to add some kind of personality to illustration. Guys. I'm going to create
one more canvas where we actually
go in and draw. And we're going to use
two cameras today. So first one is this
PDF format file, where I'll show you later
how to create animals, how to draw animals. And second one, where
we actually start coloring and finishing
our illustration. So I think that's it. Now it's time to
create extra paper. Let's do it.
3. Creating Paper : So you need to be in procreate. After that, you need to tap Plus and need to tap Plus again. Then switch from pixels
into inches and write 11. Pair 9, ". We're 300 DPI and available
layers, layers are 56. By dependent on a
modal of your iPad. You might have different number
of layers and tap create. This one. We're going to use this Canvas today for our illustrations. After that, I will create
a couple of new layers. And we need to create
texture paper. Once again, in my
M on my freebies, you will have paper. Now we need to export this
paper into the Procreate. Like I told you, you
can drag and drop this paper or you can
go to Actions button, tap, Add and tap, Insert a File, and then go to Downloads folder and just insert the file directly
into the Procreate. Then let's just rotate
it and fit to Canvas. And as you see, it's standard a little bit too big the size
of Canvas for the paper, but don't worry about that, just move it to the edges. After that, just
duplicate layers and moves the blending layer mode to Linear Burn in one way and
Color Burn visa nasa layer. After that, we need to
duplicate linear burn mode and duplicate
color burn mode. Guys, now you need
to be very careful. You need to select Linear Burn modes together and
merge together. And after that, you need
to select Color Burn, blend and layer modes together
and merge it together. And now you see it a little
bit too dark for me. So I can lovers opacity
a little bit maybe till 75 per cent of linear burn mode. So make sure that color
burn stays on 100 per cent. After that, you select two
layers by swiping, right? And you need to press Group. And you can rename it
and write a paper. In anything done. Before. We're going to move
to the next part, we need to make sure that
our color palette is active, yet it's set as a default. How to do it? You need the expert color
palette and then the Press. You said three dots. And here you will have
options set as a default. I don't have it here because
it's already set as default. You might check it here. He says Set as Default. And after when you move to
disk to our main window, you have our color palette here. And guys, if you want to have your colors like
somewhere nearby, you might just move the
color palette here. So we have our brushes, we have like one set, another sad, and
everything is ready. So let's move to next part where I will show you the process, how I create lovely
animal illustrations.
4. Drawing Cute Animals : Okay, I'm ready to
explain to you how I create lovely
animal illustrations. So we opened our
PDF file as a swan. Here I will just
briefly explain what I do in order to
reach this effect, in order to pay in cute
fat animal Chevy one. So first of all, I find some reference
picture like I told you, own a website and
splurged on cobe or pexels.com where you can find and use illustration for personal and
commercial purposes. And after that, you need to divide the animal into
some basic shapes. It can be like
rectangles or circles. In after that, I
shaped our rabbit with simple forms and I use
circles as you see here, like ovals as well. Head is a big ball
as a big circle. Bodies, a big circle. Ears and legs are ovals. And also I showed
where I have eyes and nose after that and I use
six B pencil for doing that. So I might our heads a little
bit bigger. After that. Of course, ovals are
nodes that straight. I change the shape
a little bit here. The thicker in a button. After that, I changed a
little bit like face, this chubby cheeks of
all our little rabbit. I met some Fed because
I like feather animals. And I changed a little bit
this body of our rabbit. And basically I left
untouched the 0 v legs of rabbit
and I add a tail. We don't have it
done illustration, but I think we style
it would be cubed. And that's it. Next we go to another animal. We have our, this one, and here we actually
have rectangle. And I tend to keep it
as simple as possible. So I paint, you see is
a regular rectangle. After that, I separated head
and tail from a main body. And after that next
part, what I did, I just created a new layer, I lovers opacity
of the rectangles. And I started
adding some shapes. And you see, I made the
head a little bit tilted. I decided to make bigger
eyes because it looks cute. And I just tried
to show here that we have had you don't
need to be perfect. You can redraw it. And you see I tried
to show the end goal that wins are tilted
a little bit, like say, so I tried
to use basic shapes. Saying this tail, likes it. We have lovely dog. This dog, as you see, I have many, many rectangles. So I, in my head, I divided this illustration here into small squares,
small rectangles. This is rectangle. Head is rectangle as well. Both are rectangles, rectangles. Now, if we separate
body from the head, this part is also
rectangle as well. Ears are rectangles. This is oval. You also
can draw this rectangle. It's up to you. And
basically that's it. After that, I grab, I create a new layer. You see, I grab another color. I make a pencil thicker. And I just started combining yes, this
elements altogether. Like I want to make ear softer. We have a few rectangles,
but of course they're not. That's trades alliance. So I look at the illustration. You can draw eyes like this. You can draw different
kinds of eyes. You can make them wider. You can close eyes. So it's up to you. You can create the illustration. And I decided to make
poles a little bit bigger. So you see as a very
thick hedgehog. So we have two ovals, one oval for the body
and one for phase. And you see here I changed
a picture a little bit because I changed the angle. And also I added
one more poll here from this side and then
make it very soft. So we have lovely seal and Alexa position.
I'll exit angles. So as you see, we
have one, Oh wow, we have circle and we have
small ovals as like legs. And after that, I decided to make it a
little bit more cartoony. And as you see, I tend to make
it a little bit choppier. I go to my Adjustments
tool and I press liquefy. And I just recently
moved this part, this topic, this part
of body a little bit. I made it sicker, like you might see it here. And here I show
some curve because I thought this was wonderful. Yeah, but when we draw it, of course people want to see
it a little bit cute here. So I thought if I give
him a few more pounds, he would look very cute. That's what we had in the end. So you can use Liquify to change the proportions and
choppiness of your art. So we have bear. So here we have rectangle, we have one more rectangle, one rectangle and
small squares here. Phase also rectangle. You see it's not oval,
it's straight rectangle. Painting like this, I
decided to draw our Bayer. Like we have rectangle here, we have rectangle
from this side, rectangle here, rectangle
as a head and some polls. And after that, I just grabbed another pens and not in
another color, new layer. And I tried to connect
some parts of our bare. Actually, let's do it
together right now. And after that, we
can move to coloring part, just our bear. And now I will show
you what I do in order to create lovely art. Like I told you, we
created new layer above. And we need to show,
visit rectangle. The shape of a bear. We need to show
that our bear has posed here, here and here. It shouldn't be perfect. Because like I told you, is just the second step
of our illustration. We're going to delete
this, removes this part. Okay, perfect. Now grab our reference picture
and we need to move it to the sides
because we don't want to have the same illustration. You also need to add
our own personality, our own touch to the art. Now, we will oversee opacity, create a new layer. And probably I'm going
to change the color to purple one here, six B pencil as well. I just want to try to draw. Let's increase the size. Draw very soft lions. Again, this is our lovely pair and you see he looks very cute. And this is the way how I
create lovely illustration. But our next step is
you might keep it that way or you might
move it a little bit too. Cartoon styles option. This one. And this pair is very lovely. But you see we have some
differences, of course, like I tried to edit some
elements like head and back. And I added some far and
I made him pretty chubby. You see, I devoted more time. I change the face a little bit, I changed the eyes. And that's pretty much it. So how to do it, what to do in order to create
such cartoon illustration? What elements you
might add that can help you to make
this bag you'd like. Also like lovely, It's
this tiny lovely hat. Or maybe some dress rebound, or probably you might add
back whatever you like. So if you want to create cute illustration,
my suggestion, just make your animal
as round as possible. That's what I think
in this case, go to Adjustments, press, liquefy, and just move. This part's a little
bit two sides. You might redraw face. You might add more elements, or you might draw belly
whatever you want. What makes you feel that
this is the right way? We have our bear. Okay, so once again, like I'll show you what we have in real life like this bear. And we have the bearers at
one that is more cartoony. You see it has some face
expression and so on. We have rabbit. I decided not to make big changes because it's
already pretty cute. So if you don't actually need
to draw too much details, so I just tried to
add the rebound. There's some tiny details, some blush, and that's it. After Rabbet, we have our, this, our delivers a letter
from Hogwart's, and it's also a magical one. And second one we have dog. It's cute, but I decided to make our dark like some Savior or like
some superhero dog. You see it has
this lovely scarf. Hedgehog. Also, I didn't make
big changes when I turn this art into
a cartoony style art. You see I just changed
the eye because I wanted to make it
more determined. And I made blush and
change the nose, the position of the nose a
little bit and that's it. See you like I told you, I like to make all
animals chubby. So that's what I did. I made our sealed chamber, I changed the isolator bit. Here you have one
face expression and I edit in flexible rain. And I think it's cute, like CLV is a ring. And this is a process
that I follow when I create lovely,
cute animal art. And now I think we're ready
to move to next part. And you're going to draw
bear in gouache style.
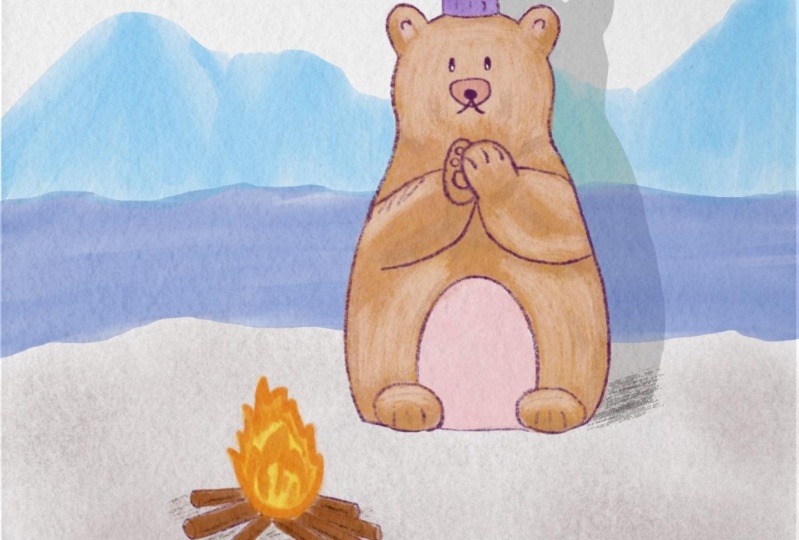
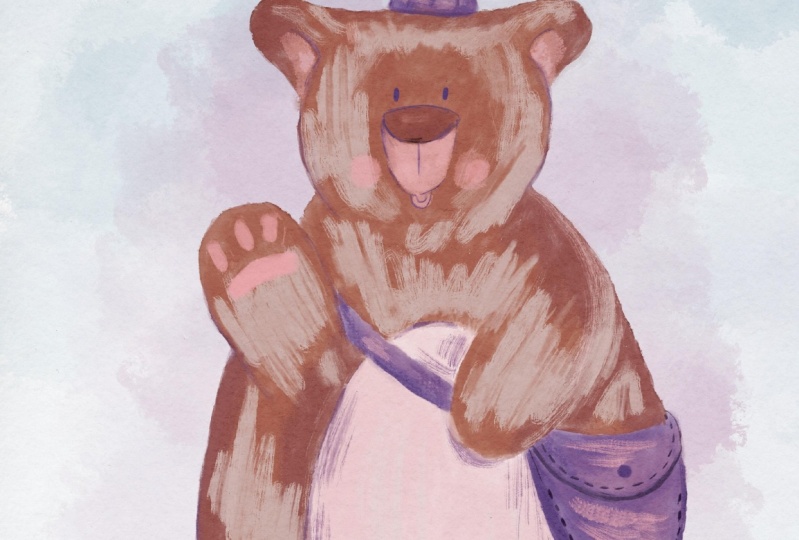
5. Painting Bear in Gouache Style: Thank you. So if you have bear, I go to my cute animal
set and I just tap it. And as you see as the colors, the outline is dark purple because I don't want
to have a dark. And let's create one more layer underneath for this are to
go to when you do Boone, your watercolor brush set. And I'm going to grab all
the beach brush first. And after that I have
some reference pictures that I will show you what
we will have an end. You need to press reference. Okay, so I grab this brown color and app does it once again,
all Beach brush. And let's just fill this area, the bare area, with some color. I'm on the niece of
our sketching layer. And let's start doing that. Blend is a little bit. Now, let's create one more layer above grep, pinkish color. And I want to feel
the belly part. After that, I want to
feel to area four, the bag and head. And let me think, I'm going to grab this pretty
bright color, same brush. Now I'm going to grab this dark blue color,
something like that. Next thing what I'm going
to do is I'll create, let me see one more
layer above of the bear. And I'm going to
grab sticks, brush. And let's see, we
have brighter color. And we're going to use
this brush and add a little bit of some brightness. Yes, some highlights
to the bear. I like this truthy strokes to
create very lovely effect. And if you want to make it brighter or of course
you can do it. In this case, you need to
go to curves and just you see experiment and see
what's most suitable. Maybe lovers out a little bit. And there's a barrier
that we have. It's very loudly. You
might grab blending tool. As a blender I am using Bu parcel base is great
vendor for everything, for watercolor, for gouache, for pasta as well. I'll create one more layer
above and same brush, and I'm going to grab a
little bit darker color now. Now we need to show shades. And I don't want to
change anything. I truly like the way
how this turned out. Now face. I'll create one
more layer above everything. I'm going to grab this
pinkish color and I want to add some
color, two ears. And E wolf grabs his brush, moved more towards orange color. Yellow like says. And nose is pretty bright. Grip pinkish color. Show some pink color here. The sticks brush is
truly cool if you want to add a lot of shades. Now I want to add some
shades tools as a part of our bare same brush. A little bit darker color. Now create one ML
there and in nice. And we're going to grab slightly lighter color
for adding highlights. Now guys, I want to
add tiny bit of shade, so I grab sticks color. I grabbed all my
dark purple color. And I just want to
show some tiny lines. Little bit like emphasize
the main lines here. Knows. And pink color. And also I can add
some color to belly. So we don't need the
reference picture anymore. And it's a bear,
even gouache style. I hope you enjoyed this short tutorial and you are ready to
draw the next one. Once again, you might draw the background, It's up to you. I'm going to merge
everything together. I'll create one molar below. And you went grab
any color you like. Probably, let me think
I'm going to grab this purple color
and a little bit. If you want, you might add
more shades, more highlights. I'm going to keep it that way. So that's the bears that
we drew in gouache style. And now let's move to the next
part where we're going to paint in watercolor
style, our lovely
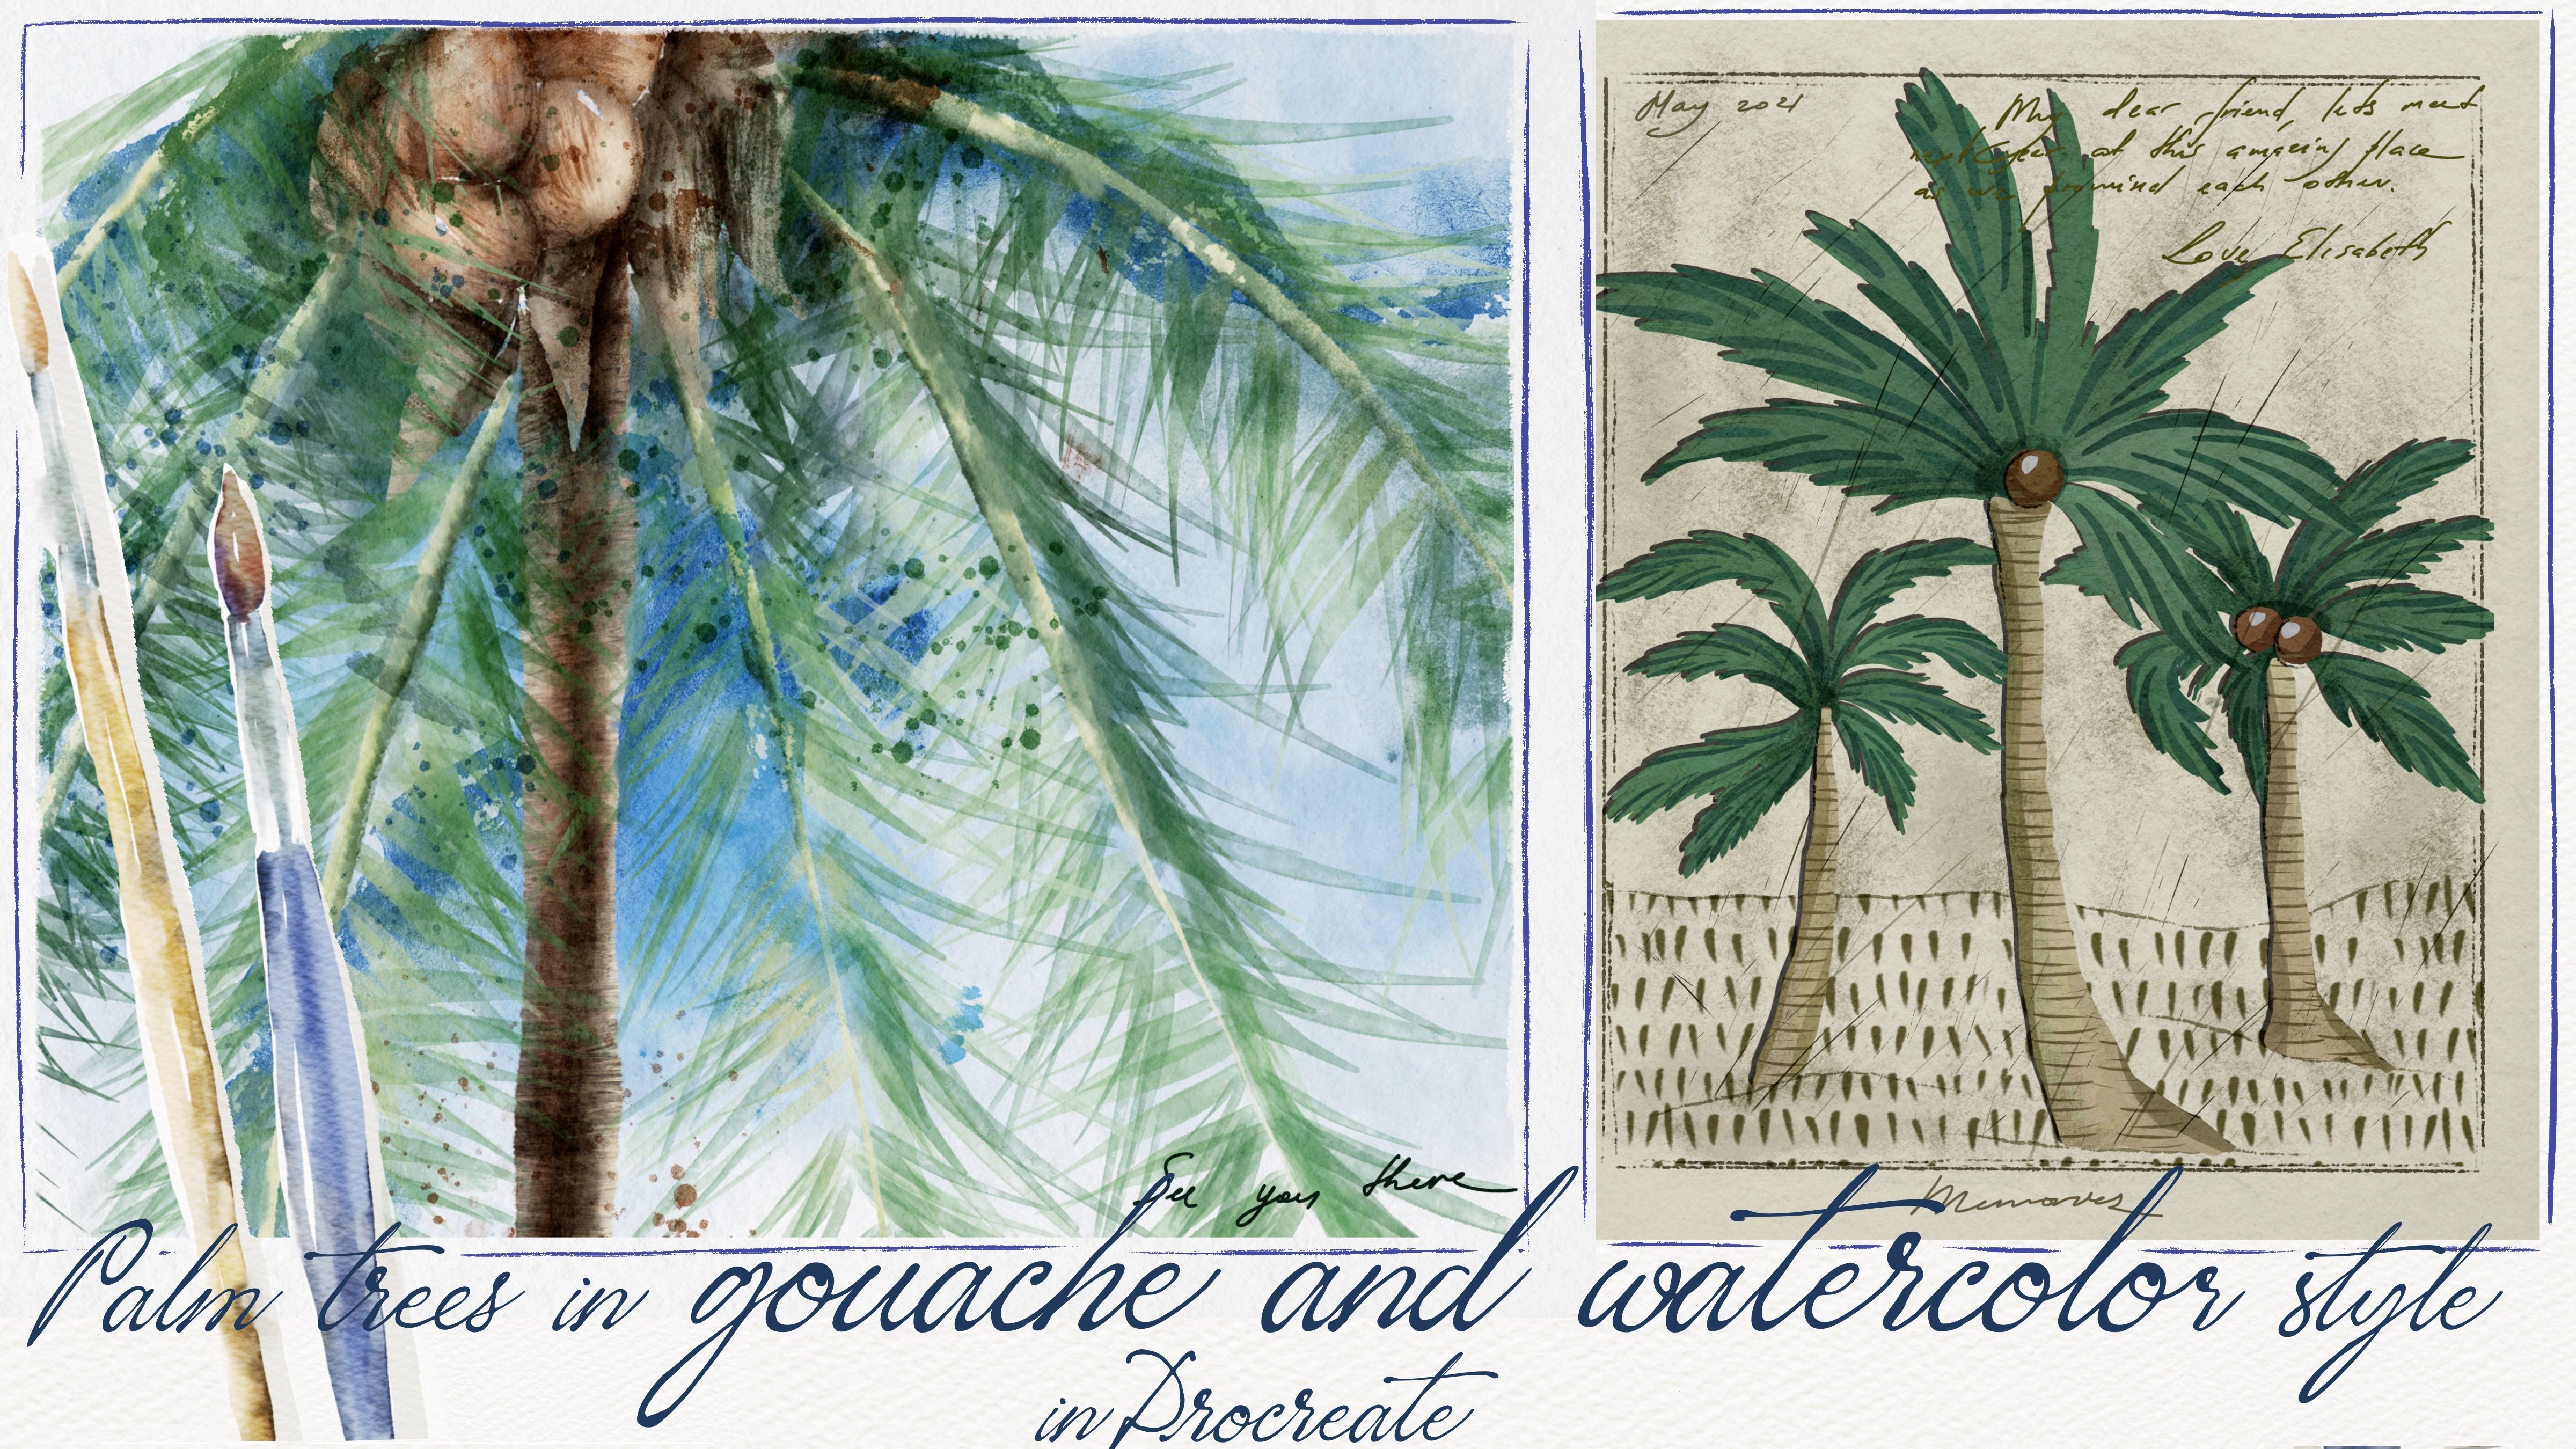
6. Painting Owl in Watercolot Style: Having a goal. And we can draw
some kind of three. Remember, don't go near
watercolor, pencil. Let's just move it a little
bit to the right side. I don't want to devote lots of time to the tree trunk like
this would be perfect. And guys, I'm going
to draw underneath our sketching layer. Now let's go to Canvas
and grab reference. It's what we have. As you see, I
decided to stick to some brownish colors and I'm going to grab
book lays and brush. Now, this part is for
all, so it's fun. And I will stick to
some details first. I know you need to draw, like start with big objects, but I just wanted to
finish with tiny details. And after zed, move to the more important
and difficult part because you see feathers as so colorful and it's a
little bit more complicated to, to start with feathers,
let's just have, as a warm up some
tiny details because they don't require you
to mix lots of colors. Now if you want to make it more colorful, just duplicate it. I'm going to lower
that positive deal 50 per cent and then
merge together, create one layer above. And we still have had
and grab blue color and blend some
sharpness if you have. So. Also duplicate if you want
to make it more colorful, I will lubricate and
move one layer till 40, 50 per cent and then
march together, create one more layer above
grabs is pretty bright, purple color and add
some color around. I forgot, I should be blue. Like they can be
any color you want. I just decided to
make some blue. They're obligate. D saturate. How to desaturate,
go to adjustments, hue saturation and brightness, desaturate it a little
bit and make it brighter. That's what I want to do. Because I don't want
it to be too bright. And yeah, we've done
this sauce details. Now, three drunk, I
will not devote loss of time does add the
tree trunk and grabs is pretty pale brown color. Let's create one more layer
on the top of everything. And I will grab this pretty
bright or brown color. I just want to add increase
the size a little bit of strokes so I don't feel the whole area
is just one color. You can see it. Just want to add a little bit of
other shades later. If you press harder,
you will have more pigment. That's important. You see in some areas,
I press harder, in some areas, I barely
touch the paper. You see it's so, so
transparent mostly. And Lidl create one layer above. And I decided to grab
this darker color. And I will go on top, you see? And I just add more shades. Increase the size and show some strokes here
because this is birth, it has feathers,
so I'm trying to imitate the texture feathers. Okay, Is it every app you
see they're just hidden. This era a little bit darker. So I'll create one more layer
underneath of everything. And I will try to go
with this purple color. Well, that's pretty much it. I can add a little bit of
some color variations here. And I will add a little
bit purplish color here all around. If you want, you might
change the color. You can go to hue,
saturation and brightness. And humans think what
might be more suitable. Okay, I liked the
way how it looks. I'm going to merge together. Lovely. Oh, and I
can duplicate it and intensify the colors
if you want to. Of course. I like when it's so gentle. So I can go to curves and
also play with colors. And I'll create one more
layer above, clip it. And I can go to
some stamp brushes. Maybe loose watercolors
tend to move to multiply blends a layer mode in order to make
it more colorful, I just want to add
some stems all around. You see it's very lovely effect. You can go to Curves. Once again, you can
intensify the shades. I will go to our lovely
head and I grab eraser, and I just want to erase stars. Okay. I forgot about chicks. Let's create one more layer
on top of everything. Grab this pink color. Then, then, then we'll glazing brush and just draw
a lovely chicks. And my suggestion, you
might go and nice and erase some parts with
a color that we had. Then blending tool and
blend it a little bit. But I still want to add some shades to the
envelope. How to dose it. Grabs this dark color, create one molarity above,
multiply same brush. And I'll just add
some shades here. If you want to intensify shade, you know what to do like this. Now I want to add
some shades to head. Multiply as well. Same blue color, same brush. I just want to show the shape
here and shade this part. Don't go beyond alliance. Afterwards it curves. Then you can just
intensify your shade. You can press clipping mask. Okay, Wonderful.
Now, merge together. And what else should we do? I think we need to add some
shade to the tree trunk. And for doing that, we need to remove the transparency
because I'm going to use a clipping mask
blend layer more. And because it's watercolor
brushes semi-transparent, we need to have not
transparent layer, but I duplicate the layer, go to logger layer, brass hue, saturation,
brightness adjustments, Brightness walk single
100% and merge together, create one more layer above, clip it, and moves the
layer to multiply. Now, let's go to some stamps. I decided to make it a little
bit of purple like this, thanks to hue saturation
and brightness. And that's pretty much it. I'll merge it together. And final touch, I'll create
one more layer above. More button is a multiply. I'll switch to another
brush to boo, to ZBrush. I just want to
show some feathers that are lovely bird is
already final thoughts. You might still add a
little bit of background. Thanks. Tool was brushes that
we have like this. Moving this way. And be careful when you
have zero overlap bins. Just carefully erase it. If you're splatters
my suggestion and such copays it
end brown color. And we don't need
this illustration. Turn it off. And did on. Oh, lovely illustration of all in watercolor
style is ready.
7. Painting Dog in Pastel Style: Now lovely dog. This one. Create one more layer. Mickey, great. Now
you're going to draw on the knees are
lovely, dark layer. And we're going to
burn your watercolor, watercolor grab more
pastel strokes. And I just want to
feel this area, this is greeted dark color because I like when the colors
are layering one another. And I'll create one
more layer above. And guys, we have the same
brush and now we're going to add some color to
our lovely dog. So when you makes each new
stroke, you will have this. He sees his feelings that is
actually realistic pastel. That's why my suggestion, try to leave your
Apple pencil from screen as many
times as possible. Now, we need to go underneath
serves our dog layer and we're going to add some color to the background
little by little. And we're going to start, this is perfect color. Also, don't forget, we
are going to layer it. And same brush and I'm going
to grab a bright blue color. You see an layer, it also same brush, pinkish color. I'll create one more layer. Grab a dark blue color
would be perfect. Like sad. And I want to
desaturate this color because you didn't need to make the background
very bright because it will draw our attention
from our lovely dark. Now, we'll go to the DOE, create one more layer above
and we still have some scarf. And this is our dark
as you remember, Garfield be pretty bright. No swoop, purple.
Still same color, which is this curve. Later I'm going to add, now I'm going to
add some shades. Now, brighter color. Let me see you have
this pastel texture. I still want to lower the
opacity of our sketching layer. And little by little, Let's just start adding
some shadows to our doc. I'll create one more layer
above. I will clip it. I don't want to go
and be on two lines. Same brush, let it be grep,
slightly darker color. And in areas where we have two objects
next to each other, we will have some shapes. Don't worry if you
don't like the color, you can change it later. Okay, After that, you can go to course and you can
play with the color, make it lighter,
darker, It's up to you. You can go to hue, saturation, brightness and also
play with the color. I want to make it a little bit shady or greater
than malaria above. And now I've grabbed Bu pastel
flakes, vertical brush. Go to multiply. Because when you go to
Multiply blend layer mode, you will have pretty
colorful color. You add a little bit of shades. Also go to course, you can think about the colors. Let's start with this one. Let's grab both pastel watery. And we want to add more shades. Now going to love herself
possibly a little bit. And you see it creates
very lovely effect. Let's grab a lighter color. And add some strokes
here as well. And some bright colors. Yeah, Lexis say, and I'm going to create one more
layer above said dog, but underneath our scarf. And I'm going to
use the same brush. Go to multiply. And I'm going to add
some lines here. Postel water is perfect
for it and shades because It's very gentle brush. And you might play with colors. You might add as many
colors as you want. It's actually a very cool if your latest texture
plaintiffs colors. And because this is not
clipped to this layer, so I can go beyond two lines sloppily because I can add
some shades all around. Now I want to add some colors, create one more layer,
some highlights. So let's grep whiter color, nearly white, and just
add some texture here. You might have grabbed
yellowish color, very yellow color. My suggestion grips
six B pencil. And with just said
tiny details here, create one more layer and
set it as a multiply. Because I'm going to
have darker color here. And we don't need our
reference picture anymore. Let's turn it up and guides
our lovely arteries. This lovely dog is ready. And I hope you enjoyed today's
tutorial and you'll learn something new about paint
and animals in watercolor, in pastel and even
gouache style. And guys, in our next class, we're going to append
lovely animation and we're going to
paint character. I hope you will enjoy
this art as well. That was the end for
our today's class, but I hope you enjoyed
our painting process and you learn something you how to create those lovely,
cute animals. And once again, I'd be happy
to see all your artworks. I wish you luck and let's see each other during
our next class. Bye bye.
 Inga Yoon, Digital illustrator and teacher