Transcripts
1. Welcome and Introduction: Welcome to my new class
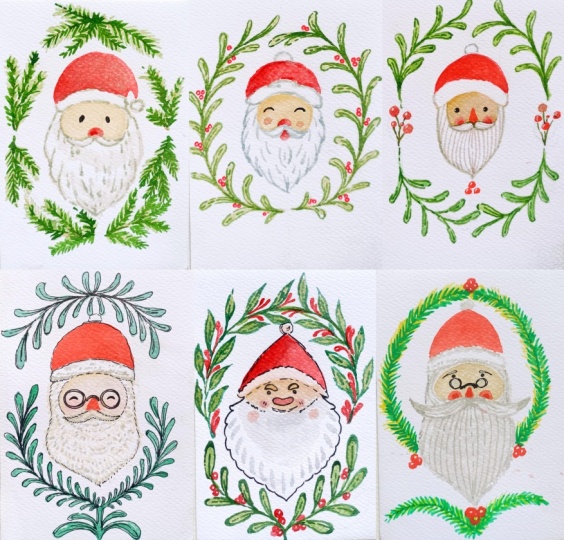
holiday Cheers in watercolor, Santa wreaths and barn faces. In this begins friendly
watercolor class, we'll be painting seven
adorable cena portraits, each surrounded by its own festive wreaths of pine leaves, holly berries, winter greens,
and decorative branches. Whether you are preparing
for the holidays, creating handmade
cards or simply looking for relaxing
seasonal projects, this class will help you paint charming centas with
confidence and joy. In here, we have
varieties of centas of different seeps and sides and
different kind of wreaths. For some of them, we
also use file liner to do the outlining to make the
process a bit more simpler. So these are the
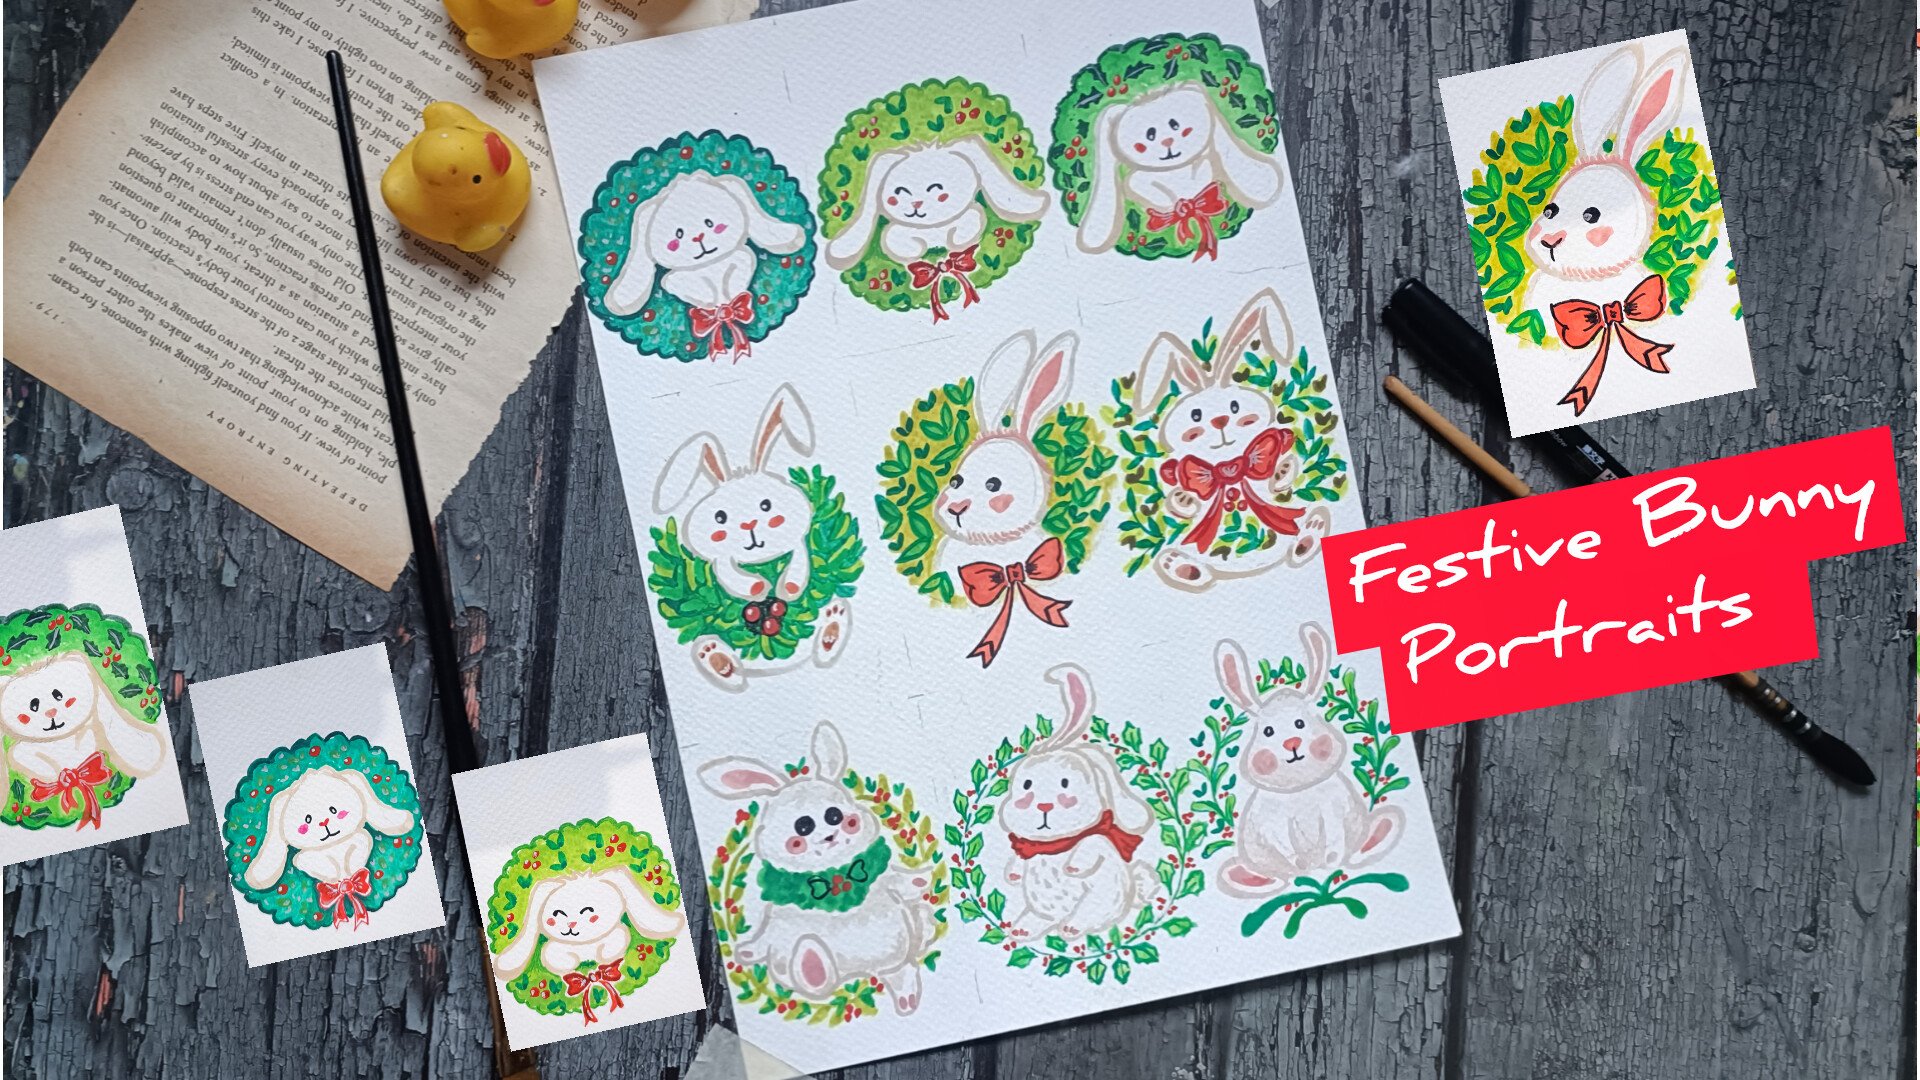
seven Santas portrait that we'll be creating
in this class. And as you can see, there's a beautiful variety among them. We will begin with
the absolute bisinH you can draw the Santa
using simple shapes, how to build the faces
and the mustards, beards and hat and how to keep the proportions cute
and consistent. Next, we will move
on to creating different types of leaves and first breath alimon
Al two method using file leaner for a more
defined illustration look and using watercolor only for a
softer and pinto leave style. Once we are comfortable with
the sketches and fool in, we will dive into the main
project of the class, painting all seven
Santas portrait, seven unique Santa paintings, e inspired traditional Christmas greenery and festive colors. Every project is taught in calm, clear and real time formats. So you can paint along
with me comfortably, even if you are completely
new to the watercolor. This class will be perfect
for the beginners, intermediate artist,
watercolor enthusiast, or anyone who loves
Christmas illustration. Let's celebrate the
season with creativity. Grab your brasses, and
let's start painting. Hi, I am Michel an
artist from India. And this is my
Skillshare profile. I love creating fun and
easy watercolor oil pastels and illustration classes. You can find more of my work
on my Instagram and YouTube. Join me in this class,
and let's create some beautiful Santas portraits.
2. Supplies: For this class, you will
need basic supplies, a pencil and research to
do the basic outlining, watercolor paper or
mixed medium paper or any paper of around 300 GSM will do the work insert that the texture is rough
and it soaks water. Then there is watercolor
that we'll be winding. Here here I'm using
Camelins watercolor. If you have gauze,
you can use that too. And if you are
using small seeds, you can use a machine tip
to secure the p here, I'll be using large dust
to remove the erases dust. To do a little bit of
outlining and adding details, I'll also be using fine liners
for some of the project. Here I've got one right
from Sakura micron, I'll be using it to create small berries for one of the project. That's the basic supplies you will be needing
for this class. I forgot to mention
watercolor brushes. A small watercolor
brush will do the work.
3. Class project: For your class project,
I did love for you to paint or all the seven Santas
portrait from this class. You can follow my
demonstrations step by step, or feel free to add your own creative touches,
different colors, different great ss,
fun expirations, or even your own
festive details. Once you have completed
your project, please upload your project
to the project gallery. Seeing your artwork is one of my favorite parts of
teaching here on Skillshare. You can also see in
your practice sketches, color test or warm up
seats if you like. Your project upload helps
inspire other students, and your feedback or review
really helps support this class and
allow me to create more lessons for
you in the future. I'm excited to see
your sent us ptraits, have fun, experiment,
and enjoy the process.
4. Easy santa sketches: Welcome to the first
time on striation video. In here, I'll be
showing you how you can easily create the
feces for the santas. So the main thing is
to create this kind of small small see for the
feas, and it's quite simple. You can here see
that the seeds of the feces are somewhat
exactly the same, a very small see for the feas, and then we have large beard. The seep of the beard and the moustache sting
is a little bit. Apart from that, the feas, the nose, and the moustache
are somewhat same. To make this sketching
a little bit easier, I'll be starting
with intersecting line and then a circular see. On both sides of
the circular face, we'll be creating the
outline for the Band. You can create any kind or any design for the
and as you see fit. Then for the top,
we'll be making the circle a little bit
softer and on top of it, if you want, you can
create triangular C for the hat or you can
create somewhat of semicircular C for the hat. And then we'll be dividing the remaining section of
the circle further on. Dividing it further on to create the remaining section
for its face, the mousts and the mouth. And on top of it, I'll be
creating very small C, either triangular C or circular C for the
node and small I. This is a simple way you
can create the Cena sphere. We'll be wearing the SPs a
little bit instead of circle. Sometimes I'll also be
creating elliptical seeps. Sometimes I'll be creating a bit of elongated C for its space. So just wearing this circular C so just by wearing
this circular sep, we can create different kinds
of pieces for our Santa. In here, I have created somewhat of elliptical se for its piece. On both side of the circle, we'll be creating its he line and just below the
intersecting line, we'll be adding its moustache. As I mentioned, you can
create any kind of beard, see, or any design. On top of its head, we'll be
creating the Santa's head. Here, for all our project, I'll either be creating
triangular see for its head or somewhat
of semicircular sea. And here we have got a old cena with round eyes and round nose. This is half, you'll be creating
very simple sketches for the Santa For five of the project out of seven, I'll only be using the
watercolor to do the outlining. But if you're not
that confident, you can use the fine liner to do the outlining and
then add the color. Here I'm using gel pen to do the outlining to make this
a little bit more clear. Also, after doing the pencil skitting I'll be making
adjustment if required. You don't have to stick with the outlines that you have created. Feel free to make changes and
adjustment as you see it. Let's quickly go over
on the outlines. As for adding details for
the mosas and the beards, you can create small
strokes with a fine on it to create a
little bit of seeding. To so that it's a little bit dense on with the watercolor, I'll be using one
or two layers of the colours and
create small strokes, either using the green
colour or a little bit of wine to create a kind
of hair like texture. As for the coloring of the fees, I'll be using the skin
color that I have. If you don't you
can use the yellow, mix a little bit of
red and white to it to get different
kind of skin tones. And to add rosy necks to the
cheeks of the Santa Claus, I'll be doing a little bit
of wet on wet technique. On top of the skin tone, I'll be adding a little bit of red to create a little bit of blending effect as well as
rosy cheeks for our Santas. For the nose, too,
I'll be using the red. I won't be creating the mouth, but if you want, you
can do that too. With these, we are
done with our two simple santas of sketches. Now, let me show you the simple sketches
for the leaves that we'll be using to create
the wreaths for the center. It is a very simple kind of
leaf that we'll be using. Simple see for this leaf. Then here we have got somewhat of a rounded
see for the leaf. Third one is pine like, so small strokes with a
brass or fine liner. And fourth one is holly leaf. I won't be creating this. If you want, you can
use in our project. But to keep things
simple and easy, I won't be grating this since it will take a little
bit more time. To draw these
leaves, just create hexagonal leaves and make the
edges a little bit curvier. So these are the
four different kinds of sleeves that I'll
mostly be using. Now here I'm going with
the brass been to do the outlining to
make the outlines for these leaves a bit clear. Mostly for our project, I'll be starting
with the pencil Sig and then use the watercolor
to do the coloring. But for last two project, I'll be using the fine liner or the brass bean to do the
outlining for the leave. You can do the outlining
in the beginning or you can do the outlining
after doing the coloring. Et's do the outlining
for the second leaves. So here we have got curvier
saves for the leave. I'll be using two or
three seeds of the green. I'll be starting with the
lighter seed as I'll be starting with a
lighter side to do a flat pass, and then top of it, I'll be going with
the darker set to add a little bit of detailing and a little bit of seeding for
some spots of the leaf. And now let's do the
outlining for the final leaf. Instead of this kind
of leaf, if you want, you can create other
kinds of leave, too. For the berries, I'll be using red or orange to
do the coloring. You can also use the
fine liner or as pin or red gel paints to
make the small berries. In the next part of this video, I'll be using watercolor to
create the leaves directly. So hexagonal see for the leaves. If you want, you can add a
little bit of tiny veins and mid ribs in the middle
section of the leaves. So these are the leaves
that I'll be creating. I'll be wearing the saves in the sizes of the
leaf a little bit. The kind of leaf that I'll be using for most
of our projects. Let me show you the leaf. So this is the leaf
that I'll be using. So this is the
example of this leaf. Then we have this curvier leaf. So here's an example
of curvier leave. You can see I use two
shades of the green a bit lighter and darker
one for the spine tree, for the pinetree leaves. And I did not use this leaf
for any of the project, if you want, you can use
for any of the project. All the videos in this
class is in real time. So if you want, you can
always follow along with me. If you have needed as use that, I lost my needed eraser
so that's why to avoid smudging of the pencil
sketches or coloring, I'll be using this large brush
to remove the eraser dust. And now let me show you how
you can create the berries. As I was mentioning, you
can use the fine liner, gelpinsObpins to
create small saves, some small circular
see for the berries. Leave a little bit of space
in the middle or on one side to sew a little bit of highlight the reflection
caused by the line. Here I've got sakura
micron fine liner, and for one of the project, I'll be using it, but
for most of them, I'll be using the red
watercolor to create it. Let's do the same thing,
creating berries. This time I'm using watercolor, creating berry thin
lines to create this circular seed
for the red berries. And with these, we are
done with this section. I'll see you in
the next section.
5. Leaves for wreaths: Let's continue
where we left off. In here, I'll be
showing you how you can create the leaves
using the watercolor. As I said, I'll primarily
be using two or three sets of the greens to do the
coloring for our leaf. Simple seeds for the leaves. If you want to do a little
bit of gradient creation, you can make the edges
of the leaf a little bit darker and the remaining
sexon a bit lighter. With a lighter
side of the green, I'll be creating the flat
base as our primary layering, and we will wait for it
to dry a little bit, and on top of it, we'll be
going with a bit darker tone. I'll be using light
greens, yellow green, and sap green and a combination
of all these greens. In here, as you can see here, I'm using a bit
darker consistency of the sap green as
our primary layering. And on top of this,
I'll be going with a bit more darker tone of
the green to do the outline, add a little bit more detailing. You can just get the different
seeds of the green just by changing the
consistency of the color. By consistency, I
mean just adding more water to get
a bit lighter tone or lighter seed of the green. Yeah, here, too,
we'll be waiting for it to dry a little bit. For the pine needles, I'll be creating a little
bit of muted color. So in here with a dark green, I added a little bit of
white to get this kind of mutate tone for the primary
laying for our pine leaves. Creating small brus strokes
to create the pine like leaves. The last one. So for holly leaves
here too, once again, I'm using a bit here, once again, I'm using a
bit diluted sap green. We have primary layering
for the leaves. Let's create one or two
more hexagonal saves, a little bit carvin, adding
a stem for the leaf. And now let's wait for
it to dry a little bit, and then we will do the second layering of the coloring for it. And it has dried a little bit. Here, I'm going with a bit darker to another green
to do the outlining. For the outline, I'll won't
be creating the uniform line. I'll be creating
somewhat of broken lines for some of the section. I'll also be wearing
the thickness of the lines for some
of the sections, I'll be making it a
bit more thicker. Let's go over the main stems. Here, let's make it
a bit more bolder. And with these, we are
done with our first leaf. This time here, I'm using a bit more concentrated sap
green to do the outlining. I did not add a lot of water. I added only a little
bit of water to get this consistency
of this sap green. Rat small and thin strokes
to do the outlining. I'll be creating a little
bit of broken lines, and I'll be adding the
mid ribs. If you want. If you want to make the
leaves a bit more detail, you can also create
the mid ribs. Mid rib is the line that divides the leaf
into two section. Also, if you want, you can do a little bit of more detailing
using the fine liner. If you want to add a
little bit of reflection, you can use concentrate
in white or whiting to create a little bit of reflection on some
section of the lean. And in here, I'm
using dark green and adding it on top of the muted
green that we used earlier. The sides of the strokes
are somewhat sane, but in here, I'm
adding a little bit of less strokes on top of this. Let's do the outlining
for our last one. Let's create the mid drops
and the veins, both. Since the stems and
the branches of the leaf won't be
that much thicker, I'll only be creating
one or two lines, but if you want, you can leave a little bit of
space in between. For the lot section of the stem, I left a little bit
of lighter side of the green to be visible. Adding the mid drops and the
veins for the final leaf. With this we are done
with the second part. I'll see you in the third one.
6. Simple coloring: Welcome to the third
in the final coloring. In here, I'm using skin colour to do the coloring
for the center. So mostly, I'll be using a bit diluted consistency of the skin tone to
do the coloring. For the upper region, the
region just below its hat, I'll be making that region
a little bit more darker. For some of the
project, I'll be using a bit darker tone like ocher for the upper section and a
little bit just above its beard to create
a kind of gradient. We will wait for it to dry
a little bit and then add a little bit of red to
create rosy sticks. And as for the hat, simple, one or two layering of
the red will do the work. If you want to create a gradient or do a little bit of
reading, you can do that. Mostly, I'll be doing
a simple flat pass for the hats of the centers. Small strokes with the red to create a little
bit of rosy chicks, wet on wet technique will
do the rest of the work. And with these, we are
done with the weed, and I'll see you
in the next work.
7. St. Nick in a berry garland: Welcome to the first project, St. Nick and a Bay Garland. Let's start with the
intersecting lines to divide the peace in
different sections. Simple intersecting lines.
For most of the project, I'll be creating the
face of the centers, a little bit above this
intersecting line, a little bit above
the horizontal line. If you want to wary the
policemen, feel free to do that. Let's create the
circular C for its face. As an sn, if you want
to vary the seeds and the sizes of the circular
see, you can do that. Now let's do a
rough outlining for the placement of the berries
on both sides in here, I'll be adding the berries. So moving back to the
piece of the center, starting with the outlining
for the heat of the center. If you want, you can
create triangular seep like this for the
heat of the center, but I'll be creating
semicircular seep later on. If you want, you can go
with this triangular see. Let's create the outline for
its id and the moustache, a triangular C for the nose, small De circular C. And let's do the outlining
for the moustache. For this first product, I'll be creating a little bit
of smaller moustas. If you want, you can
make it a little bit more bigger, more rounder. In here, I'll be creating
this simple vers for the moustache if you want, you can also add a
small resemblance for the mouth just
below the moustache. Finally, let's do
the outlining for its beard, where a small beard. In here too, if
you want, you can make the beard a bit larger. I won't be painting the ear. If you want, you
can do that, too. So this is the kind of
simple semicircular hat that we'll be creating
for our first center. Let's do a rough outlining, creating this kind of
semicircular arc on top and below the
head of the center. Later on, we'll be using
colour to create the leaves. For now, let's just only
do this semicircular same. Here, I'll be creating
this kind of round leave. I'll be using the sap
green to do the coloring. If you want, you can use any
other sets of the green, or you can also vary the seeds
on the sides of the leaf. I won't be doing the
outlining for all the leaves. I just create the outline for the final leaves on each stem. If you want, you can do that. Now let's lightly erase
the pencil sketch. Is that a little bit of pencil sketch should
be visible so that we can use it as the guideline
to do the coloring. If you have needed eraser, use that to avoid
the erased dust. In here, I'm using
rust to remove the erased dust to
avoid the smudging of the pencil sketch.
Let's do the coloring. So first here, I'm starting with the skin tone for the
fece of our center, lighter consistency
of the coloring. In here, I'm using a bit diluted consistency of the skin color, filling the entire section. Creating a flat
mask for the face. Do the outlining near
the stas a little bit clear since we want to
preserve the rounder C for the mosas If you want to create
a little bit of gradient, you can use a bit of ocher, like in here I'm doing. If you want to keep it simple, you don't have to use that. Here I'm using a little bit
of water to blend the color. Blending these two colors, it will blend on its own since the color
has not dried up, so the wet on wet technique
will do its magic. Very small quantity of red
to create rosy chicks. Here, too, I use a bit
diluted consistency of the red to create
the rosy chicks. Using a bit more
concentrated red to do the outlining for the cap. Creating flat pass for the cap. If you want to
create a gradient, you can use a bit darker
tone of the grade. We will wait for it to dry. Until it dries, let's do
the coloring for the leaf. In here, I'm using
the sap cream. I added a lot of
water to dilute it. I'll be creating seven or eight simple leaves
for each stem. If you want, you can
vary the numbers. Just very simple saves
for all the leaf. Let's create a few more leaves, one or two more, and we will do the leaves
for the remaining. And with these, we are done
with the first branch. Let's do the same for
the remaining three. If you want to vary the
consistency of the color, you can add a little bit of more water or you can just use a little bit more
pigmentation or you can use a little bit more pigment to get somewhat of
concentrated color. Or instead of using
the same color or same consistency
of the color, you can vary the consistency
of the color for all the four branches and the leaves that we'll
be creating in here. And let's add one
more leaf in here. And with these we are done with the two branches at the top. Let's create let's do the same thing for the two
branches at the bottom. Instead of creating
the same kind of leaf in the bran,
you can vary it. You can use or create different
kind of leaf or branches. For now, let's continue with creating the remaining leaves. I'll be adding two more
leaves for this one. Making it a little bit larger, so this will be the final leaf. The consistency of
this is looking a little bit more darker,
but when it dries up, it will lose a little
bit of intensity, creating the stem and the
leaves for the final branch. When it dries up,
we'll be going with a bit darker consistency of the same sap green
to do the outlining. And as in the
demonstration video, I'll be creating a bit
of broken lines to the outlining and I'll also
be creating the mid drips. Let's create the
leaves for this one. As for the berries, I'll
be using red colour to create the circular
seeds with the berries. I'll be adding four
or five berries, and I'll also be adding
three berries just below the beard of this Santa
Claus just below the beard. And with these, we are
done with the leaves. We will wait for it to
dry until it dries. In here, I'm using a
little bit of skin tone to create a bit of outlining
for some of the section. And now in here, I'm using a mixture of bit of
ocher mixed with the gray. And I'll be creating
this kind of line to create the appearance, to create this kind
of texture for the beard of our
first Santa Claus. Creating this kind of
curvy lines, and yeah, we'll be feeling the entire
section for its beard and a little bit and a little bit for the moustache of the Santa Claus with this. Let's do the outlining. Let's do the same thing in here. Instead of this
color combination, if you want, you can use other. As I mentioned in here, I mixed a little bit of
ochre with the green. Instead of that,
you can only use a bit of lighter
side of the grey, diluting it or adding
a little bit of white. And with these, we are
done with the beard. Let's do the same thing
for the moustache. And let's make the upper part of the hat a bit more
clear and distinct. A little bit of pencil sketch was visible, so removing it. Now we will wait for it to dry, and then we will
add the eyes and the nose till it dries in here, I'm using the red to create the circular
C for the berries. If you want, you can leave a little bit of white space for the upper part to so the reflection or create
a bit of highlight. I'll be going with
a white ink or white colour to add the highlight
later on when it dries. For this one, I
created five berries. Let's do the same thing
on the other side. So here, too, let's
create five berries. I'm wearing the
seeps and the slides of the berries a little bit. Three more. Let's
create three more. If you want, you can create berries in between the
leaves and the branches. That will be interesting, too. And let's create the
final three berries just below the bead
of our Santa Claus. So in here, I'm creating
the same kind of berries. I won't be creating
the branch in here, but if you want, you can
proceed with that, too. Creating the nose
for our Santa Claus, Insure that the watercolor has dried and then only proceed. Small semicircular soup
and adding in on top of the rosy chicks to add a little bit of more
characteristics to the face. And now let's do a little bit of gradient creation
for its heat. So overlying this bit concentrated going on
top of the flat was. And with these, we are
done with the red for the baries and the
remaining sections. In CO that the primary
layer has dried. In here, once again,
I'm using sap green. This time, I'm using
with concentrated form of the sap green to
do the outlining. As I mentioned, I'll be creating a bit of broken lines
to do the outlining. So carefully going
over all the leaves. I'll be creating this kind of broken lines for the
stems, the mid ribs. If you want, you can also create the veins, tiny minute veins. This will take a little bit of time and you'll have
to be a bit cautious since we'll have to
create small and thin strokes to
do the outlining. Instead of this, if
you want, you can use the fine liner to
do the outlining. Yeah, let's continue doing the outlining for all the
leaves that we created in here. If you want to make it a
little bit more interesting, you can create the coloring
for the background, too. You can do the coloring
for the background, too. It will take a little bit of time and you will
have to courses. So you have to start
with the sketches for the center and then
first, do the coloring, using a bit lighter tone of the color or mutate tones to do the background so
that on top of it, you can use the greens to create the leaves
or the berries. You can do that if
you want. And with these we are done with
the first system. Let's do the same thing
for the second one, a bit of broken lines to do the outlining and creating small stree for the
mid rip for the leave. And as I was mentioning, as you can see, when the
colour dried up, the intensity of
the greens that we use initially has
decreased a little bit. And when the color that
we are using in here, the darker or bit concentrated
form of the sap green, when this dries, it will also lose a little bit of intensity. And now, let's do
the outlining for the last leave for
the second branch. We are done with that two
branches for the upper part, doing the same thing
for the two branches on the lower section, a bit of broken
line for the stem. And now, let's do the outlining
for the remaining leaves. Simple broken and curved
lines to do the outlining. A single line for the midrib. We'll be doing the
same thing for the remaining leaf and the remaining branch,
the last branch. As I mentioned, the whole
we do in real time, so you can always
follow along with me. In here, if you want to make adjustment and changes,
you can do that. You can add more berries,
as I was mentioning. You can increase the
number of the leaves. Apart from this kind of leaf, you can also add
other kind of leaf. With this, we are done
with the third stem. Now moving on to
the last system. Carefully creating small strokes with the brush to do the outline If you want, you
can make the region where the stem and the leaf connect a bit more darker to make it a little
bit more interesting. And with these, we add with all the food stems
and the leaves. Now, let's create the
stems for the marries. Simple straight lines for
the stems for the berries. Instead of this, if
you want, you can use a little bit of brown to
do the outlining too. With these, we are
done with the greens. In here, I'm using
a bit of green to create the top of the
cap of the Santa Claus, making the outline
for the mostess a little bit more darker
a bit more distinct. Let's do the same thing
for the outlining. And yeah, with this, we
are done with this gray. Finally, let's at the eyes. In here, I'm using
the gelpin to create a small circular
see for the eyes. Lastly, using a little bit
of white ink to create a little bit of reflection for the Mrs small dots with a white. So small dot with
the white ink to create a little bit of
highlights and the reflection. Adding it for the last berry. And with this, we're
done with the highlights and the reflection
for the berries. Creating a very small
twining stroke for the reflection for the
eyes, very minute stroke. And yeah, with this, we are done with
our first project. I hope you had fun
painting this. I had a lot of fun creating this simple and
easy first project. I'll see you in
the next project.
8. Santa joyful christmas circle: Welcome to the second project, Santas joyful Christmas circle. So this project will be somewhat similar to the first
project we did. I'll be creating
a bit larger kind of wreath for this one. So let's start with
the intersecting lines to draw out the guideline
for the fees of our center. For all the projects,
I'll be placing the fees of the centas a little bit
above the center point. If you want to change the
positions of the face, you can just move the intersecting lines
a bit up or down. Let's create a circular
C for the fees. In here, I'll be making the
eyes of the cenas closed. If you want to create Open
nine, you can do that. Now let's create the outline for the upper section
for the cenas cap. Here, too, if you want,
you can make it a bit more thinner or
a bit more thicker. Using this intersecting point
to create the small nose. Instead of creating
triangular sep, and here I created
this kind of seep. If you want, you can create
the triangular sap too. Let's do the outlining
for the moustache. For this center we have got
a bit smaller moustache. Here I'll be creating
a small mouth. To the rough outlining for
the beard for the center. So for this one, I decided
to make the beard a little bit more fluffier as
compared to the first one. Here, if you want to change the proportion and the
sizes of the face, beard or moustache,
feel free to do that. Outlining for the cap. Here, once again, I'm creating this semicircular C for the cap. Instead of this, you can create a triangular C for the cap. Closed eye for our center. And yeah, with this,
we are done with a very simple outline
for our center. Create the outline
for the wreath. I'll be creating the
same kind of leaves in the branch that we used
in our last project. Instead of creating
four branches in here, I'll be creating only two,
and these two branches, as you can see, will
be a bit larger. Instead of creating this
kind of leaf or branch, if you want, you can
use if you want, you can create any other kind. I'll be creating this kind
of curvier lines to add a little bit of more volume
to the weird of the center. And yeah, with this, we are done with the basic
pencil outlining. Let's erase the pencil sketch. Insert that some section of the pencil sketch
should be visible so that we can use it as the
outline to do the coloring. We'll be using the same
color skin, for the hat, we'll be using red for the beard and the moustache,
I'll be using gray. And for the feas, I'll
be using the skin color. For the nose and
the mouth in here, I'll be using red. And as for the leaves
in the branches, I'll be using sap green and a little bit of
red for the berries. Now let's do the coloring. In here, I'm starting
with the skin color. So carefully doing
the outlining for the upper and the lower section
for the visible face, carefully doing the
outlining for the face. In here, I'll be creating
the nose, and now, let's do the remaining
section. Now let's do a flat. In here, I'm using a bit diluted consistency
of the color, and this will be
our first layer. For the upper section, I used a bit more concentrated color to create a bit of gradient, the shadow cast in by the
top of the Santa's hat. We will wait for it to
dry a little bit and then add a little bit of redish
color for the cheeks. Let's create the
outline for the stem. I'm using very
diluted sap green. And we will wait for it
to dry a little bit. Now, let's do the
first layering. So in here, once again, I'm using a bit diluted
form of the sap green, the same kind of leaf that we created for our first project. Here I'll be making
the leaves a bit larger as compared to
the first project. If you want to
change the sides and the placement of the leaf,
feel free to do that. Or instead of creating
this kind of leaf, you can create totally
different kind of leave. This leaves are very easy to do and have very simple saves. So for most of the project,
I'll be using this. But if you want to experiment, you can create other
kinds of leaf and add more varieties to it
and add more lements. And with these, we
are almost done with this first branch.
Let's add a few more. For the lower section in here, I'll be creating a
bit smaller leaf. Bit smaller leaves for
the lower section. And yeah, with these we
had done with this side. Let's do the same thing
for the other side. And in here, I'll be adding the berries in
between the leaves, and I'll be using the
sakura fine to do that. Instead of that, you can
use the breast pain, sketch pain or watercolor, whatever you have or whatever
you feel comfortable with. Let's continue with creating this small leaves for
the entire section. As I was seeing in
the first product, if you want to create the
background, you can do that. Instead of adding the
colour for the cenas first, you can use a bit
muted or lighted sets of the colour to
create a background. Or if you are more confident, you can just do
the outlining for the centers with different kind of color and create background. Preferably use muted or light colour since it will
become a bit hard if you will do overlaying with
the greens on top of the darker color as the
two colors might merge. Oh And with this, we are done
with the second one. Let's create bit smaller
leaves for the lower section. With these, we are done with the primary layering
for our leaves. We will wait for it to
dry a little bit and then do the outlining like we
did for our first project. In here, I'm using a bit
diluted form of the grade to do the outlining for the
moustach, bead, and the cap. Creating these kind of
small strokes to create the fluffy beard for
our Santa Claus. Now let's join all these
strokes with each other. Create a little bit
of curvier lines, and the lower section,
as you can see, is a little bit more darker. We'll be adding this
kind of small strokes for the inner section too. Before doing that, let's do the outlining for the
moustache for our Santa Claus. If you want, you
can still make it a bit larger or a bit more small. Let's create this kind of small strokes for the
remaining section. If you want, you can add
more strokes or if you want, you can create a
bit of gradient. You can use the lighter tone of the grade to create a
flat, and then top of it, you can add one or
two layers of it to create a bit
more fluffier end. Now let's do the outlining
for the remaining section. In here, I am creating a little
bit of small broken lines to do the outlining for the lower section
of the Santas cap. Create a little bit
of shaky lines to do the outlining to
create a little bit of cloth like appearance, creating the semicircular
see for the top of the centascap to create a bit of realistic appearance
for the centascap. In here, I'm using
a bit diluted read to create the rosy checks
for our Santa Claus. Now let's do the coloring for the entire section
for the Santa's heat using the same red. This time, it's a bit
more concentrated. Let's peel the entire
section with this red. Now we'll be doing a flat vase to cover the entire section, and when it dries,
we'll be adding another layer on top of it to create a little bit of gradient. Adding this for the nose, and I'll also using this for the mouth of the
second Santa Claus. Carefully adding it just below the moustache
of the Santa Claus. Wait for it to dry and then
add the ice till it dries. In here, I'm using a bit
concentrated sap green to do the outlining
for our lead. The same kind of outlining that we did for
our first project, a bit of broken lines
to create the outlines. A bit of broken lines to
create the outlines and also adding the mid rips in the middle for the mid rips too, I'll be creating a
bit of broken lines. If you want to add a
little bit more detailing, you can also add the veins
coming out from the mid rip. Continuing on with
the remaining leaves for the second branch, and then we will move
on to the first one. This will take a little
bit of time since we have lots of leave
for the second project. If you want to make this
process a bit more faster, if you have a sketch
pain, breast pain, you can use that to
do the outlinings. Also, if you have green fine
lines or green gel pens, you can also use that to do the outlinings in here since we are creating a bit
smaller and thinner lines, so that's why we'll
have to a bit causes and it takes a
bit of time to create the small and thin lines and to do the outlining
for all the leaves. After doing this, I'll
be going with a bit fine on to create small baries
in between the leaves. I'll be creating two to three
baries in between the leaf, and I won't be adding the
baries for all the leaf. But if you want, you can add the baries in between
all the leaves. And with these, we are
done with this one. Let's move on to the first
one, doing the same thing, a bit of broken lines
to do the outlining for the leaf and also creating the broken
lines for the midrib. Making the stem a
bit more thicker. So yeah, let's continue
with the remaining leaf. These two project the first
and the second one are same. We created somewhat
of same kind of the Santas and the
same kind of the leaf. We changed some of the elements, but overall, we are
somewhat similar. For the third center, we'll be making a little
bit more changes. We'll be creating pine needles, we'll be creating pine leaf, we'll be creating pine leaves as the wreath and we'll be making the feas a
little bit more larger, larger and thinner moustas and a bit different
kind of eyes. Also, if you want
to make changes and add more element to this
one, you can also do that. We're almost done
with the leaves. After this, we'll be adding a little bit more
detailing for the cap, a little bit more detailing
for the fees by adding eyes, and if required, add a
little bit more coloring. Continue on with the
remaining leaves. If you want, you can add
few berries just below the beard of the Santa Claus as we did in our first project. And we have got only two
leaves to do the outlining, starting with creating
the mid ribs, and then let's do the outlining. Outlining our last leave. And with these, we are done with the greens
for our leaves. Let's make the nose and the mouth a little
bit more redder. So a bit concentrated, right? And as you can see, I'm
adding it for one side only. Now moving on to the cap. Let's create a bit of gradient. So this side will be
a bit more darker. If you want, you can spread
the color for the cap too, but it seems pretty good to
me, so I won't be doing that. Here I'm going with a gel
pen to create small eyes. For the second center, I decided to create
this closed eye. So we have got a jolly freeze
for our second center. These we are done with
the feast for our center, adding the final detailings. So in here, I'm using the
sakura micron pine liner to create this small circular
see for the marries. Adding the marries in
between the leaves. If you want, you can use
a little bit of greens to connect these berries to the remaining
section of the leaf. It seems pretty good to me, so I won't be doing
that, but if you want, you can proceed with that, too. Also, as I mentioned, I won't be adding the berries
for all the leaves. If you want, you
can do that, too. Let's continue with
creating the small berries. And in here, I'm
leaving a little bit of a space in the middle. If you want, you
can cover that too. And with these, we are
done with the first one. Let's add a few more
berries for the second one. Small circular seeps. You can also vary the
sides a little bit more. Yeah, we are almost
done with the berries. Let's add a few more. Adding
two or three in here, too. And with this, we are done
with our second project. I hope you enjoyed this and I had a lot of fun
painting this one.
9. Santa in a pine forest frame: Welcome to the third project, center in a pine forest frame. So this is going to be a
little bit different from all the two projects that
we have did earlier, starting with the
intersecting lines. In here, I'll be
making the feces of the center a little bit
different, a bit more fluffier. And instead of creating
the easier kind of leaves that we used for our
earlier two project in here, I'll be creating
the pine leaves. And yeah this is going to
be another exciting one. Let's do the outlining for the circular see for
the center space. As I was mentioning,
I'll be making the face a little
bit more fluffier, so creating a bit more fluffier. So making the beard a little bit more rounder and a
bit more curvier. Now, let's do the outlining
for the upper section, the cap for the cenas head. And in here, I'll be creating the triangular set for the hat. A little bit bent in careers for the cap of
this third center. The head looks a little
bit more downward, but we'll be making a
little bit of changes. Let's create the
nose and moustache, and then we will do the
outlining for the beard. Small mouste for
this third project. If you want, you can
create the mouth like we did in the last project. In here, I'll be creating
this kind of small eyes, create the here line and
extending it to the beyond. This is our rough mancllusketch
for our third center. If you want to make changes and adjustments, feel
free to do that. In here, I'm creating
somewhat of circular C for the wreath that will be
surrounding this third Santa. In here, I'll be creating
clusters of the branches, a total of seven cluster
of the branches. Do the outlining for the remaining section,
the lower part. Here I won't be creating the redbries If you
want, you can add them. And apart from the spins, if you want, you can add
other kinds of leaves too. And with these, we are done with the basic pencil outlining. Let's erase it lightly, and then we will
add the coloring. Is that some section of
the pencil outlines would be visible so that we can
use it to do the coloring. And if you want, you
can do the outlining with a fine liner and
then add the coloring. In here, I'm starting with this very diluted form of the skin color to
create the outlining, and I'll be adding it for
the entire section too. As you can clearly see the piece of the center is
a little bit more broader as compared to all the other two centers
that we created so far. Now, let's field the entire
section with this color. Using this skin colour to create a flat as for the first layer. If you want to create a
little bit of gradient, you can use a bit of darker
star with a skin tone, or you can use a bit of
cher just below the heat of the center and a little
bit above its moustache. We will wait for it to
dry until it dries. Let's create the cluster of
branches for the pine needle. Branches for the pine leaves. So a cluster of three
or four branches and the stems for
this pine leaf. Here, too, we'll be doing
two layering of the color, starting with a bit
lighter tone of the green and then going with a
bit more darker tone. We'll be creating small streaks with the brush to
create pine needles. This will take a
little bit of time. So if you want, you can
decrease the numbers, you don't have to create
the same unseen number of the leaves that
I'll be creating. Two more cluster of the
branches at the base. And I think we are done with
the number of the branches. If you want, if you want, you can increase the number two. So now we will wait for the branches to dry a little
bit until it dries in here. Let's do the outlining
for the Santas, beard, Mustas and the
remaining portion. We'll be creating somewhat of same weird as we did
for the second project, but it will be a bit more
rounder and bit more fluffier. Now let's do the outlining for the Santas Mustas creating
small strokes with the breast, do the outlining, sere
that the color has dried, otherwise, the two
colors will mix. Create this kind of small
streaks for the beard. So a bit of broken lines and
a little bit curvier lines to add more volume to the beard of this
third Santa Claus. You're fully doing the outlining
for the upper section. If you want, you can
use a little bit of water and spread
the colour to create a flat vase and then add another layer of
color on top of it. Let's create the outline
for the upper part. The bottom section for the cap. Making that distinction between this beard and the face a
little bit more pronounced. Now, in here I'm spreading
the color a little bit. The intensity of the color the intensity of the color
has decreased a lot. The initial layer that we
use has dried somewhat, so it's not that spreading. And with these, we
are done with this. Now, let's do the coloring. So in here, I'm going with red, a bit concentrated did. And yeah, completely feeling the entire
section with this. You're going to start with
creating the outline for the cap and then feel the
remaining section with the red. So this is our first
layer for the cap. When it dries a little bit, we'll be adding another layer to create a bit of gradient, making one side a
bit more darker, the other side a bit lighter. Tiny nose, so carefully
adding this red. Instead of using this red to create the nose
and the mouth, you can use a bit more
concentrated form the skin color, or you can use orchid
to create the nose. And yeah, with this,
we adn with the nose. Here I'm using a bit
lighter or diluted form the sap green to create
the first layering for our pine leaves. Creating small strokes
just like this. And we'll be creating the small strokes
for all the branches that we have created so far. It will lose its intensity a little bit when it dries
and then on top of it, and then on top of
it, we'll be adding a bit more concentrated
sap green. As you can see in the
whole dog in real time, so you can always
follow along with me. Let's move on to the second one, same kind of small
strokes with this one. Instead of using the greens
to create the pine needles, if you want to create a
bit more muted color, you can just mix a
little bit of white to the sap green or the dark green to get a bit of muted color. And if you want to make it
a little bit more darker, you can use a little
bit of you can start with the dark green
as the primary layer. And then for the second layer, you can mix a little bit
of brown or black to the dark green and create
another layer on top of it. And, yeah, we are done with the first
second and third one. Let's do the third. Now let's continue with
the remaining one. In here, I mistakenly used a
bit more concentrated green, so let's make this a
little bit more darker. Continuing on with greeting these small strokes for
the remaining branches. The three centers that
we created so far, we did not use the fine liner
to do the outlining or add any details apart from the red fine liner that we use
to create the red berries. For our fourth project, we'll be using the breast
pin or the fine liner to do the outlining for
our centers and the leaves and then
add the coloring. And the leaves will be
a little bit different. The easiest kind of
the leaves that we practice in the
demonstration medium. And we have only got
two more cluster of the leaves to add
the coloring to. Let's continue with creating the small strokes to cover
the entire region with this. I won't be creating the red
berries for this product, but if you want,
you can add them. My goal was to keep all the
project under 20 minutes, so that's why I did not
add the red berries. But if you want,
you can add them. And we have got
only a last branch, so creating the small
leaves for the last branch. And with these we add the
first clearing for the leaves. Now let's do the final layering, using a bit darker tone of the sap green since we
started with the first one, since we started with the top, the color has already
been dried up. I see what the color
for your project has dried and then only
apply it otherwise, the two colors will
blend with each other. In my keys, the
color was dried up. That's why I'm adding
the color on top of it. As compared to the
first lane in here, I'll be adding a bit less
number of the strokes to create a bit of contrast in between the two layers
of the spine leaves. And you can clearly see the difference between the
intensity of the two colors. The first layer that we created
is still visible and it's adding more characteristics to the leaves that we just
created right now. This is going to
take a little bit of time since we have got
lots of leaves to add. So let's continue with creating the small strokes for the remaining branches
and the stems. Instead of using the same
color, you can vary the color. You can use a little bit
of dark greens, too, or you can mix a
little bit of browns to this sap green or you can also use a little
bit of red and brown to create small
pine needles with that. That will be interesting, too. This will take a little
bit of less time as compared to the first
layer since we'll be creating since we'll be creating less number of the
needles with this one, When we are done with the
first and the second one. Let's do the remaining five. Continuing on with the
remaining branches and the remaining clusters of the
branches that we created. Oh And for the remaining four projects, as I was mentioning
for the third project, we'll be using the fine
liner to do the outlining. And apart from that, for the remaining three
projects, the fifth, sixth, and the seventh,
for two of them, I'll be using a little bit of fi liner to do the outlinings. For one, I'll be creating the same kind of pine
needles, pine leaves. And instead of creating
this cluster like, I'll be creating I'll
be creating somewhat of semi circular
and large branches, and we'll be using different
color combinations. We'll be using light
greens and dark greens. We have got only two
more branches to add, and then we will add the
detailings for our Santa Claus. Sorry, I'm just rambling since this is taking
a lot of time. Stay pecent and just
add more leaves and add small strokes
to create those leaves. For two of the
project, I'll also be adding the small glasses. If you want, you can add the
small glasses in here too. Just very simple sips to circle sees for the Santa glasses. Adding a little bit of more strokes wherever it's required. And finally, moving
on to the last brand. Here we have got
three or four stems, a bit of broken lines
for the main branch. No covering the entire section, as you can clearly see, just
overlaying it on top of it, and the numbers of
the strokes are comparatively lesser as
compared to the first one. As compared to the first layer. Let's create a few
more branches in here. I decided to make some cluster of the branches a
bit more denser, adding few branches
for this one, too. And with these, we are
done with the greens. Going back once again
to the Santa Claus, here I'm using a bit
concentrated green, and let's create a bit of broken lines to do the
outlining once again. Bit of broken lines
and carefully creating the outline for the Mustas
of this third Santa Claus. Let's do the outlining for
the remaining section. Adding a bit of more
detailing for the beard, the earlier outline, just
overlaying it on top of it. Apart from that, as you can see, I'm creating a bit
of broken lines to add bit more texture and more characteristics to the beard for this
third Santa Claus. Go moving on to the cap, doing the outline for this
encircling the upper section. Yeah, with these we add the
green for the outlining. Adding a few more
small strokes to make the beard look a little
bit more fluffier. And with this, we add them
with the gray for the beard, mousts and the
outlining in here, I'm going with right, a
bit concentrated red, adding a little bit of gray on the one side of the Santa nose, moving on to the Santa, a bit more red on one side
on this left side. And now let's spread the color. Spreading the color a little
bit for the Santa snows. Let's create the eyes
for our Santa Claus. Small eyes like
this. If you want, you can create
other kind of eyes. And with these, we are done
with our third project. I hope you enjoyed
this project too, and I'll see you
in the next month.
10. Jolly santa in a winter wreath: Oh. Welcome to the
fourth project, the easiest one Jolly
Santa in a winter wreath. Let's start with
intersecting lines to draw out the
guideline for our Santa. This is one of the easiest
projects of this class. In here, I'll be
using fine liner Obrapin to do the outlining. I will save a lot of time,
and apart from that, I'll be creating a
bit simpler wreath that surround the Santa and it won't be surrounding on all side only for
the lower section. In here, I have created somewhat of eptical s for the fees. If you want, you can
create the circular sp and proceed with the same kind of Santa that we have
created so far. Now let's do the outlining
for the Santas cap. The thickness for the
lower section of the cap, I have ebbed uniform
for all the project. If you want, you can
vary it too instead of creating this kind of
thicker bottom section, you can make it a bit
more thinner or even you can make it and you can
also make it more thicker. Now let's do the outlining
for the Santa nose and the mooss In here, instead of adding the nose
at the intersecting point, I just added it a
little bit below it. Now let's create Santa's Mar. Using this line to determine the length for the Santa's
beard, if you want, you can create a
kind of triangular C for the Santa's med that
will be interesting too. Same kind of mean that we did
for our last two project, a bit of fluffy beard. If you want, you can
make changes with the seep sides of both the
beard moustache and the nose. Feel free to make
adjustment as you see fit. Make the seep a little
bit more curvier. In here, I'll be creating
a bit simpler eyes, small beady eyes
using circular seeps. This section was a
little bit thinner, so I decided to make
it a bit thicker. If you want, you can
create this kind of circular C for the cap
or you can make it this kind of a bit of bend triangular C
for the centashat. And with this, we are done
with the basic pencil sketch, Cad the wreath that builds
around the cents port. So very simple wreath,
I'll be creating in here. The simplest kind of leaf that we practice in the
demonstration video. If you want, you can extend
it through the upper section. I won't be doing this,
but if you want, you can proceed with this. In here, I'm using the
brasbin to do the outlining. Instead of the brat pin, you can use the fine
liner, jail pin, wall point pen or any other pen that
you will do the work. Or if you don't want,
you can just use the watercolors to do
the outlining later on. Here, too, I'm
creating a little bit of broken lines to
do the outlining. If you want, you can
create the uniform lines. Let's do the outlining for the Santas Musa For most of the project, I'll be creating this
kind of moustache. But for one of the
project, the last one, I think, for that, I have
created a bit larger one. In here, too, if you
want, you can make the moustache a bit more larger. Use this line to create
the Santa beard. In here, I'll be using
the grid to create the same kind of strokes that we used for our earlier project, adding few lines with the
rasping to add more volume to the Santa beard and now
circular C for the Santa IG over the outline for the Santa We'll be using the
same color combination that we have used to open, red for the centascap, nose and a little bit of red for the centa stick
and skin color for the cantas piece and seeds
of the green for the leaves. In here at the bottom, I decided to create
three or four berries. This is optional. If you don't want, you don't have to add it. Let's create a little bit of detailed leave
that will surround the barries If you want, you can add more
varieties of the leaf, but I'm satisfied with it. Now, let's do the
outlining for the stem, and then we will be doing the
outlining for the leaves, doing the same thing
on the other side. As I mentioned, I won't be adding the leaves for
the upper section. If you want, you can do that. Very simple saves
for the leaves. I'll be gritting total
20 or 30 leaves. You can vary the seeps
sizes as well as the placement of the
leaf as you see fit. Simple seed, just like the seep of an e and then we will be. And then we'll be
connecting this leaf to the stems and also be
creating the mid drips. And when we are done
with this stem, moving on to the second
one, doing the same thing. I like C for the leaves,
very simple save. Let's add a few more. And with these we are done with a
simple saves for the leaves. Let's make the outline of the hat a little bit more clear. So going over the
lines once again, not going over it, just
adding it beside it. Let's add a few more berries. If you want, you can
add few more berries at the upper sections too. And with these we are
done with the outlining. Let's erase the pencil marks. I'll be adding a little
bit more details later on. Do I'll be going back with the brush paint to add the mid drops and connect
the leaves to the stem, removing the eraser dust. And now, let's do the coloring. In here, I'll be starting with
the red for the Santa cap. Going with the red
for our Santa hat. Here I'm using a bit
diluted red colour to add the coloring. Later on, I'll be
going with a bit more concentrated one to
create a bit of gradient. Carefully adding this color
inside the outline section, once again, using the bras pin to make the leaves a
little bit more detail. Adding the mid drops
for the leaves and connecting it
to the main stem. If you want to make
it a bit more detail, you can also add the veins
coming out from the mid drips. Yeah, let's continue with adding the mid drips and connecting
all the leaves to the stem. And with these, we are
done with the first one. Let's move on to the second
stem that we have in here. The same thing, adding the mid ribs and connecting
it to the main stem. And with these, we are done with all the leaves and the stems. Let's make this a
little bit more detail, adding the veins for the leave. And with this, we arden
with the outlining. Let's create a few
more leaves in here. This is optional. If you don't want, you don't have to do this. And with this, we are
done with the ruse paint. Let's do the coloring In here, I'm using sap green, carefully filling the insides of
the leaf with this. Here I'm using a bit
diluted sap green. So carefully filling the
insides of all the leaf. In here, I'll only
be using this sd. I won't be adding another
layer on top of it. But if you want, you
can proceed with it. So instead of using this medium consistency of the sap green, if you are going to
proceed in that way, you should use a bit
lighter consistency of the color and then go in with a bit darker tone
to add a little bit of seeding and a bit more
detailings to the leaves. Adding the sap green
for the larger leaves. Carefully adding it for
the smaller leaves. And with these, we are almost done with the sap green
for all the leaves. The intensity of this color will decrease a little
bit when it dries. But here, we are done
with the leaves. Let's do the colour
for the center spaz. In here we am using
the skin color, completely feeling
the entire section. Now, using a little bit of red to create the
rosy chicks for our Santa Claus using the same red and spreading it on the other
side of the chick, and also using the red
for the Santa's nose. For now, let's make
the Santa's cap a little bit more darker
and a bit more vibrant. So using a bit darker
consistency of the red. I won't be covering the
entire section with the red. I'll be doing a little
bit of blending, adding a little bit of
red for the Santa's nose. In here, I'm using a little
bit of water to spread the color to create a bit of blending and a
bit of gradient. So both the sides
of the Santa's cap or the hat is a bit darker, and the middle person
is a bit lighter. Adding the red for the three berries that we have in here. Let's make the sides
a bit more darker, adding another layer
for the Santa's nose, particularly on one side. With this we add with the red. Now in here, I'm using a
little bit of lighter tone of the gray going
over the outlines, the outlines we created
with the eb pins. Adding a little bit of
tiny strokes to add a bit more volume to the
beard and the mouse. If you want, you can
create the same kind of lines that we did
for our first project, or you can just
follow along with me and add few lines like this to add a little bit more
volume for our Santa's beard. Adding few more.
For the cap two, I'll be adding a
little bit of line. So small strokes for the
lower region of the cap. Adding it for the
upper section too. And with this, we add in
with our fourth project. I hope you enjoyed
this one, too, and I'll see you in
the next project.
11. Grand beard in pine halo: Oh. Welcome to the fifth project Grand Mod in the pine halo. So this is going to be
an interesting one. In here, we'll be
creating a different kind of as well as adding the
glasses for the center. So let's start with
intersecting lines. Here I'll be making the
feats of the center, Centas Mud and
moustache a bit larger as compared to all the projects that we have covered so far. I'm making the circle a
little bit in elliptical se. Now, let's add the detailing. Here to keep things
simple, I'll be creating this kind of semicircular
C for the centers cap. Instead of this, you can proceed with a triangular
C if you prefer. I'll be creating a triangular
C for the centas nose. Let's create large
moustache for the center. This is the largest
moustache that we have created so
far in this class. If you want to make it a bit more denser, you can do that. You can also increase
its length more, or if you want, you
can decrease it. Let's create the
centas here line, and now extending this here line to create the centas beard. A bit larger beard
for the center, a bit of conical
C for the bottom. O. Now let's do the
outlining for the centacap. Same circular C for the
centascap instead of this, if you want, you can
create the triangular C. For this center, I'll also
be creating the eyebrows. Simple glass for the center. I'll be using the breast pine or the file ine to do the outlining
later on after coloring. And for the top, I'll be
creating the pine wreath. Pine leaves, the same kind of pine leaves that we
used in the third project. In here, I'll be using at
different color combination. Let's add the top
for the centers cap. And in here, if you want to make chinese an adjustment,
you can do that. If you want to create this
kind of hexagonal holly leaves or this kind of
leave for the wreath, but I'll be creating
the pine leaves. So feel free to make
chins and adjustment. Now, let's erase the pencil
sketch that I have created. I see that a little
bit of skit should be feasible so that we can
use it to do the coloring. And if you want, you
can do the outlining like we did for
the last project. Let's remove the sisters. Now, let's do the coloring here. In here, I'm starting with the skin color for the Santa space. So a bit of diluted color. Let's do a flat pass
for the Santa space, and then we'll be
adding the colors for the cantas beard and Santas cap and the remaining part and
the remaining elements. Carefully outlining the
Santa space with this color. And now let's feel
the entire section. Completely feeling the entire section when this skin color. Spread the color a little bit. Don't let the color
accumulate on one position. Here, a little bit of color was accumulated using the
dry rss to remove it. Now let's do the coloring for
Santas bead and moustache. In here, I'm using
a bit diluted gray. Creating the outline for the
cantas large Mustas still, if you want to make the
moustache a bit smaller, a bit more, larger, a bit
more flafer, you can do that. Now, let's do the
remaining part. So going over the
outline for the cantas and a bit of conical
seep at the base. A bit of sticky lines to
create a little bit of rough texture for the outline
for the Santa's beard. Here we'll be creating
the same kind of line that we used for
our first project, creating this kind
of a small line and then Alvey spreading it. Right now, I'm
creating this kind of small lines and then Alvey
spreading it with the water. A little bit of it
will be remaining, and the others will spread out, but you can see the visibility
of some of the lines. So it will create a
different kind of texture. As you can see, even after
spreading the color, a little bit of the lines that we created earlier
is still visible. So that's what I was aiming for. Now let's do the flat pass for the remaining section for the Santas beard and the here line. Now we will wait for it to dry. In here, I'm using a bit darker
consistency of the gray, and going over the outlines, since the color has
not dried up properly, a little bit of this
color will blend with the earlier layer of the light fast that we
did with the light grey. That's what we are aiming for a little bit of blending
in between the two colors. Let's do the remaining section. Small strikes to
create a bit of fur like texture for the Santas cap. Broken lines to
do the outlining. And I was not able to record the entire section of creating the outline for the cantas bean, but you have got the
idea what I did in here, a little bit of blending of the two colors because of
the wet and wet technique. Now, in here, I'm using red
to create the Santas cap. Here too, I'll be creating a little bit of
gradient later on. But for now, let's fill the
entire section with this red. If you want, you can use this red to create
the outline of the centacap and then feel
the rest of the inside. You'll love to admit courses
since the color that we used earlier gray for the outlining
has not dried up properly, carefully adding it near
the outline section. So we're creating a few berries, three berries on each
side of the centas B and one at the top,
and one at the Bs. A cluster of three
merries so a total of 12 merries Using to create the triangular
C for the centas nose. And let's create
the rosy chicks for our santa fiellingesides
with the d. If you want, you can use a little bit
of water to spread it. Now, let's create the
outline for the stem, and then we will
doing the coloring. So in here, I'm
using the sap green. I mixed a little bit
of yellow with it. Instead of this, you can use the other lighter side of
the green, yellow green, or the light green and create
the outlines with it and do the primary layering for the pine leaves and then go
in with a bit darker down. Now let's create
the small strokes, the same kind of strokes that we did for our earlier project, and we'll be completely covering the entire section
with both the sides. For the middle, I'll be leaving a small space to add
the red berry later on. But for now, let's
continue with creating the small strokes and
covering the entire stem with this It's quite simple, kind of the same kind of pine leaves that we created
in our earlier project. And with these, we are
done with the first stem, leave a little bit of
space in the middle. Let's do the same
for the second one. Apart from this, I'll also
be creating two small stem. Apart from this, I'll also be creating two small
stems at the base. For now, let's continue
with the first one. Instead of this,
if you want, you can create the holly leaves. That will be interesting too. So after this, the sixth
and seventh project, I'll be using the fine liner or the breast paints
to do the outlining. That won't take
that much of time. And with these pattern
with both the stem. Let's create another
stem in here. And here, I'm using other color, so light green, creating a bit smaller strokes as
compared to the adob section. Moving on to the second
stem in the base. We will wait for it to
dry a little bit and then add another
layer on top of it, adding a little bit
of more strokes. This has dried up, so
using the same color, So these two stems have
dried up somewhat, so using the same colour that I use using the same colour
that I use for the bees, a bit darker consistency of it, and let's go over it. So creating the same
kind of small strokes. In here, I'll be adding a
little bit of laser strokes. But yeah, we'll be covering
the entire section with this kind of strokes
for our pine leaves. Instead of this, you can use any other sets of the
green to do this. And as I mentioned, if
you want to make it a little bit more interesting
and a bit more vibrant, you can also use a little bit of red and brown to
create some strokes. I created this on my own. Let's do the same on this side, the same kind of small strokes
for the entire section, a bit of broken
lines for the stem, let's do the entire section
with small strokes. Carefully adding it
beside the centers beard. Ensure that the color has
dried and then only do it. Otherwise, otherwise, the two colors will mix
and we don't want it. And that is something
we don't want. And with these, we are
almost done with this. Only a small section remains. Leaving a small
space in between. Let's do the same
thing in here using the darker consistency
and adding another layer of leaves on
top of the earlier layer. A bit smaller strokes as
compared to the upper section. A little bit more for
the middle section. And now let's do the same
thing for the second one. Adding for the lower section. And with this, we are
done with the green. And now let's add
the red berries, using a bit darker consistency of the red to
create the berries. As I mentioned, I'll be
creating sets of three berries, leaving a little bit of
space in the middle. If you want, you can
cover the entire section with a red, and
then when it dries, you can come back with a white to create a little
bit of highlight, a bit more detailed highlight. And with this pad
with this side. Moving onto the other side, let's add more baries beside the Santas beyond
three on both sides. And finally, let's add
three berries in here. I decided to create one more, so four berries at the top. So we have got a
total of 13 baries. If you want, you can
add more berries, and you can also create different kind of
leave if you prefer. Adding a little bit of red for the cantas stecks and a little bit more
for the cantas nose. And the color has dried up. I waited it for to dry. Let's create the
glasses for the cena. Here I'm using the gelpin to do the outlining for
the centas glasses. Small circular see
for the centas glass. And on top of this, I'll be creating the centas eyebrows and tiny little eyes.
Let's connect this. Now let's create the centas
embros and the eyes. Very simple seeps for the
eyebrows and tiny little dots, tiny dots for the centasey adding a little bit of white for the centas glass, a
little bit of white. I also added a little bit of white for the centas eyebrow. Adding a little bit of white
for the upper section. And finally, let's create this kind of pattern
for the Santas beard. The same kind of
pattern, simple, straight and curvier lines that we did for
our first project, completely filling
the entire section of the Santas Bar as well as
four Santas Mostas with this. Instead of this, if
you want to create other kind of fluffy texture
for the Santas beard, like we did for the
earlier project with the kind of small strokes,
you can do that, too. But in here, I'm
creating this kind of brokens and curvier lines
for the Santas beard. Let's create a clear distinction between Santas beard and Santas moustache making the outline a bit more prominent to
create a clear distinction. For this region, let's add
a little bit of more gray, adding a little bit
of more gray for the edges of the centas moustas. Moving on to the Centasht. Adding a little bit of gray for the upper and
the lower region. And with these, we are done
with our fifth project. I hope you enjoyed this, and I'll see you in
the next project.
12. Festive santa in holly blossoms: Welcome to the sixth project festive Center in Holy Blossom. For this project, I was not able to record the
initial process, but let me show
you how I did it. I started with the
intersecting lines, and then instead of creating the circular C or elliptical
seas for the fees, in here, I created this I C, and then I added simple
eyes in the nose, and I did not add the
moustas for this center, making this center look like gnome And this is
how it turned out. So let's do the outlining. And here, I'm using brush
paint to do the outlining. Instead of this, you can use the watercolor to do
the outlining later on. Or you can just follow along with me and do the
outlining with the brass paint file liner or you can just follow along with me and do the outlining. I did not add the
moustache for this center. If you want, you can
do that. In here, I created a triangular
s for the Santa scalp. In here, too, if you want, you can create the semicircular S. I am using a bit of broken lines to do the outlining for
some of the sections, creating bossy
eyebrows for our cena, tiny eyes, and a bit large nose. In here, I'll be using
red to do the coloring. Now let's do the outlining
for the cents beard. In here, we'll be creating a little bit more detail
outlining for the centas beard. A bit of conical
shape for the bottom. Now let's do the remaining
section for the centas beard. Here I'll be creating two
different kind of leaf for the wreath that will
surround the cantas face, a little bit of
distinction in between the centaspas and
the remaining beard. Let's make the outline for the cap a little
bit more bolder. If you want you can create
the moustache With this, we are done with the outlining. For the leaves and the branches, I won't be using the fine
liner to do the outlining. But if you want, you
can proceed with that. And now let's lightly
erase the pencil sketch, and then we will
do the coloring. Ensure that the ink has
dried and then erase it. Otherwise, the ink will
smerge a little bit. Slightly erasing the
remaining section. And now let's remove
the erase it dust. Et's do the coloring in here. I'll be starting with the
skin color for the face. Go in with the
diluted consistency of the skin color
for the centafece. We'll be covering
the entire section. You don't have to
worry when you apply in top of the nose
and for the eyebrow. A simple flat as
with the skin color. I'll also be using
this skin color a little bit for the cenas bear, creating small dots creating small dots on both the
sides with the skin color. Let's add a little bit
more coloring to it, a bit of small red dots. In here, for the mean, I'll
be doing a little bit of flatwa and create a bit of
larger strokes later on. For now, let's do the
coloring for the Santas cap. A bit of concentrated
red for the centas cap, carefully filling
this raid inside this triangular C
for the cantas hat. And with these, we are done with the rate for the centas hat. In here, I'll also be
creating the berries. But from the berries, I'll
also be creating the birds, a little bit of
different kind of bird, red bids for the upper
section of the wreath. Now, let's add a little bit more detailing for
the centaspas. In here, I'm using a
little bit of ocher, adding it just below the
cap and a little bit and a little bit below the
eyebrow and near the eyes. Now going with the
water to spread the color and do a
little bit of blending, also using this color for the lower section
of the centas cap, a little bit for
the upper section. Go with the grad to
create this kind of mid larger strokes on the
sides of the centas beard. As I was saying in here, I'll be doing a little bit
of flat was with this gray. So a very diluted
consistency of the gray, and now in here, I'm
using water to spread it. If you want to add a little
bit more detailings for it, you can go in with a little bit of lighter consistency of the gray and create small strokes
on top of this light vs. It will spread on its own because of the wet
and wet technique. And now in here, I'm going with a bit lighter consistency of
the red for the cenas nose, making the checks a
little bit more redder. Now, we will wait for it to dry a little bit until it dries, let's do the coloring for
the remaining section. So in here, I'm using
a little bit of lighter consistency
of the sap green to do the outlining
for the stem. I'll be creating
two different kind of wreath for this project. In here, I made a mistake to
two lines instead of one. So to cover it, I decided to add an extra line in here too. Now, let's create
very simple kind of leaves that we practiced. I like s for the leaves. We'll be covering
the entire section, the upper section with
this kind of leave. And for the lower section, we'll be creating the
rounder see for the leaf. And for the lower one, we'll be creating the circular berries. But in here, we'll
be creating bids, small red flower
buds or barry bids. The line as I just created
turning into a leaf, create more leaves in here. And when the stripes
we'll be going with darker side of the green
to redo the outlines, add mid drips and
a little bit of more detailings create the
leaves for the other side. In here, I decided
to use this mistake that I did and add
more leaves to it. Adding more leaves. Adding the last leaf
for this upper section. Adding a few more
leaves in here too, as here, one more leaf in here. And with this, we are
done with the leaves. We will wait for it to dry
a little bit and then add the more detailings
until it dries, let's create the leaf in here different kind
of leaf in here. I'm using the same color
first doing the outlining for the stem and then
we'll be adding the leaf a bit of rounder leaf, the one we practice, the one we did in the first and
the second project. So initially, my plan was to
create this kind of leaf, but then I gave up that idea and created the rounder leaf. Here I'm just creating
this kind of leaf, but later on when I'll
be doing the outlining, I'll be turning this leaf
into the rounder leaves. If you want, you can proceed
with creating this kind of leaf or you can just start with creating the
rounder leaves. We are done with
this sign. Let's do the same thing in here too. For this side, I'll adding four or
five more leaves. If you want, you
can vary the seeds in the sizes of the leaves too. Adding the final two leaves. And this is the final leave. Now, once again, we will be waiting for it to
dry a little bit. If you want to make chinese, add a little bit more add a little bit more
details, you can do that. Let's wait for it to dry a little bit, and
then we will proceed. It has dried up, and in here, I'm using a bit darker tone of the green to
do the outlining. Creating a bit of
broken lines to create the mid rath and attaching
it to the rest of the stem and a bit more broken outlining for the remaining
section of the leaf. I'm making the edges of the leaf a little bit more
bold and more strict. This is going to take
a little bit of time. So be patient and do the
outlining for all the leaves. And if you want, you can
use the fine liner or the breast pain to
do the outlining to make this process
a bit more faster. And apart from that,
you can also use the colored brush paints or the sketch paint or fine liner. Otherwise, you can just
follow along with me and do the outlining for all the
leaves that we have in here. Carefully creating small strokes with the breast to
do the outlining. And if you want, you can
create this uniform lines. You don't have to create
this kind of broken lines. I use these broken lines to add a little bit of more
characteristics to the painting. That's why I prefer using
this kind of broken lines normal or over normal
or uniform lines. Continuing on with
the remaining leaves. Let's make this stem
a bit more bolden. Let's do the remaining
six leave for this side, and then we will move
on to the other side. If you want, you can add the
veins for the leaf stew, outlining the leaves and
then adding the mid rim. We have got four more,
and then we will move on to the other side
and the leaves at the maze. For our last project, I'll be creating the
same kind of center that we did in the
fifth project, center with the glasses, but there will be
a little bit of difference, different
kind of wreath, different kind of
facial feature, and I'll be using
the fine liner to do the outlining for
all the sections of that project, the wreath, the center, the
glasses, the mead, and the mosa we'll be using the fine liner to do the outlining for
all the things. But instead of using
the fine earlier on, we'll be using the fine liner or the brass mean later on
after the colour dries up, add a little bit more
characteristic to the painting. And with these, we are done with outline for the upper section. Now, let's do the same thing
for the lower section. Is that the color has dried
up and then do the outlining. And as I was mentioning, I'll be making the
leaves a little bit. And as I was mentioning, I'll be making the leaves a
little bit more rounder. If you want, you can create
the sharp edges or otherwise, you can just follow
along with me and turn the leaves into this
kind of curvier leaves. Continuing on with this. In
here, I'm using sap green. I just a little bit
more concentrated form. So yeah, let's do the outlining for all the
leaves that we have in here. Add a little bit more cream
to make the seeds a little bit more curvier and to cover the pointed section of the leaf, a bit of broken lines, wearing the thickness
of the lines. Making the edges of the
leaf a bit more curvier, outlining the leaf,
and then adding the broken lines for
the middle of the leaf. Going over the outline
for the last leave here. And with these, we are
done with this side. Let's do the same thing
for the other side. When the strips of I'll be creating small red
berries in here, and as I mentioned,
for the upper section, I'll be creating small red bods. Let's do the remaining
six sleeves, making the edges a
little bit curvier and then doing the outlining
and adding the mid drips. Going over the
outline for the stem. And now finally doing the outline for the
remaining three leaves, making the g a mid carrier,
adding the midrib. So it's going to be
a bit repetitive. Sorry for that. I'm just repeating the same
thing again and again, but we have got only
two more leaves. Creating bit of broken lines for the mid drops and then
doing the outlining, making the edges a
little bit curvier. And with these, we add with the sap green for the outlines. Now, in here, I'll be going with the red red watercolor to
create the red berries. So a bit of concentrated
red to create the berries. Wait for it to dry. And
now let's do the coloring. So concentrated red to
create small berries. I'm leaving a little bit of
white spice in the middle. I'll be creating cluster of two or three merries
if you want, you can increase or decrease the number of the
merries in the cluster. I won't be adding the
berries for all the leaves, but if you want, you can add
the berries for each leaves. Let's add one more
berry in here. You can go in with the green to connect this barries to
the rest of the stem. I won't be doing it, but if you want, you can
proceed with that. Moving on to this
side, the same thing, creating cluster of two or
three or single berries stew. Adding one more in here. I see that the color has tried and then only
proceed otherwise, the sap green will mix with
the red and create a bit of green and create a bit of brown color,
which we don't want. Let's add a few in here, three berries in here, and decided to add one more in here. Now let's move on to
the upper section. In here, as I was mentioning, I'll be creating this
kind of small birds with the red. Very simple see. And in here, I'm attaching
this red birds to the stem. Adding this simple
bird beside the leaf. I'll be creating multiple birds like this for the
entire section. I won't be adding it for
each individual leaf. I'll only be adding it
for some of the leaf, but if you want, you can
add for all the leaves. And beside this, if you want, you can also add the
red small berries that will make it a
bit more interesting. S carefully creating these small birds alongside the stem. If you want to make this
a little bit more faster, you can use the red color. You can use the red
fine and red skeet pin or red breast spin to
create the small birds. Adding few in here. So
let's add two in here. I think we are done
with this side. Let's move on to the other side. For this side, I'll be
adding a little bit more since we have got
two stems in here, small seeds for the bird. And as you can see, I'm leaving a little bit of
space in the middle. So a little bit of reflection or highlight for
the small birds. Adding one more in here. And yeah, with these,
we are done with this. Some of the bids that I created are a little bit lighter inside, so I'll be adding more
colors to it later on. For now, in here, I'm using a bit darker consistency of
the red for the Santa cap. Now let's spread the
color a little bit with the water to create
a bit of gradient. We are done with the cena scap, making the eyebrows a
little bit more brownish. In here, I'm using aka
too Now for the nose, a little bit of red, covering the entire section
with this red. And now, once again, going
back with the red to make some of the birds
that we created a little bit more darker. The birds that turned out a
little bit of lighter inside, going over it
carefully and yeah, let's do the same thing
for the remaining birds. Moving onto this side, doing the same thing, going over the outline of the birds that
are a bit lighter and sane. For some of the berries, too, making it a little bit
more darker and bolder. And with these, we are done
with our sixth project. I'll see you in the next one. I hope you enjoyed
this painting, and I'll see you in
the next project.
13. Whimsical santa in winter greens: Welcome to the seventh and the final project of this class, whimsical Cena whimsical
centa in the winter greens. Let's start by doing
the outlining, starting with the
intersecting lines. And now let's draw the piece, starting with the circular
C for the piece of this center This will be somewhat similar
to the center that we created the grand bead
in the pine halo. So we'll be adding the
glasses for this center. The only difference
will be I'll be creating a bit smaller moustas. Otherwise, most of the things
will be a bit similar. The coloring will
be a bit different for the moustache and the bead. Here, I'll be trying
to create a little bit of golden hue for the
bead and the moustas. So I'll be using a
little bit of skin coloring to add a little bit of detailing and a bit
of flat base for the bead and the moustache
for the canta clos. Let's extend this line to create the hair line for
our Santa Claus. This will be the lower
section for the center side. In here, I'll be
creating the circular C for the cap of the Santa Claus. A bit of fluffy beard, conical at the bottom. This will be the hair
line of the center. Now let's do the remaining. So this will be the bottom
section of the centas cap. Semicircular C for the top. If you want, you can create
the triangular C for the cap, adding another semicircular
C for the top. In here, I'll be creating
the glasses for the center. If you want, you can
create the eyebrows, too. Basic simple pencil sketch, and let's do the
outlining for the wreath. In here, I'll be creating
the same kind of leaves that we used in
our earlier project. With these with the
basic pencil sketch. Now let's erase it. If you want to make
changes adjustment, change the placement
and the pdsons make things bigger or smaller,
feel free to do that. Ensure that a small section
of the pencil skits remain visible so that you can
use it to do the coloring. Removing the eraser dust, now let's do the coloring. In here, I'm starting
with a skin color. Doing the outline for
the center squee. And now we will covering the entire section
with this skin color. Here, too, I used a bit diluted consistency
of the skin color. Bread the color a little bit. We don't want the colours to
be accumulated on one place. So in here, I'm using a bit of dry brush to remove
the excess water. Removing the excess water
with this dry rush. Instead of this,
you can also use that tissue paper or
cloth to remove it. In here, I'm using a bit
concentrated skin color. Now, spreading it a little bit. Region below the centa cap
and a little bit above the centamsta will be
a little bit darker. Using a little bit of red to create the rosy checks
for our center. In here, I'll be
using red to create triangular noes for
the cena later on. For now, using this
diluted consistency of the skin colour to do the
outlining for the centas beard. Creating this kind
of broken lines using small bras strokes. Let's create the
centas moustache. For the entire region of
the centas moustache, I'll be creating the
small strokes and completely filling it
with the small strokes. And for the remaining section to the beard and a little
bit of the centashe line, I'll be creating small strokes. Getting this kind of
small strokes with a brush to make the beard look a little bit more fluffier. In here, I'm trying
to make this beard and most a little bit
of golden in color. So apart from this, I'll also using gray. So a color combination of these two color the skin
color, as well as the gray. Covering the entire section
with the small strokes. If you want, you
can also do a flat on top of it when it
dries a little bit. Let's add a little bit of more small and finer strokes for the regions that are
a little bit empty. Adding a few more
strokes in here, too. If you want, you
can also use red or pink to create the mouth
for the Santa Claus. Adding a few more strokes wherever you think
it's required. Let's do the remaining
section in here. I'm starting with the red to do the outlining for
the upper section, the upper section of the cap, and then we will be
filling the entire section in the entire section of
the cap with this red. In here, as you
can see, I'm using a bit darker consistency
of the red for the cap. Semicircular C for the
cap of the center. Spreading the color in
the form of semicircular. Let's define the outline. And now let's completely
feel inside with this red. Making the edges a little
bit more smoother, and we will wait for it
to dry a little bit. In here, I'm creating triangular notes for our Santa Claus. Now let's do the coloring
for the background. In here, in here, I decided to use a
bit of muted color, so I use dark green and mix a little bit of white to create
this kind of muted color. I'll only using one
side of the color. I won't be going in with a darker side of the color
to do the outlining. But if you want,
you can do that. Instead of that, I'll be
using the brat pan or the fine line to do the
outlining when this dries up. Same kind of leaf and
the same kind of stem, a bit of broken
lines for the stem and this kind of rounder
saves for the leaf. Filling the entire branch with this kind of rounder leaves. To make this a little
bit more interesting, you can use two or
three different sets of the green and create
leaves with them. So some of the leaves will be of different sides of the green, others will be of
lighter or darker sad. Let's add the leaves
on the other side. In here, we'll have to
add few more leaves. Let's add the last
leaves in here. We will wait for it to dry
and then do the outlining. Let's add two more leaves in
here for the middle section. We'll be using the
same color and doing the same thing for the
bottom section too. Let's start by drawing out the guideline for the
stem or the branch, and then we will add the leaves. In here, I'll be wearing the sizes of the leaf a little bit. For the upper section, I'll
be creating a bit larger leaf and as we move away from
and as we move away, I'll be making the leaves
a little bit more smaller. So this is the simple
see for the branch. Now, let's add the
same kind of leaf. Extending the size of
the stem a little bit. And now let's create the same kind of leave that we just did. Simple and rounded
see for the leaf. This is going to take a
little bit of time since we have to create a large
number of leave in here. The intensity of the color will decrease a little bit
when it dries up. As you can see, I use the same
intensity of the color for the above leaf and how it
turned out when it dried up. It will also lose its intensity a little bit when it dries up. And as I mentioned, I won't
be doing the outlining, but if you prefer
when it dries up, you can do the outlining with a bit more darker
tone of the green. Adding the leaves
on the other side. And as you can see, as I
was mentioning that I'll be decreasing the seeps of
the leaf as we move away. So the leaves at the
bottom are the smallest. Let's move on to the other side. We'll be doing the
same thing. Simple and small round see for our leaf. And as we move away, we'll be decreasing the
size of the leaf. Gradually adding the leaves
on both sides of the stem. I won't be adding the berries
or creating small birds, but if you prefer
you can do that, you can use the red you
can use the red watercolor or use the red fine line to
create the small berries. And with these, we are
done with this side. Let's do the same thing
on the other side. This time, I'm starting
from the bottom, starting with the
smaller leaves. And as we move away
from this bottom, I'll be increasing the side
dis of the leaf a little bit. I'll be adding two or
three more leaves, and then we will wait
for it to dry and do the outlining with a fine liner. And with these, we are
done with the leaves. As I was mentioning,
I'll be creating a bit larger leaves for
the bottom section. So the same kind of a leaf, but a little bit
larger and we'll be connecting this larger leaf
to the remaining section, and we'll be
connecting this leaf with another stem
to the main branch. And we'll be adding a stem
coming out from the leaves and connecting it to the two stems or the branches
that we have above. Adding another pair of leave a bit smaller as compared
to the earlier one. And now let's connect it to
the rest of the two branches. Making a little bit more
darker for the lower regions. And we will wait for it
to dry till it dries. In here, I'm using a bit of
grey to do the outlining to create a clear distinction between a different
section of the Santa, as well as we'll be using this green to add
a little bit of detailing for the moustas and the B four hour Santa class. Adding small strokes
for the lower region of the cap to make it a
little bit more detail. Let's do the outlining and then we'll be adding a
bit more detailing, creating this kind of bit of broken lines to
outline the moustache, a bit smaller moustache. And the same kind of
small Bussus strokes that we did earlier
with the skin color. So doing the same thing, creating small strokes
with the screen and overlying some of
the small strokes on top of the earlier color, the skin tone that
we used earlier. And I'm doing the outlining, so making the outlining a
little bit more distinct. And yeah, Yeah, let's continue with
creating these monostroe for the entire region. As you can kingly see, I'm
not completely covering the earlier layer that we
used with the skin tone. For this lower
section of the cap, adding a little
bit of this screen to give it a little
bit more volume. Now let's make the moustache
a little bit more detail. Adding a little
bit more strokes, this mill the moustache. Adding a few more
strokes here and there, and with these we are
done with the green. Now let's add the detailing. Here I'm using the
black gel paint to create the outlining
for the glasses. Going in with the pencil
to create the outline for the circular C. Now, once again, using
this black gel paint to do the outlining
for our glasses. Let's make it a
little bit bolder. So adding another layer of following the circular
C for the glass. And yeah, let's make it
a bit more distinct. If you want, you can
create the eyebrows, but I decided not to do that, since this simple eye
looks pretty good. And with these we are done
with eyes and eye glasses. Now let's do the outlining
for the entire section. For most of the section,
I'll be creating this kind of broken lines
to do the outlining. Doing the outlining
for the centapiece. Now moving on to
the upper section. This kind of small
broken lines to do the outlining
for the centas cap. Instead of this, if
you want to create the uniform and straight line
to do the outlining, adding the outlining
for the upper section. Now let's define the circular
C for the centas cap. Small strokes with
the sail pin to do the outlining for
the Santa's beard. And with this,
we're done with the outlining for the Santas piece. Now let's do the outlining
for the rest of the section. Here, too, I'm
writing this kind of a little bit of sicky
lines to do the outlining. And for some of the section,
instead of one line, I'll be adding two
or three lines to make it a little bit more distinct and to add a little
bit more characteristic. I'll be adding more
lines particularly near the section where the
stem and the leaf connects. This is going to
take a little bit of time since we have
got lots of leave, and we'll be doing the outlining for all the leaves
in the same manner. Two or three lines if required, and a little bit of broken
lines for the mid ribs. And if you want,
you can also create the veins coming out
from the mid ribs. If you want, you can still
use a bit darker side of the green to add a little bit
more coloring to the leave. And you can also use a
bit lighter sides of the green or yellow greens to make it a little bit more
lighter in the color. Hold now, let's continue doing the outlining for the
remaining section. I won't be adding the
berries or the birds. If you want, you can do
that using the red ink or watercolor using the red
ink or the red watercolor. And with these, we are
done with this side. Let's do the outlining for the remaining leaves
on the other side. A bit of seqy lines
to do the outlining, two or three lines to make some of the sexton a little
bit more darker. Let's do the outlining for
the last remaining leaf. With this, we are done with
the leaf for the upper part. Let's do the same thing
for the leaf in here. Here we have got lots of leaves. Be present and do the outlining. Here, too, we are
doing the same thing, a bit of sechy lines
to do the outlining, making the edges a little
bit more darker and the regions near the region where the leaf and
the stems connect, adding a few more
lines that region to make that region
a little bit darker. Continuing on with the
remaining leaves in here. So we have got lots of leave add more than
50 leave in here. Not in here, but a total
of 50 leaves combining the two wreaths that we created for the bottom and
the upper section. Continuing on with
the smaller leaf. For the smaller leaf, I won't be adding that
much of detailing. But if you want, you
can do the same thing. Creating the outlines with
a bit sticky line and then using a bit of broken
lines to create the mid drop. And for the section where the leaves and the stems connect, adding a few more live to make that region a little
bit more darker. And with these, we are
done with this side, let's do the outlining for the
larger leaves at the base. Adding a few more lines in here to make it a little
bit more distinct. Moving onto the other
side, the same thing. I was not able to
record this section, but I did the
outlining on my own. And now we have got five or six more leaves
to do the outlining. And after this, we'll be
finishing this project. A bit of sticky lines
to do the outlining, a bit of broken lines
for the mid drips and a little bit more lines for the region where the stems
and the leaf connects. Adding the mid rips
for the larger leaves and adding a little
bit more detailing. And with these, we
are done with the seventh and the final
project of this class. I hope you had fun painting
all the seven centers. Let me know which one
was your favorite.
14. Thanks and conclusion: Thank you so much
for joining me in this festive watercolor journey. I hope you enjoyed painting the seven cheerful
Santa portraits with wreaths as much as
I enjoyed teaching them. Remember, your
style, your lines, and your colors make
each painting unique. So celebrate your progress. Don't forget to upload your class project in
the project gallery. I would really love to see
your Santa portraits and any practice seats you have
created along the way. If you found this class helpful, please consider
leaving a review. Your feedback truly
helps the class grow and allows me to keep bringing
you more creative lessons. You can also follow me here
on the skills here for future classes and connect me on the YouTube or Instagram, pursuing more of my
art and tutorials. Thank you once again
for painting with me. Wishing your warm, creative
and festive holiday seasons. Here's a small preview
for my next class in which you can create this
kind of samuri scienter. I hope you will join me there and wishing
you all the West. See you in my next class.
 Vishal Munshi