Transcripts
1. Introduction: Welcome to Graphic glass. I'm Laurie Russell, a graphic
designer and illustrator, and I am thrilled to
be your guide through this beautiful world of
digital stained glass art. Whether you're here
to learn a new hobby or add a unique skill to
your artistic tool kit, this class is designed to spark your creativity and help you create truly stunning pieces. Stained glass has a rich history dating back to ancient times. It has been used
to tell stories, celebrate beauty, and inspire awe through the interplay
of light and color. Today we're bringing
this art form into the digital age
using procreate, allowing us to experiment
and create without limits. My journey into
digital stain glass comes from a very
personal connection. My dad is a talented
stained glass artist and I have always been captivated
by the pieces he creates. The way light dances
through the colored glass, bringing each piece to life always seemed like a
bit of magic to me. I wanted to find a way to blend this traditional art form
with modern technology. Not only so that I could create digital stain
glass art myself, but also to provide a method
for my dad and others like him to sketch and plan
out their projects digitally. In this class, you'll learn
the techniques that will enable you to design your
own digital stain glass art. Including advanced techniques to help you mimic the texture, lead lines, vibrant color and light of real stained glass. After learning the technique, we'll walk through a full
design together step by step and then you'll create
your own project to share. I cannot wait to see the beautiful stained glass artwork that you're
going to make. Whether you're looking
to connect with a cherished hobby as I am with my dad's passion
for stained glass, or you simply want to explore the possibilities
of digital art. I invite you to join me on this exciting journey together. We'll turn pixels
into luminous art, one vibrant piece at a
time. Let's get started.
2. Resources: In this video, I'm going
to walk you through how to access all of the
class resources. When you go to the
resources page, this is what you
will see up here. At the top, we have
a couple of buttons for you to download
some of the resources. This one will give you the
free glass texture brush. This one will give you all
of the other resources. The color palette, the
image of a glass texture, and a couple of templates. Both of these take
you to Dropbox, but you do not have to have a Dropbox account to use them. You can download these files without signing into anything. Below this, we have
some information and the link to the Pinterest
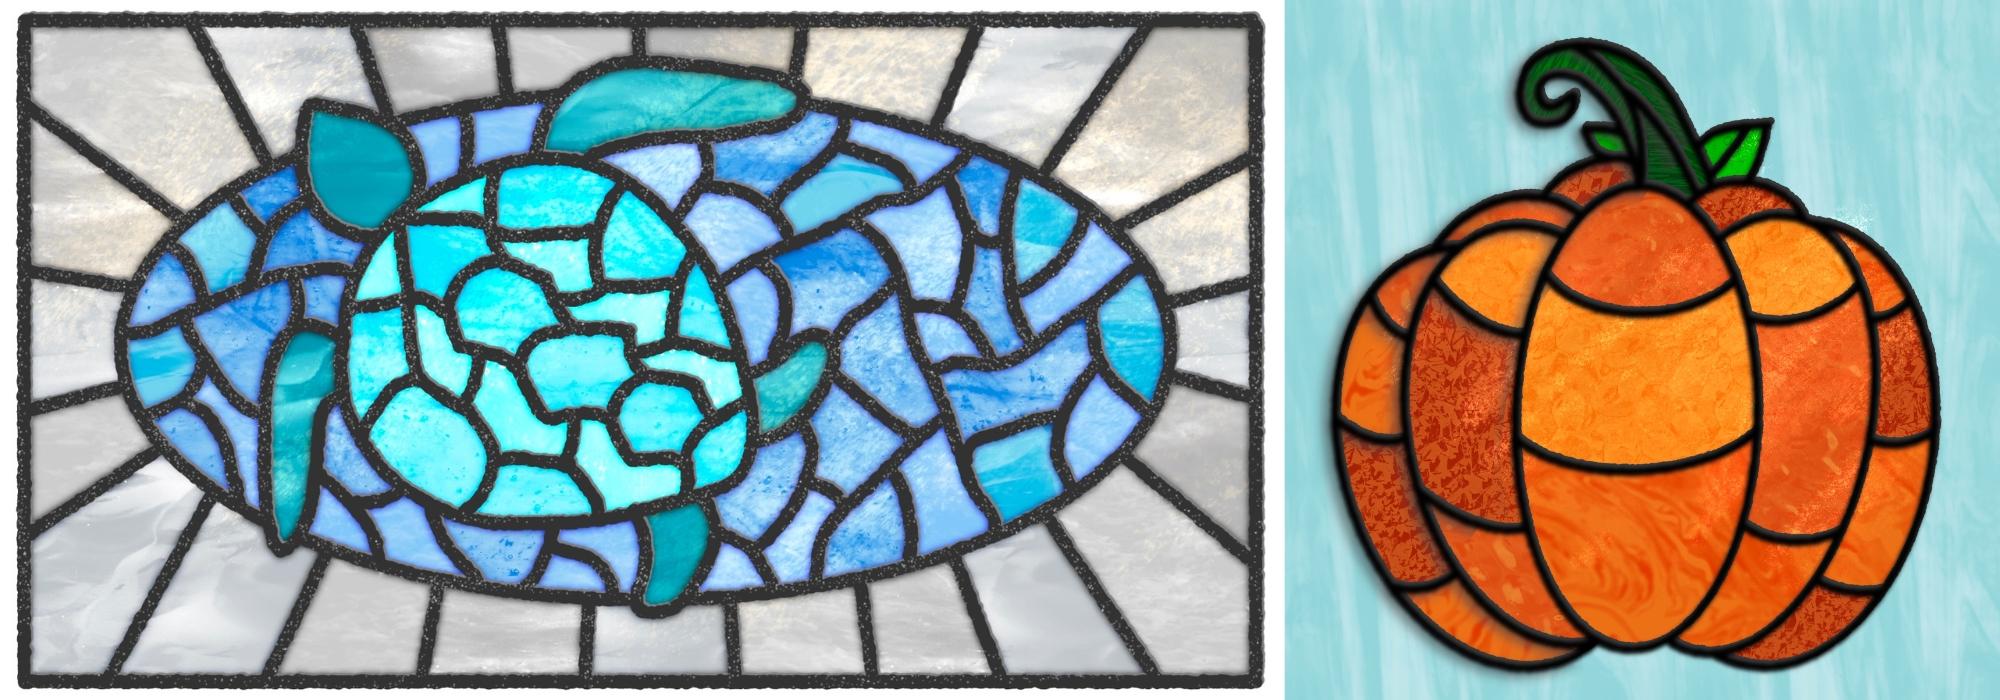
inspiration board that I've set up for you guys. Tapping that button will take you right to the
board on Pinterest. You can see I have
a whole bunch of inspiration images
set up here for you. Some of them are a
little more basic, some of them are more
detailed or complex. You don't want to copy any of
these directly, of course. But you can take inspiration from some of the subject matter, from the colors, from some of
the framing of the layouts, all kinds of different things. Just to give you an
idea of the type of things that you can
do with this art style. These are almost all actual
stained glass pieces. It's hard to find a
lot of digital ones, but the same idea can be
used for your digital art. The last thing I have for you on the resources page is a
digital stained glass kit. This comes as a
procreate brush set. It has a pencil brush, a few different lead brushes, and some textures as well. This glass brush kit
that I've put together for you for procreate
is optional. But I do think it's
really helpful to speed up your workflow. However, as we go through the project and I'm going
to teach you the technique, I'll walk through and
show you which built in procreate brushes you can use for these different
steps as well. Here's the brush
set in procreate. I have a couple of set dividers
here that just basically show you the
different sections of the brushes under tools. We have the sketching pencil, you can use any procreate
pencil, of course. I'd just like to include one in my kits just so it's handy. I have two different letting
brushes here for you. One of them has a bumpy base. You bump that up in size, you can see the difference here. One of them is a
pretty smooth base. You're not going
to have nearly the bumpy edges that you
do on the other one. The next brush is the
letting texture brush. This is something that's
really nice to use with a clipping mask on top of
your lead and a lighter color and you'll want to match this to the size of the
lead that you have. The next two brushes
we're going to get into when we work through the C, but we have a highlight brush
and a highlight smudger. The highlight brush you'll
use in the actual brush pane, the smudger you'll use
on the smudging tool. All the rest of these under glass are all overlay brushes. You would use one of
these on top of a color. You would add a new layer, grab a medium to dark gray.
Use any one of these. Generally, you would be using
it with a clipping mask because your color is only going to be in part of your image. But this is how it works. You're painting on your texture. When you change this
blend mode to overlay, you get that nice glass
texture in that color. There's a whole
bunch of different glass textures
included in this kit. That is everything that
comes in this kit. Normally, I sell
this in my shop, but I'm including it for free. For students of this course, all you need to do
is just fill out this form and that will get
sent to you automatically. In the next lesson, we are going to go over
the class project.
3. Project: In this video, I'm going to talk about the project
For this class, I'm giving you two
different options based on your comfort level and how much detail you want
to put into it. For our class project, I'm going to use the Rows
template from our resources. This can be adapted to
different skill levels. If you want something a
little bit more simple, you can either do the rows without the extra
bits of the frame, or you can choose to do the
hot air balloon sample. This is the one that we're
going to build together. We're going to create all of these layers and all of
these textures and effects. In the next lesson, we're going to talk about
how to set up your canvas and
some best practices for digital stained glass.
4. Setup: In this video, I'm going to
talk about how to set up your canvas and some
tips for your project. There is no one canvas size that works best
for stained glass. You really want to think
about the design that you want to make and what
dimensions work best. Are you going to make
something that's going to look nice on a square, a rectangle, horizontal,
vertical, basically. You just want to
be thinking about your resolution and
whether it's going to be shown digitally or you might want to try and
print it some date. My first project tip is just make sure you
have fun with it. Choose a subject
that you enjoy and you're going to have a
good time working on. Because this is a little bit
of an intensive process. You're going to
be going over the same artwork multiple times. You want to be
choosing something that you are going
to enjoy drawing. When thinking about the subject of your stained glass art, you also need to consider, is it something that
I can simplify? Really fine detailed lines don't work very well
for this style of art. The other thing we
want to think about is using medium
shades of colors. These are going to show
your textures best if you have white or really
light, or really dark colors. It's not going to show
your textures as well. Let me show you what
I mean. I'm just going to put a full layer
of overlay on this. It doesn't look like
anything's happening, but when you look at this layer, you can see that there is
actually texture there. When you use overlay
over a pure white, it's trying to mix and
there's nothing there. We have to have some color
on here for it to mix with. In order to get clear
or white glass, we actually need to use these really light shades of gray. That's why I've included these in the color palette for you. Let's take a look
at another color. This looks pretty dark
in the color palette, but it's actually
a medium purple. If it's not going to show as much of
a texture or be as vibrant of color as you
normally see on glass. We really want to stay more in this quadrant of our color. Will you can see that already looks better just adding a little more
saturation to it. Same thing if we use
really light colors. If we go too much in
the desaturated area, it's not going to show
the texture very well. We want to stay a little
bit more saturated. Then we're going to pick
up more of that texture. Try to stay in the medium
range of colors, if you can. I've included almost every color in the rainbow, and
it works pretty well. It also does depend a little bit on the actual texture
that you're using. I'm going to hide this one and we'll try another texture
and see the difference. You can see this
shows up quite a bit differently than this. Every texture that you try, you just have to
play around with how it interacts with
the color below it.
5. Digital Glass Technique: In this video, I'm going to show you the
technique that we use for digital stain
glass art in procreate. I'm going to use just
a basic rainbow as an example to show
you the technique you can follow along. You can just watch and feel
free to pause, rewind, rewatch it if there's
something that you didn't get, if there's something
you don't understand. You can also ask questions
in the discussion area down below to show you the technique for creating
digital stained glass. We're going to
recreate this rainbow. This is going to go pretty fast. I'm just going to show
you the overview, and then when we
actually do our sample, we're going to walk
through every step slowly. For this, I'm just going to use the screen size because
that's what's easy. The first thing I would do
is grab my sketching pencil, or any pencil that you'd like, and just do a rough sketch
of where I want this to be. I'm using quick shape to
get my lips pretty close. Now I have my basic sketch. I would rename this to
sketch layer above it. Name that lead. We need to reduce the opacity
of our sketch. We can either tap on the
N and drag that down. Or we can take two fingers
and tap on the layer, and then just drag on the
screen on our lead layer, I'm going to grab this dark
color here in the palette. Choose which lead
brush you'd like. I tend to like the bumpy one, but you could use a
smooth one if you want. Let's see what side we have
here. That's pretty good. This one is at 6% but again, it's going to depend on the
size of your canvas as well. And let's just go ahead and start tracing over our sketch. I would normally take a
lot more time with this, but I'm just going pretty quickly just to show
you the technique. Now if I have lines that
are going to cross, I'm going to actually do
those on a new layer. It'll make it really easy
to race underneath this. I'm going to use quick shape, put one finger down to get a perfectly perpendicular line. Push and hold my racer. So I'm racing with
that same brush. Then I can come back to the
layer that has all my arcs on it and just clean up
these bottom edges. Switch to the line
layer, grab this edge. Then we can combine them
by pinching them together. Now we no longer
need our sketch, so we can just turn that off by using this little check mark, and our first layer
of lead is done. I'm going to make two copies of this by swiping to the left and choosing duplicate,
the bottom one. I'm going to hide for now. We'll come back to
that. This top one, I'm going to hide
temporarily because we need to change the color
of this one in the middle. First we're going to tap on
it and choose reference. Then we're going to
come to the magic wand under adjustments to hue, saturation, and brightness, and turn this into a light gray. Go ahead and bring
this top one back. We're just going to offset
these a little bit. You can zoom in a little
bit if you need to see. I'm just going to
tap a couple times outside this corner so you can see we're offsetting
that light gray. Now we're going to add a
little bit of texture to this. Come to your very top
layer and add one more. We're going to make
this a clipping mask and this is going
to be our texture layer. I'm going to change to
a pretty light gray. Grab this leading texture brush or you can use another brush
and procreate called flick. Then I'm just going to go
over all of my lead lines. This is optional, just gives
it a little bit more depth. That's a little bit too
big for these lead lines. You want to make it match, so it just looks
like it's adding a little bit of texture to it. It doesn't have to be perfect. The clipping mask
helps because you can go outside of your lines and it'll
stay where it needs to. Just wanting to add
a little bit of visual interest and
texture to this. Then I like to lighten
this up just a little bit, about 70% Now we are
going to add color to our rainbow by making this
lead layer a reference. Any color that we add is going to stay inside these lines, just like a digital
coloring book. Let's add some layers for color. Right above our sketch
for this rainbow, I'm going to use six colors. I'm going to add six layers. I do recommend keeping your
colors on different layers. You don't have to, but it makes adding the glass
textures a lot easier. Normally, I would layer these
if I had a lot of colors, but I only have these six, I think it'll be pretty easy
to tell what I'm doing. Then I'm just going
to color drop. There's actually
two different ways that we can add our
texture to this. Both of them are going
to involve using clipping masks above the color. You're going to add a new layer, change it to a clipping mask. You can either use
one of the brushes or you can actually insert
an image of that texture. Go to your wrench, which
is your Actions menu, choose Add, and either
insert a file or a photo. Depending on where
you have it saved, this will bring that image in. You need to make sure that it's covering all of the color
that's on that layer. You can rotate it, stretch it, do whatever you want to make
it look nice on the layer. Then you just need to change
the blend mode to overlay. I like using the brushes because they're a
little bit quicker. You need to change to a dark
to medium gray for these, then you can choose any
of these that you like. I also have another
set that I really like I got from another
creator on etc. I will put a link to this
in the description as well. They have a bunch more textures in here
that I really like. They all work the same way. Basically, you choose the
texture on your clipping mask, add it on the same thing. If you use a transform tool, you can adjust these as well. Then when you change the
blend mode to overlay, you get that really
nice glass look. So I feel like the
brushes are just a quicker way to get your
textures added on here. You may need to slightly adjust the color if it's not
showing up enough. If this is going too fast, remember we're going to
go through every step a lot more slowly
in the project. Walk through, now we have color and texture
on all the layers. There are a few final details
that we can add to these. Remember this bottom
layer of lead that we didn't do
anything with before? We can go ahead and
turn that back on. We're going to change
the blend mode on this to color burn. Come to the magic wand
and gag and blur. And we're just going
to slide this over to about three to 5% You'll see that gives it already a nice
realistic look there. Let's go ahead and add
one layer above this. We're going to change
this blend mode to add, and we're going to add a
bit of glare onto here. I'm going to use
this light orange that I have in our
color palette. The glass high, using the glass highlight
brush from our tool kit. Or you can also use
the soft brush from the procreate airbrush kit and just use it on a low opacity. I'm just going to brush across. Just add a little bit of
light coming through here. This brush has a little
bit of texture to it, you can play around with that. Next, I'm going to
switch to my smudge tool here and use the
highlight smudger to smooth this out a little bit. I'm using fairly
light pressure just to clean up some of those edges. That is a basic overview
of this technique. In the next video, we
are going to move on to actually doing this project together, starting
with our sketch.
6. Sketching: In this video, I'm going to
talk about the importance of sketching out your
stained glass design. I always recommend doing a sketch before you
start a design, so that you can have
a basic idea of the layout and where you
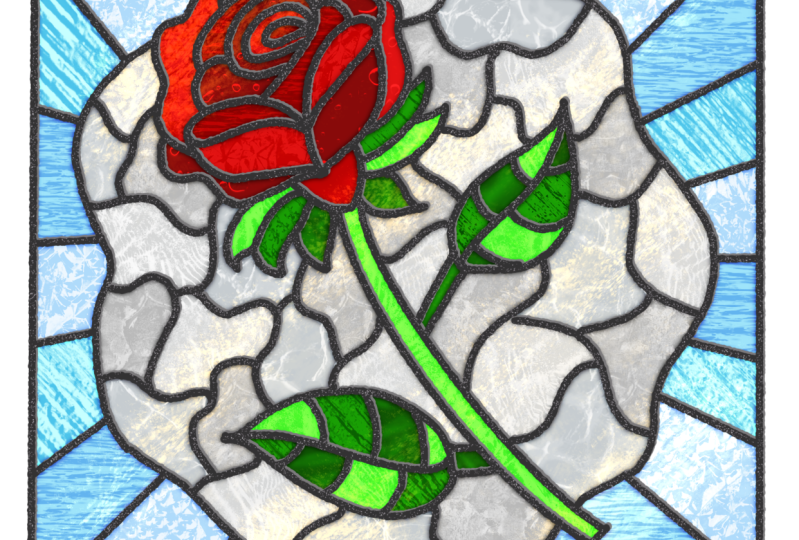
want your pieces to be. For our sample project, we are going to
recreate this rows. If you want to do a little
bit more simple project, you can do just the rows without these extra frame pieces. Or you could also choose to do this hot and balloon design. I've provided you templates for both that you'll be
able to work off of, and of course, you can always
do your own unique design. The templates are
provided as a resource, but you do not have to use
them. Here's a pro tip. As a general rule, I do
not recommend tracing over anyone's template or directly copying any reference photos. We want to make sure that
we are doing our own work. However, for this class, you do have permission to trace the templates that are
included in the resources. As you're learning
the technique, let's start a new canvas
and make a square. If you're going to use
one of the templates, you'll need to import
it into your canvas. Come to the wrench,
that's your Actions menu. And insert a file or a photo, depending on where you saved it. Let's go ahead and reduce
the opacity of this. I'm going to tap two fingers on that layer and just slide it way down for sketching. I always like to use black
with just a basic pencil. You can use the one
that's in our kit or any of the pencils
that come with procreate. I'm going to start
with the rose, that's the central
focus of this piece. If you're using the template, you can just trace it. You can still change the flourish a little bit
and make it your own. The nice thing about
digital art is you can do some things that
would be actually really hard to do in real glass. Some of these really thin
spots and all these curves. One thing to think
about when you are putting your glass sketch together is that generally you don't want pieces
to exactly line up. That's why I'm making
these stems go just slightly off of
this middle piece. Rather than having the meat
exactly in the middle, I'm having them
offset a little bit. That's more like what you would see in real stained glass. If I do the outline
of this leaf. I'm not going to have just
one stem come off the middle. I'm going to have it split
over the sides a little bit. Then this piece of lead can
come up the middle here. Just gives it a little
more realistic look when you know what
glass can and can't do. Even though technically with digital we can do
anything we want. If you want a more basic design, you can just go ahead
and stop there. A lot of times in
sta gloss you do see the focal point of the design framed in some other shapes, with glass pieces filled in. We're going to go
ahead and do that, but if you want to just
go with this design, then you can skip on
to the next lesson. When I have lines
that cross over, I do find it's easier to use
multiple layers for this. For example, I'm going to
go ahead and just make one big circle here
using quick shape, get that exactly
where I want it, then I can erase the pieces
that are crossing over. With this rows can make a square with
quick shape as well. Again, with these rays, I wouldn't go directly
into a corner. I would go just
offset a little bit. Look a bit more
realistic that way. And when I do my letting, I'm going to use quick shape to make
perfectly straight lines. But for my sketch,
as long as they're in approximately
the right place, that's going to be just fine. This one I want to not
hit on this break. Right here, I'm moving it
over a little bit onto the petal. The same
thing right here. I don't want to match
up exactly here. So I'm going to offset
for the inner circle. There's a few different ways
that you can go about this. You can look at the Pintraus inspiration board
for some ideas. This can be like I have
it here in this sample. Or it can be not quite so much. It's totally up to you what
kind of look you want. The thing to think about is
making sure that your lines are not meeting up with
the edge of another line. So I would continue
to fill that in. Since we've got the template, I don't necessarily need
to do a full sketch, but I just wanted to
show you the process. In the next video, we are going
to put our lead lines on.
7. Leading: In this video, we are going
to take our sketch and turn it into lead outlines
for stained glass. Just like we learned in
the technique video. Whether you've got
your own sketch or you're going to use
one of the templates, the next thing to do is to get our lead lines
added on here, add a new layer at the top. We're going to
rename this to Lead. Let's go ahead and grab the dark gray color
from our palette. You can choose whether you use the bumpy base or
the smooth one. I tend to like the bumpy one just because I like
the look of it. But that is totally
personal preference. Then we're going to fill this in basically the same way
that we did our sketch. We're going to start
with the focal point, make the outer and inner frames, and then fill in
the other pieces. The first thing to look at
is the size of the lead. That actually looks pretty good. It's really going to depend on the canvas size that you set. So make sure that you're
happy with your lead size before you get going
too far because it's really hard
to change it later if you have any spots like this that you
want to clean up. Pushing hold on your eraser, so you're erasing
with the same brush, check the size and make
sure that you do that. Now before we move on to some of these other steps,
here's a pro tip. If you have lines that
cross over each other, try doing them on
a separate layer. Initially, it's a lot easier to erase and clean
up those edges. And then you can always combine
them at the end later on. And remember you have
quick shape available to you to get smooth
curves and lines. Once you've got all of your lead layers
how you want them, go ahead and group them. And then we're going
to isolate them. We're only seeing
the lead layers, not any of your sketches. And we're going to
hide the background. Take three fingers
and swipe down. We're going to choose copy All you can bring
your background back, hide this group, and add
one new layer at the top. Swipe down again with three
fingers and choose paste. The reason I like to
do it this way and not just combine all my lead
layers is in case I want to make changes
later If I found some error or some spot
I forgot to erase. This is a lot easier by having these separate
layers here. I'm going to name
this layer lead and then we're going to
duplicate it two times, swipe left on the layer and
choose duplicate For now. We're going to hide
both the top and bottom layer on this middle layer, we're going to tap it
and choose reference. What this does is when
we color drop later on, the color is going to
stay inside the lines, just like a digital
coloring book. The next thing we're
going to do is change the color of this lead. Come up to your magic wand, that is your adjustments menu. And choose hue saturation. And brightness on the
brightness slider. We are going to move this up
until you get a medium gray. I'm at about 63% Now we can
bring our top layer back. We're going to just
offset this a little bit. We can see both colors. You may want to zoom
in a little bit. So you can see with your
middle layer selected, come to the arrow, which
is your transform tool. And we're just going to tap
a couple times outside of this corner just to
offset that a little bit. This next step is optional, but I like the realism that
it gives to the design. Select your top lead layer
and add one layer above it. And we're going to make
this a clipping mask. I'm going to rename this to
Texture choose a light gray. I'm going to use the leading
texture brush from our kit. If you don't have this kit, you can also use a
brush called Flick, which is in the procreate
spray painting set. All we're going to do here, come on top of the
darker lead layer and just add a little
bit of texture. I'm going to go ahead and
do this and be right back. Now we've got some texture
applied to our lead. I usually like to
reduce the capacity of this just a little bit to
make it blend in more. In the next video,
we are going to add some color to our design.
8. Adding Color: In this video, we
are going to start adding color to our
stain glass art. This is one of my
favorite parts. In order to add
some color to this, we're going to put some
new layers in here. They're going to go
right underneath this bottom lead layer
that we have hidden. We're going to come
back to this later. Let's go ahead and
select the layer underneath that
and add a new one. I'm going to add a
handful of layers in here because I know I'm going to
use a few different colors. Here's a pro tip. I like to add each of my colors on
its own separate layer. This makes editing the colors and glass textures
later so much easier. I like to name the layers as I go so that I can
stay organized. Let's start with the rose. Since we have our lead layer
here set as a reference, as we color drop, it's going
to stay inside these lines. We can color drop once
and choose continue fill, and just tap on the other ones that we want to be
that same color. Then I'm going to move
on to the leaves. I generally like to
use three shades of a color in these I find that gives it a really nice dynamic, and then I spread them
out a little bit. It gives almost the
illusion of a gradient, especially when we mix
up the textures later on in this color palette. Here I have the rose, the leaves, some of
the white frame, and some of the blue frame. And you can choose to follow
along with those or not. It's totally up to you, but I have three shades of
each of those colors. I'm going to need
a few more layers. Now, a little trick I have
for working with white glass, especially if you have multiple shades that you're working on, is I'm going to temporarily
change the color of this so that I know that I've already filled in those spaces. I'm going to grab this pink. I'm going to alpha
lock this layer by swiping right
with two fingers. I'm just going to
fill it. I know that I've already
done those ones. Then I'll come to my medium
gray and start filling in. It just makes it really easy to see the spaces that are left, especially if you're wanting
to mix up your colors. I think that looks pretty good. The dark ray, we
should be able to see what's left perfect. Now we can come back
to our color palette. Select our lightest gray, Come back to this
layer that's still alpha locked. And choose fill. We're all set on these
rays around the outside. If I have three colors,
I generally like to just do them in a round. But again, fill it
in however you like. So every third one I'm
going to choose this color. And if it doesn't come out
perfectly even, that's okay. Now our colors are all filled in and we are ready
to add some texture.
9. GlassTexture: In this video, I'm going
to show you how to add glass texture to your artwork and really bring it to life. There are two different
methods to do this. We can insert an image of the texture or we can
use an overlay brush. Let's walk through
both of those now. We've got our color
added to our piece. It's really starting
to come to life, but it looks a little bit flat and probably a little bit dark. We're going to change that
once we add the texture. No matter which
method you choose, we're going to need
a new layer above each color with a clipping mask. This is going to
keep that texture just on those spaces
with that color. That's why it's really important to keep your
colors separated. It just makes this
process so much easier. If you're going to use an image, come on over to the wrench, which is your action menu, and insert a file or a photo. Depending on where you
have that image saved. This will add it to your
canvas and you want to make sure that it's completely
covering that area. If it imported smaller, you see it's not covering
all of this blue. I would need to stretch
it out a little bit. And you can of
course, rotate it, change the proportions
of it, all that stuff. Once you're happy
with the placement, then you're going to change
this blend mode to overlay. Now we're starting to see
the look of stained glass. Here's a pro tip.
If you want to re use the same glass
texture image, you can duplicate it, put it on a new layer. And then use the transform
tool to flip it, rotate it, resize it, and that will change the look of that texture on that layer. The other method is to
use an overlay brush. Again, we're going to add
a layer above our color, turn it into a clipping mask. Overlay brushes
tend to work well with a medium gray color. You may have to adjust it
a little bit depending on the actual texture of the brush you're using and the
color that's beneath it. You can fiddle around
with it a little bit, but somewhere in the medium gray range usually works pretty well. I've included quite a few of these glass texture brushes in the kit that comes
with this class. But I also have another
set that I really like that I got from
another creator. And I'm going to
go ahead and link this in the description as well, because there's quite a few more here that
they have created. If you want to use
additional textures, you can go ahead and
grab this one as well, but they work the same way. Basically, you're going
to grab that brush, you're going to paint it on anywhere that that
color is on the page, you can do the same thing. You can grab this, rotate it, resize it, then
when you're done, change this to overly. Now as you can see, this one isn't showing up
as well on this color blue. If you need to adjust it, you can come up here
to adjustments. You can either play
with the curves or go into hue saturation.
And brightness. Just mess with these a little
bit until you can see more of the texture that's
coming out a bit more. Now if you take the
brightness down or up, you can see how that's affecting the visibility
of the texture. So I'm going to go ahead and add some texture to all of this
and then we'll be right back.
10. Final Details: In this video, we're going to go over a couple things
you can do to add some final details
to your artwork to make it look like
realistic stained glass. Now we have glass textures on top of all of
our color layers. It's starting to
look really good. The next step is to add just a couple more final
details to really make this. We've added some texture to our lead and we've started
to make it three D, but we are going to
take that up a notch. Remember this layer that we
didn't do anything with, we are going to work on it now. Let's go ahead and
turn it back on. We're going to rename this to Color Burn and change that blend mode as
well to Color Burn. Now we are going to come to the magic wand and
go to Gagen blur. And we're just going
to slide this over to about three to 5%
You can see that starts to add this little shadow glow effect on the
inside of our lead. There's nothing, we're
starting to add that blur. You go too far, it's
not going to look good. But adding just a little bit of this adds that
really nice depth. You can see already what a difference that
makes to the piece. The next thing we're
going to do is add a little bit
of light to this. Let's add one layer above
this and rename it to glare. We're going to change
this blend mode to add on our color palette. We're going to
choose this orange right here for our brush. We're going to choose
this glass highlight in our resource kit. Or you can also use
the soft brush from procreates airbrush kit and
just use it on a low opacity. All we're going
to do is just add a little bit of light to a
few key areas of our design. If you add too much two
finger tap to undo, you really need just a very
light pressure on this. Then we are going to clean
that up with a smudge tool. On your smudge menu, you can use that same brush
from the airbrush kit. Or if you have our tool kit switch over to the
high light smudger, just gently go over these edges and it'll smooth
them out a little bit. If you still feel like
the glare is too much, you can adjust the opacity
of this layer as well. That's going to give it a
really nice finished look. Congratulations, you did it. You have your own digital
stained glass art piece. In the next video,
I'm going to walk you through how to share
this with the world.
11. Sharing Your Art: In this video, we're
going to talk about how to share your artwork
once you've created it. Whether you were following along with me and you made this rose or you chose to make your own design or
the hot air balloon. Now you need to know how to
share it, It's really easy. You just need to come
over to the wrench, which is your Actions menu. Come to the share, and then you can choose what type of
file you'd like to save. I recommend either
a Jpeg or a PNG. A PNG is going to be a
higher quality file, but it is also going to be
a much larger file size. Just something to think about if you're going to be sharing it on social media or trying
to e mail it to somebody. For example, on this piece, the Jpeg comes in at
only 634 kilobytes, which is pretty small. The same image as a
PNG is 2 megabytes. Now that's still pretty small. You can E mail that or shared
on Social pretty easily. But with a much more complex
piece with more layers, the file sizes are going
to increase. On this rose. The Jpeg comes in at
one a 2 megabytes, and the PNG is up to six,
just for comparison. Once you've exploited
your design, make sure you share it with us. In the project area
here on skill share, the other students will
love to see your work. And I'll be in there
as well giving feedback and answering any
questions that you have. I can't wait to see your
beautiful stained glass artwork.
12. Thank You: I hope you found this helpful. I love showing people how to combine creativity
and technology. If you enjoyed the class, I would really appreciate
it if you take just a couple of
minutes and leave me a review here on skill share. This just helps other
students know what to expect from me and this
class. Thank you so much. I can't wait to
see the beautiful stained glass art that
you're going to make. So be sure to share it with us in the project area
of this class.
 Laurie Russell, Digital Artist | Illustrator | Educator