Transcripts
1. Introduction: Hi, friends. Welcome
to Tiny Art Big Joy. I'm so glad you're here with me. This class is all
about creating small, playful illustrations that feel light, doable, and uplifting. No pressure, no perfection, just tiny art that
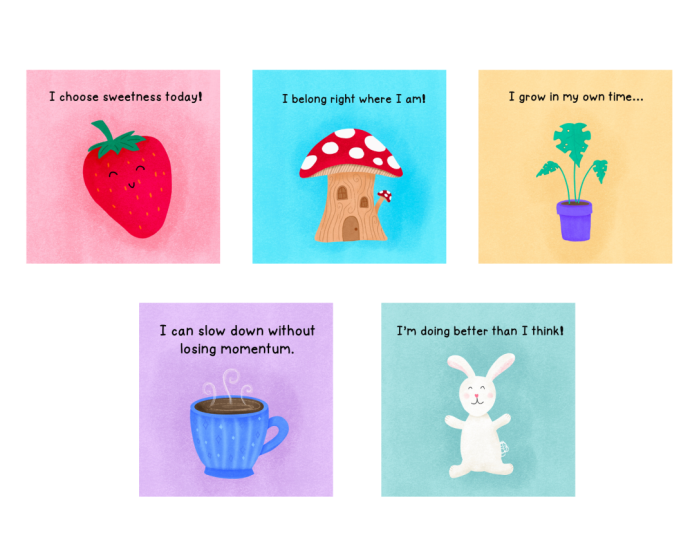
brings big happiness. Over the next five days, we'll draw five little pieces
together, a tiny fruit, a tiny house, a tiny plant, a cozy mug, and a
cute little critter. Each one is quick, simple, and designed to give
you a creative win without taking over your day. This whole class is built on one affirmation that's
guiding my own process, too. I'm allowed to keep
it simple and fun. If you want to borrow
it, please do. It sets the tone beautifully. You only need your iPad and
Procreate for this class, but you could also do
this on paper with pens, pencils, markers,
anything you choose. I'll walk you through
each piece step by step, and you'll finish the week
with a sweet collection of tiny illustrations that you can share or simply
enjoy for yourself. Tiny Art creates big momentum, and I'm excited to draw with
you. So let's get started.
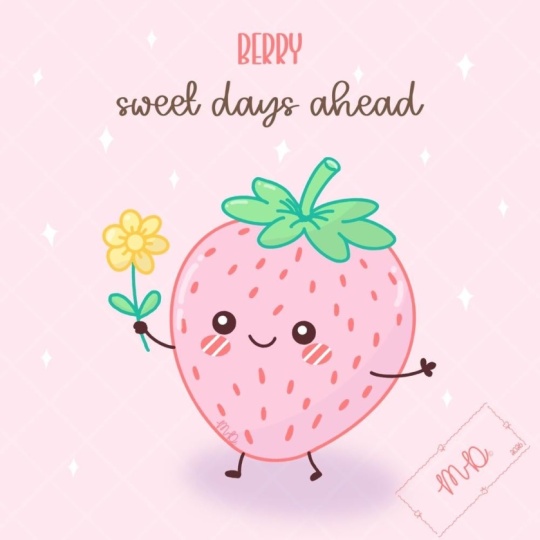
2. Tiny Fruit: So Welcome to day one of Tiny Art Big Joy. Today we are starting
with a tiny fruit, something that's
sweet and simple to warm up your
creative muscles. Our affirmation is, I
choose sweetness today. Remember, we're keeping
this simple and fun, so grab your stylus or your pen. Follow along with
me, and let's make this cute little
tiny fruit together. I'm going to start with a
standard square canvas, but you can do this at any size. And like I said, you
can also just do this with paper
and pens as well. I always like to sketch
things out first, even if it's something
pretty simple. So for this strawberry, I'm going to do
almost a heart shape. And now we're going to mark out where the stem is gonna go. And I always give my little
characters a fun face. Now, this is a
little bit too big. I want to have room
for my affirmation, so I'm just going to click
the transform tool here and shrink this down
just a little bit. Okay. That's step one. Really easy. Now what I'm
gonna do is add another layer. I'm going to move this
sketch to the top and change the blend mode
here to multiply, and then reduce the opacity quite a bit so I can
draw on top of this. For my illustrations, I
really like this crayon, but you can use any brush
or tool that you want. For the strawberry,
I'm going to use this red pink side
of the palette here. I'm going to grab this
middle color here. See how big is this brush. It's a little small.
Let's go up a bit. And then I'm just going
to trace over my sketch. And it doesn't have to be exact. It's just something
to start with. Grab the color and just
drag it in there to fill. For the stem, I'm going to
do that on a new layer. Grab this green here. And I want this to cover up
the top of the berry just a little bit. Same thing. Grab and color drop. And now, really, we are already almost done with
this illustration. These are supposed to be quick and fun and not take
you too much time. Just get you back into
a creative habit. Let's add another new layer. I'm going to choose
just almost a black here and draw my little face on. Now, you could absolutely add your affirmation
and stop here. I like to add a little
bit of texture, and there's a lot of different brushes and
ways you can do that. I'm going to add a new
layer above both of these. Change the blend
mode to multiply. And tap on it and change
it to a clipping mask. What this will do
is it will keep the texture within
each of these. That's another great reason to keep them on separate layers. I'm going to grab my
crayon brush here. Make sure I've got
my green color. And I'm on the clipping mask
layer, not the actual color. Let's go ahead and
turn the sketch off. And now, when I put
this texture on here, it's going to stay right
within that green. Let's do the same thing
for the strawberry. I'm going to tap and hold this
time to sample that color, make it really quick and easy. And I'm going to use a little
bit bigger brush just so I can cover this area
a bit more quickly. And I don't know how much
of that's coming on camera, but you can see
there's a really nice subtle texture on these. The last thing that
I like to do on my strawberries is
add the little seeds. Let's go ahead and add
a new layer at the top. I'm going to grab this yellow here and go back to my
crayon at a smaller size, and just kind of add these
wherever it feels right. They don't have to be any
specific shape or size, just kind of randomly
adding these on here. Now, what I'm going to do to
make these look like they're integrated with the strawberry is come to my adjustments menu, gauge and blur, and just slide that over a little bit to
kind of blur those edges. The last thing I'm
going to do is duplicate these,
swipe to the left. On the lower layer, I'm going to turn that black. A really quick and easy
way to do that is to go in adjustments and
turn the brightness in the saturation
all the way down. Then I'm just going to offset
these ever so slightly. It gives them just a little
bit of a three D shadow look. Now we're ready to
add our affirmation. I'm going to put
this at the very top here and pick whatever
color you want. I'm going to use black. Come to the wrench. That's your actions menu under
add and choose Add Text. This is definitely too big. So before I get started, I'm going to change my font. And take the size
down quite a bit, so I can fit it all in one line. Alright, double tap there. I choose sweetness. Today. And now we can come back
with our transform tool and put that wherever it
fits in our composition. And the last optional
step is I'm going to add a little bit
of a background color here and come all the
way to the bottom. I like to do these on a separate layer rather than changing the
background color so that it's easier to add
texture and things later. I'm going to grab
this very light pink, and I'm actually going to make it just a little bit lighter. So let's go this way just a bit. Okay. I'm going to drop
to fill that layer. And then we're going to
add one more above this, turn it into a clipping mask. And this time, I'm
going to choose screen, which is going to
make the texture lighter rather than darker. It's a nice, subtle effect. Nice work. Look at that tiny
bit of joy you just created. Go ahead and post your fruit
in the project gallery, if you want to
share it, and I'll see you tomorrow for day two.
3. Tiny House: Welcome back to day two
of Tiny Art Big Joy. Today, we are going
to draw a tiny house, just a few shapes and
some cozy details. The affirmation today is, I Belong right where I am. Let this be easy. You're allowed to keep it simple and fun. Yours does not have to
be as detailed as mine. Let's just get in
there and draw. Once again, I'm going
to use a square canvas, but you could use any
size that you'd like. I'm going to go back to my pencil, which
I like to sketch. And to create this cute
little mushroom house. We're going to create
the mushroom cap first. Just kind of a basic
organic shape. We're going to add the trunk and maybe one little extra mushroom coming
out the side here. This is where the underside of the mushroom is going to be. We're gonna have maybe
a little door right here and a window. And that's pretty much
it for this sketch. Super quick and easy. Let's go ahead and
move that to the top. Change this blend mode to multiply and reduce the opacity. Now we're ready to actually
start drawing our mushroom. So I'm going to go ahead and
start with the cap first. I'm going to grab this red and just refine this shape
a little bit as I go. Color drop to fill. And we're
going to add a layer above this as a clipping mask
and add those white spots. If you push and hold,
bring one finger on. You'll get a perfect circle,
which is pretty cool. But also your spots don't
have to be perfect. Sometimes it's nice
to have a little bit more organic shapes. I'm going to draw all
of these outlines. And then when I color drop, I can choose continue fill and just tap each of
these to fill those in. And I'm just going
to clean up these edges just a little bit. I really like this organic, imperfect kind of a look, but I don't really like
these pieces that are sticking out quite so much here. Great. And there's
the top of our house. Now we're going to
work on the trunk. Let's go ahead and put
a new layer for that. And you can grab any
of these colors. I'm going to kind of turn
this one into a brown by grabbing the orange and
desaturating it a little bit. Make sure this layer
is below your roof. And I'm going to kind of
try and make this look, again, a little
bit more organic. Drop some colour in there, and then we'll have this little
one coming out the side. And at this point, I
could go ahead and do the other mushroom on the same layer here because
they're not going to touch. Let's sample this color and just draw another much
smaller mushroom cap here. Go back and extend that
stem just a little bit. And then the same thing. We can go onto this
clipping mask layer and add spots to this
mushroom, as well. Now your basic shape
is already done. Let's go ahead and add
this door and window. We're going to put those
above the trunk layer. Let's sample this color and then we'll go just
a little bit darker. And for these, I'm going to
add a clipping mask above it, so it's really easy to
put the window panes in. That way, they will stay
right where we want them. And I'm going to add
this little tiny detail here just because I
think it looks nice. And then we just
need a door knob. So you can get into
the Tiny house. So at this point, it's
looking pretty good. We can go ahead and
turn our sketch off and we can add the
affirmation at this point, or we can add texture and a few more details, which
is what I'm gonna do. Yeah. Let's add another layer
above our red mushrooms. This is going to be a
clipping mask, as well, and change it to multiply. And I'm going to do
that same thing. I'm going to grab my crayon and just add a little bit
of texture to these. Now, because this is above
the white right now, that's why you're seeing
the texture here. So all I need to do is
just swap these layers, and then we will have texture on the red, but not on the white. Let's add some texture
to our trunk here. And one thing that
I like to do is use a smaller texture brush and go around some of
these features, so they pop a little bit more. And again, nothing perfect. I'm not making an absolute
perfect circle here. I just want to outline this window a little
bit so it stands out. And we'll do the same
thing for the door. And then we'll use a medium size brush and kind
of blend that a little bit. So it's not quite so dark. Add a little bit of
shadow underneath here to show that the
mushroom caps are there. And the last thing that
I'm going to do for this one is just add a
little bit of a wood grain. So I'm going to add
one more layer. And let's put it behind the
door. But above the trunk. For this one, I'm going
to change it to screen, which is going to lighten
this brush and just use a very subtle texture here. I'm going to turn the opacity
of this brush down and just kind of add some
of these swirls here. And then we're going to change the opacity of the whole layer, so it just blends in
a little bit more. Okay, I'm liking
the way that looks. I think we're ready to
add our affirmation, which is, I belong
right where I am. I'm going to change
back to black, add a new layer at the
very top and add the text. Now we can resize
this a little bit. Now we can resize this a little bit and put it right
where we want it. Now, especially because we
have a white background right now and these white
dots on the mushrooms, they're not showing
up quite as well. So I am definitely going to
put a background on this one. And I think we used one of
these pretty blues over here. So let's grab this one, lighten it up a little bit. Color job. And on this layer, I'm going to use
a texture brush. And let's try making the screen. Let's see how that
looks, making it a bit lighter. Yeah, I'm liking that. Beautiful job today. Your
Tiny house has so much charm. Share it if you'd like, and
I'll see you for day three.
4. Tiny Plant: Hi, friends. Welcome back to day three. Today, we're going to be
drawing a tiny plant. Plants are perfect
for this because they remind us that
growth happens in small, steady steps, and that's
our affirmation today. I grow in my own time. Stay loose, stay playful, and let this feel gentle. Let's get into it. Let's
open a new canvas. I'm going to grab my
sketching pencil. And you can draw any kind
of plant that you want. I'm going to start
with sketching out a little planter pot. And this is going to be
a very stylized version of a Monstera plant. I just love the look of those. I start with a little bit of a heart shape at
different angles. Make this top one a
little bit bigger. And then to make
the monstera shape, you're gonna actually just cut out some of these
little spots here. So I'm gonna mark
those off in my sketch so I know where those are going. And that should be good to go. I'm going to shrink this down a little bit because I already know I'm going to need room for my affirmation at the top here. I'm gonna change this to
multiply and reduce the opacity. So the first thing I'm going
to do is the pot here. I think this purple is just a really fun color.
So I'm gonna use that. Have an oval shape here. What's around this
corner a little bit. I think, especially
in today's kind of oversaturated
AIR environment, it's just so nice to
have things that are actually imperfect and not always have to have
everything just so. It's nice to know that a
human created something. Alright. I am going to fill this with a different color,
and I'll show you why. It's grab a contrasting color
like yellow. Dragon drop. And now what I'm going to
do is choose my select. Switch to automatic
and just tap on that yellow there,
copy and paste. Now I have this fill
on a separate layer. I'm going to hide
that for a moment. Let's come back here and
let's go ahead and take that out so we don't accidentally
have it in there. Tap on it, and just three finger swipe
to clear it. Alright. Now we can go ahead and change this color to anything we want. If it's gonna be dirt, probably this kind of dark
brown will be good. I'm gonna take two fingers to swipe and turn on
Alpha lock here. Then I can just drag and
drop the color on there, and it will stay on that shape. And this looks like it's
leaning just a little bit. I know we wanted it
to be imperfect, but I feel like the plant might fall over. So here's
a little trick. If you go to transform, you have a couple other
options here which can really help you
with your design. So if I go to distort, I can pull just this corner out and kind of get that
lined up a little bit better. Okay. I feel like that's
looking a bit better. Now we can go ahead and
move on to the plants. Let's grab a nice green here. And I'm gonna make
these stems just a little bit thicker
so they stand out. And these are going
to need to be above the dirt so that you
can actually see them. And the leaves are gonna
go on a separate layer so that we can actually
manipulate them a bit more. For these, I'm going to make them just a teensy bit brighter. Go ahead and make your modified
heart shape, fill it in. Now we're going to go through
and do these cutouts. Grab your eraser. If you are on your brush and
you tap and hold, then you'll erase
with the same brush, which is really nice. You won't have those
weird edges there. So I'm just going to cut a few
little spots out of these. And these can be
organic shapes as well. They don't need to
be perfect cutouts. Mm. Mm. And sometimes monstera
leaves have a little bit of a spot where insects
have eaten away, so you can put a few of those
in if you want, as well. Now our base drawing is
looking really great. Let's go ahead and turn our
sketch off. And same thing. We can go through
and add texture and details just like we've done
in the last couple of days. I'll go ahead and
speed this up since it's basically a repeat of
what you've seen before. Now we're ready to add our affirmation and
our background. And let's go ahead and put a
background on this as well. I think this yellow will
contrast really nicely. Lovely. Your tiny plant is a little reminder of
your own growth, too. I'll see you tomorrow
for day four.
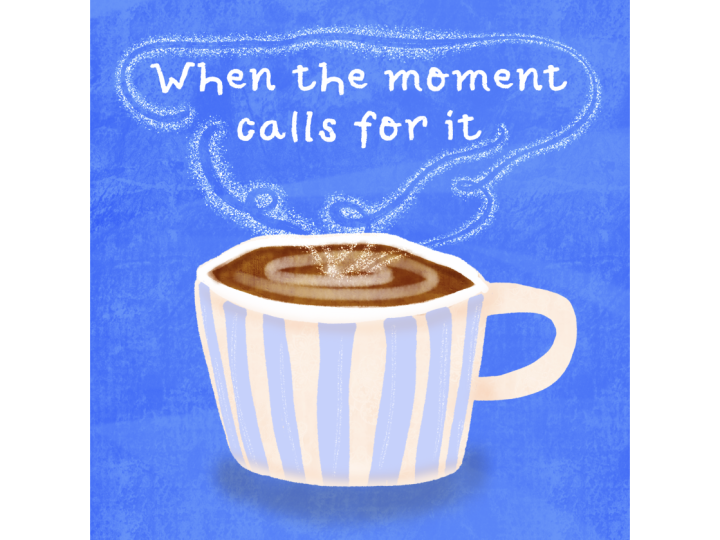
5. Cozy Mug: Welcome to day four
of Tiny Art Big Joy. Today's illustration is a tiny, cozy mug, something
warm and soothing. The affirmation for today is, I can slow down without
losing momentum. Let this be calm and simple. You're doing
beautifully. We can draw this little cup of comfort
together. Let's get started. I'm going to start as
usual with a quick sketch. I'm drawing the mug a
little bit further down because I want to leave room
for some spirals of steam, and this affirmation
is a bit longer, so I think it needs
to be two lines. Add a little handle here. Alright, that's looking pretty
good for a basic sketch. Let's move this to the top. Change the blend mode to
multiply and reduce the opacity. Now we can start
drawing our mug. For this one, I'm going to start with the tea or cocoa,
coffee, whatever. I drink a lot of tea, so
that's what I'm drawing. Let's go ahead and draw a nice organic shape
here, fill it in. Then I'm going to draw
the mug behind this. Let's go ahead and
do this nice blue. First thing I'm going
to do is draw the rim, and I can basically just
do a whole shape and fill it because it's already
behind the teeth. And then we'll just
adjust it a little bit. So it doesn't look too big. That's the great
thing about erasing with the same brush is I'm still getting this
organic look here, even when I'm erasing, rather
than if I was erasing with, say, this monoline brush, I would get a really
sharp look there. And that's just not
the look that I want. Now we're going to do
another layer behind this for the actual mug so we can put some
shadows in here. Go ahead and Whoops. Make sure that you close
the top of your shape, and then we'll be
able to fill this in. I'm going to do a handle on another layer so that I can
do some more effects on it. Close those off and fill. Now we have the basic mug. I'm going to turn off
my sketch so that I can look at the proportions and layout of this a little bit. Feeling like the rim is a
little bit thin right here. So let's do that. And I think this needs to come
out. Just a little bit more. Now we're already to the
point where we're going to add texture and details. Here's one little
time saving trick. I'm going to add a new layer, change the blend
mode to multiply, and before I turn it
into a clipping mask, I'm going to duplicate
it three more times. This saves the time
of not having changed a blending mode every time
you add the new layer. Then you can just drag these on top and then we'll turn
them into clipping masks. Yeah. Let's add some
texture to our beverage. Because I want this
to look like it's inside the lip of the cup, I'm going to add a little more shadow on the backside here. And then we'll add
one more layer above this with clipping mask, changes to screen, and then we can put some
swirling details in here. Really subtle, but I think
it adds a nice touch. Now let's go ahead and add some texture to our cup itself. First layer I'm going to work on is this base part of the mug. I'm gonna tap on a hole
to sample the color. And I think I'll use my
medium texture brush. And what I'm going to
do is I'm going to add some darker texture. Make sure you're on the
clipping mask layer, and then I'm going to add
some darker texture right here as if the rim of the
cup is casting the shadow. Same thing over here.
And along here. And then we can blend
these out a little bit. Now we're going to do something
similar for the handle. We're going to make it
a bit darker here as if the mug itself is
casting a shadow. And then for the
rim, we should be able to just do basic texture. Now, if we want to add
some extra details, we can definitely do that. I'm going to add a screen
clipping mask layer here, get my small texture
brush and just add some subtle lines here. In order for us to see the steam that's coming off
of this beverage, we definitely are
gonna need some kind of background color to contrast. Let's go ahead and add that in. Really pale purply color here. And again, we're gonna put
screen on the layer above it and add some nice
subtle texture. Now we can come back
and put that steam on. It's going to need to be
above all these other layers. And let's grab white by double
tapping in that corner. And I'm going to
use my thin brush. That's a little too thin. And you can make this be any
shape that you want. I'm going to add a little
bit more texture to these. And I think in
order to see this, we're still going
to need to do a little bit more behind the mug. So let's add one
more layer here, change it to multiply. And just add a little
bit more subtle shading behind the mug so that it stands out just a
little bit more. Then we'll be able to
actually see that steam. I really love the color
of this background, but it's not contrasting
quite enough with the white. Okay, I think that works. Now we're ready to go ahead
and add our affirmation, which is I can slow down
without losing momentum. So good. Your mug feels
warm and cozy already. Rest up and come join me
for our final day tomorrow.
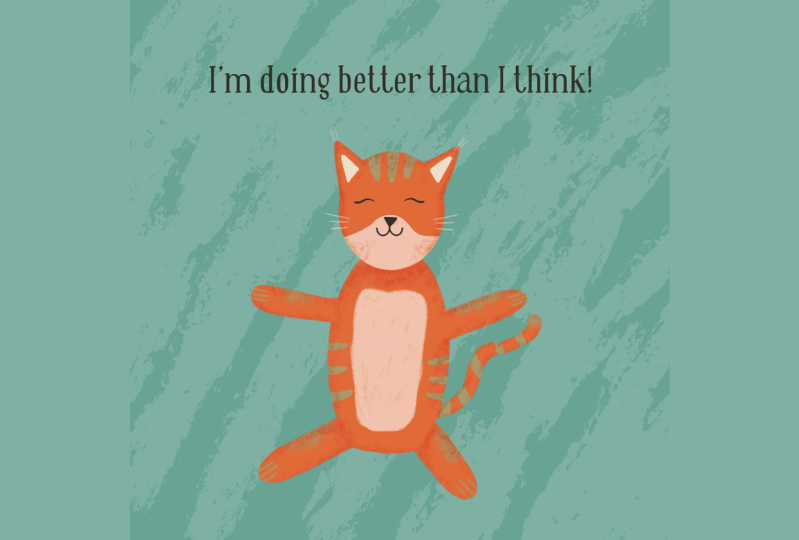
6. Cute Critter: Hey, friends.
Welcome to Day five, our final day of
Tiny Art Big Joy. Today, we're going to
draw a tiny critter, cute, simple shapes,
nothing complicated. Our affirmation today is, I'm doing better than I think. Now, I have drawn a bunny here, but you can absolutely draw any critter that you would like. The basic shapes and principles
are going to be the same. Let your inner child
have fun with this one. You're allowed to keep
it simple and fun. Alright, let's draw
something adorable. When you're drawing characters, it's definitely important
to get your sketch in. They may look complicated, but really they can be broken down into very simple shapes. Kind of an organic, oval
shape for the face, bigger one for the body. Feet, arms. I'm drawing a bunny, so it's going to
have the big ears. All my critters have hearts for noses, so that's
what I'm gonna do. And really, this is a
great base to start from. You can basically turn this into any critter that you'd like. You could add a man, change the ears and
make it a lion. You could add a
little bit of a mask here and a striped tail
and make it a raccoon. Really, the sky's limit. So pick whichever
character that you'd like. Go ahead and change just to multiply and reduce the opacity, and we can start
drawing our bunny. Now, because I want my bunny
to be a really light color, I'm actually going
to go ahead and do the background first so that
I can see what I'm doing. For this one, I'm going
to use a nice blue, maybe a little bit
more teal there. I'm going to change
just to multiply. Because my bunny is going
to be pretty light colored, I know I'm going to need
a darker background. Let's go ahead and
add this texture. And now I'm ready to
start drawing the bunny. I'm not gonna have
it be pure white because it's really hard
to add texture to that, but we're gonna go
just slightly off. I'm gonna go into this kind of orangy yellow sphere and come just off white
a little bit. I'm going to go ahead
and draw the face. My ears for this bunny
are going to be attached. So I'm gonna go ahead and
put them on the same layer. Next, I'm going to add
a layer for the body. And arms can come off of
here. So that's fine. And I think actually
the legs as well. These really just
going to be kind of sitting freeze forward here. And then we are going to add
a little tail back here. Make that a little bit brighter. It's a little too
thin. Here we go. I know that's not perfectly,
like, where a tail would be, but just but it gives it
a little something extra. And I think suspension
of disbelief is fine. Now we're gonna go ahead
and work on the face. Because I already know
where everything's gonna go and I'm not
exactly on my sketch. I'm gonna turn it off,
so it's easier for me to visually see
where I want things. But if you're following
your sketch exactly, then definitely you
can leave it on. I'm going to add the mouth first and then put
the little heart on for the nose. And this is just my
style of character. Absolutely, you can
do whatever you want. Now we can go ahead and add some texture to this little guy. I change this to
multiply clipping mask, sample this color and go
grab my texture brush. Because we didn't
do this pure white, you can see we
actually are going to get a little bit of texture on here,
which is really nice. And then I am going
to use white to do a little bit of a muzzle here. We can go ahead and add
some color to the ears. This nice pale pink here. I'm still doing this
with a clipping mask, so it's staying within the ears. And now we just need to
finish off the body. Change just to multiply.
Clipping mask, sample the color. And for this one, I'm going to add a little bit
of shadows first, and then I'll do the
overall texture. So I'm going to do
a little bit darker here where the shadow
would be from the head. Hand a little bit where
the legs would bend. And then we can go ahead
and do the overall texture. Yeah, I like to add
some little paw prints or claws or something like
that to my characters. So let's just grab kind of a
neutral color here and grab a smooth pencil and
just add these on. Alright. Now, this bunny
is looking really good, but it's too big
for the page now. We don't have room
for our affirmation. So we can actually
move the whole thing. We can select all these layers, either group them
or just select them all and come to the
transform tool. Make sure it's on uniform. And then we can just shrink our bunny down
just a little bit. It's always better to
draw bigger and shrink it because you're not going
to get the pixelation. If you draw too small
and make it big, then you risk having kind
of those rastry edges. Alright, we just need to
add our affirmation now. I'm doing better than I think. I'm gonna go ahead and
make this all just a little bit smaller 'cause I
think it can fit on one line. You made it. Five days, five tiny pieces of joy. I'm so proud of you. Share
your full collection, if you'd like, and stick around for the final
class wrap up.
7. Wrapping Up: Thank you so much for joining
me for Tiny Art Big Joy. I hope this challenge
helps you reconnect with your creativity in a
soft and simple way. Our guiding
affirmation has been, I'm allowed to keep
it simple and fun. I hope you carry that with you in your art and in your life. If you enjoy this class, please upload your project
so we can all celebrate with you and feel free to check out my other classes for
more creative play. You created something beautiful
this week. Keep going.
 Laurie Russell, Digital Artist | Illustrator | Educator