Transcripts
1. Class Introduction: Hello, everyone. I'm Chen chibi and watercolor and Wash
artist from Vietnam. Wash is my go to medium for capturing the charm of
flowers and landscapes. Let me show you some of my recent sketchbook painting to give you a sense of my style. In today's class, let's explore the advanced
wash technique to capture seen rainy scenes
and a glowing rainbow. In this class, we'll start by practicing wet on wet
techniques to achieve the soft misty look
of a rainy day perfect for capturing
reflections and atmosphere. Next, I will show you
how to blend colors to create a delicate rainbow
against a moody gray sky. Finally, you will learn the
easiest method for adding realistic raindrops to give your painting that
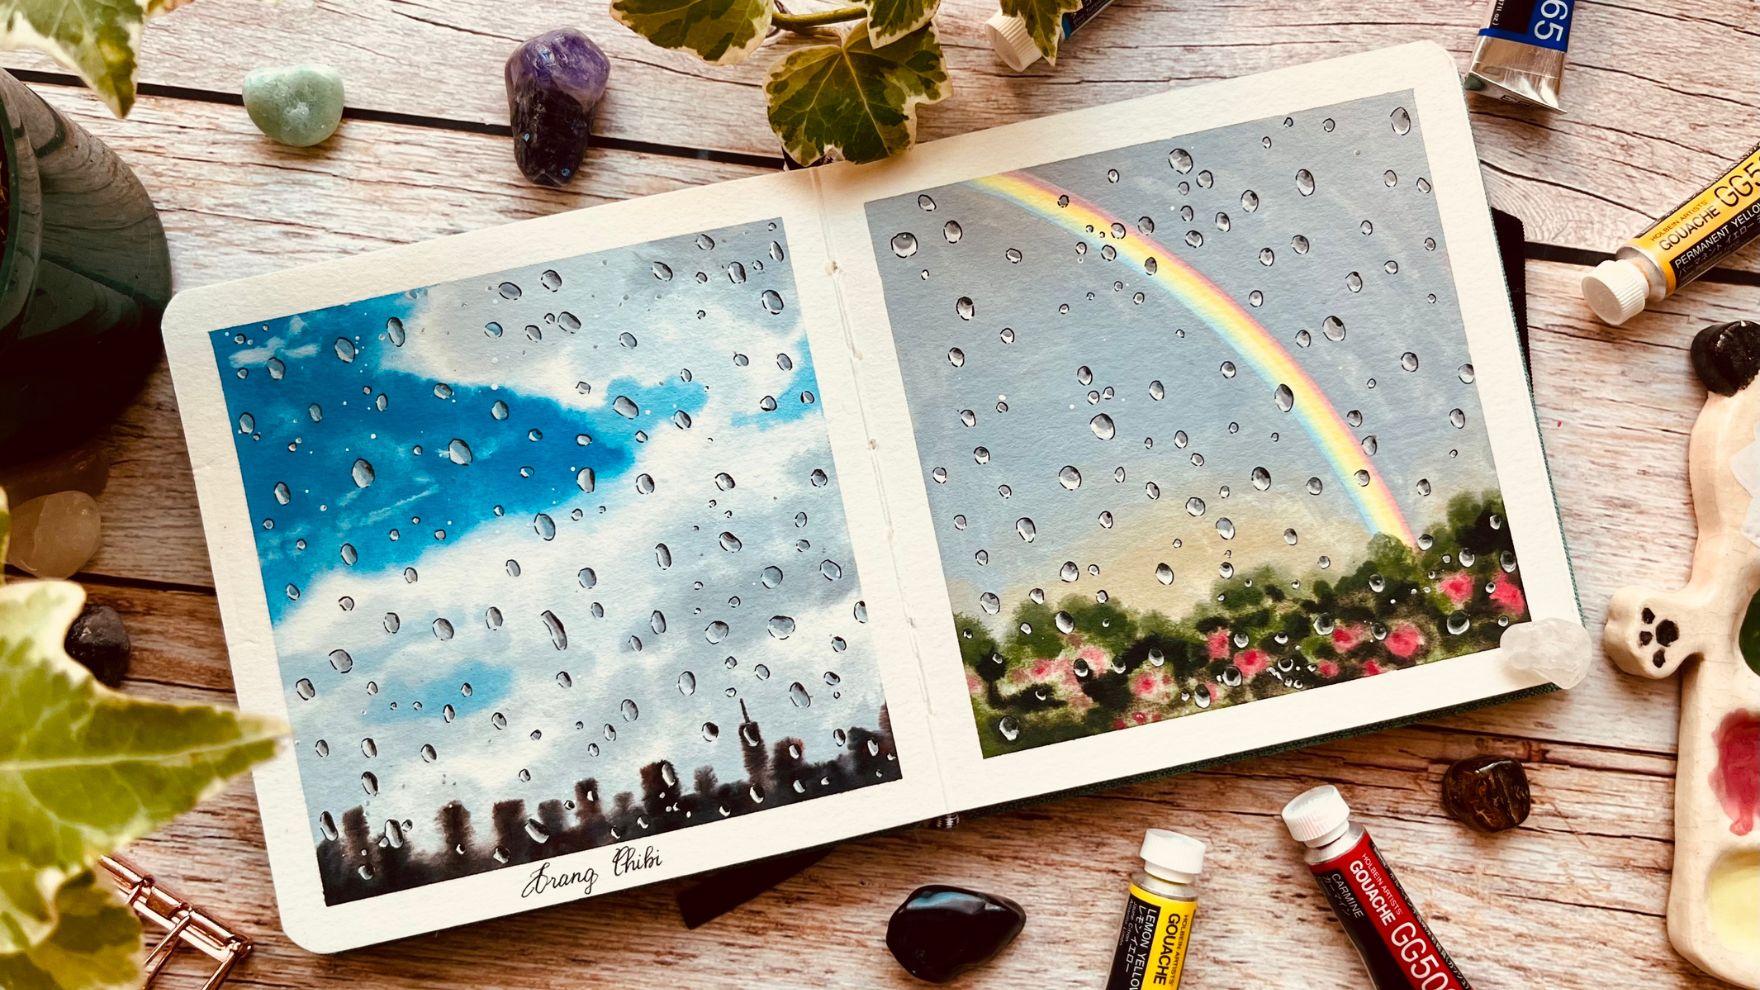
final magical touch. For the final project, we create two
beautiful paintings, one capturing a peaceful
rencene and the other bringing a vibrant rainbow to life among the clouds. This class is best suited for artists with some
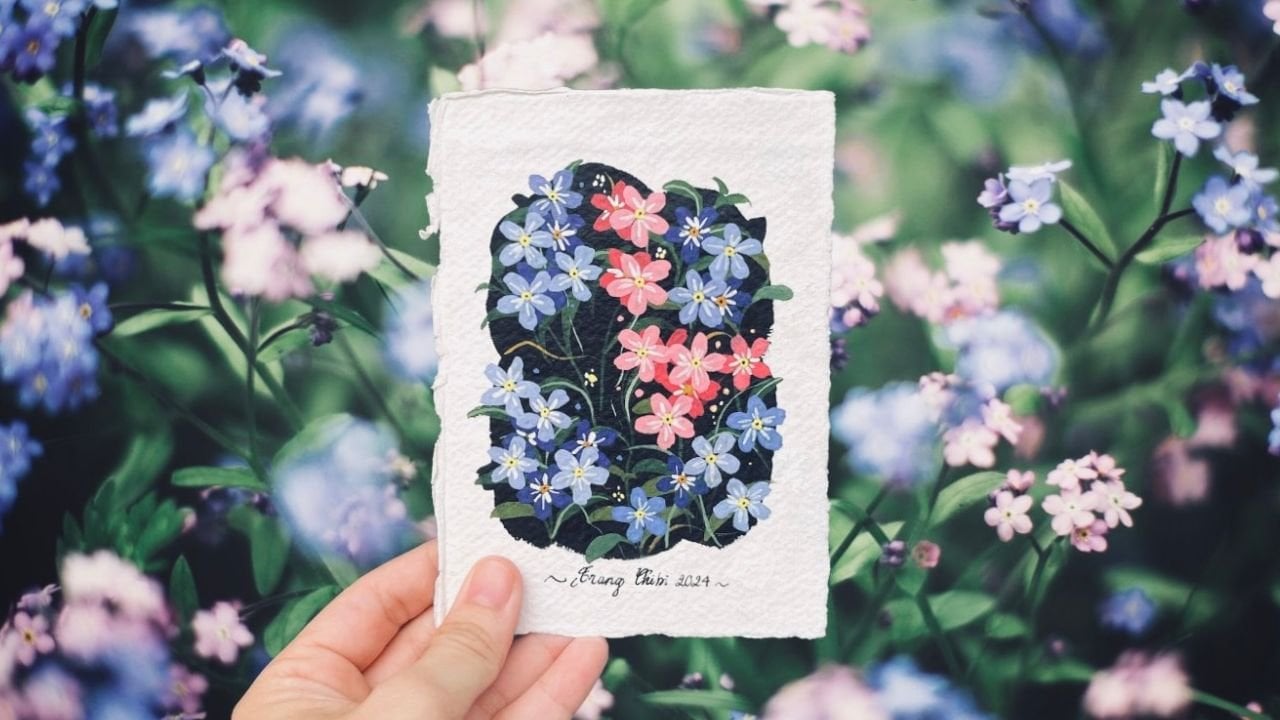
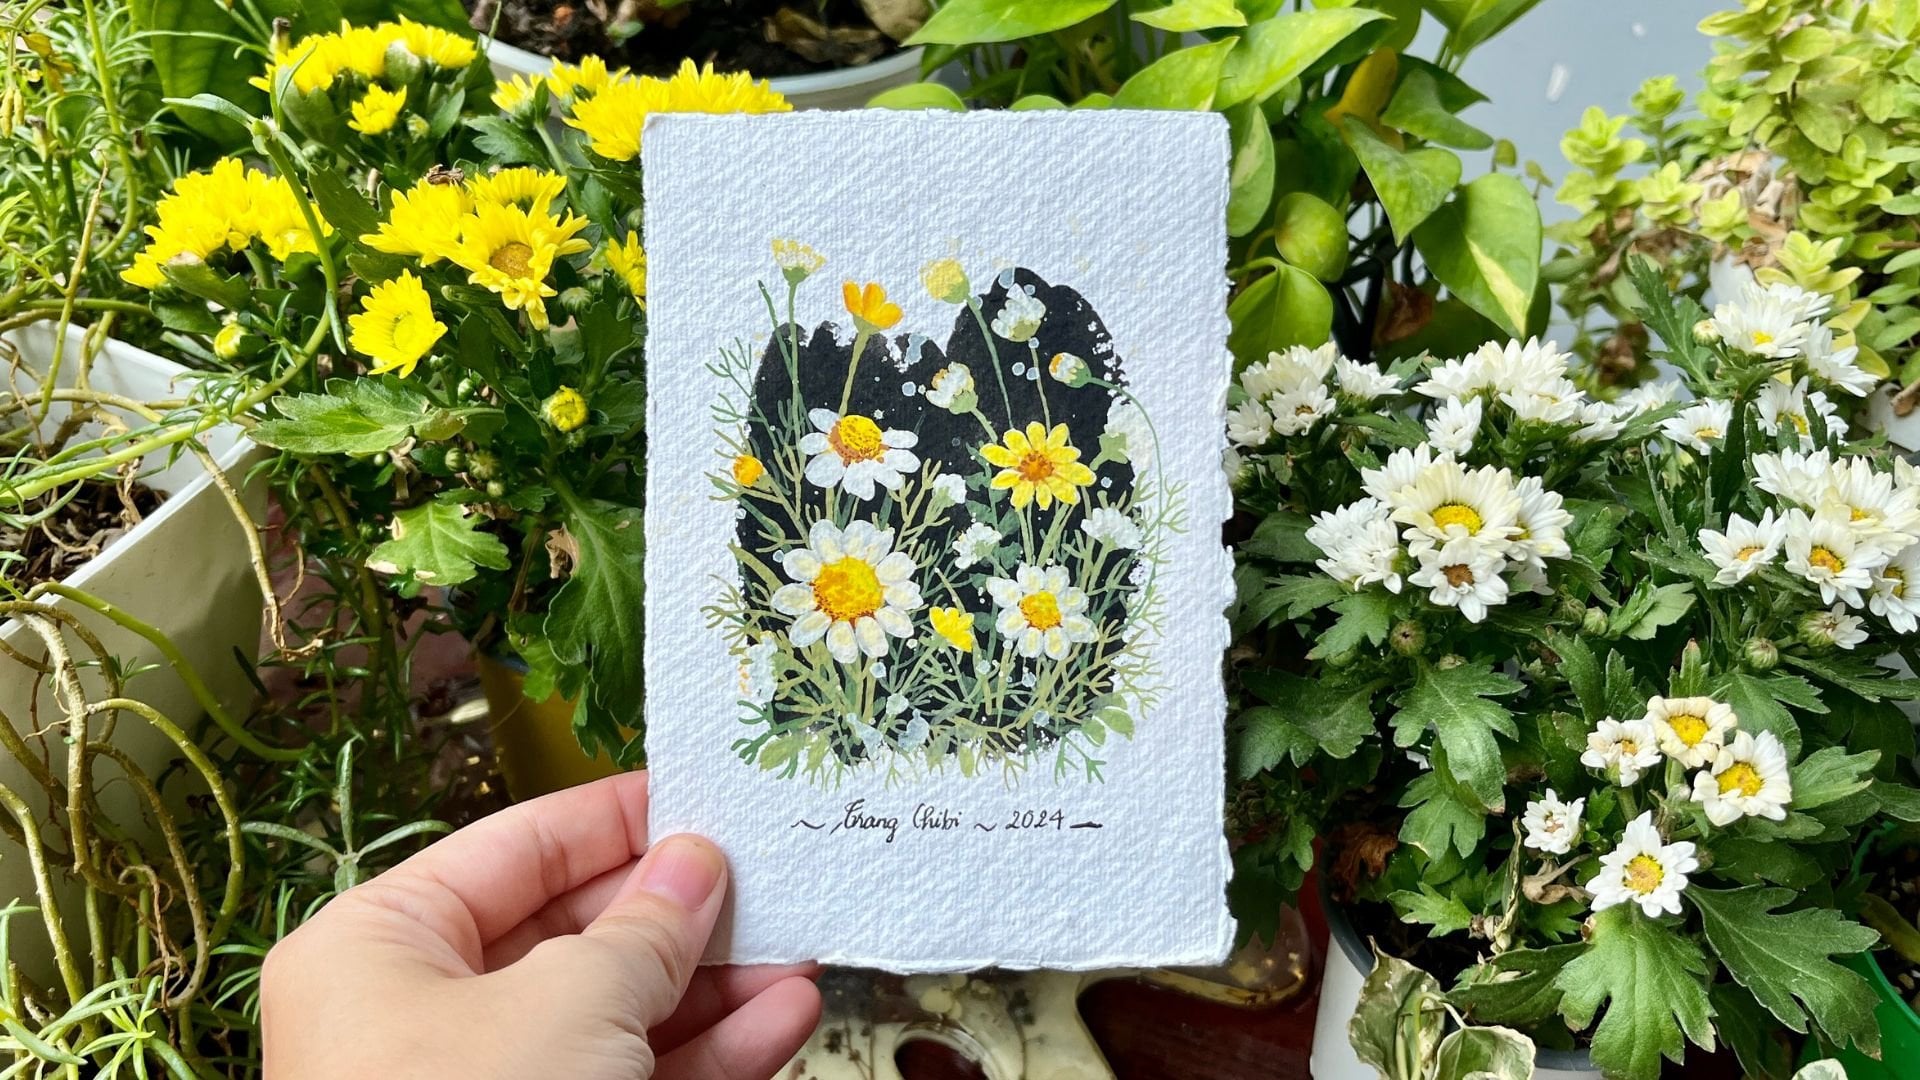
gush experience. If you are brand new, feel free to check out my beginner classes on painting daisies
or forget me nots, where we focus on basic
layering techniques. So grab your brushes, and let's bring the beauty, a brain and rainbow
to life together.
2. Tools and Materials: In this very first lesson, I will walk you through
on the tons and materials we may need to
use for our today's class. Keep in mind, these
are just suggestions. Feel free to use
any art supplies which is more accessible
and convenient for you. In order to paint glass,
we need glass pen, we need paper, we
need some brushes, mixing palette, and
what a container, small piece of cloth, and some other items
we mentioned later. First, let's talk about paper. For out today glass
demonstration, I will use this
watercolor sketchbook. It is 100% cotton, what color sketchbook and it has 12.5 multiplies
12.5 centimeter. But you don't have to use the dea exactly similar
dimension as I do. Just need to remember
because we use a lot of wet on wet technique
in out today glass. I recommend you to use some
100% cotton watercolor paper. Normally for layering
technique in was, we don't need to use high quality or 100%
cotton watercolor paper. But for this glass,
in particular, it would be much easier if you use 100% cotton
water colour paper. Second, we need Waban and In imi Waban and the
mops has 36 colors, but you don't need to use
36 colors in this glass. Actually, in order to
paint the sky here, I use motion be tian blue. I will mix ocean blue, we collect a bit black to
paint the gray in the sky. Of course, we need a lot of white paint because we
need a lot of white paint. I put it here. This is a number to paint
the city, the city. For this piece, we use the similar color to gray
color to paint the sky. But we need to use in order
to paint the rainbow here, we need to use the sky blue here because if you don't
have a sky blue, it is a pastel blue. But if you don't
have it, you can mix portion blue bin blue. Anything is possible
with a lot of white. In, it was two yellow colour
to paint the yellow part. The first one is lemon yellow. And the second one is primrose. We don't need to paint
the green because if we mix blue
with lemon yellow, we have green and I will use oriento red
to make the red part. If we make oriental red
rirose we have orange, so we don't need to have
orange in our color palette. In order to paint the
flour and cheese here, I will use it is olive green, it's the same oriental
to paint the flowers, so we don't need to
pick the colors again. That is on the colors we
need to use in today class. Feel free to use any was
brands you have at home and you don't have to use the exact similar paint
box as my some colors, for example, olive
green or sky blue, you can mix it yourself. I have already taught how to mix olive green in my very
first glass class here on skill share, blooming with glass, materials, techniques, and daisy delight. In that class, I taught you
how to mix different colors from just five primary colors. And next we need brush. For today glass, I will use this flat brush
to paint the sky. I will use this fiber
brush to paint the city, the flowers here, and I use this small brush to paint the
rainbow and the rain drops. And I will use this compass
to draw the rainbow. But you don't need to use a
compass to draw the rainbow, you can draw it by hand
or you can use the circle round objects
to draw the rainbow. We need a liner, we need this final to draw the darkest part
of the rain drops, and this is 005
Waterproof finer. We need a water container, a mixing palette, and a small piece of cloth in
order to clean our brush. After we clean our brush, water container it be cleaner, it is the small
piece cloth here. I believe that is on the
tones and materials. We need to participate
in this class, and I will see you in the
next lesson where I teach you some essential techniques before doing the final class project.
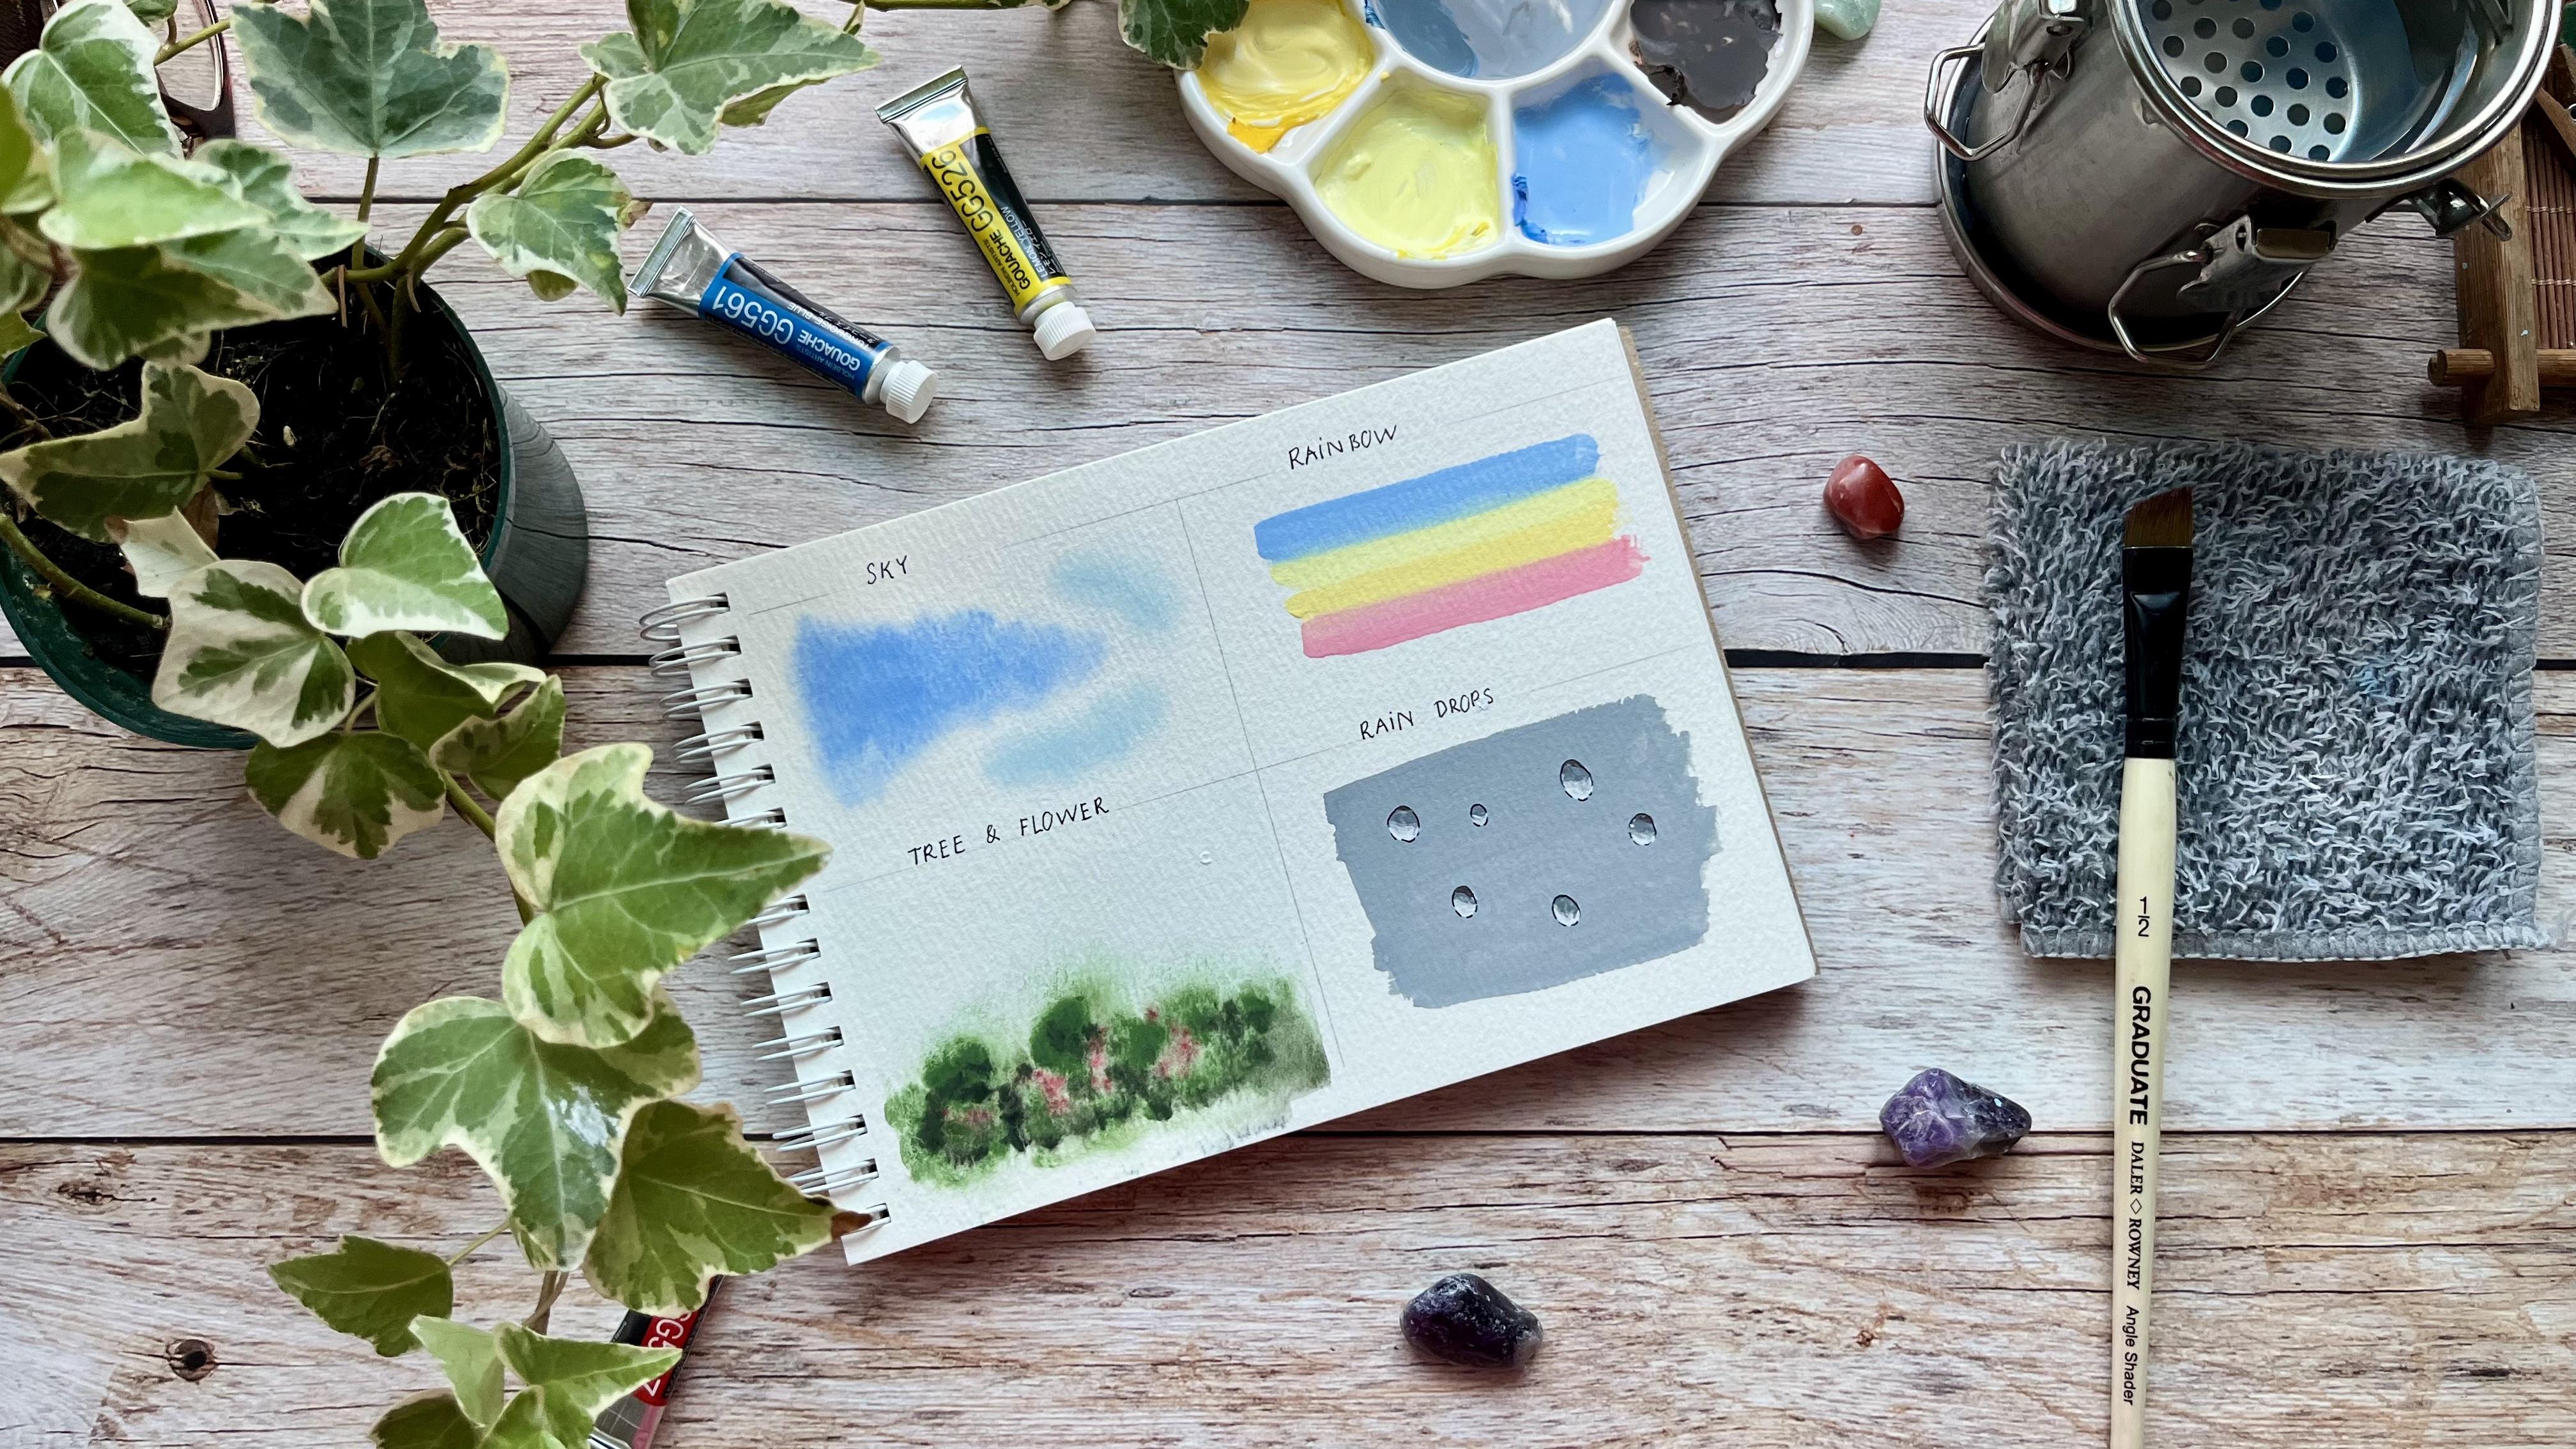
3. Technique to Paint Clouds: In this session, we practice
different techniques before moving to our class
final Bjeck we cover the red on wetting
nick to paint soft clouds and that beautiful background
seen through a window, blending techniques for a
salt and smooth rainbow and an easy approach to paint raindrops with
realistic values. In this lesson, I will teach you the technique to paint
the blurry sky here. So in order to paint
this type of sky, you need to use the
red on wet techniq. So first, I will wear
the the whole area. One note, this technique works best with 100% cotton
watercolor paper. This sketchbook, it
is only 55% cotton. So it is good enough
for practice, but for final painting, I mean it was 100%
cotton watercolor paper. Because with other tile paper, the water and the
paint dry faster. You see, I read the whole area. And for final piece, I use Bluian blue
with a lot of white. But for this practice exercise, I just this premix
sky blue so you can see on wet surface, the pain will have
the blurry effect and it is very similar
to the cloud in the sky. And we need some gray. We need some gray been
the shadow of the cloud, it was a little bit
of motion blue, a little bit of motion blue, a little bit of black. It is a lot. I mix this with a lot of white to
create the gray color. Vy is good enough for
this practice exercise. But for the final painting, I will chain on it a little bit. As you can see,
because this is not 100% cotton watercolor paper, this is just 55%, the paper here is already dry, just wait around
ten second and it is very difficult to create
the blurry effect here. But that is the basic
technique we will use to paint the sky on one
of our final painting. And in the next lesson, I will teach you the technics to paint the ee and flowers
in this painting.
4. Technique to Paint Trees and Flowers: In this lesson, I will teach
you the techniques to paint the cheese and the flowers here in one of our
final painting. Similarly, with the
painting the sky, we also use the wet
and wet techniques. So I went the whole area. I was this fever us to pick up the olive green here and
I mean paint the cheese. And as you can see, because
of the wet surface, the pain in bloom as if it is
blurry under the win since I red. As you can see, when I paint, I need some gar and now even put red color on it to create
the flour in the cheese. I want a black. Because you look at the letter, I will show you the
reference photo and we need black to some lock
spot on the cheese. And this is technique to paint the cheese and the
flowers under the rain. In the next lesson, I will teach you how to paint the rainbow.
5. Technique to Paint the Rainbow: Now, let's practice the
technique to paint the rainbow. We use the blending techniques. First, I will add some
blue on the paper and even this sky blue
is too vibrant for me, I will add more white
to make it even softer. So first, I mean, put
the blue on the paper. Next, I mean, lemon yellow. I add a lot of white
to make on the color, pastel color because we want to create the rainbow is very
soft on the gray sky, the color shouldn't
be too vibrant. It is lemon yellow, and we leave a gap small gap
between two pin two colors. Next, we add prim rose. I know why here because we need to make
the right color anyway. I think I add too much color
so I need to put more white. Big type of soft yellow color. We add it under the
lemon yellow here. And finally, we put
some red colour h. So after putting all the
colors on the paper, now we need to blend
everything together. So in order to do this, we need to clean our
brass and make it most and we paint in the in the
session between two color. We had a lot of paint here, so now everything merged together, and that is the main technique we use to paint the rainbow. In the next lesson, I will teach you how to
paint the rain drops.
6. Technique to Paint Raindrops: In this lesson, I will
teach you how to paint the rain drops, the e is gray. First, we need to create a
gray background for the sky. I do find that the gray here
is a little bit too blue, so I will add more I will
add more black here. I gray to paint the whole
area to create the gray sky. Actually, the gray here is too dark for me in
our final project. I will make it lighter but this is good
enough for practice. Now we will need to wait
for this surface to dry before painting the
next step of the raindrop. I just use a heat dryer to
accelerate the drying process. After the gray already dry, now I need to add more light
this value of the rain drop. By this, iron, use a very light gray on add a
lot of Y into this mixture. Only this corner
because later we will need to use darker gray to paint the middle value
of the raindrop. Now I will put some rain drop here because it is a
practice exercise, I will make very big rain drop so that it would be
easy for you to see. Now, once again, I need to
wait for the pain heel to dry before painting the middle
value of the rain drops. Now, let's pin the middle
value of the rain drops. I realize that I have a
spelling mistake here. So in order to do it, we will create a gray which is darker than the gray of the sky. So I think I will use the gray here. A little bit blue here. The gray, it is darker than the gray of
the background sky and I will at it on one
color of the rain drop. So you can look at the reference photo to see the light direction
to decide where you should put the gray here. Just now we need to wait for the pin to dry again
before coming back to paint the kis value
of the rain drops. Now, let's paint the kis
value of the rain drops. For me, the easiest way to do this is to use
this fine liner. I use 005, there's
more fine liner. Remember to choose what
the pro fyyler I tied with other ti pen before and the
ink bled on the wat surface. So I went pin around the
wind drop like this. We might also want to ask
some even more dark color. Depend this time depend
on the reference photo. So some rain drop in a little more dark value but for some you can
leave it for now. Now, let's blend
everything together. Even use most to paint in the
intersection between two color to make
the chance season. Smoother. And this is how we
paint the raindrops. If you look at this, it looks a little bit
awkward because we have very big rain drops. But when we paint many of them, and it will create the
illusion of detail, so you have a feeling one of them raindrops without looking at each rain drop in detail. This is end of our techniques lessons and
started from the next lesson, we learn practice paint
the final project.
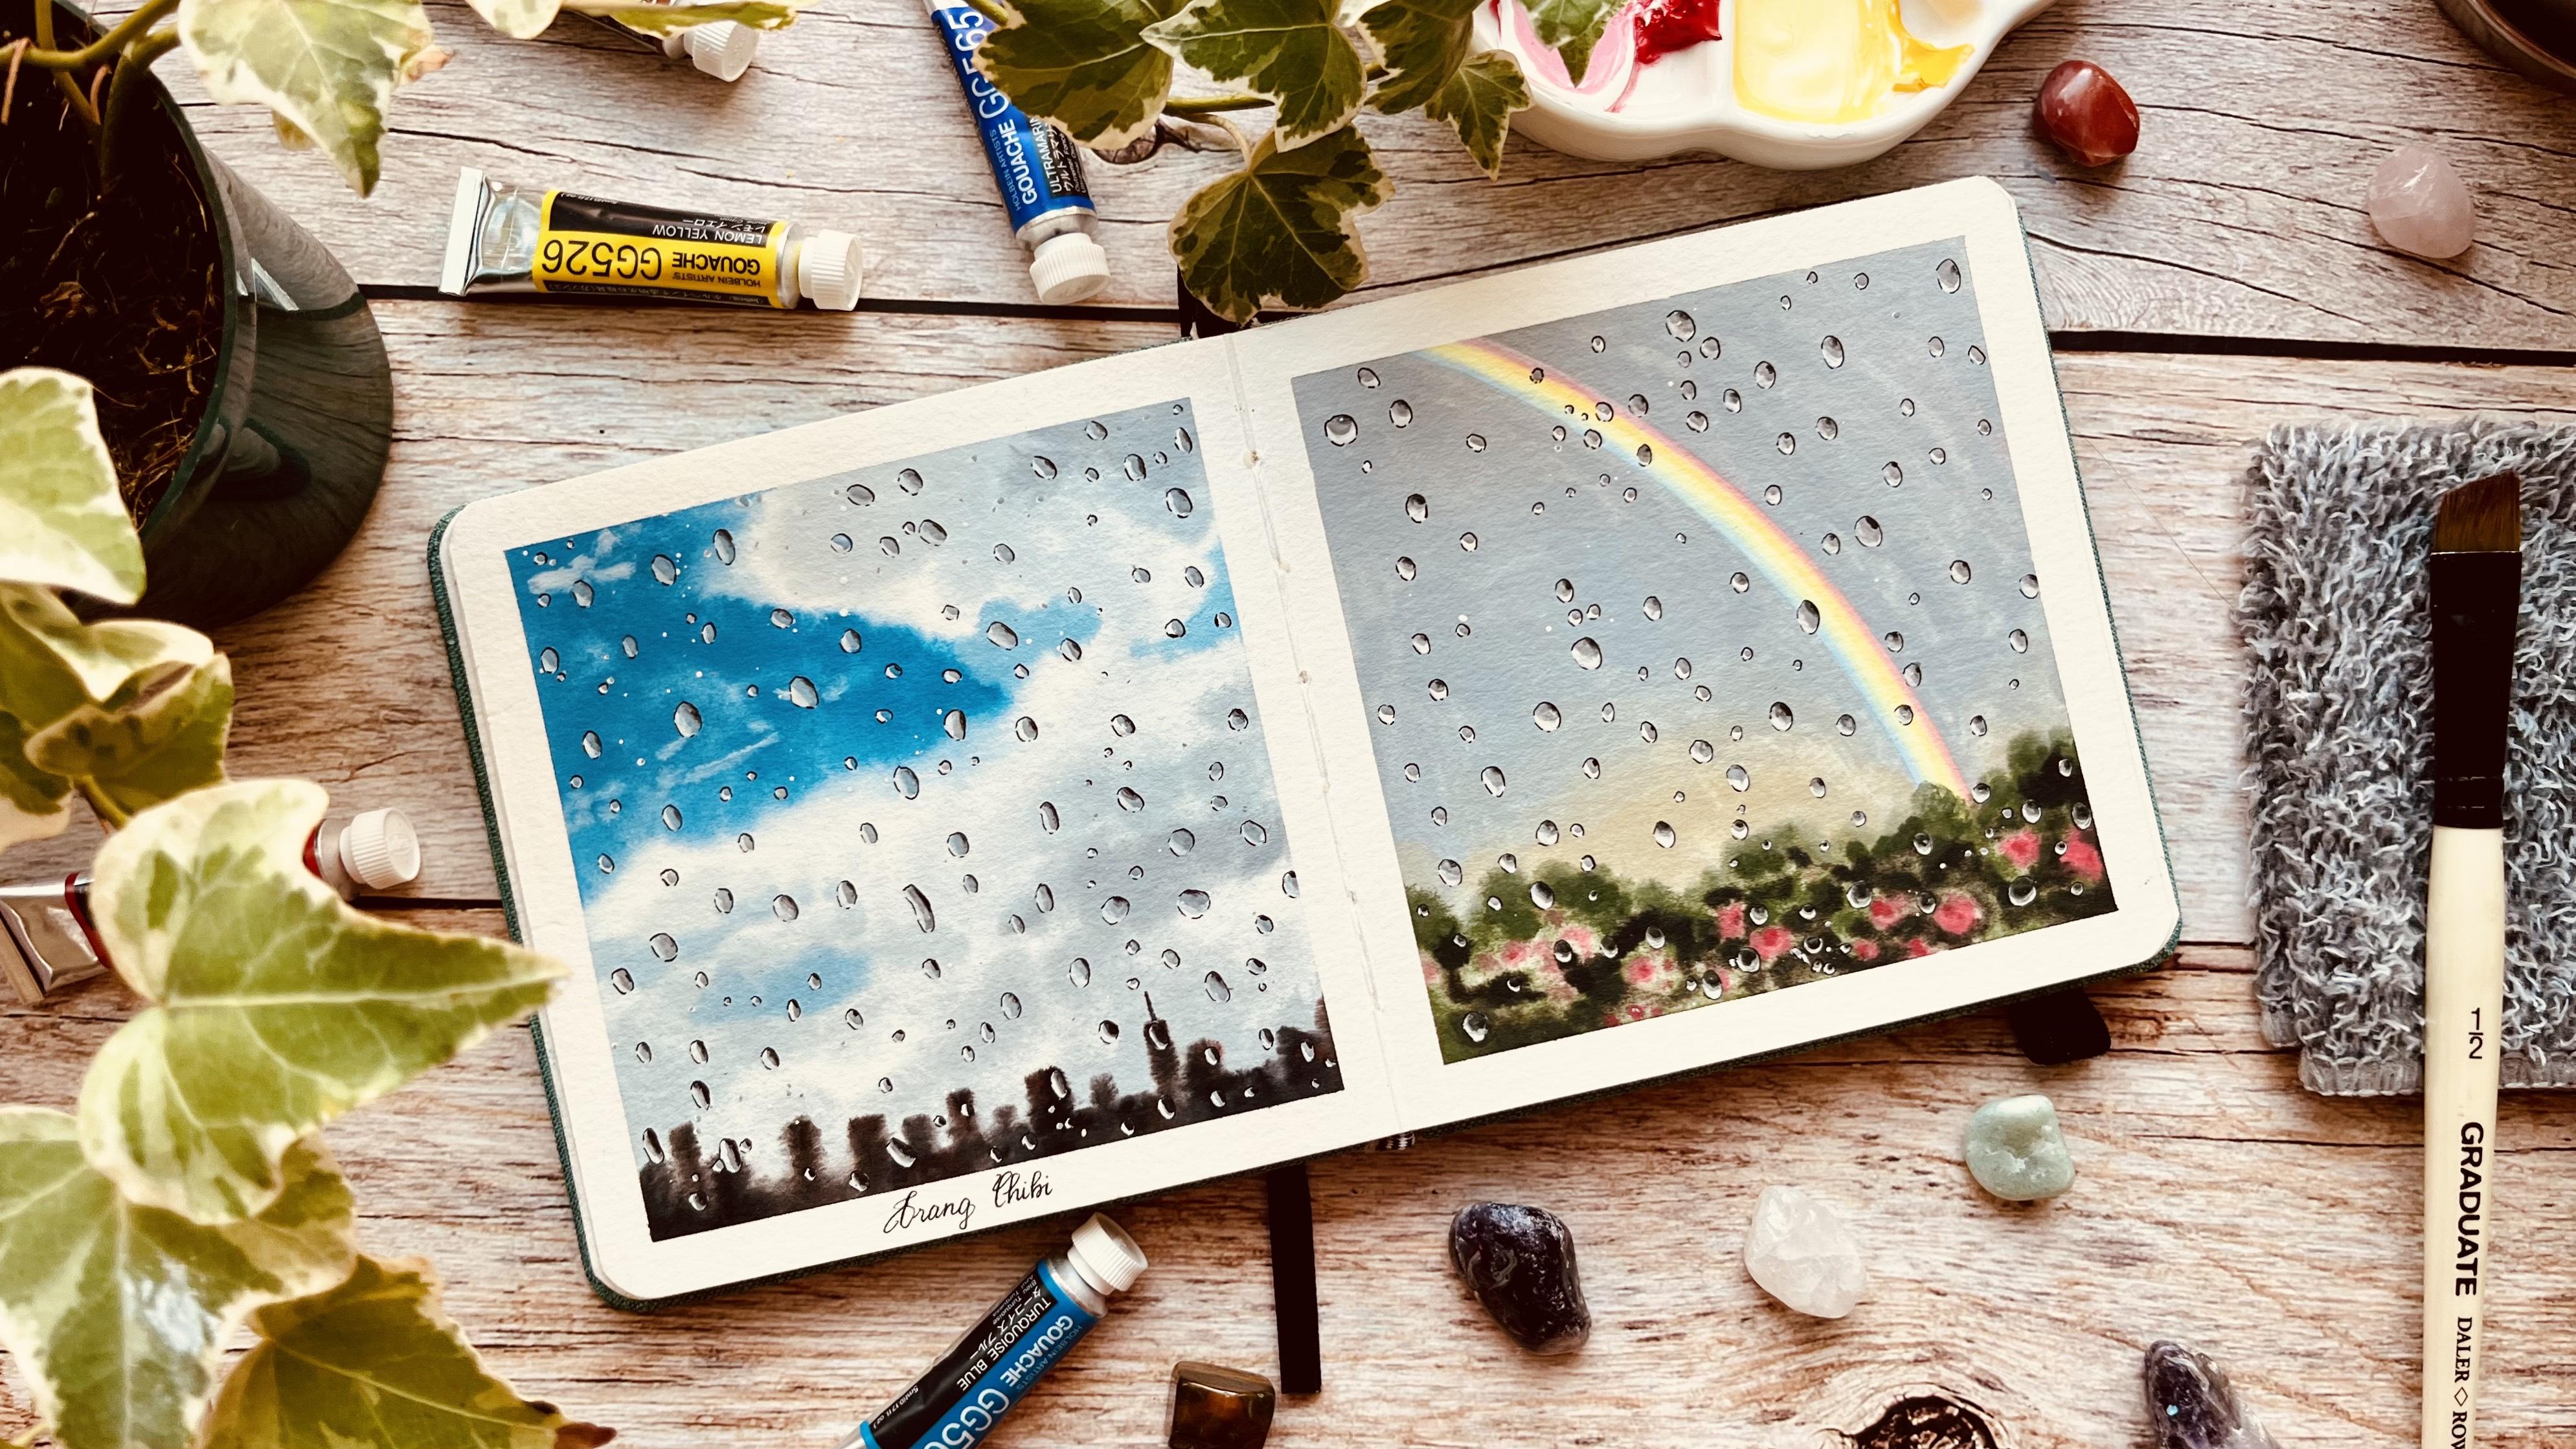
7. Final Project: Painting the Sky: Thanks for sticking
with me so far. We've made it to
our final project. Now, let's bend these two
beautiful ny scenes together. Let's bend the first bending of today class, final project. This is the reference
photo because I bought it too big to I
will try to put it here. So I will paint this
painting on my sketchbook, but you can paint it on
a loose sheet of paper. I shouldn't be a big problem. Before painting, I will
try to mix the color post. I see the sky blue
here is a little bit too vibrant for the sky. I will mix the Buton blue. White in order to paint
the blue part of the sky. Blue and blue white dark blue and it is more suitable
for a rainy dye like this. I think this blue
is good enough. Now I will clean our brush, make sure it is clean and
wet the whole surface. Actually, I often use a more
watercolor brush for this, but I don't want to for glass, I don't want to use a lot
of supply to confuse you. That's why I just
use a flat brush for this purpose and
it is good enough, you can wear the whole surface. Is this more It is a little bit too
small for this purpose, but it is good enough. Now this fever for us to
at the blue the sky here. We don't need to follow exactly the they add a little bit of flow here into this gray to them, this area. Now, it being the gray on
the shadow of the sky. Now, I mean, add a little
bit more pure wine in the why session of the sky. I want to make sure
I have enough we first then we will
add the wine now. It's a little bit
of mess in a bid. But this is the sky. We need to paint
the city behind. Actually, I think we still need small cloud here, and I want to at this. I do feel that the paint
here is already dry. I will wear this area again. It is dry now, so for
this time painting, we need to paint
everything very quick. Now I will add this paint the city smaller bus to paint the because everything is under the win, so we don't need to
focus a lot on detail, but we need to add more
black here because you see the I will add
black on the brow. I do five that I don't
think I need to add more I do five that I want
more gray into the sky. So I will where at
the area again. Sorry, I forgot to mention the water spray in
the supply session. I think the sky is
not gray enough. I don't want to overdo it, so let's stop here and we need
to wait for everything to dry before coming back to paint the raindrop
on this background.
8. Final Project: Painting the Raindrops: The ground here is really dry. So now let's pint some
rain drop together. And I do find that the sky
here is a little bit bright, so it was white to paint the lightest
value of the raindrop. I will look at the
rifle photo to paint to paint the
biggest raindrop first. And now I will use the I
mean the splatter technique. The purpose of
this is because if I paint on the rain drop by hand I've been turned out to be to become some pattern because if we do
something like this, the itibuton of the wind drop something falling
down from the sky. Now I will make I will make some small I think I need
to make more white in. If I can do everything again, I think I will make
the background sky is a little bit darker, so I mean, I I don't want to pull
white, paint some cloud. But you can see for
this type of technique, we need to do
everything very fast. So I cannot think too carefully
before putting the color. So next time I will be I mean you I think that's enough rain drop. A few more. Now we need to wait for everything to dry
before coming back to paint the middle
value the rain drop. Let's come back to paint the middle value
of the rain rock. I look at the
reference photo here, you see the middle value here is gray but
with a hint blue. I try to make this by adding I add this blue here into the black here into
the gray here. Need to add more black. Mixture to paint
the middle value of the wind drop on this
side of the bending. If you look at the
reference photo, you see in the this side. You don't have to try to mask exactly what is in
the reference photo. I do feel that the
Bible is still wet, so I try to to hold my
but a little bit higher. So for part of the
I mean, the gray. So try to make the
different shades of gray. For the Bright east of the sky, we will do light of gray. But you don't need
to charge to mask exactly because you
see it is in the sky. I don't necessarily reflect
what is exactly behind it. But for the bottle, I will charge to use I will a y here into this miter
to create a dark curve I look at the reference
photo and I also need to add some dark value into
some in rock over here. We can add now or later, but I want to add now. And that's on for now. We will need to wait for this
to before coming back to the final to add the dark
pis shade the raindrops. Let's coming back and use the final to paint the
dark pit area, the raindrops and
use the 003 and 005 because we have different rain drops
with different size. But if you only have one
final s it is good enough. I will start with the 0052 because the problem with fine al is when
we paint bi was, sometimes it will not flow you can use a small
brush to paint this was, but from my experience, this kind of paint will make
the process much faster. And As you can see, I am skipping the small
wind drops for now and then come back
with smaller finer because I think I do think the painting will be
more natural this way. But I have tried before
and you can only use one finer and
it is good enough. Now I whisk to even final
final to being the smaller We have some small in drop and I forgot to add
the gray shade into it, but I just want to add
a rap with this final and it is good enough
because it is too small and when we see a
lot of rain drop together. Our eye cannot realize
the difference. Actually, I want to make the camera lower
because I am shortsighted, so I really need to
to put my eye my eyes near the paper for this
type of detail bending. I don't want the camera
to fill my head. H I mean I look at the camera
and I do feel that we still need some I just this final to wear some circle to give the
illusion of more raindrop oh I think we almost
finished and now I need to this must rush to we don't need to do
this on the wind drop, but I be in the session some windrop to
create the smooth transition. Focus on the blackest. Focus on the biggest
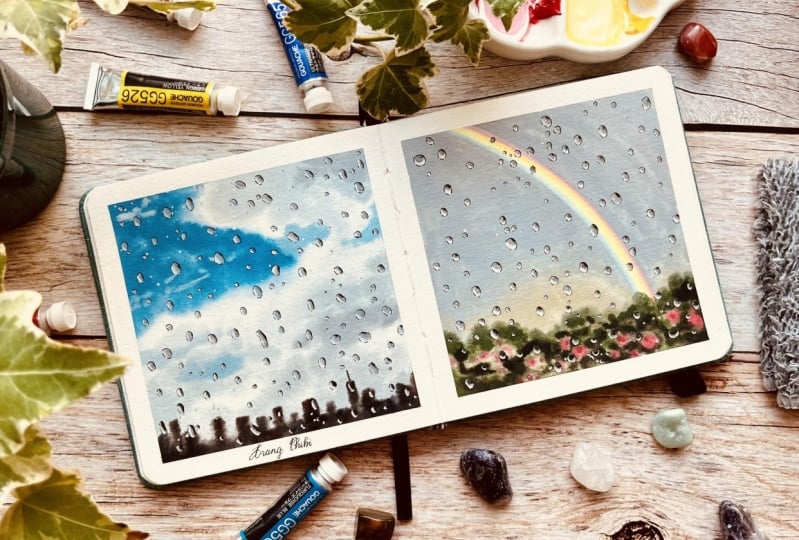
range of first. I think that's all
for now and we finish our first painting of
Audis glass final object. And let me peel the deps off. Actually now I will go for
lunch and I will see you in the afternoon and we will paint the second painting
with the rainbow.
9. Final Project: Painting the Rainbow: Let's come back with
our second painting of our final project. You see, actually,
one day has passed. Yesterday, we painted this
and today let's paint this lovely blowing
rainbow scenes together. As you see in this
reference photo, there is a rainbow
here and here is something like houses or chain. I cannot see what is there, but I will change the
composition a little bit. Instead of one line of cheese, I will make it curvy and I put something
like flowers there. Let's get started. So the
four thing I will draw is the rainbow and I
use this compass to draw the rainbow because
my hand is quite shaky, but you don't need
to use this compass. I believe some people can
just draw it by hand. No problem and you can
use some circle object. Let me try. Let me see how I
painted it before and if you see in the
reference photo here, everything is gray, but I
will ask some warm color here to make the painting
more interesting. L try to paint the rainbow. What a compact can
do is we can go to the problem with using some circle object is you have a two circle
with the same diameter. By the rainbow, we need to circle with different diameter. That is the rainbow. And I will start painting this rainbow because I
try to paint the sky. You can try to paint
the sky before. But the problem is
because you see the rainbow is very small, so I need to put my
hand on the paper, so it will be much easier if I have something to
paint my palm on it. It is the paint from yesterday and I need
to reactivate it with I think I want to
make it a little bit more. I don't want the pencil mark too because we can cover
everything with glass, but for the rainbow, I am afraid that we
cannot use a bow, a lot of pain here, so it is better to have
a sharp pence here. I think this blue
colour is good enough. We make these from today. I think you see, I draw a compared to the photo
I do it is a little bit too bright. I will add more. I think I will have
some adjustment here. The rainbow here, you see, it is more it has more bow
color at the bottom and lighter color I will add I will add more
Y on this part. It will be more difficult
to blend the color after we add another color onto it. So I'm trying to make the color. So we use lemon, you know. Make a small ye here. It is okay for the lemon yellow to overlap with the
blue color here. In COV rim. But it's not okay
for primrose color. That's why I use two tone
yellow for this bending. Because if you look
at the rainbow, the yellow will be the
more vibrant color. So depend on your paint bobs. You might show different
color scheme and if you make a bigger painting because
this painting is very small, so I don't want to add a lot of colors onto it because
it will be difficult. But you can certainly add blue
the green and then yellow and then orange and
even add some purple. You can add more the colors
mulch into each other, but if you want
smoother transition, you can put more original
color onto the paper. But this bending is
very small, you see, we need to be very
careful to paint here, so I don't want to make
things more complicated. I think red here is still
a little bit too vibrant, so you need more y. You see, we use a lot
of Y for binding. And we have done
the first round of the rainbow and we can now we need to blend
everything together, but I want to wait
for it to dry and we also need to blend the
rainbow into the sky. So I want to paint
the sky first. So this gray to paint the sky, I want to that is the
brass we used yesterday. I use this gray
to paint the sky. It is good enough and I want to add a little bit orange
into the horizon to make the whole contain to be more here a little bit. So this orange. I forgot to mention in
the material lesson, but you can only mix orange just by adding yellow and red. But because I have
already purchased 36 color bob I want
to save time now. You see the brass is
a little bit ody, so we have some gray here. But it is okay because the own here should
have some gray. But this video is a
little bit too long. I will stop the video now
and I was the one to clean my breast before coming back with the gray
to paint the sky. Now, let's paint the sky. Normally, I don't have to turn my to turn my paper around, but for this bending, I think it's more convenient
to to turn the paper around. And for the pain
near the rainbow, we need to make sure we don't add a lot of pain,
not a lot of pain, but not too stingy here because otherwise it will be
more difficult to make the blending
near the rainbow. I'm going to ask some
more wind over here. I still to be too still
too vibrant, I think. So we don't want to try to
make we don't need to try to make the perfect radiant for the sky because it
is the sky anyway, and the sky of rainy day, it don't be too, it is not. It is not very smooth
and perfect radiant. Now I want to wait
for this back grow to dry before coming back to make the blending
for the rainbow. Now, the pain has already dry. So I will use a feeble brass
to blend the color together. So what I need to do is to make the to make these to be most not wet. So don't use a lot of pressure here because otherwise you will pick up them from the paper. As I mentioned before, the window here will
be even more natural. If you add more color
into it so it should be blue they actually purple then blue then gray Then orange. But for this small bending, I don't want to make
things too complicated. I think that's good
enough for the rainbow. I want to add some stop this lesson here because for the
rest of the spending, you will use the
similar techniques as in the previous spending. So the next lesson
will be quite fast.
10. Final Project: Flowers and Raindrops: Welcome back. So
now we need to add some flour and cheese here
using some red on wet, Nick. What I like from Ga is you
can put the color here. Wait for it to dry overnight
and come back to pain. It is what we cannot
do with acholic. What I don't like from
acrylic is we need to make sure the pain not
ripe for the whole process. I want to ask some
pink color first and ask the small brush. I add more black here. Because if you look at
the reference photo, there are some bus very dark. So now we need to wait for everything to
dry before coming back to paint the rain
drop and we use the similar techniques as
in the previous painting. Let's continue our painting
and I will this why it to be gray color here to paint the lightest version
of the rain drop. I will try to pin the the latches, n drop first. The problem with the
technique is something we have some accident like this, but it's not problem. I will just make it weak
wind drop over there. Now we will wait
for each dry before adding the middle value
into the windrow. Now, let's come back and
add the middle value, so I will make this gray add
more pain more black here. I look at the reference to
find the direction the light. I want to I need some I think I need to
have some issue now, so so I forgot to mention that we
also need some tissue. Normally, I don't need
tissue for paint with gas. I need it when I paint
with watercolor, but you see, we can also
have a hype accident. I need to I think it will
be okay after it dry because the sky is
not perfect anyway. So I'm going Aunt M
go in here ton the So now we wait for the
painting to dry before painting the duck piece
value of the raindrop. So it's time for us to use
the to use this fine to add some I need this because the pan often
not flow very well. I mean it's 005 to map the big wind drop first and come back with a
small final letter. I need to put the
camera down because I am shortsighted
and I really need to put my eye near the paper to then this
kind of small detail. Actually, here we
draw, not pain. I think pain is when we do
something with the brushes and And finally, I use
it must watch too. I just need to focus
on the bien drop here. Let me peel the Good luck with your painting, and I will see you
in the next lesson.
11. Conclusion: That brings us to the
end of today's class. Thank you for joining me. If you found this
glass headphone, please leave a review. Follow me on Skillshare and share your painting in
the project section. The techniques we learned today and just for
this painting, they can be used in so
many other projects too. Happy painting, and I hope
to see you in another glass. M
 Trang Chibi ❤️, Watercolor and Gouache Artist