Transcripts
1. Class Introduction: Hello, everyone. I'm Sensi Be an artist and
teacher from Vietnam. I started my actony with
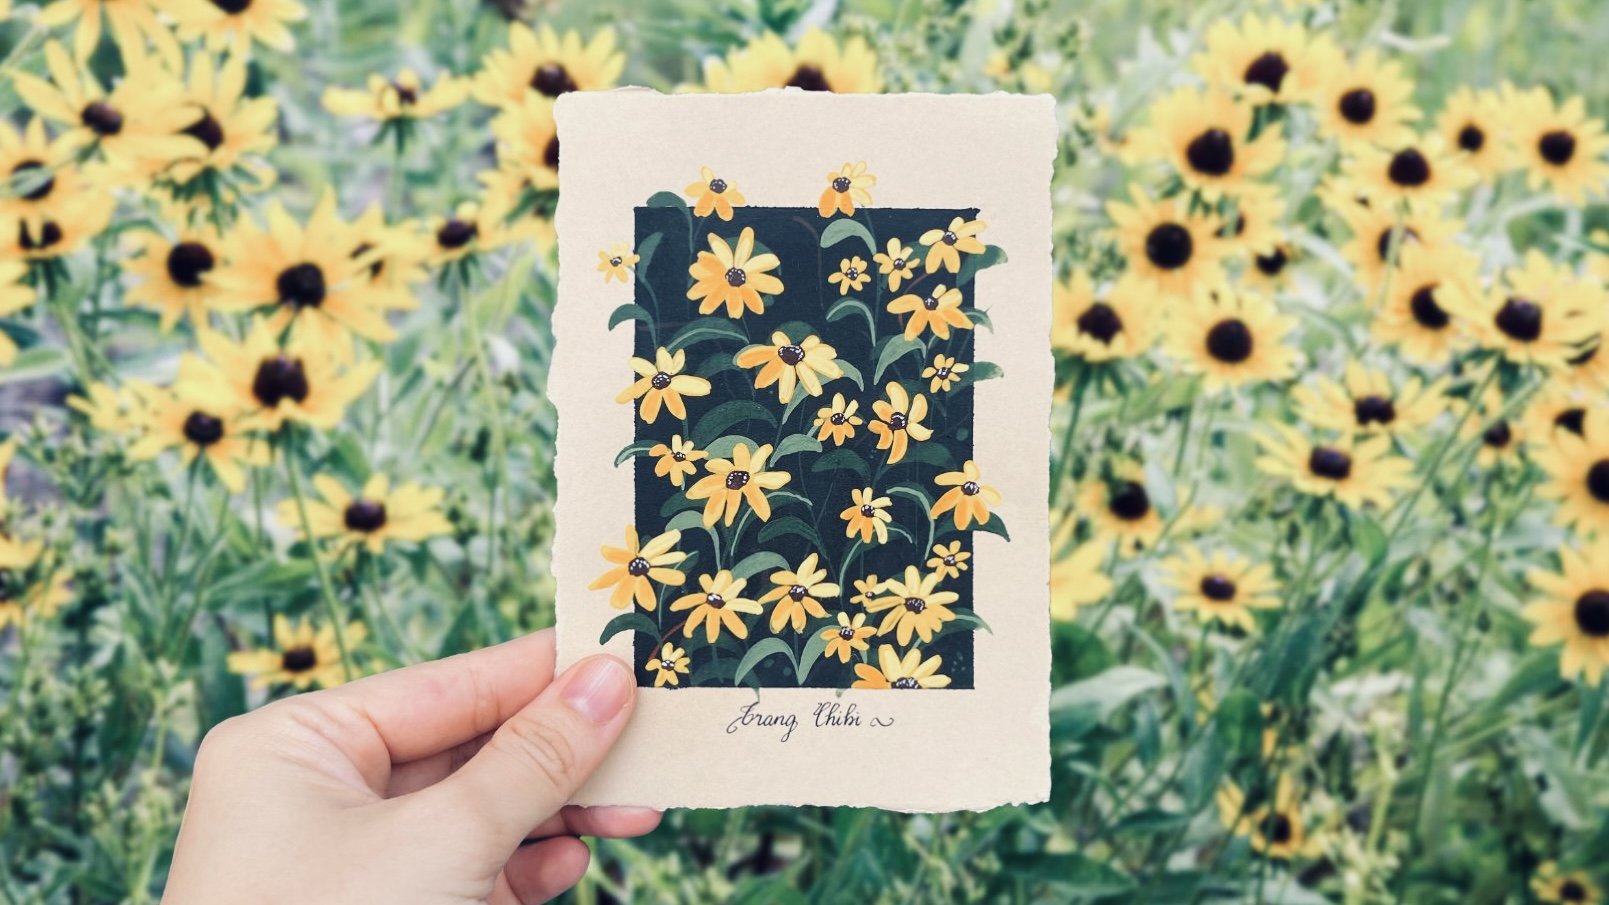
watercolor, but recently, I have fallen in love with was, and now this is my 2 million for creating this vintage
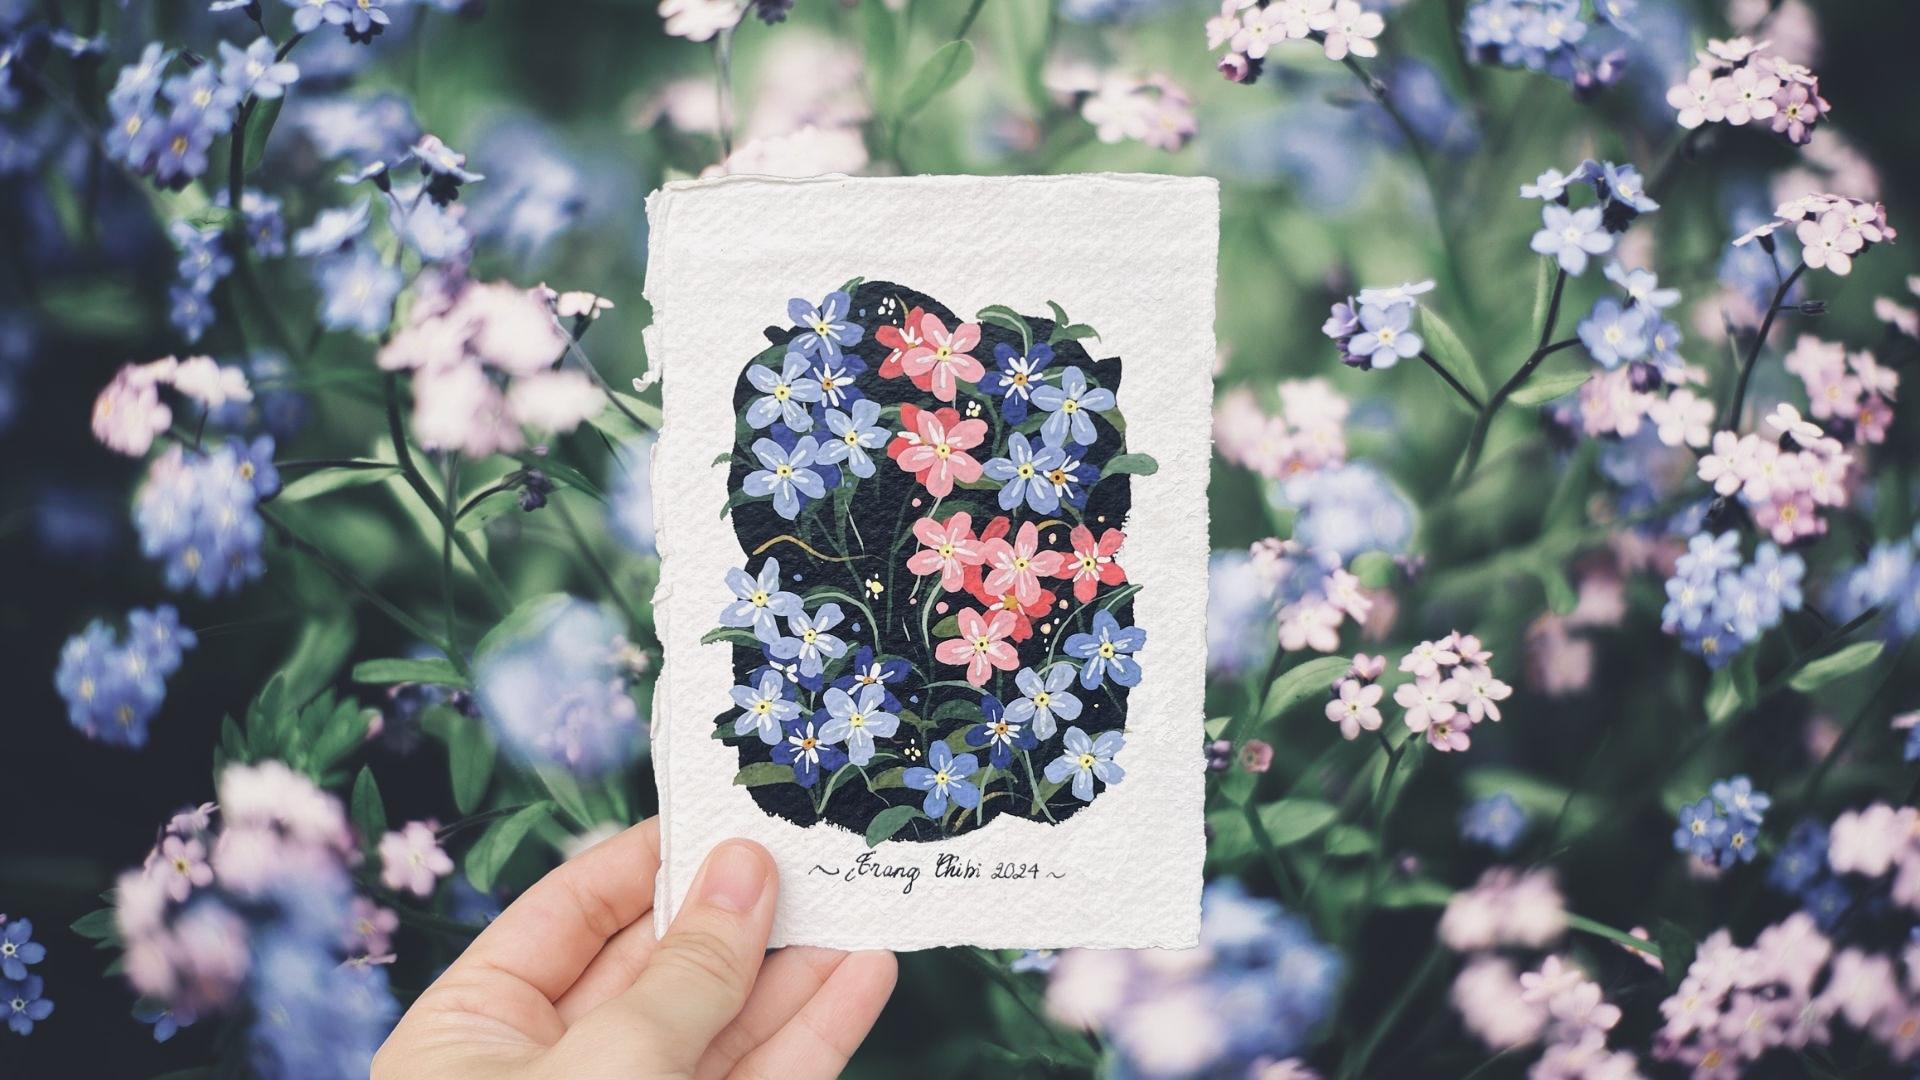
inspired floris. In this glass, we'll dive into the essential layering technique of glass to paint this charming, forget me not bloom. I will guide you through
the entire process from selecting the ray materials
to practicing leaves, background flowers and adding detail to foreground blooms. By the end of this class, you will have a beautiful
layer painting that captures the delicate
beauty of these flowers. So let's get started and bring these blooms
to life together.
2. Tools and Materials: In this first lesson, let's go over all the tones and materials we may need
to use in this class. Just a note, you don't need to have exactly similar
art supplies as I do. Feel free to use whatever
the most convenient for you. You can even try with
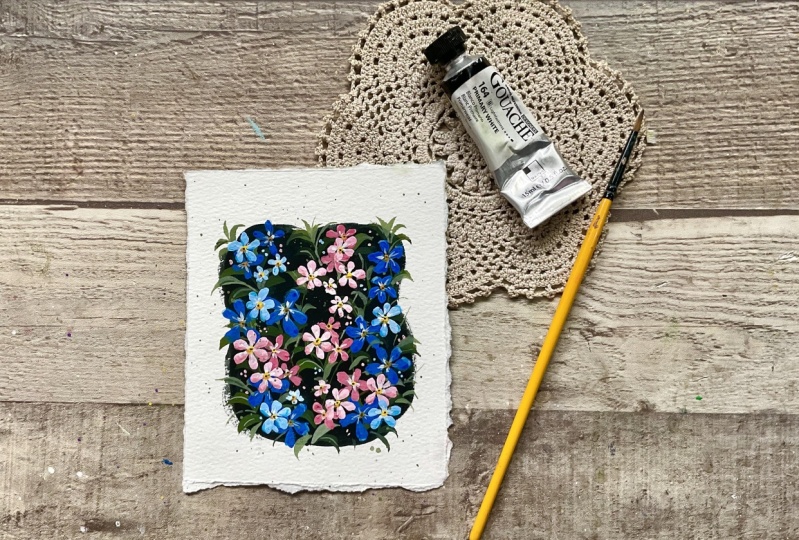
other mediums such as algic glass or pasta colors. So in order to paint with glass, we need glass pane,
we need paper. We need brushes and some other items such as because I use this
type of glass pane, I use this to pick up the pain from this box into my palette. And you see we need palette, we need water container, and we also need
a small piece of cloth in order to
clean our brushes. So let's go into
everything in details. For today's glass, I
will use this box him glass pin it has 36 colors, but we don't have
to use all of them. You can use whatever
glass pane you have at home from Visa
Newton Hobe in. Actually, him is just
a student grade. Grass pin you can purchase
spreadshep on Amazon in some art supply store
I purchased this in Vietnam and this box
is only around $10. In order to participate
in today's class project, we need some color
first, we need black. It is black. To paint the background to
paint the leaves, I will use olive
green, this color. Olive green. In order to
paint the flowers here, I will use marine hamarin
hamarin to paint this kind of purple ish flowers for this
redish flower I will use, it is oriental red, but you can use any red
you have in your supply. We also need you see some lemon yellow paint the
center of the flour. Lemon. We also need some
yellow ochre this here to paint the center
of the flowers on the background and also use the yellow ochre to mix some different shades of
green for the leaves. We need a lot of
white paint to mix the colors and also paint
some veins on the petal. So I have a separate
back for white paint, but I think I have
already run out of it. That's for the pain, you can use whatever grass pa
you have at home, you don't have to use exact
the same pin bobs as mine and you might don't have
to the exact colors that I have somewhat
similar is good enough. Second, we need some paper
for today plus project and in order to paint this type of vintage vibe I will
use adi paper. It is a handmade paper, watercolor handmade
paper from India. But in case you cannot
purchase this type of paper, you can use whatever paper you have whatever
watercolor paper. That is a tone paper, and this is just a
normal watercolor paper, I have already taught you how
to make this title on edge on my very first glass glass here on skill share
blooming with glass, materials, techniques,
and as delight. You can check that
glass out if you want to make this tile paper. Third, we need some brushes. In order to paint out
today's glass bush, I only need three brushes. So the flat brush here, I used to paint the
background I use this row brush this rail
brush to paint the petals, the flowers, and I
use this ler brush. You see to paint some stem, some veins on the leaves and you see some
veins on the petals. And finally, we need
a mixing palette. If you don't have
a mixing palette, you can use ceramic dish at your kitchen, and
that's good enough. We need some water container
to clean our brushes, and we need a small
piece of cloth so that after we clean our
brushes with the water, we can make it even cleaner
using this piece of cloth. That's on the materials and tones we may need to
use in this class. Once again, you don't have
to use the a supply as M. You can use whatever
supply you have at home to paint with S. That is
the end of this lesson, we will see you in
the next class, even practice some important
techniques for this class.
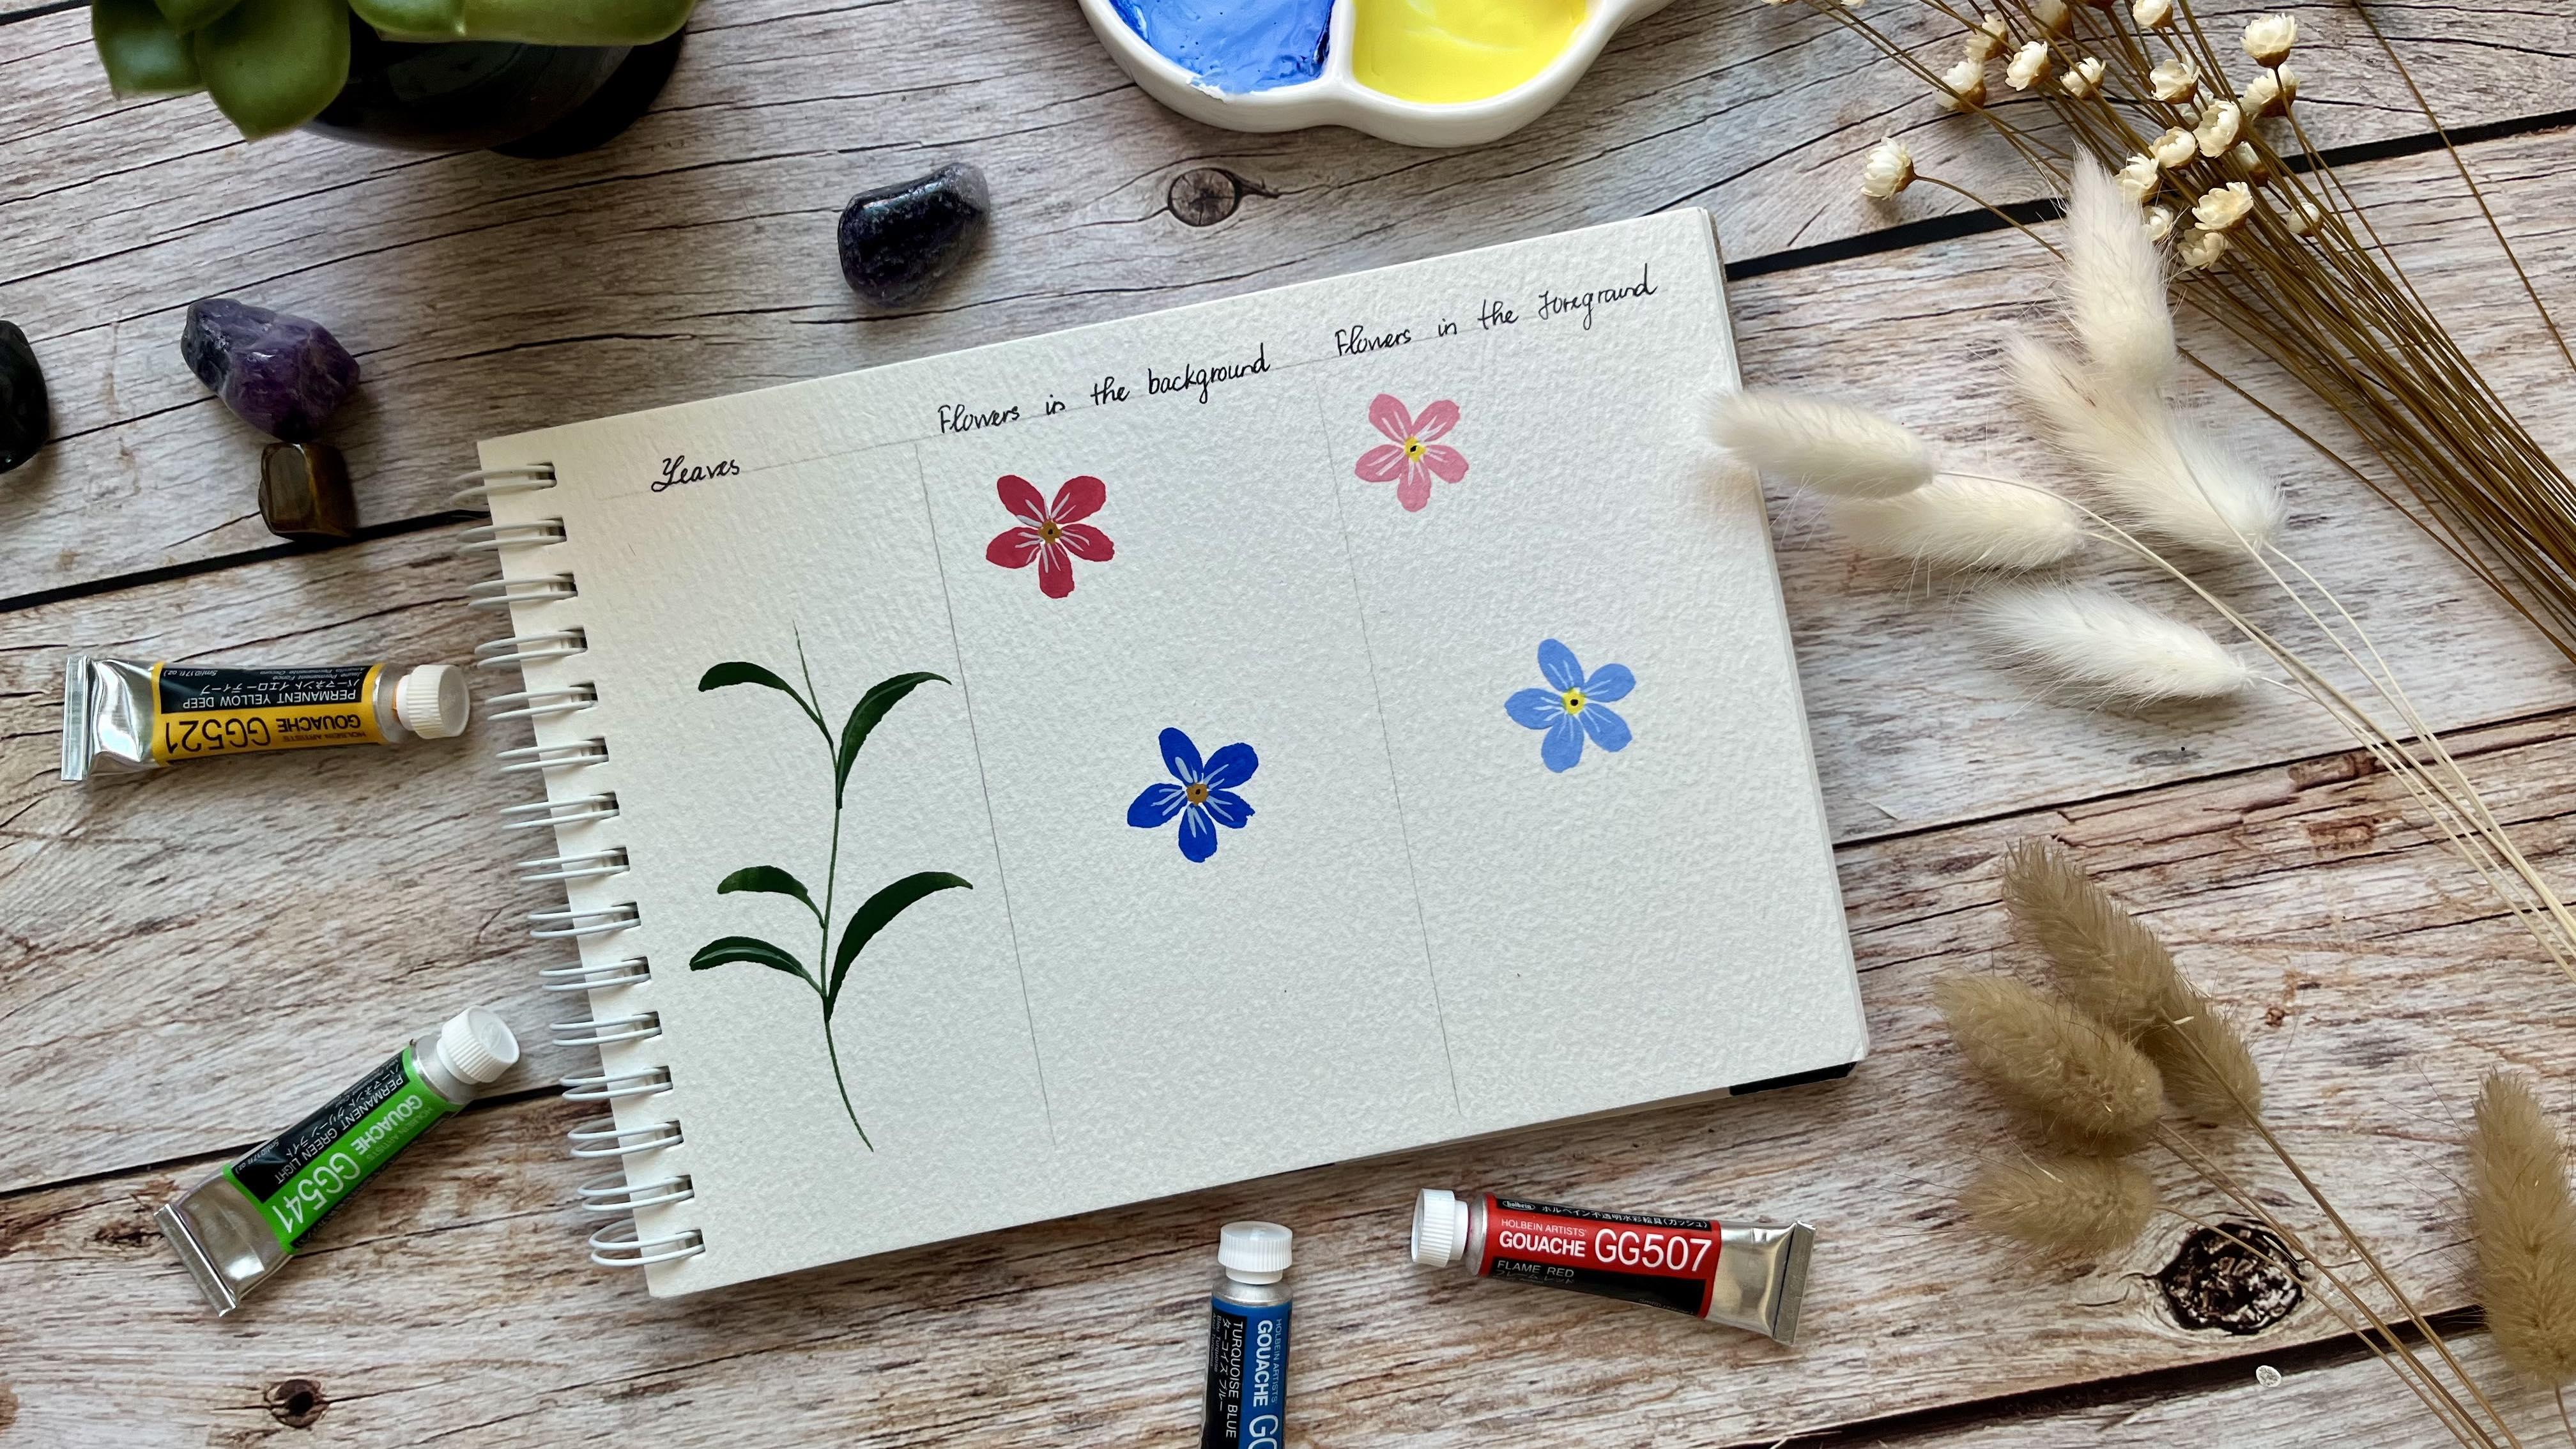
3. Technique to Paint the Leaves: In this session, you go
over some basic techniques to paint forget me not,
lease and flowers. And if you want to
practice more about the layering techniques and how to create a ton paper edge, please go ahead and check out my previous glass
blooming with glass, materials techniques,
and they see delight. In this lesson, let's break
this to paint some leaves, forget me not bloom and we will analyze the
reference photo first. As you can see, if you
google, forget me not, you can see a lot of
reference photo on the Internet and you can see
the forget me not bloom, we have a thin stem and
then some thin leaves. Let's try to depict this type of blaze on the
paper using was pane. First, I will use olive green. From hemi was to paint the leaves for our
today glass final version, but feel free to use any tight green shade that
you would like to use. In order to paint the
forget me not leaves, first, we will
paint a thin stem. I will use this liner brush. Normally, when we want
to paint some thin line, we want to paint it
from top to bottom. But you see normally the stem
will grow from bottom to the top and the thicker at the bottom and
thinner at the top. So try to make a thin line from bottom to the
top of the paper. So that is the stem. Then I will use this row brush, a small brush to
make the leaves. You don't have to try
your best to make the exact the leaves exact as
what you see on the photo. So just make a simple
version of this. Leaves the forget me not
bloom in somewhat like this. If you look at the leaves, the forget me not
loom on the photo, you can see it is very
clear that we can see the thin vein in the
center of the leaves. Let's wait for the
paint here to dry and we will come back to use
a lighter version of going to paint the thin vein
in the center of the lips. Welcome back to the glass. I just use my head wire to
make the paint to dry faster. If you look at the
reference photo, you can see the vein
here is a little bit darker than
the leaves itself. But in for today's
glass final Bj, I want use a light
shaded green to make the thin vein in the
center of the leaves. So, feel free to use
whatever version you like. For me, I prefer to use a lighter green to
paint the central vein. But in case you want
to use a darker green. If you look at this paper, look at these leaves. I use a little bit dark
green to pin the leaves. I will use a lighter shade
of green to paint the vein. If you want to paint the
leaves a little bit lighter, you can use a darker version, a wing to paint the
center of the leaves. I am making a lighter
version green here and use this brush to paint
the central vein of the leaf. I far today glass final project, I don't paint the vein on the leaves sum of the leaves just here and
there because in reality, if you look at the photo, we don't see all the central
veins on the leaves. That's on the techniques we
may need to use to paint the leaves of the
forget me not loom. Let's come back in our next
lesson and in that lesson, we will learn how
to paint flowers in the background of this painting of today's final glass project.
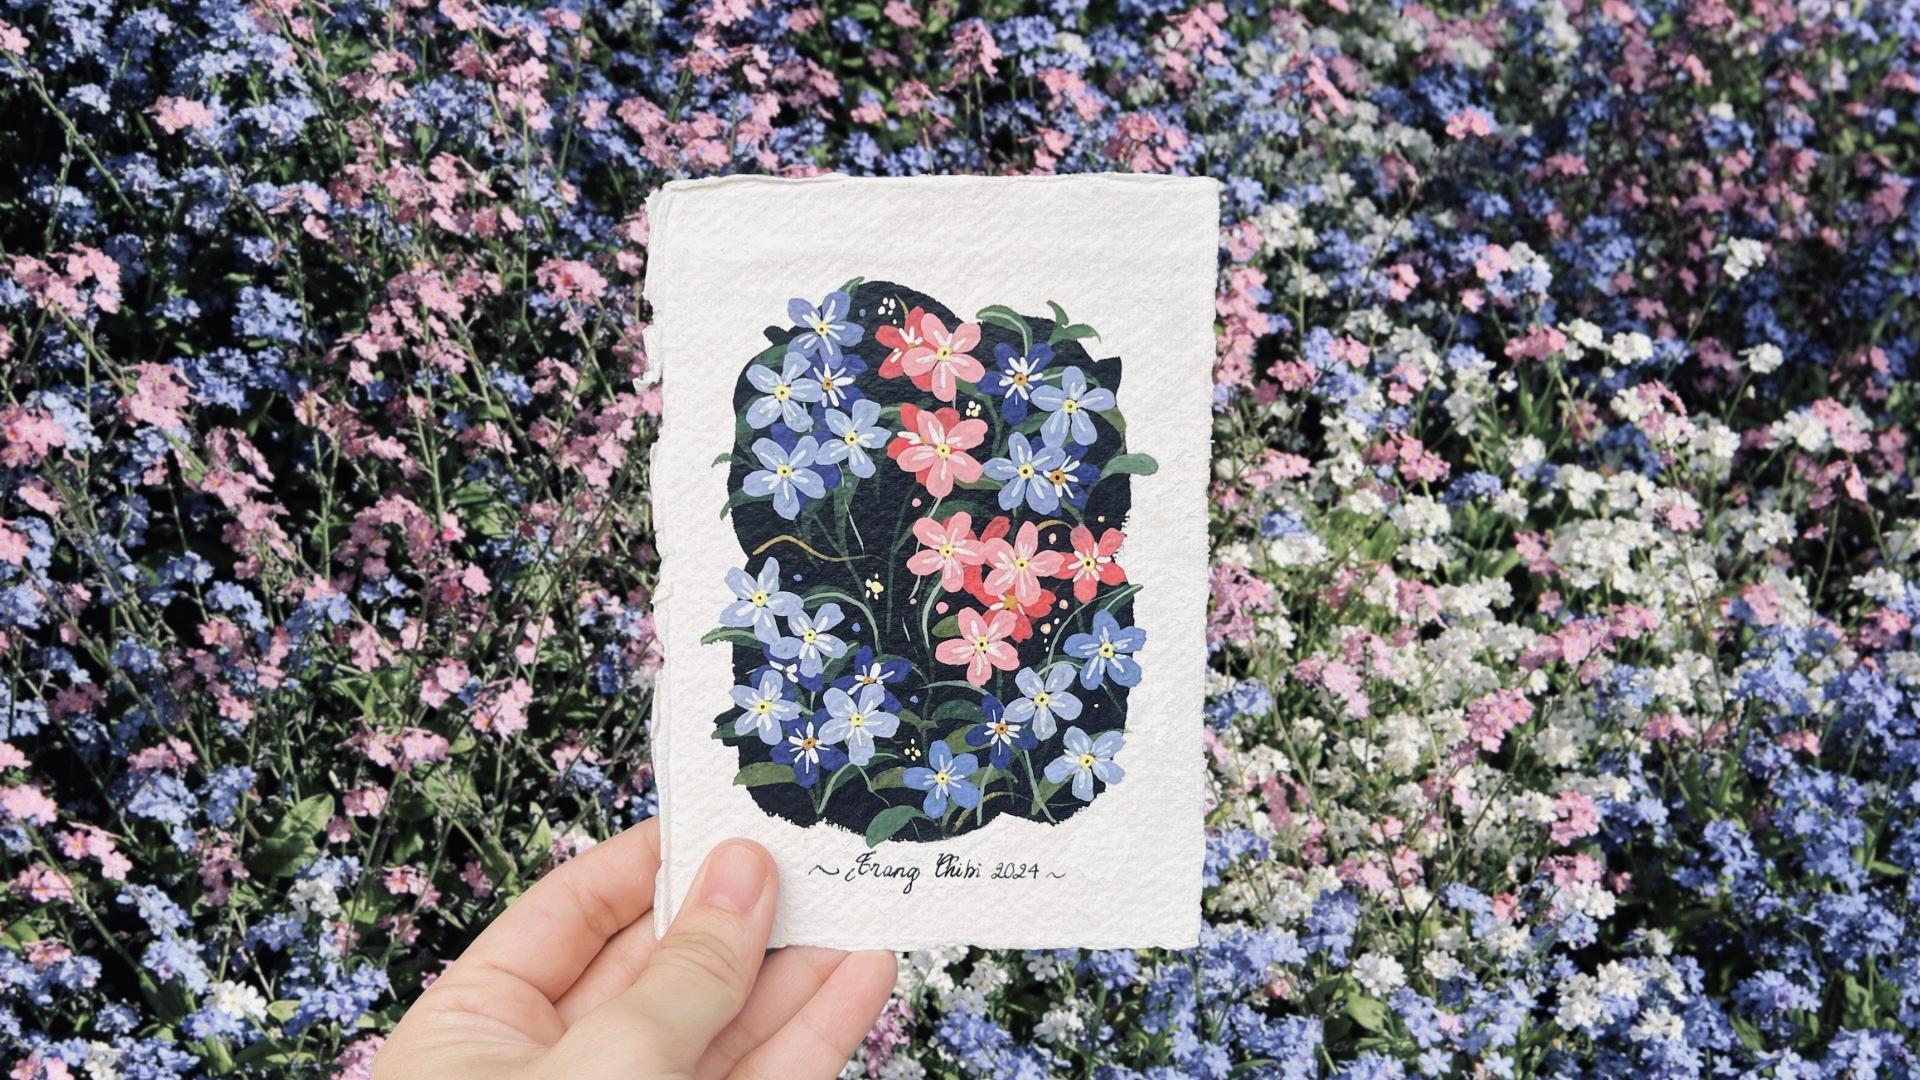
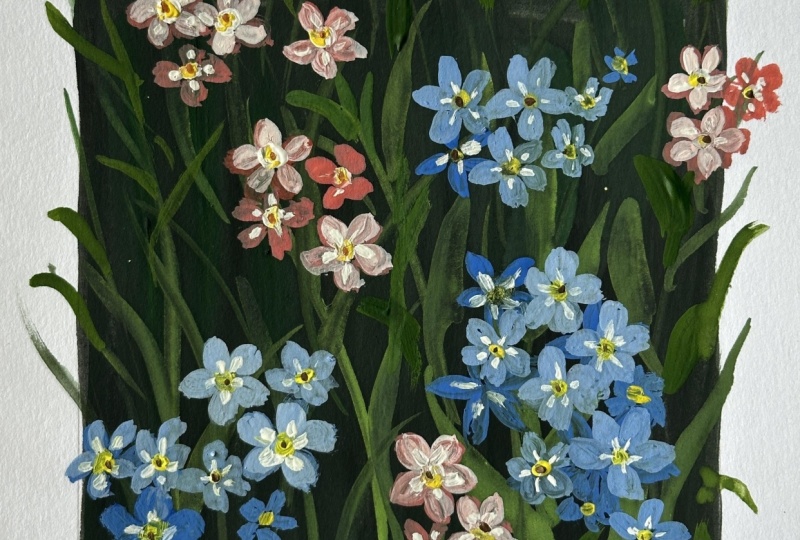
4. Technique to Paint Flowers in the Background: U Welcome back to the glass and here is the reference photo of today's class final Bjet. As you can see in this photo, we have the forget me not
flowers in a blue shade and in the pink
shade and we have the flowers on the background
and the foreground. For this class,
practice to paint the flowers in the background first and in the next class, we practice to paint the
flowers in the foreground. So in order to paint the flowers for both flowers in the background
and in the forground I will use this small raw
brush and I will paint the flowers in pink shade first and flowers in
blue shade later. So in order to paint the pink
flowers in the background, I will create a you see this red color
shade from the trip, even we want to place some
dark flower in the background. It is still too dark. I will ask some white
here to make it lighter. But not too light
because we need to even lighter shade of pink to paint the flowers
in the foreground. In order to paint the
forget me not flower we will make it fine petal. You don't have to try to make the petals evenly because
you see in natural, we to see a perfect flowers Yeah. And you see we leave the gap in the
center of the flowers. Next, I will make the
wi with enhamarinT make the flowers in
the blue sheade not too light because we use an even lighter
version of this blue to paint the flowers
in the foreground. If you use a bigger
brush than mine, you don't have to just one shop. That's enough to make the pedal, but I am using a
relatively small brush. Let's see, I need
to several shops in order to paint the pedal. And that is the petals of the
flowers in the background. If you look at the
reference photo, you see we still need some white vein and
some yellow central. Let's wait for the
paint to dry before painting the nice layer of the
flowers in the background. Welcome back to the lesson. Let's pin some white vein
of the flower petal. For flowers in the background, instead of using the white
paint straight from the tip, we will use a grayer
version of this. By this, I mean, it
is black and I will add just a little bit of
black into the i here. I think even this
is a little bit too gray I think that's okay. Big is just for
practice in order to paint in our
final glass project, I will be more picky about
the shade of colors. So maybe add some vein here. Here you see we are painting
on the white paper, you cannot see the vein I mean, the vein in the
edge of the petal. You don't have to try to
make it perfect here. Just some little veins of the petals and
that's good enough because the paint is a
little bit too thin, so I don't have to wait it to dry before painting the
center of the flower. For center of the flowers
in the background, I will use yellow ochre. Instead of making
a perfect circle, you see, I just dot. I will just at some dots in
the center of the flowers. And if you look at
the reference photo, you see the only thing left from the flowers is we need to paint the very center of the
flowers in dark brow. So now I use the hat dryer to make this paint dry so that before painting the
center of the flowers. Well, come back to the glass and now the pen is ready to dry and we need to paint the center of the flowers in
the background. I forgot to mention I
forgot to mention in the materials lesson
that we need some brow. I think it is the offsie
name of this color is Bn Amber to paint the
center of the flower here. So I do believe that
almost almost all of the boxes pin a bras pen you can find this dark brown or if you don't have
this dark brown, and I see some pain bulbs
you only have a bit in ok this kind of a
little bit of red brows. You just mix it with
black and you can create this tin dark brown and just put it in the center of the
flour and that's on picnics, we need to use to paint the
flowers in the background. Let's meet again
in our next lesson and practice to paint the
flowers in the foreground.
5. Technique to Paint Flowers in the Foreground: Hello everyone.
Let's come back to our glass painting
for beginners class. In today's class, let's paint forget me not
bloom together. In the previous lessons, we have practice to
paint the leaves, the flowers in the background, and now let's practice to paint the flowers in the foreground. The flowers in the foreground is just a lighter
version of the flower in the background in order to make the lighter
version of the paint, I mean some more white
on the pain here. I add more why here
and more white here. I use add more why here
because you need to use the white shed from the tube to paint the vein on the battle
of the flower this time. Don't worry because I
have another white pain, but I just want to utilize
the final drop a bit. First let's practice to paint the pink flower in
the foreground. I I will add more white
into the red color to create a light shade of
pink similar technique, we paint a fine petal flowers. Similarly, we will add
more white paint into the unamarin blue here in order to create
a lighter shade, a blue to paint the
flowers in the foreground. Now, let's wait for the
paint to dry before coming back to paint some details on the flowers in
the foreground. I have just used a hair dryer to accelerate the drying
process of the pain. Now let's paint some veins on the petals of the flowers
in the foreground. This time we will use the
y shade from the tip. Again, we will use the
lilac brush to paint some white vein on the petal. We don't have to make
the vein perfect. We don't have to
try to make it too straight or equal
with each other. Just some little thin vein. Then this time, even if this lemon yellow in the
center of the flour. I think the brush
here is not clean. So it this lemon yellow
is a little bit darker, but it's not a big problem. So use this row brush to go with some dark in
the center of the flour. And now's wait for the
paint to dry again before painting the.in the
center of the flower center. Welcome back, and now the
paint is already dry. I mean, it's the
same the same brow, the same dark brow to being
the center of the flower. If you are even more
careful than me, you can use a darker version of this dark brown to paint the
center of the flowers in the background and use
a lighter version of this dark brown to paint the center of the flower
in the foreground. But for me, using the same
version of the brow is enough. That's on the techniques
we need to master before painting today's
glass final Bje see you in the next lesson, we even paint the final
class Bje together.
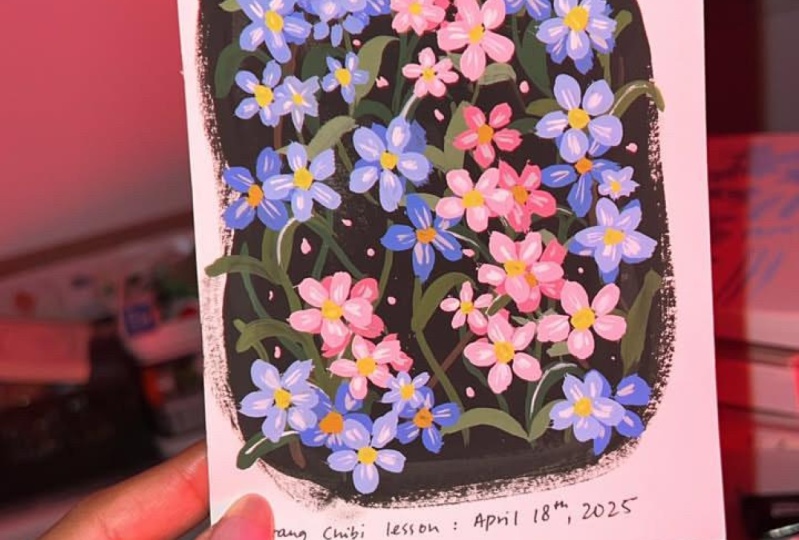
6. Final Project: Create a Light Sketch: I hope you enjoy the glass sofa. And now let's dive into the final project and paint this lovely forget me
not bloom together. So as you can see, I have finished this piece
of painting before, so now we can just copy
it into our paper. But actually, what I
often do when I see this photo and before transferring everything
on the paper, what I do is to create a sketch. The final painting is in pencil. So first, I will want to
sketch the background. I will create a
dark background for this painting and I will make a version of
this background. But you can also use a square square shape or a circle shape or
shape, everything. But before going straight
into painting bocees, I will create a
pencil sketch first. So you see here we have
a big leaf here, leave. What I'm doing is I try to capture to capture the flowers, the blooms on the photo, but in my own sense,
my own version. And here we have some
blue flower blue flower. You see, in this color, there's no flowers on
this color of this photo, but I it will be a little
bit boring with that, I just several small on
this color on this color. Here is blue flower, blue flower. Put some flour. You see you paint the
dug on this paper, the pencil sketch here when
we cover and we don't see it, but I just want to
create this sketch so that I can visualize the final
version of the painting. I often utilize the same piece of paper for the final
painting to create the sketch. But you may want to create the thumbnail sketch on another piece of
paper or sketchbook. That is your own decision. But for me, this
sketch is good enough and you will start to paint the background in this lesson.
7. Final Project - Paint the Background: Hello, everyone. Welcome back to our Glass painting
for Big North class. And in this class,
in this lesson, let's paint the background
of the final project. In order to paint the
background, I mean, it's the black here
and mix it with green. Try to use the green
without any white in it, I will mix it with black to create a black background but with a little hint of green, which is similar to what we can see in
the reference photo. You can try to cover the
pencil, the pencil marker. It's not too difficult
thing to do. Again, for this background, we don't have to try
to make it perfect. Actually, the more
imperfect it is the better. I We have just finished painting the
background for this painting, and now we will need to
wait for dark background to dry before painting the lease out today glass final Bjeck.
8. 8. Final Project - Paint the Leaves: Hello, everyone.
Welcome back to our Was painting for beginner glass. And as you can see, the palette here is a little
bit too crowded. So I will use another palette to make the green paint paint the leaf because you can just use this live green olive green, but I want to CV some some different green
on the on the background. I mean, I put the yellow green here
and some yellow ochre. And I will mix different
different ratio olive green and yellow ochre to create
some variety in the on the leaves of
our final paintings. So for the first
round of the leaves, I will just this poor olive green from the tip from the
actually from the boxes here. I will try to make the line
from bottom to the top. And if you look at the
reference photo here, you can see we have
some brow stem. I will also use the brow here to ask some more
dynamic on the pending. That's enough enough for the
first round and then I renew this this going to make
some leaves just some leave because the olive shade from the bobs is a little
bit too dark for me, so I just want to use it to paint some leaves
on the background. You can see when I use the
hat wil to dry this painting, I made a mistake of making
a water drop onto this. So now the background
is not perfect, but as I mentioned before, we need to make an effort to make our painting
not perfect. Now, we add more yellow
ochre into this green to make a different shade
of green to continue to add some more leaves
on this painting. Actually, I want to use
this shade of wind to make some more stems
on this painting. The messy, it is the better. What's more brown. To make it more
natural, you see, we create the leaves
on the top of the stem smaller than the leaves on
the bottom of the stem. I think it's enough for the
leaves on the background, and now I will need
to wait for it to dry before painting the veins on
the center of the flowers. As I want to ask some
leaves on the foreground. Welcome back to the glass. Again, I have just
used my head wire to accelerate the drying
process of the paint here. Now, let's pin
some thin veins on some leaves and I will introduce the Y into
this green nature. I will use this light to pin just veins some
veins on the leaves. We don't have to pin
the vein on every leaf. Just some here and there. And also, I use the
same light shadow green to paint some
lease on the foreground. I ask some small leaves to create the dynamic
of the painting. And I think that's enough for the leaves of
this final painting. Now let's wait for everything
to dry before painting the flowers on top of
this background. Uh,
9. Final Project - Paint the Background Flowers: Welcome back to the glass, and now let's pin the flowers on the ground on
top of the leaves. And for this, I will
paint the blue flower first and paint the
pink flowers later. If you look at the painting I created before
before this class, I don't like I feel that flow the flowers on the background is a
little bit too dark. So this time, I will
make a lighter version. I believe I use the shade from the antimarin pen
shade from the box. So we make we make
some flour here. You see on this color, there's no flowers on
the reference photo, but it is a little
bit boring that way. So I mean soak
with some flowers. You don't have to follow the reference photo exactly and you don't have to
follow me exactly. Just make some random
flower here and there. Try to use the was in
creamy consistency because if the waste is too
thin or too dry, it cannot cover everything. But in case it didn't
cover the previous layer. We can just wait for it to dry before adding another
layer on top of it. But this is the flour
on the background, so it's not too important that it have to cover
the background. And I think that's enough for blue flowers
on the background, now we will move to paint some pink flowers
on the background. So this thing here is a
little bit too light. So I will add more red
to make it darker. But I want to make it lighter than the flowers
on the background, my vio painting because I feel my first version
is be too dark. So this time, I will make
sure it is lighter. First. For this flower I want to
make it smaller a little bit. Another smaller flower here. I think that's enough
flowers on the background. Now, let's wait for the
paint to dry before painting another layer of
flowers on top of this
10. Final Project - Painting the Foreground Flowers: Welcome back to the glass. And now let's create another let's pin another layer of flowers on top of this, the flowers on the foreground. So let's try if I can squeeze
any white pain from this. It's too difficult now, so I mean another
another pain for this? I think I think this
pain is a little bit. So So I think what I mean, I mean, I mean I put I mean put the wet pen here onto onto this. I think this shade this
pink is good enough. Because the brush is already dirty because
of this, this time, I will paint the I will
pin the pink flower first. I want to make it even now it is normal. I even lighter, so I add more we I think this shade
is good enough. This time, I want to
make sure the pain is thick enough to
cover the background because it is already the final layer of flour and I want to make
it really bright. I think it has six petal. But I don't think it
is a big problem. Just assume there's some
special flower in this bloom. I want to make a small And I think that's enough for
the thin flour. Now, let's go to see
wherever we can. I think it's okay. We can we can use
this mitchell pi I think it is I want to
make it even lighter. I want to make some
smaller flour. I think that is enough
flowers for our paintings. Actually, I do feel
that I do feel that I have a pain
for this version, I have a pain too many flowers. But it's not problem.
Every paintings every painting is not the same. Now we will need to wait for this layer to dry
before coming back to paint the veins and the
center of the flowers.
11. Final Project - Final Details: Welcome back to the glass. Now let's pin some
whites on the petals. And first, we will paint some bins on the
flour on the back ww. So for this, use this black to add it onto the white pin here. I think that's not
enough white, I mean, I mean, use this
gray color to paint the Now I do feel that it is a
little bit too light. We need some veins on the
on the pin flower here. Now, we need to ask some while pain on the petals of
the flower on the foreground. Now, I do feel that this painting is a
little bit too dark, because once we put the
yellow centre of the flower, it will be brighter. I forgot to add a vein here. So because the vein is too thin, we don't have to
wait for it to dry, I can go ahead to add
the central of the Now, we move to lemon yellow to paint the
center of the flour. We use lemon yellow to
paint the center of flour. And I do feel that
this pin is not enough to add a little bit
more white here. I do feel that the I do feel that the pain is a
little bit too thin here, so I want to go another route. I forgot to add. I think we almost
finished. Now we wait. We need to wait the centre
of the flower to dry before painting the.in
the middle of it. Let's come back. Now we need to add the smaller brow.in
the centre of the flower. And I via I forgot to add the uro sensual. I will go awhile and
hopefully when I come back, that sentire is already dry. Now, I mean, it's I mean, it was a pink and, you know, to wear some smaller.in
the background to make the feeling there's something
behind behind the flowers. I think this is good enough. We forgot to put the
flow here over there, but over painting
is good enough now, so I will make here show here. And so we have just finished. Forget me not painting, and I hope you enjoy the class so far and
let's see each other in our final lesson where
I will share with you some more tips and tricks for
glass painting in general.
12. Final Thoughts: That wraps up today's
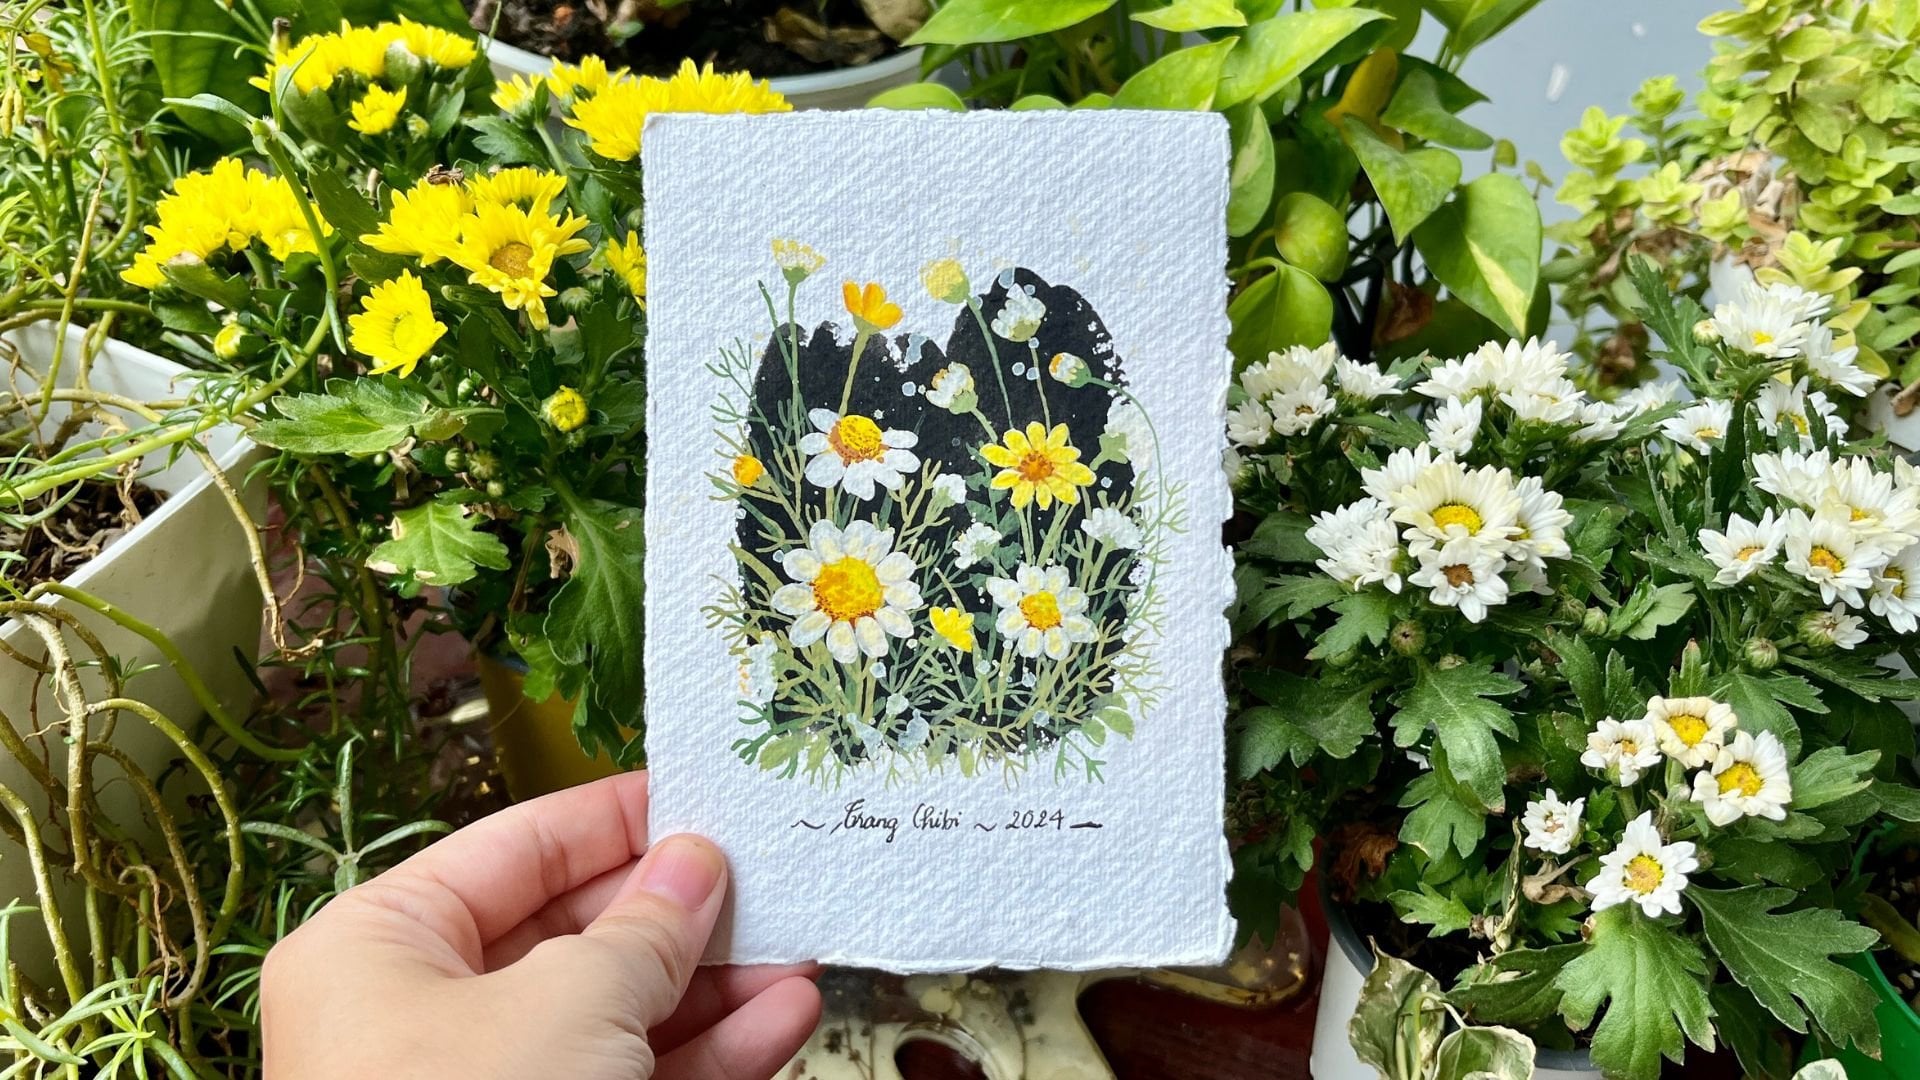
glass. I hope you enjoy it. I also added in
the Bjet session, another version of my painting
a forget me not flower, and you can try to
paint it yourself. And if you find this
glass headphone, probably check out my
other skill share glass and give me a follow, and I hope to see you
in our next glass.
 Trang Chibi ❤️, Watercolor and Gouache Artist