Transcripts
1. Class Introduction: Hello, everyone. I am t to
be an artist from Vietnam. I started my art journey
with watercolor. But recently, I have
fallen in love with wash, and now it is my go to medium to paint flowers and landscapes. In today's glass, we'll dive into the materials
and techniques, you need to create this stunning vinted
five daisy paintings. This glass is perfect
for absolute ages, but it is already
doubled in wash. I hope it offers you a fresh perspective and helps
you to live up your skills. By the end of this glass, even feel confident working with wash and ready to
bloom as an artist. And remember, aces aren't
just for your garden, they're about to make a
home in your sketchbook. So grab your, your brushes, and let's get started. I can't wait to paint with you.
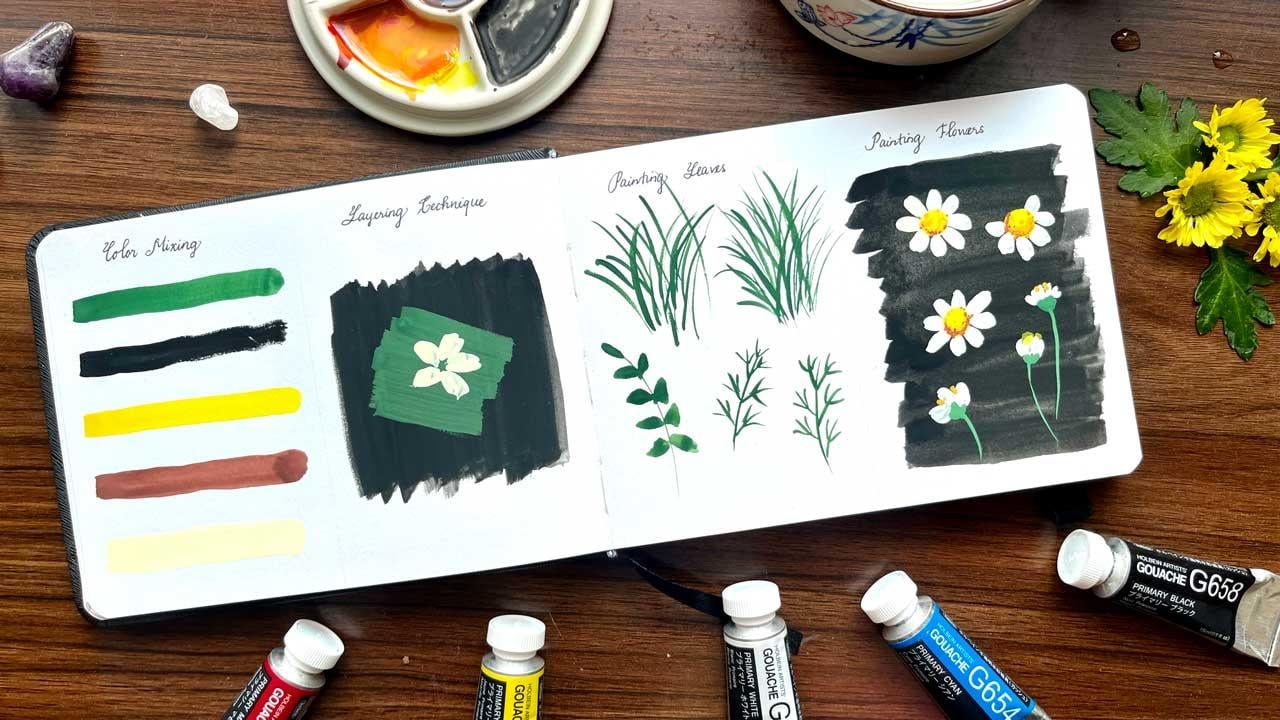
2. Gouache Painting Materials: Hi, everyone. Welcome
to the first lesson of Blooming Wah or wash finding
for beginners glass. And in this lesson, I will talk about on
the materials we may need to participate
in this glass. In order to wash, we need wash pain, we need paper. We need brushes. We need the container
and mixing palette, and we may also need
a small piece of cloth in order to
clean our brushes. Let's go into
everything in detail. For wash in today's glass, I use whole in a primary color mixing set which only includes five
primary colors, which is Ma sion, white, yellow and black. It also have a mixing
guy lies so we can use to mix every color we may
need to use in we sh pending. In our next lesson, I will teach you how to
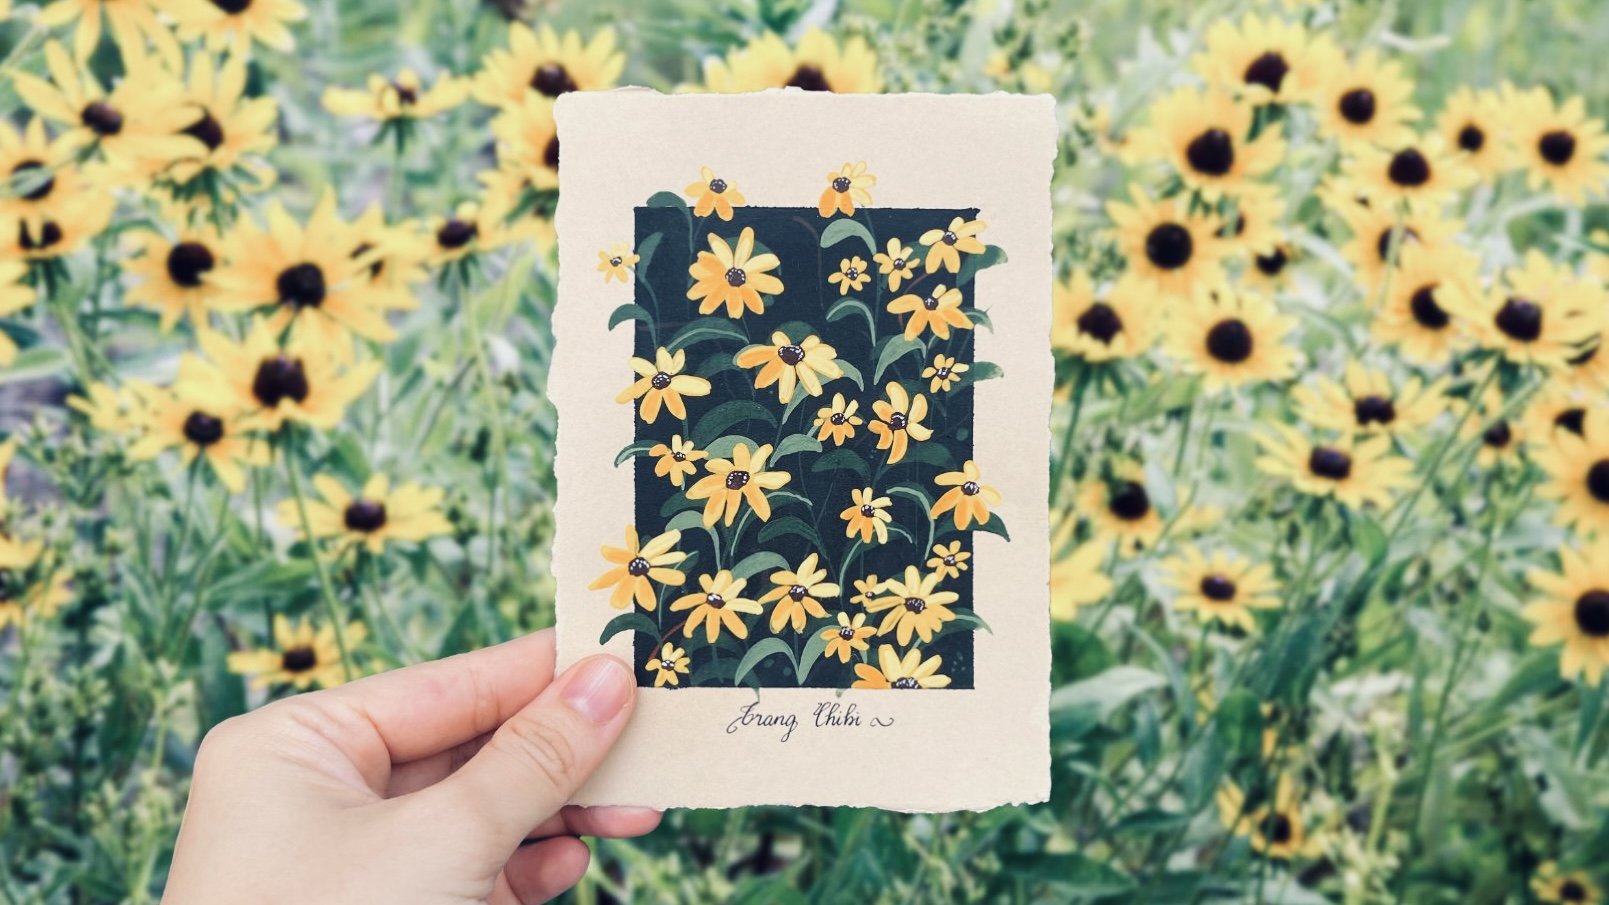
mix different colors for our two days glass back. For paper. In our today's glass, we will paint this bit
ccs with vintage f, and I paint it on idy paper. In order to pain in order to
this bit in today's glass b, we can use Hardy paper. Which is very easy to
purchase in some countries, for example, in the
UK or in the US. Not very easy to buy in
some other countries, for example, like in Vietnam, it's not very easy to purchase, but it is handmade 100% cotton,
what the color of paper. It is made from India. If you don't have a paper, we can try a different
type of handmade paper. You can use torn paper. This type of paper, we have
some wooden pattern on it. You can just normal
watercolor paper. I can teach you how to make
this t torn edges so that we can create a vintage i from
a normal watercolor paper. You can also paint ball our glass balls on some
watercolor sketch book. I will use this sketchbook for practicing some techniques
for this glass. It is 100% cotton
watercolor sketch book. For today's glass,
we don't have to use 100% cotton
watercolor papers. But for more advanced
wash technique, for example, on wet technique, it may be helpful to use 100% cotton paper instead of just normal watercolor paper. We need brushes
for today's glass. I use only three brushes. This flat brush. I mean used
to paint the back round. This lila brush, I
mean used to paint a thin flowers and leaves. And this small rounded brush, I been used to
paint the flowers. We need to a water container, you can use anything. I just need to be able to hold the water and a mixing palette. I tend to use, I prefer to use cera me palette instead
of a plastic palette, and we need to use a small piece of cloth
because for example, when we clean brush
is using water, it may not be clean enough, so we may need to tough
it again on the cloth. And that's on for materials, we will need to use in this
class in the next lesson, I will teach you how to mix the colors for our
today's glass for sake.
3. Practice Mixing Colors: Hello, everyone. C B is here and welcome back to our wash for beginners glass. In this glass, I will
teach you how to mix different colors for our
two day glass final bj. There are only five
colors in this bca. The first one is the black, but with a little of green. The second one is green. Actually, there are different
tones of green here. We gen first using
more dark green and then gradually introduce more
lighter shades of green. We need to use yellow. I use straight yellow
from the trip for some flowers and for
some central flowers. We need to use white and very lice yellow
colors for some flower petals. I first The green
colors because we need green to make this type of brown because it has
some hints of green on it. So in order to mix
the green color, we need to use cyan and yellow. And I will put it
on the palette. I will make a lot of
it because we will use a lot of green for today's
practice and glass pose. Let's try missing some color. I think the ratio about one s, one yellow is you see the green here is a
little bit too vibrant. I, the yellow, and the son. In order to make the colored, I been at just a little. You see, when we introduce
Mini into our mix, we even have d. The green is more green that is my favorite
my favorite green. In order to paint our
today's glass final base, we need to different
shades of green. In order to make the color, we add black and to
make the color white. So So for now, I mean just want
to I just want to tack this color on
our sketch book. One thing we need to know is we need to have a green
consistency to pain with wash. This is the primary green we
use for today's glass bj. The second the second color is the black color for the back. I put the black here
on the palette. And I I just use the dirty brush to
introduce some hint of green into this back row and
even use this black with a little hint of a green to paint the back row of
our filo project today. The next color we need to use is the yellow for the center of the flower and
for some flower, I just the yellow color
straight from the tree. You see it is very
difficult to clean the bruh with the so we need to a piece a cloth to make
sure our brush is clean. This is the yellow color for sun sunflower petals and
for central sunflower. We will need to use now I bet how to mix the brown colors. In order to make
brown color I will mix and a bit of style. Let's see what we
can guess here. If is the brown colors, and we've used to paint some shadow on the
central of the flower. And finally, we need to use some just a little hint of yellow to in
some flower petals. That is white color. And we mix it with just a
little bit of yellow here. I need to use with a container I only make a part of this white color for this
part it's still white. Need white to make some
highlights on the flower. This is the creamy light yellow, we need to use to paint
the flower petals. And that cot to use
for today's glass b. Of course, with five
primary colors we mix a lot of different
colors and I may scan this color mixing guidance so that we can download and write these
mixing colors at home. That's for this glass about color mixing in the next lesson
about the wing technique, which is the main wash
binding technique we need to use in this glass. Mm.
4. Gouache Layering Technique: Hello, everyone. Welcome back to our wash for Beginners
painting plus. In this lesson, I will teach you about the
layering technique, which is the primary technique. Actually, it's the
only technique we need to use for our
today's glass philo. In order to this
layering technique successfully The main thing we need to know is
we need to have the right consistencies,
the wash color. This is the pain
from our prev class, a prev lesson about
color mixing. You see, in order to do the layering
technique successfully, we need to have the
prime consistency. It is not the pain
from the trip. The pain from the
trip is a little bit dry and we need to put it with one or two drops of water in order to make this
grimy consistency. And normally for wash painting, we can do the layering
technique from duck to light or
from lie to duck. But in order to practice
a sign I will teach you how to do the layering
technique from duck to lie. And we will start with the
almost black like row. This is our first
layer in order to do the layering technique
successfully with wash binding, we will need to wait
for this layer to fully dry be layering
different color onto it. Normally, we don't have to
wait a long time for wash to a head for this exercise, I will wait for
it to dry largely and we may only need 15 minutes. Hello, everyone. Welcome
back to our wash for beginners glass and we've continue our layering technique. You see the background
here is not fully dry. It is still a little
bit wet here, but we just need to
avoid this area. I've use the green color to make a new layer
on top of this color. In order to successfully
do the layering technique, again need to have some
of green consistency. One thing to remember. For the first layer, we can do a lot of stops to
paint the back grow. But in order to do the
second or third layer, we shouldn't use a lot of shop. I mean, we just need to
use several shops because we may reactivate the
pain under this layer. So that is the second layer, and now we will again wait
a little bit for the paint to dry before pending a
different layer on top of this. Let's come back.
Let's come back and you see it is still a
little bit wet here, but it's not a big
issue because we can just make another
layer on this part. So you see the wash here is a
little bit too dry for now. So before making
a layer on this, I make it wet to create
a greening consistency, it shouldn't be too wet
because if it is too wet, it's not opaque enough to create an opaque layer on
this back grow. Let's try to paint a
small flower here. As you can see in this case, and in some other case, you see when we paint this
flower on this dark role, the color here is
not opaque enough. So if we run into this issue, let's wait until
this layer is dry and will put another layer of the same color onto this layer. But that's enough for the
layering technique exercise, and I will stop this lesson
here and in the next lesson, I will teach you how
to be different t of bless we may use for
our final glass bj.
5. Practice Painting Leaves: Hello, everyone. Shh,
and welcome back to our wash pending
for beginners glass. In this lesson, we practiced
to be different ty lease. We will use for this final. The first ty practiced
to pain is grass. You can use a brush
or a routed brush. I will try the
routed brush first, and then I will try the brush to let you see the differences
between two ties a brush. For this is the size, I will just the green color
we have already mixed. For brush, In order to give grass. Instead of using the
shop from one direction, we will make a
different direction. I tend to make two
or three shocks from the bottom to the top and then one shock from
the top to bottom. The re is one, two, two. If you want to make the
rush leave thinner, it beneath the lila brush. So you can create very thin
lis in leaves in this brush. And if you want to make the
shop a little bit loser, you can hold the brush at the at the bottom of the handle. So if you hold it as you riding, you can easily control the
direction of the shop, but if you hold it at the end of the handle because you
cannot control anything, the shop will be
random and organic. The second type of blaze in but this two pain is this
type of ble here. In order to pin this type
of b we first create a thin line in the middle. You can use the
brush or the brush, and then we will this
shop is is a leaf. A So fi is some lips. I've been paint it on the
back row this this painting. And finally, to paint
this tight basic lips. So you can use both the routed brush or
the brush depending on whether you really want the thin lies or not so thin lie is also
acceptable for you. So I try to paint
with the brush first. So maybe can pain
something like base. Or you can use the routed rust. For the routed brush, it is more difficult to
create the super thin lie. So you can use you
can use brush, wiggle brush this routed brush depending on what type of
blase you want to cate. That's on for the
lips painting lesson. And in the next lesson, you to paint different
ty basic flowers.
6. Practice Painting Flowers: A Hello, everyone. Chi is here and welcome back to our wash painting
for beginners glass. In this lesson, we
will practice to paint some daisy flowers. Because generally,
the daisy flower is in white or
light yellow color. Before painting flowers, I will create a dark
background first. So I can in this flaruh and is the black paint with a
little hint of green we have already mixed in
missing color lesson. And I will create
a dark back will for us to practice
to paint flower. You see here we are
running out pain, so the color here is
a little bit thin. In order to paint
this back will later, I add more color. But for now for this
practicing is the side, it's okay to just
this left over pain that's on for the back ground. Now, we will need to wait
for this back ground to dry before this to paint
some lazy flowers. Hello, everyone. Welcome back to our wash painting
for beginners glass. As you can see, the background
here is already dry. So now eve this to pain different see flowers
onto this background. As you can see, the background
here is not very united. There are some area
which is too light. This is what happened when
the pain is too thin. In our final project, make sure that we We mix pain. It is grimy enough
and pique enough. But for this exercise, this background is enough. First, I will teach you how to paint this front facing flowers. So I use the color here. It is dry a little bit. I've asked more water to
create the creamy consistency. What I'm doing is the
first layer I paint on the flower in white
are light, yellow. And in the second layer, I I put the central flower, which is yellow, and then we some high and also some
shadow in the the flower. Some people start to paint the daisy flower with
the petal first, but for me, I feel that it is easier to paint the
round es cental first. I am using a very small brush. I mean two shock for each petal. But if you are
using a big brush, maybe one shock is enough. And you see the petal
don't have to be perfect. There are some
petal. It is small, bigger, longer, shorter. But it is the nature. So we need to wait for this layer to dry before
adding the center of the flower and I will
have to paint this title. It is three quarter. I don't know how to say
three facing flower. In order to paint this
flow I paint, again, I paint the center of it first, but instead of the
routed the circle, it should be val. T. Now, you see it looks a
little bit awkward. But when we put the
central flower here, it will make more
vibrant and dynamic, and then even bring this to
pain this type of flower. Again, even pain the f central. The longer petals
on the side, and it So now let's put this to
paint some some books. We need to have
some in still here. I think we have a
p we have painted the first layer on the flowers, we may need to put
in our final orsion. Now we need to wait
for this layer to be completely dry before painting the central of the flowers. The first layer is only dy, now I'm going to paint the c
of the flowers and I'm using the yellow color I mixing with any other
colors from the tb. So it is already a
little bit dry now, so I've put some water here to make it to have
a creamy constituency. When you pain bruh, make sure that you
don't put a lot of force into the brush make the brush slightly touch the paper because it touches
the paper very hard. When we activate the
pain on the law. Here we will need. Actually, I feel that this green is
a little bit too dark. So I can make it some
yellow and some white. I do think that we need
to make some adjustments before we go into
the final pending. But for now, I want to
make it to be my base. It is still to duck for me. For this, bic exercise
is not really important. It is okay to to use
the color in the set. You don't really like and this rust to it is the second layers
of the flowers, and now we have to wait for
this to dry again before painting the shadow on
the c of the flowers. So on the layers
here are already. So now I need to put some shadow on the
center of the flower. So this brown color here
is a little bit too dark. So I was some magenta to make some ore to make some orange to the transition between
the dark and the light. It is to to red ish for me. I end up using a
lot of yellow here. We may need to clean the palette before
doing the final balls. We just some dot some dot
and with the transition. As we're assuming that the
light shot is over here, so I can put here to
indicate the light shots. So I went the yellow. As a a bit more
dynamic over here. It is just more so we don't need to have
a detail about that. Just to make a little bit hint of I mean the flower center. Now we the brow here. This row. I don't want to
wait another row, so I just do it on
the bottom here. Even if the pain is still wet, it can create on. If it is also not a big problem. I just want to create the du. You may want to wait for for the central flower to dry completely before
putting the shadow. It really depend on you. But for this little
practicing is side, I don't want to
spend a lot of time just for waiting
the pain to dry. When we do the final bad check, depend on the whole pending, we may need to ask some highline some
shadows on the pedals. But for now for this
practicing exercise, I think, I think that's good
enough for the flowers. On the techniques lesson and started from
the next lesson, we will start to do
the final baeck.
7. How to make Torn Edges on Paper: A Hello, everyone. Welcome back to our
wash for gin glass, and for our final version, we paint this vindage, they see on this d paper. But in this lesson, I teach
you how to make this p edges, even if you don't
have this t paper, you just have this cl pedal. First, you need to
repair a piece of paper, which is than your
intended size, which you will paint on. And I will use the pencil to mark the four edge of the paper. Then this ruler. Make sure to put the er a
little bit inside the lie. Put it and then we have a piece of
paper with edge. It is very suitable for this type of painting
on for this lesson, and the net lesson, we may start to paint
our final back.
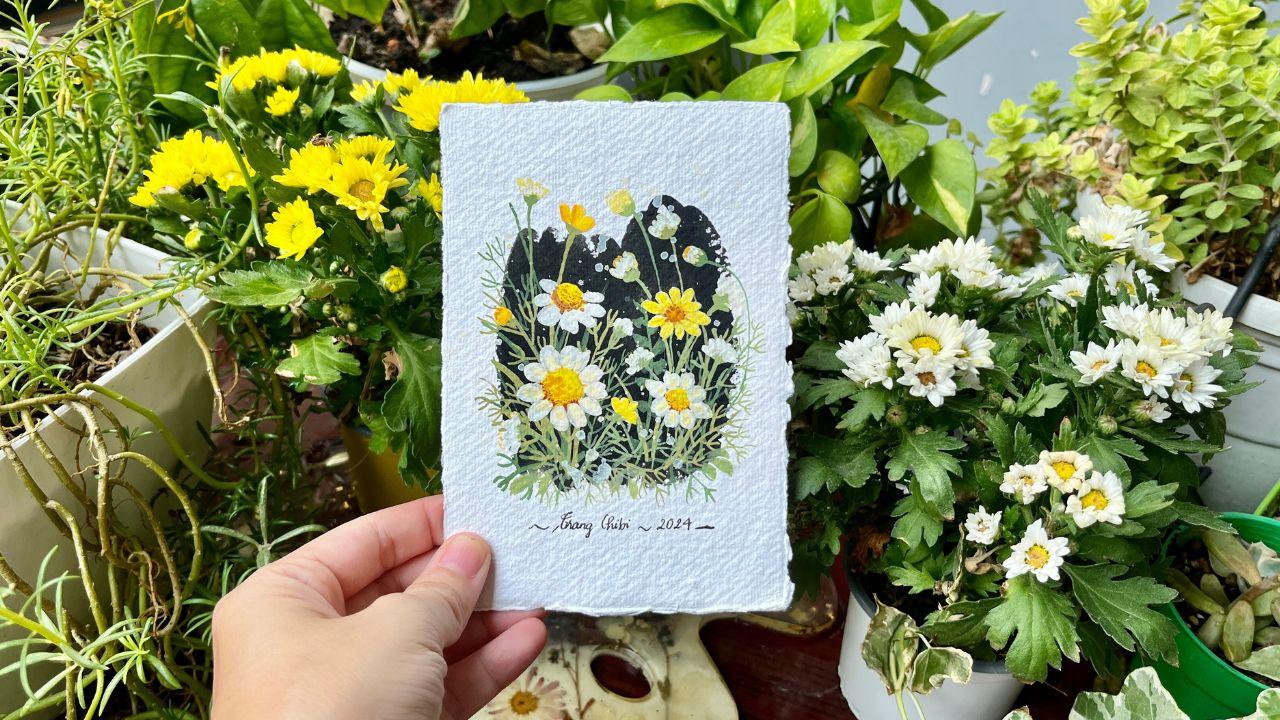
8. Final Project: Painting the Background: Hello, everyone. Welcome
back to the wash for beginner class and
started from this lesson, we will paint the final bh, this vintage vibe painting. This is a piece of heady paper
and in order to paint it, more easy, I tape it down. Because we don't use
the edge of the paper, so you can just
put the tape here, but I don't want the tape
to be shown on the screen. I me put it. I will put it like this. I will put on the tape on
the back of the paper. I put it down like this. So now we will need to mix
the color for the back row, so we run out a black pain. I put for black pain here. I use the green we have here. In the next lesson, I think we we need to make more green. For now, I use on the green. We p here to make the. I think we out this palette
in the next lesson, I use another small
dish to the green. Okay. So you don't need to make this black back
role exactly like this. But if you want to make exactly, you can use pencil to
have to drop first. In this guy, because when I normally I don't need
to use the pencil. But when I do the fi, I feel a little bit
nervous than usual. So that's why I
use pencil to mark the area I want to pin
this black back role. That's enough just need It is okay to make the ftp a
little bit dry on the edge. The background to make it very
loose instead of some to. In the middle, I will
make sure it is black. I on purpose to leave Sagakia. I think I will make it
just a little bit here. I makes it even loser. That's enough for the big well, and now we will need to make sure to wait for the big well to completely before the leaves.
9. Final Project: Painting the Leaves: The back ground is already dry. However, the paper is still
booking a little bit. I did bother you. You can wait a
little bit longer, maybe one morning
or one afternoon. But for me, it is
not a big problem, but I will use another
dish in order to mix more colors for pending. So I will mix green For
our previous mixing green, I do feel that we have more blue in order to create
this tide Oli green, I think this time, I add
more yellow into the can. So it's about one
portion of two portion of yellow. Let try. And I think this color is I and we need to
have some magenda. You see, this color
is a little bit dark and I still feel that it needs
a little bit more yellow. Actually, we don't need
to add black into this because they can make it
just by adding magenta. A It is different from the
colors in this painting. I believe I paint this painting using Him wash not Hoby in wash. It's very easy to buy ime
wash here in Vietnam. It is a Chinese brand. But for people from
other country, I do think that Hoby
in is more popular. That's why I use
Hoby for this glass. I this green color for
the first layer of bleat. I to beat. It really need more yellow. I won't remember every formula
of mixing a mixing color. Normally I need to
try and add this at that until I have the
right color that I want. I will start with adding just random I don't feel that I don't have a more
control with this bras so I this pen I leave here. You may want to add
a bit more black here to make the color even more dark because this is just the very first
layer of bleef. We will add more layer on
top of that. It is too dark. But don't worry because once the wash is dry a little bit, it will be lighter. You may want to ask just random. Is not need to follow
one direction to create the dynamic of
p. And I think we need I think is more that's on for
the first layer of leaves, and we will wait for it to dry before pinding the
second layer of. The first layer,
the first layer of leaves is already dry, so now we will paint
the second layer. For this painting,
in particular, I only use two layers, colors to pain leaves. But in some cases, you may
need to use three layers. I make a little bit by green. I do feel that we still
need a little bit. I had some magena here, and maybe a little bit yellow. Let's see. It of green. Make sure we don't
have any black in this layer and make some water to make it
more equ consistency. Now let's paint
the second layer. First, I think I mean pain I do feel that is
a little bit too dark. I want to make the
first layer and the second layer has a
significant gap in terms of the color I don't know why it is a little
bit when we put it here, maybe because the
color is too wet. Was often become more
opaque after it dry. If you want to make
it even lighter, we may in some. Actually now, it is not two layers of color of
green, three layer. When we, you can see it is a. So we paint the I think that's enough for
the second layer of lease. So in the next step, I will paint the flowers
and then we will come back after finishing
on the flowers, we come back to
see if we need to add some moms into this pending
10. Final Project: Painting the Flowers: So the layer is already dry, so now we will paint the flower. I think a bit is a little bit. We need to add more
white and yellow. In this painting, we have some white and yellow
flowers for the first layer, I just we add a very
light layer yellow. So the paint here is
already dry a little bit. I mean, this color, this pain to paint the very
first layer of flower, and then depend on the flower, we may add some white or
yellow on top of that. So in this bending, in order to paint
this fast and easy I mean look at this pending. But in order to if
you don't know how to position on the flower and
leave in this bending, I think it is work to make a pencil sketch
before you paint. You see, even when I'm looking at this
painting as a model, my painting now is
slightly different. The petals here are
significantly wider. I will change it a little bit, here I will create this type
of shape for its flower. Here it is not in
the original pending but I will smaller boop. In the original painting, I use the splashing technique
to create some random here. I think I will also
do this in this. I will. Water color bruh. I didn't mention in the
material lessons of this glass, but you can use the normal bruh, but for water color
bruh, it ho pain. I think that's all less is more. It is the first
layer of the flower. Now we need to wait it to dry before painting other
layers on top of that. The first layer, the
flowers is relatively dry, so now I will paint the flowers. I find that the yellow color directly from the tribe
is a little bit to, I miss it here with the color under it to make
it a little bit more orange. I think big color
is good enough. Actually, this one here, I mean make it I, light yellow bet. This one in white color. The brush is a little bit, so it is not very white, but has a little bit yellow bad. It is even more suitable
for disposition. You'll see that here. We, we need to add some stamp to this li brush because
it is we need to very thin lie here. It is still but not
a big problem. T. That's enough for this layer. Now we need to wait again for the painting to dry before painting the shadow
on the flowers. Hopefully it is the phil layer. Let's come back to paint. Hopefully that is the player. We just need to ask shadow on put it on the
cent of the flower. Be at this orange color. I think the center of
the flower here is not really we need the
right for now, but it's good enough for the central I want to create this. A bit, just a bit or, similar to what the
color It should be I think this is to rely so add
some orange here. Add here and there. Here. I think we missed it. We didn't. And that's all for this title at I didn't
want to overdo it. And now I mean
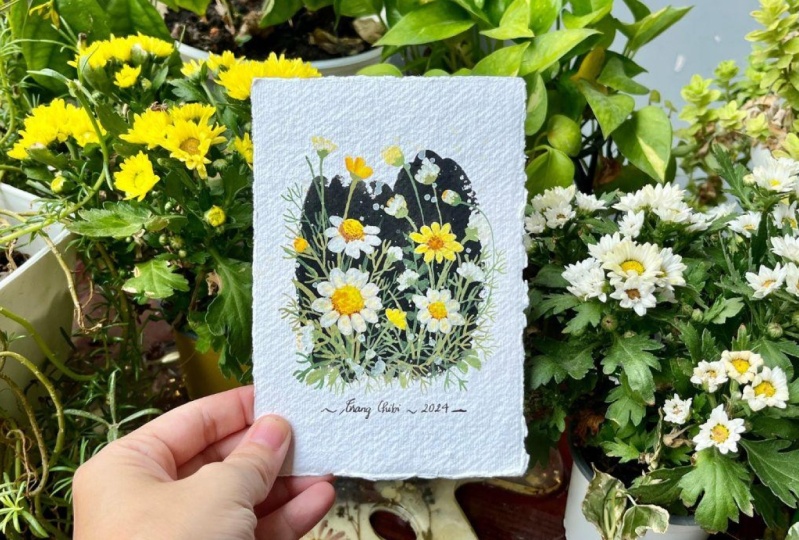
shin my name here. That's all I take off the tape. And we have a based lovely
vintage as painting, and it will be a great gift you can give to your
friends and family. That the end of this lesson. And I will see you in the next glass where
I will tell you more about some gis and tricks to improve your painting process.
11. Final Thoughts: And thus rub a wash
painting journey. I hope you enjoy painting these beautiful daisies
as much as I did. Thank you so much for
being part of this glass. If you have fun,
feel free to share your bug in the glass gallery. I would love to see your
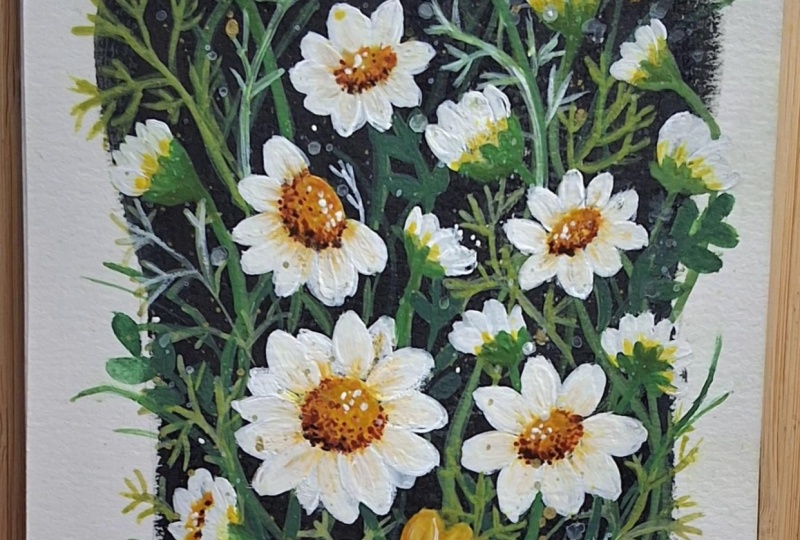
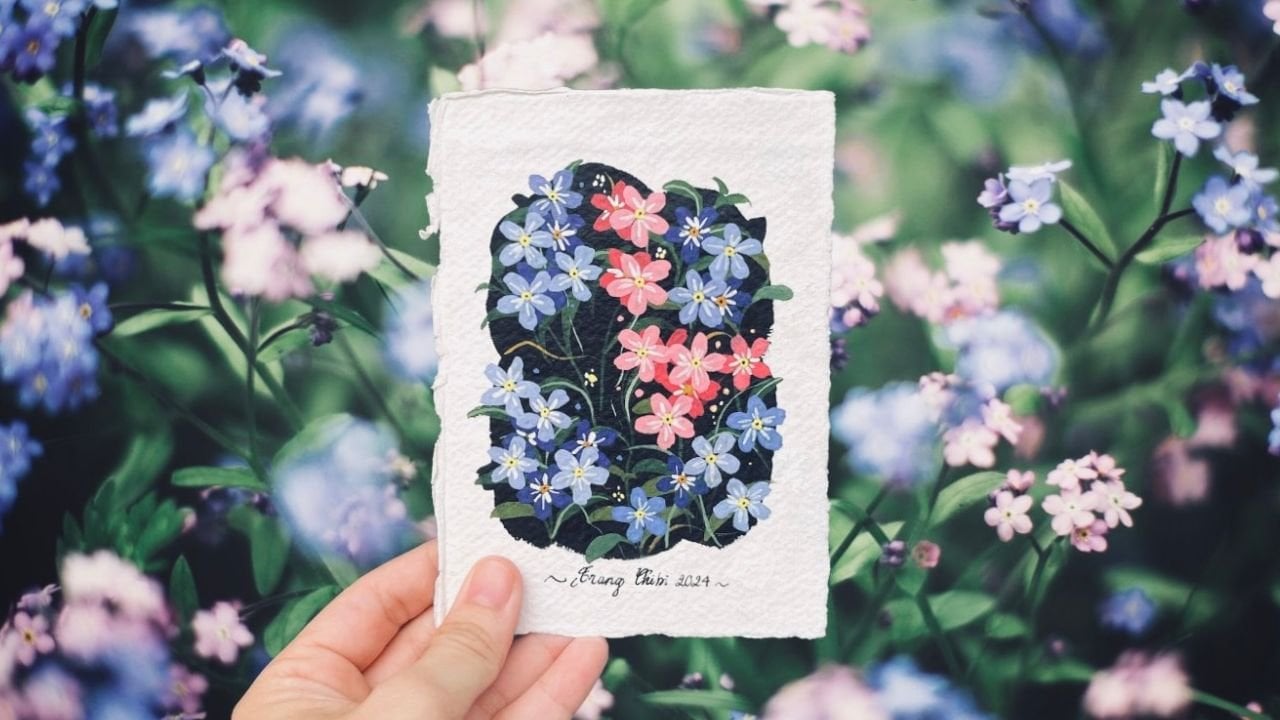
blooming masterpieces. I've also added some daisy wash painting examples
in the bog section, which you can try on your own. Of course, if you
have any question, don't hesitate to reach out. Keep painting, stay spy, and I can't wait to see where your wash painting journey
will take you next.
 Trang Chibi ❤️, Watercolor and Gouache Artist