Transcripts
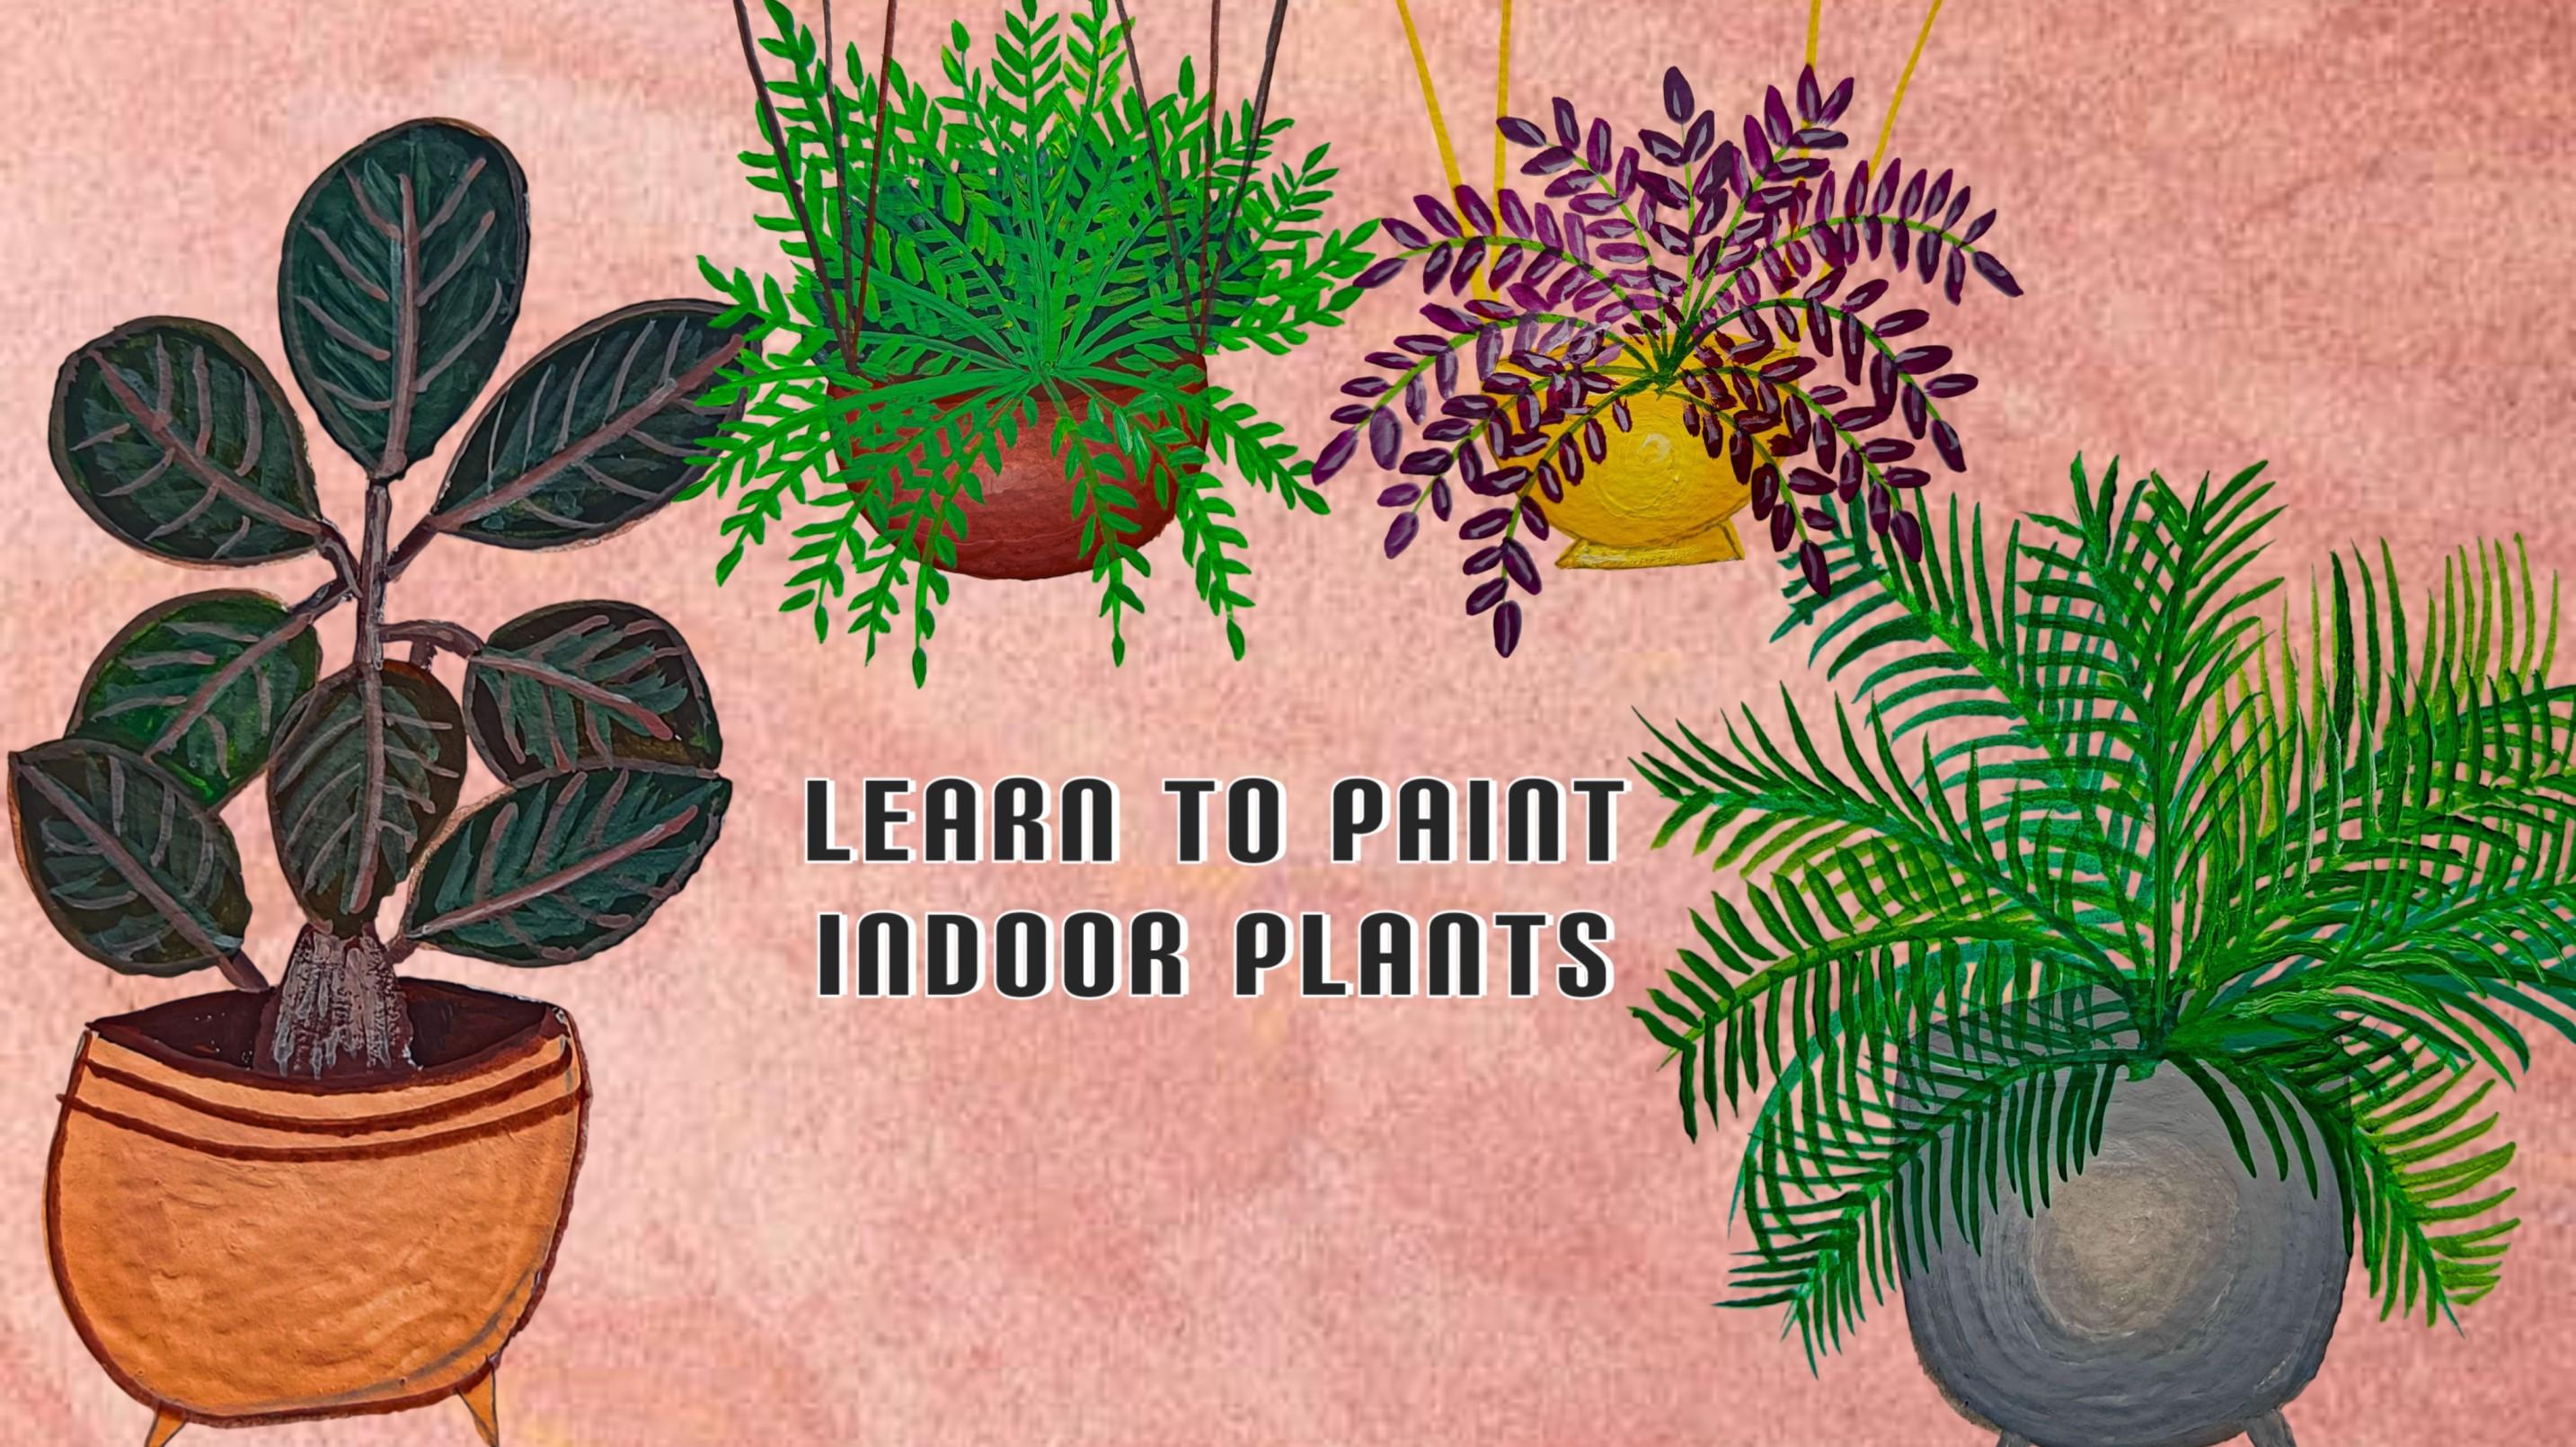
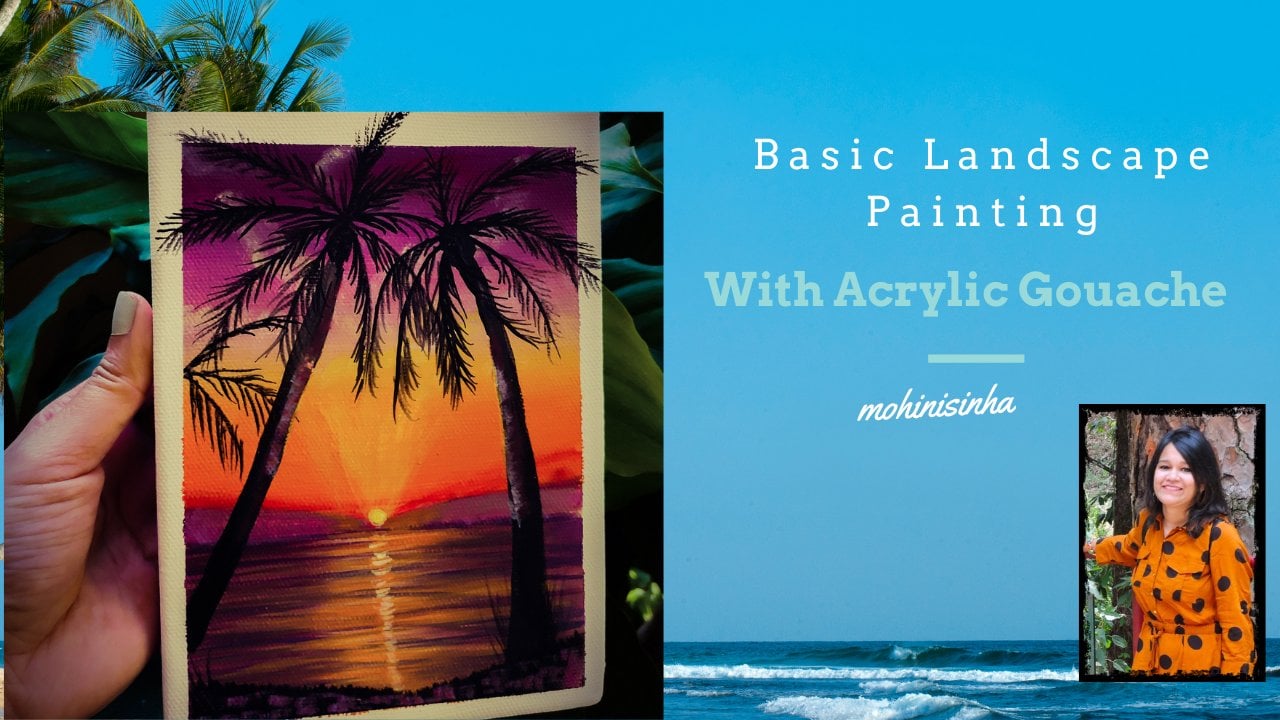
1. Introduction: Integrating indoor plants into daily life not only
enhances the environment, but also contributes to
physical and mental health. My name is Mohiisna and I'm an acrylic
artist based India. I mostly do landscape painting and animals and bird
portrait painting. Many of you know me as Mohani Art Gallery from
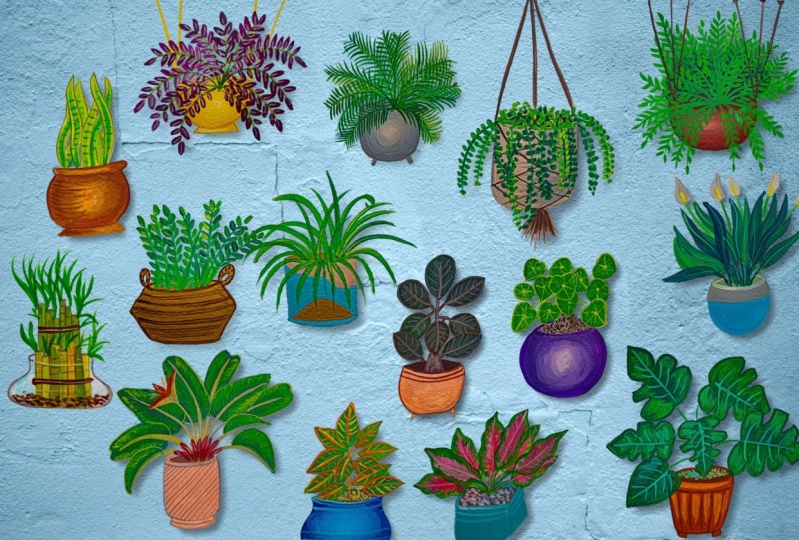
my Instagram account. So in this class, we will be learning
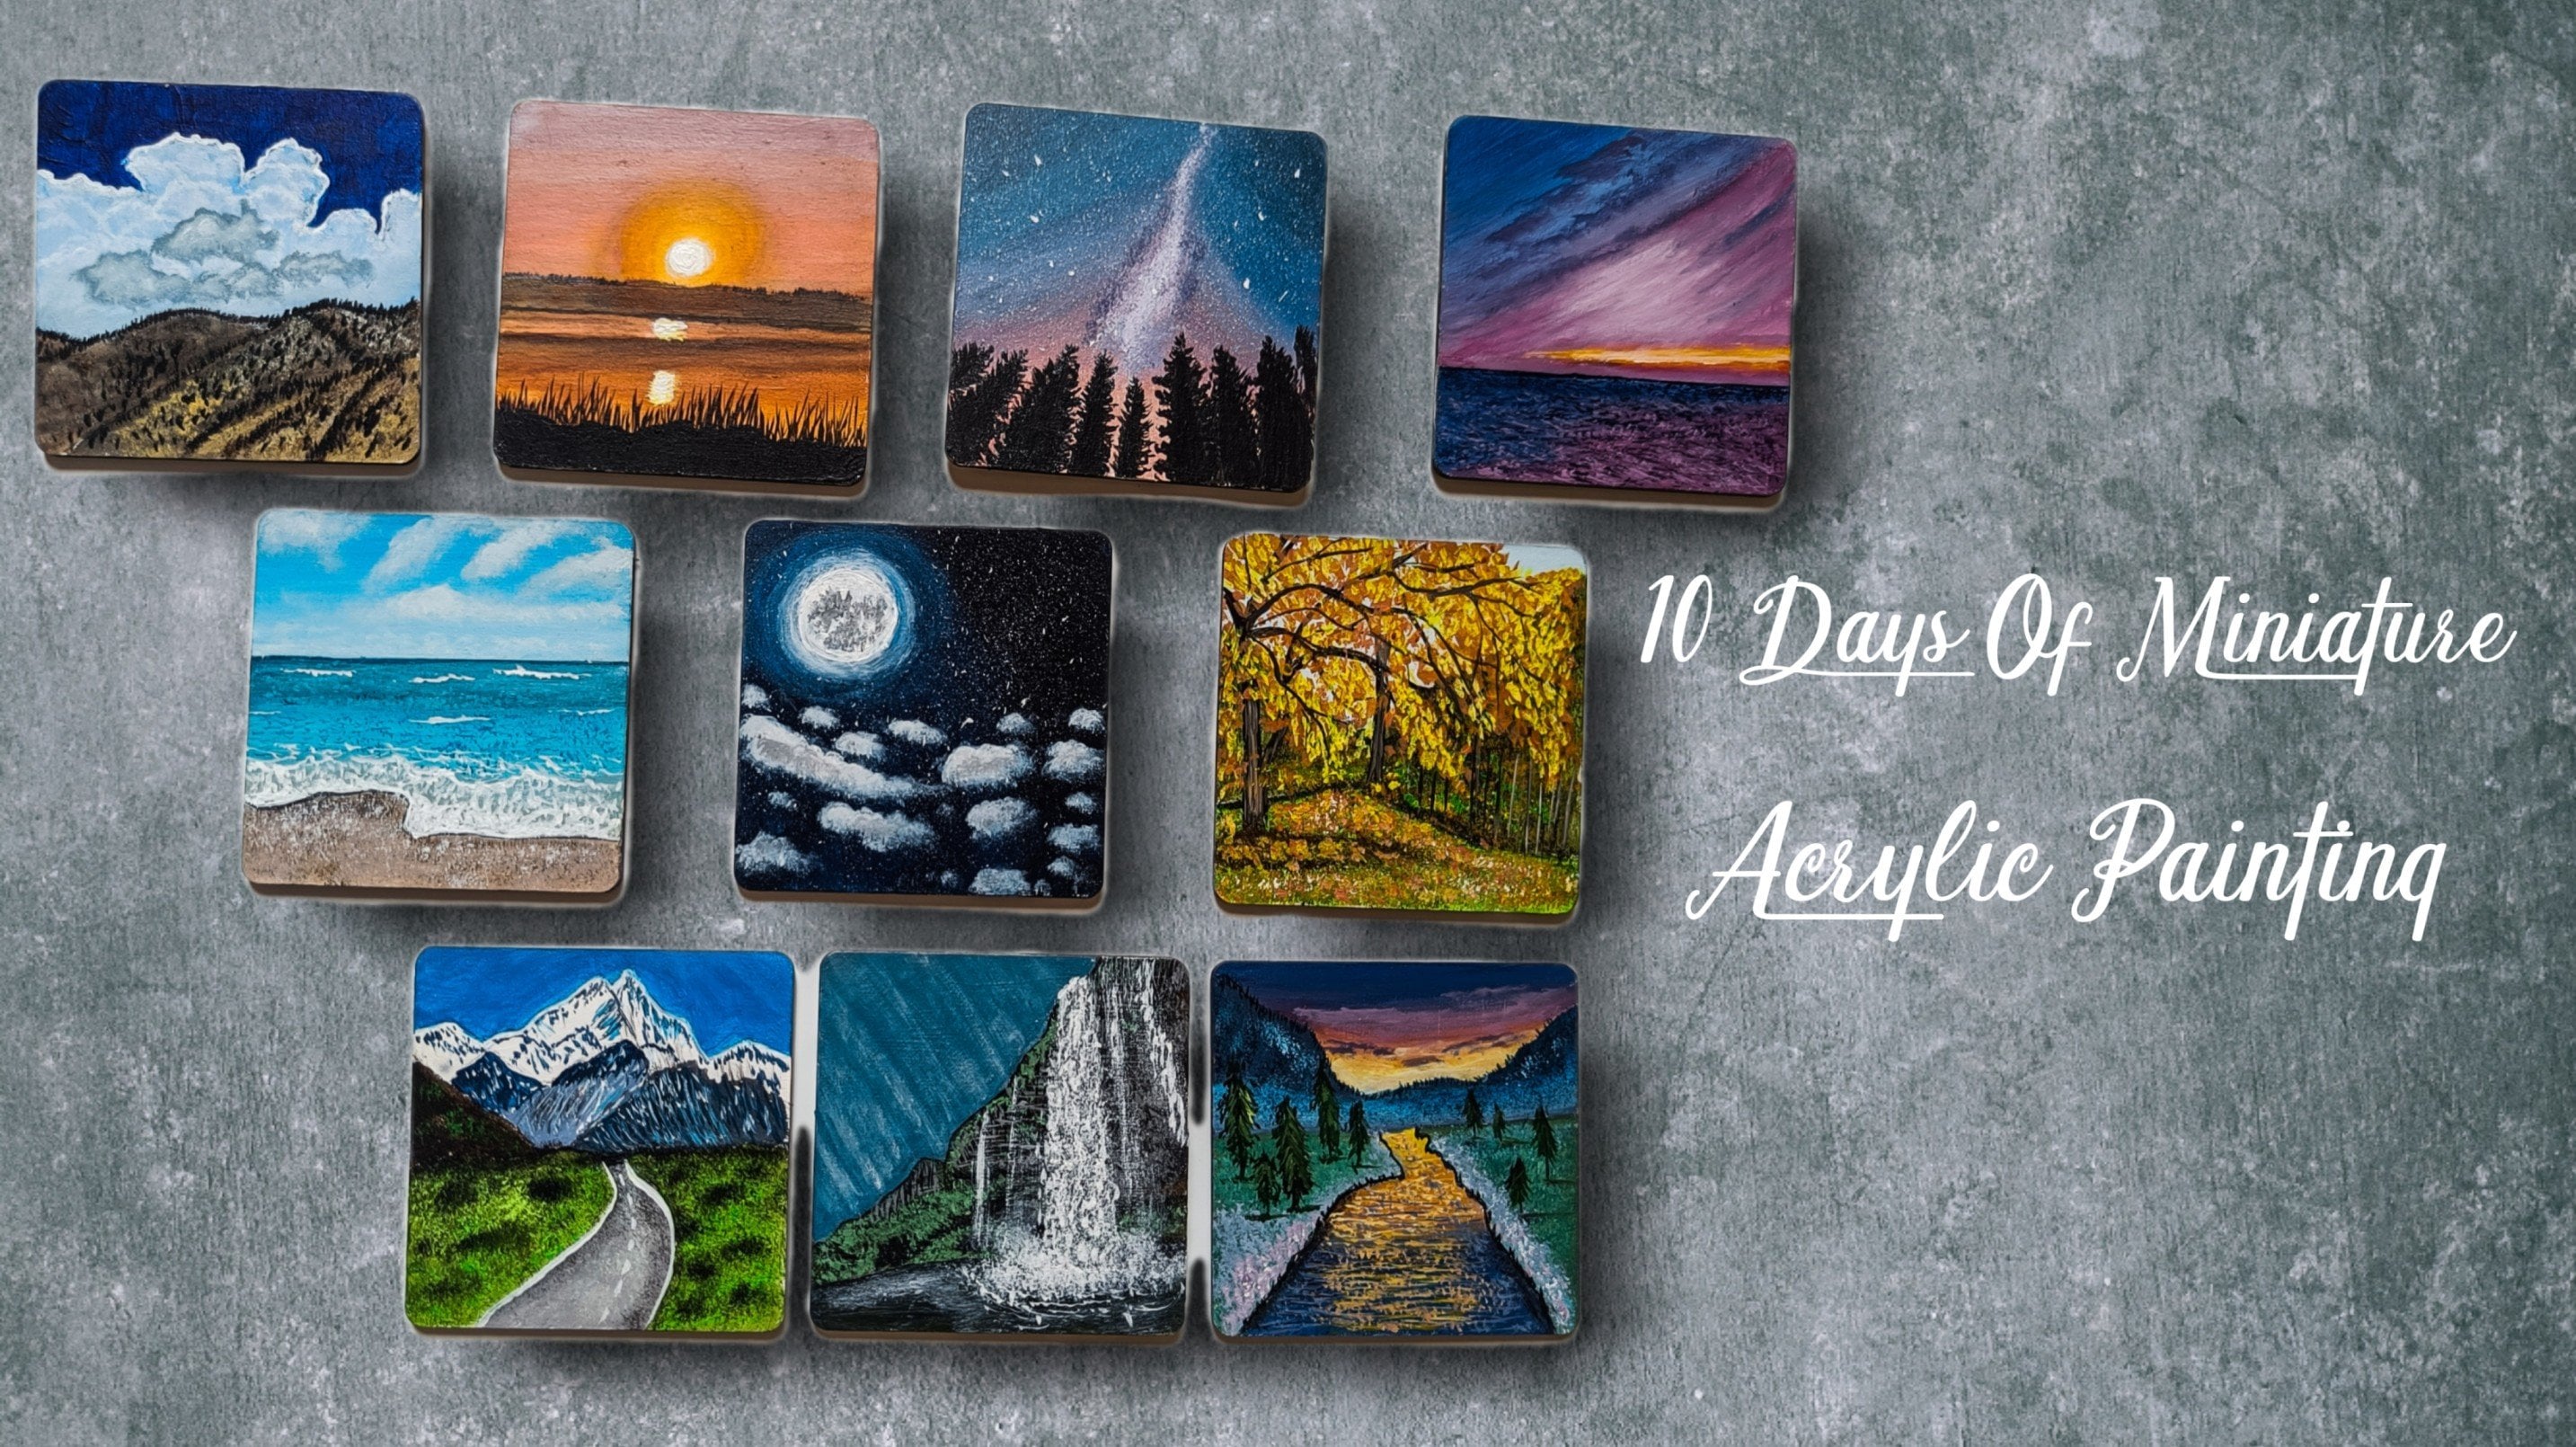
15 different types of indoor plant with
their benefits. Also, all these classes are
mostly within 30 minutes. You can paint all these
paintings within 30 minutes. Now, this painting I have
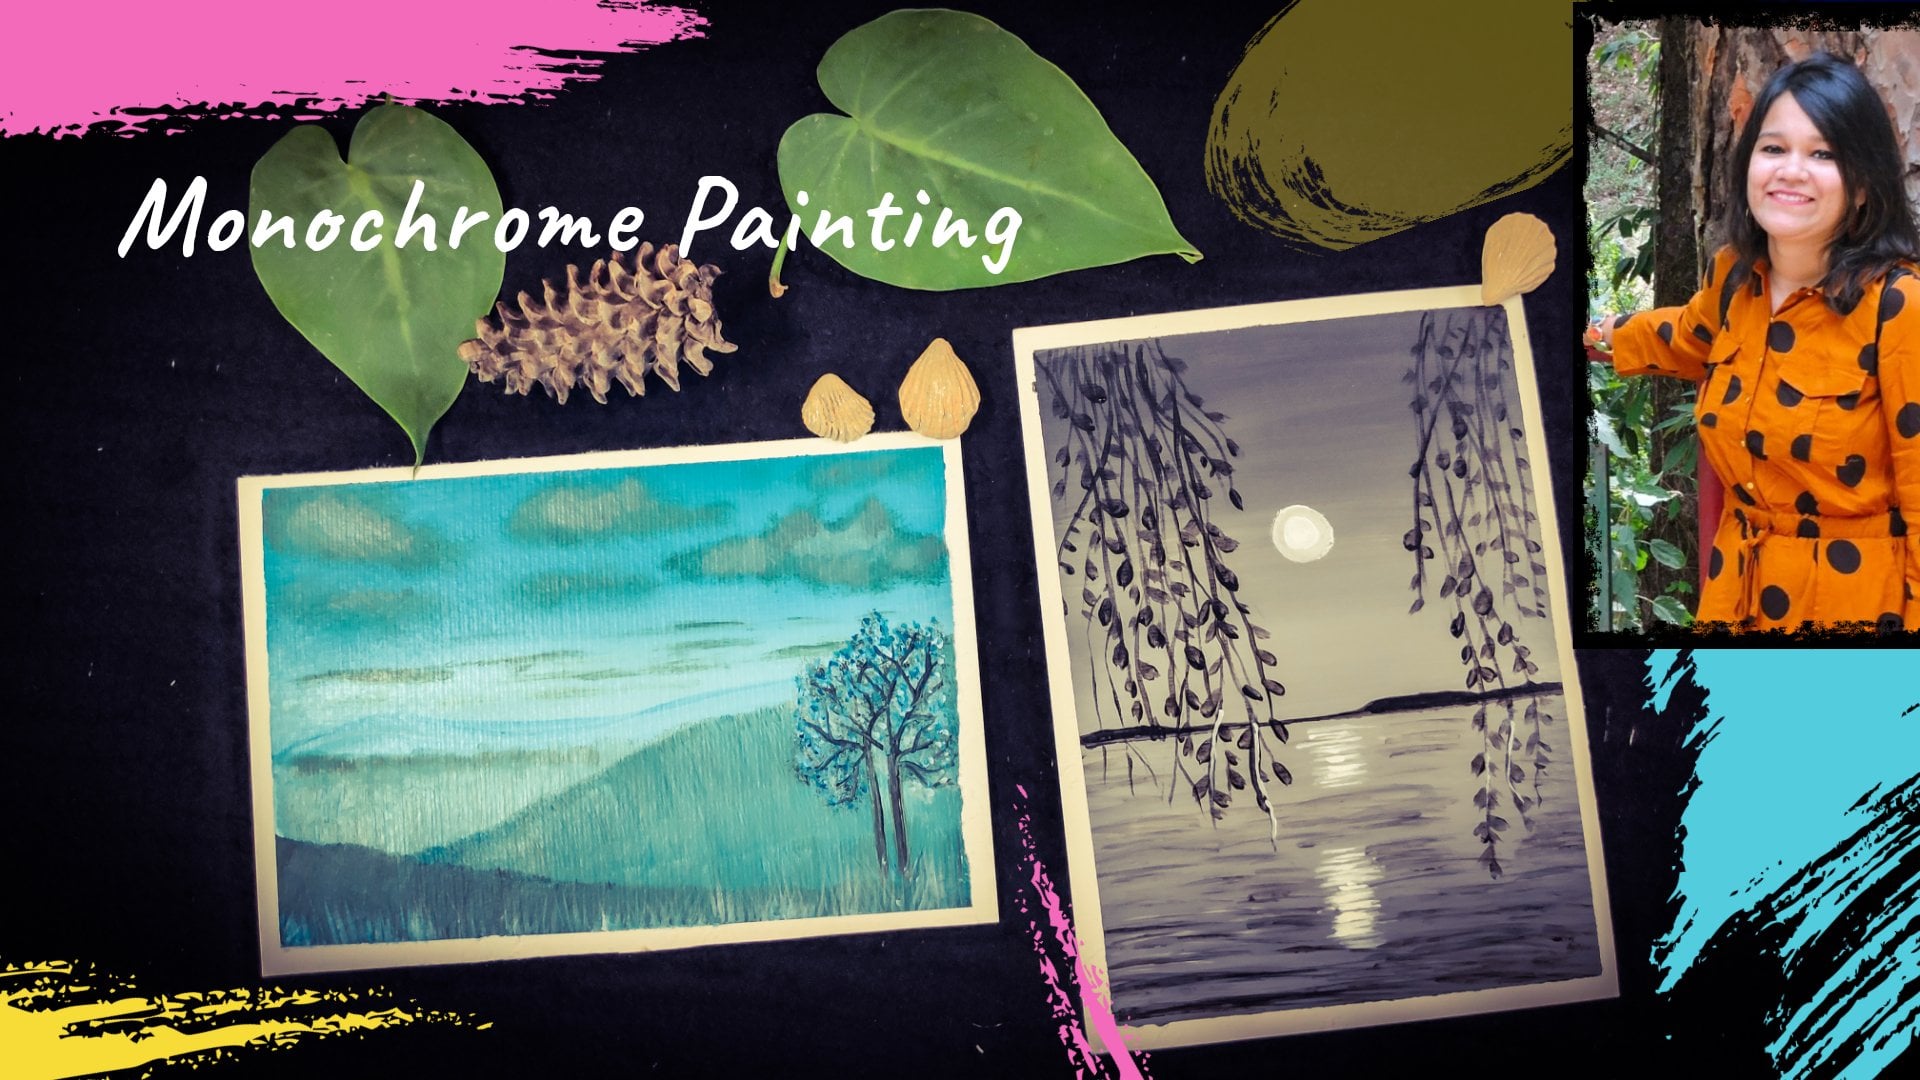
done in a white sheet, but you can also do it in a black sheet of
paper, as you can see. So without wasting our time, let's start painting these
beautiful indoor plants, and let's dive into it.
2. Materials Required: Welcome back. So
let's discuss about the materials which we will be needing for all these paintings. So this is a Gash set
which I'm using here. I will not be using
the entire colors. Few of them I will
be using here. Apart from that, these
are the brushes. There are two round brushes
and one rigor brush. So these three brushes
of size four, six, and this is a size zero brush, which I will be using in
this entire paintings. Then comes the paper, which I will be using. The paper is from Zensungum which is of 300 GSM coal press. You can use any thick
paper whichever you want. But for this case, I will
be using this paper. Then apart from this for
drawing this pencil, technical pencil,
then the palette, which is the glass
palette I will be using, then pumps the water jar, and at last, the tissue paper.
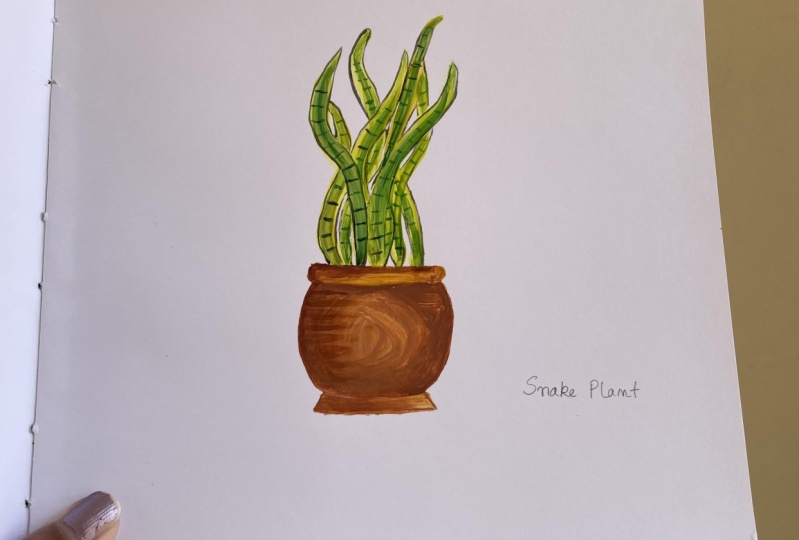
3. Snake Plant: Welcome back. So let us paint our first indoor plant
that is the snake plant. So let's first draw the pot, and then we'll start
with the painting. So this is my pencil,
technical pencil. And let's start first
by making the pot. It's a very small square size
notebook which I am having. It is 300 GSM, as you can see. So just creating a very
rough sketch of the pot. So just a very rough sketch, and later on while doing
the coloring part, we can fix the sketch as well. So just the base is flat
and little round shape. So there's much drawing only
we will be doing and rest, we will directly
do while painting. Just the pot I'm
drawing over here. So now let's start
with the painting. So the first color which
we will be needing is the a burnt sienna, then yellow ochre and white. So these three colors, gauche colors we will be
needing for our pot painting. So first time taking
white, then burn sienna. You can take similar
colors like that, either burn Sienna or any brown color whichever
you are having. And if you don't
have yellow ochre, you can use yellow as well
for this or Hansa yellow. A yellow you can use. So let's start with
my round brush. Now, since this is a
very small painting, so I'm using the size four
round brush for painting this, I'll just dip it in water, and directly, I will
grab the colors. Now, if your color is hard, then mix little water. It should be a milky color. It should not be a
very transparent color because gauche paints
are opaque color, so I don't want it to be
very transparent color. So I'm mixing all the two
colors with this white, and we'll start with painting. So just doing the borders first and then we'll start
painting inside. So as you know, snake plant has a
number of benefits, including air purification by removing toxin and
releasing oxygen, especially at night,
which can improve our sleep quality and
reduce allergies. So air purification is
one of them which is very important for when
we keep snake plant. Apart from that, it also
releases oxygen at night. So that's why it improves
the sleeping potential. So now I'm just covering
it with the area. So that's why indoor
plants are very important. We should keep indoor
plants because it is very good for health also. Especially this snake plant it's very low maintenance because it does not require
too much of water, and it also improves
our mental health, creates a more positive
and calming environment. So that's why I
decided to paint this. I've just painted this spot as you can see the
highlight in the center, and I'm just trying
to blend the colors. So trying to blend the
colors as in Gauze you can easily blend the colors because colors can
be reactivated. You don't have any
issues over here. So just adding more of white and just trying to blend
the colors together. Also doing the upper part. So first outline
the color border and then fill the color. That will be easy for you to do it because the colors will not come out when we do the outside boundary and then we start
filling the colors. So inside, I have done a little lighter version
and the outline, I'm just doing it a
little darker version. Simple mixing two of them and doing the lower stand
area which is there. So every indoor plant has their own uniqueness,
their own quality. So we will be coming to
all the plants one by one. So this is our first one, which is the snake plant. So this spot area
is almost done. I'm just making it a
little more blended. So one side I've kept dark
and one side a little light. So like that, I have
just tried to make it. And then let's start
with the snake plant. So I have taken these two
colors that is cobalt blue, and lemon yellow, so
to make it green. So first, we will be
using two types of green. One is the dark green and
another is the lighter green. So for dark green, you
have to mix more of blue, and for lighter green, you
have to mix more of yellow. So this is the difference
between the two greens. So when we want a darker green, we will be mixing more
yellow to this blue. And if I want the darker green, then I will be
mixing more of blue. So first I'm using the lighter
green, as you can see, I'm just making the lines below a little thick and
above a little thin. So just making it like S shape. Slowly, we will be adding
one by one the leaves. Now for the darker color, I'm just mixing more blue
to this yellow adding more darker color to this it's actually in the middle and the
outside part is light. So it's like that.
Similarly, again, I will create one more. Same process. You
have to repeat in different angles and somewhere dark, somewhere light green. So like that, we have to mix it and make a mismatch so that it will look a little
more interesting. Otherwise, it will look
like a very flat leaves. So that's why I'm
adding different different greens to it. Somewhere a highlight
of little darker green Some are a little thick,
some are a little thin. So just adding the varieties. You can also draw this if you're facing issue by
doing it directly. You can draw the outline and then you can
fill in the color. It's up to you, but I
thought of doing it directly with my round brush. So slowly, slowly, I'm
adding the values. The green I'm adding in the middle and the
lighter color is outside. That's why lighter color
I have made a little thick so that both the
colors are visible. So slowly, slowly,
I'm just trying to add more and
more leaves to it. Do it slowly, take your time. It all matters how much pressure you are applying on
your round brush. If you press it, this will
create a thick lines. If you will release it, it
will create thin lines. So first, I will press it, and then I will
slowly release it. So this will create
a thin line upward. So in different
different directions, some are slanting,
some are straight. So in different directions, I'm trying to create it.
4. Snake Plant Final Detailing: Welcome back. Now you
can see there are varieties of greens which
are coming up here. So first, I'm just adding dark, then alternatively,
I'm adding light. So like that, you have
to just fill it up with these types of S shaped leaves altogether and try to create the
pointed leaves. So even if with
your round brush, that point thing is not coming, just try to make it a little pointed with your round brush. So mostly in all the paintings, we will be using
round brush only of size four or six or two
and the liner brush. So all these brushes
we will be using for our upcoming indoor
plant painting. So the edge is a little
more yellowish and the inside is more
greenish texture. So just enjoy the process of making these s shaped leaves. So you can see how
it is looking with a light and dark
color of the leaves. Now, let's draw some more detailing in this
with my liner brush. So just taking white
and yellow colour and a mix of white
and yellow colour. And I will just highlight the edges outside with
this brush first. Mostly in the leaves,
if you have seen, the outer part is more towards the yellowish side and
the inside is more green. So like that, only I'm trying
to create the texture. There are N numbers of different
types of snake plants. This is one of them which I am trying to create over here. So there are N numbers of snake plants which
are there in market. But this is one of the type
which I am trying to draw. So just enjoy the process of
outlining and the detailing. Now, I'm just adding a few
details in the center, just the line in between. I'm not going to do
too much detailing because it is a big
enough friendly class, and I want each and every
one of you to try it out. So just making the lines in
between at a certain space. And with my same
brush I'm using. Again, I'm taking my
smaller size round brush, and I will try to create
with this just the lines. These are nothing but the
horizontal lines which I'm creating in
between these leaf. So these lines, I will
be adding into each and every leaves which are visible, so it should be a darker color than the color
which we have used. So darker color means more of blue should
be added in that. So just adding more of yellows to some of the
leaves which are left. So very small small
details are these, highlighting the above
area with the brown color. Giving a little shape and
roundness to this pot. You can create any
color pot if you want. But this is the color
which I have decided. You can choose any color, whichever color you want to choose and you can
create such textures. Just adding few textures of horizontal curvy
lines to one side. Adding a few more lighter lines. So now we will be adding more
lines to this above leaves. So for the lining part, I always use the liner brush. So here I'm just taking
black a little bit. So here, if you're
using black color, try to make it very
translucent type colored. Try not to use a
thick black color. It should be very in
a liquid form and a little bit of yellow
I'm trying to add to make it a greenish color. So when you add yellow to it, it turns out to be a little
greenish and grayish color. So that color I'm
using over here. So the color should
not be very dark. It should be like a
grayish texture color, and very thin lines you have to draw when you are
outlining the leaves. So just take your time
and draw very thin lines. Oh So when we are adding the lines, now we can exactly see where
the leaves are moving, how it is turning,
how it is twisting. So exactly, you can
see all the leaves. That's why sometimes
outlining is important. So we almost done with
our painting, not much. It's a little bit
yellow texture. I'm adding in between
these colors, few yellows and again, mixing this yellow
and black together, making the lines a little bold. You can see little bold
lines I'm just adding. So this is almost done. So this is our
first indoor plant that is the snake plant, which we have just completed it. And do try it out, and we'll meet in
our next class.
5. ZZ Plant: Welcome back. Let's
start with Z Z plant. So again, the same size
notebook I have taken. And I'll just draw a
rough sketch of the pot, and then we'll start
with the painting. So with my technical pencil, I'm just trying to draw
the base of the pot, just giving a
little shape to it. So something like this
type of shape is the pot, and a little bit of the lines also I will create where
I will put my leaves. And this is the handle
which is of the pot. So that's it, and little
bit of lines I will draw, and we'll start
with the painting. Very simple and easy painting is this. So just creating straight
lines because these are mostly in straight
up for directions. That's why I'm trying to
create it a little straight. Now, these are the
three colors which I'm using here that
is burn Sienna, yellow ochre and white. So again, this is my round
brush which I will use here. So let's start with the first color that is
yellow ochre and white mix. And first, I will
paint the base. Simple base painting,
milky colors. Don't add too much
water in these colors, otherwise it will turn into a very transparent
color, which we don't want. So Zizi plant is often referred as fortune trees are
believed to attract wealth, prosperity, and good luck. The strong and upright
growth pattern symbolizes steady and
financial and personal growth. And Zizi plant is also a natural purifier which
removes the toxin very well. So you can see, I'm just
covering the whole pot. So I think each and every one of us needs prosperity
and personal growth. So we should keep ZZ
plant in our home. So just adding a little bit of this color to the handles
which I have made. Same brush I'm using which
I have used previously. So mostly in all the paintings, I will be using the
same type of brush. So just filling it with the
same yellow ochre color. Trying to make the
edges a little dark and the center a little
lighter in color. So once we are done
with this blocking, I'll create some textures
with this bunt sienna. Simple blocking I have
done with this color. And then we'll start with the texture detailing
of the pot. Just taking this
burn sienna color. I'm not mixing too much water
in this, taking, again, the same brush which I have used and creating the top line first and simple lines just creating some
designs in the pot. So try to add a little
water to this burn sienna. Don't add too much water. Otherwise, the whole color
will become very light. So we want a dark color. So try to use bulky color. So just created the textures
and the outlines outside. So now let's start
with the painting. So for this upper part, also, I'm just trying to create the
lines and to the handles, a little bit lines and textures I'm trying
to create over here. And also, I will outline
this with same color. Oh So just adding few lines, you can use here liner brush also if you're not able to
do with the round brush, it's up to you which
brush you want to use. So you can see I've just added the details a little bit of
lighter color in the center. Now my pot painting is done. Now we'll start with the leaves. So for the leaves, we'll start taking two
colors that is first, the color is tallow
green and lemon yellow. You can take any type of green, but I thought of taking
this tallow green. You can take permanent green
also and lemon yellow. So I will use two
types of green. One is dark green and
one is light green. So in the dark green also, I will add little yellow to it. So first, the lines So if you have
seen this ZZ plan, the lines which are
at the bottom are a little thicker than
the top lines. So I making the
bottom one a little thicker and the above
is, again, simple lines. So just adding a few
more thick lines below. So when you press
the round brush, the lines will be thick
and when you will use the tip of the round brush, the lines will be thin. So this is a technique which I mostly use in round brushes. You can easily create thick and thin lines
using round brushes. So now let's create thin
lines and then the leaves. For the leaves, I will be using
a mix of both the colors. So will be dark,
some will be light. Mix of both the colors I will use for painting the leaves. A very simple technique
of creating leaves. So first, I will take
this green and then grab a yellow mix, and you can see how light
the color is a little bit white to make the
color a little opaque. And just adding with
the tip of the brush, these small, small leaves
which are in upward direction. Some are dark, some are light. So a mix of both the colors. I'm just trying to add it. Once you add
varieties of greens, any plant or any tree will automatically
look very beautiful. So just taking yellow
also and creating lighter green because already green was there on my brush. So again, a little darker green. So like this, the mismatch of dark and light
green, we have to add. Same process I will be repeating
in this entire section. So just enjoy the process. So you can see, I
have already created half of the leaves. So are dark, some are light. So try to create a mismatch
of mismatch of these. So just creating some
more and try to create it in the upward
direction because mostly the leaves of these
are in upward direction. So very simple and
easy technique of creating with just the
tip of your round brush. But make sure that your round
brush is quite pointed, then only you will be able to create such type of textures. So this is the whole leaves which I have created
in this pot. So I will add some little
colors to this below area, which is left out which I have spaces to give a look
of the whole pot. So this is it, so
I won't be doing much in this because
otherwise it will create a lot of detailing. So try to make the leaves
with different colors. Then only it will look beautiful also and
a little real also. So do try it out and thank you
so much for watching this. We'll meet in the next class.
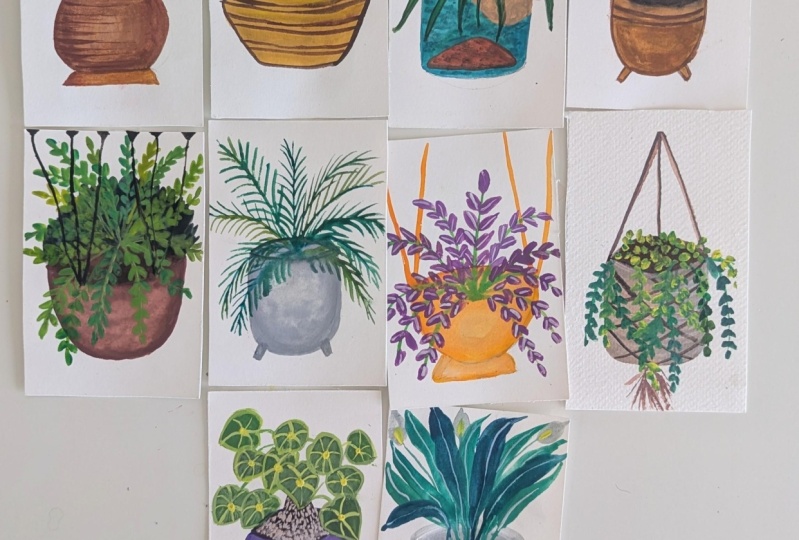
6. Spider Plant: Welcome back. So let's start
with the spider plant. So let's do the little bit
of drawing of the pot, and then we'll start
with the painting. This pot will be more like
a bow style painting, which I'm doing inside this pot. So just drawing a sketch. Very simple sketch it is with a straight line and a
curve below and above. So very simple sketch and
a little bit of drawing. You can do it either with pencil or you can
directly do with color. It's up to you how
you want to do it. So this is the complete sketch. After that, let's start
with the painting. So first, we will be needing three colors that is light blue, portrait pink and yellow ochre. So let's start first with the yellow ochre and light pink. So now my color is
already in fluid format. So what you have to do is if
your color is a little hard, then you have to add a
little bit of water in it. But if your color
is milky and fluid, no need to add any water. Water on your brush
is more than enough. So just first filling
the upper part. So it should be a
thick, milky color. It should not be a thin color. Otherwise, it will
become transparent. So covering the above part, then let's do the blue. This is the light blue
which I have taken. If you don't have light blue, you can take any
blue and just add white to it to make
a light blue color. So just adding in the
middle part which is there. Again, here I am using my
round brush of size four. You can use any round brush depending upon the
size of your image. So whatever is the
size of the image, that will be the
size of your brush. So bigger size of the pot, so you need a bigger
size of round brush. Now let's talk about
the benefits of this. It's not only remove
air pollutants, but it is easy to propagate. Also, low maintenance. It reduces stress, and also it is non
toxic to dogs and cat. So these are some of the
benefits of this plant. So just filling the middle part, and it is also
useful in feng shui. So many of them use
like that also. So yes. So let's first
fill the middle part. Do it very carefully and slowly so that the colors don't
go out of your borderline. And the below part
which is there that also I'm covering
with this blue, And now, let's do the part which is left with yellow Ochre. So finally, our W
painting is done. Now we will start
making the leaves. These are very wavy leaves which are like an upward
direction and very easy to make, especially with round brush. Now I'm covering the above
part also with the same color. Now, let's start
with the colors. Now, first color which
I'm using is Thalo green and also lemon yellow, I will add to it because I want a little
variations in greens. That's why I've taken
lemon yellow over here. Now, let's start
painting the leaves. So first, take this tallow green and on top of it, lemon yellow, and you will see two
colors will be formed when you will create
these leaves. So it should be thick from the bottom and a little
thin from above. So just slowly to the leaves. Some are dark, some are light. So if the color is light, that means you have to add
more amount of yellow to it. And if the color is dark, you have to add more
amount of theho green. So just adding the
leaves one by one. So I'm not making this very complicated leaves
because I want it to be done in a little easy form so that each and every one
of you can try it out. Even the big nurs can
try it out very easily. Also I'm trying to create
in different directions. So try to do it very slowly. When you will press your brush, it will create a thick line. When you will
release your brush, it will create a
nice pointed lines. So this is the trick in this. So when I'm pressing it, it is thick and when I'm
releasing it, it is thin. So like that, you have
to move your brush. So you can see I'm just creating
in different directions. Oh. I'm also overlapping on top of it so
that it looks like a full leaves which are
in all the directions. Try to use different
variations of green, some dark, some light. Then only it will look a
little more realistic. Adding few of them below. Enjoy your process
how the brush is moving with this painting. And again, use milky color. Don't use thin colour. Try to use milky
colour as possible, especially in this area, try to use the darker colors so that you can easily
see the lines. If you will use lighter colors, it will not be visible because already that
color is light. So try to use darker
color for the leaves. So we are almost done with
this painting in, like, within ten to 12 minutes, you can easily do this painting. Very simple and
very easy painting and very beautiful look to it. So I'm just done with it. So I hope you guys enjoyed
doing this painting. And if you are trying it out, do share your project, and you can also tag me on Instagram that is
Mohii Art Gallery. Giving a final touch
to this painting. Oh, this is it. I hope
you guys enjoyed. So see you in the next class.
7. Purple Heart Plant: Welcome back. Now, let's start
with a purple heart plant. So let's first draw the base, and then we'll start
with the leaves, a simple, again, a simple pot. Now, this will be a hanging
pot which I'm making. So that's why I made it a little round and a little base below. So colors I have already
taken out all the colors. Just a few edge I'm
trying to show. So let's start with
now the painting. So I'll be using again, round brush of size
four or size six. You can use these other colors, magenta, chrome yellow,
white, and sap green. So these are colors
I will be using. Again, let's start with
first the painting of pot. So for pot painting, I'm mostly using chrome
yellow and white mix. So starting from the
chrome yellow color, I'll go towards inside in a circular motion
towards the white area. So it will be a little blend inside light from dark
color to light color. So from both the sides, it will be darker color. And as we will go inside, it will be a lighter color. Lighter color means we have
to add more white to it. So first, I will just block
in this with one color. Just one color I'm using
to block this first, and then I will do a little
blending because in Gauche, we can blend the colors by
reactivating the colors, but not in the case of acrylic. So when you're doing acrylic, you have to do step
by step the blending. If you want to learn how
to blend the colors, you can check out my class. That is the bignelevel
class for acrylics. I've just blocked in the colors. Now I'll start giving a
blend effect to this pot. So taking white first and starting to blend
from the center, moving the brush in
the circular motion, and taking it to the
outward direction. So this is how you can give a little round and curvy
shape to your vase or pot. So very simple technique
it is that you have to just move your brush in a circular motion
from the center, and slowly the color
which is below, it will start blending this and mixing with this white color, and you will see a transition
from light to dark color. So this is how it's a
very easy process of blending any pot any circle
especially with gauche color. After doing this, we'll
start with the leaves. Just adding little
whites in the center and little to the top
base, which is there. Adding a little more
yellow towards the side. So this is the
whole pot painting. Now we'll start with the leaves. Leaves are also very
simple in this. It's not very complicated. Now here for the leaves, you can either use your rigor
brush or you can simply use your round brush also
for using the tip. But here, I'll first use the rigor brush
mixing this yellow and just creating first the lines where this will be
since it is a hanging pod, so I'm just first trying
to make the lines, and then I'll start
filling out the leaves. Now, let's start
making the leaves, making the color a little fluid and starting
with the lines first, and then I'll start
adding the leaves. So trying to make the lines
in different directions. So like a round shape,
it should come. Some are falling also, taking a little bit of white and mixing this to this
magenta color. I don't want a
very dark magenta, but a little white. When we mix little white, it becomes a little
opaque color. So using the tip of
the brush and creating these nice round leaves. Now, the tip is in the
outward directions, then only that pointed
shape will come. But So I'll just try to fill this entire
section with these leaves. These are similar
types of leaves which we used in ZZ plant, but in ZZ plant, it was trade. But in this, these are all
in different directions. So mostly, it is a
technique is same, the arrangement is different. Just slowly, slowly try
adding these leaves. So now let's talk
about the benefits of this purple heart plant. It is very low maintenance, and it has a quality
of drought tolerance, even if in less water,
it can survive. And it also does
erosion control. In case of if there
is erosion happening, it also attracts pollinators because it is very
purplish color, so it attracts all
the pollinators. And it is also used as
an ornamental plant. So just try to add the
leaves in a similar manner. Little bit darker
shades of this magenta also you can add just by using directly
this magenta color, and you can add dark
magenta values also. So just enjoy the process
of leaves making. Now, here you can see the color has become a little light, so I'll take magenta and make
this color a little dark. So here, since it is
a yellowish color, so I'm just making it a
little darker version of magenta so that it
is easily visible. So one side is almost done, other side also we'll
do the same process. I'll just speed up a
little bit the process so that because it is the
same repetitive process, so I'm just a little
bit speeding it up. We are almost done
with the whole leaves. Now we will draw
a little lines in between these leaves by
using my rigor brush. It's a mix of magenta and white. And in the center, I'm just trying to add
these white lines. So this is not completely white. It is a mix of magenta in it. Now when you are creating
all these lines, try to make the color
a little fluid. Then only these fine
lines will come. Otherwise, thick
lines will come. Here, you don't have
to use milky color, here you have to use
your thin color like we use in acrylic when we do
some detailing or something. Similarly, this is a
repetitive process, so I will be speeding
up the process so that so that we can cover it. Just enjoy the process and do it very slowly because
these are very tiny, tiny things which makes the
painting really beautiful. So try to make very
thin lines and just enjoy the process of making So you can see we're
almost done with the lines and our
painting is almost done. This painting you can have done on the
white paper, but yes, you can also do it
on a black sheet of paper on any colour paper, white, brown, any color
paper, you can do it.
8. Areca Plant: Welcome back. Let's
start with Erica plant. So let's first draw a little
rough sketch of the pot, and then we'll start with
the leaves painting. Simple sketch of the pot. Mostly slide U shape. Now, the colors which here
I will be using is first, white and gray
color for the pot. So the two colors here
we will be using first, and then comes the leaves. H So these are the two colors. So if your color
is not very fluid, then you can add water. Otherwise, just on your
brush, it's enough. So first taking water on my brush and
grabbing the colors. So you can see my color is
already in a creamy form. If your color is not
in a creamy form, then you can definitely
add little water to it. So first, adding the edge, and then I will go inside. So first, just
outlining the edge with gray color using my round brush. Now slowly, slowly, I'll
start filling off the colors. So the color will be from
dark to light in the center. So like that, the
color will be moving. So you can see as
I'm going inside, the color is becoming
more and more light. So it will be a transition
from dark to light. Just I will take a little white and I'll
start blending the colors. Moving the brush in a very
soft circular motion, and don't press the brush
while you are blending it. Very gently, you have to do
this technique very gently, and you should not have too much water also on your brush. It should be a damp brush. Then only that color will start
blending with each other. So you can see it has
started blending. So between is the white, and as it is going outward, it is more of a grayish color. So very slowly with
your dam brush, just try to move the brush in a circular motion and
try to blend the colors. So you can see now it has a blended little bit
color which has come out, you can easily
remove with water. So the shape should
be perfect when you are creating the pot. Now the below portion, adding a little water
to it to remove the extra color
which has come out. So the lower one with
just gray color. So very simple and easy
pot painting, it is. You have to do a little
bit of blending, but the result is really very beautiful
when it comes out. Now, let's add the
upper part also, the line with gray color. Yeah. Whenever you are doing such type of painting, do it very slowly. Take your time and do it slowly, especially giving the borders, the lines and everything. Now, just adding a little more
white and grayish texture on the top to give a
border to that line area. So now we'll start with
the leaves painting. So for the leaves,
this is halo green, which I will be using here. So let's take out
the To green color. So I'll be using two to
three different types of green in this so that there
will be some dark greens, some light green,
some yellowish green. Now, this is the sap green
which I'm taking out here. So thalo green, sap
green and yellow. These three colors I will
be using for my leaves. And for creating the leaves, I will be using a thin rigor
brush that is of size zero, mixing both the colors, both the greens together. When you mix both
the greens together, the color becomes more dark. So starting from the center, just making it like a
slanting directions. I'm just creating
first these stems where the leaves will be going and just adding a little bit of white,
sorry, yellow to it. This is lemon yellow,
which I'm using here. So just adding a little
bit of yellow and then creating the leaves first
in the downward direction. Just very thin lines
and bigger lines, these are thin and bigger lines, adding a little
white to this mix. Now, this color has
become more light. So I'll just add a little
bit yellow to this. Now, adding again the lines. Now you can see just making the lines in a
downward direction. Now, try not to use too
much water in your color. It should be more
than the milky color, but it should not
have too much water. Otherwise, your color will
become light and dull. As you can see below, I have added a
little more water. Should be less water, but I'll fix that later
once it dries. So again, mixing this sap
green and yellow together. Different type of green
I'm adding here now. So there's a mixture of
two to three types of greens which you will see
here in this painting. So this is in the
outward direction. So do this process very slowly. Take your time and do it because all these steps really take time when you
are moving the brush. Especially, you must have
seen the Eureka plant. It is very wavy and very
thin leaves are there. And just enjoy the flow how
the brush is moving in, like, freely you can see a mix of dark and
light green color. So this also, I'll
try to fix it. But first, let's do the top one. Now, since it is in the top, so I'm putting the leaves
in the upward direction. So, likewise, you have to do the directions for the leaves.
9. Areca Plant Final Details: Welcome back. So
let's start further. So just taking again
this sap green color and creating more leaves this side because I'm not satisfied with the leaves which
I have created here. So I'm just adding a little bit more of this
sap green color. So this thing you can draw
with your free hand also, you can also draw with pencil, and then you can do the
rest of the lining. Any ways you can do, either you do it directly
or you can first draw the lines with
pencil and then you can do it with the colors. It's up to you how
you want to do it. So first, I have
created the lines. I have created lines
in such a way that it looks like a round circle. So like that, I have
created the lines. So again, I'm creating
the leaf lines, since it is moving towards the upward direction and
a little bit slanting. So I'm making it a little bit
slanting as I'm going down. So let's talk about the
reca plant benefits. So it's a air purifying plant. So it is actually a
blessing in modern decor. So it not only improves the indoor humidity but also
creates positive energy. And it is one of the
easiest plant to propagate, and it can also help
with allergies. So there are so many
benefits of the reca plant. So I'm just adding more and more leaves to it with different colors of green. Some are sap green. So are this halo green. So here, wherever there
is this grayish area, I'm trying to keep it more dark. So I'm trying to use the
sap green color more. So slowly, slowly, this
whole shape is building up, as you can see, just keep in mind that whenever you are creating any liner thing, just try to make the
color a little fluid. It should not be a milky color. It should be a fluid color. So again, just mixing
this tallow and sap green together and creating the lines in
the downward direction. These are very simple
lines, curvy lines. These are not straight lines, but these are a little
bit curvy lines which I'm trying
to make over here. Simply trying to fill the
entire area around with leaves? So just enjoy this process of towing and take your time
and do it very slowly. The more you will give
time to your painting, the more beautiful your
painting will look. If you have reca
plant at your home, you can simply check it out
how the leaves are moving and you can just paint it like
that in a similar manner. It's not like what I'm creating,
you have to also create, but this is just an
exercise at how we can do the indoor plant painting and how we can draw the
lines with couch paint. So just adding one more line in the middle because
there was a gap, making the color with a mix
of yellow and sap green, and again, adding the leaves. So you can see the leaves are both in the
outward direction, but curvy, these are
not straight lines. So whenever you are
creating leaves, don't create the straight line. It should be a
little more curvy. Just adding one more over here, just overlapping each other. So just making it more like an overlapping leaves
on top of each other. So we're almost done
with this painting just few more
leaves we will add, and we are done with this
beautiful Erica plant painting. So wherever you see a gap, you just add more
leaves to that place. So here I could see the gap. So that's why I'm adding a little more leafy
texture over here. So now let's add
one more over here. Wherever you feel space
and you can fit in the overlapping leaves there, you can definitely add
the leafy texture. So this is how we build
the shape of the plants, any plants, whichever
we are doing, just overlapping on
top of one another. The more you layer these plants, the more beautiful it looks. O. And I'm adding one
more over here. This will be the last leaf
which I'm adding over here. I think it's all filled up. So if you're trying
out this painting, please to tag me
on my Instagram. That is Mohini Art Gallery. I would love to see
your project works. You can not only do it
on this white paper, but also you can do
it on a black paper, which I will show you how it looks when you do
it on a black paper. So this is the whole painting, and it's really looking
very beautiful. I really enjoy doing this
Erica plant painting, and this is the black paper
on which I have done. So on black paper, also, you can do such
type of painting.
10. Fern Plant: Welcome back. So let's
start with the fern plant. So let's first draw a
little sketch of the base, and then we'll start
with the plant. So a little sketch of this pot. So this plant, I will mostly be making like a hanging plant, which is a hanging pot. So I'm just making it on
a little hide so that I'll try to make it a
little in a hanging shape. A simple U shape and on the top, also the inverted
half circle shape. So let's take the
first color which is which is Indian red. So you can either take
Indian red or you can take the burn CN
also, then white. So again, I will be mixing
these two colors together. This is hallow green for the leaves Then
comes lemon yellow. I think in most of the painting, lemon yellow is used. So yes, lemon yellow, and then comes the final color which I will be
using is the black. All these colors I will be
using for the entire painting. So let's start
first with the pot painting with my round brush. So in each and every painting, I'm using the same brush, either size four or
six depending upon the size and the
shape of the pot. So taking Indian red first, whenever you are doing
any painting first, do the outlining outside and then start
filling the colors. This will help you to
make the shape neat, and the colors will not
come outside your boundary. So that's why I first start
with the outside part. First, I do the
boundary part and then the filling of the colors, the blocking of the
colors I do after that. So I've just done
the outline first. Now I will start
filling the colors, mixing a little bit
of white in this. And you can see the color has become a little light color. So just applying it
to the inside part. Here also, try to
use milky color. Don't use thin color. Otherwise, the color
will not be opaque. It will become a transparent
color, which we don't want. We want a thick opaque color. So try to use milky color, so it should use
that much amount of water that it turns out
to be a milky color. So just making a
little more blending of the colors and giving a little shape to
this round surface. So slowly, slowly,
I'm just trying to blend the colors with
this lighter color, taking the dark color
inside, then again, taking the white color and
again moving the brush in the circular motion from the center like we did in
our previous painting. Moving the brush in the
circular direction and don't take too much water when you're
doing this type of step. There should be a damp brush and very little water
should be there. Otherwise, you'll not be
able to mix the colors, and it will have lots of water, then what will happen
that the color which is below will
start coming out. So this process, you have to do it very slowly and very gently. Don't press your brush. A where do it with a
very light manner, very light pressure
of the brush. Then only this type of
texture will come up. And make sure that the sides of the pot is little dark
and the inside is light. Now adding black color to this mix to make a
little dark brown color. You can see perfect dark
brown color has come up just by adding little black
to this Indian red. Now I will just fill
in the upper part some area with the black
and this tallow green mix. So if you're using
a black paper, this is not required, but if you're not
using black paper, you are using white
paper, then yes, it is required that you
have to mix a little bit of black and green and
create a surface of dark blackish texture, and then start giving
those leafy values. So just making a nice
half circle thing, just covering the entire
area with this color. You can see I've
created the shape like a half circle and fill
this entire area, and now I will start
creating the leaves. So first, I will create the
stems with my rigor brush, and you can use
your rigor brush, also, you can use
your round brush. Round brush, if you're using, you have to use just the tip. But if you're using
a rigor brush, you can use the complete brush because it
is already thin. So it depends upon what
brush are you using. So first, I mix the color
with my round brush, and then I'm using
the rigor brush, making it a little fluid. And then I'll start
creating the lines. Again, for the lines, you
need a little fluid color. So I'm just trying to create the lines where the
leaves will be. So first, see how the values are coming when you are creating these textures with light green since here we are
using light green. That's why I have made
the background this dark. But if you're using
a black paper, no need to create
that dark background, you can directly
create these leaves. So first creating the stems. This is how the stems will look like in
different directions. And now we will start
creating the leaves.
11. Fern Plant Final Detailing: Welcome back. Now, let's start further the
leaves painting. So just mixing this lemon
yellow into this green. That is the hallow green
which we are using here, mixing it and making
it a little fluid. So whenever we use
any lining part, we take fluid color. So it should not
be a thick color, otherwise, lines will be thick. So it's just creating
small, small leaves. First, I'm creating one side
and then to the other side, and slowly, I will move
further on the top. So you can rotate your notebook or whatever
you are using. You can rotate your own
way and own comfort. So the above which I'm
creating the leaves, I'm making it a little
dark so that it is visible more because it is
a lighter background area. That's why I'm making the
leaves a little darker. So now let's talk a little
about the benefits. Now it is definitely
a air purifier, and it not only
controls humidity, it absorbs excess of
moisture from air, so it's very good
humidity controller, and also it reduces stress. It's very helpful for
stress reduction. And also in many medical
purposes and in cosmetics, these fern leaves are used. So many advantages of this
fern plant and of course, it looks very beautiful
and very decorative. So just adding the leaves and repeating the
process further. So all these repetitive process is like a meditative process. When you do a
repetitive process, and especially with colors, you get involved into it so much that you don't think
even of any such things. So these things are really
very meditative and also, and you are creating a
beautiful art for your own. So when I was
creating this class, I researched so
many indoor plants. I was not aware that there were so many indoor plants that
have so many benefits. So start I slowly started
exploring about them, and through this class, I'm also learning the
benefits of all these plants. So it's very good to learn about these indoor plants
which we have at home. So same process. I'm just
applying it on all the leaves. It just matter that what is
the direction of your stems, and like that, you have
to move the brush. And try using rigor
brush in this. Don't use the round brush. Try using rigor brush of size zero or you can use round brush, but round brush should
be of size zero. That brush definitely
you can use. Now, just creating one
more stem in between. So it should be filled with leaves and full of leaves,
it should look like. So like that, you have to
create the whole background. Just enjoy the process of this. It is mostly the same colors. I haven't used much
different colors in this. Mostly the light and colors are these and some are a little
more of hallow green, and some are a little more
towards the yellowish side. And little white, I'm
adding because I want to make a little lighter
color somewhere. So I'm just adding a
little white to it also to make a
little color opaque. So whenever you add white, the color becomes
a little opaque. So that's why I add a
little white to it. So just adding a few more leaves because we have to fill the
entire section with leaves. And you can see all these
paintings you can you can do within the within
half an hour. So it's easy, also, simple also and really
very meditative process. So do try it out and feel
the meditative effect of it. So I've kept these
paintings quite simple. I don't want to complicate this. That's why I have kept it
a little simple so that each and everyone
who is beginner and who has never tried
painting can try it out and see this
form of painting. Now I've started
adding it belows. That's why I have turned
the image upside down. That will be easy for
you also to paint the below leaves because when you turn your
page upside down, you can easily create the
lines in the upward direction. Simply I'm just
adding the leaves, and these leaves are
mostly close by. So now I have entirely filled the leaves of the
whole with tea leaves. You can also add few in
the middle if you want. So just adding few more. Mm adding a few more leaves. I don't want to leave
that black space visible. That's why I'm adding more
and more leaves to it so that it doesn't look like it is
separated black patch behind. That's why I'm
adding few leaves. And together it should look like it is filled with
entire leaf section. Now I'm just adding the lines, which is since this
is a hanging pot, so I'm just trying
to create the lines. These are little slanting
lines which I have created, and I'll be creating
three lines, the first, a little
thicker lines, not very thin lines. So just do it very carefully. If you want, you can
draw it with pencil and then outline it.
That is also okay. Here, also, I'm using my rigor brush for
doing all these things. So taking a little bit
more of green colour and adding a little
more leaves in between. So we are almost done
with this whole painting. Just a few more lines are left, and we are done with this. Now, let's create the lines mixing this Indian
red and black color. Do it very carefully, and it's better if you
create with pencil and then start creating the outline. So here you can see one is
bigger and one is small. So again, in between, I will put one line
for the hanging part. I'll not put it two,
so I'll put three. So this is the entire
painting, how it looks. You can also do it on
a black background. And to share your project works, I would love to see
your project works, and I hope you are enjoying this series of indoor painting. So thank you for watching.
12. Rubber Plant: Welcome back. So let's start
with the rubber plant. So let's first do the
sketching of the pot, and then we'll start
with the painting. Here, we will be
sketching leaves also a little bit because they
are different shapes. So yes, we will be sketching a little bit of leaves as well. So let's start. Just
a simple sketch, it is not very complicated. A simple pot and a simple leaf shapes in
different directions, I'll try to draw a little bit of round circle shape of this pot. Even if the shape is a
little bit of not proper, when you are doing the
painting, you can correct it. So I'm just giving
a mark so that, okay, the shape is like this. So the root of this, I'm making it a little broad and thin lines, thin branches. And with that branches, some leaves are coming out. And these leaves are a
little round in shape. It is not very pointed
shaped leaves. So I am creating a little
round shape of this. I Very simple and
easy sketch it is. Just you have to follow
the steps and you can easily draw this sketch. Now, once we have
drawn this sketch, we'll start with
painting of the pot, and then we'll start
painting the leaves. So you can see I've almost drawn in different
direction the leaves, some are up, some are down. So in different directions. Now let's start with
the pot painting, and let's see what colors
we are going to use here. So the first color is
the portrait pink, you can see my color
is already milky, and if your color is not milky, add some water to it. Take your round brush, wet your brush, and
grab the colors. Don't make the color very thin. It should be a milky color. We don't have to make the
color like transparent color. It should be a milky color. Then only that finish will come. So just taking this portrait
pink color and just blocking this entire pot so just slowly, I'm just covering
the entire sections. And this is the time when
you can shape your pot. If it is a little bit
more round in shape, you can just fix it
with the colors itself. And you can also cover
your pencil line. A simple pot color I have kept. I'm not making it
too complicated. So now let's start
with the stems. So for the stems, the colors
which we will be using here is the Indian red
and black color. So let's take out Indian red. If you don't have Indian red, you can use Bern Sienna. So just taking
Indian red, white, and and sap green. So let's start with the
painting now and black also. So all these colors I have
taken out on my palette. So mostly we will be
using this color only. So let's start with
first the stem painting. So for the below part, I'm just taking Indian
red and black mix and just covering
first the area, which is the area, which is the soil
area, actually. So I'm covering that part first. Now I will do these stems. So again, taking the same color. Just covering this soil part. It is a very dark color, so you have to make it a
very dark brownish color. So now let's start
painting this stem, starting from the top. You can use a smaller size
round brush also, if you want, mixing a little bit
of white to make it more a muted type of color. So just adding the lines. Now, see the lines
which is there in between the leaves
I have not added. It was just for reference. So I'm just leaving
that portion, and I'm just covering
the below part. You can see the below,
the brown color is a little lighter in shade. So when you add
white to that color, it will become a little light. Oh just adding few more lines. If you're facing problem by
doing with your round brush, take your rigor brush
or liner brush and then draw all these stems
and lines with that brush. Sometimes it happens,
it is very difficult to draw or paint with
your round brush. Just a simple lines. Again, I'm taking this
portrait pink and adding some textures into this
root which is there.
13. Rubber Plant Final Detailing: Welcome back. So let's start
with the painting of leaves. So just taking
black and sap green first and just mixing and making it a very
dark green color. So you must have seen that
these colors are very dark, and the leaves, especially the leaves of these rubber plants are
very dark in color. So that's why I'm
trying to make it a little dark in colour. So I'm just coloring
the leaves one by one, adding some of this
Indian red, also. You must have seen a little reddish touch to these leaves, if you have seen it closely. Especially the newer
leaves which are there. They are especially
a little bit of reddish in color,
like reddish, green. So one by one, I will start coloring each and every
leaves like that. So let's talk about the
benefits of the rubber plant. Now, the rubber plant requires very less water and low light. It's a very low
maintenance indoor plant, and, you know, one thing that it survives in air
conditioning rooms also. So you can put them in the
air conditioned room as well. And the best air
purification plant it is. And, of course, the colorful
foolage plant it is. So that's why most of them keep it inside the room as well. So these are some of the
benefits of the rubber plant. So just adding a little more of red somewhere
somewhere a little less red. So like that, little variations in the leaves
you have to put in. Somewhere it should
be a little dark, somewhere it should
be more reddish, so that there are variety of combinations of
leaves will be there. So I'm just trying to add
different combinations. So it's a very simple process. I'm just trying to fill in
the entire leaves which I have just drawn and
sketched with pencil. Sometimes I just use this sap
green and this Indian red, and I'm just
creating the leaves. Somewhere I'm just adding this Indian red sap
green and black, and I'm just creating
another leaf. So like that, you have
to keep the difference. And try to use milky color. Don't use very light
and transparent color. Otherwise, you will
have to repeat the process once
this base dries. So if it is very transparent, your color is very transparent. Wait for the base to
dry and then again, repeat the same process
with milky color. So try not to use very thin colour because
these are not watercolors. These are very thick
opaque uh colors. So we have to use it like that. Sometimes we use thin colour
as well for glazing medium, but mostly we use
thick colours in this. So just enjoy the
process of blocking. Now, once we are done
with the blocking, we will add a few
more details to it. So just have covered the entire leaves with
different types of greens. So now let's do a little
bit more of detailing. So for the detailing, we will be using this
portrait green and, of course, the thin brush. Now let's mix some more colors. So first I'm mixing
this red and white mix. Now I will take my bigger brush, that is the round brush, and I will mix a little
white to this green, which I mixed earlier. And I'll give a little
highlight from the center, just like the uh lines
in the diagonal shape, both the sides, just to give a little more texture
to this plant. Just adding a little
more white and again, adding few more textures. Similarly, I will do
for the others as well. So you don't have to
take very thick color, it should be a little thin
color that will work. Just the very light lines. Now this line I have created
in the opposite direction, it should be outward. What I will do, I
will just apply the same color which I have used earlier and just wipe out the
mistake which I have done. Again, I will take this
white and green mix and now I will
create those lines. It should be in the
upward, outward direction, not inward, that mistake
I have done earlier. So outward direction. Now, let's do the
others as well. So in most of the leaves, you have to add like
this type of texture. Once I've added these textures
and all the leaves, so I'll take a mix of
this red and white, and I'll try to
create the lines. So these lines are mostly light, this reddish or brownish color. It's not completely white. So that's what I'm
trying to create. It. After that, just draw the leaf
lines and give a little lines to
all the leaves. Also, the edge of this spot I'm just adding with this
red colour and also giving a little detail line to this spot with
simply red colour, Indian red colour and also giving a nice outline to this spot with
the same color. So now, Lad, let's add a few more details to the leaves, the lines
which are there. So the lines will be a mix
of Indian red and white, which is an outward direction. So I will be repeating same process on all the
leaves. It is very simple. But yet when it is
done like this, it comes out very beautiful. You can see, I'm
just adding one by one on all the leaves,
as you can see. The same painting,
you can also do it on the black sheet of your paper. It all depends upon what color you want to
choose the background color, either black,
brown, gray, white, any color of paper you can use to paint these beautiful
indoor plants, any paper, whichever
you feel like. And I'm just giving
a nice outline to all the leaves as well
with the same color. So your outlining is
important because you must have seen the edges a little bit of the reddish,
brownish in color. These are very small, I think, four inch to five inch
painting which I'm doing here. But when you will do
it in a bigger one, you can create more details. So for practice, I think we should always
do a smaller one first and then go for the
bigger one because a smaller ones are more
difficult than the bigger ones. So just very easy,
big nerve friendly. Everyone can try it
out if they follow each and every process which
I have taught over here. And you can see already this red and white mix of the lines have made this
whole leaf so beautiful. So just enjoy the
process of painting. And if you're trying it out, you can also tag me on my Instagram that is
Mohni Art Gallery. So just a final touch to it, and I'm almost done with it. Just making these
lines more bold. So I hope you enjoyed
doing this with me, and I will see you
in the next class.
14. Pearl Plant: Welcome back. Now, let's start with string of pearls plant. So these are the colors. We'll discuss it later. Let's first draw the pot, which is the hanging pot, which I will draw over here with the three strings
attached to it. So let's first draw the sketch, and then we'll start
with the painting. Simple cylindrical sketch
I have drawn over here, and then the strings
also I will try to draw. So just drawing three
strings as well. Now, let's discuss about the
colors that is hallow green, lemon yellow, portrait pink, gray, and burnt umber. So let's first do the
coloring of this pot. So I'm taking portrait
pink and mixing it with this gray color to make a very different kind
of grayish pink color. So first, I'm just
trying to paint the outline and then I'll
start filling the colors. You can see it is a grayish, pink type of color which
is coming over here. You can choose whatever color you want for the
base of the pot, but I have chosen this color. So it's up to you what
color you want to choose. You can choose a
different pot color. It's totally up to you. It's just the technique which I'm telling you that
how I am doing. But yes, you can do it on your own, whatever
you feel like. So just adding more of this
portrait pink in the center. So just creating the nice round curvy
shape at the bottom. Taking more of
this portrait pink and adding some textures
to one side of this. And to the other side, I will be adding some
grayish texture. Eight. You can see the two textures which
are coming there. Now, let's draw the
lines which are there. It's just making a little more neat blending
of these colors. Now, let's take the burned umber and we will be
drawing the lines. For drawing the lines,
make the color very thin. Otherwise, there will be thick
lines which will come up. It's just making the color fluid and trying to create
the shape of it, filling the upper
portion with this burned umber and filling the entire
thing with this color. Now, again, taking
this portrait pink and this gray and giving a little shape
to the upper portion. Just adding some edge to it, and then let's create the
lines which are hanging and which are there in the bottom
part of this spot as well. This I'm using the liner brush and trying to create
very thin lines. Making the criss cross
lines, as you can see. Also outlining this upper
portion with the same brush. Oh. Whenever you are doing any outline part, do it with very thin color. This is the shape.
Now let's begin with the outlining the outer part to give a nice smooth
shape to the spot. So now let's create the lines
where the leaves will fall. So making the color
a little fluid, mixing this lemon yellow
and green together. Very little amount of
lemon yellow I've mixed, and I'll just create
the lines where these all the leaves will fall. So this is covering the
entire pot, as you can see.
15. Pearl Plant Final Detailing: Welcome back. So
let's move further. Just taking this
To green first and creating a little bit of
yellow also on top of it. I haven't mixed both the colors. I've just taken To green
separately on top of it. I've added lemon yellow, and just creating dots. You have to create dot
shaped leaves in this. There should be no
shape of a proper leaf. The dots. When you use
two colored separately, you can see the two colors coming individually
in the leaves. Somewhere you have to use
just the tallow green. Somewhere you have to use
the mix of both the colors. Somewhere you have to
mix the colors and then use these
light green color. So like that, there will be
variations of green in this. So first, I added
on the top of it. Now I'll start adding to the
lines which I have drawn. Simple leaves, I'll try to draw. These are all dots
which I'm drawing here. No shape, nothing, just the dots which I'm trying
to draw over here. So now let's talk about the
benefits of this pearl plant. So it basically is a
unique decor piece, which is used in
many of the places for stress reducing and
offers coming effect. It is also an air purifier and
it's very low maintenance. And one more important
thing is that it symbolizes luck, growth, and prosperity, enhancing
personal and spaces energy. So these are benefits
which I have observed, which I have just taken out. And by doing all
these paintings and by searching for the
benefits of the plants, I'm also coming to know what are different types
of indoor plants, which I can also have it at my home because I don't
have all these plants, but definitely in near future, I will definitely
have these plants in my work studio
and in my home. So this plant, I really
like this pearl of string. It's really, very beautiful
and it looks really, very beautiful, if you
have seen in real life. So just creating dots, simple dots and with different
varieties of colors, as you can see, some
are dark green, some are light green, some are a mix of
green and yellow. So mostly where
there is a pot area, I'm trying to create a dark
green version of color. Now, here I'm mixing
this portrait pink and yellow and green mix to give another color of green. So this will come a little
lighter green color to it. Creating the dot with
the tip of my brush. Very simple and easy painting. You just have to create dots, very small small dots. So just enjoy the
process and you have to fill this entire thing
with these small, small dots of leaves which are filled into this whole pot area. It is a bit time
consuming process, but it is very relaxing and very beautiful the outcome
is, as you have seen. And once you will also
try it out and do it very patiently and take
your time and do it, especially the process, which is the repetitive process
which we are doing, sometimes we get bored. So take breaks, take a
tea break or something, and then start doing it
because sometimes it happens that we are bored
of repetitive process, and in a hurry, we
finish our work. But what happens when
we do it in a hurry, sometimes we spoil our painting. So be careful with that. Whenever you feel that
you are getting a little bored and you want to
finish it in one go. So take a break,
leave that painting, and then start after that. Now again, I'm adding
a little bit more of the lines in between, just to add a little
bit more leaves. Now, these lines are just imaginary lines
which I have created. You can create your own
imaginations of the lines. You can create the
strings which are moving on top of the string. Anything you can
create by your own, it's just an idea which I am
trying to give it to you. But remember that there should be varieties
of greens in this. Otherwise, it will look
like a very flat painting. So if you want a little more
vibrancy to your painting, just add different
varieties of greens. Like one is a dark green
without mixing any color. One, you have to mix it
with yellow and green. And the third one, I have
mixed a little bit of this portrait pink to give it a more lighter
shade of green. So like that, you can make and mix and play with the colors, and you can make varieties
of greens with this. So I'm almost done
with the texture part. I'll just make this
upper line a bit more thick because I feel
that it is a very thin line. So I'll make that line
a little more thicker. Again, I'm just
mixing a portrait pink to this burnt umber. And I'll just try to make the lines a little
bit more thicker. You can see I'm just making these lines a little more thick. And sometimes we face a little difficulty
while drawing the lines. You can just rotate your
page towards your side, and then you can
draw these lines. That will be easy for you. So a little more thicker lines. A little frills I will add
to the bottom part of it. Like, these are the threads which are combined
and it's looking like a thread which is tied over here and it is coming out from the
center. So it's like that. See very simple and easy and
beautiful painting it is. When you will start doing it, you will find it
very interesting and the result is
really very beautiful. You can try it on any sheet, any paper, whatever you want. So this is the whole
outcome of the painting. So if you are trying it out, do tag me on my Instagram. That is MohnirtGallery. I love to see your projects. So see you in the next class.
16. Chinese Money Plant: Welcome back. So let's start
with Chinese Money Plant. So let's do a little
sketching of the pot, and then we'll start
with the painting. So here we will be
sketching not only the pot, but also little leaves also because they are in
different directions. That's why I will first outline the leaves and then we'll
start filling the colors. So first I'm creating a nice
circular, round shape pot. You can just turn
the page towards your side and you can create
a nice circular round thing. If you're not able to
do it with free hand, you can use your compass or any circular thing to
create this shape. Now this is a shape which I have created a little
bit of corrections, I'll do, and it's done. And then we'll start
creating the leaves. So for the leaves, these are actually a hard shape, some oval shaped leaves, which you must have
seen the Chinese plant. And this is a nice, strong strength which is
there in the plant, which is a thick
like you can say, a thick base of this plant. Is there, and the
rest of the leaves, which has the stems, very thin stems, but the
base is a very thick one. So that's why I have
created a thick base, and some are like
heart shaped leaves, some are over leaves. So when it is growing, it
is a shape of over leaf. When when it is fully grown, it is a shape of a little
heart shaped leaves. So like a bonsai root I have
created the billow part, and the rest are very
small, small, tiny, tiny branches and stems
which will be coming out. And it is full of
leaves, actually. So that's why I'm
creating it very closely. So just trying to take out one by one from
here and there. So are in different directions. So, likewise, I'm trying
to create all the leaves. Now, once we are done with
the complete drawing, we'll start with the
painting process. So first, we'll paint the pot. So for this, we will
be using two colors. That is the mouth color. This is gray, portrait pink, sap green, and mouth colors. So these colors first
I will be using. And also lemon yellow. So let's take out the colors. And let's start
with the painting. So these are all the
colors which I've taken out, as you can see. So let's remove our
brush from here. Let's start with
the round brush. You can use size four or
size six round brush, whatever size you feel like. And then I will take
the first color, which is the mauve color, and it is a mouth color. You can take purple color. You can take burgundy color, any color you want you can
take for doing the pot. So I will be using here two colors this mauve
color and portrait pink. So first, I'm just outlining it, and then I'll start
painting the entire pot. Go slowly one by one, take your time and do it. So whenever you are doing
any pod thing or anything, you just try to outline the entire thing and then
start filling the colors. That will be easy for you
and you will not be able to take out the colors
from the boundaries. So you can see a neat
boundary will be created. That's why I have first
done the outline, and then I'm starting
to fill the colors. So just with one color
I'm filling first, Always take milky color when you are doing the
blocking of anything. Don't take thin colour. Otherwise, it will be
very transparent and I don't want the thing
to be transparent, so it should be opaque color. That's why I use milky color. So here my color is
already in a paste form, so I've just taken water on my brush and I'm
directly using the color. But if your color is a little
thick and a little hard, then just add water, make it a little milky form,
and then use it. Giving a nice round
shape to this pot. Now, this is a time
when you can fix the mistakes of sketching
and everything. So just a round
shape I have given. Now I've washed my brush and taking this portrait
pink color and starting to move from the center to the outward direction. When I'm moving this color
in the circular motion, this color will start mixing
with the mauve color, and you will see a nice, beautiful color of mix of
this portrait pink and mauve. Because in gauche, the
color reactivates. That's why this color has
started mixing with this color, and it just started turning
into a nice, light, pinkish purplish shade, which is coming out
really very well. So just trying to blend
both the colors together. I really like this
type of painting, especially in the pot section. So you will see in
most of my paintings, I will be using this
type of technique. So again, I'm adding
this portrait pink and slowly
blending the colors. It actually looks very beautiful when it is totally blended with the darker color. So you can see slowly, slowly, you have to do
don't press your brush. Do it in a very light form. Sometimes just a dam
brush will also work. So no need to take any color, just a dam brush, and
you are good to go. Now let's do the painting
of the upper part. So for upper part, I will be taking one more
color that is burnt umber. So let's take out
that color as well. So very little amount
I'm taking because only the below
part I have to do. So first, taking this
burn tumber and covering this nice hard tree section, which is there, that
is a plant base. The plant root, you can say. So it's quite a big
triangular shape it has. I've just blocken in that shape. Now I'm taking gray color, and I'll just create some nice dots inside
this pot section, which will look like that
there are pebbles which are there above on the
top of the soil. So I'm just trying to
create a texture of pebble. Also, you can mix
some colors of gray and burn tumber to create
a darker pebble color. Small stone type of shapes, mixing both gray and portrait pink to create,
again, lighter shade. So different different shades of colors I've just added just
by using the dot technique. And again, I'm taking
this mauve color and just outlining it further. So now we will start
with the upper part. So I will add a
little details to this brown area as well,
where the stem is. So just taking brown color and creating some more
brown colour pebbles inside this to depict that
there are some area, which is the inside the pot, which is the ground area. So just adding different
different textures of colors, and then I'll take
this gray color, and I'll create some
textures inside this part, gray and portrait pink mix, just adding some textures onto the stem area,
lines random lines.
17. Chinese Money Plant Final Detailing: Welcome back. Now, let's
start with the leaves. So I'll be taking first little
gray and sap cream mix, little amount of gray to give a grayish look to the leaves, and just filling it with my
round brush of size four. Just trying to fill it up very carefully so that the
shape is not disturbed. So do it very slowly. Take your time and just fill the entire leaf
sections which are created. And use very thick color. It should not be like
very thin colour. Don't add too much water. Again, it should
be a milky color. Then only in one coat, it will be a perfect finish. And if it is a thin color, then you have to apply at
least two coats of it. So it's better to
take a thick colour rather than doing repeating
two, three times. Now, just mixing this lemon
yallow to this green and making another shade of green. So different different greens
will look more beautiful. Now, let's talk about
a little benefit about the Chinese money plant. So as the name says,
it is a money plant, so it mostly describes the
wealth and prosperity. It is, of course, the purifier, and it is an indoor plant. So it is air purifier. Also, it is non
toxic to the pets. It's very pet friendly plant. You can keep it at home. And also it is of
very low maintenance. And it's very nice round shape. It looks very nice if you are keeping it
because of its shape. Now just adding, again,
different different greens. I'm not making the green very light because I want
a dark green color. That's why I'm not
mixing too much of the grayish or yellowish
color because on top of it, there is a yellow
lines or veins, which we will be creating
with yellow color, so I don't want the
color to be very light. So I'm just filling all these leaves with
certain dark color. So just enjoy the process of filling two to three
leaves are left. Now, you can see
I have completed whole filling of the leaves. Now we'll start with
certain detailing. So I'm just taking
yellow and mixing it with green to make it
a light green colour. And I'll just first make
the lines which are there. And again, in the center, you can see there's a space, so I'm just adding on top of it. Now why here I am using the light green is that if
you use the dark green, it will not be visible. That's why I'm trying to use a little lighter green than
the green which is below. That's why I have mixed it
a little lighter green. So here also, I'll create one
because I see it is empty. So likewise, you can adjust
your leaves here and there where you feel that it is empty space
and you can fill it. So now I'm taking my rigor
brush and just giving lines, giving the lines
to all the leaves. Very thin stems are these. Now let's do a little bit of
detailing inside the leaves. So mixing portrait pink and lemon yellow
in a little bit of gray and just trying to first
outline the outer part. Again, whenever you
are outlining it, try to use very
thin liner brush. So this is my very
thin liner brush. So then only that thin
line will be created. If you are having issue
in creating thin lines, try to use any technical
pent to create the lines. That is also fine. But if you're not able to
create thin lines, then practice a lot
with the lining part. Do some lining straight
lines, horizontal lines, vertical lines practice,
and eventually you'll be able to
draw the thin lines. So this is how we practice
thin lines actually. And whenever you are
doing thin lines, make the color very fluid. It should be in liquid form. Then only those
lines will be thin. If you will use a
creamy texture color, then the lines will
be thick and uneven. So whenever you are doing
any detailing part, any lining part, try to use a little liquid
form of color. So just I'm outlining
all the leaves. Now, when you will outline, you can easily see the shape of each and every leaves,
how the shapes are. So that's why outlining
is important over here. So after outlining,
I will be adding veins inside these leaves. If you want, you can
do one more coat of this green on top of it to
make it a smooth finish, but I didn't want the smooth
finish of these leaves. That's why I have done just
one coat of the greens. But you can do two
coats of the greens. So my lining is almost done. Now I will start creating the
details inside the leaves. So first, I'm using
the round brush with a thick colour of lemon yellow and a mix of portrait pink and just
adding in the center a dot. You must have seen there are yellow veins inside
these leaves. So that's what I'm creating. First, I've created dot. Now the veins, again, I will be using same liner
brush for creating it. Again, take very thin color. Otherwise, the lines
will be very thick. So try to make very thin color and try to create these lines. This is actually the
main thing inside this whole leaf painting because all these thin
lines which are in, like, in circular form, that makes the whole
leaf beautiful. So try to use thin yellowish
color and create the lines. So I'll be showing
you a little closely so that you can see how
thin the lines are. So you can see how thin the
lines you have to create. So try to make it very
thin as thin as possible. And the color should
be, again, very thin. Don't use thick colour. Otherwise, you will not be
able to create thin lines. So, likewise, we
have to repeat on each and every leaf
which we have created. Now this leaf, I have created
in a very small notebook, but if you are creating
on a bigger one, it will be easy for you to
create more and more veins. But if you are creating on
a smaller piece of paper, then yes, it is a time
consuming process. But this helps us to
practice more and our hands also the
muscular exercise, as well as working on
a smaller piece of painting is more tough than
painting on a bigger one. So just creating the lines
and these entire leaves. Now same painting,
you can repeat it on the black sheet of paper, which I will show
you after this. So we're almost done with this Chinese money
plant painting. So I'll show you how
you can do it on the black sheet of
paper as well so that you can decide which paper you have to choose either
black or white or gray, any color you can choose. So this is it. This is
the entire painting. Just few more lines
and we are done. So a little bit shape. I'm just trying to
give it to this also so that proper
shape comes out. I should not look
like that it is mixed with that stone area. Just adding few more stones, and we are good to go. So this is it. So you can also do it on a black sheet of
paper like this. So we will now meet
in our next class. So this is the two painting.
I hope you enjoyed it.
18. Peace Lily Plant: Welcome back. So let's start
with Peace Lily plant. So let's first do the
sketch of the pot. And it's, again, a
very simple sketch. So just with my pencil, I'm drawing a rough
sketch of the pot, and then we'll start
with the painting. Simple sketch of up
oval and below also, I'll try to give a
little oval shape to it. So just rotating my notebook to give a nice oval shape to it. If you have issues in creating
such type of oval shapes, you can use any round or you can use your compass for
creating this shape. Or later on, you can
adjust with the colors. You can fix the lining
issues with the colors. A little more roundness
to the other side. So this is it. So now let's
do the coloring part. But before doing
the coloring part, let's see what colors
we need first. So first is the permanent
light blue color. Second is the gray color. Third is the white color. The fourth one is lemon yellow, and the fifth one
is thalo turquoise. So these are colors
we will be needing. So I've just taken
out the colors. There's gray, blue,
yellow, white, and blue. So that is thalo turquoise, which I'm using here
instead of any green. So just taking the
first light blue color. If you don't have
light blue colour, you can easily make with any blue color and add
just white color into it. You can easily make
that light color. If you have cobalt
blue or serim blue, this type of color
can easily be made. So just adding the half of
this with light blue color. So you can see the half
circle which is below, I'm just adding with this color using my round
brush of size four. If you are making a
bigger size indoor plant, use bigger size round brush. So round brush, you have
to decide on the basis of the size of the indoor plant
which you are painting. So just outlining the first, the outer part, and then
slowly fill the colors. Once you do that, the colors
will never come outside. Now, the blower
part I have done, now I will do the upper part. The upper part with gray color. Simply just outline the area and then start
filling the colors. It's a very simple and easy way of doing the pot
with two colors. Once we are done with this, we will start
creating the leaves, adding a little more
lines on the top. And then a little bit more of this gray and this yellow mix. And inside, I will be
adding this colour, making a little darker color and just adding a little blue to
it to make a little grayish, greenish color type of thing. And I'll just add it inside.
19. Peace Lily Final Detailing: Welcome back. Now let's
start with the painting. So here I'm taking
halo turquoise and mixing it with lemon yellow. So you can see a
very dark color of green will be formed when
you mix yellow with this. Now, this is lemon yellow,
which I'm using here. So first, I will
create these stems, and slowly I will
just move my brush. With one stroke only, I'll try to create the leaves. And if the leaf is
a little thicker, then you have to just repeat this one stroke process again and make the
leaf a little thick. And just make sure that the tip is pointed when
you are doing it. So without doing any drawing
anything with one stroke, you can paint this by
using your round brush. So again, I'm taking
this color and use milky color when you are
creating such leaves. Don't use thin color. Otherwise, it will be a
very transparent thing, and you will have
to do it again. So try to use milky color. And you can see, you have to
create thick leaves in this. It is not thin leaves. These are quite thick leaves
in different directions. So that's what I'm
trying to do over here. First I'm creating the stem, and then I will create
the leaves accordingly. So you can add different
variations of leaves. One is dark, one is light. If it is dark, then you
have to add less yellow, and if it is light, you
have to add more yellow. So these two things
you have to keep in mind when you are
doing this step. So very simple step. You just have to
move your brush, like in a wavy mode and then the shape will
automatically be created. So when you press your brush, it will create a thick lines. When you will lose your brush, it will create a thin line. So this is the
technique which I'm using here to create the leaves. Now, I'm pressing the
brush to create thick, and as I'm going up, I'm releasing the brush
to create thin line. So likewise, we have to go. So now let's talk
about the benefits. So the first benefit is that
it boosts oxygen level. It also reduces
the stress level. The stress level is
reduced by this, as the name suggests,
it is peace lily. So obviously, it reduces stress. Also, it improves the humidity of your room where
you are keeping it, and it is useful gives
a positive vibe, a positive energy when you will keep this peace lily plant. And also it enhances
the productivity. So these are the advantages and benefits of using a
peace lily plant. So just using the same steps
and I'm creating the leaves. You can see in
different directions. I'm trying to create
it like a U shape, which comes out to be
from top, you can see. So very simple step, and in this case, you can also overlap the leaves once you have done the
background of the leaf and it has dried completely because gauge colors
dry very fast. So you can easily do the
over layering on this. So just try to first make sure
that the background color, the one which you have
done in the background, it has dried, then only
do the overlapping part. So if you're doing overlapping, if the color behind is dark, use the top color
as the light color and don't repeat it
again and again. Otherwise, that
background color will reactivate and it will
mix with this color. So these things you
have to keep in mind when you are
using gauche colors. This case is not with
the acrylics because acrylics does not
reactivate with water, so you can always redo it. But yes, gauche
reactivates with water, so you have to be
careful when you are doing it when you are
layering the colors. Very simple process. You can see I'm just layering
it with darker color. So darker color means
you have to just take that thalo turquoise color and that dark color
will be formed. So once I'm done with
the leaves part, I will be creating small flowers which are really
very white in color. But since my
background is white, I cannot use white colour, so I will be using a
mix of gray to it. So just adding some
layers of the leaves. You can see this side, I have already added so many layers. This side, it is still left. So this side also I will
add a little bit of layers. And always use milky color. So I am really enjoying
this indoor plant. I hope you guys are, too, because I really love painting
the leaves and the lines, everything, especially
the trees also. So I will be bringing one class on different types of
trees which are there. So this one I thought when I so when I saw
these indoor plants, and I thought, why not to create the indoor plants and see
what benefits it has. So this is how I'm also
learning because I also was also not aware of
these many benefits of keeping the indoor plants. But by doing this exercise, I am also becoming aware of
the benefits and everything. So now I will create the small
flowers which are there. First I'm just
creating the line. And the flower which I will
create is with gray color. But if you're using
a darker background, you can directly
use white color. Since my background
is already white, I cannot use white color. So just creating a
leaf shape Flower. It's like that only the
leafy shape flower. And in between, there
is a yellowish bud. It's just a simple
flower, it is. But if you're using a gray or brown background
or black background, you can directly
use white color. So very simple and easy step. So I don't want to complicate
these indoor plans. I want each and
everyone to try it out. Even the big nurs can try
it out. It's very simple. You just have to follow each and every steps which I'm doing. So now I will be taking yellow
color and just putting in between this thick yellow color. Now, see, this yellow
is not visible, so I'll just add little
white to it to make it more visible and you have to use
thick raw yellow color. Then only it will pop out. So you can see how this
yellow is popping out. When you will do it on
the black background, it will pop out more. But since all the paintings I'm doing on the
white background. So this painting also I did
it on the white background. So I'm just creating the lines
with light green colour. So we are almost done
with this painting, and I hope you guys will also enjoy this while
doing this painting. It's a very beautiful
plant and very beautiful and very vibrant
green color it has. So I hope you will also
enjoy doing this plant. So there are little
little gaps in between, which I'm filling
it with gray color. And later on, I will draw
the lines with green also. This is the entire look of the painting of this into plant. I hope you also will enjoy
doing this painting. And if you are trying it out, do share me and tag
me on my Instagram. That is Moheni Art Gallery. I will love to see
it. Just adding a nice border on the
top with white colour. The edge of this pot. And this is it. So I hope
you guys enjoyed this. I'll show you what I have done on how I have done
on this black paper, how it looks on the black
paper when you will do it. So you can do it on
black paper as well. So let me just show you how I have done on
this black paper. So this is the one which I
have done on the black paper. Like this, you can use it.
20. Bird Of Paradise Plant: Come back. So let's start
with bird of paradise plant. Let's first draw the pot, and then we will also draw the leaves a little
bit because they are different type of leaf and these leaves are
actually very big, so I will draw a little bit, and then we'll start
with the painting. So first I'm drawing the pot, which is quite a ucular like
a cylindrical pot it is, which I am trying
to give it a shape. After that, I will just draw the leaves and
little stand to it. So just simple basic drawing I'm drawing over
here, as you can see. Now I will draw the leaves. Just simple leaves, but
these are bigger leaves, so we have to draw a
bigger line curvy line. So simple line first, I'm drawing, and then I will
start drawing the leaves. So simple leaves, but
these are bigger ones. So just trying to
give a little shape of in different
direction the leaves. Like, one is moving in left, one is moving in right,
one is in the center. So like that, one is
overlapping each other. So like that, I will
try to give it a shape. So very simple drawing it
is not very complicated. You just have to follow the steps and you'll
be able to draw it. Since those three leaves are
in different directions, that's why the
shape is different. One is facing on the
top, one is at the side. So that's why the shape of these leaves are a
little different. These shapes are actually
like a banana leaf shape, you can say, and it's a very
beautiful indoor plant. Just follow the process and draw the sketch first and then
do the coloring part. It will be easy for you once
you have drawn the sketch. So you can see one side
I have already drawn. I'm doing the other side. Most of the leaves I draw
with my imaginations. I just see how the plant is, and with my own imaginations, I just try to draw the leaves. You can also do the same. It's not like exactly what I
am drawing you have to draw. You can draw the leaves according to your
own imagination. Just the shape
should be like this, the side and the top
leaves, the shape matters. Now, once we have drawn, now let's do the painting
of the pot first. So two colors, which is gray and portrait
pink, I have taken. So let's start
with the painting. So I've taken round brush. Now, let's do the
painting first, dip your brush in
water, grab the colors. Again, milky color it should be. Just using one color that is the portrait pink color to
block in the entire pot first. Use thick, milky color. Don't use thin colour.
Otherwise, you will have to repeat the process. So just try to block
in the entire pot. Whenever you are doing any
blocking of the object, you have to use thick color. Thick color means milky color and try not to use
watercolor types. Don't mix too much water
in this gauche color. Just filling the color, you can see how thick
and opaque the color is, coloring the below part as well. So now you can see I've just
colored the entire pot. Now I'll give a
little details also. But first, let's color it and give the upper
part a little shape. So in this, I've just
mixed a little bit of care to give a separate
touch to the top part. So now let's add some lines to this pot using my rigor brush. Now, whenever you are
creating any liner thing, try to use thin color, add some water to
your color and make the color a little thin
and then do the detailing. So I'm just creating
the outline of the pot. And the reason of making thick lines is because you
are using thick colour, if you will use thin colour, the lines will be very thin. And you just have to use the tip of your brush
to create the lines. Now, I'm first
outlining the pot, and then I will give
a little design in a diagonal shape to
the spot as well. Just giving a design in
a diagonal direction. So we're almost done
with the pot part, the outlining we will do, and then we'll start
painting the leaves. So just very carefully
just draw the lines. You can do any
drawing on the pot. You can leave the pot like this. It's up to you how you
want to decorate your pot. It's your pot. You can decorate it anyway. So this is my style
of decorations. You can decorate it in any
style. It's up to you.
21. Bird Of Paradise Detailing: Welcome back. So you can see all the colors permanent rose, lemon yellow, gray,
portrait pink. This is sap green, thalo
turquoise, and orange. These are the colors
which I have taken out. So let's start first with
filling with green color. So the green which I'm
using here is sap green. Now, first, I will make
brown color by mixing gray and a little
bit of Taloturquois, little bit orange to make
a little brownish color. So you can see a little
brownish color has come up. So by mixing all these colors, you can simply
make brown colors. Now, let's start with first
blocking of the leaves. Again, I'm using in each and
every painting, same brush. So even if I miss telling
that what brush I'm using, it's the same brush of size for round brush which
I am using here. So first, I will give
a little outline to the leaves and I'll
start filling the leaves. So taking both the
colors together, and I'll just create
the filling first. Simply blocking the leaves, you can see it's a
very dark color. So we will be layering the leaves here because
there are lots of textures which needs to be
added in this leaf pattern. So just adding the colors first, leaving the center line. And slowly, I'll just
add some shapes, giving a little shape to the you can see the shade which is coming here
when I'm using the brush, mixing this lemon yellow. This type of shade I will be
adding to the entire leaves. Just just rotate it towards yourself and it'll be
easy for you to do it. So taking just yellow and
pink portrait pink mix and just creating
these textures. It's like a shading technique
which I'm using here. And again, milky color
don't use very thin color. Otherwise, that color which
is at the bottom will come start mixing with these
colors, which we don't want. So try to use thick color over here when you are
using gauze paints. Similarly, we will be doing
the other leaves as well. So first, we will
do with dark color, and then we'll start
creating the textures. So I'm mixing both the colors, that is thalo turquoise
and sap green together to create a
nice dark green color. And I'm first blocking the leaf. So you can see I'm just
first giving the shape, the border, and then I
start filling the color. While doing this, you will be able to paint it
nicely the shape, and the colors will not go
outside your boundaries. So first, try to add the outline to the leaves and then start
filling the colors. That will be easy
for you to do it. So I'm just filling this color and after this base has dried, it dries very fast as I
live in the humid area, so it dries very fast. If you're living in a colder
area and it takes time to wait for it to dry and
then give these textures. So very thick creamy
colors are these. Similarly, we will repeat for
the other leaves as well. These textures actually
adds beauty to the leaves. So again, taking the same color. And this time, the shape of
it is a little different. So it's like a
half circle shape. So first doing it with dark color and then I'll
start giving the texture. So you can first fill in these dark color first
on all the leaves. And one by one, it
will slowly dry up, and then you can do
the texture part. This is also one way of
doing that one color you do it for all the leaves and then
start creating the shades. So first of all, why it is
called a bird of paradise? Because the flower which it has, it is a shape of a bird. It's like a shape of a bird. That's why it is called as
a bird of paradise plant. And, of course, let's
talk about the benefits. The benefits are it's
actually an indoor plant, so it is an air purifier. Also, it is very
low maintenance. And it also has a
quality of protection from allergens that it absorbs many toxins
from the environment. It has a capability of
absorbing all the toxins from the environment and keep
your environment fresh. And it is also a stress reducer. So these are all the benefits,
some of the benefits. There are many
benefits, actually. These are some of
them. So you can see now I'm again adding a
little texture to the leaves. So from the upper direction. Now let's do the other leaves. So when you mix these
hallow turquoise, it is a very bright green
color which comes up. So I really like
this green color. And when you add yellow to
that touch of this dark color, the yellowish green shade which comes up on the
leaves is very beautiful. So first, I'll
just start filling the entire leaves and then
I'll start giving the details. So just enjoy the process
of filling it up. You can speed up the process
to two X if you want, or you can go along with
me. It's up to you. You can see how thick
color I'm using here when I'm taking the paint. So if you use thick
colour in one go, that color will be perfect. You don't need to add
more colors to it. But if you will use
thin, transparent color, then you will have to add at least one more
layer of blocking. So try to use thick
colours when you are doing especially
the blocking part. So we're almost done
with the blocking. Just one more leaf
is left and we are done with the blocking part, and then we'll start with
the detailing of the leaves as we did the other leaves.
22. Bird Of Paradise Final Detailing: Welcome back. So
let's start further. Same way, we have
to do the detailing of the other leaves as well. Take thick color and try to move your brush in the direction, like slanting
downward directions. Then only the shapes will come. So taking a very thick color of yellow mix and just moving the brush in the
downward direction, you can rotate your notebook or whatever you are
doing towards your side, so it will be easy for
you to paint the leaves. Just adding more of dark color to give a mix to this shade. Again, same technique I'm
applying to the other leaves. Similar way, we have to add
the entire leaves like this, giving a little
texture to the leaves. Now, here you can see that
two leaves are overlapping, so I have done till above, and I have left the below part. And same technique I'm
doing the other side with the darker color so that it gives a nice texture
to the leaves. Just take your time
and do it slowly and carefully so that
the brush marks doesn't go outside the border. So all these process is a time consuming process
and it takes a little time. So do it slowly one by one and slowly give that
texture to the leaves. So once we are done with
all these leafy parts, we'll start with the
middle part of the line, which is the in line, and we'll create one flower which
is of a bird shape. That's why it is called
as bird of paradise. So that is very important flower which we will create over here. So just adding the details as we can see one leaf
is overlapping another. So accordingly, you have
to give the details. So here also, I'm using the
same brush, same thing. Everything is similar.
Now, let's add the lines. I've just mixed a little bit of yellow and this portrait pink, and I'm just creating the lines. Already, little green is
there in that yellow. So yellow, portrait
pink and little bit of green mix to create
this middle line. Here, also, I'm using
the same brush, that is the round brush. You can use your
rigor brush as well. If you are not easy with
the round brush if you face difficulty creating
the lines with round brush, you can use the
rigor brush as well. It's up to you. So do it carefully. Take your time, rotate your notebook according
to your convenience, where you can see how the
lines will be moving straight. So accordingly, just rotate
your notebook and try to fill in the lines. So once we are done
with the lines, I will start creating the flour. I haven't drawn the flower yet. I'll directly do with the colors by doing the layering
technique here. So here, actually, the
layering technique will be required. So again, mixing this
yellow and portrait pink, and I'm just trying
to add some lines. So here I will be
adding the flour. So I'm mixing this
yellow and portrait pink first and creating the base, which is it's
actually a V shape. So first, I'm creating a V
shape with my round brush. And then on top of that, there is a orange flower shape
which will be coming up. So with the orange thick colour you have to take because
we are layering it. So try to take thick colours
and not too much water, otherwise, that green
will mix to this orange. So thick color you have to
take this time and creating a nice flower shape
orangy color on the top. And after that, I will
be using the rose pink. That is the permanent rose
to give a little details. But first, let's
add a little detail and lines to this
below part first. And then a little texture, I will add with my
permanent rose also. Simple floury shaves and little lines which
is coming out. So very tiny details are these which I'm trying
to add over here. So now just adding a
bit more of orange to make a little darker color and a little bit
of rose pink also. And then we'll start with
another detailing at the roots of the stems which are connecting just
using this rose pink, and I will be just adding it
down the rose pink color. There are certain roots which are coming out like this color. So that's what I'm
trying to give a shape, little bit of at portrait pink, I'm mixing to it and just adding the
texture at the bottom. So you can see, I've just
added at the bottom part. A little bit portrait pink I'm adding in between
these textures. So this is the complete painting of the uh Bird of Paradise, a little bit more detailing, and we are done
with the painting. I'm mixing this portrait
pink and yellow, and I will try to make
the color a little thin, a very thin color it should be, and we'll start a
little outlining thing. So let's outline
these lines which are in the center with this color. Just a simple outline
to all these stems. You can see how beautiful and bright this
painting is looking. Now I'm mixing a
little bit yellow and this greenish color to it, and I'll just try to outline
all the leaves first. So you can see how
thin the color is. So you have to take
a liquid color when you are drawing the
outlines of all the leaves. So very very thin line, and the color should
also be thin. So try to add water
in that color and make the color thin and
then create the line. These lining things actually
add beauty to the painting. That's why it is very important. So just try to add the lines And we're almost done
with the painting. I hope you enjoyed this beautiful painting
of Bird of Paradise. So I really enjoy doing this. It's a very beautiful
plant and very beautiful. The painting has also come up. So I hope you will enjoy
doing this painting. So just outlining it, so rotate your notebooks towards your side
and then outline it. That will be easy for
you to outline it. And we almost done with
the outlining part and a little bit
more of the outline. And this is the
complete painting. I hope you enjoyed doing this. So we'll meet in the next class.
23. Croton Plant: Welcome back. Let's
paint Croton plant. So let's first start with the
sketching of the pot first. It's a different kind of pot which has a round twist to it. So let's start first
making the upper base, and then we'll start
with the shape, which is having a little
more twist turn to it. So just drawing a
rough sketch and whatever little mistakes if you're making while
doing the sketch, you can easily cover it by coloring it with gauche because the gauches are
very opaque colors, so you can easily cover them. No need to rub it. So now we will also create some
leaves which are there. You must have seen different
kinds of croton plants, but this is one
of them which has variety of colors
inside that leaf. You must have seen
yellow, orange, pink. So variety of colors are there
inside this Croton plant, which makes it
really, beautiful. So I'm just first creating a normal sketch of the leaf
in different directions. So overlapping leaves as well. Once we are done
with the drawing, we'll start first
painting the pot, and then we'll paint the leaves. Now, this is the imagination of the leaves which I'm drawing. You can draw it in any
form. It's not like that. Whatever I am drawing, you have to draw the same
leaves in the same directions. You can draw it
in any direction, whichever directions you want. So let's start with the
coloring of the base. So the two colors which
I will be using here is the Prussian blue and
permanent blue light. So these two colors
I'm using here. You can also use two
different blues, one dark and one light blue. It's up to you what
color you want to choose to paint your own pot. So I have chosen
this color because I want a combination of
light and dark color. So that's why I have
chosen this color. So first, I'm just doing
the outline of the pot, and then I will start
filling the pot. So once you outline the pot, it will be easier for you
to paint the entire thing because the colors will
not go outside the line. So it will be easy
for you to paint it. Now, once you are done
with the outlining, I'll just start filling
first with the dark color. So quite dark color it
is. The Prussian blue. Then inside, I will start adding the lighter
version of blue. The way I have done the other pots like doing
in a circular motion, same way I will try to
do this one as well. Just adding the light color first and moving it
in a circular motion. So whenever you are
filling any color, blocking anything, try
to use milky color. Don't use very thin
color because it will not look good because
these are not watercolors. These are gauche colors and gauche color should be opaque. I should not be very thin. Otherwise, the brightness and vibrancy of the
color will be gone. So try to use colour,
thick, milky color. Just moving my brush
in a circular motion. Sometimes dam brush
also works very well for creating such type of
smoothness to the base. Just the dam brush
will work very well for making the
whole blending thing, especially the circular
motion blending. So just enjoy the process of painting the whole pot
and a little bit design. Also, I will try to make on this once I'm done
with this blending. So also, we will paint
the below stand, which is there, a small
stand as you can see, and the above line simple thick line I am using over here. Okay? So again, a
little line below. Simple lining thing
I'm trying to create. Now, see, this color has
come out a little bit. I'm just using water, and you can easily remove the
mistakes with just water. So this is how you can
remove the mistakes, but try to remove it
before the colour dries. My color was wet, so I could
have easily removed that. Now, the stand part you can see how perfectly the blending is done when you
do it a little bit below, I want it to be more smooth, so I'm just adding a
little darker color first. And then I'll try to smooth it more because the blending should be very
smooth in this case. Then only that effect, that glowing effect of light blue and dark
blue will come. So just try to blend it
as good as possible. So just doing the blending part. Even if you have created
the lines or anything and you see that your blending
has not been perfect. We'll just remove those lines again. You can draw it again. Just try to remove
those lines and first blend the colors and then
again try to create the lines. You can always redo
the things in gosh, as well as in acrylics. In Gauche, it
reactivates with water, so it's perfectly fine. You can remove those
marks with water. And in acrylics, you
can always overdo it. So like that, I've just
removed the marks first, and again, I will try
to create those lines. So my pot painting
is almost done. We'll start with
the leaf painting. So just below also, I'm adding two more lines.
24. Croton Plant Final Detailing: Welcome back. So let's
do the leaf painting. All the colors I have taken out. This is how green, orange,
chrome yellow, white. So let's start first with chrome yellow and mix
of this how green. So just mixing a little bit
of yellow to this how green, and I'll just first
apply one layer of this color on each leaf. So first, you just
outline it and then start filling this color
with your round brush. So everywhere I will be using same round brush of size four. You can also use your
same round brush of size two, four, six, anyone, depending upon
the size of your paper. If you're making a
bigger size plant, then you have to use
bigger size round brush. So this is how we
decide the brushes. So to make a dark color, I'm just adding
this Persian blue so that it shows a little
overlapping thing. Because if I will
use the same color, overlapping will not appear. That's why I have to change
a color a little bit to make it like a
overlapping look. So again, I've changed
the color a little light, and again, I'm overlapping it. Like this, we do the leaves. Whenever we are overlapping it, try to change the colors, dark, light, like that. So it will be helpful for
you to understand how the leaves are moving and how the leaves are
overlapping each other. Now, let's discuss about the
benefits of Croton plant. So it is obvious that
it is an indoor plant, so it is of air purifier. And because it is a very
vibrant color plant, so it enhances the mood as well. Also, it increases the humidity. If you are putting
it in the winters, it will be beneficial for you because there
is less humidity. Environment is less humid. So keeping this plant makes
the environment more humid. Also, it acts as a
stress reliever, and it is also an
antioxidant plant. So many beneficial things it has apart from air purification. And you must have seen this
colorful vibrant colors which make your place
really beautiful. You will feel very
good when you will watch this especially
the leaves of the plant, it has multiple colors in it. I'm just using two colors, but you will see that there are multiple colors in that plant. There is orange,
there is yellow, there is red color. So different varieties of
croutons are there in market. You can see, I've just
painted the leaves, and now I will start
doing the detailing. So now let's take again this chrome yellow and
this orange color. And a little bit of blue mix to make it a little
brownish color, and I'll start filling
the lower portion. So you can easily mix three
colors and make brown color. You don't have to use
separately the brown color. If you mix yellow, orange and that blue color, you can get a nice color that is very reddish brownish
color you can get. So again, I'm taking this yellow and orange and
little white mix to it. And I'll start adding the details so whenever you are using such
things for detailing, try to use your liner brush. So I'm just taking
my liner brush or you can say rigor brush
because it has long tail. So it is my rigor brush. So I'm just creating
the lines first. Simple stems here and there. And after that, I'll start creating the
details inside the leaves. So the stems are also very
orange, brownish in color. You can see. So just trying to add certain
lines here and there. So let's start
painting the leaves. So first, I will make the
veins of the leaves with orange and yellow mix. Somewhere I will use orange, somewhere I will use
white and orange mix. Somewhere I will
use just yellow. So depending upon the colors, I'll just make the changes. So currently I'm just
using orange and white. Why I have added white Because a little transparent
this orange color is. That's why I'm adding
a little white. Somewhere I'm adding
a little yellow to make a little difference
in the colors. So to make the
variations in colors, So first, I'm just adding
the line in between. After that, mixing
it with white, the yellow color, again, I'm trying to draw the line. So it should be a very thick
vibrant line, it should be. And then I'll draw the
lines of the leaves. Just simple lines with
my yellow and white mix. Again, I'm doing it on
the upper part as well. Somewhere I will make
that yellowish line. Somewhere I will make
the orange lines, little bit variations in colors. So just enjoy the process of
making these simple veins. So very simple technique
I have used here. I don't want it to be
very tough so that people cannot paint it
and feels difficult. And most of my classes in this, the lessons which I
have put in this, are maximum 20 to 30 minutes
of videos are these. So it's not compulsory. You have to paint
each and every plan. You can choose your own favorite plant and
just paint it out. I think you will really
feel good by doing this, uh class, I have learned
a lot of things. I have learned about the plants
and how their leaves are, how they are helpful
in our life, actually, why we should put these indoor plants in our home. So when you will also
start painting it, you will also come
to know there are so many benefits
of these plants. They not only add beauty
to your home to your room, but also add beauty
to your life. You feel very good when
you are around the plants. So I'm just outlining
the whole leaves now. So once you're done
with the inner veins, you have to outline it. It should be a
very thin outline. It should not be very thick. Otherwise, it will
not look good. So whenever you are creating any thin line, use thin paint. Don't make the paint very thick. So try to use thin paints as thin as possible and
try to just outline it. And if you will take milky
colours for outlining, there will be very
thick outlines. So try to use thin colors. Then only you will be able
to outline the entire thing. So you can see how beautiful
this is looking once we have done this orangy and yellowish colors of the
veins of the leaves. I'm just trying to outline it so that it is clear
that where the leaves are. That's why outlining
is important. Once you have outlined this, you can see how the colors vibrant orange
colors are looking. So now we'll mix little
white in this yellow, yellow and white mix. And also, I will add some more highlights to the
center of the line actually, giving some
highlights to some of the veins just to make the
color look more vibrant. And then on the top of that, I will add a little
orange to it. So when you add on top of white, the orange color, it
becomes more vibrant. So that's what I'm
doing over here. Now you can see how vibrant
this orange is looking when I have just added on top of
this yellow and white mix. We're almost done with this
whole Croton plant painting. I hope you enjoyed this because
I really enjoyed painting this beautiful plant with beautiful and lovely
vibrant colour leaves. To try it out and tag me on my Instagram that
is Moheni Art Gallery. And there are a couple
of more plants left, and there will be a bonus
lesson also coming soon. So few more plants
and the bonus lesson. And I hope you're enjoying
this series of indoor plants, as I am really enjoying it, painting these beautiful
indoor plants. So just adding few stones
with the light color with this blue and white mix and just highlighting the base. And that's it. We're
almost done with this painting and see
you in the next class, and this is on the black one.
25. Lipstick Plant: Welcome back. Let's start
with lipstick plant. So let's draw first the pot. Little different
kind of pot it is. So as the names suggest, lipstick, so nothing is
related to lipstick here. It's just the color
of the plant, which with that, the name
has come as Lipstick plant. So don't worry about
that. We cannot create any lipstick
with this plant. So just creating the
shape of the pot, a little different shape. And we'll draw the leaves a little sketch of
the leaves as well. So where the direction
of the leaves are going. And then we'll start
with the painting. So very simple sketch. I'm trying to create the leaves
in different directions, and these leaves
are in wavy form. So that's what I'm
creating here, a little wavy structure
of the leaves. So once we are done with the creating of
the entire leaves, we will start with the
painting of pot first, and then we will proceed with the plant painting
the leaves painting. So just creating in
different directions, all the leaves, some are
thin, some are thick. So variations are
always there when you create some plants or some indoor plants or any
plant whichever you create. So there should always be a little variation in the leaves. So once we are done
with the drawing, now, these are the colors which
we will using crimson lake, light blue color, white, sap green and yellow. So all these colors
we will be needing. So first color which we need is the light blue color
which is there. That is actually a teal
color which I'm using here. It is a little light
blue in shade. If you don't have teal color, you can use any light
blue color and mix that color with a little bit of green and you'll get that
texture of the teal color. Either green or a
little bit yellow, also, you can mix in that. So I'm just filling it
with one color only. So any color you can
use for the pod, it's not like what
I am using here. Same color you have to use. You can use any sort of color, whichever is your
favorite color, you want to color that
pot with that color, you can use that color. It's just I am using this color, but you can use any color,
whichever color you want. Try to use a thick, milky color, and water should
only be on your brush. But if your paint is thick
and it is very, like, hard, try to mix it with water
and make it a little soft and then use it in
a creamy texture way. Don't make it like a
watercolor because these are quite opaque colors and it looks good when the colors are opaque. So I'm just first blocking
in the entire shape. Also giving the outline
to these edges. So I'm done with
this pot painting. I'll create the
middle part also. So with this red color and
with this blue colour, it turns out to be a little
purplish shade color, and now I'm adding
a little yellow. It will turn out to be a
little brownish color. So this way, you can create
brown color as well. You don't need an extra
brown color over here. If you have a dark brown
color, you can use it, but the colors also works
very well by mixing it. So, you not only learn
when we mix the colors, what colors are
form, it's good that we mix the colors
and make the colors. So that's why I try to
mix the colors and make it instead of using
a number of colors. So just created
this whole thing, which looks like a
dark, brownish color. Now I'm taking this green colour with a mix of this lemon yellow. This is sap green
which I'm using here. First, I will create the lines. And slowly, slowly, we'll
start painting the leaves. So mixing a little bit of yellow in this green
and first outline it. Whenever you are doing
such kind of painting, very miniature type of painting, try to first outline the thing and then start
filling the colors. It will be easy for
you to color also, and the colors
will not come out. So making into the
inward direction, the shading, like we do
shading with pencil, it's the same technique
I'm doing with brush. So same technique I will be
using for all the leaves. So just first outline it and then start
filling the shades. Same round brush I'm using
that is of size four. Again, giving a little texture. That is the shading
which is inward direction and
leaving the center, you have to leave
the center because there will be pinkish color. Cause of its color, it is named as the
lipstick plant. It's a very beautiful
plant, as you can see. And once we create it, you'll see how beautiful
and vibrant it looks. Even if you have
the pinkish color that is fluorescent pink
you can use in the center. Like, I was not having
florescent pink, so I'm using this red. But if you have
flourescent pink, you can use in the
center to create a nice, vibrant pinkish touch to it. So just outlining it. And same process as
we did for others. Now, once we are done
with all the detailings, we'll start with the
filling of the pink color. So first, taking pink color, that is the red color and
mixing it with white, I will turn out to
be a nice pink color when you use crimson lake. And again, same
shading technique I'm using and moving the brush
in the downward direction. So filling this middle part
with this pinkish color. So similar I will be doing for the entire leaf
sections which are there. Try not to make it
very light colour. It should be pink but not very light because light color also we will be using
on top of that. Just fill all the
leaves in the center with this pinkish,
bright pinkish color. Once we are done with this, we will add some details also.
26. Lipstick Plant Final Detailing: Welcome back. So
let's start further. So now I will take white and mix more lighter color than
the one which I'm using here. And again, adding a
little bit more textures. Simply, I'm just
layering the color with light pink color
and making small, small line type of textures
with my same round brush. Now let's talk
about the benefits. So it's obvious that it is
used for air purification and it has the ability to purify indoor air by absorbing toxin, and it is very adaptable because it can tolerate different light
levels from bright, indirect to moderate low light. So it is quite versatile. You can use it indoor
as well as outdoor. Also, it has an ability
of stress relief, so it helps to reduce stress
and improves the mood. Because of its vibrant color, it also used for a
decorative purpose, it can add a decorative
touch to any room because of this beautiful leafy
texture which it has so these are some of the benefits
of the lipstick plant. So one benefit is that it can be used indoor
as well as outdoor. So now I'm just
creating a line in the center with a
light pinkish color. See, this is the painting
which I'm doing it's almost of size four inch,
not bigger than that. But if you are doing
on a bigger one, you can add more details to it. So doing it on a
smaller sheet of paper is more difficult than
doing it on a bigger one. You can easily add
details on a bigger one, but on a smaller one,
you have to be very careful when you are
adding the details. So try first on the
smaller piece of paper, and then go ahead
with the bigger one. And the more you will practice
all these techniques, the more you will
be able to paint. And you'll see
within six months, you'll see your
painting has improved a lot if you have
started just now. So I'm adding one more on
top of it, as you can see. And you can easily add once the color has dried behind
color which is used, the back color which has been
used, once it has dried, you can easily apply a
layer of different color. But don't try to smudge it up. Otherwise, that back
color which is there, it will start mixing
with the top color. Always use milky color, thick, milky color, not very
transparent color. It should be. It should be a thick opaque color
if you're using. So this is how you can just overlap on top of one another. Same technique you can use
with acrylic, gauche, or oil. Now, same thing I'm
doing here also. Same technique which I did
for all the other leaves. Here, also, I'm just
adding the textures. The more you do the overlapping
on top of one another, the leaves, the more
realistic it looks actually. It's not like what I
have created the shape. You have to also
create the same shape. You can create your own
direction of the leaves. It's your imagination, your
way of doing the indo plants. I'm just giving you the
technique how you can do. And you can see there are so many indo plants
which are there, and I'm also learning
about them slowly that there are so many
indo plants which we can have So I also
have but only few, and I'm also
planning to buy some after working on this
Indo plant lesson. So a few of them I
will definitely buy, especially that
bird of paradise. I really like that plant. So again, adding one more leaf. So same process. Now,
all these ellipsti plant also have different
different shapes. Somewhere it is in the middle, the pink colour is, somewhere it is in the sides, somewhere it is,
like, in the spots. So it is different
different types. So this is one of them
which I am painting. So there are varieties of types of lipstick
plant, actually. So just making the lines and little textures
of light color. And we're almost done
with the painting. I'll create some stones
over below section as well. So small stony effect. You can leave this. It
is completely optional. If you don't want to
create such textures, you can leave it like the
muddy part like that. But I love creating these
small pebbles here. So I'm just creating small, small stone type texture. And then I'll just outline this whole pot section with a mix of white
and the steel colour. So just outlining it. So in the complete process, I have just used one brush. So one brush also, you can paint many
different things. You don't need a lot of brushes. So you must have
seen that I'm using only two to three brushes
in all my paintings. So here also, with
just one brush, I have done the entire painting. It all depends on how you hold
and how you use the brush. If you're using the
tip of the brush, you can create the
lines and so on. It's adding some textures, and we're almost done with it. So you can also do this plant
on a black sheet of paper, as I have done it. I'll show you. So this is it. So yes, let's meet
in our next class.
27. Monstera Plant: Welcome back. So let's
start with Monstera plant. So let's first to the
simple sketch of the pot. Now, this is a very
traditional pot which is used in ages. Very simple brown color pot. But this time we'll not be
coloring it with brown, but we will be coloring it with orange and
chrome yellow mix. So I'm just creating
first the shape, and then we'll start
with the coloring. We'll also draw the leaves because these leaves
are a little different, so we cannot do with one stroke, so we have to draw
the leaves as well. So after drawing this pot, we'll draw the leaf. Very simple and easy way
of drawing these leaves. First, we have to draw the
leaves in a hard shaped form. Try to make it in different
different angles, and these are quite big leaves. So I'm just trying
to make it a big. And then you can divide this
shape into parts like this. Very easy way of creating these cracks which are there
in between the leaves. You must have seen
the monstera plant. It has a different shape
of zigzag shape it has, which makes the plant
actually very beautiful. So just similarly, we will be doing the rest
of the leaves as well. So try to make it in different
angles in different sizes. Then only that plant
will look a little real. So this one I'm making in a
little different angle where the stems are behind like below and the leaf is
popping up, like that. First, I'm just
drawing the leaves and the shapes and then
we'll draw the cutouts I'm trying to make it as simple
as possible so that each and every one of you can follow these steps
and can paint it. Most of my indoor
plant paintings are within 30 minutes.
So you can check it out. You can take any indoor
plant whichever you like, and you can just pick it up and you can just start from there. It's not like that you
have to go one by one. Whichever is your
favorite indoor plant, you can just pick it up
and you can paint it. So you can see I'm just
giving the shapes. And then first, we will paint, and then after that, we will remove the lines
which are there. So just trying to
give a little shape. When the plant is newborn, the shape is
actually hard shape, and when it starts growing
bigger and bigger, the shape becomes like this. One. So we are done
with the drawing. Now we will start
with the coloring. So first, we'll color
the below part, and then we'll start
with the rest. So I've taken two colors that is orange and chrome yellow. So let's paint this below part. So first, I will
take my round brush. Again, the same size
round brush I'm taking over here that is of size four, and just take a milky color of orange and try to
fill it up first. First, outline it and then proceed with
filling of colors. You can see how opaque
and thick the color is. So this much thick
the color should be, I should not be a
transparent color. Otherwise, it will
not look vibrant. So once we are done with the entire filling
of the colors, we'll start with a little
detailing in this, just giving it a
little shape to it. Now taking this chrome yellow. It has a little bit
of orange in this, so orange texture
will also come up, adding a little layer
on the top first. Now, my base color
has already dried. So now it is not much visible, so I will take black color. So I'll take a
little black color, so I will make it
a little brownish color by mixing
black color in that. So making it a little
brownish color, and then I'll just start making the lines just to add a
little beauty to the pot. So making the lines
with my rigor brush. So just one line on the top and giving a
little baseline as well. Just outlining the
parts which are there. So you can see I have
not mixed much of the black because otherwise it will turn into
entirely black. Try to mix very little
amount of black when you are using it and just giving the lines Do it very slowly and carefully
when you're doing this type of detail so that the marks does not come
out because it will be very difficult to
remove the mistakes. Now, simply, I'm
just outlining it. Now I will use this nice thick yellow color
that is chrome yellow, and I will add a little
highlight on the top first. Try not using water in this and little highlight
in these spaces, just to add a little
value to these pots. So you can see how beautiful
it is looking when we have added this
yellow texture, now taking black
and mixing it with orange to make a little
dark brown color. And I'll cover the upper part. So a little darker brown just to make the soil area. And then outlining it. And we almost done
with this pot section. Now we will be doing the leaves.
28. Monstera Plant Detailing: Come back. So let's
start with the painting. These are the colors, lemon
yellow, hallow green, orange. Then this is light blue. And these are same colors
which we have used earlier. So let's start
with the painting. So again, the same
brush I will be using. First, I will be
filling this with one color that is the
hallow green color. Just make the color
a little milky. Mix little bit of lemon yellow in this and try to fill
in the colors first. So just let's start from here. Now, filling the colors, first outline the whole area
and then fill the colors. It will be easy for
you to fill it. So just making the
color quite opaque. And when you mix yellow
and different yellows, the color becomes really opaque. So mixing of colors
is really good. So here I'm just
making the outline, and then I'll start
filling the colors. Very simple and easy form. Try to fill the lines
which we have drawn, not the outer lines, after once we have
filled the colors, done the detailing,
and then we can remove the extra lines
which are there. Just try to fill it carefully. So now let's talk about a little benefit about
the monstera plant. Monstera plant helps
in air purification. It filters the indoor
air by absorbing toxins. It also boosts humidity. And one of the main benefits of putting this plant is that it improves our mental health and encourages growth
and prosperity. So if you are having monstera
plant, then you are lucky. So just filling this entire
thing with just one color. So some are dark,
some are light. If you want a light
color of green, then you have to mix lemon yellow and a little
bit of chrome yellow. And if you want
the darker green, then just use allow yellow,
Tallow green directly. Sometimes when there
is overlapping, we need to add their
lighter greens and dark greens variations. So keep that in mind if
there is any overlapping, then you have to make
the color a little dark. One color should be dark and other colors
should be light. Easiest way to fill the
color is just first outline the entire thing and then start
filling the colors. If you're not happy with
layer one coat of the color, try adding another coat. But in Gash I mostly add
one layer of colors. That's why I use thick
and milky colors. So try to use a thick color. Don't make it very watery. Water should only be
there on your brush. If your color is already creamy, then just on your brush, it will be more than enough. But if your color is, like, hard and it has dried up, then try to add some water and make it soft and then use it. So very carefully try
adding the colors. Now, you can see I made this a little dark so that
it is visible. Doing the other leaves as well. Once we are done
with de filling, we'll start with the detailing because one by one, we
are doing the filling. The colors have already started drying because whenever
we do any layering, we should do once the base color has dried,
it should not be wet. So once we have done
with the blocking, the colors will automatically dry because it dries very fast, and then we can do
the layering easily. Almost we have done the locking, just one leaf is left. So now let's do the
detailing one by one. So just mixing little chrome
yellow to the screen. And let's start
from the top leaf. Now, the color has to
be a little light. So try adding lemon yellow also. So same shading
technique we have to do. Like we shade with pencil, same we have to do the
shading with our brush. I'm adding this
light blue color to this green mix because
this will give a nice color of greenish
to this painting, very light, greenish
bluish texture. So that's why I'm mixing a little bit of this
light blue color. Take your time and do
it slowly one by one, these details because
these details actually takes time when you
are doing it one by one. See, I'm just doing
first the outer part and then the inside part
with the darker color. So there will be a variations of greens from dark
to light colour. Similarly, I will be doing the other one also. M
29. Monstera Plant Final Detailing: Welcome back. So
let's start further. So one by one, we
have done first two. Let's do the other
one. Just rotate the notebook which you are
doing towards yourself, and it will be easy for you
to do these detailings. So one by one, start
doing the details. The color which you're doing
these details should be lighter than the one which
you are using as the base. And also apply the same color that is the tallow
green in the center to mix the color with
this lighter color so that it will not
look like odd one out. So just mixing this blue and this green color makes the
color look more vibrant. So just adding
these small details and then in the
center darker color. It's a little time
consuming process, but the result looks good. Now, this is a very
small painting of like four to five inch, but when you're doing
on a bigger one, you can add more details to it. So, yeah. So now we have done with all
the shadings and everything. Now let's start doing
the lining part. So the lining part again, using the rigor brush. So mixing the two calc and slowly first out
making the stems. No. So actually, the center stem is not visible. So because of this middle leaf. So just a little line I've
created one line on the top. Now, let's add some lines
in these leaves as well. So whenever you are
doing any lining part, try to make the color
a little fluid. Then only you will be able
to do the lining part. Don't make the color very thick. Otherwise, these thin
lines will not appear. So try to make the
color a little fluid and then start
with re lining. I'm just mixing a
little yellow to this blue so that it turns
into a lighter green color, and I'm just adding the lines. So same steps I will be repeating on the
entire leaf sections. So try to do this very
slowly, take your time. You can change the directions
of the leaves if you want. It's not like what
I have created, the direction, same direction
you have to create. You can change the directions
according to your own will, according to your
own imagination. If you have one
terra plant at home, you can just see it and see how these leaves are turning
and you can just copy it. That also you can do.
Also with the same color, I'm just outlining
the outer part. These steps take time. So do it very carefully, take your time and do it slowly. So just a little outline. And then we're almost done
with this monster painting. Few more as steps are left
and we're almost done. So I've taken this No. This round brush only, and I'm doing the lining
because that thin brush, it was becoming very thin. So that's why I've taken this
round brush only to make the lines and using the tip of the brush to give a
little shape to it. And this way, whatever
mistakes you have done, you can remove and you can give a nice shape
to the painting. So just add the
lines one by one. These are not very thin lines. These are little thicker ones. But it is easy to make the
lines with this round brush, which is of size four. Especially for this painting because we don't need
a very thin line. Once we are done
with the outline, it will be more
visible the leaves, especially the
overlapping leaves. Few more paintings are left, and we are done with
the indoor plants. So I hope you're
enjoying this series of indoor plants and also learning
about them the benefits. And you can see there are
so many indoor plants that we can't even imagine, and I'm also
learning accordingly when I'm doing all
these paintings, I'm also learning about them, and soon I will be keeping
few of them at my place. So just outlining
the whole thing Now, once the outlining is done, we will erase all the pencil
lines which are there, and you have to erase the pencil lines only when the color has been
completely dry. And you can see how I
am doing the outlining. I'm just rotating my
notebook towards myself, and then I am trying
to create the lines. This is the best way
to create the lines, and you will not
make any mistakes. Now, once we are done
with this lining part, wait for all the colors to dry and then only
remove those lines. Here my green color came out, so I'm just using water
to remove that color. So this is now it has
completely dried. I can easily remove it the pencil lines which
are there with my rubber, so I'll use my rubber to remove all the lines which
are unnecessary. And we are finally done
with this painting. So remove the lines only
when the colors have dried. Hope you enjoy doing this beautiful monster
plant painting. So try to carefully
rub all the lines. And this is the
entire indoor plant that is the Monstera
plant painting. Also the last step, I'm just taking this
light color and creating some pebbles and stones
in this sand part. That is the area which
is the soil part, small, small stones
with different colors, with some brown
with some yellow, with some orange,
different types of colors, one dot. And this is it. So let's meet in our next class.
30. Bamboo Plant: Welcome back. So let's
start with bamboo plant. Let's first do a little bit
of drawing of the nice, transparent pot it is of a glass which we
are making here. So we'll try to make it a bit transparent,
transparent and look. You must have seen
the bamboo plant, which is kept at home with a
transparent glass below it. So something like that,
I'm trying to draw. Keep in mind that whatever
pencil line you are drawing, just make it very light so that when you
are drawing the lines, it is not visible. The pencil lines especially when you are making
a transparent pot. Now, once we are done
with the transparent pot, we'll draw the bamboo
stems which are there. So there are two stages, they're two bamboo on
top of one another, like it is arranged. So I'm just trying to create
the bamboo stems first. Very simple and easy
lines are these. Some are thin, some are tall, some are short,
something like that. I'm trying to make it. He similarly on top of it
also, I will make the lines. Now here will be the
thread which will be tied to these bamboo sticks. Also, I will be making, again, one more layer of bamboo
which is there on top of it. So it is actually a two layer
of stems which are there. So something on
top of each other, I'm just trying to create. Above lines also will
be tied to a thread, and leaves we will
directly create by drawing it with
our round brush. So thread also will be tied
in the center of these stems. So now let's start
with the painting. So first, we'll paint the pot. So as it is a transparent pot, we'll not be needing
too much colors. We will mostly be
needing two colors. That is one is gray color, and the other one is blue color, that is light blue. So gray color and blue
colour have taken out. Also, white will be needed. So a little bit of white
also, I will take it out. And let's start
with the painting. Again, I will be using here my rigor brush and round brush, two brushes, and we'll
do the whole painting. So first, let's do
the blocking of the outlining of this jar, which is there, which is
a glass jar, actually. So just outlining
it a little thick. That's why I'm using a
round brush over here. So a little thick outline
is needed over here. Try to make it as neat as possible as this is
a transparent jar, so I don't want a very thick
line to be and just take the colors a little
thin color and try to draw the lines slowly. Now, once the lines are drawn, I will just smudge a
little colors below with the grayish color with
just a little smudging. Whatever color is
there on my brush, I'm just smudging a little bit, and a little bit water
I will add to it, and I'll just smudge a
little bit of colors below. Now I will take a little
transparent blue color, and then I will apply it. So it's a transparent blue
and white mixed color. Make it a little watery
and then apply the color. I don't want a very thick color. That's why I have made
it a little transparent. So you can see how
transparent the color is. You can see the lines
of these stems. So this much transparent
it should be then only it will
look like a water. So this is a water which is there till the half of the jar. And then so this is it. We'll not do much
in this glass jar. And then we'll start with
painting of these stems first. So let's start with
painting of these stems. So I've taken out
two colors that is chrome yellow and halo green. I'm mixing both the
colors together to make a nice greenish color a little bit white to make
it a bit opaque color. So when you add a
little bit white color, the color becomes
a little opaque. So just adding on
the first stem, So slowly, slowly,
I will be adding a different different
shades of these greens. So first is a little yellowish
green which I have made, and I'll do it till the end. Then I'll take more of yellow
and green a little bit, and I'll slightly change
the color a little bit, and I'll try to make
a different green so that both of them
doesn't look same. A little brighter one, just by adding white to it. Similarly, I will be
doing rest of them. Different different greens, some are yellowish,
some are greenish. So different
different greens will help us to paint a bit. So I've taken lemon yellow also. So I will mix lemon
yellow also in this green to make a
different variety of green. So you can see I'm trying to change the colors
of these stems. Just try to make it different
different greens so that it will look like
some are little dry, some are little green,
some are little brownish. So something like that,
I'm trying to make it. So one by one, I will be
coloring all of them, trying to make all of them
a little different colours. In some I'm adding more
of the chrome yellow. I So likewise, I will be repeating all
the stems one by one. So just enjoy the process and see how I'm doing
the color mixing part. And I hope you will
enjoy the process of different types of greens which are coming
here as you can see, some are yellowish green,
some are grayish green. So different kinds of
greens are there over here. By mixing so many colors, we not only learn how to mix the color, the
color mixing part, it's very important that
what colors you are making, what colors you are mixing
because each and every color is not available in
our environment. So sometimes we have
to mix the colors, and if we don't know
how to mix the colors, we'll not be able to mix it. That's why I mostly
try to mix and make the colors so that
you get an idea that what colour should be mixed
so that we get this color. Now, similarly, we will
be doing upper part also. But first, we'll create
the line which is there, which is a thread
that is tied to it. So this is the Indian red
which I'm using here. So just taking my same brush, and I'll just make a
thick line over there, which will be like
the thread which is tied to all these stems. So similarly, I will be doing for the above stems as well, same colors, but in
different sequence, not in the same sequence. So I'll try to do
the upper part also. So let's take first our
rigor brush and make these lines proper because I think this line has
not come properly. And also, I will
make the tip of all these stems with a light grayish and Indian red mixed color. So I'm using here a rigor brush, and I'll just add a
little tip on the top. Just to give a little
tip on the top. I'll be doing on all the
stems. Same process. I was just correcting
the shape of this little bit because I feel that it is a little
bit the color has come out. So I'm just trying to
give a little shape to this thread which I have
made with my rigor brush, just the roundness thing, which will look like
that it is tied up. Also, with a similar brush, I'll just try to make the lines. So not only vertical
lines I will make, I will also make some
horizontal lines as well. But first, I'll just
making a vertical line. So now you can see
each and every stems nicely by
using this color. I will also make the
stems in between. So our lower part
is almost done. Now we will do the upper
part of this bamboo tree.
31. Bamboo Plant Final Detailing: Welcome back. Now, let's do
the upper part of the tree, sorry, stem, like how
we did the below one. So just adding, again, the same colors, but this time, I will make the upper
part more greener because I'm just trying to
make the upper part a little more fresh and green. So I will be adding more greener stems towards
the upper part. So just same step
we have to repeat a little bit difference
of green color you have to show so that you can easily highlight the
stems one by one. If you will put all these
stems of same colors, you will not be able to
recognize which one is which. So that's why I'm trying to give a little transition of colors. Some are light, some are greeny. So are more yellowish. So like that, just try to make the stems So once we are done with the stems, we'll start with the leaves. So let's just talk about the benefits of
this bamboo plant. So a bamboo plant is
also a air purifier, and it is mostly used in homes and homes and offices
for decor purposes. It is also a symbol
of luck and fortune, and it brings harmonious
and positive energy to our room, as well. So mostly, you must
have seen that these plants are mostly used as a very thoughtful
gift in return. So yes, these are some of
the benefits of keeping bamboo plant and
let's paint further. So I'm just trying to do the outlining with
the liner brush. Just simple lines I'm creating. Now, this is the line of
the jar which is there, the line I'm creating. And then the lines a little bit line I'll create
in these threads also, a little bit water effect
below with this rigor brush. And a little bit line. Also, I will be creating in
this thread which is tied, just making the color
a little more grayish. And again, the upper part, which we did in
the below as well. Same color I'm just using
to make the upper part. Same thing we have to do
what we did in the lower, the upper part as well, just outlining and
the lines which is in between the
horizontal lines. Same thing. Nothing
is different, a little bit color
variations are there. So all these little
little things makes the actual painting beautiful, but I'm trying to make it
as simple as possible. So just making a very thin
line in the center of this h. Indian red color just to add effect to
this thread look like. So just adding some lines
to these stems as well. I'm not making very dark line. It is a very light line, like brownish in color. That's why I've added
Indian red to this gray. Now we will start
painting the leaves. Again, for the leaves, I'm
taking this hallow green, then this chrome yellow, a little bit of lemon yellow, and make the color a little milky so that you
can easily move your brush and then
start making the leaves. So first, the lower leaves which are a little smaller in size. So the process is very
simple, press and release. So you have to press your
brush to make a thicker line, and as you release it, it will become a thin line. So this is the process of
making these simple leaves. And these are quite long leaves. That's why I'm making it
a little long and thin. So similarly, just doing
on the other side also, making the color
a little bit more yellowish and greenish texture. Just trying to add
little more leaves to the other sides,
little small, small leaves, not very big, especially to the lower
part of the stem. And as I will go above, I will make a little bigger one. So very small small. Now, this color is
a little darker green so that it is
visible in this section. That's why I made
it a little dark. If you will add lighter greens, it will not be visible. So that's why I have made a
little darker green below. And just highlighting it
with a little lighter color. Now I will make the
above leaves which are quite long and
very twisted form of. Now, see this color
has dried a little. So I'll just add a little water on my brush and take the color, and then again, I
will start further. So you have to take
a very milky color so that your brush
moves and flows. If you're feeling that your
brush is becoming sticky, just wash off your brush, take some water on your brush, crab the color, and then
again, start with it. Very simple and very beautiful bamboo plant painting, it is. I really like the
output, how it has come. And this is our
15th lesson also. But again, another
gift for you guys. I will be posting
few more plants, few more indoor plants. So just wait and watch. So I'm thinking of putting at least four to five more
of the indoor plants. So just enjoy it. Don't worry. This is
not our last session. So I will be posting rest of them also like alternate days. So just enjoy it and feel
the movement of the brush, how the brush is moving. In this brush is actually dancing as the
leaves are dancing, so the brush is also
moving like that. So just enjoy and feel
the rhythm of your brush. So just adding few more
leaves here and there. We are almost done
with this painting. And you can also do
this painting on the black paper or gray paper or brown paper,
whichever paper you want. The technique will
be almost same. Little bit stones and
pebbles I'm adding below with this mix of gray
and Indian red color. So when you mix Indian red and gray becomes
a lighter color, and when you will directly
use the Indian red, it will be a darker color. So mix of these two colors. I'm trying to make it these
small, small pebbles below. Just to add effect, you can remove that, you
can leave it as it is. It's up to you how you want
to decorate your painting. So just simple
dots I'm creating, taking some lighter textures
and adding in between, just to mix the colors. So I hope you enjoyed this
painting with me, too. And if you did do share
your project work, you can tag me on my Instagram. That is Mohii Art Gallery. And also, you can
do another form of bamboo tree,
which is this one. It's like this. Like this, also, you can paint it. It's your choice. So, yes. And let's meet in
our next lesson.
32. Lavender Plant: Welcome back. So let's
start with lavender plant. So lavender can not only
grown as indoor plant, it can also be grown
as a outdoor plant. So here I'm just creating first, the pot, which is a
straight line first. And then I'm just
joining it like a curve. And then, again,
the slanting line. So this is the pot which
I have created here. So very simple pot,
very basic one. We'll not be doing
much drawing in this. We'll directly jump
into the coloring part. So the colors here which
we will be using for the pot is the two colors, that is the chrome
yellow and Indian red. So this is Indian red. And if you don't
have Indian red, you can also use burn
Sienna and chrome yellow. If you don't have chrome yellow, you can use cadmium yellow also. So I'm just taking
out both the colors, and we'll start
painting first the pot, and then we'll start
with the uh plant. So I've taken two colors out. I'll be using same
brush which I have used in all my indoor plant painting. That is the round
brush of size four. So just blocking the first
the lower portion of the pot. So whenever I do any painting, I first do the outlining, and then I start coloring
the inside part, as you have seen
if you have done the rest of the indoor plants. So I'm just first blocking in. Always try to use milky colors because we
want a quite opaque color. I just mix a little bit of this chrome yellow so that
the color becomes thick. So when you mix two colors, the colors a little become
thicker than how it is. So that's why I mix a little
bit of yellow in this. So I'm just coloring
first the lower part. It's a very simple painting. It's not very complicated. And I think within 15 minutes, you will be able to paint
this entire lavender plant. It's not necessary that you
have to use the same, um, a pot which I have used here, you can make any kind of
pot, any design, anything. So also, the lavender plant
offers several benefits, especially when it
has grown indoor. It is not only used
for air purification, it also helps in
stress reduction, and it also has a
sleep aid properties. So it is good for as a sleeping if somebody
has a sleeping problem, if they will have this plant, I think that can be resolved. So and also it is used
for like aroma therapy and have very
therapeutic qualities like anti inflammatory effects
and many other things. It also create a relaxing
atmosphere and add a touch of natural beauty to the entire room
where it is kept. So these are some
of the properties of using lavender plant. So I was also not aware of these qualities which
lavender plant have. So now, while doing
this painting, I also researched
and I came to know that there are so many
qualities of using this plant. It's not only beautiful, but it has a number
of qualities. So you can see I've just made a little design of simple lines. That's it. So now we
will do the middle part. So the colors which we
will be needing for this is the many colors
actually we need. That is first is
the white color, then sap green and
there's mauve color. So first, we will make a little dark brown color by mixing a little white
in this Indian red, then a little yellow and
a little green to it. So a kind of a muddy color, a muddy color which
will be formed, a little darker color
than the burnt sienna. You can say it could
be a rhombotype color. So something like that, and
then you can just fill it up. You can see how
dark the color is. So you can mix any colors
and you can make it. So now we will be
doing the grasses. So before doing the grasses, let's just make these
lines a little darker by mixing a little
white to this yellow. So again, I'm just making
a little darker lines. Same thing. I'm just repeating the lines like I
have done earlier. Now, once you add white color, it becomes a very opaque color. Even if you will
add in any colors. If the color is transparent, if your lemon yellow or
chrome yellow is transparent, just add a little
white to that color, and you will see how
opaque the color becomes. Now I've just done the
outlining of everything, and now we will
create the grasses, but I will be using the
rigor brush here because I want very thin leaves there, which is there in
this lavender plant, and try to make the
colors a little thin the only your
brush will flow. Otherwise, thick lines
will be created. You can see how thin
I'm making the lines. So try to make the lines as thin as possible in
different directions. Then only that
effect will come up. So slowly just adding
water to this green color, the sap green color, and just
try to create the lines. So are thick, some are thin. When you will press the brush, it will create thick lines. When you will just use
the edges of the brush, it will create thin line. This is how we use
mostly the round brush, also, the rigger brush also. So just making the lines in different
different directions, these are actually stems
which are very thin. So now I have just added, I think, enough of the lines. After that, I will start
adding the flowers. These flowers are
really beautiful. When you add a white color
to this mauve color, if you don't have mauve color, you can use purple color also. But if you have mauve color, then use directly mauve
color and mix a little bit white to this to make it a little light version of it. And then just add very small small dots with
the tip of your round brush. So you can see I'm just
using the tip of my brush, milky color and just
adding on the top. Very tiny, tiny dots are these. Just try to zoom in in so that
you can see it carefully. So you can see how
the dots are coming, very small small dots you
have to create and try to use milky color over here when you're creating these dots. Some dots are a little dark, some dots are a little light. So like this, you have to create the variations in
the lavender plant. So mostly just using
the edge of your brush, round brush, you have
to create these dots. And as you go outward, the dot becomes just one. Earlier, I'm just creating
on both the sides, and then as I go to the outside, I just create just one dot. That's why it becomes pointed. So like that, you have
to create the dots. So first, I'm just doing
on the above part. And slowly, I will also add below because there are
lots of gap in between, as you can see, which
we have to fill. So just repeat the same process, mismatch of the colors, some are dark, some are
light. So like that. So we are almost done
with the upper part. We'll now start with
the lower part of the flowers as well. So you can see this
is a light one. Above one is a little dark one. So little contrasting colors, you have to add some dark, some light, some variations of these mauve colors
just by mixing white.
33. Lavender Plant Final Details: Now we'll start
with the lower one. First, we'll add a
little bit leaves. I've just mix a little bit
white into this sap green, and I'm making a little
bit of grasses below. These are very thin grasses,
very small grasses. So just I'm trying to
create at the bottom part. And in the rest above, I will try to create more
of the lavender flowers. I'm just making more
lines so that it looks like a very
bushy kind of thing. So just creating some leaves, very thin leaves are these. So just creating the leaves with a lighter green color just by adding white to it and just
making this lower part very, like, bushy kind of and
also adding some of the stems which are coming outward so that
these are all small, small leaves which
I'm trying to add. And I will also
add more stems so that more we can add more
these lavender flowers. So just taking the same
color a little darker green and just adding
a few more lines, little thicker lines
just to fill the gap in between so that it looks
quite green from within, and little bit lines, and then I'll start adding
more of lavender flowers. Just taking white and this
move color together mixing both of them and just
adding more of the flowers. Same process, but
this time flower is down a little
below, not upward. Then only it will
look symmetric. So you can add these
flowers in any direction, whichever direction you
feel like you can add it. Very simple and easy
these flowers are, and you can create it on
your own in any direction. It's not like how I am creating. You have to create
it in the same way. You can create in your own way. You can just make these stems
move here and there and you can just add these
lavender flowers. Just adding a few more stems, and I will add a
little bit more of the flowers in the side. So just enjoy the process
of creating these. Now you can see how thick and pushy it is
looking once we have added so many flowers and
grasses and the leaves. This is on a black paper, which I have done. You can also try
it on black paper. Now, let's add a
few more details, and we are done with this
painting. Not much to do. So again, taking this
Indian red color, and I'm just making a
little outline of this with just Indian red so that the lines of this
pot is very sharp. So you can see I've just
made it a little more neat, especially the boundary part, and it'll stand
below, and it's done. So see you in our next lesson.
34. Jade Plant: Welcome back. So let's
paint Jade plant. So first, we will draw the pot, and then we'll do the drawing of a little bit of the stems. So leaves we will directly
draw with our brush. So just the stems, the main stem, and the
pot, I will be drawing. So just a simple pot
with a curved surface. Both the curved surface and then a little more
curve below also. If you face difficulty in
drawing these curve surface, you can just rotate
your notebook and try to draw it
towards yourself. It will be easy for you to draw. Now, the main stem,
which is in the center, so it's like a bonsai tree form, which I'm trying to make
as this jade plant. So I'm making the center of the stem a little thick and
the sides a little thin. So you can see, I've
just made the small, small stems and the sub
stems also I'm making, and I'm trying to give
a round shape to it. So it will be mostly
in the round circle, whatever stems I will make, and the leaves also, I'll try to make it in the round only. So I'm just trying to
make the stems a little bigger so that it covers
the round part also. Now, once we are
done with the stems, we will now paint the below pot, and then we will do the stems. So let's start
with the coloring. These are the colors. And first, we'll do pot, and then the
stems, these are the colors. First color is titanium white, then burnt umber, and
then chrome yellow. So I've just taken out all the three colors here
as you can see. So we'll also take a black color because black will also be
needle a little bit. So again, using the same brush
which I have used earlier, that is the round
brush of size four. Let's start with the
burnt umber and mixing a little bit of black because I want a light very dark color. And mixing a little bit of white to make it
a little subtle. Now, a little bit of yellow
also have added to that. Now you can see how dark
and milky the color is. It's quite opaque color. Don't make it very transparent. It should be a
very opaque color. Otherwise, you have to do at
least two coatings of it. So try to use a milky color, and it should be opaque. So when we add white
or black to this, it automatically turns
out to be opaque because white makes the
colors a little opaque. So just adding
first to the sides, try to do it very slowly, first, try to make the
boundaries and then start coloring so that the colors will not come outside the lines. So very slowly, try to
fill the colors first. I will block in the entire
thing with this color only. I will start highlighting some
areas with lighter color. Just a little lighter. I'm just making this
by adding white to it. After that, I will make
two highlights just to show that some shining
is there on this spot. Also outlining the upper
portion with the same color. Now let's start mixing white
with this burnt umber, and let's do the stems. So for the stems, a little lighter color I need. So I've just added a little more white and
this yellow color, chrome yellow, and I'm just
filling it with this color. So you can see the color
has changed when I've added more of white
and yellow to it. So different color is this. So just try to make it a little lighter than the one which we have used in the pot, and just do it very carefully. And whenever you start, try to press your
brush and release it. The stems will be perfect. You don't have to even draw it, but I have drawn
it so that it will be easy for you to make it. So press your brush
and then release it. It will give a nice
pointed shape. So you can see how
nice pointed shape is coming out when
I'm releasing it. So doing it on the other
side as well, first. Same technique there also. Now once I've drawn the painted these stems
and everything, now, see the color has
come over here, so I'm just adding some
water to remove that color. You can easily remove
it with water. So now let's start with the detailing also
and a little bit of filling off inside also the
area which is the mud area. So first, now my color
has dried the below one. I'm just mixing little
bit of yellow, white, and brown and just adding
a little two highlights. After that, I will blend this color with
this darker color. Now, as I'm moving the brush, the below color has
started becoming activated because these are
gauche colors and it reactivates when it
interacts with water. So it is getting reactivated, so the color is
fading a little bit. That's what we want here. So I'm just washing off my
brush removing extra water, and I'm just trying to blend
it with this dark color. So this is how you can
highlight the area when you want it to be highlighted to just show this
shiny part of it, adding little white in between and just trying to
blend it with the same color. It's a bit tricky, but if you do it slowly, it will definitely come. So slowly, slowly take
very little amount of color and give a
little highlight to this. And especially to the
sides, you have to blend. You don't have to keep
the sides very sharp. And just trying to
add a little bit more of these and just adding a little more lighter color on the top to give the edge to this spot and filling this inside area with
completely black color. So slowly, slowly,
the shape is coming, and I'm just filling
it with plaque to give a little contrast
to these areas. Now I will add a little
detail to these lines. But again, mixing a little white and just trying to
create small small lines. You can also do these lines
with your liner brush. So just small small lines. I'm trying to add
in these stems. We are almost done with the
stem part and the pot part. Now we will start
creating the leaves. But before that, I
will also outline this all area with
a black color. So again, make your
color very fluid, and then only you can
outline this area. Try to make it as thin as possible and it is only
possible if the color is thin. Don't use thick colors. The main stem, I will highlight and rest heavily because those are
very thin ones.
35. Jade Plant Final Details: Come back. So I've
taken two colors that is lemon yellow and sap green. So these two colors I
will be using here. So first, the sap green, mixing it with a little bit of chrome yellow
and lemon yellow, and just trying to create a nice round shape
to these leaves. These leaves are
mostly round in shape, as you can see,
especially from the edge. It has a round shape to it. So that's what I'm
trying to create. Let me show you a
little closely so that you can see
how the shapes are. These are quite round
from outer edge. So you have to create a
round shaped leaves in this. You must have seen
Jade plant which has round shapes on the top. They are not pointed leaves. These are very round in shape. So that's what I'm
trying to create over here with some light
color, some dark color. So mix of colors, mix of greens, some darker green just
by using sabgreen and some lighter greens just
by mixing these yellows. So try to mix match the greens
and make different forms of greens so that the
plant will look more real. So very simple and
easy it is you have to create the round leaves. Now, let's talk about the
benefits of the jade plant. It is a air purifier and
it purifies the air, and it also helps in
stress reduction. It improves the mood of a particular person if he or she keeps them in their environment. It is also associated
with wealth, prosperity, and good luck. So these are some of the benefits of using
the jade plant. So let's continue
with our painting. So small, small, very small
size leaves are these. These are not very big leaves. And mostly these bonsai
shape comes when it is old. So initially they are very thin, but as it keeps growing, and I think in many years, it will it turns
into a bonsai form. You can easily create a
bonsai of this jade plant, and it looks very beautiful. So it can add a lot of
greenery to any space, making them a great
decorative addition. So, yes, making very small, small tiny leaves in this. All these processes take time, but do it carefully. Take your time and do it. Don't do it in a hurry. Just take your own
time and do it. You can also draw small, small round shapes
and then color it. It's up to you how
you want to do it. But I felt that this is
the most easy way of doing it just by doing it
with your round brush. You can easily
create round shapes. So just enjoy the
process of creating these small small leaves to
the entire stem section. So you can see variations
in greens I have added. Some are dark green,
some are light green. So try to make a little
mix of these greens, some dark green,
some light green. Then only this plant will
look like a real plant. Adding few small, small leaves. If required, we will
be also adding some more stems to this plant if
required. But let's see. I think we will be
needing one more in the centers to give
it a more dense look. If you are facing difficulty in doing with this bigger
size round brush, take a smaller sized
roundbush and try to create this small small
round shaped leaves. It's totally up to you how
you want to create it. Now, I have created this
pot with a very dark color. You can create the pot with light color and give
these reflections. It's totally up to you how you want to create your own plant. So I have just given you a
little idea how to paint it. Rest is all up to you, how you want to decorate your
own indoor plant painting. Now I will add a little
bit more branches so that it looks more dense. These are thin branches. So very thin line. I'm just trying to add here
and there just to make this whole look like a round shape and filled with these leaves. Now again, I will
start adding small, small leaves in these stems. So we are almost done
with this painting, and if you are trying it out, you can also tag me on my Instagram that is
Mohii Art Gallery. I will love to see them. There are so many indoor plants. You can try any of them,
whichever you want, whichever is your
favorite plant, and you can try it out. There's, I think, 15 plus
I have already shared, and you can try as many as you can and do share
your project works. And also your feedback
is also important. Can see how I'm just
trying to fill it up with these small, small leaves. So I really enjoy painting
these all indoor plants, and I've learned a lot from
this especially this class. I have not only learned the art of doing the indoor plants. I've really enjoyed and
also learned the benefits. I was not aware of the benefits
of these indoor plants. So I came to know
so many benefits of these indoor plants. So I'm just creating small, small pebbles inside this just to give a
little look to it. And we are almost done with it. And you can also do this painting on the
black sheet of paper, which I will show
you how to do it, how it comes when you do
it on the black sheet. So yes, you can also do it
on a black sheet of paper. So we'll meet in our next class.
36. Watermelon Peperomia: Welcome back. So let's start with watermelon peperomia plant. Let's first draw the pot. Now, this pot is
actually a hanging pot, so I will be drawing
a little upward, and it will be a little
hanging pot type of. So just creating a nice shape a circle and very simple sketch, and we'll start
painting the leaves and a little round shape of the
circles and the joining. These all pots are
joining to the surface. So I'm just drawing the lines. You can draw these lines with
your scale also if you're not okay by drawing
it with a free hand, you can take your scale
and then draw these lines. It's perfectly fine, but
draw a little diagonal line. So at least two rope kind of
thing I have drawn upward, and rest, we will be
doing while painting. So let's start first with
the painting of this pot. So for the spot painting, I will be using two colours
that is permanent rose and so it's quite vibrant color, permanent rose, and
also one more color we will be needing that
is the portrait pink. So just taking that
color also out. Now, these colors
we will be using for painting this spot.
Again, same brush. That is the round
brush I'm using here. Wet your brush, grab the colors and start
with the painting. Mixing a little bit of portrait pink to make it a
little lighter color. So starting from the edge
and making the circle first, and then I will start
filling the colors. Very simple painting. It's not so much complicated
as it is looking. It's easy one, so don't worry. So just giving a round
shape to the pot, and then we'll start
painting within. Now I'm adding a little more of this portrait pink and just trying to cover this
pot with this color. Now, we have done many
similar pots like this. You must have seen
that we have used in the center a
little lighter color. And as we are going away, it is more darker color. So like that, I will
be creating this also. So first I'm just blocking
it with this same color. So you can see how opaque
and thick the color is. Now I will use the
portrait pink, and I'll try to create some nice round
shape in the center, and I'll try to move
this color outward. Since my background
color is also wet, so it started mixing it
with that color and has become a nice blending
has been formed. It's sometimes we only
need brush to move the brush and just make
the color blending. So without color also, you can just blend the colors. Again, I'm adding
a little more of this portrait pink and moving it in the
outward direction. So now you can see
how glowing it is looking when I'm added
this lighter color. After this, I will be adding some little bit of
details in this pot, some little bit of lines just to decorate this so that
it does not look simple. So just trying to
draw the lines first, I'll start from the center. These are very curvy lines. These are not straight lines. So just drawing, like the
shape of the watermelon, same the pot, and the
watermelon leaf also we'll draw it in the same
way. You will see it later. So now this thing has drawn now we will
do the upper part, these two parts. So let's start. Again, taking the
thalo turquoise. So it's quite a dark color,
this halo turquoise. And then the permanent
blue light color. This is a light blue color. After that, again, one more
color we will be needing. But first, let's do the leaves. So just taking these
hallow turquoise, and I will also add
a little bit of yellow that is
lemon yellow to it, just to make the
color more greeny. Very little amount
of yellow I will add to make the color more
green and bright, and then I'll start
making these shapes. We can see round from the top
and a little more carved. It is not very pointed leaves, so it is around in shape, and I'm just trying to color it. So as I'm drawing,
I'm also coloring it. You can first draw and
then do the coloring part. It is totally up to you
how you want to do it. But I'm just coloring
it directly. Now, I will be adding
multiple leaves in different directions so that this complete area is
filled with these leaves, some dark leaves,
some light leaves. So darker leaves, again, directly, you can
use this color. And for the lighter leaves, you can just add more of
this lemon yellow color. So slowly, slowly,
I'm just trying to give the shape of the
leaves everywhere. You can also do it in the
same way or you can first draw it with pencil and then you can do
the coloring part. So in different directions, I in upwards, some
inside, some down. So different
different directions, I'm trying to create
these leaves. So yes, just filling the colors. Now, these colors are
very thick colors. Don't make the color very thin. Otherwise, you will have
to repeat the process. So try to use thick
color so that in one go, it is perfectly fine and don't
overdo the coloring when it comes in touch with that pink color because
if you will overdo it, that pink color will reactivate. So try not to do
overdoing it and don't use very thin color. Try to use milky color so that the color remains as it is. So slowly, slowly,
I'm just trying to add the leaves in
different directions. You can see already
this leaf is looking so beautiful and vibrant in
different directions. I'm just adding the leaves. I'm not even adding
the stems here. I'm just adding the leaves
one on top of the other. So once this is done, we will start with the
detailing of the leaves. So it's a little darker color when I'm overdoing on top of it. So we're almost done
with the leaves part, and now we will start
with the detailing. So just few leaves are
there to color it.
37. Watermelon Final Details: Welcome back. So
let's start further. So few leaves are left. We'll just paint it,
fill the colors, and then we'll start
with the detailing. Try to make the top part of the leaves a little
more darker so that you will see the difference
between the lower part and the upper part and you can
easily do the detailing. So just a few leaves
left and we are done. So you can see I'm just adding directly this turquoise color. I'm not mixing any yellow
for the darker ones. Okay, so now let's start
with the detailing. So this is the light blue color which I'm using here and mix of turquoise and a little yellow color to make it a little
greenish shade also. And we'll start with the lines. So the lines are
actually the lines of, like, a watermelon, how
the watermelon looks. So these linings we
will be doing with our either liner brush or you can use the same
brush which I'm using. It all depends upon you. So you can see how the watermelon
shape is like that only we have to do the lining
also of the leaves, starting from the center and just making it the curvy lines. So very simple,
just starting from the center and you have to
create some nice curvy lines. These lines are not
like the normal veins which we create in
the normal leaves. These are these lines start from the center and then ends
all in the round circle. So here I'm using my rigor brush to make the lines more thin, and I'm also outlining the
outer part so that you can see the exact shape
of the leaves. O. Similarly, we will be doing the rest of the leaves as well. So first outlining
the outer part, and then you can create the
veins inside these leaves. So when we create the outline, you can easily see
how the leaves are overlapping on which leaves and which leave is
overlapping on which one. So that's why these
lines are important. Now, let's talk
about some benefits of this watermelon plant. So it is an air purifier, and it is a very small
and compact size. It has, so it can be
easily kept anywhere. Also, it is a non toxic plant
and very safe for humans, as well as for the pets. Also, it has a very
aesthetic appeal which very decorative
type of appeal it has, and it really can make your
room very vibrant and greeny. So these are some
of the benefits of using this watermelon plant. So watermelon comes for name because the shape of
these leaves are like that. That's why the
watermelon name comes. So very beautiful
these looks like a watermelon fruit type. You can see I'm just starting
from the upper part, and I'm just trying
to create the lines in all the directions. Similarly, we will be
repeating for all the leaves. So I'll just try to zoom in so that you can
see it more clearly. So you can see the lines,
how the lines are like the lines of the
watermelon fruit. Similarly, we have to create the lines of these
leaves as well. So I'm mixing a little
bit of portrait pink to make the color
a little more light. So making a dot and
then I'm making these curved lines all
over these leaves. Same thing you have to repeat
on all the leaves slowly, but do it with your liner
brush because these are very small details if you're
doing on a small paper. So yes. So like this, you have to repeat
each and every leaf. So it is a time
consuming process. So one by one, you
have to do the leaves. So take your time and do it. Sometimes we get bored when we do the same repetitive process, so it's completely fine. It happens with everyone. If you face such type of issues, then you can take break, take tea break, or
do it next day. It's totally upon you how you
want to do your painting. It's not compulsory
that what I have done, the base of the pot, the color of the pot, you have to use also the same color. You can use your own colors. You can change the
directions of the leaves. It's just a technique which
I'm telling you how to do it. But the creativity, you
can put it in any way. It's totally up to you how
you want to decorate it. So slowly, slowly, I'm just
doing one by one the leaves. You can also fast forward
the video if you want. But if you're doing
along with me, then do share and tag
me on my Instagram. That is Mohii Art Gallery. I would love to see
your project works. Also, don't forget to give your feedback because
feedback is very important. This is how I also get to know that what are my
mistakes, how I am doing. So please try to give
feedback as well. So just completing the
leaves and then we will do the chains which
are tied to the spot. Mm. So we are done with the leaves. Now we will start
with the chains which are there on
the above part. Here. Also, I will add one
because I can see one dot, which I'm not feeling good. So I'll just create one
more leaf over there. So I will add with
my same round brush, one more leaf on top of it, and one more on the a
little shape pointed shape I'm just trying to make
especially to the outside leaves. Especially the leaves
which are outside, it should be completely pointed. That's why I'm trying
to create that. One more leaf I have added here. So a dark color leaf, and then I will do the same
detailing on this leaf, too. So let's now do the chain part, taking my round brush and
this rose pink color, permanent rose color and
just trying to create a nice chain shape on the top. I think I will be doing for
the rest of the chains. So we almost completed
this painting, one leaf has left and we are
done with this painting. So I hope you also enjoyed
doing this with me as I did. So see you in our next lesson. Also, you can do this
painting on the black paper, which I'll show you how it
looks when you do it on the black paper. So yeah.
38. Syngonium Plant: Welcome back. So let's
paint sinoniumPlant. So first, we'll be
drawing a small pot, and also we will draw a little leaves
because these are different types of leaves. First drawing a simple
pot of very basic one. And then we'll start
creating the leaves. These leaves are mostly
overlapping the pot also. So that's why I've created
a straight line over there. So just a hard shape, a little more bending
towards the upper side, and the leaves are
like a hard shape. So I will be creating
these leaves in different directions. Currently, I'm creating
the base leaves. I'm not creating the
overlapping leaves. Once I will color it, then we will start creating
the overlapping leaves. So very simple drawing. I'm trying to draw
from all the sides. Drawing is almost complete
Llets do the painting. I've taken out all the
colors as you can see. So the first color which I
will start doing is the white, yellow, sap green,
and burn sienna. So first, we'll start
painting the below part, that is the pot with
my round brush. So first, I'll take burn Siena, wet your brush, grab burn Siena. And just starting
with the pot, again, taking a very milky color, and gradually, I'm just
trying to paint this. First, I'm doing the outlining, and then I will start
filling the colors. So try to use milky
color so that in one go, you have to your pot is done. Simple blocking with one
color I'm doing over here. Once the blocking is done, we'll now do the
blocking of the leaves. Mixing little yellow
in this sap green and just painting these leaves. First, outline the leaves and then you can
fill the colors. Not much to do in this, we just have to fill
the colors in this. Try to use milky color
when you are filling it so that you don't have to repeat the process
again and again. Now, some are dark,
some are light, so I'm just trying to change the color and making some
leaves a little dark, some leaves a little
lighter color. So lighter color means I'm adding more of yellow into this. So very simple painting
and very easy. You just have to
follow the steps and you'll be able to do it. You can see the variations
of greens in this. Once we are done
with the blocking, we'll start with the
detailing of the leaves. Are we almost done with
the blocking part?
39. Syngonium Plant Final Details: Welcome back. So let's do
more detailing in this, adding white to this green color and making it a
very light color, just trying to create a nice
thick line in the center. It's not a straight
line it a little bit of Shimri lines are these, and just adding the
outline also in a very, like shimri one. So just making it
a very thick line. And you just have to literally
shake your hand and make these lines because these
are very crooked lines. These are not like
straight lines, especially the area which is on the sides are also
very, like, crooked. So try to make the
lines like that. And similarly, we will be doing for the rest of
the leaves as well. So let's talk about the
benefits of this plant. So it is a very
excellent air purifier, and it not only boost humidity and it also
reduces dry air. So it looks very
beautiful and adorable, and it is very easy
to grow as well. And it has a great CO
two absorbing capacity. And one more thing is that it is a very good very
good luck plant, as you can say, perfect
for feng shui plant. It is used as that also. So just try to add the details. And once we are done
with these detailings, we will start
overlapping the leaves. So by the time the colors
will be dry and we can easily overlap one
leaf on top of the other. So now let's do a little
bit of overlapping on this, taking the same color, a little darker color than
the one which we have taken. Somewhere I will use dark color where I have used light below, and on the other part, I will be using lighter colours. So like that, I'll try
to use the colors. Now here I'm trying to use a little darker color,
just filling it up. Similarly, taking a
little more of the colors and just trying to make
it more thick the colors. Now we will be adding to the areas which have
spaces in between. So taking a little maybe
towards the sides, which is little tilted. Now, you can see
the color is a bit lighter than the one
which I've used below. So you will get variations
of greens and you will be able to differentiate
between the two leaves. That's why different kinds
of greens if you will use, and you will easily be able to differentiate between
the leaves especially. So likewise, I will
be doing few more. It's not like what I'm
doing, you have to also do. You can draw it, and
then you can do it. It's completely up to you
how you want to do it. It's just the idea that this way also you can do the painting. Creating some lines. Also, I will add one more leaf towards the area which is here. Simply filling it
with a thick colour. So now we will add
the same details which we have done for
the bellow leaves. Simple and easy
techniques are these, and you can easily finish
this painting within 15 minutes if you will follow each and
every steps of mine. You can see when we have done
the overlapping of leaves, now it is full of leaves, and it is looking like a plant which is very healthy and it is filled with different
varieties of greens. We almost done with the leaves. I will also add a little bit of detail to the pot because
it's looking very plain. So I will add little
white lines in this. So just taking white color and just trying to
create the lines. Simple straight lines,
not much. That's it. And this painting,
you can also do it on your black sheet of paper, which I'll show you, creating
a little stand below. So now let's show you how you
can do it on a black paper. So this is it. So let's meet in our last class.
40. Prayer Plant: Welcome back. So let's
start with Prayer plant. So first, we will
be drawing the pot, and then we'll start
with drawing the leaves also because this is a
different kind of leaf. So just a simple pot. And the leaves, these are
mostly oval shaped leaves. So I'll just try to
draw a few of them, and you'll get an idea
that how the leaves are. So mostly I'm trying to draw the ones which are
not overlapping. So try to draw the leaves
in different directions. Oh. So once we are done
with the drawing, let's start with the painting. So the colors which we will be using is the bonsiena white, lemon yellow, black,
and sap green. So let's start first
with painting the pot, adding white little black to this bonsiena to make it a
little more darker color. Just trying to block in
this lower part first. I'm trying to make this whole
pot a little dark in color. Once this pot painting is done, we'll do the outlining
of a ve also, and the middle part will
be mostly black in color. Sticking black and
just applying it in the middle part. B
41. Prayer Plant Final Details: Welcome back. So let's
start painting the leaves. So for the leaves,
I will be using a little bit of black
and sap green mix. I want a little
darker green color. So I'm just mixing a little
black and to this sap green, you can see how
black the color is. If you have dark green color, you can directly use it. If you don't have
dark green color, then you can mix a
little bit of black in this sap green
color and just try to first block in
all these leaves. So let's talk about the
benefits of this prayer plant. So it is a air purifier which helps in purifying the
air by removing the toxin. It is also a humidity booster, which releases
moisture in the air. It is also known through the
process of transpiration. It is also known for
its nighttime movement. That is, it's true to its name
that it is a prayer plant, which leaves a fold upward at night resembling
the praying hand. That's why it is called
as a praying plant. And it also promotes
mindfulness. So there are so many
benefits of these plants, as you can see, So you can see, I'm just blocking it. Some are light, some
are dark green. So a mixture of greens, I'm just trying to add. I really enjoy doing
this plant series. I hope you guys, too, because I learned so many things about the plants which
I was not aware of. And especially with
gauche colors, it has come up so well. So let's start with
the detailing. So I'm just taking a little
white and lemon yellow mix. So first, I will create the
stems with this light color. Very simple and easy
painting it is. It is not very much complicated. So now I will just try to create some more details
in these leaves. Just taking some green, yellow and white mix. So try to add more white to this so that it is
more visible and bright and just trying to
create a nice exact pattern. Try to make a thick zigzag
pattern in between. So with the same brush, I'm trying to create some
veins of these leaves. It has a different kind of textures on the leaves,
as you can see. Very simple and easy. Anyone can paint this
beautiful prayer plant. So we are almost done with
the detailing of the leaves. We'll add few more leaves in between newborn
leaves, some new buds. So I'll just try to create two more by just taking
out in between the lines. And these leaves,
I will make it a little light in colour
because these are new buds, so that the new leaves are basically a little
more light in colour. So just trying to create very small tiny leaves
on the upward direction. And then we'll do
the same detailing as we did on the other leaves. So you can see how
beautiful these leaves are looking when you have given a little transition of these
lighter leaves as well. Also, I will try
to add some stones over the area small pebbles. Shapes just with a dot. And we are done with
our last class. So I hope you enjoyed the whole series of
indoor plant painting. So I really did enjoy
doing this whole series. So I hope you guys
to enjoyed this, adding some little
details to the spot. So with 23 brushes, I was able to make all
these indoor plant leaves. So you don't need
so many brushes for making the artworks. You just need two,
three brushes when you are dealing with
some indoor plants. So you can see how
beautiful this has come up. So if you're trying it out, do tag me on my Instagram. That is Mohoni Art Gallery. This is the one which I have
done on the black paper. So I hope you enjoyed
this whole series. Almost we have done 20
indoor plants together. And personally, I have
learned a lot from these. Just by making the artwork, I came to know so many benefits, so many benefits of these
beautiful indoor plants. I hope you guys also
enjoyed doing all of these. All of these I have done on
the black paper as well, not only on white paper, but also I did try on
these black papers, and it has really come out very well using same gauche colors. You can also try it
out on any paper, any color paper, black,
gray, brown, anyone. And these are very
simple and easy, anyone can try it out. I hope you enjoyed all of
these indoor plant paintings. And we will soon meet
in our next class, which I will be publishing soon. So thank you so much.
 Mohini Sinha, Acrylic and Gouache Artist- Nature Lover