Transcripts
1. Intro: As Julie said by Buddha, happiness is not having a lot. Happiness is giving a lot. Like a lotus flower. We do have the ability
to rise from the mud and bloom out of the darkness
and radiate into the world. I myself as deeply inspired
by the teachings of Buddha. And I truly believe, the more we share knowledge, the more we get. Hello friends. My name is Santa and acrylic
artists from India. And today, I'll guide you how to paint step-by-step
Porta portrait painting. In this class. I'll be also telling you what all materials will be needing
to complete this painting. Watercolors, which will be needing to create
those textures. And complete blocking
off the portrait, the layering technique, and
the blending of colors, creating some
realistic textures. And finally, how to
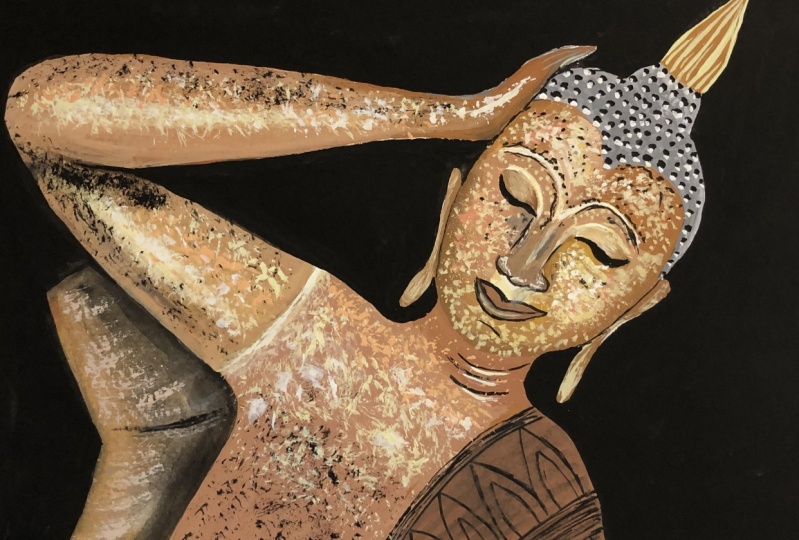
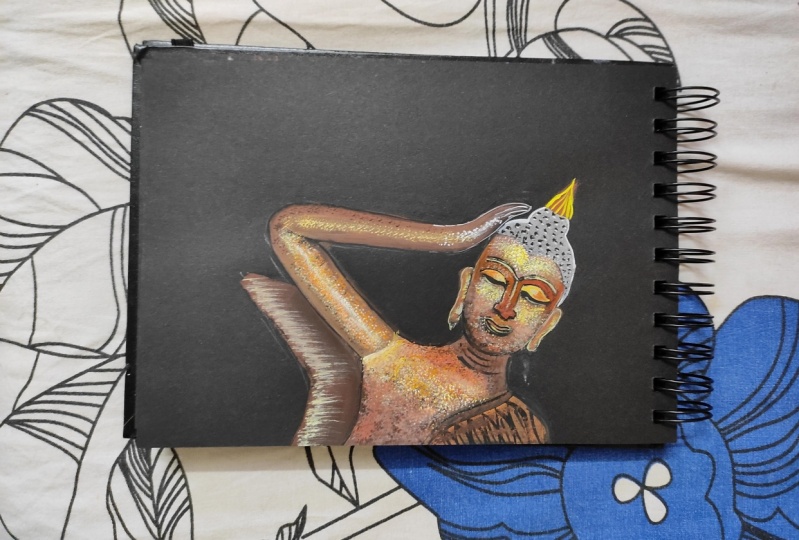
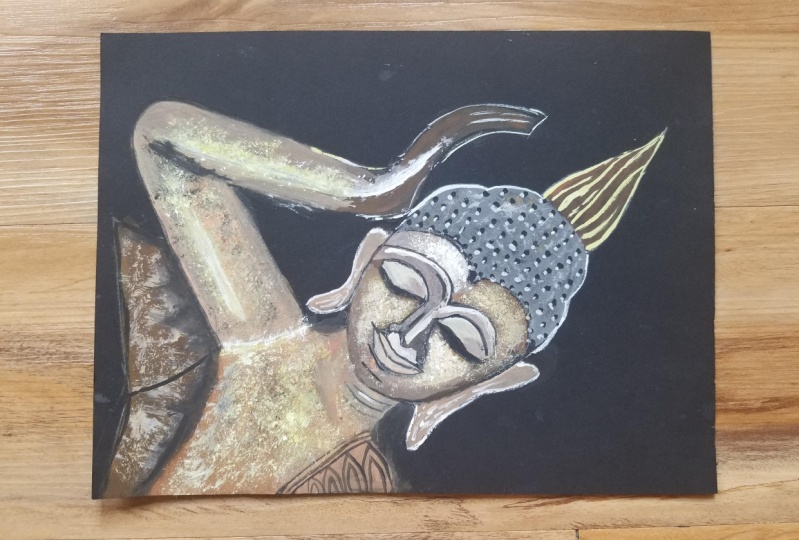
frame the painting. And this is the final look. Let's start with it.
2. Materials Required: Hello friends, welcome back. Let's first discuss about the materials which
we'll be using here. First, this is the Canvas. This is the five to seven inches of Canvas and I've
already drawn the sketch. I'll be providing
you the sketch and my reference image you
can draw from dad. And this is deep primed canvas. This black and color. The colors which we'll be
using are of different brands, which I'll tell you separately. But these are the
brands which I am using your that's golden, Gamblin, Winsor, and
Newton and Liquitex. These all brand colors I'm
using for acrylic painting. And apart from that, the knife for mixing the
colors than pencil and eraser for drawing these
scale for creating the grid. When you will be
drawing the image. Apart from that, the brushes which you will be
needing here are, there are many brushes
which we'll be needing. This is the round brush,
synthetic round brush. Then this is the Bristol brush, which we'll be
using for creating texture and other
brush to brush. That is, the one is round
brush and one is flat brush, and another one is
of larger size. There are different
sizes of Br2 brushes which we'll be using
for creating textures. Then we'll be using some flat
brushes and filbert brush. These brushes, these are
also synthetic brushes. And then comes the liner brush. There are 23 liner
brush of three sizes, which I'll be using here. Apart from this, then comes the blender brush we'll be
using for blending the color. And for cleaning our
brushes, we need tissue, paper or cloth,
whatever you feel like for cleaning the brush. And then comes the
water container. This is the container which
contains three blocks and has a grid in that where you can easily remove the
colors properly. So this is the
container which I use for painting with acrylics. And you can also put the brushes on hold
is a standard also. And the sprayer just
to spray the water. And here I'm using the palette, which I'm using here
is the glass palette. The advantage of using the
glass palette is that you can easily remove acrylic colors
from the glass palette, but just by rubbing it with these ponds or any
hard substance. These are the materials
which will be needing for completing
our painting. Now let's just discuss about the colors which
we'll be needing. The first color is burnt,
umber, raw sienna. These two colors, which
we'll be using for the background of the portrait. You can see the
background color. This we'll be using. Lemon, yellow, cad Orange. These two for creating textures, also titanium white
for creating values. So these are textures
which I have created by using
these three colors. And black, of course, for lining and for some
more texture detailing. So let's start.
3. Blocking Body: Hello friends, welcome back. We'll, we'll start with
the blocking first. The colors which we are
using here is raw sienna, burnt umber, lemon yellow,
anti-Darwinian white. And this is the complete
sketch which we'll be doing. And false we'll
do, we'll be doing the blocking part and
then the rest detailing. Let's start 50 blocking first. We'll start from the
down part that has the lower part and then gradually will go
to the face part. D first, I'm just
wetting the colors with my spray bottle that the
color doesn't dry quickly. Just taken just mixing the
colors with the water. You don't have to make
the color very fluid. It needs to be a
little bit tick. Just mixing water with
the colors I've used. Very less amount of
water, not much. Just mixing the
colors. That's it. That when I'm using the colors, it is completely read and
I don't need to apply another water or fluid to it. Coming it's not coming
out from the night, so I'm just taking
out with my brush, just trying to blend it. The water and the color. This drawing I will attach and my reference image with complete grid forms so
you can check with that. So either you can draw
with a grid method or you can trace it
whatever you like. Because I didn't want to
waste my time and drawings, so I just added the
reference image to it. Now here I'm using
my filbert brush, just applying little
bit of water. And then this bond Dumbo. And I'll mix it with raw sienna little bit, very little amount. Because I wanted a
little darker version. When you're using the colors, when you are applying the
colors on the black background. These a little bit
transparent colors, so it will not come up easily. You have to apply
another code over it. You can see it's a little
bit of a dance lewd and you can see that black
color behind to it. We will need to apply one
more layer of this color. But first we'll do
the first blocking, and then we'll proceed further. I'm just applying the blocking. I'm just blocking
the area. That's it. But making sure that the colors doesn't
go out of the edge. Adding little bit
of white to it. That it becomes more opaque. Because when you add white to, it becomes little
bit more opaque. The color tried to
do it very slowly. Keeping in mind the area. A little bit of yellow
I have applied on the top portion because as we go above the color of the statue, it becomes more
bright and shiny. From darker to little
bit lighter color. You must have seen me
mostly doing landscapes. So this time I tried
to do something. I'm like portrait. I've done. But portrait also you
can see my classes. This is the statue of Buddha, which I'm doing good. I'm just trying to
match up the colors. I've just taken a little
bit of ivory black, also applying little
bit ivory black to the lower portion because I want this lower
portion to be little dark as compared to the
above part of the body. I am doing with acrylics, but you can also try
same painting with oils or with quash
painting. Same method. Same colors also you
can use when you're using oil or any
medium you can do. You can just see I'm using
very less amount of water and adding just the raw colors and blind over the hands and body. The best part and acrylic is that the color comes
out of the border also, you can always redo that. You can cover it with black. So you can see I'm doing deep painting in the
horizontal direction, but actually this
painting isn't in vertical direction so that
you can see it clearly. I've put the painting in
horizontal direction, but once this will be done, I'll just put it didn't
vertical position. Just applying it
slowly. The colors. The best part with
acrylic is that we don't have to wait for the first layer to dry
and then we'll start in. It dries really fast. To stop the drying
off the colors. Just spray water on
it will be fine. So same color I'm applying
in the area also. You can see I'm using
the filbert brush because you can easily
cover those areas. We just sharp enough with the filbert brush,
but also you can, if you don't have filbert brush, you can use flat brush
also for doing this. It's perfectly fine what
brushes you are using, but whatever brush you're using, make sure these are
synthetic brush. You don't, please do not
use watercolor brushes. Otherwise your brush
will get damaged. It will completely dry up and the whole Bristol
will become hard. So it's better to use or
the synthetic brushes or Bristol brushes if you are doing the oil
painting or acrylics. Because these
colors when dry up, it becomes hard and your whole brush will get
damaged when it dries up. So as soon as you
are using the brush, just put the brush in water and wash it
off. All the colors. Don't leave your brush as it
does lying on the surface. Otherwise it will get dry up
and it will not come out. Same color. This I'm using with the bag seed where
the statue is lying. The area which is touching the
hand is a little bit dark, so I'm adding a little
bit black to it. Again, the downpour
caution, same way. Just trying to match up the
colors adjuvants as possible. So as to go give it a little bit realistic
look of a statue. Just making the lower portion
a little bit more dark. The first layer of this
painting is almost done. Just the pod is almost complete. Just giving a dust shape. The lower blocking
is almost done. Let's start with the next part.
4. Blocking Face: Hello friends, welcome back. Let's continue
with our painting. The body part we have
done a little bit, neck portion is left. So first let's complete
the hand painting first. Now here I'm using my round brush because
this is quite narrow area. I'm using my round
brush to paint the hand and see the size of the brush always depend upon the size
of the painting. If you're painting is
small, then accordingly, you have to choose the
smaller brush size. And if the painting
is big enough, you have to use the bigger
size of the brushes. Then only you will be able to nicely blended colors and
complete the painting on time. So here you can see I
have used five into seven inch size canvas. The brushes which I am
using a mostly 246, Not more than that. If you are using
bigger size painting, then you have to use
bigger size brushes. Now this hand and
body part is done. Now we'll go with D face
detail, phase blocking. First, the outer portion of the face is a
little bit dark. Then as we move inside to the cheek area and
to the nose area, the colors will be lighter. So from dark to lighter
version, we have to go. You can see I'm just
adding black to my raw amber and just outlining
the outer area first. Then gradually we will
move to the inside part. Mean part of the
area is the phase. It has to be very proper. Then only the whole
portrait painting will look effective. I've just taken yellow will apply on the portions
which have highlights. You're also, you
can see I'm using my round brush because it has sharp dip and you can always use round brush for creating
some sharp edges. I'm just highlighting
the areas which are a little bit bright and shiny
with my lemon yellow color. This is just default blogging and you don't have to worry, worry if there is any mistake or any colors which are
mismatched if used, you can always overdo
it. And acrylics. Just highlighting
the outer face, the nose part. You have to be very careful
while painting the face. Try to do it very slowly. Commonly. Take your own
time and do it slowly. You'd want to have
to cope up with me. You can always pause the video and then again
watch it and again to wet. This is the advantage
of watching it online. You can always watch it again. Take your time and
do it patiently. As I said, that the inner portion is little
bit lighter in color. For lighter color, you have
to just add raw sienna. And for the darker
version you have to add raw amber black, little bit of black to it. I'm just trying to
figure out which color to use and which color
to not above also, it's quite lighter version, so I'm using it. Raw sienna. There is one
portion which is quite bright. So here I'm using white color, just blended with my raw sienna. And later on we'll again
do the second layer, then we'll mix it properly. I'm just trying to figure out the colors where it should be lighter color and where it
should be darker colors. So I'm just trying to do that. And in the second layer will
do the complete blending. And the third layer will be detailing this first
blocking as almost done. I'm just trying to blend that white color with
this burnt sienna. And after that, we'll be
doing above head portion. For doing that, we need this black color and
white column mixture. It'll just block in more whites and just adding
a bit more black to it. And it's kind of
a grayish color, which we have to apply
it on the turban, but actually it's more of
black and less of white, so it's almost dark
grayish color. Again, say that. I'll just
cover this entire area, but the gray color. I'm using the same round
brush for blocking the head. The above crown portion again, the same color which
we have used for the blocking the body. Same color I'm using here also. Something just I'm removing that so that it doesn't stick up. I'm just applying that
same color on this also. Finally, our first
blocking is done. Now we will start with
us Second blocking.
5. Second Layer Of Blocking: Hello friends, welcome back. Let's start with
our second part. So you can see that this
first part of the painting, which is the
background blocking, is done and it's completely dry. Now, we will start with
the second layering. I have used same colors. Just one color I've
added is GAD orange. Now again, we'll be
using burnt sienna, raw sienna, and burnt umber. I'm just mixing board of them. And then again, I'm applying the same color over the body. Now you can see that
the color has being, become quite opaque when you are applying
the second layer, because the background
color is black, so you have to apply
two layers of color to red then only it will
be more effective. Here the upper part
is quite bright, so I've just added white to it. And I'm just applying it on the above portion
of the body. Painting looks quite difficult, but it's not so difficult if you follow each and every step of my painting and you
can easily respite. You just need to follow
these steps and you will be there with
that beautiful. What does statute painting? Just you can see I've
added a little bit of orange to red and I'm just
trying to blend both of them. Deciding the colors is very important part that which color you
have to use when. It's very important part of the painting to decide
which color to use. Just doing the neck area gave the lines are not visible. We can do it again. The blocking is more important. So you can see your the
middle portion is bright, the upper portion is dark, and the lower
portions also dark. This is how we have to
do the entire painting. Once you are done
with the blocking, make sure that dry to blend the color three of
the colors properly, then it will be more effective. Now the lower
portion, same color. You how opaque the color is
when you add white to it. In the middle, I've added
a little bit of yellow to it so as to give a
nice contrast to it. Adding a little bit of
yellow in between also, because it is quiet, shiny like a metal. Now let's add a
little bit white and lemon yellow mix and
create that line, which is joining the hands. Line, which is shining. And this is also quite bright. It's not completely white, so I've just added little
bit of lemon yellow, just trying to match the colors. And now again, little lighter version of the color by
adding burnt sienna, raw sienna and burnt umber. Just blocking the hands. You can see I'm using very
less amount of water, just my brushes wet and
painting is completely row. I haven't used much of water to it because I want
to pick a color. I'm just trying to create. That white portion,
little bit more white, more bright because
it's quite visible. Bright. Now, for blending this, I'll be using my blender brush, which is from Princeton. It's very nice brush. I've just wet the brush, remove extra water
and just trying to blend both the colors. Just remove that extra gallery and then again start blending. It. Lets very nice blender
brush from Princeton. Even for any
landscape painting or any portrait painting where there is better
blending is required. These blender brush plays
a very important role. Both if you don't have
that blender brush, you can use your thick
round brush and use the same technique of
blending that does that take round brush
should be synthetic. Year again, I'm just
blending the colors. So the outer portion
of the hand is quite dark and as it goes
inside it's quite light. You can see here also I'm
using the same filbert brush. And I'm just repeating the technique of
blocking and blending. Trying not to split the
colors outside that boundary. Doing it slowly. You can see just adding a little bit of white
to the scholar, how the color value changes. It becomes quite
bright and opaque. White plays a very
important role to it. Slowly just mixing the colors. Same thing I'm doing here is adding a little bit of
white and yellow in-between. The blending, which I have done. On the lower hand area, that is, on the upper hand
area will be doing the same thing on
the upper hand. Because this is
also quite shiny. Bright. Again, I'm adding the lighter version and then I'll blend it with
the blender brush. Dustin, enjoy painting. Suppose if the color is dried
up and it's not blending, then you can add same
color to the same area, same amount of lighter
version color, and then against
dad blending it. Now let's do that bit of
blocking width liner brush. Here. I've just taken
my liner brush. And when I, when you are
doing any fine line thing, just make the color a bit
lit off. Liquid form. Then only you will be able
to create fine lines. If you are using
thick rock color and trying to draw fine
lines, it's not possible. So make that colored
little bit fluid. And then tried to create
nice smooth lines. Whenever you're
drawing any portrait or any three lines or anything, just try to make that color fluid and then try to
create fine lines. I'm just lining the
whole structure, just outlining it
with the black. You can see the size of brush, which I am using your 00. It's very fine. And it's very ten so that you can easily draw
fine lines to it. If the colors are coming out, just paint that with
black. That's it. Try to take your own time
and do it very slowly. If you see that
the lines are not coming straight, it's fine. You can always redo that. You can see. I'm just blogging it with
black because I don't want that portion be visible. I'm just covering that
area with black because the background is also
black fluids fine. You can use that
black color just outlining the whole structure so that it's easy for
me to paint also. Now the drawing, the
lines off the clot. Now lining the neck area. Just fine lines you
need to create. Whenever you are doing
any portrait painting and requires a lot of time and it's really very time-consuming. You have to be in a really refreshed mode and have to have a lot of
patients while doing it. You can take small breaks and have a cup of coffee or
tea, whatever you want. Listen to music
and do it slowly. For sure, your painting
will come up really well. At the end, there
are some fine, uh, designs which are
created on the clot. So I'm just creating, just designs, some round shape. Somehow from shape
designs are there. Gradually, gradually
we are coming to the portrait painting part. One portion at a time. I haven't touched
the phase part yet. I'm still doing the
body part only.
6. Detailing Of The Lower Body: Hello friends, welcome back. Now the background
blocking is done. We will start with
the detailing. The brush I'm using here as the British blistered
brush off size two. And I'm just mixing
white and yellow, too wet, very little
amount of color. And I'll be just
dabbing my brush, the tip of the brush very lightly on the area which
I have to highlight. First, I'm
highlighting that area which is joining the
hands and the body. And then just highlighting the portions which I have already highlighted
with the yellow. As you can see. Just dabbing my brush very
softly, very gently. You don't have to
press your brush very hard otherwise that
texture detail will not come up very
lightly and gently. You have to apply the pressure. Same technique I am doing. The above portion
also of the hand, which I have already
highlighted with the white. And on top of it I'm just
creating some textures. And I'm also spreading
some textures, either of the sides also, so as to give a nice effect will be doing to the body part. C. I'm just dabbing my
brush very lightly. And you don't have to take
a lot of colors to it. And this brush is completely
dry without any water. And I'm just using that color, take color and I'm just
dabbing my brush very lightly. You can see that small
dots are appearing. This gives a very nice
texture when you are doing any portrait or any. Even these textures can be used in landscapes also creates a very nice and just
take look to it. Just highlighting it
with more of white. Now, I'll be adding little
bit of orange to it. Let's orange and a little
bit of raw sienna. And I'm just removing excess of colors and I'm just trying
to create same texture, which I have done with the previous white and yellow color. You don't have to use
too much of colors, otherwise the whole
texture technique will get spoiled up. You have to use it
very small amount of color and only the
tip of the brush. You have to dab just the tip of the brush and very gently. And same color I'm using for
the hand area also *******. Joining the body part. Just light pressure and small
dots are getting created. You can see I'm not
covering the entire area. I'm just using small
amount of area and just scattering up so
that it looks different, different varieties
of colors come up. Now have taken black, simply raw black, little amount
and I'm just dabbing it. If you think you have quite a lot of Mount of
color on your brush, just remove it by dabbing
it on your palette and then try it
on your painting. Just creating small textures to it. Clean. This brush creates
a very nice effect. When it comes to any landscape
painting or any rejects your painting does brush plays a very important rule whenever you are
creating any textures. In fact, in portraits also, it gives a very nice, It gives a very nice texture to the whole portrait painting, as you can see here. This is quite a hard brush, which gives very nice
texture on the canvas. Just creating lots of
layers of textures so that different varieties
of colors come up. When you see the painting. Just giving it a little
realistic and rustic look. You can say. Now again, taking these yellow color, this lemon yellow and White mix and just very gently creating textures. These textures you can also
use for creating classes. When you are painting any
grass texture you can always use this texture also
gives a very nice look, realistic look to it. You can see I'm just adding small amount of yellow
also do that portion. Whenever you are
creating these textures, please don't take too
much amount of colors and your brush has to be completely
dry without any water, then only that
texture will come up. Otherwise your whole
painting will spoil up if the brush is wet and
you're using wet colors. So the color has to be also dry and your brush has
to be also dry. Now taking little white and
adding on the top of it because it is quite bright and I want that bright
look to come up. All you can see we're getting
closer to that painting and the textures are
coming up very nicely. I hope you guys also
enjoying it when you are in the process of painting. All let's use a liner brush
for creating the lines. Just taking black,
that is fluid black. And the lines which
are not visible, just creating those lines so that if the colors
have come out, you can always cover
it with black. Just creating those borderlines. Now the neck lines
just making it dark. Now, there's a white
added under the black, so I'm just adding a
little bit of white toward whenever you are
doing any detailed painting, you have to make sure
that it will take almost one or 1.5 hours to
complete this painting. It's not necessary that
you have to complete it in just one day. In one hour. You can take two days, three days, four days. It depends upon
how much diamond, how much patience you have
for doing these paintings. Don't be in a hurry. Take your time, take 34 days, and do it thoroughly
and patiently. This painting I've taken two days to complete
this painting. I haven't completed
in just one day. I took two days and all. And then I completed
his painting. But first before that I
made another painting. Before doing this. That also took time. So whenever you are doing any realistic detail
painting, it takes time. If you're not confident
on doing on the canvas. So first try it on your
notebook or small notebook, and then try it on
a bigger Canvas. This, I have done it
in a small canvas, but you can always do this in a bigger Canvas and
you'll see the look, it will look amazing. Just outlining the hand
part with white color. I don't want the complete line, that straight line and just
it's not completely white. There are some
white, some black. When I'm creating those lines, I haven't used much
of water to it. Just my brush is wet, but the color is but
the color is not wet. It's almost the
same color which I am using just my brush is wet. You can see those dry brush
patterns are coming up. That is, the line is
not completely white, some are black, some are white. Now with my round brush, just that this is also a
brush, still round brush. I'm just highlighting the
hand part which is white. This hand part is I'm just
highlighting it with white and just giving a
little bit off dots. I'm using your round brush because you can see
it's very narrow. Nfl use the flat brush. It will not come up nicely. That's why I have used the
small round Bristol brush. This almost it's complete. And now we will do just the
outlining off the area. Whatever is outside, whatever
colors are coming out, I'll just paint it with black. I hope you guys are enjoying this beautiful
painting of Buddha. And if you are painting is to share your project
works and also share your projects work
on my Instagram that is more in the art
gallery. I'd love to see. They're also now are. Finally the lower part is done, we'll do with the face
part and the turbine part.
7. Detailing Of the Head: Hello friends. Welcome back. Now, we are done
with the lower part. Now we'll start with
the turban part. That is the spot. So first we'll be using
this just still brush. I'm just cleaning my brush
and just trying to dry off the brush with my
tissue paper and just dabbing little bit
white and black color. More of black and white. Then just creating small
textures on the urban area. Just creating small,
small textures. Now using my liner brush, be just creating
that black details. But before that there is a small area which
is left black, so I'm just covering it
with the same color. I think it's more black. Just trying to cover
that area and also outlining the outer area. Also, Wednesdays outlining is done. We'll be doing the beat
with the same brush. These are all small, small dots, which
I'll be creating. These dots you can also
create with round brush also. But I felt more easy to do with this liner brush and try to create a little
bit bigger circles. And as we go down,
it becomes smaller. The hole, the gray area we'll be covering
like this small dots. It will move in the
same shape like the Durban shape is
like that oval shape. The dots also will
be of the same. Hi, I really enjoyed
this painting a lot. I hope you guys
also enjoying it. Because when I first painted it, I was not sure whether this
output will come or not, but with the colors
and the texture, the final output
was really amazing. I really loved it, so I total
sharing you with you-all. I taught to create this class. Earlier. I was thinking of
creating some other class, but when I created
this portrait, so I thought why not to share
this with the entire world? I thought of creating this
as a class for you guys. As you have seen in
most of my classes, I think I've almost
14 to 15 classes will end all our nature related. But I am really truly inspired with Woodstock
readings and beliefs. And I truly believe
when you share more, you get more and you
learn more from it. If you guys are
doing this painting, please do share your
reviews about it, how it was, and how I
can improve more on it. You can see that I'm
moving the dots, like the turbine shape. How determinants
shape like that. We will only I'm moving, I'm creating the dots. Finally, the dot part is done. And after that, we'll create again small dots on the top of those black dots but with
less lighter color that is almost grayish color on
the just below part. To give it a nice
look and texture. I'm not covering the
entire black door, I'm just putting it below to give it a nice
shadow look to it. Whenever I do all these types of paintings that are
more realistic form, I end up doing it. Natalie Morris level
little more is left. It's never ending. I almost see. Okay,
this should be done to, that should be done
that is not perfect. This happens when
you are doing this, these kinds of painting. That'll get this as left. There should be like this. But then needs to be one-stop. Just highlighting the
adrian just random small, small white dots in-between. I'm just putting the top part with the lemon yellow color. This is just lemon
yellow and white mix. I'm just outlining it. And then creating
those thick lines which are off the shape
of the same Durban, you can say the ground. Sorry, I could not record
the palette work here because suddenly my
camera gods switched off. So I'm just using that white
and lemon yellow color. That's it. Lead the top and
the bottom part is done. And now we will start
with the face part. So let's start with
our next section.
8. Face Detailing Part One: Hello friends, welcome back. Now let's start with main
part that is the face. Here. I'm using my liner brush. I'm just painting that I area which I have already drawn it. Just completely black can always alter the shape of the eye when you
are painting it. Now, taking my color that is raw sienna, burnt umber mixed. I'm just adding water. It's getting dried up
because it is acrylic, you know, just
covering the ear part. You can see I'm using my
liner brush because it's very ten pattern,
very narrow area. So I don't want the
colors to come outside. That's why I'm using
your D liner brush. Suggest adding little
more of bond Dumbo, because the above part is
little bit darker in shade. Just adding a little bit
more of that bond amber. Just blocking the years. Same blocking am doing for
the other ear as well. You're actually, there's a
little bit off for shape, which I'll alter your actually the ears are
little bit connected. Some just trying to connect with those small fine line to it. Very narrow portion which
is visible for that tier. I'm just trying to
give it a shape. You can see why here I'm
using the liner brush. That's quite a lot of PTEN area which
needs to be covered. Using the white to
give a little bit soft highlights
and details to it. I'm just outlining it with
white color a little bit off. Details also, I'll add over you a completely covering
the entire ears because the above part is a bit dark and the lower
part has been bright. So I'm just covering
the lower part, but little bit of
white highlights. Just outlining that. Here also, I'm using a
completely the color. It's not much a waterway are just the brushes wet and the
color is wrong completely. That draw color. Not a
single drop of water is in the color so that it gives
a nice dry touch to it. Does dry technique. Stake lemon, yellow and white mix and cover the area which
is above the lips. It is quite shiny, so I'm just covering it with white and a little
bit of yellow. Using same color
doing the iPad ports outlining the outer
area of the eye. Then adding the two yellow, again the same outer area. It's not the hybrids, the outer area which
is above the eye. You can see the eyelashes. Just adding again. This is again my filbert brush, but off bigger size,
I have used here. Just adding yellow
to the corners. And then as we move forward, we'll add little raw
sienna and black mix. Then we'll blend
mode the colors. If you are using pick colors, you can easily blend
both the colors because it will
want to drive fast. And you can blend the colors, but if you're using ten colors, you will not be able
to blend the colors. Dry to use thick
colors when you are doing this type of blending. So I'm just using
my blender brush to blend board the colors. This iPad, it's in-between
that is very shiny, so I'm just putting that
yellowish part in-between. And on board this side
it is quite dark. Store just applying
raw sienna over there. And they're also blend
mode the colors. But my blender brush, It's more bright,
so I'm just adding more of white too wet. Just taking the
blender brush and trying to blend the colors. Whenever you are using
any blender brush. That brush also has to be dry. It. You have to put the brush in water and then soak it off
with the tissue paper. And then the brush needs to be completely dry when you're
touching it with hand. Just outlining those Ariane, just making it more
provide quite bright. Just mixing the color and
just removing the excess of water from the brush. Then again highlighting that
nose area with white color. Then the eyebrows with
white and lemon yellow mix. You can see how that dry brush effect is coming up when you
are drawing the lines, it gives a nice texture
to the painting. Again, taking raw sienna. I'm just blocking the
area below the eyebrow. Just taking quite a lot
of Mount of color and I'm just blocking that portion. It's quite dark, so I'm just adding little bit
of black to it. Just covering that area. Also denote spot. Now again, taking a little
bit too wide and this burnt sienna and this is
quite bright color this side, which is the cheek area, you can say beside the
nose anti cheek part. It's quite bright colors, so I'm just adding
texture to it. This is just all dry colors
which I'm using you, you can see this whole
areas quite bright. Now again yellow. And the other side also
lying below the eyes. Then again, taking one CNI and black mix and just
covering the nose part. Just taking again a bit more of black and brown sienna and
just covering the nose area. Phase part is quite complicated when you are doing
small paintings. Same color. Again, I'm using for the other area
below the eyebrow. Now, taking a little
bit more of yellow and just covering that area. Now, let's take black. Create the outline
of the face first. Before doing that just bite
which is coming on the eyes. I'm just covering
that with the black. Again, taking black,
which is liquid form. Just outlining the face. Fees outlining is very important because this only gives the structure
to the phase. Now let's do D dealings.
9. Face Detailing Part Two: Hello friends, welcome back. Finally, our last part
of the painting as left. So let's start with
the facial detailing. So again here I'm using my bristle brush and we'll
be creating some details. Again. I've taken some orange
and white and raw sienna. And creating the textures. I'm just outlining the outer
area of the face first. And then we'll
start with the GX. Same technique you
have to use your, you have to use
completely dry brush. And the colors are
also completely dry, no water in it. And then same dabbing
technique you have to use. Very less amount of color you need for this texture detailing. You don't have to
use lots of color. Otherwise you'll create patches. Same texture I'm
creating on the cheeks. That is why Dan lemon
yellow mixture. The area which I have
already painted there, I'm just creating the
texture over there. A bit on the above
part of the eye, bro. Just highlighting
the areas which are already I've painted
with lighter color. The same highlights I'm doing on the above part of the head, that is the forehead. I'm just using that same
yellow and white to make sure it's more of yellow
and less of white color. Area is quite shiny and I'm
using yellow and white mix. Now there is an area
which is quite shiny, so I'm using quite a lot of white and a little
bit of yellow. And I'm just dabbing
my brush over there. See it's quite bright color. So there's more of white
and less of yellow to it. I'm just adding little bit of texture on the other side also, that it looks in a blended form. Doing a little bit more
patch of white over there. The bit on the cheek side. Again using same lemon yellow and creating texture on
the other cheek side. You can see how nice and
texture look is coming up. Starting more of yellow to it. Dof, more of texture
on the body part. Phase plays a very
important role when you are doing any
portrait paintings. So this is the main
part of the painting which needs to be
taken care a lot. So take your time
and do it slowly. I'm already in love
with this painting. I hope you guys are too. And I'm glad that I could
share this video to you guys. Just doing a little bit details. Finally, we'll be done
with this painting. And the last bonus
part is the framing, which I'll be telling you. How to frame and
protect your paint. Painting from dust. Just use raw sienna and a little bit black fur
covering the lips spot and will be outlining it with black and giving some
highlights with the white. You can see these
liner brush plays a very important part in
painting the details. So make sure that you
use right liner brush. Whenever you were
doing any lining part, the color has to be
in the fluid form. Now again, a little
bit white and yellow mix and just highlighting
the lips part. Just giving little bit
of shape to the nose. Highlighting the nausea Rialto. Again, just giving the shape to the nose with
the black color. Adding a little bit of white
highlight to the nose. Just taking more of white
and darkening that area. We are almost done
with the painting. Just the bench part is left. I'm just trying to
make the nose perfect. Outlining the lips spot. Adding little more white
to the underwrite area. More white to the above part. Just doing the final
details which are missing, which I feel it
needs to be done. More. The eyebrow, just outlining that same white area
with black outline. Now using my brush to brush,
completely dry brush, I'm just taking a
little bit of white, yellow mix and just a
little bit of brown. Just highlighting. What I'm doing is just creating
little bit of textures. Moving the brush horizontally. Again, a little bit of
orange and raw sienna, and adding little bit
of textures to that. Just outlining. Finally, we almost done, I hope you guys
enjoyed this painting. And the last part
of the painting, which has left as
the framing part. That is not necessary. If you want to frame, you
can frame or you can varnish it to protect your
frame from dust. This is almost done. We'll start with the
last bonus lesson that is D, framing one.
10. Bonus Lesson: So finally, painting
is complete. So this is the last
part of the painting. And here I will show you
how to frame the paintings. So this is five to
seven inches of painting and this frame
is eight into ten inches, we'll size and the inner bag
border is five into seven, will give a nice
white border to it. So let's first
take out this pen. But my knife, because it's quite tight so I'm digging
out with my knife. You can remove it from
any sharp tool you, if you have this frame I
have bought from Amazon, you can easily get it from amazon menu search
frame of sizes as much. I'm just taking out
the entire Penn. After that, I'm just
removing that board. There. I think three layers. This is the pin from which
B2B hanging the frame. This is the first and
this is just the details. This is the frame that is
the border. You can say. This is the acrylic glass. And it has tapes on both the sides so that
this class is protected. It's not a glass, it
is an acrylic sheet. You have to take it out
board the sheets nicely. This is completely transparent. If you are not framing it, you have to one niche, the painting, otherwise, you will not be able to
protect your painting. If you are not varnishing
your painting, you can frame it like this. And it looks really nice
when you frame the painting. So I've just put that acrylic
glass and then this frame, there's dense painting
on top of it. After that, I'll just
put the masking tape on all the four sides so
that the painting does not move and get displaced off. Just fixing it with
the masking tape. On. The four corners,
have just fixed it. And after that, I'll just check it out if
it's OK. You're not. And then I'll put this board. It's not. So that pen is getting
stuck in-betweens are just need to fold it more so that it gets inside nicely. Just you need to fix it by
just removing those pins more. Just need to press it tightly. And then just close all those pins with your hand or with any
knife if you want. You can also put tape on all the four sides if you
want. This is all done. This is the painting and
this is how it looks. I hope you enjoyed
this painting. I love to see your projects and thank you for
watching this class.
 Mohini Sinha, Acrylic and Gouache Artist- Nature Lover