Transcripts
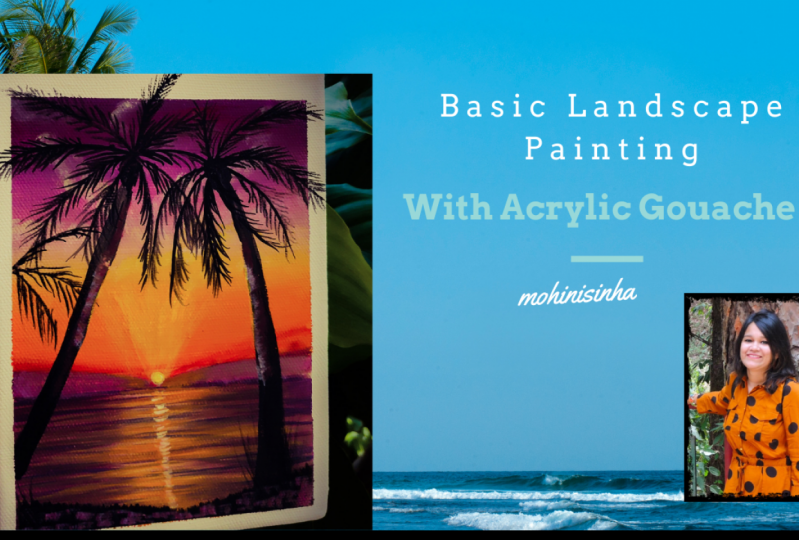
1. Introduction: Painting is just another way of keeping a diary. And every canvas is a journey all its own. All you need to Bendis. Feudal dues are little instruction and a vision in your mind. Hello friends. My name is Maureen is Anna, and I am an acrylic artist. And first of all, happy Thanksgiving to oil. Hope you are enjoying your Thanksgiving, that your family members and hope you all are fine and safe during this goo with Peter. And today, we will be learning something acrylic, gosh, this is acrylic medium, but it does something different that as acrylic Gosh. And we would bending one landscape and it is completely free and everyone can watch this on scales share. So let's start with it. So in this class we will be learning some basic techniques of equaling Gosh, rich blend and we'll be using to complete this bending. What DO materials will be required for the bending? Some basic brushstroke techniques that we will be using. How to mix two different colors. But the ballad knife, how to blend the colors effectively. How to create nice and realistic ripples in the water. And some 3D dealing that rigor brush. So let's dig into it. And I hope you all will enjoy this video. And if you like my reduce, please do. Follow me. One skill share and thank you.
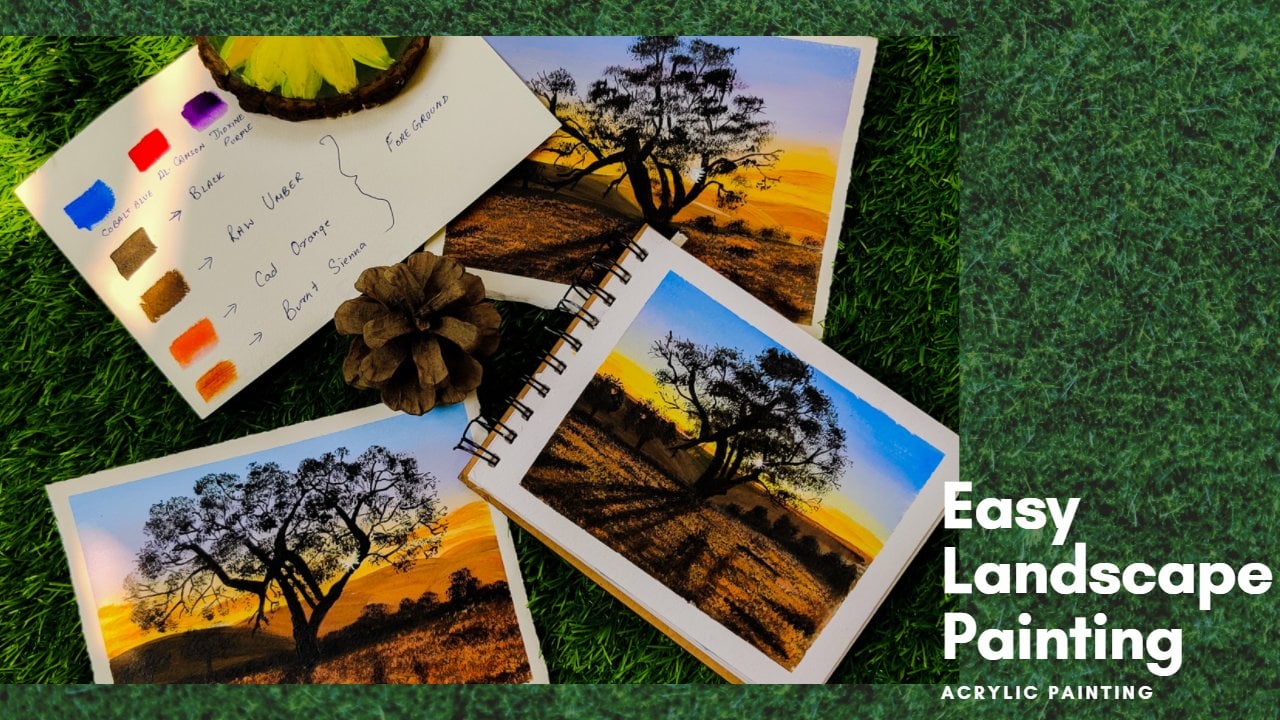
2. MaterialsRequired: Hello friends, welcome back. So let's discuss about the colors. This is, this is acrylic gorge and comes with six set of colors. So you can see it is 0.7. four pounds and it has very opaque and mapped color. It comes in small borders with black gaps. You can see there are small sizes. So these are six colors. All primary colors plus green, black, and white. So these all these colors we will be using. So this comes with a nice tip and you can easily get, take a doubt. So this is an opaque. So these are the colors which will be using. And let's discuss about the canvas. This is five into seven inch canvas. This is masking tape, GAAP for water. And this is the glass sheet which I'll be using as abandoned. And this is the kilowatt, another masking tape, small size. And these are the brushes which we'll be using. So most of them are flat brushes, more Brush, fan, brush liner brush, round brush, fan brush, and blender brush. So all these brushes and of course the knife for mixing the colors. So let us first discuss about the basic techniques of the painting.
3. Techniques Used: Hello friends, welcome back. So let us discuss about the basic techniques. So first, I'm using my plaid brush and I will show you how to blend the colors. So first I'll use the Docker version of color. And then I'm just washing off and then I'll use the lighter version that does the orange column. And after that, in the middle, I'll use the lightest torsion that is white. And I'll just try to blend the color for the background. So this is the technique which I'll be using for my background painting. So you can see I'm just adding little color and I'm just moving the brush and into flow direction. I'm just trying to blend the colors. So this is the blending technique which I'll be using. Next is the how to create the leaves off the trees. And I'm just using my rigor brush and very lightly and creating small, small lines. So this is the technique which I'll be using for creating the leaves. You can also use your brush, fan brush for creating the leaves. But in this case I'll be using rigor brush. So you can see how fine lines I've been created. So now I'll be showing you how to create the water effect. Before that, I will just show you how to create the clouds. But this brush, or you can say blender brush, I'll just create small, small round drawn circles and very less amount of color. So this is the technique by which I'll be creating the clouds. Next is the reverse. Just finding my right brush. Okay. So damn, just using the tip of the brush and creating small, small lines and just zigzag manner. Like an interlocking manner you can save and just using the lighter version. And I'm just filling in the gaps in between. So this is a technique which we'll be using for making the river. So let's start with the first part of a painting.
4. Blocking Background: Hello friends, welcome back. So let's start with depending, just deep down with the masking tape. And this is red, blue, yellow, and white color, all primary colors. And I've also pasted one masking tape and men do. And this is my flat brush, which I'll be using for blocking the background. Let's start. So first I'll mix piccolo with my ballad knife. I'll take red and blue to give it a nice purplish color. It's little bit doc. So I'll be adding Y2. And also, because we need a lighter version of poeple, very little amount. When you are adding any color or any white color, do it, add glut little amount of colors and then try to mix it. Because if you take abundant amount of colored is difficult to get back. So it's better. You make scholars in small proportion. So you can see I am just trying to get that purplish color. So now I have just clean my knife and I'll take my flat brush and just move to and fro motion and just block the background. So the upper part is a little bit docker version. Then I'll apply widen the muddy. And then again, I will move the brush so that it blends nicely. And I'll take more of white. And I'm just blending the color. I'm trying to blend the colors. Make sure you use larger size of branch then only able to blend the colors. Just boil the color and nicely. Now I'll use yellow and white with a nice orangey color and a little bit of white also. And then again, I'll just move the brush end-to-end flow direction. I'll add little white to it and let it start blending the column. So you can see I'm adding white and blending colors so that there is no line in between those colors. Whenever you are blending the color, make use of the lightest color for blending it. Don't put too much pressure on the brush. Just move it very lightly. Kahlo's blend nicely and there is no line in between those two colors. Just boy shoot off nicely or brush. And then again start blending from up and then from apparel go downwards. So this is a process which is followed in acrylics for blending. And these are acrylic medium, so they are quite mad. And now I'll do the lower part. The sides of the river is little bit doc, so I'm using purple. And in the middle I'll use the lighter color to create a son deflection. So now I am using the same color that I used. I'm just mixing a little bit more amount of color and just putting it in the middle. Just add white to it. And then again. So this is the background.
5. Water Detailing: Hello friends, welcome back. So let's start with the detailing of the river. So I'm using, You're my flat brush. And we'll be using same colour. That is our purple. And I'm adding little bit of blue to it to give it the more bluish texture. And you just have to use the dip of the brush and you have to move it and O2 for direction. Like a zigzag format. You have to hold the brush very lightly so that the mocks which you are creating, it should be in light form and should be very thin. If you press the brush harder manner, then your lines will be taker. So depending upon that, you have to hold your brush. So here I am not placing my brush, I'm holding it very lightly and am just moving it into four detection. Adding little more blue to it. And repeating the same method. So just washing off that brush and removing off that Kahlo. And now I'm using yellow, little bit of white and a little bit of red to it. And creating the same pattern, but in the middle. Just filling the spaces in between and moving it in exact form. Just adding the bid more of red and, and just applying it in the corners. So I think I'm almost done. Now. I'll use my Princeton blender brush brush and just reading the brush and just removing off excess of water. And then I will slightly move the brush on the top of that so that the color can easily blend. So you can see the color has blended. So let's begin with the next part.
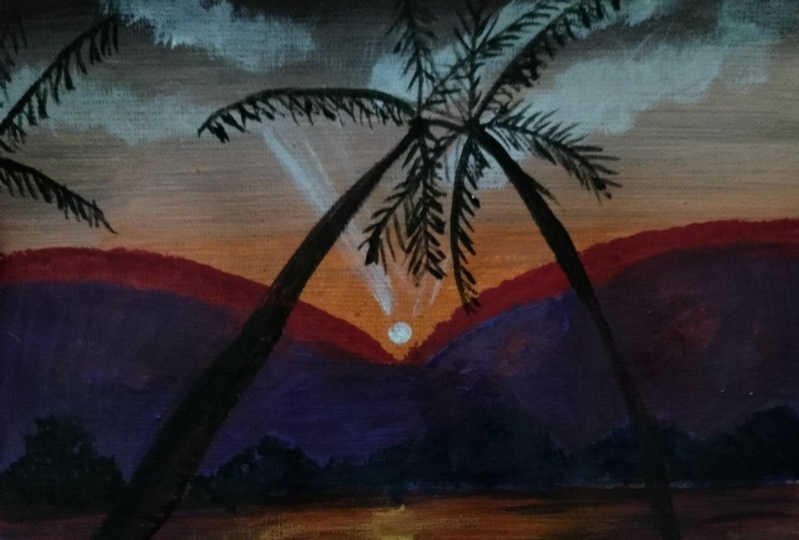
6. Creating Hill: Hello friends, welcome back. So now I'm just removing that masking tape, which I have put it in the middle. I'm just removing it. It's not necessary to put that masking tape. You can draw line also. So now I'm using the same flat brush and using my same mixture of colors, red, blue, and white. And I'll just create distance, form of shape. You can draw it with the pencil Also if you face difficulty in drawing freehand with the brush. So I'm just drawing a shape of a hill, say, and in-between am leaving space for the sun. So I'm just filling that space. And now I'd be using red color. So same red color. And I'm just using it over that hill area. And just trying to with my round brush, I'll just try to blend the colors. If the colors are where you can easily blend those colors. But if it turns out to be dry, then it's really very difficult to blend. So now what I'll do is I'll just take the bigger size brush and adding little bit of yellow. And I'll just put over the area because that eight is little bit more yellowish because of the sun. So I'm just adding that Kahlo since and just adding weight so that it blends nicely. So you can see I'm trying to blend that lower area and just mixing the colors. And now I use purple color also because you can see that white line which I need to blended properly. So I'm using a gain, that purple color and trying to blend that area. So it's quite good now. So now I'll use my fan brush and little bit of black. And I'll just create land sought of space with my fan brush. I'm just using the tip of that fan brush and giving the shape to the ground. You don't have fan brush, you can use flat brush also forgive for creating that area. The reason why I'm using fan brushes, it gives a nice texture on the top, which looks like glassy shape. That's why I'm using your row fan brush. And I just want to make that Hitler to light. So I'm using my fan brush and I'm just giving a little lighter version of polish to it. In this case.
7. Creating Sun _Clouds: Hello friends, welcome back. So we'll start creating the moon. I'll just take little bit of yellow and white and I'll just create small circles in between. This is the round brush which I'm using. Just creating a small sub goo. And I'll just move extra amount of Gallo and just thin down the paint. And I'll just blend the edges. And after that, I'll create the rays with the same color. The scholar is very ten. You have to turn down the color then only you will able to blend that color. So I'm just trying to blend it. Again. I'm using just complete white and just creating small circle. And with red, just creating the border of it. In the lower portion. This creating shadows of that ZEN using same agenda, just blocking that mountain. And I'll use again and red color mix of white. And I'll just paint the edges where the sun is meeting the mountains to create a shadow effect. And just creating small, small lines just beneath the Sun which have created. You can also use your flood brush for that. But DRM using my round brush now will be creating the clouds. So here I am using my blender brush and using very little amount of color. And my brushes completely dry. It's little bread, but it's not completely dry, but it is dry. Sand. Just using the mode of Bordeaux, you should not have enough water in your branch, otherwise you will not be able to create that effect. Suggest very little amount of color. And, and very lightly with the tip of the brush, you have to create this ocular motions. Just small, small contours. C, I have taken more waters. I'm just wiping it out and just create small, small round, circular shapes of the clouds. So this is the technique which we use in clouds. This is just the basic clouds which I'm creating. But I'll surely make one class for the clouds. So I'm just blending that shadow area with just creating small clouds above that. Very lightly you have to shape this out. Otherwise the whole painting get destroyed. So very lightly you have to do that. And if you have excess amount of color or what do you knew brush, just remove it off with duke LOT auditioned people, whatever you are using. So this is almost done. Just giving little shape, do that. Raise area. You can use your fingers also to blend it out.
8. Creating Palm Trees: Hello friends, welcome back. So here I am using my flat brush, which is slightly smaller size. And I'll be creating palm trees. So I am just thinking where to start the palm trees, so I'll not start from the ground and start from this side. I'm just creating a little bit of slanted line. And I'm just giving shape to it. And one more palm tree taller than the previous one. You can use your pencil for drawing that. Here I am only using black color. And I'm just blocking that area. Just giving shape to that branches. And the T tree trunk. Just give the shape to it. And then with my brush, create D leaves spot. So first I'll create the lines. Actually I have many different classes of the spam tree and I love making bomb trees. So you can see all of them. This is one of them. There is one balmy palm tree painting class also. This is just a simple one. In the middle. I'm just creating a little bit off round shape. And then I'm creating small, small lines. But my regular brush, I'll create one palm tree at the sites. Just believes. And I will just try to give a little bit more shape to that tree trunk. Just wash off your brush properly. And again, use that black color. And I'll be creating the leaves, just small, small lines which let my rigor brush. You can also use your fan brush for creating those lines. It depends upon a choice you can create with the data of fan brush also and when trigger brush also. And in fact with Cambridge also. And in fact, these three different types of rashes give different textures when you use all these three brushes. Menu or you are giving detailing to your palm tree. And you can use these three brushes. In fact, I have one class for, especially for palm tree painting. You can watch that. I have used their fan brush as well as the Congress for creating those leaves. So just enjoy the process. So whenever you are using acrylic, you should keep in mind that these colors dry off very fast. So again, use medium, but use medium only when I'm doing large canvas paintings. Mostly in small paintings, I don't use any medium, but yes, we do have mediums for that. And when you are doing the detailing part, your color should be very thin, then only you will be able to create those detailing like you're black color, I have tin that painting then only and be able to create those ten lines. If you are using the color directly, you will not be able to create those ten lines, so you have to turn down the colors to create those fine lines. So this is almost complete. Do three more stems are left. You can also check out my paintings on my Instagram, that is more neon gallery. And if you're trying this bending due DAG mean. So we're just left with the last part of bending. And this is almost done.
9. FinalDetailing: Hello friends. Welcome back. So I'm just using my small flat brush and red and yellow mixture and just creating a small lines besides that little bit of blue. And just creating that sun is reflecting on that trunk. Same thing l apply on the other tree trunk. And you can see I'm just tapping on the edges. I am not come completely painting the whole thing. So as to create just the effect of the sun reflecting on that trunk. I'll use white and I'll just create nice more, given more shape to it. And will create small, small lines, but just wide column. So as we go down, the lines become shorter. And just the edges of the drunk. I'm highlighting. So painting is almost done. I am just giving the final details to it. So starting little white and yellow mix show more of white and yellow. Same thing on the other drunk shade to the ground because rays also reflecting on the ground. So I'm just giving a little highlight. Now again, I'm using my brush with the black gallo. I'm just giving the shape to the trunk. Makes sure that your color is ten out. You have to make sure whenever you are blending or making ten lines, that color has to be ten node. Otherwise you will not be able to make these sharp lines and find lines. So I'm just creating grasses, a little bit of classes. Besides So this is it. And just remove the tape and see how it looks. So the painting has not yet ended, it's still left. So I'm just removing the state. So let see what is left now. Just removing it slowly. Finally does removed. You can leave it like this or you can do what I'm doing next. Let's wait and watch. I'm just giving highlight. So again, taking my blender brush because I see this not nicely blended, that tree is I'm just giving a little bit of highlight. So now what you can do is if you want, you can do it if you don't want. Its perfectly fine. So you can see, I'm just giving the yellow highlight to the corners. Now this is the final painting but yet does not complete. So let's start with the another bot. So again, I'm using that black paint and giving more lines to that leaves. So you can see I'm just extending that area in that white portion and creating those leaves. It's not necessary for you to do it. But I felt at night, so I did it. It's up to you. If you want to do it, you can do it if you don't want, it's perfectly fine. So I'm just taking out some areas of that believes in that white portion and just creating small, small leaves. So do share your project works. And you can share me your project works on Instagram also, that's more neon gallery. And this painting is completely free. Everyone can watch it. Does. I've specially designed for Thanksgiving. And thank you all for watching my videos and giving me a lot of support and love. This painting is almost complete. So this is it. Thank you.
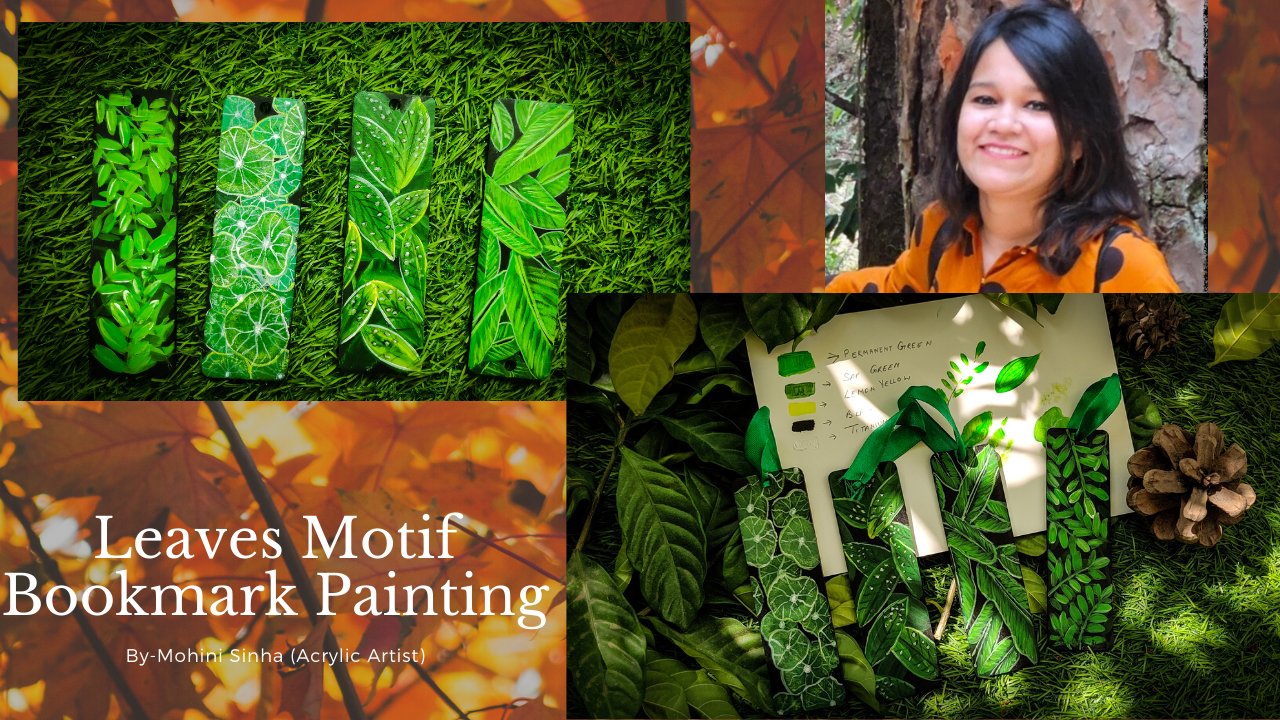
 Mohini Sinha, Acrylic and Gouache Artist- Nature Lover