Transcripts
1. Intro: Everything in nature, in whites us constantly to be what we are. Clouds, which don't
overthink, but just drift. Every sunrise gives you a new
beginning and a new ending. Sky is not the limit. It's just a view. Climb mountains. Not so the world can see you. But so you can see
the world clearly. The dark is tonight, produces the brightest
star. Trees. Stay ground and keep growing, and know when to stop. Just like moon, we also
go to so many phases. Let the waves Getty you
where light cannot. A strong person and a waterfall always
carve their own part. And finally, like the river, which never stops flowing
until it reaches the ocean. This life is your opportunity to continue flowing down the
path of enlightenment. Hello, my name is acrylic artist from
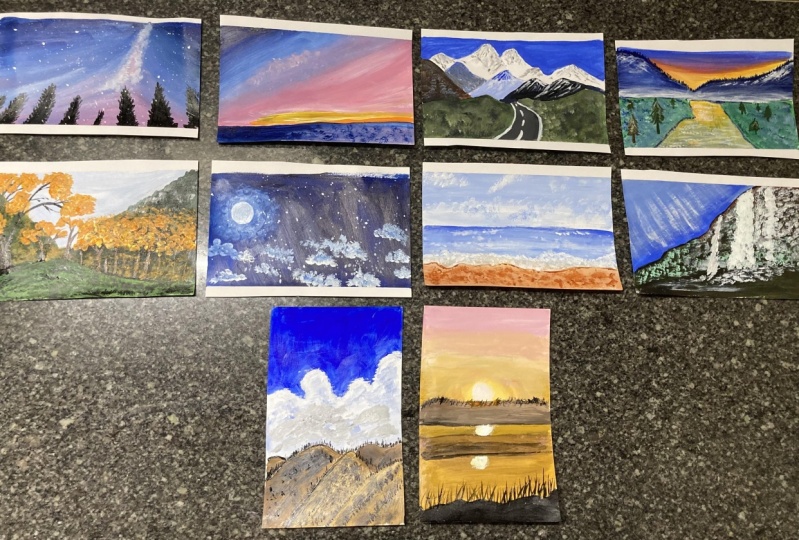
many of you know me. I love doing the job. So this time I have for you back at each other elements in this class we'll be
basically painting, then miniature paintings,
acrylic medium, and posting it every day
like one video at a time, one element at a time. And also there will be one for this class for you so
that it gives a prize. So stay tuned for that also. Let's start with our first
day of painting and slowly read through every day
with all that stuff.
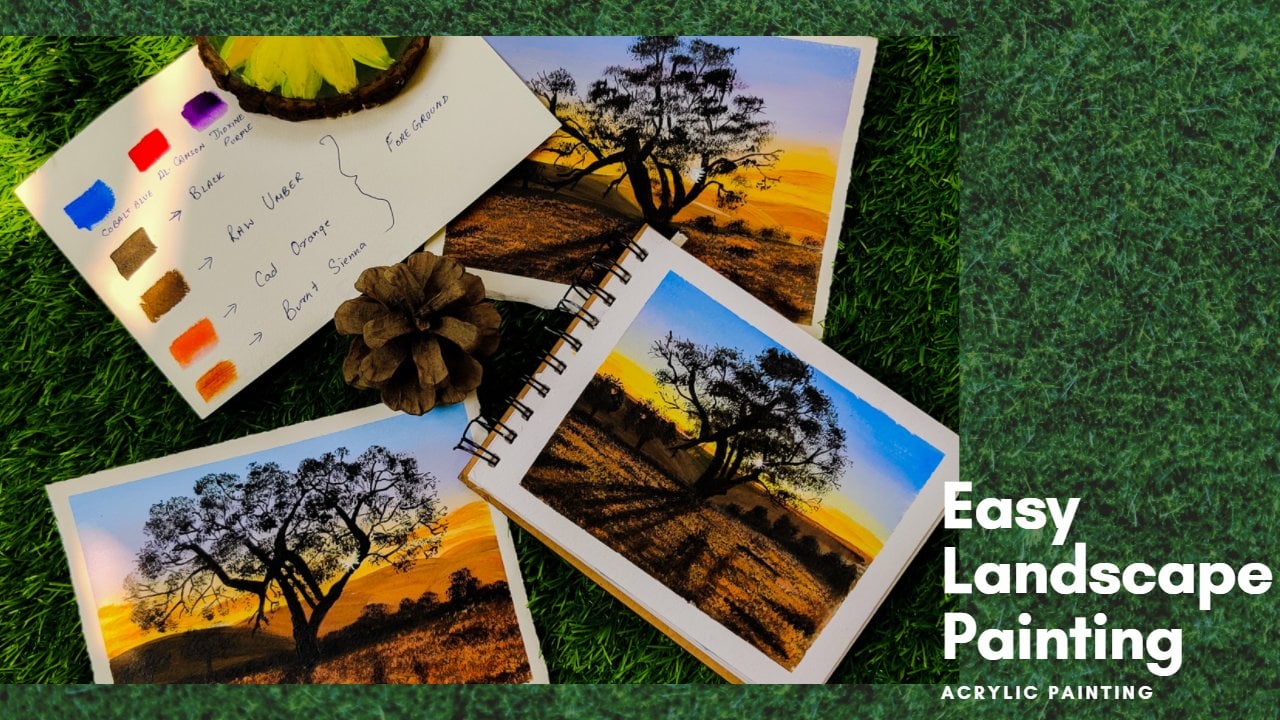
2. Materials Required: So now let's discuss
about the materials which will be needed for
completing these paintings. So the base is the MDF
board and magnet sheet. Then the water container, tissue paper, the ballot. And these are the brands of
colors which we'll be using. And these are the masking tape, ruler and pen, and
these are the brushes. So let's start.
3. Clouds - Drawing Rough Sketch: Hello oils. So let's
start first the isopod. So these are the MDF
boards of four inch size. And these are magnets sheets, which is cut out and round
shape and which will stick on the backside
of this MDF board. So this will be, this is the base which
we will be using. And before using, we'll apply this JSON from liquid texts. So we'll just take out
the JSON in this palette. And just like we paint the base, we will be applying this
object so over this MDF board. So similarly we will be
doing on the ten MDF. So this is one of them
which I'm just showing you. And you guys have to do
it on all the den MDS. I'm just showing you one. So if this Jesu is take enough, there are many types
of gestural somatic also, if it is thick, you can also apply a
little bit off water in it and then apply one or
two coats of this Jesu. In this MDF I've applied
to codes of Jess. Jess was actually very important
when you are painting on any MDF base or any
wooden base or Canvas. So Jesu is the medium which
blockings the poles of these Woodson canvases so
that the color remains on the top of it and it does
not absorbed and faded. So that's why it's very
important to apply, Jess. So when you are using
Canvas or any wooden base, c, I've applied one code on it. So once it is dried-up, will apply second coat, the same way like we have
applied on the first code. So this is one of the
MDF which I have already applied to code so fat and
also take the magnet behind. Similarly, we will be doing
for all the ten base. So now let's first start
with the first magnet. This is the picture
which we'll be painting. So let's first draw the
sketch with a pencil. Just a rough sketch of the
clouds and the mountain. So this is the center point. The first element which we
are doing is the clouds. So the main focus will be on the clouds rather
than the mountains. So the first element of
nature is the clouds. Just drawing a rough
sketch of the clouds. And then the mountains, which are overlapping
one another. Now once we are done
with the sketch, will do the blocking. And the whole demo paintings,
miniature paintings. I'll be uploading every day. The paintings not in one go. So every day I'll be
uploading one magnets.
4. Clouds - Blocking: So now let's start
with the blocking. So these are the colors
which we are using. Naples, yellow bond,
Dumbo to Danny and white, black and Winsor blue. And the brushes which we'll be using here is the flat brush. This is the filbert brush size to Bristol filbert
brush size to n, rigger brush size 0. So let's first use the filbert brush for
filling the upper area. So here I'm using the same
filbert brush of size two. Since it is a small
paintings where I'm using a smaller
size of this brush. It depends upon the size of the canvas which we are using. Though, I'll be
adding ultramarine blue also do it because this
Winsor blue is quite light. I'll be just adding
little bit of ultramarine blue to
this Winsor blue. So here I've taken
ultramarine blue. So now I'll be just blocking the entire above sky with
my filbert brush. This is synthetic
brush which I'm using. And you can see I've
just wet my brush. I'm not applying any
water to this color. Just wet my brush and I'm
just using this color. So whenever you are
using acrylic medium, you don't have to use a lot
of blood amount of water. You just need that
much amount of water so that it is blending
is easy for you. But you're blending
is not required. We're just blocking in this
whole sky with one color. Just taking care of
this whole layer of clouds and just blocking
the above area. You can see this color
is bit translucent, so we'll be doing two
coatings of this blue part. So now once this above
Skype part is done, we'll move towards
the Cloud one. So just blocking in one more time to give
it a smooth finish. Now, using my same brush
with same amount of color, I'm not taking extra blue, I'm just using the color which is on the brush
and taking white. And I'm just blocking in
that entire Cloud area. So filled with brushes. Very nice when you are creating clouds because
it is round in shape. And you can create that round contours with this round
shape filbert brush. This is the brush which
is of size two I'm using here because this is a miniature painting and
it's very small in size. So you need to use a
smaller size brush. But when you are you a bit, but when you are painting
bigger paintings, you can use bigger
size filbert brush. It depends upon the size of
Canvas which you are using while painting the
landscapes or clouds. So you can see, I have not taken extra blue colors in this. I'm just using the
same amount of color which is which was
on the brush and just mixing it with titanium white and giving shape to the clouds. So this is the first
blocking which we are doing. The detailing will be
doing after this blocking. But in this painting the
main focus is on the clouds, because this is
our first element, that is the clouds. So we'll focus more on this cloud part rather
than the mountain. But now once we are
done with the top part, so let's take this bond, umbo and black mix and little
bit of Naples, yellow. So I want a little muted colors, so that's I'm trying to create. So the reason of adding
Naples yellow to create some greenish texture
because when the yellow and black is added, it gives a light
greenish texture to it. So that's what I'm
trying to create. I don't want it to
be complete green. It's brownish also at
the touch of green also. So color mixing and
deciding which color to use is basically a very
important part of painting. Any painting which you are
choosing as a picture. First process is the color part, which, what color
we need to use. This comes with practice and experimenting the
mixing of colors. So when I started painting, I was also not sure
which color to use, but with experimentation
and color mixing. Gradually, I came to know
when to use which color. See there are so
many mountains which are overlapping one another. So plus mountain has done. So net comes the second 1. First 1 is already done. Now the second one
is quite light. So just applying more of Naples yellow so as to distinguish
between the mountains. Because that is also
very important to black and just align so that these two mountains
are distinguished. I'll just adding white to it. And just blocking in the space. Ys all blockings you can do
with the flat brush also. But here I'm using
filbert brush because the same brush which I used
for the entire painting. So the same brush I'm using
here for this blocking also. So very slowly you need
to do because these are very small miniature paintings. You need to take
care of this things. Because the more you practice
small miniature paintings, the more hands-on you get. This area is quite light, so I've added more of
Naples yellow to it. You can see already vital
blocking the shapes are coming. And we just need to do the detailing after
doing this blocking. Now let's start with
that upper one, so that is quite dark. So I've just taken bond Dumbo. So let's take black also because that is an
adjoining Mountain which is joining the first one. So now this is done
blocking part.
5. Clouds - Detailing: Now let's begin with the clouds. So creating contours. So this is first, let's do that top part first. You can see it's
quite translucent, so I'm just applying one more
quote of the same color, which we used earlier. So that it looks like
finished painting. Can see same brush I'm
using the J used before. So now you can see
the opaqueness of the color when we are doing this toward code
on this upper sky part. So now let's start
with the clouds. Brush we're using
here for the clouds. Also. Just washing my brush off, removing excess over water. And then just taking this color white color on my tip and creating
some round shapes. Just using that tip of the
brush and creating the shapes. This brushes already
half round in shape, so it will be easy for you
to create those counters. And see, I'm just
first applying on the tip of the clouds. And then we will
do the inner part. So just mixing that color a bit. Again, taking white
on the tip of the brush and creating shapes. So clouds are actually
very tricky when it comes to painting
its needs practice. And more patients for
creating such Guan does, the more you do the
lettering on the clouds, the more realistic it looks. You can see I'm just
doing the edges first, just giving the shape to the
clouds before going inside. Now let's create
the inside shapes. So just digging with just
taking the colors on the tip and creating
this circular shapes, half circles you can say. And removing excess of white
and just mixing the color. So this you can do with
this presto brush also. But I think with this
synthetic brush, it will go nicely with
the same brush I'm using. And again, I'm creating some big quantities adjoining that same gander
and giving shapes, removing excess
of color and just blending the entire lower part. I haven't I'm not destroying that lines which I
have already drawn. The shapes I'm doing is I'm just creating this shape and then removing
excess of color, just trying to give the
shape like the clouds one. And thus removing
excess of color and just moving the brush in the circular motion
and blending that color. I'm not touching that
line which I've drawn. I'm just blending the
color into that space. Likewise, you have to
create this small contours and remove X's are wide
and just blend it. This is one of the easiest
technique of creating clouds. You can see I've just taken very small amount of this
white color and I'm just Mixing it and if your brushes dry than just wet your brush, remove excess of water and take little amount
of color and then start doing this glazing thing. This is called as glazing, like we can see
the back portion, but the above portion is
quite different color. This is something like glazing technique which
we are doing here. And you can see I'm creating and the shapes and overlapping
it one on the Ananda. So that it gives some
realistic looks to the clouds. Again, just filling this area. So again, taking white and just moving the brush
and the circular motion, taking very little amount of color and just
filling these spaces. So again, just wetting my brush, taking very little amount of white and just overlapping
on those areas. You can deaths such a thin white color
so that you can see that background lines also that you have to create
for creating these clouds. So again, I'm creating
contours on the top. So the above, our shapes
a little smaller in size. And as we go down the
shape size increases. So this is the pattern which
we have fall following. Read the shapes are coming and just blocking
the lower portion, which is quite white. Now once this is done, there are clouds which are
on the top of the clouds, like the clouds which are
floating over the clouds. That also we have to create. Creating more shapes. You can see already these clouds are looking like realistic. This is like the basic details which we are doing for
creating such clouds. And always use synthetic brush
for creating these clouds. And let's create the clouds which are on the
top of the clouds. After this, let's add
a little bit of black, white, and a little
bit of blue, also. Very small amount of blue
and more black because it is quite darkish,
bluish green color. So now on the top of it, I'm just creating the shapes. These are actually
the clouds which are on the top of the clouds. So that's what we are creating. So just creating the cloud
shapes, random shapes, very light pressure
to the brush. And I'm just
creating the shapes. And little white mixing to
the same color and again, creating the shapes over to creating layering on the
top of those clouds. Adding and leaving the shapes. Leaving the outlines,
you can say. In taking more of white, again, there's
washing my brush off. Again, taking more of white and just applying
on the top of this. So the more layering
nucleate in the clouds, the more realistic
these clouds look. Actually. This is how we create
simple clouds. This is not yet over. We need to outline
the above clouds also before we end up
this Cloud section. Using my liner brush, that is rigger brush of size 0. And I'm just outlining
these clouds. Just, oh, I've wet my brush
and taken this take color. And I'm just outlining
this outer portion. That this outer portion look
more vibrant and more sharp. So you can see I'm
just outlining this outer portion and also
altering some shapes also. This is the complete
cloud shapes. And there's something on the lower section
of the clouds also. So it's bit off the same
color, that dark color. And I'm just moving
my brush and soak low motion and this
filling this area.
6. Clouds - Mountain Detailing: So finally, now coming
to the mountains. So here I'm using
my filbert brush, just dry filbert brush
and taking black just on the tip of the brush and creating some small textures. Just using the tip of
the brush and creating small, small, fine details. And just blocking in this very light pressure you
have to put in to create this small dots on the entire
surface of these mountains. It creates a very nice texture and look off the mountains. So just doing this for
the entire mountain area. So also taking this bond amber and creating these lines which
divides these mountains. Just dabbing my brush, the tip of the brush and
I'm creating those lines. These are pretty dark. So I've just added
black also to it. So now we will be using our rigger brush and this
black and bond on Bluemix, we will be creating
small lines which will depict the distant tree. So before that, let's first draw the lines and shapes
to this mountain. Whenever you are creating
these fine details, the color has to
be in liquid form. Because of the color
is take you'll not be able to create
those fine lines. So now, after
creating these lines, I've just added a
little water to it and a little bit of Naples. Yellow to give a greenish
touch to this lines. And just creating vertical lines over these adjoining lines, which are giving
shape to the clouds. Just on the edge of the clouds, I'm creating some
vertical, small, small lines which will depict the small trees at a distance. So it will resemble like some distinct bushes or trees are there on the
top of this mountain. You can see the color
has to be in liquid form to create such fine lines. Top lining, I'll be filling
this vertical lines. Some are big, some are small. So these small,
small textures plays a very important role for creating some
beautiful paintings. And these, these
miniature paintings are not only gives you practice, but also helps you to build
your muscular exercise, your hand brush exercise, and do more fine painting you will do the
more you practice. It all depends upon
how much you practice, the brushes and color
mixing and the paintings. So start with do doing miniature paintings rather
than doing big canvas. And see that top one, it's done. So the line which is joining
the second mountain, I'm creating again vertical
lines over there, also. Some dots and between some lines in between
the mountains also. These small, small
details actually adds beauty to the
entire painting. To just lines. Can see these are very
close lines which will look like the trees
which are together. So all this painting
is almost complete. Only few details are left. And we are done with this
first miniature painting. So always create fine
line brushes whenever you are creating such small details. So now let's create
some more textures using this Bristow
filbert brush, adding white and Naples yellow, again, creating some textures. This has very fine dots, textures which I'm creating very light pressure
to the brush. My brush is completely
dry without any water. And I'm just creating these small fine dots on
the entire surface area. I'm adding little
bit bond number also to give some textures. These, now let's do the top one also is a very fine textures. Now, the top one is
quite light in color. So that's why I've
added white to it. And just very light
pressure to the brush. And just using the
tip of the brush, I'm creating these torts. Very light. Just I'm touching the surface. I'm not pressing it. So you can see already it's looking really very beautiful. I hope ****, you guys
are also enjoying this. And don't forget to
share your project. Bach, I love to see those. Again, taking my rigger
brush and creating some lines in-between
these mountains. And finally, we are almost
done with this painting. So now we will do
the second painting. That is the second
miniature painting. And let's see what
element it is off nature.
7. Sun - Blocking The Sky: Now let's start with
our second painting. That is the second
element, that is the sun. So here we're mainly
focusing on the sun. So this is the sketch which will be picture which
we'll be painting. So let's start. Let's
first draw the sketch. So there's a center line, so which we'll be drawing
with the masking tape. Instead of drawing with scale, you can use pencil to
draw that line also. But here I'm using my
simple masking tape to draw a line in the center. So this is not exact center, but a little bit below it. So just now we will just draw the below part
that does the Grass Pad. And we are done
with the sketching, not much sketching we need
to do with this painting. So just a little bit
down the middle one, we'll be drawing the hills after removing
that masking tape. This is it. So not much of the sketching. And yet is that line which is little dark for
just I'm drawing it. So it's okay. So let's now start
with the painting. Let's discuss about
the colors first. So these are the colors
which we will be using. Let's start. Black, danny and white. Cadmium yellow,
Alizarin crimson bonds, sienna, cadmium orange,
and lemon yellow. There's one more color
that is the bond. These are the
brushes which we are using that as an extra brush, that is the blender
brush list all are same. And then there's a
pen cap which will be creating circle that is the
sun with this band gap. Start with walking. For the blocking. I'm using the same lot
size filbert brush. That is of size two. And we'll just be
blocking this area. And color mixing is very important when you are doing
this such type of painting. So let's take a little bit
of white then, Alizarin, crimson and black little bit. So it's kind of a purply grayish shade which I'm trying
to create a whale. And the top part of the
sky is the scholar. So first I'll be starting
with the top part. You can see I haven't
used much of water. It's just that the brushes wet and I'm just using
same raw color and I'm just trying to blocking
the whole background. So this is the first
color which I'm using after mixing
two or three colors. Then as we go down, the color becomes
little bit warm colors. So that will be creating
by mixing these colors. I'm just washed my brush
and taking this cadmium yellow and a little bit of
alizarin and white mix. So I wonder quite a
light color actually. Just adding little water to wet. And again, I'm taking
cadmium yellow alizarin mix, a little bit of white and
just blocking this below. So now you can see there
is a line in between. So I'll take again
that same color and I'll just blend both the colors. Because for blending both
the color has to be wet. Then only you can
blend the colors. If both the colors are not wet. You cannot blend the color. That's why I used first
color because that was already dried up and the
second color was wet. So I just took the first color and then started that blending. Now, as we're moving down, it's more of a warm color. So now here I'm using my pen cap and taking
this lemon yellow, just very little
amount of color. And I'm just trying to create a circular shape on the
center part of this. Canvas. So just creating
a circle with this. And after that we'll be
blocking the entire site area. So that center is
actually quite white. So I'm just leaving it
as it is for time being. And then we will do the
color mixing afterwards. So again, taking this
cadmium yellow medium and white mix and just
applying on the outer circles. So now we are just
moving towards the warm color and
just taking orange, cadmium orange and then
applying on the second layer is taking a little bit water and just applying the
second layer of color. After that again, Alizarin
crimson little bit, burnt sienna and white mix. And applying on the sides. You can see there are a lot
of color mixing over there. And this comes with practice
that what color to use. So in this, you also learning some nice color
mixing techniques. These are quite nice and bright colors and it looks very nice when it comes to like
sunset or sunrise painting. So in this case, our
main element is sun. So we are mostly
focusing on that. So here I've just mix alizarin, cadmium yellow, burnt sienna. Same color, but a little bit. And then white. Talk a little bit more of burnt sienna and
a little bit black also. Just applying it. More. And blonde number also. And just applying
the lower side. You can see my color was rank. So I've just added a little
water with my brush. And then again, taking
cadmium yellow, just washing off my brush. And taking this round brush
that is round blender brush. And then applying
white in the center. This brush is
actually very nice. It is from Kingston and a
size six round blender brush. Just blending the colors. So this brush is not wet,
it's completely dry. And I'm just using
the dry brush and the colors to create
these shapes. Just trying to blend the colors. Now again, taking white and creating that round
circle now again, washing off my brush. And then taking the dirty
bit too white in the center. So this is also a dry brush. It's still wet, but it's
not so wet that I've just removed excess of water from this brush and
then I'm doing it. I'm just trying to
blend it nicely. Now, this is the line
which we need to blend it. So first, we need to
take some lighter color. That same color I'm creating, which is that upper color. That is quite popular. Gray shade, which I'm
trying to create. I'm now adding little
amount of water toward so that I can blend it. And then just adding this
color to the upper area first. And then slowly
going downwards with this darker shade that is orange and
Alizarin mixed color. And just taking a little
bit too wide also, because not quite dark. And just mixing the color C. Now this is, this mixing is very important because
both the colors are wet. So you can easily
mix both the colors. Whenever you have to
blend two colors, both the colors have to be wet. Then only you will
be able to blend both the colors if one
of the color has dried. And again, you have to apply the same color which is dried. And then you need to
blend both the colors. This is a technique
which is used in acrylic for blending the colors. Now once we are done with
this whole sky thing, we'll do the down portion, that is the reflection
of the sun, which is falling on the water. It's actually so you can see how nicely this blender brush creates magic with this
blending technique. So now again, I'll take this
cadmium yellow and create this cool effect around the sun to give it a
more brighter look. You can see already that
brightness is coming up. So now again, we will
use that same color, that above top color, removing excess of water. Because we don't want much of water when we are using acrylic. So just creating that same
color, that above color. And again, I will
just blend that area. You can see how nicely
this is blending. But this blender brush, this brush is actually
very important when it comes to
the blending part. Now once we are done
with this whole thing, the top part, we will be
moving towards this down part, just creating little
round circular effect of the sun, which is coming.
8. Sun - Blocking The Water: So now let's paint
the lower part. So let's not take
this out first. Let's paint this lower part first and then we'll take
out this middle area. So for this lower part first we will use the same
brush we'll be using. And the first color
we'll be using is this bond amber and black
mix for creating this line. Little bit more color
and just the line. And then there's
again another line. Let's first mix this three
colors like we did earlier. Same color which we created
earlier and unjust. We're just blocking in a little
bit of lemon yellow also, so that the color
becomes opaque. And just applying it a
little bit white also, this alizarin and cadmium
yellow and cadmium orange mix. So just covering that area. And then the below
areas quite dark. And that is the darker
shadow or something. Just adding bond, Dumbo
and black mix and creating this dark water effect. Before all these painting, I'm using synthetic
brush, as you can see. I'm just covering this area. Just a little horizontal
line, quite thick. I'm just blending the scholar are again using the
same orange which we used earlier for
this upper part, little bit of buoyancy
and also added to what, an orange and cadmium yellow
toward little bit too white. And then I'm also trying to blend that
dark portion, also, leaving that lower portion. I'll be covering this entire
area that does the water. After that, the slower
grass area will be blocking in wet black color. And see how bright
this color is when you use so much mixing
of the colors. So this is very important when it comes to
the color mixing. You should know how to mix the
color and how much amount. As you can see, I'm using
very little colors of mixing. So you don't have to make
pseudo-mature amount of color. You can mix very little
amount of colors and then try the
color combinations. I'm just creating a
little bit darker value. This is darker. So once we are done
with this water part, so we will now be doing
this lower grass area. This we will be blocking
in that black color. So you can see I'm just using this raw color
and my brushes. Let me read that much
amount of water I'm using here and I'm just blocking
in this at DIA lower part. After that, we will
be doing this upper. That is the land area
which is in middle, which is where masking
tape is there, so that we will be doing. And this shadow
part is also loved.
9. Sun - Blocking The Mountain: So now let's take out
this masking tape. You can see both the
colors have dried and such nice straight
lines are being created by using
this masking tape. And now we will create this island which
is in between that, that water and the sky. Let's use this bond on board and black and
a little bit of white. So it's quite muted colors. So that's why I'm creating, I'm adding white to it. Just trying to cover this
entire middle portion. The same color, just adding a reward because it's quite dry, the color is just creating the island or
land which is in-between. Suggest taking a
little bit of alizarin and just filling
this entire area. We need to do it very slowly so that the colors
doesn't come out. So now I'll be using my liner brush to
create these lines. So above I'm just creating
small, small lines. But before doing that, I'll first create the lines and then I really
does shape to it. And then I'll create the lines. And the slower, also just
creating a single line. And then I fill in this area. Now again, taking a
little bit of orange. Actually black only
because this side, it's black and orange is
actually in the middle. So just creating small, small lines so
that it looks like a distinct trees or
bushes are there. The center I'm
leaving because I'll create it with some
orangey color. And then taking cadmium orange, mixing it with little
black and creating these lines in the center area. Where does send
reflection is there? So these actually very small, small details which creates
magic to the painting. Very small details which
we need to take care while we are doing such
kind of paintings. Just blocking in this lower area is black and burnt umber
mixing a little bit off white. Just covering this whole
lower portion very gently. Now once this is done, aching white and a little bit of cadmium yellow and creating
shadow effect of the sun. Which is in the
middle and below, leaving that darker portion. Just taking a very raw color
without running water. Because we need quite brighter
look off this shadow. Again, just washing off my brush and just taking a role White. Take row wide and just
applying just below to it. And also the loading dock shade. And then taking little
bit of lemon yellow, very small amount
of lemon yellow and adding on the
sides of the white. You how bright this is looking. Now with my liner brush, I'm just giving it a shape. Just little shape toward yellow also. Adding to the corners. You see how bright this
reflection is looking. Now just staying a
little bit more of white and mixing a little
bit of black and just covering this whole that middle area because
it is actually very dark and we want light effect just
like a foggy thing, which I'm trying
to create a whale. Just adding caddy and also
removing excess of color. And it's quite removing
excess of color. Just applying a very fine
layer on the top of it. The color is very
transparent and I'm applying it so that the below
color is also seen.
10. Sun - Final Detailing: Now let's start
creating the grasses. So this is actually
the last part of the painting which
we are doing and little bit more
detail things we will do for the sky and then
we are done with it. So just with my rigger brush
and using this black color, I'm just creating some
fine lines, fine grasses. So the color has to be in liquid form to
create such grasses. And you can see these grasses are in different directions, somewhat horizontal or vertical, some water in
diagonal directions. So whenever you are
creating grasses, just makes sure that
the color is in liquid form and you are
creating the lines, vertical lines in
different directions. So likewise, I'll be completely filling this
entire Bellow area. And some grasses are
tall, some are short. So make variations so that
it looks like a real grass. If your lines are being
created, like take lines. So try to make that color in liquid form and use rigger brush off small size and very
light pressure to the brush. And with just the
tip of the brush, you have to create these lines. You can see I'm just
using my tip of the brush to create
these fine lines. Now once we are done
with these lines, will now move towards
this upper area. And I'm using that small
size filbert brush and taking burnt umber. This darkening, this lower
line little bit more. And this line a little
bit more lines I'm just creating in this water effect to create some water effect. And now let's test some shadow, which is there on the mountains. So that also will be creating. So just taking orange and just applying on this center area, like it looks like the
reflection of the sun, which is falling on
this small land area. Mm-hm. Oranges
already transparent. So you can see the
below colors as well. Just adding a little
water and just spreading the colors on the
other board decides. So now let's do
some more detailing of this whole top sky. Just a little bit
more round shapes. This is our final detailing which we are doing
very little amount of color I need for
creating some effects. So making that same shade. And I'm just trying to block the sides
portion of the sky. Let my blender brush. And again, just taking that same color
which we used above, very small amount of color. And I'm just trying to
blend both the colors. So when you do this small
miniatures painting, you get more confidence
when you are doing the bigger one because the
bigger one is easy to do. But when you are doing
that small size paintings, it's very difficult to paint. And when you are practicing
more on these small canvases, you get more hands-on
and more practice. And your painting
skills also improve. So I think whenever you
are starting any painting, first start with
the small paintings instead of using bigger canvas. Final level of blending. I'm just doing, giving more shape to this son parte. Little lemon yellow. So just keep in mind that both the colors will only blend. Then both the colors are wet. Just keep that in mind. Whenever you are
blending two colors, bring more of white
in the middle. So my wife has almost dried off. So let's see if I can do it. No, it's not coming. See outlining it. So again, I'm taking
just a little bit more amount of white, just adding in, in
a middle to give it a more brighter look toward. So finally, we are done
with our painting. So if you are trying
this painting ******, share me in your project work, you can also tag me
on my Instagram. That is more an art gallery.
11. Stars : Blocking The Sky: So let's start with
our next painting, which we'll be
mainly focusing on the night stars and night light. So let's discuss about
the colors first, which we'll be using here. The first color is
cadmium yellow, burgundy, Prussian blue, cerulean blue, pale
violet, white, and black. And the brushes which
we'll be using here is all same brushes
except few brushes. These are same brushes
except the blister. That is the round
and flat brush, which we'll be using here. So these two, the brushes are different except Paula same. So let's start with
first, the sky painting. So first we'll be using our filbert brush for
blocking the sky. Sky is a magical sky, so we'll be needing
lot amount of colors. As you can see you. We'll be using the darker
color that is Prussian blue and a little
bit of black mix. So just starting
from the top corner. So it's like a
diagonal painting, like a triangle shape
painting we'll be doing here. So I'm just adding little
white because as we go down, the color value
starts decreasing. So you can see the upper is quite dark and as
we're moving down its light. So this is just
adding surrealism, blue and Prussian
blue and a little bit of burgundy and white mix. Taking little amount
of water in my brush. And just again, starting
with filling the color. You can see on both the sides, I'm applying same color. The movement is
in diagonal form, but in a form of triangle. You can see on both the
sides you have same colors. So just mixing the color
and blending in nicely. And now, taking small amount
of burgundy and pale violet. I'm just blocking in
the lower portion. Taking more white. Again, blocking in can see it's coming like a triangular shaped form when
we are blocking the colors. And I'm also blending
it simultaneously. Make sure that whenever you
are blending two colors, the colors has to be wet. Then only you will be able
to blend those colors. So now I'm digging more
of pale violet and burgundy mix and a little bit of yellow and then applying below because this is quite
pinkish purple shade. So that's what I'm
trying to create. And again, adding little bit of yellow one burgundy
and white mix. And then just applying
on the lower portion. So just applying the colors. And then after
washing off my brush, we'll try to blend
these two colors. I'm just washing off my brush, removing excess of
water from my brush, and then trying to
blend both the colors. The board the colors would
only blend if they are wet. Otherwise you'd have to
apply both the colors again to blend it. So again, taking this hello, black and little bit of helium and Prussian
blue mix and y it also, again applying on
the top because the top is quite dark actually. So that's what we're
trying to create over you. And again, light shade. Just applying. One more, quote. So when you apply
one more quarter with the blending of the colors and the mix of the colors become more prominent and more smooth. So at least whenever you
are doing any blocking, it leads you should do
twice that blocking thing so as to make a nice
blending, smooth blending. So you can see I'm
altering the colors also a little bit where
I feel like it's dark because it quite light
color when we are going down. Now you can see there
are two lines in between the two colors. Now I'm just washing
off my brush, removing excess of
water and aldehyde, try to blend these two colors. So instead of using
the same brush, you can use blender brush
also for blending such thing. This is also nice for
blending two colors. You can blend, blend with
the same brush also, and you can blend with
blender brush also. It's up to you how you
blend your colors. Just mixing board burgundy and
cadmium, yellow and white. And just adding it below. And again, we'll be blending these two colors because you
can see there are two lines. Your brush not have water in it when you are
blending the colors. And the colors has to be dried wet when you are
blending two colors. So you can see
here it is, right? So I have added both the colors and then I'm trying to blend it. Again, see how vibrant
this so color is, this burgundy and yellow mix. So blending is very
important when it comes. So let's blend from
this blue one also. Just trying to mix
these colors properly so that there are no lines
in between these colors. Just adding a bit
more of pale violet. And blending is very important when it comes to create disguise of
different colors. Mixing the top part
goes, there are lines.
12. Stars : Blocking Trees: So now let's start
with the trees. So for the trees, we'll be using a liner brush, that is the rigger
brush and black color. So just taking black
color and creating force the lines from smaller lines
to bigger lines like this. We'll be moving forward. And then we'll be
creating this pine tree. Now, let's create
the tree leaves. Just small, small dots
and make sure that your color is quite liquid form. And the leaves are in the upward direction,
as you can see. So similarly, we will be doing the rest of
the trees also. So you can see I'm just creating the leaves and the lines which
are in upward direction. Let's create a triangle shape so that it'll be easy for us to create a nice shaped tree. And also blocking this area, also the triangle part. And the middle area, we'll be filling with
these same color, which we have done
the upper one. So first let's create this
triangle and then we'll be filling that gap which
is left and in-between. So now taking my
filbert brush and same color and just
filling this area, which is left white. We can also do it in the
first goal when we're doing the Skype
bot so that it'll be easy for us to fill in. I'm doing after
creating this lines. So you can do before also. You can see I've just
filled the entire area. And then we'll start
creating the trees. So first let's create the
second tree, which is so you can see how I'm
just moving my brush. I'm moving and creating some random shapes in
the upward direction. There are many ways you can
create this pine trees. There are different
types of pine tree. This is one of them
which I'm creating. So again, D, Todd, one. We also have to
create these stars. So after doing this, we'll be creating
this task so that drops doesn't fall
on these trees also. So let's first do this tree and then
we'll create this. Does
13. Stars : Final Detailing: So similarly, we
need to do the rest of the tree is also met. My same rigor brush. So just blocking in
the triangle shape. So once we are done
with blocking part, we will be first
creating these stars. Creating this task, we need
this Bristol flat brush. So what I'll be
doing here is just taking water and white color. And with my finger, I'll be just
spraying this color. On this background. You can see how
nicely those small, small dots are coming up. So likewise, just
taking little bit blue. And again, just sprinkling it using my finger and just
trying to sprinkle it. You can also use your
toothbrush if you have to create this effect. Now, in the middle,
it's quite stories. I'm just using white
and violet color and just using my
tip of the brush, I'll create this texture. So very light brush pressure
and creating these dots, which is going till
the topmost sky. Lower is little bit take n as
we go up, it's bit narrow. So this is the pattern
which I'm trying to create. So again, taking violet and
just my tip of the brush, I'm creating this texture, very light brush pressure
you have to give. Just adding little bit of burgundy and creating
some effects decides. Then again, digging a little
bit of blue and white mix. Little bit of burgundy also. Just adding on these sites. So that it makes a
little bit darker color on these sites. It's very important that
the brushes now again, I'm taking my round brush, that is round brush to brush
and just creating this dots. Just trying to cover the
entire lower or area also and till the upper end. Or like this way you can create
some good starry nights. You can see how nicely
these stars are looking. So just small few dots, big dots with white. And now you can see that the white sprinkle has also
come up on that black one. So that'll be just covering it. Because I don't want
on these trees. Now, we'll start creating
the tree texture, which we were doing earlier. Just same three textures with my rigger brush. I'm just creating
these textures. I'm also removing
those white spots which are reflecting
on this tree. So when you are painting, when you guys are painting, first create the stars and
then create these trees. That will be easy for you to
create the trees afterwards because the sprinkle will
not fall on your trees. Just creating some
textures on the trees. So make sure that these
textures are very close together so that, that line is not visible. That line which we have
drawn that triangle line, it should cover the entire
triangle line area. It should be that close. Can see that I'm trying to cover the entire that
line area so that that line is not visible. So I hope you guys are
enjoying this class. And if you're drying
this painting to share your project works. And also on my Instagram
that is more money on Gary. You're always welcome
to tag me there and share your
artworks and projects. So whenever we do such
small miniature paintings, It's kind of a practice
that we do whiting, It's the best way to practice
any kind of painting. So that's why I taught to create these miniature paintings
so that you can practice a bit and it's a good
hands-on practice when you are a beginner
or intermediate level. Similarly, we will be
doing the entire tree bot. So just enjoy the
process and make sure to cover this entire triangle area when you are creating
such textures. Once we are done with
this whole triangle part. So we almost complete this entire painting and just
some few details are left. I'm just trying to cover
the entire triangle so that it is not visible. And finally, we're almost
done with this painting. And if you are trying
this painting, please do. Tag me on my Instagram also, I love to see your
project works. Just a bit of white
effect in between.
14. Sky : Blocking The Sky: So now let's start with the next element
that is this guy. So this is the
Canvas and these are the colors which we'll be
using, the first color. And this is the
painting which we'll be doing like the
magical sky it is. So this will be painting. This picture is not clear, but you'll see
when I will paint. The colors are, the
first color which I'm using here is the pale violet, cerulean blue, Burgundy,
cadmium yellow, white, and alizarin crimson. These are the colors
which we'll be using. So first let's tape down the
smile with masking tape. So it's quite a t to 20% ratio. And I'm just creating
a horizontal line. If you don't want to
use masking tape, you can create the
line with scale also. But I prefer using masking tape, because with this you can easily create those
straight lines. So now let's start
with the coloring. But before that, let's
discuss about the brushes. Will be using the
same brushes except the one as the comb
brush off from rosemary, which is of size two, rest all are the same brushes, which we'll be using. So let's start with the sky. So here are the main center
of point is the sky. The magical sky which we
will be creating here. And this is default
wet brush we'll be using of size two to, Let's take first cerulean blue, little bit of pale violet, and a little bit
of burgundy also. Just here. We have to paint it in
diagonal direction, not in horizontal and vertical, but in diagonal,
like starting from the corner and then
going forward. Let's paint. This color
is actually little light, so we'll be adding your Prussian
blue so that it becomes a little bit dark because we want a little darker than this. So let's add a small
amount of Prussian blue. So now that this mix will
be adding little bit of Prussian blue to make it a bit darker color
because we want dark color. So again, we'll
start from the top. You can see the color
has darken a little bit. And then moving into and flow direction,
you're just moving. So I'll take a
little bit more of Prussian blue and
apply on the top. And little more. Because we want the
corners to be dark. And as we go down, the color value
becomes more light. So now adding little bit
of pale violet to it and mixing it and then applying because it's
quite light color. Just adding little
white also do it. And then moving down. So we don't have to fill the
entire area but little bit. And then just washing
off my brush, removing excess of water. And then softly blending
those middle boundary, which divides the two colors. You can only blend colors
when both the colors are wet. Otherwise you will
not be able to blend. So this is bit light, so I'm just adding more of
violet and white to it. Adding more of violet
because it's light in color. So that's what we are
trying to create. And then blending these
two colors again. Now, adding little bit of
burgundy to this pale violet. And then applying a thin line, just adding little white also. Then applying below
this pale violet color and then again mixing the color. You can see that
the blending only takes place when both
the colors are wet. So I'm just removing excess of color and with the raw brush, I'm just blending it. Whenever you are blending, don't press your
brush very hard. It should be very
light pressure. And this is the synthetic
brush which I'm using. Now again, adding
burgundy to this. Color because we want a
little bit of purplish color. And just creating little bit of cloudy shades on
one side corner of the again moving the brush and just to and fro motions,
very light pressure. And just creating
some cloudy effect. Very light pressure to the brush when you
are creating this. Now. Taking this burgundy and just adding to
this pale violet, and then creating a line where that masking
tape is meeting. Again. Just taking little
white because I wondered the light color and just
adding below this shade. So there you can see there
are so many shades of color. Now you can see there
are two lines which are forming so we
need to blend it. So first color has dried off. So I'm just making that
the same color and just trying to
blend both of them. So I'm just removing
excess off color and washing off my brush
and then again blending it. So just blending it. And then using this alizarin very little amount and cadmium yellow to
create a orangey shade. And just creating the line. Because this is quite
orangey form of shade. Just creating one single line. And then yellow and white mix. On the top of it. This is the yellow color
and white color mix. And then just trying to
blend both the colors. Just washing off my brush. And again, taking
this burgundy and pale violet and on the
top of it of yellow, just adding that color. Just blending the
lower part also. And again, adding little water to my color because it has dried off and just mixing
this whole column. And see there are so many
colors and this cloud which creates it magical sky, you can say just creating
little effect of clouds. Very, very light
pressure to the brush, and just creating little effect. You can see how magical
this sky is looking at different shades of
colors added to it. Just adding a little white
in the middle portion. Take very little
amount of color and then just moving the brush
and the to and fro direction. So now taking again cadmium
yellow and a little wide and creating little darker
effect of this yellow. And then taking again this
Prussian blue and burgundy and white mix and
creating some clouds. Very light pressure and just moving the brush with
the tip of the brush, I'm just creating random
shapes and cloudy effect. And this color is
completely dry. There is no water in it. So you can see how nice
this effect is coming. Again, adding little
white in the center. And just moving the brush in
the to and fro direction. Because that middle
area is quite white. So that's why I'm trying
to create it more bright. This cloud painting
is almost done. And then we'll start
with the below portion. Just doing the final touch
of this cloud painting. The more you do the layering, the more it becomes like Cloud, Natural sky you can see. So just adding little
bit of that shade also.
15. Sky : Blocking The Foreground: So let's first create a little bit off more
yellow to this center part. This is the main highlights. A little bit white and yellow
mix between just creating a line and now taking this Prussian
blue and just creating that straight
line, that Prussian blue. So whenever you are
creating such lines, make sure that the
color is not sore. So once we have done
creating this line, I will just remove
the masking tape. Again. See how nicely
this line has come up. Let's start filling this area. This is a water pot. So let's mix this portion. Blue answers, brilliant blue
and a little bit white. And just so more of Prussian, little burgundy. And just start. So one side it is
quite bluish and the other side it does more of like pinkish
shade, you can say very slowly touching
that upper line. I'm just covering one side of this water to just
blocking in the scholar. Then on the other side
it is more of burgundy and a mix of Prussian
blue and white. So just covering this area. The above part is
actually the line which is who love blue. So I've left that part, just taking blue and just
covering the upper part. And now with my blender brush, I'll just try to
blend this color. It's not blending so accurately because the color has
actually really dry. But it's fine because we have to create these water effect. But this compression, this will, it will be fine because
we'll cover that area. So now using my brush, just wetting my brush
and taking this Prussian blue and just creating
small, small lines. Just moving the brush in
horizontal direction and creating smallest
model line just applying on the tip of
the brush the colors. And I'm just creating the lines. The above part is actually quite dark and as it goes down, this side, make soft
border colors actually. So I'm just adding a
little bit of burgundy also do it to make the color a little bit population
just adding these small, small lines in horizontal nano. See this gives a
very nice effect to the water when you are
creating such lines. Similarly, I'll be
covering this whole area. You have to see that all these comb lines
should be separated, should not be joined,
otherwise you'll not be able to
create such lines. And very closely, you have
to create this lanes. You don't have to leave so
much of gaps in between. And make sure that
all these brushes are a part that lines
that cone part. If the adjoint you'll not be
able to create the effect. And the color has to be in
little bit of liquid form. Otherwise, this whole the color
should be in liquid form, it should be and take. Likewise, we have to
cover the entire area. And then we will be using
burgundy of lighter color. And we'll be filling this area. Gandhi and white mix. Same technique and just
applying it a little bit. So you can see how nicely that
what reflectors coming up. So we will mix this blue part also so that both look combined. Just trying to blend the colors with this texture so that it doesn't
look in separate. So now you can see how
nice this as looking. And if you're doing this project due to share your project work and you can also tag
me on Instagram, that is more art gallery. So just one line of light color to give more
bright effect to it. These are very small, small
details. So that's it.
16. Moon : Blocking The Sky: So let's start with
our next painting, that is the moonlight. So here our main
element is the moon, which we will be painting. This is the image and the colors which we are
using year as white, black, Prussian blue,
and cerulean blue. So these four colors
we'll be using. And apart from this, the pressures all
are same except one which is the bigger
size for the brush. Synthetic brush and rest
all are same brushes and also that form which
we'll be drawing a circle. If you don't have formed, you can draw circle
with a compass or with any circle thing.
So let's start. So my bigger brush and taking black and Prussian blue mix and just starting from
the corners side. And then we'll go diagonally
to the other end. From dark coat color to the lighter color will
be moving like that. So you're also, we will be doing Just nice coat of
black and Prussian blue. So it's quite a dark color. And as we move towards
the other side, will add little white
to it to create a nice lighter
shade of the color. Now adding surrealism blue. And then moving
towards the other end. Slowly. Now as we are moving towards
the other end, we adding more of civilian blue and less of Prussian blue. As you can see. So covering the entire area. From the darker color
on the advanced side, we move to the lighter
version of blue. The lighter version of
brooder only will be creating the moons and the clouds. I adopt a bigger
size filbert brush because it will be easy for
me to fill in the color fast. If you can use a smaller size
also, it's completely okay. So once this is dried up, we'll do one more coating of the color because it
does not quite smooth. So we'll be doing one more
coating of the same color. So we can see are two coating is necessary when you were
doing the background. But you can blend two colors only when both the
colors are wet. So you can see I'm just
blocking in this color. But one more Good. Once this is done, we will create a now the moon, but they will take the
sponge and we'll put it on the sponge with my
brush and just dab, just dab it on the canvas. On one end. We can see the circle
as being created. And then we'll do the detailing. Just smoothening this color
because it is quite wet. So just mixing the color.
17. Moon : Creating Moon And Clouds: So now let's start
with this Cloud-first. So I'm just taking this small
filbert brush and white. Just very small amount of white, very little money and it's
completely dry brush. And I'm just creating
small, small clouds. I haven't drawn any shape, but if you are not, o give it drawing freehand
so you can draw shapes also. You can see I'm just using
very little amount of color. And with my dry brush, I'm trying to create some
snowy, cloudy texture. And just moving my brush in this circular motion
and creating small, small different shapes
of cotton balls. You can see. Likewise, the whole below part is the cloud part which we will be doing,
will be creating. This is another type of cloud
which is quite simple Cloud and just using your
synthetic brush, you can create such beautiful
droughts and you don't have to press your brush very hard whenever you
are creating such clouds. Just make sure
that your brush is very soft and very light touch to the brush and very little
amount of color to it. And your brush should
be completely dry. Dry as in like you just dip
in water and remove excess of water and use it for
creating these clouds. So you can see, I
have just fill in this lower part with
different shapes of clouds. And now digging a little bit of black and mixing white to it. Very small amount of color
you need to create such. In between, I'm just
adding those, again. One layer of this dark color. Just doing more of white and creating more
vibrant clouds. Just adding a bit of textures. Can see it's quite bright. Now. Once this is done, we'd be taking again white, a little bit of black mixed leg, grayish color you can see. And just read it, be adding a little bit
of texture in between those clouds to give it a
little depth to the clouds. So now taking my blender brush and then creating
first the circle, just mixing it nicely. And this brush is completely
dry without any water. I haven't dip the
brush in water. It's completely dry brush. I'm just creating the circle, little broader circle because
it is quite light blue outside and then
inside it is white. So now just if the brushes
getting dried off, you can add a bit more water, but if it is not getting dried off and the color is not sticky, don't use water when you are
creating such round effects. Just moving the brush in
the circular motion and very light pressure and
creating this round effect. Now, let's create
this center part. So for the center part, I'll be using this white. Very little amount of wide. And then start with the center. Just very slowly. Create the circle in the center. Just taking roll
white, that's it. And then mixing the middle part. You can see already it's
so bright white and just blending the outer whites little bit to give them
more light effect to it. Just taking a little bite. And now this time my brushes wet and I have removed
excess of water and I'm just creating some round
white effect around it. So make sure that you wash. Your brush does not
have water in it. Otherwise, your whole
painting get spoiled. So now let's first outline
this whole round moon shape. So with a quite thick color, I'm just outlining
the outer area. And also filling this in dire. You have it my liner brush. So Mona's neighbors mood
for we need to give some textures to wait
for the textures. We will be using
that grayish color, like white and black mix for creating some textures in it. Now again, just digging a little bit of wide
and just blending the outside part so that it looks quite
bright from outside. Also, very little amount of color you have to take
when you are creating some nice transparent
white effect. So yeah, this is done. So let's start with this. So one part, just filling
in this with white. So after filling this
entire thing with white will create
some texture also. And see it's completely white. And then we'll add a bit of grayish texture using
my filbert brush, using my rigger brush, I'm just take you through
creating gray color and creating some
random textures in it. Just some lines and dots to create some effect, moon effect. And see it's looking
quite pretty. So. Now what we'll
do is we'll take the Bristol brush,
Bristol flat brush, and then we'll just take
the brush little bit, remove X is a water
and then take this white color and just
sprinkle it to create stars, like we did earlier in
the previous painting. So just for creating stars, we can use this bristle brush. So this is, it.
18. Moon : Final Detailing: So now let's create some
more details with this moon. Because you can see it's
not quite so close, just creating more circles,
more accurate circle. You can see when you are doing such small painting
is very difficult to adjust it because it's
quite small painting. But when you are
doing small painting, your learning very
nice technique and your hand exercise
is also being done. So it's good to practice
first on small paintings. And then you get a very nice
hands-on on your paintings. Then you can create
on the bigger ones. Just outlining it a bit. So it's not quite smooth. So just I'm trying
to smooth ended up taking more of white. Just creating more bright. Why do you can say? So now again, I'll
create this outline. Just giving little final
touch to the painting, but it's almost done. Just a few final touch. So that just few details which makes the
painting or beautiful. Just adding more white to it. You can see now how
bright and white it does. Like it's shining. And just adding little more
that grayish detail also. Now let's create some more
whiteness to the Cloud, but just staying
wide color and with my Philbrick brush
creating more, adding more white to it
because it is quite bluish. Suggest on the top part I'm adding more white to the colors. So this is almost done just adding more
white on the top of the clouds to give it a more like brightness to
this whole night view. So we are done with
this painting finally, and move on towards the next
element of the painting. And if you are drying
this painting, then do share me to share
your project work and also do tag me on my Instagram that is
more in the art gallery. This is it. Just a bit off. Little bluish effect
on the sides. See the more you
do the detailing, the more you will find. Okay, this is wrong,
this is wrong. So this is a never
ending exercise, which is really
frustrating sometimes. So it's better just to stop it at a moment when
you feel like Okay, it's fine. It's okay. This is actually the
main part, the moon. So tasked to be perfect and round in shape.
As you can see. Finally, we are done. Thank you.
19. Ocean : Blocking: So let's start with
our beach painting. A fresh canvas. And this is the painting
which we'll be doing. Let's first tape down
with the masking tape. The center part. Just taping it more
higher to the center. It's not exactly centered. The sky is little
short than the sea. And then we'll just draw a
rough sketch of the sea waves. And then we'll start with
the painting with my pencil. I'm just drawing a rough sketch. So now let's discuss
about the colors. Black, burnt umber, white, blue, and cobalt teal. So the pressures, these are the brushes which we'll be
using all our same brushes. So this is the blender brush and stressed out
all same brushes which we'll be using here. So let's start first with
blocking with my filbert brush. Let's first take cerulean
blue, and white mix. And let's start with
first the top part. So the top is little bit
darker and as we move down color that the color
value decreases. So this is the pattern, how we'll be blocking
the background. You can see as
we're moving down, I'm adding more white to it. And you can see I've taken
very less amount of water. I'm just using just my
brushes wet, That's it. And just digging the raw color. And I'm just blending the color. So as you know, when
the colors are where you can easily blend the colors. So currently my color as wet, so I'm able to
blend these colors. So very softly you have
to blend the colors. Very light brush pressure. And just moving the
brush into from motion. And just blending the colors. White. And again, starting blue. Again blending. So at least two coats of colors you need to do when you are blocking in the background. So now let's do the
C part for the C m using cobalt teal mix
and cerulean blue, little bit of black. And first creating the top line. Because that is quite dark. And as we go down, the value of D increases
because it is more of just covering this area. And then adding in
more detail and white. And blogging in
this lower portion. Again, taking deal and white. Just leaving that area
which we have drawn, just covering this entire area. And then the lower portion, just adding a little black to it because it quiet show
grayish green shade, actually, more of white. And a little bit of bond Dumbo. And then covering
the area below it. And now digging more
of burnt umber, mixing it with same color and just blocking the
lower portion dark. So I'm just adding white to it. I'm just logging in this area and just removing the color
and just blending it, just water so that
there are no lines. And then the lower portion
with burnt umber and white, more of burnt umber because it's quite dark and a
little bit white. And just blogging in the
area which is lower. This is the sand area
which we are blocking in. Finally, blocking is done. We'll move towards
the next spot.
20. Ocean : Background Detailing: So now let's create the
sky and the clouds. For the clouds, I'm using the same brush that
has the filbert brush of smaller size and just taking white color and dry brush, just creating some
round, round shapes. So just very light pressure and very little amount of
color you need to take. And just creating small, small cotton balls shapes. So very light pressure
and moving the brush and the circular motion and
creating the clouds. So this is another
type of cloud, which is very easy and you
can create it in this Cloud. In this type of cloud, you need to have the
synthetic brush and very small amount of color
and completely dry brush, then only you will
be able to create such cloudy sky is very little
amount of color you have to take on your brush
so that it gives a nice feathery
touch to this sky. Can see how small amount
of color I'm taking. The billow clouds are
very small, small. So little bit of
blue also allowed. And very small, small clouds
below, just the dots. We are done with this cloud but just giving
more light to it. The easiest Cloud which you can create when at the
beginner level. So now let's do this, remove this masking tape
and fill in this area also. Now let's fill in this spot
with this blue and white mix. So very light color. Actually I'm trying
to create still dark. Just filling this area. So just filling
this area still I'm not convinced with this spot. So let's take a little
bit blue and again, fill in this area. Just trying to create
another quote offered. Because I want to
remove that line which is there for the masking tape. Little darker color and
creating some small clouds. Sorry about that light. And so this is not
coming up, right? So what I'll do is I'm
not looking appropriate, so what we'll do it. So there's always a
chance of overdoing an acrylic whenever you
have do any mistakes. How we can do it is just
add a little bit of room, filling the scholar
with the same color, background color, and just
adding white and blue. So why does almost finished? Just take out a
little bit white. And then I'll again filling
does then that area. And just with this same color, I'll just fill in this area. And after doing this, I'll just put the masking tape where that line is joining. And then we will again create
the sea from that level. Again, we will just
put that masking tape. This is folded so I'll take
another masking tape and just applied on the line which is visible that
masking tape line. And I'll just put it over there. And again, I'll just fill in that area with the
same see color. And we are good with it.
21. Ocean : Detailing: So now let's fill
in that area with the same color which we have used earlier, that dark color. So here I'm just taking
this two colors, blue and cobalt,
teal and black mix. And that my blender brush, I'll be just filling
the above area. So just filling that top area with my liner brush, taking more of black and blue
and just creating the line, dark line so that it
divides this whole area. Now, Let's remove the masking
tape and see how it looks. So nods, good, quite. So this is one of the
technique how you can redo your work. Now, just creating lines
with this white color. Just take white color and
just trying to create some not smooth lines
but the water effect. So again, see these
are all crooked lines, not smooth lines because this is the water which
I'm trying to create. Now creating some random dots, some dots, some lines, creating like some texture. Just lines and dots mix so that it looks like a
thick layer of water, which is like a formatters
coming across the shore. So in this case, you
have to take a tick, tick white color for
creating such textures. So the lines which are
close to the shore or very close to each other
and as we move away, it is little bit farther. Little bit away.
It's not so close. So this is the texture
that you need to create when we are
painting this seashore. So once we are done with this, we'll be creating some
lines over the sea also. Can see these are quite
thick lines and take colors. Just random lines. And some lines on the top also. And then taking black and a little bit of
blue mix and just outlining this, this waves. Just outlining this area. And then taking my pesto brush and bond amber and black mix. Just creating dots
and some lines, very light brush pressure. Then filling the small, small dots on the
entire land area. Taking little white, very light pressure. And just with the tip of the brush I'm creating
these textures gives us a nice
realistic look to the land when you create these textures with
different color values. Now we're taking again
blue and white mix and creating some lines. I think more darker color. Just creating. So instead of
creating lines with this, we'll try creating lines with our brush because
that will be fast. You can do with this also, but fifth column brush, it will be more faster than creating with
this rigger brush.
22. Ocean : Final Detailing: So now let's take a
brush and then again, same, this cerulean blue. I'm just creating small, small dots on this entire area. Just adding a little
water because I need little fluid color. And just creating lines, horizontal lines, small,
small lines with this brush. And two on the top of it. So once we are done with this, so instead of doing
with this dark color, we'll be using light color, that is d, D and white. So teal and white
mix and doing on the top of this dark color. Same technique. And we're almost done
with this painting. Just few more details are left. This is the easiest way of creating this
seashore. You can see how taking my
Bristol round brush and taking white on the tip of the brush and creating some dots on the edge of the shore. Because this is quite, take some dots on
this sandy Rio also. Just small dots here and there. Then with my favorite brush just adding a little more white to this cloudy urea. We're almost done
with this painting. And I hope you guys
liked this painting. And if you are trying to share and do tag me on my
Instagram, that is more unique. Art gallery, few random lines and some more lines
here and there. So we are done.
23. Mountain : Rough Sketch: Welcome back. So let's start with
our next painting. So today we'll be painting mountains,
something like this. So let's start with
first the sketching. Let's take a pencil
and just scared, do a rough sketch of it. And then we'll start with
the blocking of colors. So first I'll be drawing the road which is coming
out from in-between. And then we'll be drawing a rough sketch of the mountains. Just a rough sketch. And the road which I've
drawn in the North from centred slightly below. So just a very fine sketch of the mountains which are
overlapping one another. So this is it. And there is also lines in between the
mountains so that also, I'll draw a tiny bit so
that it'll be easy for us to paint and block
in the colors. These are all
overlapping mountains, one over the other. So there's also a mountain above the two
mountains in between. Stan. So now let's
discuss about the colors. So these are the colors
which we'll be using. The first color is cadmium, yellow is really blue
portion blue tags in purple, white, black, burnt umber,
and permanent green. These are the brushes, just all are same brushes except the fan brush retweet be using
for creating the grasses. Let's start with
our filbert brush for blocking in the sky. For blocking in the sky. I'm just using little bit of white and cerulean blue
mix to block in the above. Just blocking the above sky, leaving the mountains and just blogging it very carefully. So since one code
we will be doing at least two to three codes so that it should have a
smooth finish off the sky. So now let's start
with the next part.
24. Mountain : Blocking: So the above mountain
is quite so fast, we're just blocking in with white with my same
filbert brush. After that, we'll be
doing the detailing. Now let's paint the road. So I'll take take little
black and white mix like a grayish color. And I'm just blocking
in this spot, we're just blocking this middle part way with this grayish color. Just adding little
bit of digoxin, black and white mix. It's not quite dark color, it's quite light in light
dish grayish shade. Now once we are done
with this road, but we'll start doing
this grass area. So for this we'll be needing permanent green and black mix. Just blocking in this
whole grassy area which is on the board, the sides of the pathway. So just taking black and green and just
blocking it roughly. It should not be a smooth
blocking and spine. If it does a rough blocking on both the sides, we'll be doing this blocking. Again, cm using very
little amount of water. It's just on my
brush. That's it. I'm not using extra water or am I not adding any extra
water to these colors? Because it's the color. Whenever you are using acrylics, you should not use so
much amount of water. Otherwise, this
the brightness of the color and that freshness
of the colors disappear. So it's better not to use so much water when you
are using acrylics. And please don't
try to use it as a watercolor because it
is not a watercolor. If you want to use acrylic as watercolor, use acrylic ink. So now let's start
painting the mountains. I'm just taking Prussian
blue and black mix and add a bit of
dioxazine purple mix. So really in blue also, just want to create a
nice bluish shade off. You can see off bluish. I'm just covering the mountains. Just blocking that middle
portion which I have drawn. Again, taking same color and again blocking
the other side. There are some areas which are dark and there are some
areas which are light, so we need to take care of that. And then adding little white to it because it's not
so light color. Just adding dioxazine,
purple, white, and black, offering this middle portion. So you can see here I'm using
my rigger brush to paint the entire thing so that the
colors doesn't come out. Because we want to, we want colors to be
in that boundary. So just taking a little
bit of bond amber also mix and black mix and just covering the
other mountain pot. So there are varieties of
shades on the mountain. So when you make
so much of colors, you also get the knowledge and advantage of learning
more varieties of shades. So it's better you
mix the color and shake and try mixing the colors. Because it helps to us to learn more about the color
variant and how can we mix the exact
color when we're doing any portrayed or
any landscape painting. So now comes the other
mountain which is on the other side. So I'm just mixing
bond amber and black and covering this
entire area because there's quite a dark
shade mountain. So once we're done with this, we'll do the detailing now.
25. Mountain : Detailing: So now let's start with
the mountain detailing. So here I'm using my rigger
brush and B2B doing the detailing for us to just taking white and just
creating the borders. So the outline you can see just outlining and shaping
the mountains. I'm just taking that row wide because I want
to take lines. You can see the color
which I'm using is quite thick and there's
no water in it. So after drawing the lines, Let's create some detailing. Taking civilian blue and just outlining this area and
creating small, small lines. So this is a really blue and
the same mix which we have used earlier for creating
the lower mountains. It's actually a black
and Prussian blue mix. And the cerebrum BlueMix. This is the color
which I'm using here. Just adding little white to it. And you can see these
are quite take colors which I'm using and
creating some details. So these are very small, small lines which will
appear like there are some mountains and Hobbes on
the top of the mountains. Just adding a little bit off the colors and just creating
some dots and lines. So whenever you are creating such small,
small, tiny lines. So let's make sure
that the color is all. Take form, not in liquid form. It creates a very nice
look when the whole oh, does detailing will be finished. Initially, it looks
like what we're doing. It's weird, but when it's
completed looks really nice. Prussian blue and black mix. Just adding some details
on this darker area. Now again, taking
the same color, creating some details below, adding white to it, and again creating some more
details in this portion. Just like there are
some snow urine there. Adding little bit
of lines and urine. They're depicting
like the snow area. Just lines, diagonal
lines which I'm creating. Again adding cerulean,
blue and black to it. And again creating some
more textures in between. More you add textures
and the more you do the layering of these things, the more realistic it looks. This is a small
painting and it's just an beginner's class
of the realistic painting. So I'm not going in
so much of deep. But whenever you are doing
some realistic painting, you have to do lots
of layering in order to look like a
realistic painting. The more you do layering
and the more you do color mixing of the exact
color which is being used, the more realistic it looks. You can see I'm just adding a few details here
and there so that it looks more realistic form. Just adding more little
lines over there. Now using my round
brush and taking black and little
bit of a jumble mix and creating some textures on
this part of the mountain. Just taking, creating some dots with
the tip of the brush. So very light pressure
and my brush is completely dry
without any water. And ink. Little bit
of green also do it. Again, taking little
bit of black on same mixture and I'm just
applying what the end diode is. Green area. Over this entire green area, I'll be applying this texture. Brush actually plays a very important role
when it comes to texture or some tree
texture or grass texture. So whenever you have
to create textures, use presto brush for
creating such textures. As we are done with the class. We'll also do some like textures
on the bot ways as well. To the sides of the pathway.
26. Mountain : Final Detailing: Let's start with the grass part. Now here I'm using lemon, yellow and green mix and
my Bristol flat brush. I'll be creating details. So this is completely dry brush. And I'm just applying the
color on my tip of the brush and just tapping my
brush very gently, not very hard pressure
to the brush, very light and gentle pressure. Just using the tip of the brush and creating
this texture. You can also use your fan brush. If you don't have this brush. For creating such textures, it will be filling this end dire grass area with
this texture technique. Now here also you can create layering and variety
of green colors to create a natural
scenic or grass look. This is a technique
where you can create some beautiful
realistic grasses. Just adding more
of yellow and just creating the text shows in
z these are very small, small dots which
are being created. Once we are done with
this grass part. So I'm just washing
off my brush and now taking this round brush, round bristle brush
and adding little bit of burnt umber to
this green mix. And just creating some
little bit black, also, just creating some dark spots which are in-between
these grasses. These are very small, small minute details which makes the painting
more beautiful. So it's not that I
don't make mistakes. We all make mistakes at some point of time when we
are doing such paintings. But we should not lose hope
and we should always try. Because whenever we
do something wrong, we learn something new. Now you can see I'm just using that white color
very small amount, and creating the
texture in between. Just in-between using
my rigger brush and taking white color
and just creating an outline like the
border of the roads and the pathways and designs
which are made on the road trying to create those signs. And this white line. You can see our painting
almost complete. Only few parts are left. Adding just in between this area which divides
the mountain and the road. So outlining this
mountain more with white. Now, taking my brush and again, blocking in that above Skype bot because it's
not quite smooth. Now you can see off the
second code how it looks. Again, taking my rigger
brush off smaller size, and just creating some lines with this cerulean
blue and white mix. Dealing as never-ending. The more you do details, the more it looks
quite appropriate. So it's, it's
actually when to stop and so that your painting
is not destroyed. So this painting is
almost complete. Just adding more details, let fit my Bristol brush, taking black and creating some black textures which
divides this pathway. And does green's Office
and the mountain. And also there are some
dark patches in between this green grass area. We're almost done with
the spin painting. If you try this painting to
share your project work, and also tag me on my Instagram, that is more Heaney art gallery. So I hope you guys are enjoying
this miniature painting. And the motive behind creating this class was that you get used to acrylic paints. And the more you practice, the more you learn. So I thought of explaining each and every part of
the nature element, which either it is mountain,
grasses, sky, everything. So here we're almost
covering everything which makes our
environment are beautiful.
27. Waterfall : Blocking: So now let's start with
our next painting. So this time we are
doing waterfall, so this is the image. So this will be painting. So let's first draw some rough sketch
offered through pencil. And then we'll start
with the painting. Let's first draw the sketch. First time creating
the mountain. Which is almost like
diagonal and shape. And some guts in
between the mountains. So that also I'm trying to draw. So it's just a rough sketch will be doing
painting after that. And the lower part where
the waterfall will fall. So this is the area. So not much of
these sketching is. There's just a few
little rough sketch so that we can paint it easily. So there's another
and the lower side, that slanting area
so that I'm drawing. So this is almost
done the sketching. And now we will do the painting and from
Yoda, waterfall will flow. So let's discuss about
the colors first. So the colors are white. Surrealism, blue, black, bond, amber, and sap green. So now let's start
with the painting. These are the brushes,
and let's start. So first we'll begin
with this guy. And this is the
filbert brush will, I'll be using for this, I'll be using this cerulean blue and a little bit
of black added to it. And this white color, I don't want perfectly
like bluish color should be a little bit of Payne's
gray tape color. You can see. So just applying turbid, just mixing the color and
just applying on the top of it to starting little more
white to it to make it more. Now just blocking in that
whole background area. You can use your
flat brush also for blocking in it's not required that you have to use
your filbert brush. You can use your flat brush. Even you can use your round
brush for this filling part, this background and
he blocking part. So it depends,
doesn't not depends upon like you have to
use velvet brush here. So I felt it convenient. So I am using this
filbert brush. So once we are done with
this whole blocking, just mixing it a bit more. Maybe we'll have to do it one more coating
after this dries up. So now let's take this
bond Dumbo and black mix. And let's start
with this blocking. Starting more of black to it. Because I want pretty dark color and a little tender of white. Just adding this color
to the mountain. Blocking in this
whole mountain area. Just highlighting
these lines a bit dark so that it is more
clear and visible. Just the blocking
which we are doing. After that, we'll be
doing the detailing. But first we are doing
with this blocking part. Just taking green and
covering this upper area. Just quiet greenish in color. So just blocking
in the upper part. And then again taking those brownish color and
governing this lower one. So only that part of
areas green and a little bit below
also. It's green. Just slowly proceeding
with the blockings. Now, just taking again this green and little
bit of mix of this. Now again taking bond amber a bit and covering the upper part. This is little bit
greenish in color. So I'm just adding
the green too wet and just blocking in this area. Now let's do the blocking
of the lower part. Dotting more of black to it. And just blocking
in this lower part. So once we are done
with the blocking, now start with more
of the detailing.
28. Waterfall : Clouds Detailing: So now let's start with
the sky first again. So I will be doing one more layer of coding
because it is not smooth. So let's add same color and little bit lighter
color this time. Little bit of black to it and
just blocking in with my, again, this filbert brush, just blocking in this Skype Bot. So now you can see
the financial smooth. So that's what we wanted. So every day and whenever you
do any blocking of the sky, at least do twice when you're using when you're
painting with acrylic. So that it gives a nice
finish and nice smooth to it. So now once we are done
with the blocking, we will be doing the
that raise that clouds. It has different
Clouds this time. So we will be doing that. Now, taking this Bristol brush, flat brush and creating
some textures on this mountain till the time this upper part gets dried up. So after we are done with
this, small details, will be doing the Skype
odd because this is currently wet so we cannot
start it immediately. Once this background
area will dry up, we'll create the clouds. Otherwise, this whole
color will come out if you use it on a wet paint. So I'm just creating some
textures on this mountain. Just using my black color
and dry brush technique. Completely dry brush
without any water and just creating some textures that dabbing my brush very lightly and digging
very little amount of color. We just filling this
entire mountain. But once we are done with this mountain, but you'll be doing
this Skype portion. So you can see I'm covering
the entire mountain area. But this technique, it's
a very nice technique of creating textures and
mountains and trees. Using my rigger brush, just creating the outline. So that when we
create that clouds, we know that these
are the boundaries. So that's why I'm creating
just the nine to it. So that to just clear can see I'm also creating
the lines mich war, which we have drawn the
rough sketch to it. So now let's do the cloud part thing
until it's dry it up. So let's do that first. So same brush I'm using and just taking white and it's
completely dry brush. I've removed excess of water and just soak all the water and just very light
pressure to the brush. And I've just taken very
little amount of color. You can see I'm just
creating feather reshapes. So it's like a diagonal shape, just creating some
feathery shape to it. So it's like that form of cloud. So you can see we have learned
so many types of cloud and while doing
so many elements. So this is one type of cloud. Just feathery touch, very
light touch too wet. And your brush has to
be completely dried and very small amount
of color to it. And just touching the tip of the brush and
very light pressure. Then only you will be able to create this February clouds. You can see. So this is
little bit more we can do. So you can see how I'm dying, very little amount of color
and just creating feathers.
29. Waterfall : Mountain Detailing: So now let's start creating more details to
this mountain area. So let's use our this
fan brush and let's create the details
taking white and a little bit of sap green mix. So it's kind of more white
and little bit of sap green. And just applying it to the areas where we
did green to it. Just using the tip
of the brush and completely dry brush and
creating the textures. As you can see, very
light brush pressure. And you have to use
completely dry brush. It is not wet. Not even I've pulled
this brush in the water, it's completely dry and
the colors are also row. I haven't used any
water in them. Also. Like that, we have to use the brushes for
creating such textures. And see it's more of like
sea green type color. Let's do using it
to the lower area. And as V goes up,
the color changes. So it's more of a grayish,
brownish texture. So we'll do that also. Little bit up on the edges. I'm trying to create Natalie bit in-between,
not filling it in dilute, just be tough it so that it doesn't look like
uneven sort of. So now let's use
our different brush because just taking
white and little bit of black to make it little grayish and little brown color. That is bond Dumbo. And just creating,
just mixing the color. And let's start
with the detailing. So there are some lines on the top where the
mountain starts. There are some vertical lines and some horizontal
lines which are created. So just very fine lines. And whenever you are
creating these fine lines, make sure that your color
is quite fluid form. Otherwise you will not be able
to create such fine lines. And see there so fine lines. These are textures which I'm
creating on these mountain. Some more vertical lines with black to give more
texture to it. So you can see there are
so many textures now using my round brush for creating
little more textures, adding white and black and
little bit of burnt umber. And just adding some more shows. Just using dry brush
technique and just creating textures
on these sites. We can see already this
mountain is looking quite just adding little
black on the lower part. And then we'll create
the waterfall also. From the little bit, adding little bit of
green texture to it.
30. Waterfall : Water Detailing: More detailing is left
and then we'll start with the waterfall and the lower
riverside or lakeside, you can say, just adding
little more detail to it. So same lines I'll be drawing
in these lower part also. See these effects are
very necessary when you are creating
some mountains and just outlining the lower line that just joining
the water body. And attune more off white
details here and there. So you can see now
our mountain is almost ready and so we'll
start with the waterfall part. So again, I'm using your Bristol brush and a little bit grayish,
whitish color. You can see just was creating the fall where we need
to create the waterfall. Just creating the shape. With my round brush to brush. This pressure is also
completely dry without any water and just creating
small, small textures. So first grayish and
then overlap with the white texture,
bit of texture. So now let's first
do this below part. Then we'll do with the
waterfall because water will, water will fall on that. So that also we have
to create, so again, using black and sap green and
the amount of white to it, letting water I'm adding
to it because it's dry. So just covering
this lower area with darkest green color with
a mix of black and white. Just blogging this whole thing. Once we are done
with this blocking, we'll then create
this waterfall. Just adding one line to it. There's some outlines
which are there. So just I'm drawing with my rigger brush
with black color. Very small, small details. So you can see I'm drawing
very small details. See if you are a beginner and
want to learn this type of painting and you know
how to use the brushes, you can paint it easily. So whenever we start
painting anything, we should know how to
use these pressures. How much pressure, how much quantity of
color we need to use. So these are the important
things which we need to take care when we are
dealing with acrylic colors. Just taking white. And again, just take white color and
creating the textures. I'm just filling up this area which I have drawn
like a rough sketch. Just using my tip of the brush
to create these textures. You can see the lower
part is quite more white, so I'll be creating
more white offered. And there are some waterfalls
which are besides also so very light pressure and
just creating vertical lines. And z, these are dry
brush strokes actually. So again, taking
very light pressure and creating dry brush
vertical strokes to it. So now again, we need to
create this lower body part. So again, taking
this white color and just creating some dots on the top of the where
the water is falling. Just dots Here in there. So now we need to create
this lower part also. Just trying to add a
little bit of details, little bit of dots to
give a more vibrant look. Once you can see I'm not
filling the entire area. I'm also keeping that back
grayish portion also there. I'm not covering
the entire thing. Again with some
waterfall effect. Just lines and dots mix. And then the lower part also
this is covered with water. This we'll be doing
with the Bristol brush. So let's take around restored
brush and same brush, dry brush and just
creating dots. On the lower portion like a circular form or
an oval shaped form. Circle, which is just forming. Just some effects, some
effects on the mountain also. Again, taking flat
bristle brush and creating some effects
on these sides. Just dry brush and just taking very little
amount of color and just covering this
entire portion. And then again, taking my liner brush and creating
some water effect, some lines that is forming the
water ripples you can see. So this is almost done. And if you're trying
this project to share your project work and also
share tag me on my Instagram. That is more Heaney art gallery. I'd love to see
your project works. So you can see just paid off
details I'm adding to it. To give it a more
realistic look. It's almost done. Just giving some more
lake forgive effect over there because this water is falling and it create
forks when it falls. So this is it. I hope you guys are
enjoying this class. It's quite a detailed class. Smarter, normal one. So this is it.
31. River : Blocking: Hello all so let's start
with our next element. So this is the image of the painting which
we'll be doing. So let's first start
with the drawing. Just using my pencil. I'm just drawing a rough sketch of the mountain and the reverse. So it will start from the
upper than the middle part. And then first we'll
create the riverfront, and then we'll do
the upper part. So it's a very simple
sketch which we need to do. And then we'll start
with the blocking. So you can see the lines are
also not too quiet straight, it is like so and
then the mountains. So this is the rough
sketch which we have drawn and then
discuss about the colors. The colors are lemon
yellow, cadmium yellow, burgundy, Windsor blue,
black, white, and green. That is sap green. And these are the brushes which
we'll be using. These are all same, similar brushes which we have used earlier also
in all the paintings. So let's start with
the painting was the blocking and then the
detailing here for blocking, I'll be using my filbert brush. Since it is a small
miniature paintings. So I'm using a small
size filled with brush. I've just taken as rid of
Windsor blue and white. Just makes it small amount so that it's clear
to you how much you have to take blue and
how much you have to take the other colors. A little bit of burgundy
I've added to it. So just blocking
the first layer. We can see the water
is just on my brush. That's it. When you
use extra water to it. And as we go down,
the color changes. So the two colors can only blend when both
the colors are wet. If both the colors are not read, you won't be able to
blend the colors. So make sure that both
the colors are wet. See, now the upper
color has dried up, so I'm just mixing it
a bit and a little wet so I'm able to
mix that color. Similarly, as we are proceeding towards the
mountain and the river, you need to check that
the color which you are blending with has to be wet. Not completely wet, but yes, it should be wet so that
you can blend the colors. You can see I'm taking very
small amount of color and mixing it with the blue and just going upward
and mixing it more. I'm just taking blue also
because it has dried up. So again, mixing it
with the lower color. So this is a technique which we use an acrylic
for blending the colors. Taking cadmium yellow, little
bit of burgundy, and white. So we're gonna d is
nothing but little bit mix of Alizarin, dioxazine, purple. It's a mix of digoxin
and alizarin color. So it's like burgundy in shape. It's like a pit of
population also. Now down the lemon yellow. So you can see the Gallo
virions on the Cloud sky side. Now the sky part is done. So let's do the mountains
with this just, I'm just blending it
with this blender brush, more of it so that
it does nicely blend this yellow and the
burgundy color. Just blending it properly. So now after blending, this will move towards the
other part of the painting. So let's start with
the mountains. So for the mountains, I'm just taking the same
color that is Winsor blue and mixing white and a little bit of
black color also. Just covering this
whole mountain area. Also have added a little bit
of burgundy to it to make it more like a purplish shade.
And it's quite dark. So I've just added a little
white so that the color is more visible and more muted. So adding more black
and just applying, just blocking these mountains. The lower part is quite light, so I've just added white to
it and I'm just applying to the wide portion to
the lower part of the mountain and then
I'll blend together. So I'm just adding the colors
and then we'll blend it. You can see the
lower part is light, so I'm just trying to blend
a little color to it. Again, taking the darker
color and then blending it, just giving little shape to it. So finally the top part is done. Just a little bit of
blending is left. So after that, we'll move
towards the real part. And the reflection of the
sky is on the reversal that Chez that just
shared we will be creating on the river
also with same color. Using same color that
does the cadmium yellow. We'll start with
the lower color, which is yellowish, and then
we'll go with the blue. So first time doing
the lighter color, and then we'll start with
the some cool colors. So first warm and cool colors. One thing we have to do, we have to block in the color
and blended simultaneously. So make sure that you don't
mix yellow and blue together. Otherwise, it will
turn it into green. Since there is
burgundy and metal, that's why it's not
turning into green. So if you are adding these
two colors together, there are chances that the two colors can
turn into green. So make sure of that. That doesn't happen. I'm just blocking
in the blue one. Once we are done with the blogging will do
the blending all. So let's start with the
blending for that lighter color because we don't want it
to be green in color. So I'm just taking care of that. Just slowly blending the colors.
32. River : Mountain Detailing: So now let's start with
this ground blocking. So for this we'll be
using sap green and white first and then
little bit of blue also. So sap green, less
and white mode. And little bit of
touch of blue so that it gives lines
see green color. Just blocking in
this whole area. And the land which is close to the revised little
bit bluish in color. So you can see
it's quite bluish, greenish texture and color. So just applying that
and mixing both of them slowly we'll be doing
on the other side also. First green and white color
and little bit of blue mix, and then more of white. But the tent of
blue and green mix. So you already have to blocking and is looking like stunning. Like I'm really
liking the vibrancy of the colors on hope
you guys are also. Finally, we are done
with the blocking. Now we will do the detailing, but so for the detailing, we will be using our same
filbert brush. First. Let's first do the Skype Bot, and then we'll move
towards the lower, just creating some skies and some clouds forms and shapes like we did in
our previous painting. And just adding little blue
and white mix to create more shapes in the
lower yellow portion. So now let's start
with our mountains. For the so this is
before doing that, I'm just adding little
more white and lemon yellow to the lower portions
because it's quite vibrant. So this is it for the sky part. Mixing that yellow color. But once we are done with, the sky will move
towards the mountains. It's creating some
light blue texture and adding to the lower part because it is quite
light and color. Adding more blue
to the upper part. And I'm just mixing
board the colors. It's okay if these two alkalis looking in the separate form
because we will need to create some detailing so
it will get mixed up. Using my Bristol round brush. I'll be creating details
with this Winsor blue, just with the tip
of the brush and dry brush technique
and adding little bit of black also when
creating some textures. In see these textures look very nice when it comes
to Cloud detailing, as we will be doing also in a
waterfall painting as well. Finally, just adding
little white to this color and again adding
little white texture to the above area so that
it looks like there are patches of four snows Around. I'll just giving shape to it. Did we create the lines
which will look like the Far trees that is
above the mountains. Just the lines.
33. River : Detailing: So let's start with our
foreground detailing. So we have already
done the blocking. So for the foreground will
be using Bristow brush. So same color, white and
blue mix and sap green. All the three color mix and
we will be creating details. So I guess instead
of using this brush, we can use fan brush for this. Let's try for us with this. So instead of using
with this brush, we can use fan brush for
creating some tree texture. Here I'm using Bristol
fan brush of size two. And just creating textures
with the tip of the brush. It's completely dry
brush without any water. And I'm just creating that
light color which we used. The background was much
darker than the above one. And mix of light and dark colors to create the graph structure. So the edges are little
lighter in color, so we're more wide
needs to be added. So you can see I'm using
completely dry brush over here and just using the tip of the brush and
creating the textures. The same thing we
will be doing on the other side of
the foreground. Just creating for us to detect, show with green,
blue, and white mix. So in the corners is bluish and more or
less of green color. So just adding more white to it to create like
stone texture technique. So on the, both the sides, I will be creating
these textures with light bluish green texture. Here I'm using my Bristol
round brush because it is difficult to do with
that same brush. So I've also added
a burgundy to it. You can see to the sides of the riverbed am using
this round brush, bristle brush for creating
these stone like textures. Can see to the other
side of the riverbed. The stones are quite spread, so I'm just creating that
texture with my round brush. So after doing this, we'll just create an outline of the river sites with our rigger brush using
the black color. So using my rigger brush, I'm just creating the outlines
of the sides of D4 ground. And now we will be doing
the water detailing. So for the water detailing, we'll be using sale
rigger brush first. And let's start first
with the water detailing. But before that, let's create some more textures
with these sides. The black color, just creating
little bit of textures. Like looking like a
shadow of the foreground. So just a little
bit of textures. Now let's start with the
detailing of the river using the same rigor brush
and taking white, lemon yellow and
cadmium yellow mix and just creating small lines. Sum all horizontal lines vary. So whenever you are
creating these lines, make sure that the color
is in liquid form. So the technique here is whatever is the background
color of the water, you need to create a lighter
version of the lines. And for merging body colors, you need to also overlap on
the other side of the river, which is the darker portion. So once we are done
with the warm colors will also do with the
cool colors as well. After doing with
this brush will also do the Guam brush,
these detailing, but was let's do with
today's blushed Oh, that there is two textures of brushes come up
on the water, but let's do the cool colors, overlapping the warm
colors as well. So like this, we need to create the contrast between
both the colors, two sides a little bit dark. So just I've added more of
black and bluish color to it. So we are almost done with
this brush now we will be doing with accomplish
the same detailing.
34. River : Final Detailing: Now, the final detailing. So let's again take
this rigger brush and black color and
just create trees, like palm trees for us, Let's create lines where
we need to create trees. And then we'll be creating the pine trees shapes
with black color. And then we will be
letting it too wet. So these are random
tree lines which I have created and just
creating three shapes. First, small, small dots
like triangle and shape. You can see the shape has to be in a
triangular form like in triangle shapes deep from up and as we go down,
it becomes broaden. And once we do with the
black part, blocking part, we will be doing detailing with the different green colors to just enjoy this
process of tree shaping. So whenever you are creating
these three shapes, make sure that your color is in liquid form and it's not take, then only you will be creating, able to create these fine lines. Just trying to give
you an idea of how to create the distant
and nearby trees. But these tree
reflection as well. Like for destined trees
you can see these are small in shape and
small and sizes. And for the nearby trees, you need to create
the larger leap. So once this treaty
dealing is done, I'm adding just green to it. And again, overlapping
with the same color, green and a little bit
of lemon yellow as well. To give more textures
to the tree leaves. So I'm doing the other side. These are very
small details which is required when we are doing
some realistic painting. Just doing little
more outline of this reverse sides and adding few more details
to this stone rocks area. So again, see if you are
using different types of brushes and different
sizes of brushes is give all the brushes gives you a unique textures using
different brushes and where to use and when
to use those brushes is very important when you are dealing with
these paintings. So now once this
texture part is done, we'll do the water part
also with our brush, just giving little
bit of lines and details to the sides because
sides and angles moot. So now using the
brush of size two, I will be creating the details. I'll be using same colors, but with this brush. And you can see it gives
a very nice texture when it comes to
water detailing. Here, what I'm doing is
I'm just taking the color. It's not take all, so it's not ten also. So I'm just taking the color
and just moving the brush in the horizontal direction bit by bit to give it a
nice texture to it. So this middle area is quite
bright and quite warm. So I'm just adding this warmness in the middle and to the sides. It's more of a
bluish in texture. You can see here we have
used two types of brushes. One is the rigger brush
and one is the brush to give it a perfect
detail to these Riverside. Also adding little blues
to this warm colors. So we are almost done with
this painting and we're left with one more painting as
well as one bonus painting. So I hope you guys
enjoying painting these miniatures and do
share your project to walks. I love to see that as FW de dealings and
we are done with it. So finally, this river painting, landscape painting is ready. And here it is.
35. Trees : Blocking: So let's start with
our next element. So here we'll be mainly
focusing on the trees. So you can see
this is the image. So let's first draw a
rough sketch offered, and then we'll start
with the painting. So first let's just, uh, we'll draw the ground
and little bit of background details. That's it. And rest of the thing will be just doing the
painting right away. What I'm doing is I'm just
drawing the ground part. We can see the
ground is little bit triangular in shape and the background trees
which are falling. So this is the space where the background
trees are falling. So just this and then
we'll be painting. So let's start with
our painting now. And the trees and all will be
drawing directly via paint. Let's discuss about the pains. So permanent green, black, Winsor, blue and white. And the brushes which
we'll be using are, these are the brushes,
similar brushes. You can see in most of the paintings we have
used these brushes only. So let's start
with the blocking. So first we'll start
with the sky pod. So it's like 70% wide
and 30% of fluids there. So it's quite light blue color, which I'm trying to
create over here. And see It's very
light in color. So what we're doing is we're just blocking the entire thing. And then we'll be
doing the details. So you can see how
light the colors. Now once we are done
with the blocking of this whole background. So now we'll start with
the next blocking, but that is d. Just adding the two black
and green to it and just covering this entire
area with my brush. This is permanent
green and black mix. I'm just covering this area. So you can see it's
not a smooth finish. It's just like random
brush movement. I like We don't want any
smooth textures with splaying if it does like
brush marks are there. So just outlining the lower
part first with black. And then covering the entire UDL allele will be doing the
other part as well. Now, let's start
with the lower part. So just taking green and
a little bit of plaque, very little amount and just
covering this whole area. So does blocking is almost done. Now with our row,
this Bristol brush, we'll be creating some textures with this green and black mix. On the lower part
of the foreground. You can see also
on the upper side. So on the both sides, like on the upper side as
well as on the lower ground, will be creating this texture. So Ben and we'll recreate
something like autumn. So this is a technique
which you can use for creating any
landscape painting. Just adding these textures. Sorry about the little bit lighting as the squad
cloudy two days. So just adding textures, very light brush
pressure you can see. So covering the lower part. Just using the tip of the brush and creating
this texture. Now once we are done with
this texture detailing, we'll start with our tree spot.
36. Trees : Creating Trees Structure: So now let's start with
the tree detailing. So for this, I'll be using my rigger brush of psi is zero. So this brush I'll be using for creating the tree trunks
and the tree stems. So just make that black
color more fluid so that you can easily
create the lines. Just starting with
the first treeline. So just very slowly. And I'm just using my black color and creating
the tree structure. If you're not
comfortable creating directly with your color, then you can draw
with your pencil or with any pen you
want to draw it. Otherwise, if you're okay with creating with directly
with the paintbrush, you can go ahead. So I feel comfortable directly
creating with my brush. So I'm doing that. But yeah, you can create with your pencil first the outlines, and then you can
fill in the colors. So that will be easy for you. Slowly, slowly we are moving
towards the detailing. And this is a sort
of autumn trees, like trees falling,
leaves are falling. So this is kind of
this type of painting. And it looks very
complicated the painting, but it's not so
complicated when you know how to start and
what colors to use. So just follow my
step-by-step process and you will be able to paint
this entire autumn beauty. So what I'm doing is I'm just creating some tree structures. So enjoy this process of
creating the tree structures. So whenever you are creating
such a tree details, make sure that your color is in liquid form and it should be flowing the
water like water. Why we use water to
make the column flow. So for making the smooth
lines and fine details, you need liquid color. So try to make the color
in liquid form so that your brush and the color
can flow through it. Just slowly creating
the branches and branches and
stems of the tree. So this is actually
the main tree. So in this, I'm
actually painting, we are mostly
focusing on the tree, but this is our element, that is the tree, which
completes the nature of beauty. So trees are actually the
main part of our ecosystem. So actually everything
is important. But trees that gives us oxygen, so it is the main element. So just take your time and
create the tree lines slowly. This painting, I'm DJing in the last sections because it is quite complicated painting. And first I thought
little easy painting, and then I've started grading some
intermediate one so that you get to know the
acrylic mediums better. And you can also practice
the artwork daily. This is actually the main
tree and rest are very small, small trees which we
will be creating also. So you can see whenever I'm creating the branches in steps, I'm breaking those branches. These are not straight
branches are not like one. Slow branches. These
are having breaks. You can see these are having
breaks in the branches. So this is how we create branches when it comes
to the tree making. And always use rigger brush for this whenever you
are creating tree. So now I have just added
your d little bit amount of bond, amber. So just to give you a little
highlight to the area. Starting at a little
bit of highlight. Bond amber and white mix suggest creating some effects in these tree trunk Galea, just adding more of this one, Dumbo. And again creating the branches. I'm just creating the
background branches with burnt umber little
black and white mix. So these are all
background trees. I'm trying to create. Just random lines. Some are big, some are small, some
are different sizes. So adding some highlights
with that brown color.
37. Trees : First Leaves Layer: So now I have added
few more colors. That is, the Alizarin, cadmium yellow, and lemon
yellow, also burnt sienna. I'm just mixing
these two colors. That is alizarin and
cadmium yellow and a little bit of white
and a little bit of buoyancy and also to
create those tree texture. So it's kind of orangey
and pinkish shade. It's more of an orange shade. So that's, I'm trying
to create this, adding more of white. Also just adding
more of this cadmium yellow and burnt sienna. So you can see it's
like a gas unit, sort of color. So yes. Again, I'm using here the liner brush and just
starting to create the leaves. Just small, small
dots I'm creating. So just small dots or
these which I'm creating, as you can see, just random
dots here and there. Norden, one size. Fill in this entire portion. This texture effect. Just slowly take, It's
going to take college, not like liquid colors. So I've just added
water on my brush. And these colors are quite
raw colors which I'm using without much of water
in it, as you can see. And I'm just taking
the color and I'm creating small dots here and there to create a bunch of
leaves, sort of structure. I'm also overlapping
the branches. The above areas quite
full, full of leaves. And the lower part is just
the leaves are falling down. Filling this entire area. Slowly, slowly, these this
whole area I'll be filling up. It should look like a bunch of leaves which are
together on one stem. So that's what I'm trying
to create a field. This is just one layer of color. We will be doing two or
three layers of this. Then only we will come
to the exact result. So this is the just the first
layer which we are doing. So once we are done with
the color wheel again, do the layering with
the other colors, other texture color, shade of color so that it
looks more realistic.
38. Trees : Final Leaves Texture: Now let's start with
the further layering. So first layering of the
leaves we have done so, we'll start with another layer. So here I'm using cadmium yellow and just trying to
create more leaves in-between. Just adding little
bit of white also do it so that it becomes
little light color. Just adding the
details in between. Yellow also do it. Just filling in the
area because it's quite a no spaces in
between these leaves. It's very dense you can see. So that's what I'm trying
to create a whale. Just adding the dots here and there in
different directions. So you can see I'm
just filling up these areas which are left in between with another
shade of orange, squat, orangey and shade. Similarly, I'll be doing for the rest of the area as well. The more you create the
layerings in the leaves, the more it looks like, realistic and more dense. You can see how I'm using my fan brush
to create some textures. So this is also of size
zero fan brush I'm using, and I'm just taking
same color and creating some textures at the bottom part so
that it looks like the leaves which are far
from this main tree. So just adding the color on the tip and creating
these textures. So I've just covered the below
area with these textures. The fan brush. Now adding little bit
more of yellow and alizarin and again creating
more textures at the bottom. See how dense it
is looking after doing this with the fan brush. Just creating some more
textures in between here to give more variety
of texture to the leaves. Now again, using my
rigger brush and adding alizarin and white
and burnt sienna. And a little bit of yellow. Again, creating the textures. So you can see I'm
taking very thick color. It's not like liquid
form of color. So it's completely
take color which I'm using and I'm creating
those textures. So it takes time because you have to keep
track of patients when you're creating such
detailing of the trees. So in this case, what we're doing is
we're starting with the darker color
and then slightly lighter and slightly
lighter like that will be layering these leaves. So now you can see
the leaf structures and the three sheets
are coming up. So now digging more of
lemon yellow because we want the light color
and cadmium mix, cadmium yellow mix and
again creating texture on the top of it and
little bit wider. So I'm adding to it because
I want a lepton lighter shade over how we started. We started with darker
color than light, and then more light
color to give the varieties of
leaf color do it. We don't have to fill
this entire area with this lighter color. We need to fill little bit
of area here and they're leaving the background color
also visible in some parts. So that all the three
colors of visible. Just adding you can
see the texture. Similarly, I'll be covering this entire leaf area
with this texture. You can see I'm not covering
the entire portion. I'm using only few of them. Mostly the upper area I'm
covering the lower part, I'm leaving as dark. So mostly the upper part
of the bunch of leaves. I'm covering the
D lighter color. Just using my rigger brush and creating small, small textures. It's a quite lengthy process. You can see it takes time, but the end result you will see when you will complete
this entire painting. Use it will be very beautiful
because it takes time, but the end result is amazing. And currently, you can
see how we are moving and the amount of details and textures which
we are putting in. And requires a lot of
patients actually. So I mostly do like these
realistic painting. So there's also my
website is there. If you want to learn
more realistic painting, that is MS creative arts, you can check that also. That I have uploaded almost
three to four classes, which are quite in detail. If you want to learn some
realistic paintings. So we're almost done
with this three part. Just small little bit here and there
layering is required. So now again, we will create textures with
the span bridge. Fan brush creates actually a very nice textures
just here and there. Like we did for the
other color we are doing with this color. And just green also little bit. This brush create
amazing textures. When it comes to
realistic painting.
39. Trees : Final Detailing: So now let's start
with our last part of the painting that
is the ground part. But before doing
that will create some branches because these
branches of weighted. And so we'll create
some more branches and the trees which are
hidden with this texture. Just adding a little
bit more branches. You can see the trees which we create at the background parts. So this is a hidden
with these textures. So I'm just overdoing
those lines. You can see. So just using bond amber and black mix for creating the
lines and details. So again, whenever you
are creating such lines, make sure your color is
a bit of fluid form. Because then only you will be
able to create these lines just outlining some of
the branches urine there. So it looks more
bulky and heavy tree because the main tree is the tree which is having
these many branches. So just taking little bit of white because my wife
has finished off, suggest taking a
little bit of white. There are so many colors
why it is not visible. So just adding little white to this lemon yellow
color and creating some more leaf effect
on the tree part. Here I'm just using lemon, yellow and white and creating the textures
randomly urine there. So you can see there are
four layers which we did almost for
creating those leaves. Now adding, creating the same
color, that darker color. You can see a little
bit wide also. Again, creating
some more textures, darker texture in between. Because these spaces
are quite blank. I'm just filling it up and creating little
more here and there. So now let's do the lower part. For this lower part, we'll be using fan brush. So just same color and I'm just creating some textures below. But my fan brush to look like that leaves have
been fallen off. And just adding
little bit of green this color and creating more
textures at the bottom. So now we will again take the same brush and taking green into that mix to create
some nice greenish, orangeish shape, texture
and white added to it. And creating the same
texture all around. Just digging more of green and white mix to
create more light textures. So here also layering
technique works. So the more you learn, the more realistic it looks. Now just adding a bit
of brown and white, solid brown and black. And just creating a
shadow sort of texture. Triangle in shape. The shadow of the trees. And then taking my liner brush and mixing the same color
which we use for the leaves. The same color. And we
will be creating small, small dots and leave
texture on the lower but just small, small textures on the lower part of the ground. And as we go down, it decreases. Similar shades we have
to create like the one which we created
on the above leaf bud, and also in that
shadow area also. You can also create
these textures with your comb brush
because with that also, it will be very nice. Filling this entire ground area. The similar colors of the
same as that of the leaves. Using my bristle brush and
creating some more textures. On top of it. You can see how
small it doesn't. It's very difficult to paint
wet on a small painting. But with dad only will
learn and practice. Just adding the textures. We are almost done
with this painting and just very few
details are left leg wide also have added
few white details also. And finally, we are almost
done with this painting. And this is the
second last painting which we'll be doing. And the last painting is also left and also one bonus class. So stay tuned for that as well.
40. Snow : Blocking: Let's start with
our bonus class. And this is the round MDF board, which I've already primed. And I've applied burnt
sienna acrylic ink on it. So let's first start
with the drawing, and then we'll start
with the painting. Here. I'm just using my
pencil to draw the outline. Then the last thing which
was left as normal, so I taught to teach snowball. So let's first draw
the rough sketching. So just using the
line which is below the center and just
trying to draw the foreground area first. And then small mountains
which is above. So after drawing this, we'll start with the blocking. Let's discuss about the colors. So these are the colors
which we will be using. So surrealism, blue, black, and while it, and Burgundy,
yellow and white. So these are the colors
which we'll be using year. And these are the brushes, these all same
brushes which we have used earlier in
all our paintings. So similar brushes
which we'll be using. So let's start first
with the blocking. So for the blocking, first, the color which we'll be
using here is the violet. And then a little bit white mix. If you don't have violet color, you can use dioxazine
purple also for this and add a little
bit blue to it. So some little bit cerulean
blue I've added to it. And I'm just trying to block
in forced the background. So there are two or three
colors and these guys, so we'll be painting
that and blocking it. What is the first color
than the second color is little bit yellowish, which is mostly close
to the mountains. Yellowish, white mix. And then in-between
is D, burgundy color. Just adding that color also. And just mixing
board the colors. So we will be doing
one more layer of it. The background. Just applying
a little bit more of yellow and just washing off my brush and removing excess of water and ingest
trying to blend this color. Blending will only take place
if both the colors are wet. Otherwise you'll,
you'll not be able to blend the two colors. So after doing this background, we'll now do the mountains
that is the middle ground. So again, taking violet, blue, cerulean, blue, white, mix
it a bit more of blue. And just covering
this mountain part. Similarly, we'll
do the rest of it, rest a little bit more. Dark in color. Upper one is a little light, but the side one is
more dogs all have different bluish contrast color. The side one, just
digging more of blue and violet and just
knocking this toward mountain. So now we will do
the foreground. For the foreground again, while it, and more of white. It's very little amount of
violet and more of white. It's just blocking
this whole foreground. Once the blocking is done, we will be doing
the detailing part.
41. Snow : Mountain Detailing: So now let's start
with the detailing. So first with the background. So I'm just using my dry brush and taking
white and little bit of yellow and creating
very light pressure to the brush and
creating the clouds. You don't have to put too
much pressure on your brush. And just with the
tip of the brush, I'm just creating some cloud
formations on the top. So now let's do
the mountain part. So for the mountains, Let's first block in, in these second
time, the colors. Just blocking in the mountains. Taking more of a
violet and blue color, white light colors, I'm just
adding another code to it. Similarly, the other
mountains as well. So once we are done
with the quoting, the second blocking, we will do the detailing
of the mountain. So for the detailing, your, we will be using our brush for creating small lines which
will look like trees. Suggest. Just using my brush from rosemary that
is of size two. Dipping it in water
and just taking the black and blue
combination color more of black and less of blue, and just creating lines on
the edge of the mountain. These are all vertical
lines which I am creating and very close by. Similar mannose will create more lines and parallel
to the top lines, which will resemble distinct
trees on the mountains. You can also do with your liner brush if you
don't have this compression. But you need to do it
one-by-one with calm brush. You can do it in bundles. So once we are done with
this, parallel lines, will then use our liner brush to create more lines, more bigger and smaller lines, just giving it a
more realistic look. Similarly for the other
mountains as well. I've shown you, bought with the brush and the liner brush how you can create these lines. And now using our
Bristow flat brush, just taking black
and wireless mics. Completely dry
brush and creating textures as we did in our
earlier mountain painting. Just tip of the brush
and creating textures. Similarly on the other mountain, you need to take very
little amount of color. And just with the
tip of the brush, you need to create small
dots and textures. Just adding little more
textures to the base. Now once this is
done, so now again, we will take our liner brush and black color and a
little bit blue texture and just add a little
bit more details to the third mountain. Just trying to create little more trees which
are quite visible. And then we will be doing the
foreground and the trees. Also with my liner brush, I'm adding some details to this behind Mountain which
is loaded with snow. Many small, small
Johnson textures. I'm creating a
darker color also.
42. Snow : Final Detailing: So now let's start
with a foreground. So for foreground, I'm
using the same brush, that is default wet brush. And just first real
blocking, the second code. And then we'll start
doing the details. So once the blocking is done, we'll create textures
using the same brush, taking violet color and creating small textures like small
diagonal lines are there. So I'm creating but
the Guam brush, just like a bad way the
lines I'm trying to create. Now once this is done, we will now use our liner
brush for creating the trees. So first we'll create
the lines where the trees needs to be there. So they are different
shapes and sizes of three. Some are near to
D, That pathways, some money into the mountains. So someone distinct. So the Muslim or
very small trees, so different sizes of trees, we'll be creating ovale, just creating lines first. Now let's small trees also, which are very close
to the mountain. Now creating the leaves. Just moving the brush in the
diagonal directions and just creating like feathery
shapes in triangle and shapes should be in triangle in as we go down like
smaller and sizes. And as we go down, the leaves should
be in bigger size. So similarly, we need to do
the entire these three lines. You can also create these lines with a brush or fan brush, but this painting is very small. That's why I'm using
here the liner brush. But if you have a big painting, if you want to draw
big paintings, then you can use your
brush and fan brush also for creating such
lines and details. We are, I'm just
using my black color and creating these shapes. And once we are done with
creating the entire tree line, will then create the
snow on the trees. Just enjoy the
process of creating. You can see there are
different sizes of trees. Some are small, some damping. So like ways we need to
create the entire tree line. Once we're done with
this tree line, we'll be creating snow. Does giving a proper shape
triangle shape to it. So now we will create snow by
using white and little bit of violet color of white and
just a touch off violet. And same way using
my liner brush, I'm just creating these lines, slanting lines. You can see. You can see I'm just
creating some lines, dots and textures on
the trees so that it looks like the snow is
falling on the tree. So this is one of the
easiest technique of creating snow on the pine trees. Have also one more
lesson in this, where I've created
just the pine tree in the holiday cards, they call it the holiday
card class section. So you can see that also. So just we need to do for the entire tree
line, this texture. And once we are done with
this store snore detailing, we will do again the
foregrounds little bit. Does no part. Street Partners
Almost done Just two more left and we are done
with the three lines. So we are done with
the tree part. So now let's create
some more details in this foreground section
using white color. Just using dry brush
and taking that white and creating
some textures. Just filling a
little bit of area with this light violet color. Again, using my filbert
brush and white and a little bit of white
and yellow mix. And just again, just outlining
that area, that sky area, which we have created,
that Cloud area, just making it a little
bit more light and color. And we almost done
with this painting. So I hope you guys
enjoyed these paintings. And we learned almost
ten paintings. The different,
different types of paintings with
different elements, clouds, sun, stars, everything. And if you are
trying this project, then do share your project work. And also you can tag
me on my Instagram. That is more lenient gallery. I would love to see that. And thank you for
all your support and love and happy learning.
 Mohini Sinha, Acrylic and Gouache Artist- Nature Lover