Transcripts
1. Class Introduction: Hello, everyone. I'm Chen
Chibi an artist from Vietnam, and I'm very excited
to have you here. In this class, you
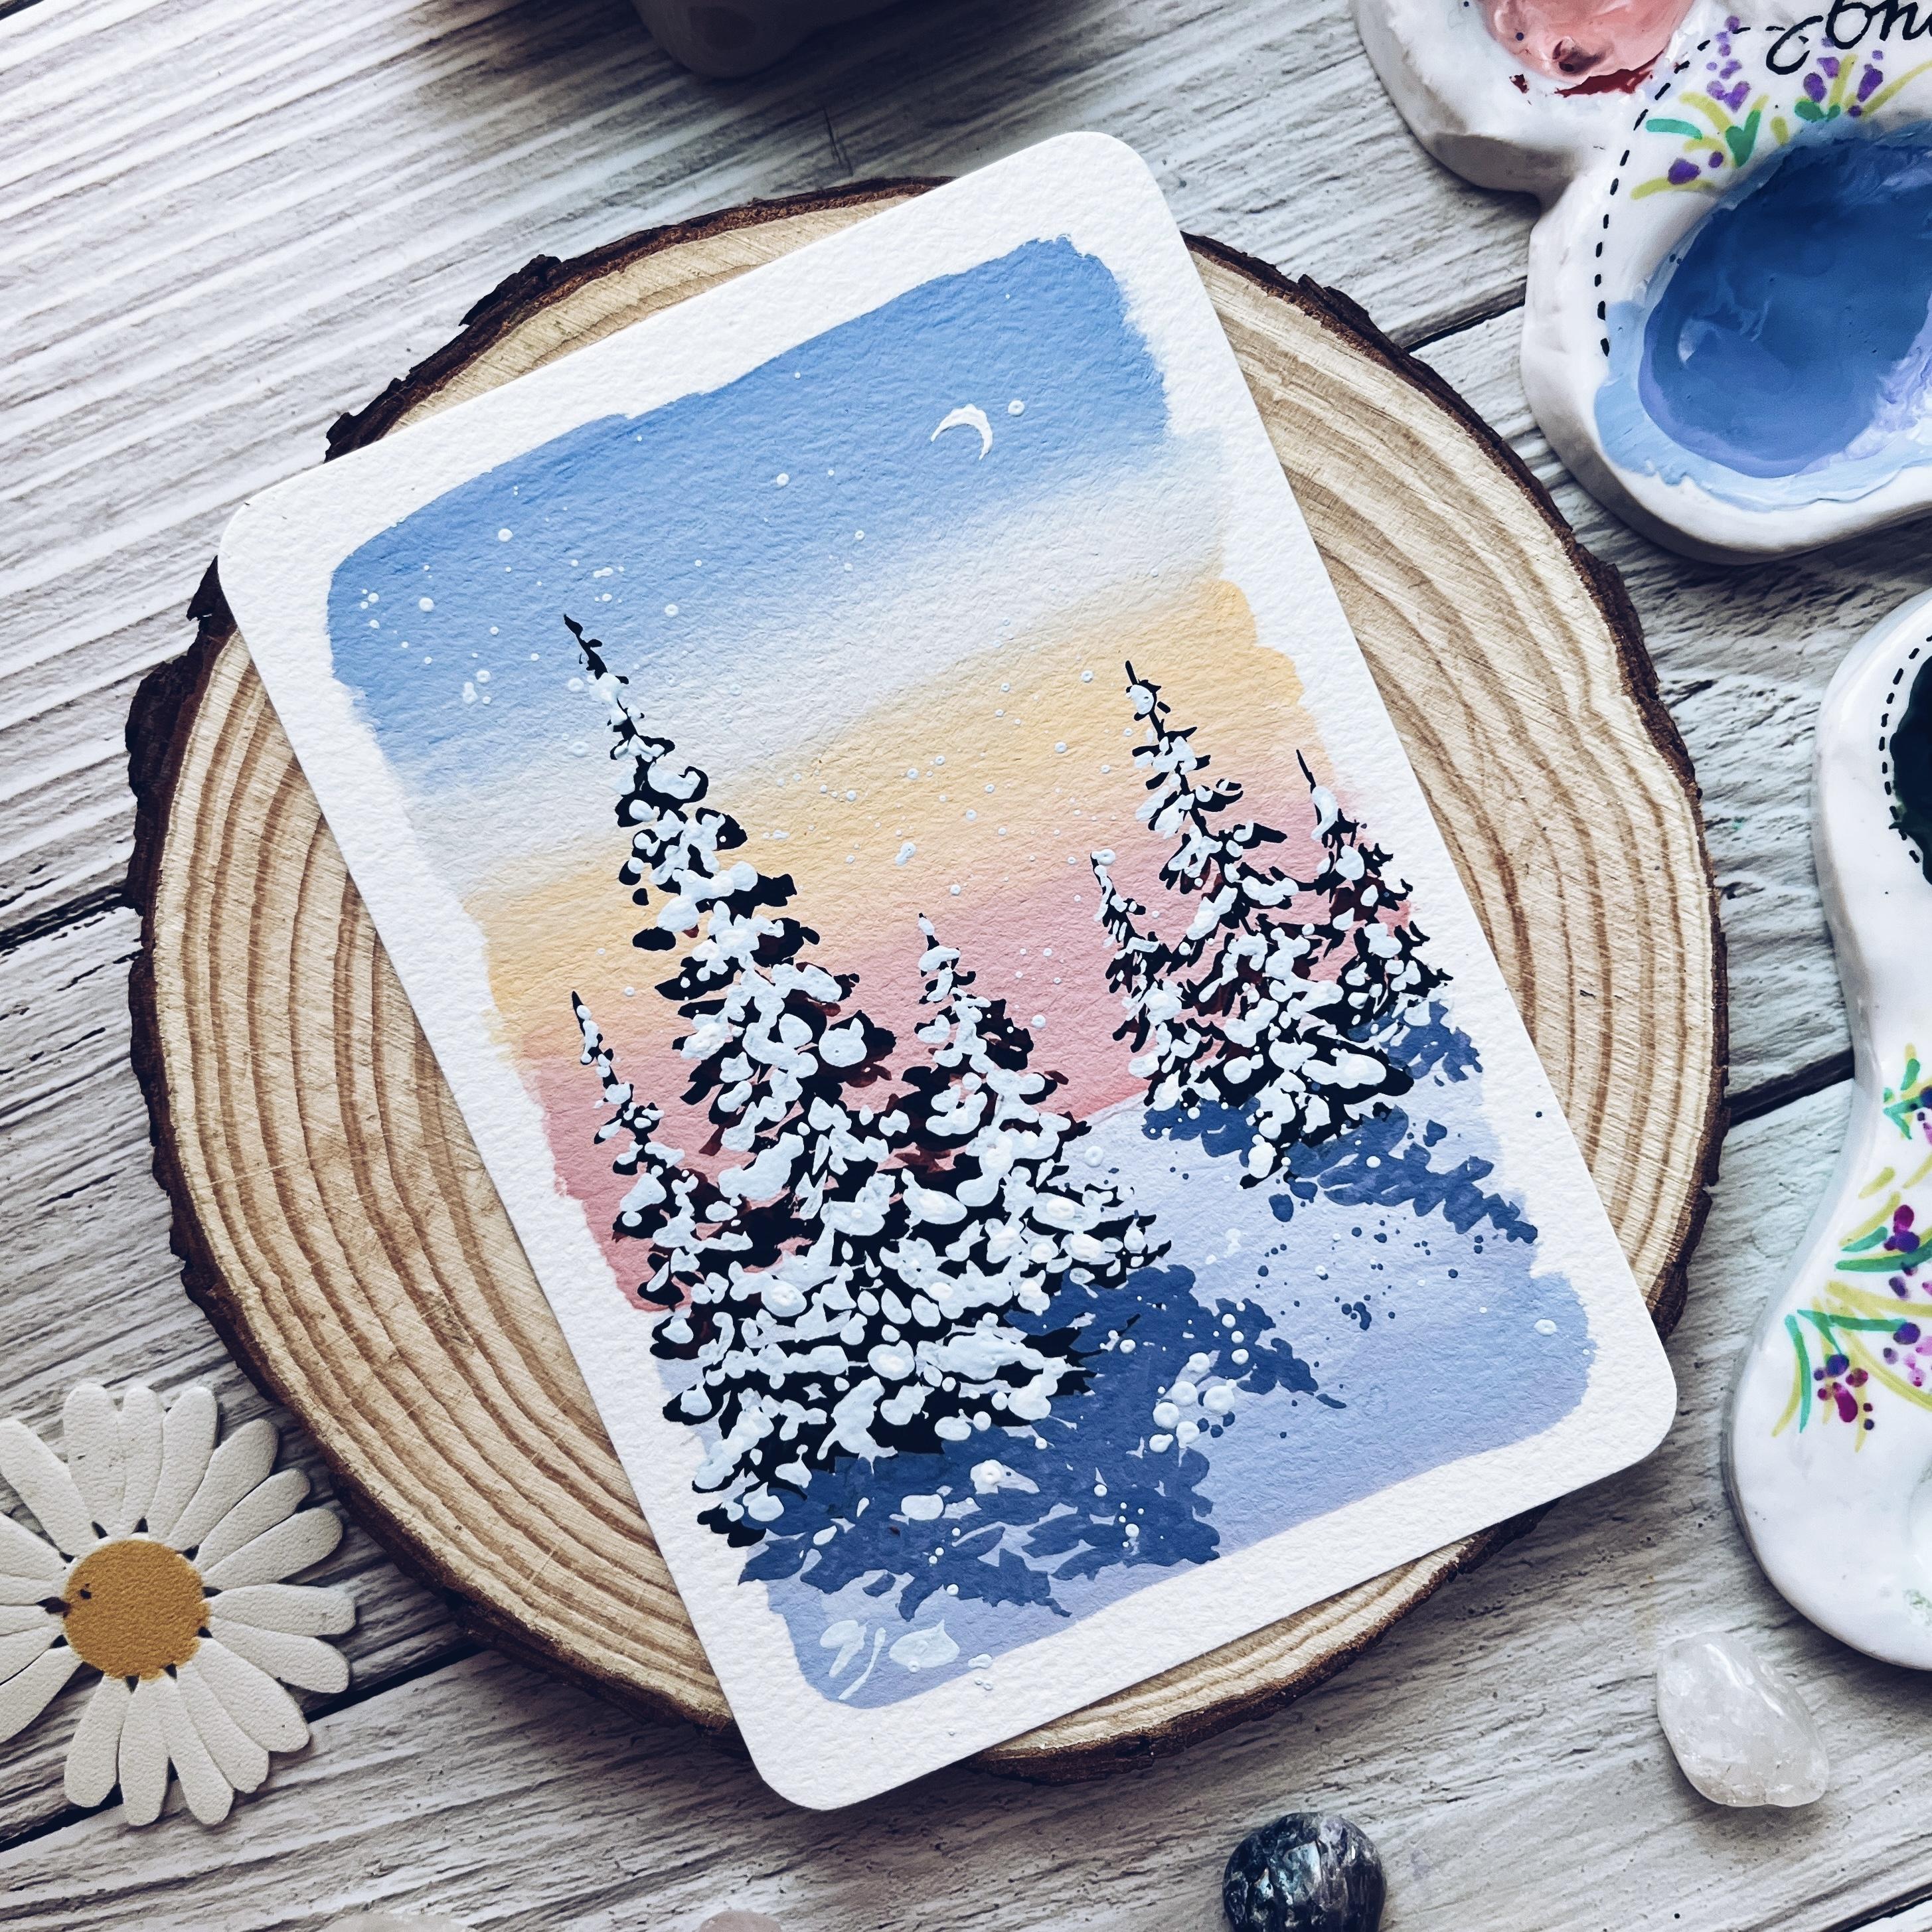
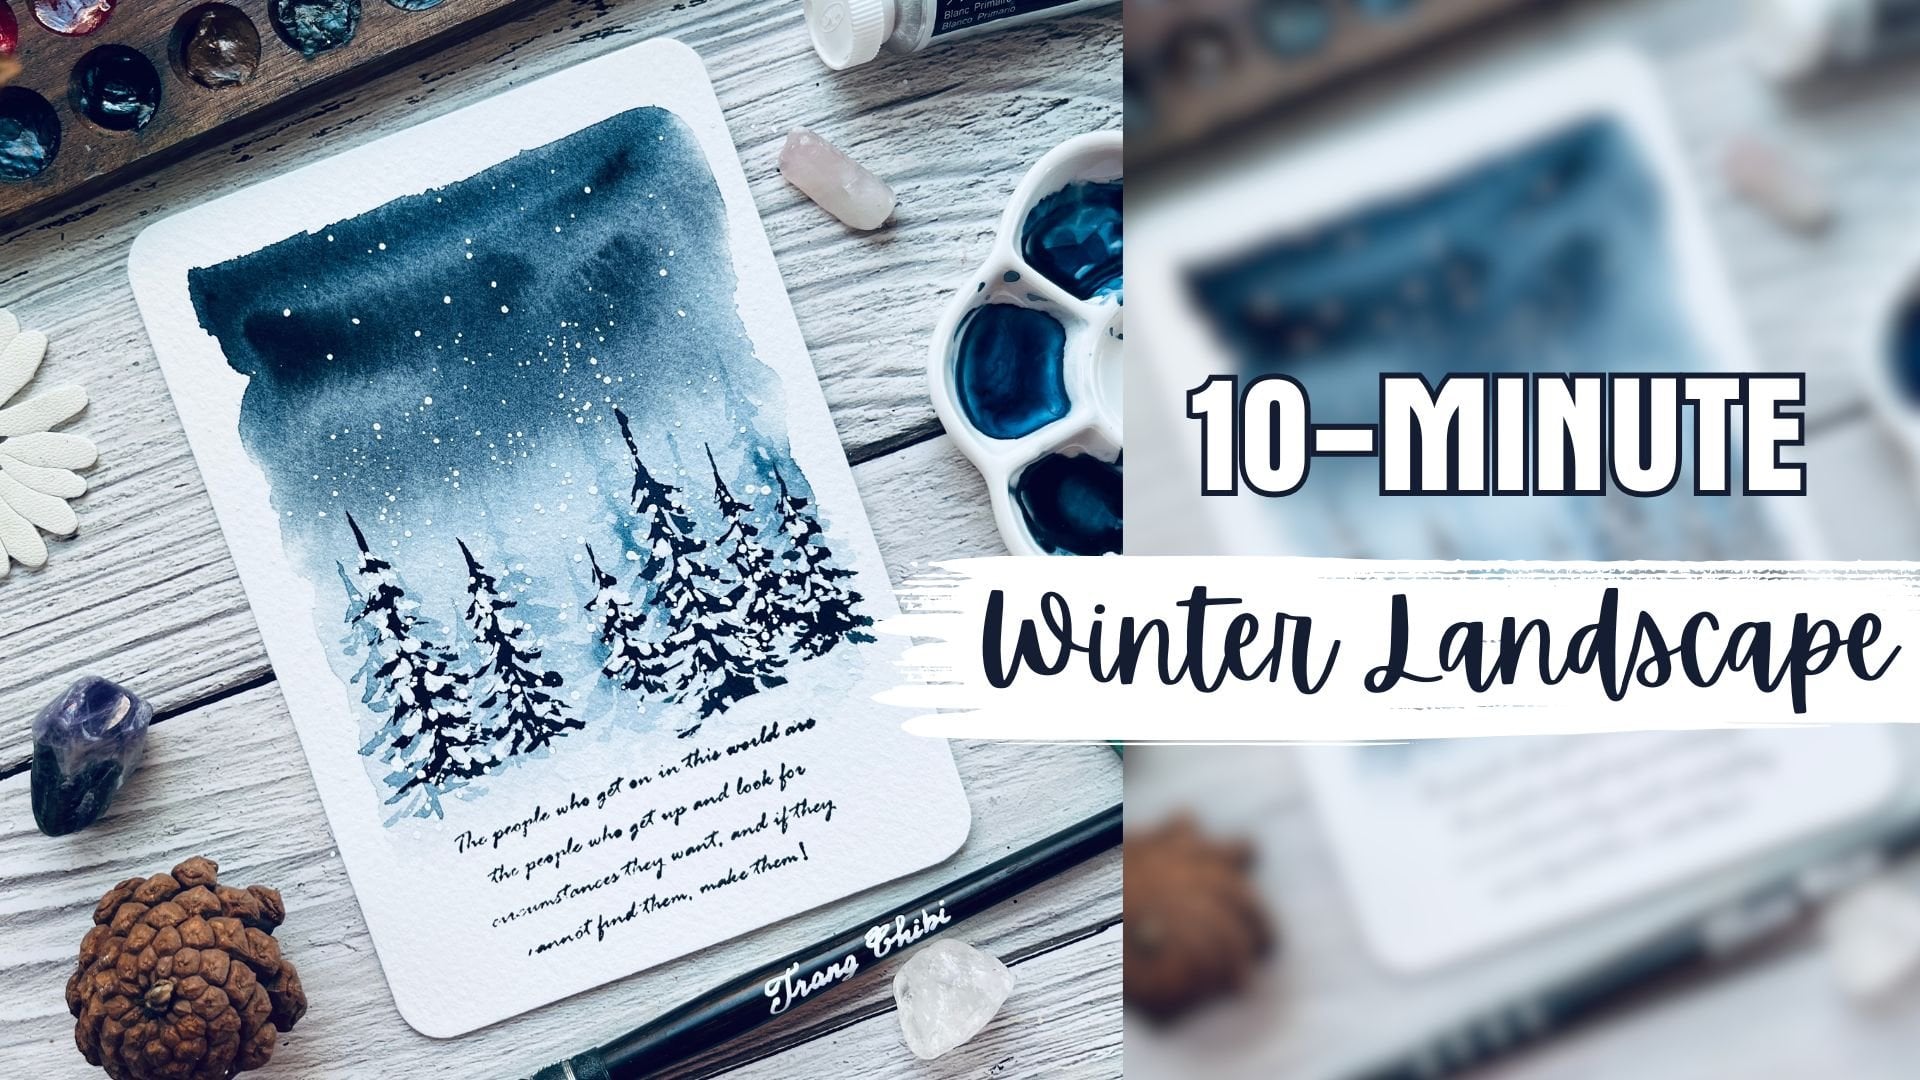
invent this lovely, glowy winter
landscape using wash. Together, we explore
essential techniques like blending opposite colors
to create a glowing sky, painting simple yet natural
looking piches and adding a magical snowing effect to
bring your scenes to life. This class is beginner friendly, but if you are
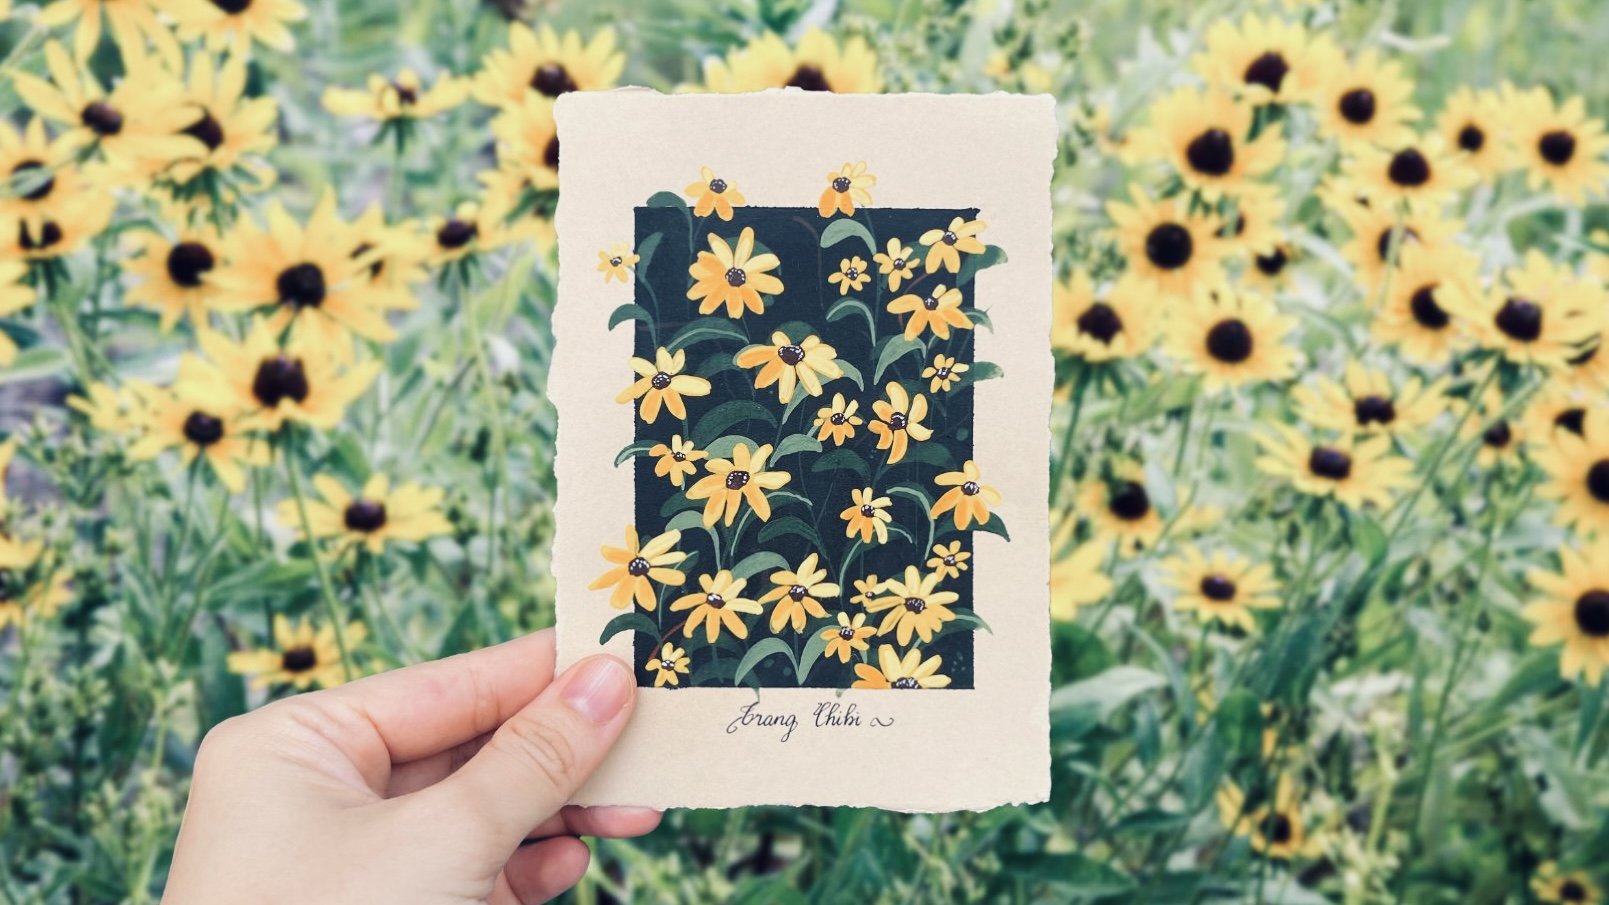
completely new to Gach, I recommend starting with my black eye Susan in
Vintage style class. It is a great introduction
to the basics and will help you to feel more
confident before diving into this project. A little bit about me, I am a self taught artist who
began with watercolor, but recently, I have
fallen in love with Guash because of it
versatility and convenience. If you enjoy my teaching
style and artwork, feel free to check out my
Skillshare profile for my classes or visit my Instagram for daily
Art inspiration. Let's on for now. Let's dive in by going
through all the tons and materials we may need
for today's project. Let's get started.
2. Tools and Materials: In this very first lesson, let's go over on the tons and materials we may need
to use in this class. Don't worry if you don't have the exactly similar
art supplies as I do, feel free to use
any alternatives which is more available to you. In order to paint wash,
we need wash pan, we need some paper, we need some brushes and
some other items. Let's go into
everything in details. For WahpanFTday class,
I will you a set of 36 colors from Him. It is just a student grade was. I purchased this set in
Vietnam for just around $10. I think the price on
Amazon is somewhere $20. I do find that the
quality of Hemi wash pint is not too
bad. It's acceptable. I do try to paint how by in
it is an artist great wash. I do think that you can
participate in this class with any brands of wash which
is available on the market. For paper for today class, I just use a piece
of watercolor paper. It is very cheap, coprese watercolor
paper, not 100% cotton. It is ten and 15 centimeters
or four and 6 ". It is a six size. You can paint on a
larger sheet paper. But for glass demonstration, I decided to paint
on a small piece of paper so that it is
quicker to paint. We need some brushes
and for today glass, I mean you two flat brush
to paint the background. And to rub brushes to paint
the pies and the snow. We may need a pencil
for sketching. We also need water
container, mixing palette, and a small piece of cloth
to clean our brushes. That's all the materials and tons we may need for this glass. I dedicate the next lesson
to talk about all the colors we may need four out
today glass object.
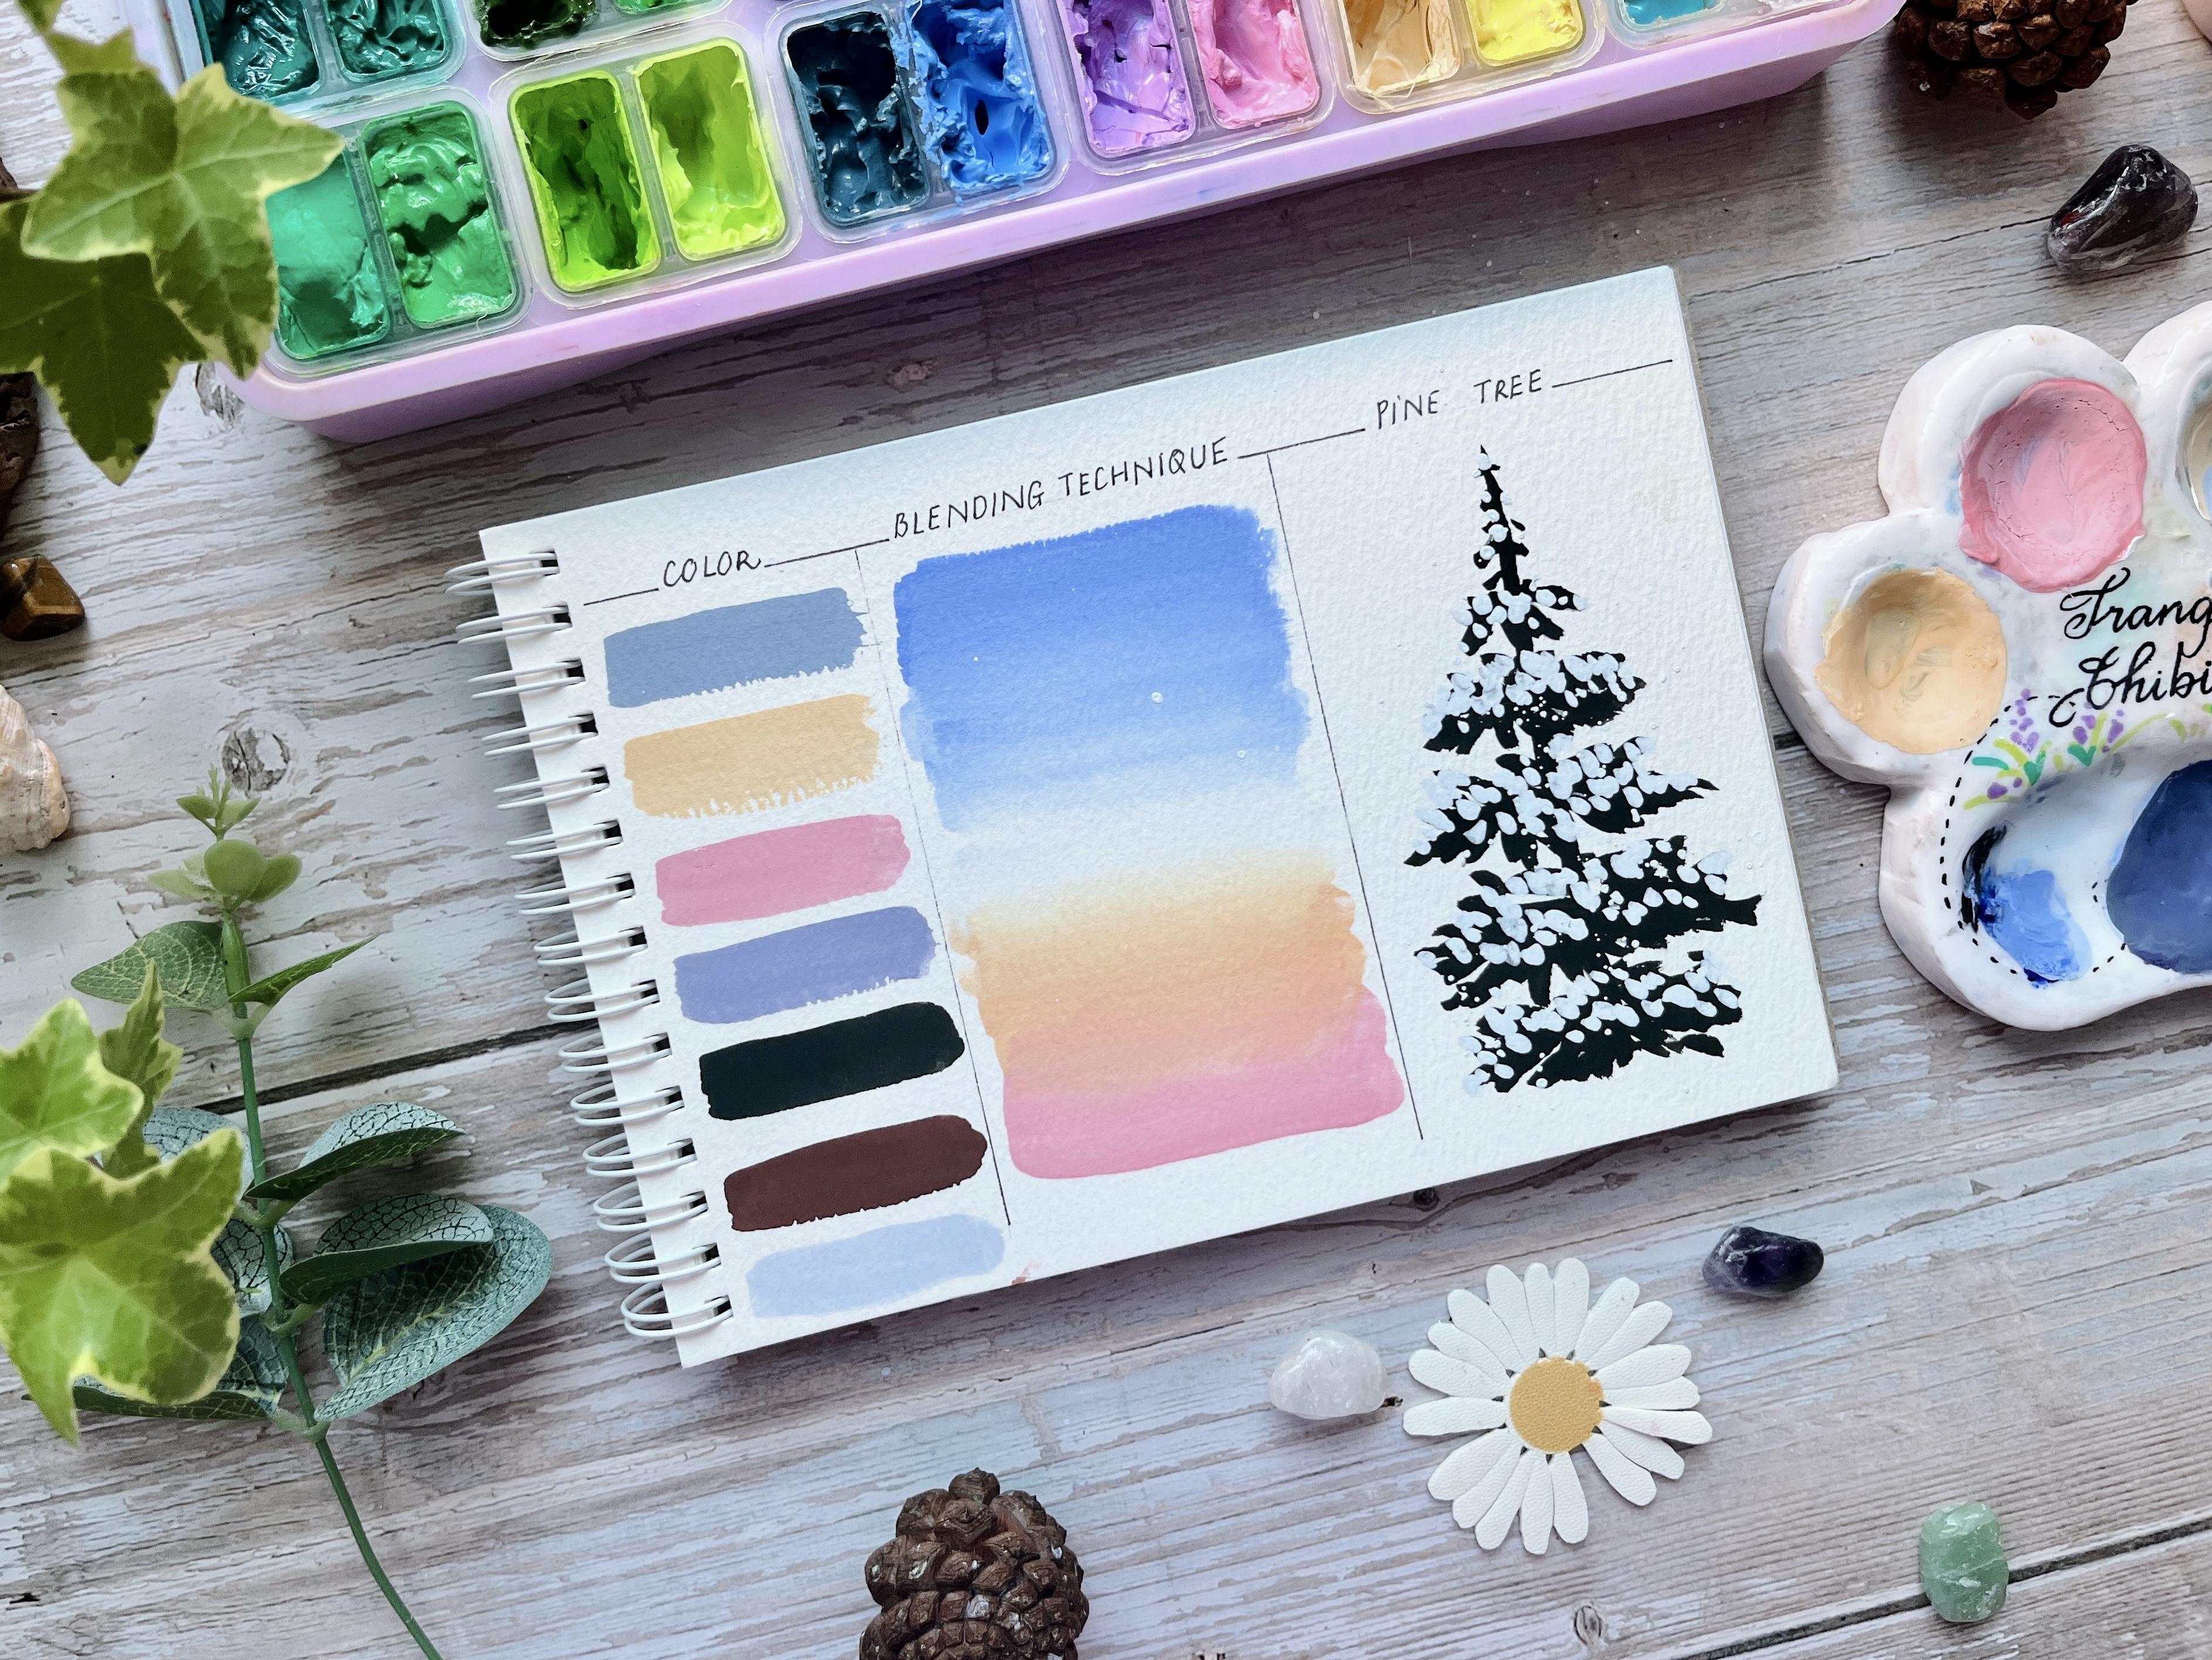
3. The Color Palette: In this lesson, let's talk about the colors we may need to use for our today class project. First, we need some color
to be in the sky in order to achieve this
blue gray color. I am mixing a little bit
hamarin a little bit black. I'm mixing it with
a lot of white. Ti is the It is the first color of the sky. For this yellow color, I am mixing in bob it is
medium medium yellow. I was mixing with
a lot of white. For this pinky sky, I will mix. Here I'm using the color
which is orient to red and I will mix it with a lot of white to create this
kind of pinky shade. For the background
and the shadow, it is just the
repeat of the sky. I may add a little bit of violet to this mixture
to paint the shadow. The color of the
shadow and the ground. For the pa the
base of the pachi, I am mixing black
with olive green. If you don't have olive
green in your inset, feel free to use any green and mix it with a
lot of black anyway, so our eyes cannot realize the different
shades of green here. It is the color of the
pi he I will also add a little bit of brown color here to depict the reflection, how the light is hitting
the cheese and I'm using a mitre I'm using a ochre and burn umber
from this pin set. For the snow, it is easy
because I just mix. I just make enhamarin
with a lot of why? The bras and the water
is too dirty now. That is the color
of the snow and that's on the colors we need
for our today's glass Bj. I do believe all of them are very common colours
and you can find it in any pinset which has more
than ten or 12 colors. In the lesson, let's practice, the blending picnic we may
need to use to paint the sky.
4. Blending Techniques: In this lesson, let's practice
some blending technique. Here, we need to create the transition from the
pink colour and to yellow. It is quite simple. First mixing pastel yellow, and some pink you just need
to use a lot of white here. Because the red color
and the yellow color, lot of them are warm color, so it easy first you will
paint the pink color first. Because the red and the
yellow in COVID orange, it's just very simple. We just add the yellow color on top of that on
top of this color. It will mix together
very smoothly. Even if our brush dot
is not a big problem. Very simple. The cheeky part is to blending with
the blue color. Let me mix some blue colour
using anchamarin and white. If we mix if we mix this
blue color directly into this yellow color we add
the green color is not the color of the sky and because this is not
poor not poor yellow, but it's orange orange yellow, orange mixed with blue, it with some brown color. It is also not the
color of the sky. The way we do this is to to make the color fit into white before
mixing with each other. Here, we add a lot of white
to create the transition. It is very difficult to
create very smooth gradient. And you see because my
breast is not very clean, so it creates some wind here and it's what
we should avoid. However, keep in mind,
we don't need to be perfect for this
kind of painting. Oh It is not a perfect gradient at all, but I do hope that you
understand the theory behind this transition
from red to yellow. You just need to mix
two colors together, but the transition
from yellow to blue, we shouldn't add
the color directly, but instead use the
white color to color, the two opposite colors and that's on for the
blending technique. In the next lesson, let's
practice to paint the pi chi
5. How to Paint the Pine Tree: In this lesson, let's
practice to paint the pai hi and the Pichi has the
chi hung in the middle, some branches and
then some leaves. But for this quick painting,
normally it's low. I will ignore the chi hung
and I paint this very simple. Let me sketch using
the pencil first. This is the chi hung. And then I use
this kind of shop, you see, to paint the hi
hang and paint the leaf. Normally after that, I
will come back and ask some chops to make the cheese
become more realistic. Let's add the colour
on top of this. Here I will mix olive
green, red, black. I do find that the color is
a little bit too dry now, so that is my way of keeping the color wet during
the long finding section. So in order to paint the patchy, I just repeat the type of
chokes I make using the pencil. Honestly, in the final painting, we don't need the pencil at all, but I just want to show
you how the stop look. So the same stoke. And don't try to
perfect the leaves and the chi chung from the very
first go from my experience. First, we just need to grip something which is
like a angle first. Here, it is not natural at all. But then we come back
for the second round, we add more we add more sup IBC there's some gap Just add some messy shops around the che ha the leaves here and
make it look more natural. Even for now, it
looks unnatural. Don't worry. Now we will
wait for it to dry before adding the snow on top of
it and it will make sense. Painting the pie cheese
under the snow is very forgiving process because
as you can see, actually, I am not really
satisfied with this pai hi every time when
I tell myself, I need to paint the pai hi very natural and it turned out
to be not natural at all. But when we paint
a lot of cheese together and adding the
snow, everything we mix in. Let's add in some snow I mix this hamarin make this blue with a lot of white in
order to paint the snow. So we just add the snow
on the top part of the pachi it's very difficult
to explain here but you can see I just use the tip of my
breast to tap the snow here. As you can see, after
adding the snow, the pachi will look
so much more natural. As you can see, now the path looks a lot of sense
and you can also use the splash technique to
make the distribution of the snow even more Natural. So this is my method of painting the PashiT may not the most
detailed way to paint this. But for outday glass Bj, we paint a lot of Pichi. We don't want pii as the
center of the attention. This way, I do
believe that we can paint the Pichi naturally, but also very fast and simple. That's on the technique lesson. It taco, our final glass Objec
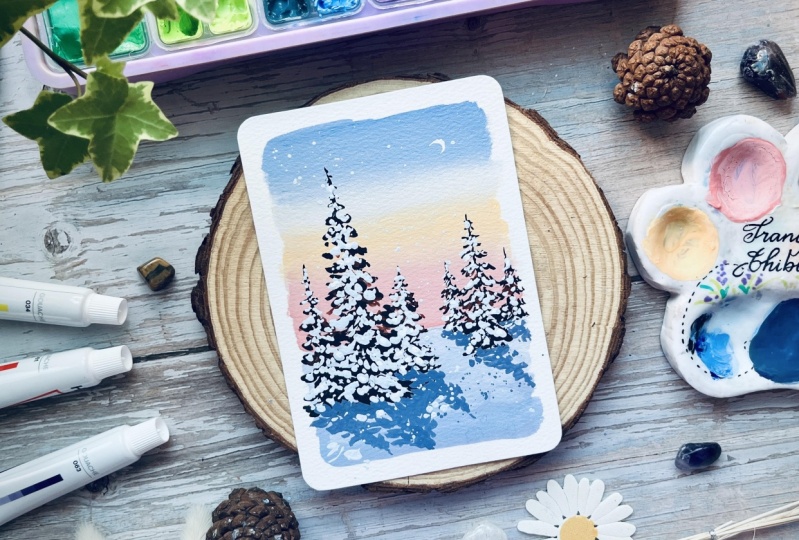
6. Final Project: Painting the Background: Now it's time to
bring everything together and tackle
the final glass Bje. You see, I have
used masking tape to tape down the paper and I don't want to create a perfect rectangular
bottle for the painting. That's why I only tap down
some edges of the paper. It is an optional step, but I often start
with using pencil to sketch the composition. So that will be a big s here. A smaller here. You don't need to copy this. I try to vary the
composition a little bit. Here is small here. Another big here. Later after this class, if you don't like
my composition, you can create any
composition that you like, but I recommend you to start with the
pencil sketch first. We can make adjustment
later because everything we draw here in
the cover by wash anyway. First, we need to make
some color for the sky. As I mentioned in the
technique lesson, and hamain just a
little bit black. We miss it a lot of white, but I will pick up the
yellow color first. And some red colour. Now we need a lot of white I think we need
even more than that. I mean, start with the smaller
small flat brush first. I mean, add more blue for
just a little bit of black. We use more blue for
the vibrant sky. Because it is near the
edge of the painting, so let's take it slowly. We may need to go over
it several time to adjust the tone and the
value of the color. What is very forgiving, don't worry, your photo
color is not what you like. Okay. I want to add more blue
onto the top of this. Then you add more white
at the bottom part. I play everything
to get the letter. Now focus on adding more Y. Make sure to clean our
brush because normally, if it's for my daily practice, I will bring the brushes to the water tab to make
sure it's very clean. Because I do find
that it is very easy to clean the
brush for the color. But for h is not that easy. I do find that the
pink color here, the red here is too vibrant, so that's why I add more
white paint into it. Now it's time to add more
add more add yellow. It is okay to mix red colour
into this yellow one. But now we need to
clean our brush. Make sure it's very clean. To add more Y onto this. So it takes time and practice
for the blending technique. And even though I
practice a lot, it is difficult to achieve the perfect
gradient for hand pain. So I don't try to
become perfect here. So now I use this big brush to smooth everything
well, everything. We don't have to be perfect here because it
is very difficult to, for hand pain, it's very difficult to make
anything perfect. And it is far from the perfect, but I do think that it is
good enough for the sky. I will stop now and we will paint the
background first before painting before wait for it to dry before painting
the cheese on top of that. So at the top of the ground, it is just light light blue to what we want to paint is the snow
on top of the ground. I will add a little bit of violet and a
little bit of black. I think that's enough
for the background. Now, we wait for
it to dry before painting the pai
chi on top of this.
7. Final Project - Painting the Pine Trees: The background layer
is already dry, so now it's time to paint
the patchy on top of it. I'm using another missing
palette because this one is crowded already and I am using olive green and I
will mix it with black. I think the ratio is one part, one part, olive green. Not really important. Is a bigger brush
to make the color. We will start with
the last first. I have a shaking hand, so it is very difficult to
paint the straight light. So from my experience, don't don't try to make the pai chi look
larger from the first goal, first we just need to focus on create a angle se first and then we go back another round to ask more to add more shop to make
the pai chi more natural. This is the fourth row
and then we go back. We may consider using
a smaller bras that further look more detail. It is not very important
anyway because we still have the bow layer
and the snow layer. So even though now it looks a little bit weird
but not very natural. Up to several, it
certainly makes sense. And I do think that when we stop worrying about how to make
the Pache look more natural, it certainly become
more natural. After painting this tile
painting several time, I do feel that I become more
confident with the Pachi because even though it looks
a little bit weird now, it when we finish on the layers and when we
finish the whole painting, it will make a lot
more sense than now. It is easier to dify it is easier to paint the
Pachilor by the way, I have several classes taking the winter landscape and
the pachi using watercolor. The better, the good
thing about watercolor is sometime we can let the
watercolor to work for you. The better thing is we
can control everything. I love both medium. I love both medium,
but I do find that watercolor is a
little bit more magical. We need to wait for
this layer to dry before painting the brow
layer on top of it. But before that before that, we can paint the shadow, the shiner even in local version of this, I will add more chaman
here and black. I want it to be violet, so I'll add more violet. So I will signature to paint
the shadow of the sheet. So we just need to
make it very loose. So I will splash this color
but not a big problem. I think I need to
pick up the here. Okay. So just want to
create something to so that we have something
going on on the ground, maybe some grass or some stone. Now we need to wait
for it to dry before painting the brown
layer on top of this. Now, let's add some brown
colors on top of the paches. This is just an optional step, but I just want to I just
want to spread that there are some light heating the paches so the poor oka color from this pain is a
little bit too light. That's why I adding some
bone umber onto it. I mix two colour together. You see the line division
is this direction. That's why I will add
more brown in this area. So with this step, we can separate the bits
from the underlayer. So now, again, we need to
wait for this layer to be completely dry before painting
the snow on top of this.
8. Final Project - Painting the Snow: Now it's time to adding
snow on top of the pi shi. So I just mixing white with
a little bit of anhamae. Even for the snow
we need two layer. The first layer, I
add the second layer, the poor y, but the first layer, I will add a little
chamoin on to it. So I will start with splashing to create the loose
filling of the pending. Then a heavy snow. Um You see, after we add the snow
on top of the pie, everything start to
make more sense. Now we will wait for this
layer to dry before adding another layer of
snow on top of it so that our snow will
have more dimension. Now this layer is already dry, so it's time to add another
layer on top of it, another layer of snow this time, I mean, it was poor white. So this way, you can paint the snow with
just one layer of bit, but by using two layer, we will make even the snow
here has more dimension. I mean, a smaller brass because I think the
line divison this way. R. So I think I will also want
to splash a little bit. Splashing is then I love
to do and it is my savor. How do you say savior because it will make everything
harmonious and natural. It is a acid, but I don't think
it is a big problem because the zoom it is
just a big part of snow. I don't think we need to
leave colour to freak it. We will finish this painting by adding adding a small moon here. I don't think you see the
light direction is here, but we understand the
light is from the sun. It is okay to put
the moon over here. I think it is not. I still follow the son the light reflection
is not from the moon. That is the end of this lesson. We can take off the tape now. Let's see each other in the final class where we talk about how to
upload your object and some more hands on
tips and tricks to help you to further
your gash bending skills.
9. Final Thoughts: That's a rough for this class. I hope you have fun and
learn something new. Don't forget to share
your final painting in the glass gallery to get feedback from me and
your fellow students. You can also post your work
on Instagram and tag me. I will make sure to lie and
comment on all of them. If you like to keep
exploring wash, check out my profile
for more glasses. Thanks for joining, and I hope to see you
in another class.
 Trang Chibi ❤️, Watercolor and Gouache Artist