Transcripts
1. Welcome and introduction: Welcome to my new class
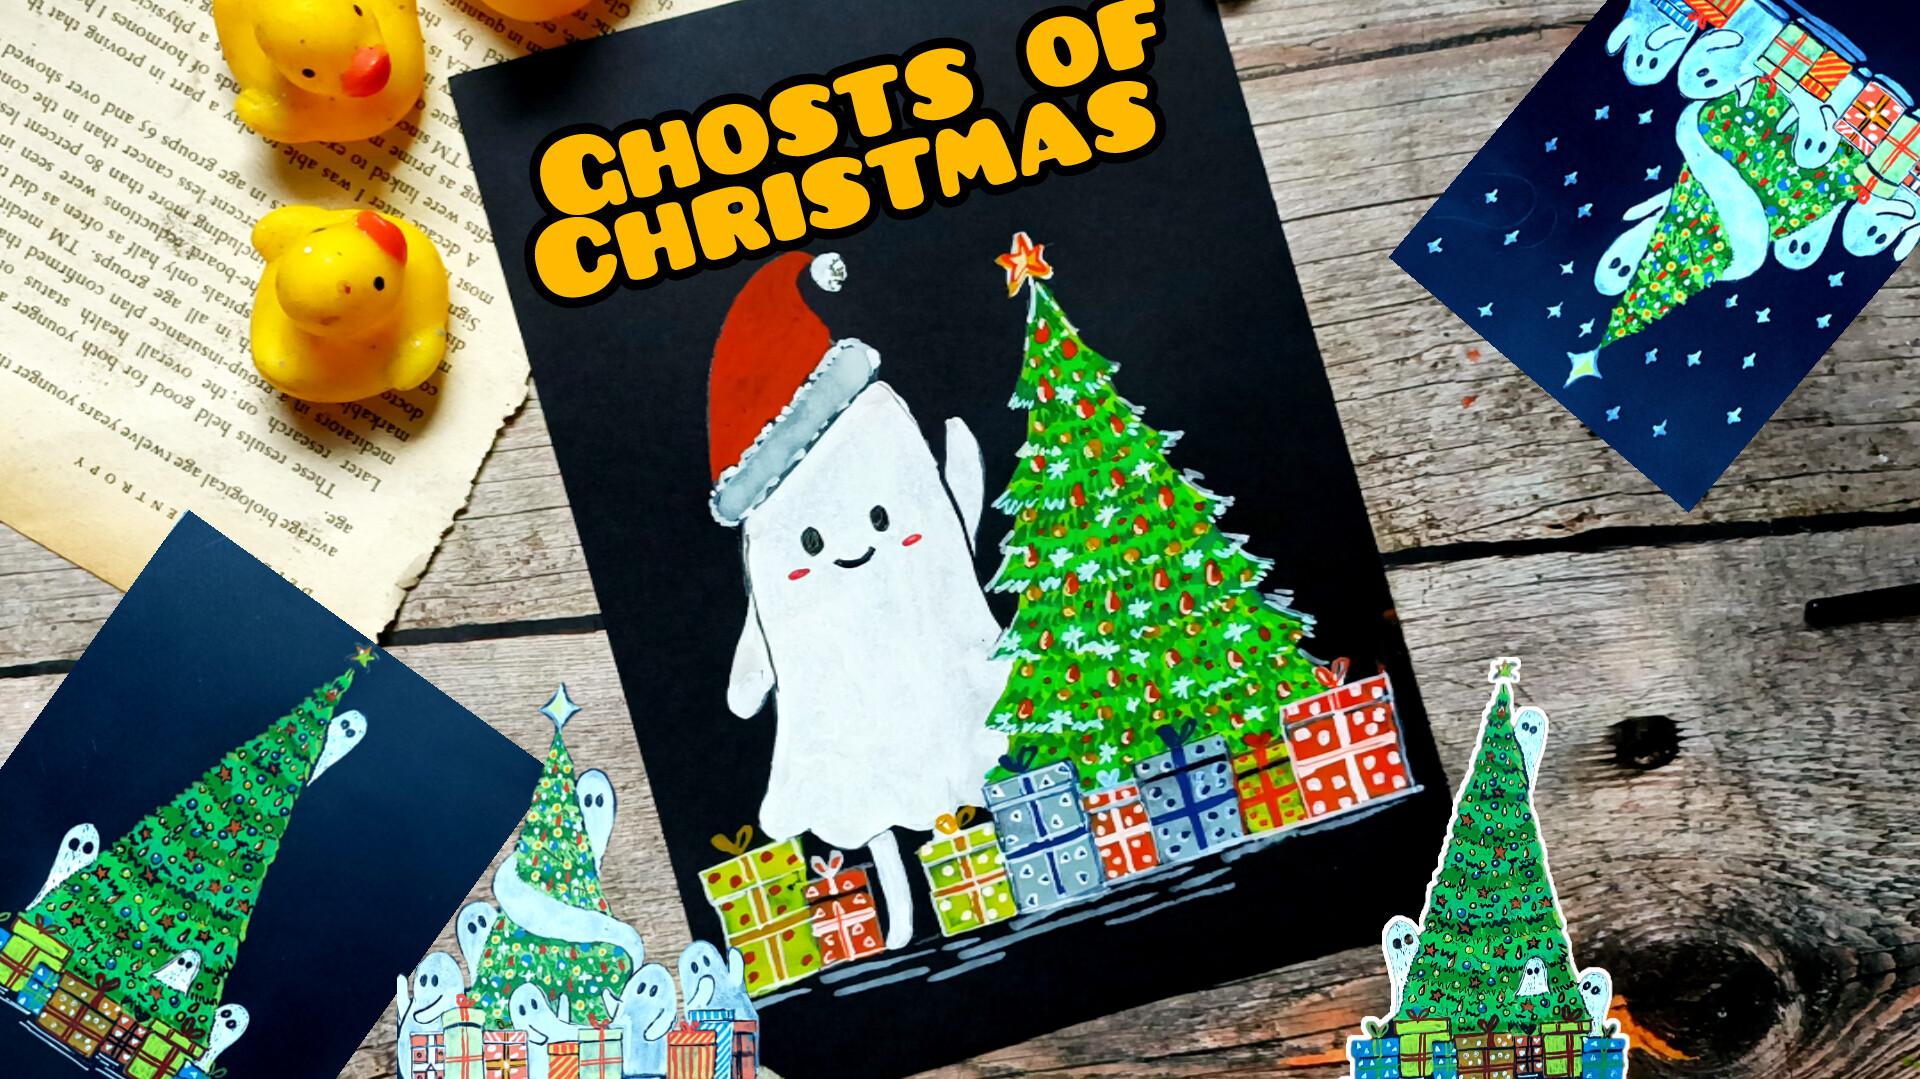
Ghost of Christmas, painting festive
ghost and tree gaze. In this class we'll be creating three vibrant and whimsical
holiday projects each filled with playful ghost and
colorful Christmas trees. Our three projects are
Santa's Little Ghost helper, this one, a cute scene
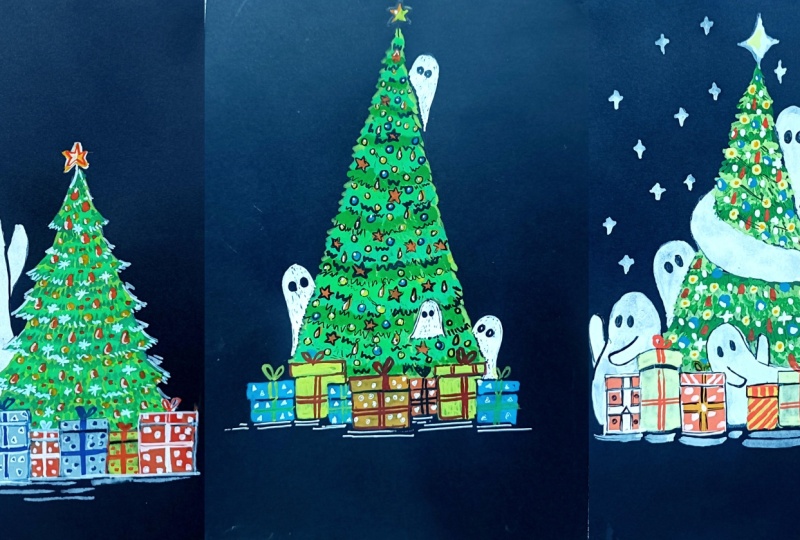
featuring an adorable ghost. Then we have peekaboo
under the Christmas tree, tiny ghost hiding inside and around a decorated
Christmas tree. And lastly, we have
midnight ghost gathering, a magical nighttime
illustration with glowing ghost gathering
around a festive tree. Before we begin
the main project, we will start with the basics, how to paint different
kind of Christmas trees, how to draw simple and
cute ghost characters, how to design gift
boxes, decorations, stars and ornaments, and how to explore different
color combination for festive cost illustration. Most of the video in this
class are in real time, so you can easily follow
along at your own piece. This class is perfect for
beginners and enjoyable for anyone who loves
festive imaginative art. You don't have to
use gauze only. Watercolors and bras paints
for beautifully too. And if you don't want
to use black paper, you can paint everything
on white paper as well. Hi, my name is hal. I'm an artist from India, and this is my
skills here profile. I teach gauze, watercolor
ink and oil pastel classes. These are some of the
class that are related to the Christmas and
holiday seasons. You can check this out too. You can find more of my work
on Instagram and YouTube. So let's begin. I'll see
you in the next video here, we'll start with
the class project.
2. Class project: For your class project, I would love for you to create your own festive
ghost illustration, inspired by the technique
we learned in this class. You can choose to paint,
sent us little ghost helper, peekaboo under the ghost tree. Midnight ghost gathering, or
you can even mix and match ideas to create your
own original ghost them holiday artwork. Feel free to experiment with different ghost expressions and say various Christmas
tree styles, your own gift boxes
and patterns, unique color combinations, and any additional festival
element you'd like to include. Once you finish your painting, please upload your project to
the class project gallery. You can also see your practice
sets, ghost sketches, tree variations,
gift box pattern, or even color taste. I absolutely love
seeing your process, not just the final artwork. If you enjoyed this class, I really appreciate if
you would leave a review. Your feedback helps me improve, and it also helps other
students discover this class. I can't wait to see your
adorable festive ghost, and I'll see you
in the next video with a list of supplies.
3. List of supplies: For this class, you will
need very basic supplies, pencil and resort to do the pencil sketching for
our ghost and the tree, and then we'll be
needing masking tape to secure the paper. Tissue paper will
come in handy too. Then we have watercolor brushes, and watercolor brushes of a
small sizes will do the work. I'll also be using brass paints, fine liners, and
white jelly pen. I'll be using the
black fineliner or bras paint to
add a little bit of detailing and white jelly pin to create ghost or do a
little bit of highlines. Instead of the white jelly pin, you can also use white gaze. If you have a sparkle paints, you can use that to
create ornaments. I'll also be using a
little bit of white ink. Then we have got gauze. I have got the semi
gauze of 24 colors. You don't need to use the gauze. You can also do the same
thing with the watercolor. Just use a little bit
more intense consistency of the watercolor
to do the coloring. In here, I'm using black
colored paper of 250 GSM. If you want, you can also use white paper of white
watercolor paper. It will do the work.
I'll also be using white colored pencil
to make the outlines a little bit more clear
and bit more visible. So these are the basic supplies
that you will be needing.
4. Tree sketches: Welcome to the first part of the demonstration video in here, I'll be showing you how you can create the Christmas tree, different type of ornaments, different gifts, as well as how you can do the
coloring for the gifts, the coloring ornaments, as well as a little
bit of retailing. These are all the
three projects, and I'll be showing you
the various elements that we'll be using
for our project. First, let's start with
the Christmas tree. The best for the Christmas
tree will be very simple, this kind of triangular C. Simple triangular C. This will act as the best
for the Christmas tree. This is the very simple
version of the Christmas tree. Now let's do the second one, starting with the Bs, the
triangular C for the Bs. And in here we'll
be dividing into different sections and
create the curvier lines. Starting with the simple saves a bit conical
saves for the edges of the Christmas trees using these conical saves to divide
it into different sections. Like here, dividing the Christmas tree into
different sections. You can vary the seeps and
the sizes of these divisions. Let's do another kind of
Christmas tree once again, starting with the
basic triangular save. I hope the pencil lines
are visible in here. Later on, I'll be going with the white colored pencil to do the outlining and make
it a bit more clear. So this will be the mese
for our Christmas tree. In here, I'll be creating
same kind of outlining, like weed for the second one. But instead of curved
see for the middle, but in here, we are creating
a bit more pointed edges. This is another kind of Christmas tree that
we'll be doing. Let's make the outlines
a bit more clear. Right now in here, I'm using the jelly pen to
do the outlining. With the jelly pen, you'll have to take your time and
do the outlining. Otherwise, it won't work. Won't be generally using the jelly pen to
do the outlining? Let me show you a different
kind of crafts that we'll be creating
very simple saves, this kind of rectangular saves. And for the lid on top, I create a bit thicker
triangular seam. This kind of small ribbons
that will be wrapped around the Christmas
gift and the presents. Here's another one.
So just wearing the saves in the sizes
of the triangular sea. Instead of this, you can also
create square like seam. Here's another one. This
is cylindrical sea. So it's lying on the
ground, ribbon on the top, and this will be the one
more ribbon tied in here. A bit of square s for
this gift parcel. So now let's do
the outlining for the ribbons. Here's another one. So this time, same kind like
we did for the third one, cylindrical see pens on the top. So these are just the
basic outlines of the parcel and the gift
that we'll be creating. Instead of this,
if you want, you can create other kinds and other varieties of the gift
parcel as you see fit. Let me show you the seeps
for our ghost Mini ghosts. Very simple seeps.
So this kind of the seeps create organic
seeps like this. And if you want,
you can also create tiny projections like this
for the ghosts hands. Coloring for the three ghosts
using different medium. So right now, I'm using the jelly paint to do the
outlining for the ghost. For one of the ghosts,
I'll be using white ink. For one, I'll be using the
jelly pen, white pine. And for the third one, I'll
be going in with the ghost. Let's create the outline for the third ghost and then
we'll do the coloring. And as you can see,
with the jelly pen, you have to be a
bit cautious and patient to create the outlines. Now, let's do the coloring
for the first one. As I mentioned here,
I'm using the whiting, a thick layer of whiting to do the background or the
first layer for our ghost. I'll be keeping the ghost
simple only using one color, but if you want to
create a little bit of shadows and a little
bit of folds, you can use a bit of green to make our ghost
a bit more detail. So use a bit thicker
consistency of the whiting or the colors that you are going to use to do the coloring
for our ghost. In here, I'm using
a smooth paper, and it's a little bit hard to overlay the
color on top of it. But I choose this smooth texture as it will preserve the
glossy effect of the gauze. Instead of this, if you use bit rougher texture
of the paper, you can just easily overlay
the color on top of it, and it will also seem
a little bit of time. With this layering. It takes a little bit more time with this smooth surface
of the paper. And the blending
of the colour is a little bit trickier in here. I would advise you to use a bit rougher texture
for the paper. Right now, in here,
I'm using gauze to do the coloring
for our third ghost. Do use a bit
saturated consistency of the gauze to do the coloring. With the ink, the intensity
of white is somewhat more better as compared with
the gauze and the gelpen. With a gelpin you'll have to do two or three
layings of the colors. And still, there are a little
bit of empty spaces in tin. So mostly I'll be
using the white ink and a little bit of gauze, too. For this third one in here, I'm using the elpin
to do the coloring. So as you can see, I'm creating smaller strokes to feel
the entire region. Okay. Still, you can see a little
bit of black visible through this. I won't be using this. I'll only be using the chilling to do
outlining for some of the section and use it to create a bit of
highlights and reflections. Instead of this,
you can also use concentrated white color
and acrylic color. That will also work. Now, let me show you
different kind of stars and star like
ornament will be creating. So using the jelly pen to
fill the insides with it, this kind of simple seen. Apart from this, white, I'll also be using
yellow to create this kind of stars
and ornaments. And for those, I'll add
a little bit of white on the sides to sew a little bit of reflection on a
bit of highlights, and also to do a little
bit of outlining toque. Here I'm using whiting
to create this star. So with the ink, you
will have to bit coarses and create small
strokes to the outlining. Let's create a star with it. For some of the coloring
with white ink, I'll be going in with the
jelly pen later on when it drows to make the outlines a
bit more clear and distinct. Since overlaying this on top of this smooth surface is
a little bit trickier, and I'm not able to create that kind of smooth
and small lines. Now let's do the coloring
for our gift parcels. In here, I'm directly using
the gauze to do the coloring. If you are not that comfortable, you can start with panzski and then feel the colors
inside with the gauze. Create this kind of triangular
or cylindrical seeps and and feel the
color inside it. Use a bit thicker
consistency of the color. Don't dilute it a lot. For the first one,
as you can see, I used a bit of more water. The lower region a
bit more thicker, the upper region a bit lighter. But when it dries,
the consistency will become somewhat uniform. And since in here, I'm using smooth surface
for this paper, the glossy effect of the
gauze will be preserved, and it will look
smooth and shiny. Right now in here, I'm using the light purple to
create the gift parcel. You can use other colors to feel free to use colors
of your choices, you can use yellows, red, greens, blues, and
different seeds of this color to create different kinds of
gifts and parcels. These are just the simple seeps that I'm using to create it. You can also create the
gift parcel in the seeps of the heart seep or somewhat of different bit larger
and smaller gift. And you can also vary
the seeps and sides. In here, I just varied the
saps and sizes a little bit. And here, I'm using our
Tarket of the pink to do this outlining for our
large gift parcel in here. And now let me show you how
I'll be doing the coloring for the ribbon wrapped
around the gift parcel. I'm using this red and just creating the outlines for the ribbons signed
around the gift parcel. And now let's do the outlining
for the gift parcel, too. I'll be starting with the
coloring for the gift parcels. And when it dries,
I'll be going with another color to create this ribbon tied around
the gift parcel. Here's another one.
Right now, in here, I'm using aqua colour
to do the outlining as well as create the ribbons tied around the gift parcel. I'll also be creating
patterns and design inside the gift parcel to give it a little bit
more characteristic. You can create your own
designs and pattern. Now, let me show you some of the ornaments that
we'll be creating. This is small circular seeps wearing the seps and
the sizes a little bit, you can make them a bit larger and a bit sander like this. Then we have stars. Here we
have got six pointed stars. With a smooth surface, it was a little bit difficult
to control the bras. Mostly, I'll be
creating the ornaments on top of the Christmas trees. And since we'll
be using a bit of two or three seeds of the coloring for
the Christmas tree, we will have a bit
of rough texture. Creating those
ornaments on top of it will be quite easy since
we'll have rough texture. And also using different colours to do the coloring
for the ornaments. In here, I'm using blue. Creating large bubbles
ornaments in here. Feel free to use other
color combinations. So here we have got
to a drop like see. Mostly, I'll be using
light yellow, orange, red, light blue, blue, and a bit of white to create the ornaments
of different kinds. And you don't have
to create the kind of ornaments that
I'm creating feel free to experiment and use different kind of
ornament as you see fin. And with these, we are done
with this first part of the demonstration I'll
see you in the next one.
5. Coloring the tree: Welcome to the second
part of the tutorial. In here, we'll be
creating Christmas trees. I'm not creating the outlines, this simple rough demonstration for the ways you can create
the Christmas trees. But the first Christmas
tree in here, I'm starting with
the lemon yellow as the big layer for
our Christmas tree. On top of this, we'll be
using different seats of the green and
create a kind of gradient for our Christmas
tree small strokes with the brush to create
this kind of texture. In here, I'm using
slight green and creating the same kind
of small brush strokes. And as we move up, I'll be using darker
shades of the green. And in here, I'm
using dark green. This is just a simple
way in which you can choose the coloring
for the Christmas green. Now let's squeeze a second one. In here, I'm just reversing
the order of the color. Instead of the darker side
of the green for the top, here I'm starting
with the darker side of the green at the bottom. If you're using a rough
surface for your paper, then you can create it mud easily and will take a
little bit of less time. In here, because of
the smooth surface, I'll have to be bit cosus and use bit darker
intensity of the color. Here I use bit lighter
density of the green. Now for the third
layer, once again, bit more lightened
detnsity of the green. I'm also overlaying a little bit of each layer of the green
on top of the other one. Using another lighter
side of the green. The gas site that
I have in here, I have got five or six
shades of the greens. Apart from the greens, I'll also using a little bit
of yellow stew. Here's another way you can
create the tree starting with a lighter or darker
side of the green as the primary coloring as the primary layering
and on top of this, we'll be adding more
layer, multiple layer. This is how I'll
be creating one or two of the trees of the project. For this one, the
second example in here, I'm using the darker
side of the green. The darker side of the green as the primary layering
for our Christmas tree. Now, we will wait for it to dry a little bit and then
add the coloring. If you have the dough dryer, you can use it to
fasten the process. Otherwise, in my case, in here because of
the smooth texture, it takes a bit more time. So I generally use the blow
dryer to quicken the process. In here, I'm using a
bit darker tone of the cream and overlaying
this on top of the light shades of the cream
that we used earlier for the primary layering for
our Christmas creen. Now, going with a
bit lighter side of the green and overlaying it on top of the darker
side of the green as well as on top of
the primary layer, creating small strokes
with this too. Bit more lighter
side of the green. So two or three different
sets of the green on top of the first layer
that we used earlier. It's not looking that
much great in here, but one will be creating
a bit larger scale. The distinction will be a bit more clear and
the different color will create a bit of gradient for different section
of the Christmas tree. Instead of starting with
a darker side in here, I'm starting with a
lighter side of the green, creating the same
kind of coloring. Ensure that the intensity of the color remains a bit thicker. Now, another side of the green, creating the same kind of
smaller strokes and overlaying and just adding it on
top of the second layer. On top of it, I'll
be creating star in. And I waited for it
to dry a little bit. I a darker tone of the
green and adding it as the third layer of the coloring
for the Christmas tree. We'll wait for it to dry and then add a little
bit of more detail. And this stars have dried up. So in here we're using
white in to create a little bit of highlights and a little bit of reflection. So small strokes with this us to create small lines like this to sew a little bit of reflection
and a bit of highlight. For our main project, since the ornament side will
be quite smaller, I'll be using the jelly paint
to create small highlights. But in here, since the
seeps are a bit larger, I'm using this white ink
to create highlights. Simple seeps simple strokes to create a bit of highlights. In here, too, on top
of the Christmas tree, let's create some star
lights and some ornaments. Now, let me show you
some of the designs in the pattern that we'll be
using for our gift parcel. You can create this
kind of hatching lines, a bit of parallel a bit of parallel angled
hatching lines to create the pattern and
design for the gift boxes. And I'm using this white to
do the outlining in here. For our project, if required, I'll be using white
to do the outlining. Otherwise, I'll be using black or a bit darker
tone of the color. Like for this case, in
case of the light blue, I'll be using a bit
of darker side of the blue to do the outlining
for the gift parcel, adding ribbons on top. Let's do another in here. Here we have got
white ribbons for this So here we have got white ribbon for the pinker gift parcel
we have in here, creating ribbons on top. Let's make the outlines
a bit more clear. And here, I'll be creating designs and pattern
for the inside. For this one, I just
decided to create plain, simple seeps, plain
simple circles. Apart from the circles, we'll also be creating triangular sep, square sep, and a combination
of triangular and square. Feel free to create
other kind of designs pattern and texture
for your gift parcels. I'm creating a bit
of triangular seep. It's not looking
triangular in here, but for our project, we'll be using the Jelle pin, more clear and precise outlines for the patterns and design. The color has dried up,
and in this manner, I'll be adding the ornaments. So just simple plain dots. In here, I'm just
creating simple plain dots with the white ink. Simple resemblance
for the ornaments wrapped around the
Christmas tree. For our main project, we'll
be using different colours and wearing the sieves and
the sizes of the ornaments. You can also create
patterns like this, simple rectangular lines. Feel free to experiment
on your own and create different kinds of
pattern and the designs. Now going with the
black bras paint to create the eyes for our mini ghost,
where simple eyes. Here, too, if you
want to experiment, you can play with
different kinds of eyes. You can also add the
mouth for the ghost. You can also use the breast
paint to do the outlining for the ribbons and the gift
wrapping around the parcels. You can also use the black to create patterns and designs. I won't be using it, but if you want, you can also use that. Let's make the ribbon
wrapped around the gift parcel a
little bit more darker, a little bit more darker. Also be using a
little bit of black, along with white to create
a clear distinction in between different sections
of the Christmas tree, small strokes with black and white to create
the clear distinction. Apart from this, if you
want to add more elements, add more different
texture design, feel free to use in
your own projects. And yeah, I'll see you in the next video with our
first project. Good.
6. Santas's little ghost helper: Welcome to the first project,
Santa's Little helper. So let's start with
the basic C. And here, I'm starting with a triangular
C for the Christmas tree. For this project, we have got a large ghost with
Santa's Jolly hat. So this is a simple C,
triangular C for our tree. In here, we'll be
creating the second kind of tree that I showed
you in a tutorial video. I'll be dividing the
triangular CP into six different sections
for our Christmas tree. Later on, to make this outline
a little bit more visible, I'll be going over it with
a white color pencil. Instead of dividing into
six different sections, you can increase or decrease
the number of the section. You can also vary the thickness
of each different layers. And with the bask outlining
for our Christmas tree. Now let's do the
outlining for the gifts. For this project, I decided to create only rectangular
seeps for the gift. If you want to change
the saves in the sizes, if you want to include
circular seeps or cylindrical seeps of the gift
or heart like gift boxes, feel free to add them. But in here, as I mentioned, I'll only be creating
different kind of rectangular seeps
for the boxes. Some of them will be
a little bit square, but mostly this kind of
simple saves for our gifts. I'll be creating a
total of eight gifts, six besides the Christmas tree, and two on the other side. I'll be leaving a
little bit of space in between the two gifts,
the six and two, the six on one side and
two on the other side, as one of the legs of the
ghost will be visible in here. Instead of this, if
you want to cover the entire spice with the
gifts, you can do that. Also, if you want,
you can make some of the gifts quite large. Now let's do the
outline for the ghost. For this project, as
I mentioned earlier, I decided to create a bit
larger C for the ghost. So we have got a
large ghost with a Santas cap. This is optional. If you don't want to add the cap for the If you don't
want to add this gap, you can just leave it as it is. The outline in here is
not that clearly visible, but you can just
look at this image, the final the end
result of this project. Creating the outlines for
the two gifts on this side. I'll be creating tiny
eyes for our ghost. Hands are obstinate,
if you don't want, you can just create the
silhouette for the bedst ghost. In here, I'll be
creating a star. I'll be using both yellows and white to do the
coloring for it. And with these, we are done with the outlining. This
is just optional. Since I use normal pencil
to do the outlining, the outlines are
not that visible, so I decided to go in with
this colored pencil to make the outlines a bit
more clear so that you can clearly see what
we created in here, and feel free to make changes
adjustment as you see fit. For this section, I have
increased the speed. If you want to follow
along with me, you can just reduce the speed
or you can pause the video. And with these, we are done with outlining the colored pencil. Now let's do the
coloring in here, I'm starting with the
light seed of the green. We'll be starting with a
primary layer of the coloring. So I'm using this
slight green color as the primary layering,
and when this dries up, we'll be adding two or
three different seeds of the green to do the coloring
for our Christmas tree. Instead of starting
with the lighter side of the green as the
primary layering, you can start with the
darker side of the green. And apart from this, you can also use different
shades of the green. Like, you can start
with the lighter side of the green for
the upper section, and as we move down, you can increase its intensity and use the darker
side of the green thus thus creating a gradient of the green from light
seed to darker sad. But in here, I'll be creating this simple gradient with this
lighter sad of the green. Since I'm using
this signing paper, it's taking a little bit
more time and it's a bit hard to overlay the
color on top of it. If you are using the
text sheet paper, it will become a little
bit more easier, and it will take a
little bit less time. So I would advise you to check the colors first on a rough
paper and then apply it. In this way, you can check
out how the two colors are reacting with each other,
how they are blending, and what kind of combination
of the two greens or three green color you want
to use in your project. Oh carefully filling this in between the different gift
parcels we have in here. Adding a little bit of more greens wherever it's required. I'll be also creating
a little bit of texture outlined for some of the section of this
Christmas tree with a white letter on for now, let's add more greens wherever
we think it's required. You can also create
this kind of texture. Small blasto for
different sections. And we will wait for
it to dry until it dries lets to the coloring for
the gifts we have in here. I'm starting with the yellow. I'll be using three or
four different seats of the colour to
do the coloring. Mostly, I'll be using
lighter seats of the color. Feel free to use
any color you wish. In here, too, if
you want to create a little bit of gradient with
a color, you can do that. To do that, you can just add a little bit of darker
side of the yellow, just beside the outline sections and just beside the
gift wrappings. Let's create one more
gift with this yellow. Apart from this, I'll
also be using orange, blues and a little bit of red. Right now, it's not looking that green, but
when it dries up, the gauze on this smooth surface becomes a little bit more shiny. So that's why I use this
paper black smooth paper. For this gift in
here, I'm using red, a bit concentrated
consistency of the gauze. This large gift with this red. Now, let's use the seam
color for this one, too. If you're using smooth
textured paper, I would advise you to use a bit thicker consistency
of the color. Otherwise, you will have to do multiple layers of the coloring. The small gift box on
the right side with the yellow is not
looking that much good, so I'll be adding a little bit
of more coloring later on. Now for the remaining
two gift box, in here, I'm using sky blue. So the same kind of gift
box, starting with the lead, starting with the lead
the upper section of the gift parcel, gift box. Carefully adding the color in between the
yellows and the red, we don't want the
two colors to mix. Coloring for the last gift
that we have in here. And with these, we are done with the primary layering for
all the gift boxes in here. Adding few lines in here to sew a little bit of sad
dose and reflection. This is Jobson if you want
to keep your project clean, you don't have to add this. And now let's color our ghost. In here, I'm using
white ink to color it. In here, I'm using
white ink to color it. Carefully going
over the outline, and now let's feel
the rest of the area. You'll have to admit causes. We don't want the colours
to mix the white from the ghost and the remaining
color from the gift parcels. Still, if you want to change
the seep of the ghost, make it a little bit larger, or a bit smaller,
you can do that. Continuing on doing the
outlining for the lower section. You'll have to add the color
a little bit careful near the outline section of
the Christmas tree. Carefully filling
the color in here. Going over the outlined
section of the Christmas tree and then filling the remaining section with this white ink. And with these, we are
done with this side. Let's do the coloring
for the other hand. In here, I used a bit concentrated whiting
to do the coloring. So you can see that our ghost looks so bright and so white. Spreading the color
a little bit. Adding the white for the
upper section of this cap. Let's use this white to do the outlining for this section, the lower half the lower
section for this cap. Using this kind of broken
lines to do the outlining. In here, lbgrating
star, simple star. On top of this,
I'll also be adding a little bit of yellow
and a bit of red too. Instead of this, if
you want, you can just use simple color
simple white star. And I was not able to record it, but I added the color for the
ghost ling with this white, and I paid for it to dry. I use blue dry it to
quicken the process. And now, and now in here, I'm going with a darker
side of the green, creating small strokes with this darker side of the green. And as you can see, I'm not
just adding it randomly. I am creating rows and columns of this kind of small strokes. For each different section, I'll be creating this
kind of small strokes. I'll be leaving a little
bit of a space in between different rows that we
are creating in here. I'll be creating
two or three rows for each different section. You can vary the
sizes a little bit, or instead of creating
three or two rows, you can just create single rows, as I'll also be using other
shades of the green later on. Adding the color for this
layer, small strokes. Let's add one more in here. And now for the bottom section. You see that the color that
you are using has dried up the color you used the color you used for the gift parcels. And now let's do another
layering of the color. And here, I'm using dark green. So mostly, I'll be adding
this for the lower section of the strokes that we just created with another side of the green. Small strokes with this too. As you can see,
I'm just adding it primarily on the
lower section as well as for the middle section of the other rows
that we created. Create comparatively
smaller strokes and the two colors
will blend on its own because the second layer of the colour that we did
has not dried up yet, so it will mix on its own. Let's do the same thing for this section, small
strokes in here. You can clearly see just by using three different
shades of the green. We have created some a
little bit of gradient. The primary layer,
the lighter side of the green that we
used earlier is still visible a little
bit because we are creating small strokes
and a little bit of it is visible since there
is a little bit of space in between the different
strokes we are adding. Adding it carefully
near the gift boxes. Adding it for the upper section. If you want, you can go in with more darker side of the green or a bit lighter
side of the green. I won't be doing that since
it's look pretty good. I'll be waiting for it to dry a little bit and then
add ornaments and a little bit of more detailing the gift boxes has dried up. So in here, I'll be
creating the ribbons and the wrapping
around the gift boxes. For this one in here,
I'm using Camo to do the outlining for the ribbons
and the gift wrappings. Later on, when it writes, I'll be going with the
white to do the outlining. These are optional.
If you don't want to create the ribbons
and the wrapping, you can just leave it as it is. For this one in here,
I'm using orange color. Let's make this a
little bit more darker, Ol this orange a little
bit on top of the Cambohu. For the two gift boxes
in sky blue in here, I'm using Putin blue. You'll have to courses in here, insert that the color
that you used for the greens has dried
up and then apply it. Otherwise, the two
colors might mix. Now for the remaining three
gift boxes and right in here, I decided to use the whiting. Instead of this
whiting, if you want, you can use other colours too. You'll have to just use a bit
concentrated consistency of the colour to overlay it on top of this darker
side of the rail. When this dries up, we'll
be adding a little bit of more detailings and creating
patterns and designs. For now, let's continue with this fight to create the ribbons and the wrapping around
the gift parcels and the gift boxes
we have in here. Adding this fight
for the last one. This project is divided into two different parts in part one, and in the next part,
we'll be completing it. For now, let's go in with this darker red to do the
coloring for this cap, using a bit thicker consistency of the red to color this cap. Carefully filling the
inside with this. Instead of this
red, if you want, you can use other colors too. You can use yellow, pinks, blues, any
color you prefer. Now let's feel the remaining
section with this. Insert that the consistency of the color remains the same. If you want to create
a little bit of gradient for this
cap, you can do that. You can add a bit of
maroon on one side. Using this colour to create
some kind of pattern for some of the gift parcels and
gift boxes we have in here. For this one, I decided to
create this small random dots, small random circular dots. Instead of this circular seep, you can create a
square, rectangular or any other kind of seeps. For this one in here, I decided to use the
white and create the same kind of design,
simple circular dots. If this is a little bit
challenging for you to use the watercolor brush
to create small dots, you can use the white gel pen if you have that will make the
process a bit more faster, you will have more accuracy
and more precision. For this blue gift box, I decided to create
triangular se designs. For some of the
gift boxes in here, I'll be using whites
and blacks to do the outlining later on.
These are optional. If you don't want to
do the outlining, you can leave it as it is, but some of the
gift boxes are not looking that much
distinct from each other. So I'll be doing the
outlining later on. For this one, too, I decided to create the same
kind of pattern. In here, I decided to make the circular shape a bit larger. We'll be covering up to this in this first part of this project, and I'll be seeing
you in the next part.
7. Ornaments coloring: Welcome to the second part
of the first project. Let's continue
where we left off. The white we use for
the star has dried up, and right now in here, I'm using amu to overlay on top of it. And I'm not covering
the entire section. The white from the
earlier is still visible and is acting
as the outline. Now, we'll be creating
the ornaments. Use the high consistency
of the color, and in here, I'm using this CamuJu and creating
these small dots. I'll also be wearing the sides
of the dots a little bit. I'll be adding this in this manner parallel to each other. Instead of adding in
this way, if you want, you can add it any other
way, whichever you prefer. Add one more of
the yellow lights. I'll also be using ds
a little bit of white, adding few more dots
for the bottom. Now let's go in with other color in here. I'm using orange. So creating tear
drop like saves. Here's the second kind of
ornament that I'll be adding. Feel free to use other
color combination and other kind of
ornaments as you desire. You can also create the socks hanging around the
Christmas tree. I'll be adding four or
five of this to a drop like ornament for all
the different sections. Later on, when this dries up, I'll be going with the
white to add highlights, small strokes with the
white ink on one side to create a little bit of
highlight and reflection. You can create as many ornaments with this color as you prefer. Just don't oversaturate it. We'll be adding more
ornaments later on. Ensure that the intensity of
the color remains the same. And with these, we are
done with this one. Let's go in with
the other color. So in here, I'm using white. And with this white, I'll
be creating this kind of s. So somewhat a star like. I'll be creating 15 to
20 of this kind of sap. Instead of this, if
you want, you can create simple or
normal star like sap. Okay. Instead of using
this white colour, you can also use light
yellow to create this kind of pattern
and designs. Feel free to experiment with different
color combinations. For some of the
sections, I'll only be using two lines and
for the others. And for the others, I'll
be using four lines to create this kind of to
create this kind of pattern. You can also use the white
ink paint to create it. I think we are done with this. If you want, you can
add a little bit more. And as I was mentioning, using a little bit of white
to create a little bit of outline for different section
of this Christmas tree, a little bit of outlining and creating this kind of rough
texture to do the outlining, a bit of broken lines too. Creating this kind of small strokes and doing a little bit of hatching to
create the outline for the different sections. Instead of this,
if you want, you can also use the black bras mean or the fine liner to
create the outlinings. You can also use that to create the wires for the ornaments. I see that the color has
dried up, and in here, I'm creating small
highlights and reflection for all the
ornaments that we added. The tear drop seep like ornaments and this
circular ornaments with the emoji Create
pretty small strokes with the brush to create small highlights and small reflection. I'll be adding the
highlights and reflection for each ornaments that
we have added in here. After doing this,
we'll also be adding a little bit of more
highlights and adding designs and pattern for some of the gifts at
the bottom section. A little bit more highlights
for the star at the top. And with this, we are
done with the highlights. Adding a few more
strokes in here to add a little bit more texture
to this Christmas tree, giving it a bit
more rough texture. And with these, we are
done with the whiting. Let's do a little
bit more detailing for some of the gift
that we have in here. Using white to create
more small dots, circular saves for the pattern and the design for this one. Put this one, doing
the outlining for the wrappings
that we have in here. So the mans, doing
the outlining for that as well as doing the
outlining for the entire gift. You can also use
the black breastpin or the black fine to
do the outlining, or you can use a bit darker
color to do the outlining. In this case, for the yellow, you can use the Camuji or
orchard to do the outlining. Doing the same thing
for this one, too, going over the outline for the ribbons that
we have in here, as well as outlining the
entire section of this gift. So for some of them, I'll be doing it, not for all of them. For this two, I decided to do
it going over the outline. You'll have to be
a bit cautious and create very small
strokes with the breast. Instead of this, as I mentioned, you can always use the gelpin. It will make the process
bit much more faster and you will get more precision
and accuracy with that. In here, I'm using
Rosen value to add pattern and
design for this one. So creating this kind of
circular C for this one. I also decided to read very
small dots for this one, too. So on top of the
white circular dots that we created earlier, creating tiny dots
with this rosin glue. This designs and patterns
and outlining are optional. Feel free to create
different kind of designs pattern outlining, or you can leave
it as it is. Mm. In here for this
one, I decided to use the blue to
do the outlining, outlining some of the section of this script with this blue. Adding few more
dots and pattern, adding a few more circular
dots for this one. And with these, we are done
with the Prussian blue. Once again, going back with the orange simple pattern
using the circular seeps If you want, you can
also create small dots and small circular
seeps with this. I decided to add few more small ornaments
with this skull. These are comparatively
smaller to the Kamu Cu color that we use
for the circular ornaments. Just randomly adding it
for some of the sections. You can also use
light blue as well as light purple to add more ornaments for our
Christmas tree. I also decided to do the outlining for this gift
parcel with this color, tiny strokes to do
the outlining. Okay. For this gift parcela I also decided to create a little
bit more detailing. So adding tiny small dots for the center of the triangular saves that we created
with the whiting. Creating a single straight line for the intersecting points, so small straight line for both the horizontal
and vertical lines. Adding a little bit of red for the large star that we have on top of this
Christmas tree, doing the same thing
for this one, too, going over the
intersecting lines with a single straight line. And with these, we are
done with this color. Now, for this one, I did not
add any design or pattern, so going in with
the white to add. So going in with
the white to add the same kind of simple
pattern or design, you can say, circular
simple circular dots. For this one, I decided to
encircle the blue dots that we created to add a
little bit more to add a little bit of more
detailing for this one. So just encircling
some of the section of the circular dots that we
created with a Trochan lo oh, Now add more white wherever you think it's required. You
can do the outlining. You can create a little
bit of highlight, as well as you can
use this to go over the ribbons and add more circular seeps
or triangular seeps for some of the gift
that we have in here. Now, let's create the facial
feature for our ghost. So in here, I'm using pencil to sketch out the
tough guideline for placement for the placement of the eyes and the mouth. Now in here, I'm
using the breastbin to create small eyes,
small black eyes. And for the mouth, too, I'll
be using this breastbin. Instead of this,
if you want, you can use red to create the mouth. And in here, I'm using this jail pin to create
rosy checks for our ghost. So adding this d just below
the eyes for our ghost. And now let's do the
coloring for the cap. So in here, I'm using gray. Now let's make the outlines a little bit more
clear for the ghosts and This is Jobson if you
want to keep it simple, you don't have to use this brass paint to
do the outlining, adding a little bit of
texture for this cap. And with these, we are done
with our first project. I hope you had fun
painting this. I enjoyed a lot
painting this one, and I'll see you in
the next project.
8. Peek-a-boo : under the christmas tree: Welcome to the second project Peekaboo Under the
Christmas Tree. Let's start with the triangular see for our Christmas tree. For this project, I'm creating the Christmas tree
in the middle. For the last project, we
created it on the right side. Our main focus for this project will be the Christmas tree and small cost that will
be surrounding it and hiding inside and beside it. In total, I'll be creating
four ghosts if you want to increase or decrease the number of the ghosts, feet to do that. So this is Java C for
our Christmas tree, and let's do the outlining for the Now let's do the
outlining for the gifts. Nia created seven gifts. It's not that much
clearly visible in here, but you can see
how it turned out. So a total of seven. And for this project, I only use this simple
rectangular seeps. If you want, you can also
create the other kind of gift boxes like cylindrical
seeps, heart seeps. You can vary the size
of the gift box. Instead of keeping them a
little bit of seam sizes, you can make some of
the gift boxes a bit larger and others quite smaller. Also, if you want, you
can leave a little bit of a space in between the
different gift boxes. And with this, we
are done with the pencil sketching
for our gift boxes. Now, let's create the outlines for the silhouette of the Ghost. So a total of four ghosts, and they are quite small. Here, too, if you want to change the sp sides placement of this ghost, we
feed and do that. On top of this Christmas tree, I'll be creating a bit
small in the star. For this one and decided to use the
jelly pen to do the outlining as well
as do the coloring. You can use whatever you can
use the gauze, watercolor, acrylic color, whitening, whatever you leave free,
whatever you prefer. I find it a little bit
difficult to use this gel pen. But for this project, I decided
why not let's use this? Now let's do the coloring. For this one, in here, I'm starting with
this lemon yellow. For the entire section, I'll be filling it with
this lemon yellow. This lemon yellow
will act as the primary coloring for
this Christmas tree. And here, I'll also be trying to create a little
bit of texture. For now, let's do the
outlining for the gift. We'll be completely filling
the entire section and use a small brass stroke to create a little
bit of texture. On top of this, I'll be adding two or three different
layers of the greens. And here, I outline
this triangular seep, and now I'll be filling the Now I'll be filling the entire
with this lemon green. For this layer,
the primary layer in here, as you can eagerly see, I'm not using a thick
consistency of the coloring, since we'll be
covering most of it. But if you want, you can use a bit thicker consistency
of the color. Let's outline this ghost. And now let's spade the color. For this one, I started
with the slighter sad. For the last one, we'll be choosing a bit darker
side of the green to do the coloring instead of
creating tree in this manner. If you want, you can
create other kind of trees as I showed you in
the demonstration video. Put that you can
directly start with the different sads
of the green to do the coloring for
the Christmas tree. As I was mentioning, spreading the color a little bit with the brass stroke to
create this kind of texture for the
entire region of this triangular Christmas
tree that we have in here. Some of the texture will
be visible underneath the other two layers
of the greens that I'll be adding it later on, since I'll be leaving
a little bit of space in between the
different strokes. We will wait for it to
dry until it dries. Let's do the coloring
for the gift. Feel free to use
color of your choice. In here, I'm started
with a view. The upper part of the
gift box will be a bit larger and the lower
part a bit smaller. What I mean to say
the upper part, the lead of the gift box will be quite broader as compared
to the remaining section. If you want, you can
use the same color to do the coloring
for the all gift. Feel free to increase, decrease the sieves in the
sizes of the gift box. For now, I'll be continuing with some random light seats of the colors to do the
coloring for the gift boxes. Earlier project in here too, I'll be using other
sads of the color to create the ribbons and the
gift wrappings around it, as well as I'll be creating the patterns,
texture, and designs. I'll also be using a
little bit of white and black to do the outlining
for some of the gifts. In here, I'm using yellow
to create another gift. For the gift boxes in here, I'm using a bit thicker
consistency of the coloring so that I won't have to add
another layer on top of it. Using yellow for this one, too. Very simple square like
see for this gift box. To make this a little
bit more interesting, apart from this small
ghost, if you want, you can add a bit
large ghost too, one or two large
ghosts that will be surrounding this large tree. That will be surrounding
this Christmas tree. That will be interesting. Now
we have got only two gifts. Right now in here, I'm using orange to do the
coloring for this one. Let's do the outlining
and then we'll be filling the insides
with the orange. Using a bit thicker
consistency of the orange to do the
coloring for the inside. And with these, we are
done with the sixth gift. For the seventh one, I
decided to use another color. So in here, I'm
going with the red. This is a little
bit smaller gift, starting with the upper
part, the lead of the gift. Now let's do the
remaining section. Small square like seed for the remaining portion
of this gift. Carefully outlining near
this yellow gift box. And for these, we are done with the primary layering
for the gift boxes. This has dried up a little bit. Now. We'll be using different
sides of the green. In here, I'm starting
with this grass green, a bit darker side of the green and creating this kind
of small strokes. You can vary the saps and
sizes of the strokes. I'll be trying to keep
it a little bit uniform. But as we move from up to down, I'll increasing the length
of the strokes a little bit. I'm also creating a bit
of rough texture with it. Following the contour of this conical sap of
this Christmas tree. And for the middle
section, as you can see, I'm making the strokes
a little bit curvier, so the whole line or the
whole row of the strokes that we are creating is a little bit curved in the middle. Adding the last row. Carefully adding it
beneath this ghost. And let's extend it
a little bit more. So with these we done with
this side of the green. Now let's go in with
another side of the green. This time in here, I'm using a bit lighter side of the green. I'll be overlaying
some of the green on top of the grass screen
that we used earlier. This will mix on its own and we'll create a little
bit of gradient. They will not blend perfectly, but yeah, you can see a little bit of blending
of the colors. I will create a
beautiful gradient in between these two different
sides of the green. And the size of the strokes
in here for this green is a little bit smaller as compared to the one
we did earlier. Now, adding it for the top. And finally, in here, I'm going with more
darker side of the green. So in here, I'm
using dark green and adding it just below the two layers of the green we added. Also overlaying a little
bit of this green on top of the glass screen that we
use as the secondary layer. Here, too, it will blend on its own and will create a
beautiful gradient. A little bit of the green, the lemon green that we used
earlier is visible, not that much of it, but
a little bit of mill. And when this dries up, some of the regions where we use lighter set of the green will become a bit more lighter because
of the presence of the lemon yellow that we use as the primary coloring
for the flat as A little bit of this was
covered by the queen, so adding a little bit more yellow to make it a
little bit more distinct. I also decided to make it
a little bit more shiny, so adding another layer
of yellow on top of it. And as I mentioned, since I
am using this smooth surface, when this gauze will dry, it will create a smooth
and glossy surface for this gauze. We will wait for it to
dry until it dries. Let's do the coloring
for the gaze. Feel free to use
concentrated watercolor, acrylic color, white ink or concentrated white
gauze to do the coloring. And here I am using this white
gel pen to do the coloring and creating small strokes to fill the entire region
with this white ink, white ink from the gelpin If you are using
rough texture paper, then you will be able to create
this project a bit more. Then you will be able to make
this project a bit faster since the spreading of the color will become a
little bit more easier. And as for the
layering, it will also become a bit more
faster and bit quicker. Let me know which
kind of paper you are using in the
discussion section. We are done with the first cost, moving on to the second
one, doing the same thing, creating small strokes with this white chil paint to fill
the entire section. And with these, we are
done with the second one. And as I was mentioning, you can add more ghost, you can also add a
bit larger versions of the ghost like we did
for our first project. And with these, we add
with the third ghost. Let's do the coloring
for the final one. And for the ornaments and the light for
this Christmas tree, I'll be creating circular saves, star saves and teardrop
like ornaments. I'll also be using
a little bit of black to do the
outlining for some of the sections of the
Christmas tree to create a bit more
distinct outline. Apart from that, I'll also be doing a little bit of outlining
for some of the ghost. Adding this kind of
broken line just below the gift boxes to add
a little bit more characteristic to this
painting. This is optional. If you don't want, you can
just keep it as it is. So with these, we are done with the coloring
for the furgost, I waited for it to
dry a little bit, and it has dried up somewhat. Now let's add the
ornaments and the light. In here, I'm using yellow
and creating small dots, small dots in this manner, creating arrow, creating this
kind of column of lights. Okay. This is a little bit
slanted towards the right, and I'll I'll be
creating this kind of a small circular dots in this manner for the remaining section of
this Christmas tree. If you want, you can
vary the seeps and the siges as well as the
placement of the yellow dots. You can make them
a little bit more closer or a bit
more farther apart. Later on, I'll be going
with the white to add a little bit of highlights
and reflections. For now, let's
continue with this. Apart from this
yellow, I'll also be using red, orange, blue, and a little bit of white to add various lights and ornaments
for this Christmas tree. I'll be adding two
or three more rows and then we'll be going
in with other colors. Like the earlier
project, this project is also divided into two parts. This is the first part, and
we have got second part. In this part, I'll
only be doing up to the lights and the ornaments, and in second parts,
we'll be adding more details and
finalizing our project. And with these, we are
almost done with the yellow. If you want, you can
add few more lights here and there randomly. You can also increase
or decrease the sign. You just add it randomly, increasing or decrease the C if you prefer. I won't
be doing that. I only so you this
as an example. Now, with the star
we created at top, in here I'm using orange to
make it a little bit more darker on one side,
using the same orange. So in here I'm creating
small tied drop like saves for the ornaments. Instead of creating
this kind of sp, if you want, you can
treat other kind of seeps as you prefer. You can convert
this into star like see or any other see you prefer, or you can just continue with me and create more tree
and rough like seeps. Later on, as I was mentioning, I'll also be using a
little bit of black to do the outlining for some
of the ornaments and light and a little bit of
white to create a bit of highlight and reflection for some of the ornaments
and the lights. Use a bit thicker
consistency of the colour to overlay it on top of
these layers of the greens. I added a little
bit less number of this ornament as compared to the yellow lights
that we used earlier. If you want, you can increase the numbers of this ornament. But we have got few
other colors and few other kinds of ornaments and lights that we'll be adding. So just don't oversaturate it. And with these, we are done
with this kind of ornaments. Let's create another
kind of ornament. So in here, I'm creating
small star like saves. Instead of creating
this kind of save, you can create
other kind of star like four cornered star
or six cornered star. That will be interesting too. Or you can create big
large circles with it or other kind of
ornament as you prefer. For this one, too, I'll be using the black to
do the outlining later on to clearly define the
outline for the star seeps. And I think this
we are done with the starl ornaments
or starl lights. Let's go in with another color. So in here, I'm using the blue, the seam blue that we
use for the gift boxes, creating small circular seams just like the yellow
lights that we created. Right now, it's not that
much clearly visible, but when twice up it will become a bit more
clearly visible. So for this part of the video, I'll only be doing up to this. And I'll and I'll be seeing in the next part
of the second project, and we'll be completing it.
9. Outlining the ornaments: Welcome to the second part of peekaboo under the
Christmas tree. We'll be continuing
where we left up. We have added the ornaments and the lights, and right now, we'll be adding the
details and pattern as well as the gift wrapping
for this gift we have. For this one in here, I'm using dark red or you can
say maroon color to create this kind of avons that is wrapped around
the gift boxes. Feel free to use other
color combinations to do the outlining, as well as create this kind of ribbons and the
gift wrapping. The ribbons and the gift wrappings are
optional if you want to keep them bit simpler.
You don't have to do this. Pull this one too
and decided to use this later on for some of them, I'll also be using a little bit of black to do the outlining, as well as a bit of white. Doing the outlining of
this one with this red. As for the patterns and the
design for the gift boxes, you can create any kind of
the pattern, circular sap, triangular seep, square sieves
or a combination of all of them using the same red
for this yellow one. Doing the outlining. And yeah, with these, we are
done with this. Moving on to the blue boxes. So for this one, in here, I'm using a bit concentrated yellow to create the
ribbons and the wrappings. You'll have to do two
or three layers of the coloring since the intensity of the blue is quite darker. So for all these three
blue blue gift boxes that we have in here,
I'll be using the yellow. Feel to use other color. Right now, it's
not that visible, but when it dries up, it will
become a bit more visible. I'll also be doing
another layering of the color if required. We will wait for it
dries until it dries. As I was mentioning,
I'll be using the black to do the outlining
of some of the section. I'll be doing the outlining for some of the lights, the stars, as well as create this
kind of rough texture, as well as create this kind of texture for the Christmas tree. This is going to
take a little bit of time since we'll have
to apply a bit of preset to overlay this on top of this many layers
of the color. Instead of this, if
you have breast pin, that will make the
process bit more faster. Use different kind of pints, all pin, ball paint, gil pins, ballpoint paint fine
under pints and see which fits and which is more comfortable to do the
overlaying in here. This is often if you
don't want to create it, you can just give
it as a touchpad. But by just doing this
simple outlining, you can make your
Christmas tree look a bit more vibrant and
a bit more detailed. So for now, I'll be doing the outlining for
all the element, all the major elements,
the tear drop like sieves, the star sieves, the
circular sieves. And also this kind
of a small and also this kind of lines
for the Christmas tree. This will take a
little bit of time, so we present and
do the outlining. Okay. Okay. You can clearly see the
difference in here, just by doing the
outlining the sieves become a bit more the sieves become a bit more fleshed out and the distinction
becomes a bit more clear. It's a little bit difficult to do the outlining here
with this bras pin. As you can see, I am doing
two or three layers of the outlining to ensure that
the outlines is visible. I'll also be creating
small circular C for the eyes of the
ghost later on for now, let's continue doing
the outlining. If you're comfortable,
you can use the watercolor bras to do the outlining with
the black color. It will be a bit
much more faster, but you'll have to bit cautious and careful to do the outlining. Since this was taking
a lot of time, I did the outline on my own, and this is how it turned out. I also used a little bit of other breast pain that I
had to do the outlining. I use this Ji Kuraaki breastpin that I have
to do the outlining. With this, I can create a
bit more varieties of line. Also using this
breast pain to do the outlining for some
of the gift wrappings, creating omen for this one. Adding a little bit of more details for some of the section, outlining some of the lights we have in here,
the blue lights. Adding these kind
of lines to add a little bit of more texture
for our Christmas tree. I was not able to record the highlights that I added
with the white later on, but this is how this
project turned out. You can add the highlights
and the reflection on the different ornaments and the lights we have in here
with the white on your own. And yeah, I'll see you
in the next project, the third and the final one.
10. Midnight ghost gathering: Welcome to the third and
the final project of this class, Midnight
Ghost Gathering. Let's start with the
basic pencilske. I'm starting with
a straight line to determine the length
of the Christmas tree. For this project, I'm creating the Christmas tree a little
bit towards the left. If you want, you can center
this Christmas tree. For this project, we'll be
creating a total of six ghost. Let's do the outlining
for the ghost. If you want you can increase or decrease the
number of the ghosts, you can change their placement
as well as positions. You can make them a bit more
bigger, bit more smaller. And as for the gift in here, we'll be creating a bit
more varieties of the gift. Apart from the rectangular and the square
seeps of the gift, I'll also be creating
the cylindrical sap of the gift, like this one. Right now, I have created
a total of six gift. Later on, I'll be adding
few more, one or two more. If you want to increase or decrease the number of the gift, if you want to make them a
bit more bigger or smaller, feel free to do that, you can
also change your positions. For all the ghosts
in this project, I'll also be creating
the small hands. If you want, you
can just keep it simple and don't need
to add the hands. This will be our base line. Let's extend the
tree a little bit. I decided to make it
a bit more larger. There will be single
star at the top. Apart from this large star, I'll also be creating
small stars, a dozen of small
stars on both sides. So this is the biggest ghost that we'll be creating in here, and this ghost is wrapped
around the Christmas tree. If you want to keep
things simple, you don't have to
create the ghost. In this manner, you
can just create a simple ghost making this ghost a little
bit more larger. Adding one more ghost in here. Adding one more
gift in here, too. So a total of seven
gibt for this side, as I was mentioning,
adding one more gift. So a total of eight gift
we have created in here. I'll also be adding one more
ghost on the left side. If you want, you can
also add few ghosts floating around the
Christmas tree like this. I was going to add
your ghost like this, but I thought that it
would take a lot of time. So instead of this, so
to keep things simple, I did not add the ghost, but if you want, you
can proceed with that. We are done with the outlining. I'll be adding one more ghost later on for now.
Let's do the coloring. In here, I'm using olive green. So this will act as
our primary color. So this will act as
the primary layering. I'll be filling
the entire section of this Christmas
tree with the screen. You love to courses while doing the coloring
near the Ghost. As you can see, I'm using
a bit thicker consistency of the green to do the coloring. I'm also whirling
this green on top of the white pencil sketch that
we created to cover it. Instead of creating the
tree in this manner, you can create the trees in other manner as I showed you
in the demonstration video. You can use other
color combinations of the green to
create the trees. You don't have to use the
same color combination or the same way that
I am creating and coloring the trees and the goes. Feel free to experiment
on your own. We have outlined
the lower portion. Now let's fill the remaining section with this olive green. And with this, we add with the olive green as a primary layering for our Christmas tree, add more green wherever
you think it's required or wherever the intensity of
the green is a bit low. We will wait for
it to dry and then add another layering of
the color on top of it. In here, I'm using
white ink to add the coloring for the stars
as well as the ghost. A thick layer of
white for the star. And now let's do the
coloring for our ghost. Is that the two colors did
not mix with each other. Adding the color
for the ghost hand. Carefully outlining this
section of the Christmas tree. And now for the
remaining portion of the ghost body that is wrapped around this Christmas tree, carefully doing the coloring, I would advise you to
wait for the green to dry and then do the
coloring for the ghost. M For now, let's continue with adding
the color for this ghost, the wrapped around
portion of its body. Adding a little bit of
more color in here, the intensity of the
white was a bit low. Also extending the
size of this ghost a little bit to insu it at the
proportion of its body and its head remains
somewhat to insu it at the proportion of its body and head remained somewhat normal. Otherwise, the head was ging comparatively small as compared to the thickness of its body. Doing the coloring for
the remaining ghosts. To create a clear
distinction between the hands of the ghost and the remaining
portion of its body, I'll be going in with
the black breastpin, fine liner or gelpin to do the outlining later on when
this whiting dries for now, let's continue with adding
the white for all the ghosts. If you want to make things a
little bit more interesting, you can also add the
Christmas caps for the ghost or different kind of cap or different accessories. You can also add
accessories like earrings, eyeglasses or moustache and other different kind of
accessories, as you see fit. You can also make
the ghost entangled in Christmas lights and
Christmas decorations. With these, we are done
with the two ghosts, doing their coloring
for this third one. I decided to make this
ghost a little bit larger. You don't have to stick with
the outlines that you have created and feel free to make changes and
adjustments as you see fit. Adding the color
for the remaining section of this ghost body, spreading the color
a little bit. Some of the region
of this ghost are a little bit less white, so spreading the colour
for those regions. With these, we are done
with three ghosts. Let's do the coloring
for the other three. Let's do the coloring
for the remaining. Outlining the side of
the Christmas tree. And now let's fill the remaining
section with the white. For this ghost, I'll only
be creating the ice. If you want, you can also
create the ghost mouth, as well as use a little
bit of red to add a little bit of red
chicks for our ghost. I decided to create one more
ghost as I was mansoning. Simple organic seek
for the ghost. And here I am using the
colour to do the outlining. You can use pencil sketch
to do the outlining and then fill the remaining
section with the white ink. Instead of using this white ink, if I had gone with
the white gel pen, it would have taken
bit more time. For most of the project, I
choose to use the white ink, and for some of the section, I used a little bit
of white gauze. And when these are done with the coloring for
our fifth ghost, let's create the
outline for its hand. I forgot to add the coloring for one of the ghosts
in the middle. I'll be doing the
coloring later on. Adding a little bit more
white for the star at the top to make it sep a
little bit more pointed. Apart from this larger star, I'll also be adding more
start on both the sides, a dozen of small stars
on both the sides. Let's do the coloring
for the Christmas tree. Is that the color that we
used earlier has dried up. And now in here, I'm using a bit lighter
tone of the green and creating this kind
of small strokes. I'm leaving a little
bit of a space in between some of
the strokes so that a little bit of the
olive green that we used earlier
could be visible. We'll be creating
the same kind of trees that we have
practiced and created. Feel free to use other green colour combinations to create your own
Christmas tree. For some of the regions, I'll
be completely overlaying this slight green on top of the olive green that
we used earlier, and for other regions,
we'll be leaving a little bit of
the olive green to be visible in between
different breast strokes. Carefully adding
this slight green just above the ghost body. With these, we are done
with the upper part. Let's continue
with the remaining section of this Christmas tree. It will be creating
the same kind of lights and
Christmas ornaments. We'll be using
yellows, red, blues. For the lower regions in here, I'm leaving a little bit
of more space in between the different brusstrokes so that more of the olive
green could be visible. If you want, you
can cover some of those section like in
here, I'm doing it. Or you can just
continue with it, making some of the olive green
from the earlier visible. Making sure that some
of the olive green from the earliest
would be visible, carefully filling
their color in between the two ghosts we have in here. Adding another of the
small brusss strokes for the remaining section
of this Christmas tree. And with these, we are done with a lighter
side of the green. This is our second coloring
for this Christmas tree. In here, I'm going to the bit
darker tone, grass green. So overlaying this grass screen, a little bit on top
of the lighter side of the green we used earlier, the same kind of stroke, a bit smaller strokes. Olas a little bit of this on top of the lighter
green as well as leaving a little bit of space in between different strokes so that the olive green from the earlier
could be visible. Filling this grass
green in between the different layers that we have created with
the light green. The colors will blend a
little bit on its own, adding it carefully in here
beside the ghost body. Carefully filling it in between that two different
ghosts we have in here, adding it for this last section. On top of the lighter
side of the green, creating a bit more creating bit more smaller strokes and
overlaying it on top of it. Skip a little bit of
distance in between the different rows of strokes that we are creating
with this grass green. Doing the same thing for
some of the other layers. I won't be covering
the entire section with the smaller strokes, but only covering some of the section of the slight
greens that we used. Adding a few more strokes
wherever it's required. And with these are done
with this grass green. I will wait for it to
dry and then add more coloring and more
detailing till it dries, let's add the coloring
for this course. The one we forgot the one I forgot to add
the coloring for. Once again, I'm using
whiting to do the coloring. Min causes us not to mix this color with the greens
that we use just now. Using this white to create the outline outline
for the gift packages, and now let's fill the remaining
section with this white. With these, we are
done with the coloring for all the six ghosts. Using this white to
do the outlining for this large gift we have in
here in the middle section. Let's make the hands
of the Ghost a little bit more distinct
using more white. Using more white to make
the clear distinction between the ghost's body
and the ghost's hand. We will wait for it
to dry a little bit, and then add the
eyes till it dries. Let's create the small stars. Simple star, just
like the star that I created on top of
the Christmas tree. Instead of this, if you want,
you can use the ink pen. It will make the process
a bit more faster. You don't have to
use this white to do the coloring for the stars
that we are creating in here. You can use the yellows, or you can use a combination of both the yellows,
yellows and the white, you can use the yellow to
create the stars and then use a bit of white to add
highlights and reflection. Or you can do the opposite, using the white to create
the stars and then use a little bit of yellow to add highlights and a
bit of reflection. I'll be creating multiple
stars on both sides. And this is going to take
a little bit of time. So be patient and
create the stars. And if you don't
want, you can just keep the project simple and keep the background blank or you can use or you can also create
a splattering effect. So just tapping
with your brush to create a splatter
across the background. That will be interesting too. Making the hands of this course a little
bit more distinct. Continuing on with creating more stars for both the sides. Mm. Apart from the stars and the spluttering
fan, if you want, you can also create
different kind of bulbs and lights and
ornaments in the background. In here, since this was
going to take a lot of time, I have increased the speed. If you want to follow
along with me, you can pause the video or you can just decrease the speed. And I think for these we
are done with the stars. If you want, you
can add few more. You can also vary the seeps in the sizes of the
stars a little bit. Here I'm using a
little bit of white to create this kind of
circular seep for the decorations and ornament
for the Christmas tree. Apart from this, I'll also
be using light yellow, a bit of yellow, red, and a few other
color if required. Otherwise, mostly, I'll be using the three
or four different colors, the white, red, yellow,
and light yellow. If you want, you can
add few more dots, but I think we are I think
I'm satisfied with it. Now in here, I'm going
with pale yellow. I mixed a little
bit of white with the yellow to create
this pale color. With this, I'll be creating
a bit larger dots, adding a little bit of
this pale yellow in here. Let's continue with
creating smaller. Let's continue creating a bit larger dots
with the pale yellow. Use a bit concentrated
consistency of the colour to overlay this on
top of the greens we have. As compared to the white
dots we created earlier, I'll be adding fewer dots
with this pale yellow color. On top of this,
I'll also be adding a little bit of yellow
when this dries up, Coloring some of the gifts that we have in here
with this pale yellow. Starting with the
lid now, let's do the coloring for the
remaining section. As you can see, I have used
a bit thicker consistency of the color so that I don't
have to redo the colouring, no second layer required. Using the same
color for this one, too, starting with
the upper part. Now let's do the
remaining section. Feel free to use other
color as you prefer. You can use the light
sets or the dark sides of the colour to do the
coloring for the gifts. This is Camo hue, a
bit darker tone of the yellow and creating
one more gift box in here. Cam you for this one, too.
Starting with the upper part. Now let's do the coloring
for the remaining section. Like the earlier two
projects that we have done, video this project is also divided into two parts.
This is the first part. And for the remaining
section of this video, I'll be doing the coloring
for the gift parcels. And then in the next video, we'll be adding the
final detailing for our Christmas
trees, the Ghost, and it little bit of highlight patterns and
designs for the gift boxes, and we'll be completing
our project. In here, I'm using orange to do the coloring
for the gift box. I decided to use this orange for one more gift box in here. Only a small portion of
this is visible in here. And for the last gift box in
here, I'm using the blue. If you want, you can increase the number of the gift boxes, you'll you'll just have to use a bit thicker consistency
of the color that can be overlaid easily
on top of the white. Carefully adding this blue in between the orange
and the yellow, we don't want the
two colors to mix. Otherwise, on one side, it
will create a greenish color, and on the other side, it
will create brownish color. And with this, we are done with the primary layering of the
color for the gift boxes, we will wait for it to
dry a little bit and then add the gift ribbons,
patterns and design. Until it dries, I'm using this blue to create another kind of ornaments or light
for our Christmas ring. Random circular dots. This is somewhat similar to the sides as we use
for the pale yellow. Instead of this, you can
use any other color. You can also increase or
decrease in intensity. You can use bit lighter tone of the blue or bit darker
tone as you see fit. Continuing on with the
blue to create this kind of circular dots for the remaining section of
this Christmas tree. This is what we'll be
covering in this video. I'll see you in the next
part of this project. We we'll be adding more details and completing the project. See you there.
11. Coloring the gifts: H. Let's continue
where we left off. We were adding the coloring
for our ornaments and lights. In here, I'm using red to add
another kind of ornament, the simple tear drop
shaped like ornament, adding it randomly in
between the white, blue, and the pale yellow dots and the lights
that we have created. Instead of this, if you want, you can use other seats of
the color to do the coloring, you can use orange, you can use pink, you can use purple
or any other color or any other color you prefer. You can also vary the seeds
and the sizes as you see fit. With this, we are done
with the upper part of the Christmas tree containing
on the remaining section. And with these we are done with this tear drop lights ornament. Let's use this colour to create the ribbons and the wrapping
around the gift parcels. Using the color for this
large gift we have in here. Instead of filling the entire
section with this orange, I am just creating two
simple parallel lines. I'll also be creating
simple patterns and design using this orange for
some of the gift parcels. Feel free to use other
color combination, other kind of designs
and patterns. Designs and pattern I was talking about, simple
hatching line. A bit broader as compared
to the ribbons we created. This is the simple kind of
pattern for the upper part. Let's do the outlining
a little bit. With this, we are done
with this one of the gift. For this 12, let's create
the same kind of design. For this 12, creating
the same kind of design, I'm just reversing the order. For the upper part, and
I created slanted line, and for this remaining
section, plain straight lines. Let's do the outlining and
make a clear distinction between the ghost and this
gift we have in here. And as I was mentioning this has dried up the pale
yellow we used earlier. I'm using this
Camboz and creating small dot on top of the
pale yellow to sew a little bit more to add a
little bit more characteristic to this yellow
light that we created. Instead of this,
you can also use white or other colour
to add small dots. You can use the
black paint to do the outlining and add
small pattern or design inside the larger ornaments and the larger lights that
will be interesting too. And with these, we
are done with the camo for the Christmas tree now using this camo
for this gift parcel. Creating simple ribbon sand. It's not visible in here, so I decided to overlay
another layer on top of it. Still, it's not that visible, but when this dries up, I'll be going with the
black to do the outlining. In here, I'm using
a little bit of white to add small reflection, a bit of highlight for some of the blue ornaments that we
added. This is optional. If you want to keep
things simple, you don't have to add this white since we already have
used a lot of white, this is a simple star like
sep I was mentioning about. Simple star like sep, I'll mostly be adding
for the lower section. If you want you can add it
for the upper section too. These are not that defined. Oh Now using this white for some of the parcels
we have in here. Apart from creating ribbons
and the gift wrapping, I'll also be creating patterns
and design using this. Simple design for this.
Now for this one, I decided to create
simple design. Oh for the upper part, I decided to create this
kind of slanted line. Using this white to do the
outlining for this gift. And I also decided to use
this white for this blue one. Simple pattern, straight lines, simple pattern, starting with the straight line for the top. Now for the remaining
section, bit slanted line, just like you have to be
dead with orange color. Instead of this, you can create other kind of pattern or design. For this two, if
you want, you can add designs or
pattern on top of it. I decided to do the outlining
for this one with a white. Adding few lines,
broken lines just below the gift parcels we have
in here. This is optional. If you don't want, you can
just keep it as it is. And with these we are
done with the white. If you want to add a little
bit of highlight or add more white wherever you
think it's required, you can do that. In here, I'm using the breast
pain to create the eyes. Simple eyes for our ghost. I won't be adding the
mouth or rosy checks. If you want, you
can do that using a little bit of red and add small dots with the red just
below the eyes of the ghost. For all the remaining five
ghosts we have in here, let's create their eyes. You can leave a little bit
of white space in between the eyes to make it a little
bit more interesting. We have got three more ghosts. I'm also doing the outlining for the ghost hand to create
a clear distinction. Small elliptical
see for the eyes, and let's do the outlining
for the hand of this ghost. Making the outlines of the
hands a little bit more clear and adding the eyes for the last ghost
we have in here. Creating a clear
distinction between the hand and the remaining
portion of this large ghost. If you want, you can
use this black paint to do the outlining for the other
section of the ghost body. You can also use this
to create a little bit of pattern and texture for the
Christmas trees like this, like we did earlier on this
simple, this kind of line. And with these, we ad
with this final project, if you want to add more
details, highlight, reflection or yeah
anything else?
12. Conclusion: Thank you so much for joining me in this Ghost of
Christmas class. I hope you had a
wonderful time painting this cute festive ghost and
colorful Christmas tree. Each project sent us little ghost helper peekaboo
under the Christmas tree, and midnight ghost gathering was designed to help you
explore simple safes, bright colors, and fun holiday
things in relaxing way. You have learned how to create expressive ghost characters, playful decorations and
vibrant treen designs all using easy ghost techniques. Whether you followed along exactly or added your
own creative touches, I'm really glad I'm really glad you were
here painting with me. Now that you have
finished the class, I would love to see
what you have created. Please upload your projects
in the project gallery, your final paintings, sketches, practice sheets, or
even color tests. Seeing your artwork is one of the best part of teaching
here on the skills here, and your uploads helps inspire
other students as well. If you enjoyed the class, I truly appreciate a
review or a feedback. It helps me continue
improving and allows other students to
discover this class too. Thank you again for
painting with me today, wishing you a warm, creative
and festive holiday season.
 Vishal Munshi