Transcripts
1. Welcome!: [MUSIC] You want to learn
how to draw with ink pens, well, welcome to my very
own personal paradise. The thing is this is a drawing class but not
your average drawing class. Most people think that a drawing happens between
this guy or girl, the pen and the paper, but a lot of your
drawing skills, if not all of them, actually start right here; it really is a mind game. In this class, I'm going
to show you how to build better observation skills, how to become more
confident as an artist, how to build visual memory, and of course, I'm also sharing a ton
of drawing techniques that will definitely bring your drawings to the next level. We're also going to
talk about how to become more creative
and how to have better ideas and more unique
ideas for your drawings, and how to actually create amazing and compelling
illustrations that actually tell a story or send
a message to your audience. Who is this class for? Amazing question.
Thank you for asking. It could be a complete beginner that's just starting
out withdrawing, or maybe you have
some experience with drawing but you want to try out using ink pens
for the first time, or maybe you are an experienced
artist but do you want to dive a lot deeper into
learning art techniques. Welcome, this class is for you. Wherever you are in
your art journey, I guarantee you that after this class you're going to be drawing better than
when you started. Before we start, don't forget to follow me
here on Skillshare, just click this follow
button up here so we can become Skillshare
best friends. [LAUGHTER] I'm kidding, you don't have to
be my best friend. Grab your art materials and
of course favorite drink, because we should be feeling amazing while we're
doing in our class. Enough with the talking. Let's start drawing.
[MUSIC] [NOISE]
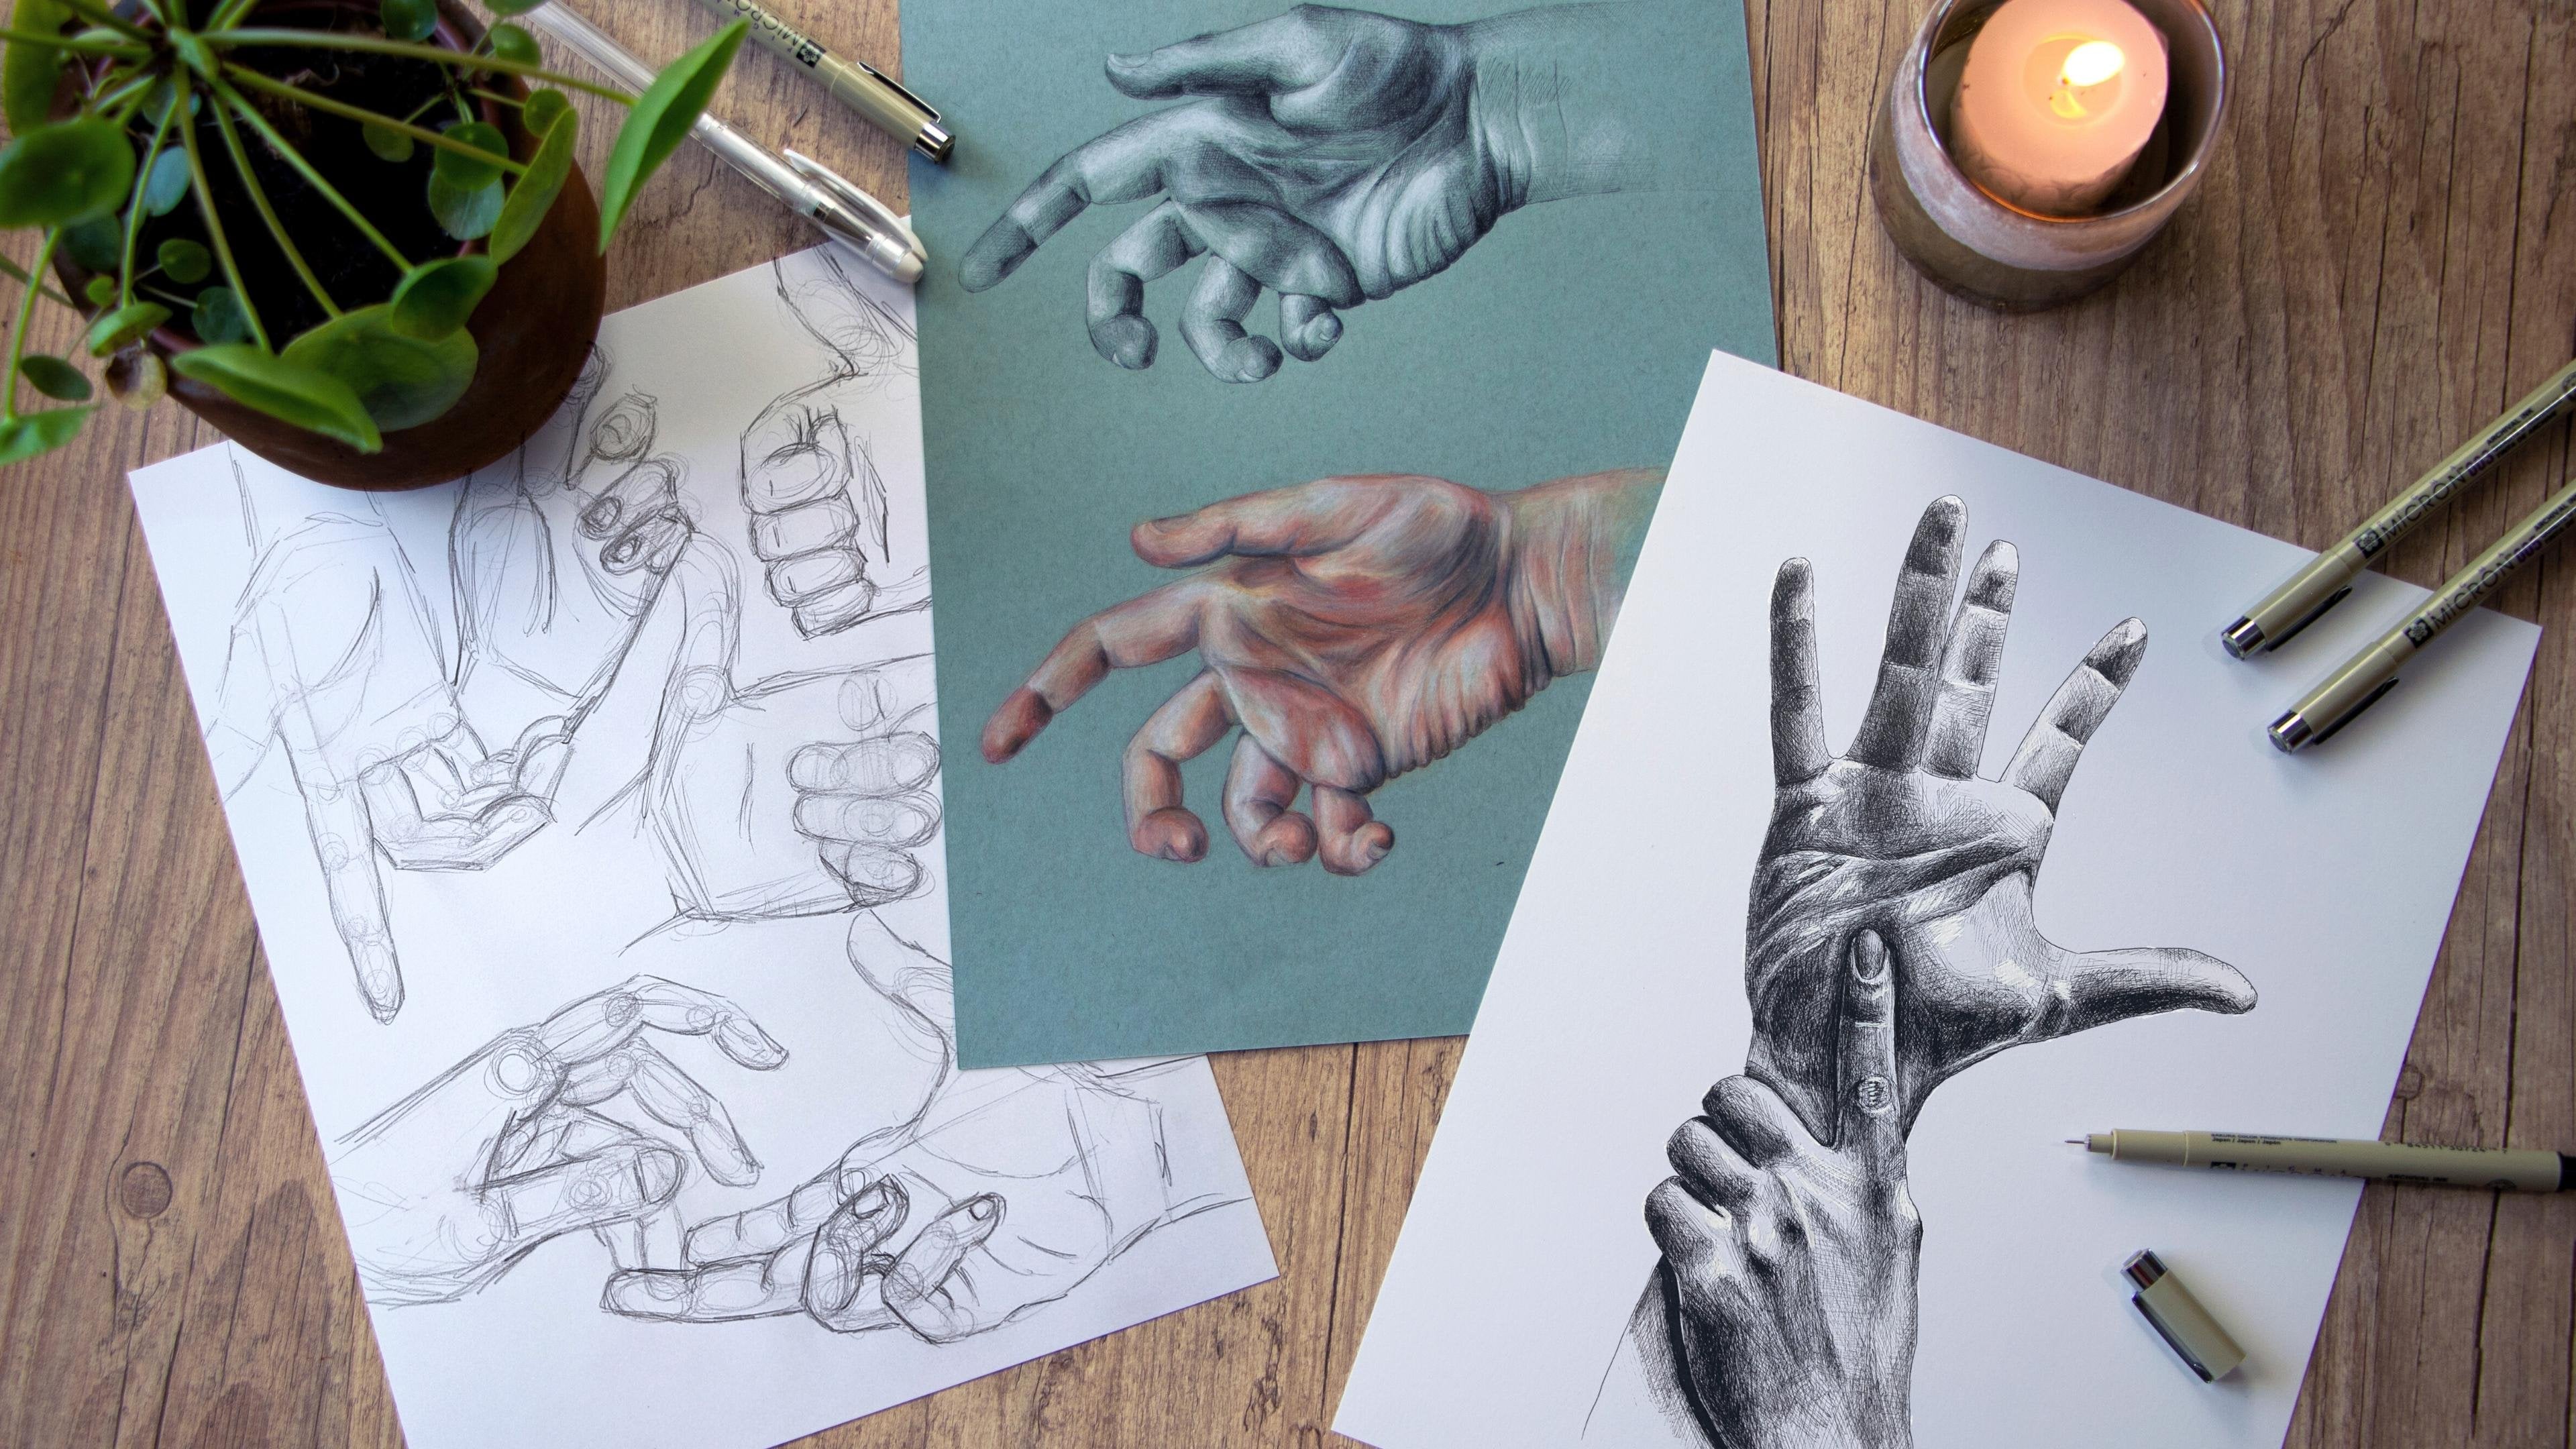
2. Materials: For this class, you're
basically going to need only your sketchbook, pencil, eraser, and pen. I will be using a 4H
pencil to sketch, a plastic razor, and fine line ink pens
in different sizes. But feel free to
use the materials you have available
to you because the whole idea of this class is for you to learn and practice, so anything you have
available will work. Now let's start drawing.
3. Working On Your Observation Skills: Drawing actually relies a lot on your observation skills, even when you draw
from imagination, you're actually
trying to remember what the thing you're
trying to draw looks like, and you're basically
recreating that in a drawing. You will notice that observing things to draw them will allow you to see a lot more details that you wouldn't see
if you weren't drawing. In this lesson, we're going
to practice our observation, to start building a better eye
for detail and proportion. You'll see that sometimes
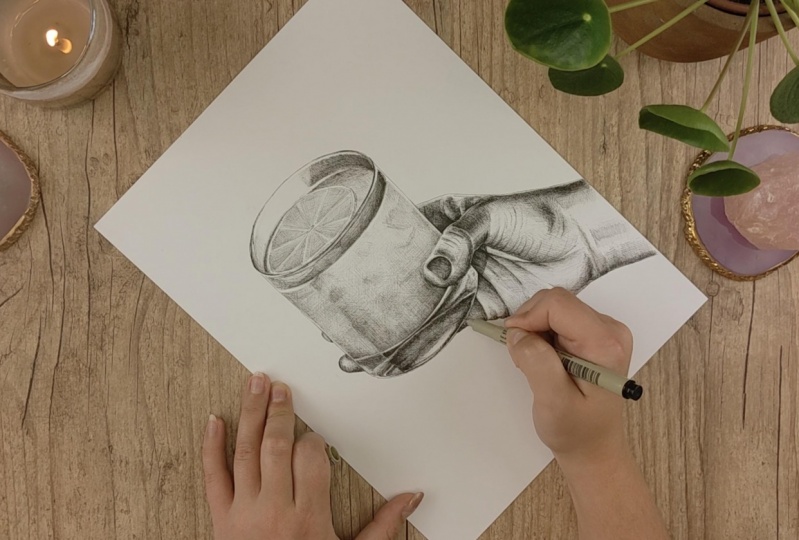
our brain can trick us and what we think we are seeing is actually not very accurate. Let's work with this example, we are going to draw using
this picture as a reference, and I know this
looks hard [MUSIC]. Well, I picked a
challenging picture on purpose because I
want you to see how much you can improve your
drawing skills using the methods I'm going to teach you throughout this class, even if you are working
with a really hard subject, and hopefully after
this drawing, anything else is going
to be a piece of cake. You can know all this
picture in the projects and resources tab down
below and with the pen, not a pencil, I want you to try to draw what you see
in this picture. I'm using a 05 ink
pen by the way. Why are we using a pen? You can't erase the pen, so working with a
pen right away will help you build the
confidence in your drawing. I know this is
challenging and it can be frustrating, believe me, it is for me as well, but it's not supposed
to look good yet. Don't judge yourself. The whole point of this
lesson is to show you that drawing is about technique
and this can be learned, so here I just want
you to see what your drawing will look
like with no technique, we are just free hand
drawing what we think we are seeing and we're
just doing our best. [MUSIC] Also, of course, I'm going to teach you
how to properly shade your drawing with
ink pens later on, but if you want to try
to add some shadows, just to experiment a little, that's great, don't
be shy and don't worry about what you're
drawing looks like yet. I just want you to draw with
the skills you have now, it doesn't have to be as
complex as what I'm doing. It could be something
much more simple because the whole idea is for you
to see your progress. After I teach you
all the techniques I'm going to teach you
throughout this class, we're going to redo this drawing using all
of the techniques, and then we're going to
compare this version of the drawing with a new
and improved version. This is just a starting point, so you can see
where you're at in your drawing skills [MUSIC]. As you can see, I did my best
at drawing what I saw using no technique without sketching first and just going for it, and this is what I was
able to come up with. As you can see, the glass looks really weird and not straight, the thumb of this
hand is like super disproportionally small compared
to the rest of the hand. This happened because
our eyes are not super used to pick on this
details right away. When you look at something, your brain will immediately find in your memory
what the thing is, so if you've seen a hand
holding a glass before, which you definitely have, your brain will try to relate the thing in
front of you with this previous images of hands holding glasses that
you have in your memory. Of course you've seen hands holding different glasses
in different ways, different hands,
different positions, different types of glasses,
everything different, and your brain's trying to recreate the thing
you were looking at, but your memories that are
usually there to help, they can be getting in the way. Now let's see a few ways you can improve your drawing skills.
4. Reference Drawing & Sketching : In this lesson, I'm
going to show you a few techniques to sketch, especially when drawing
from a reference that will help you create
the proportions right. Any of these methods will naturally train
your eye to observe the things as they are and not as you think they are if
this makes any sense. This time we're
using a pencil and eraser because I
want you to practice finding the right
proportions and it's okay to make mistakes and
try again if you have to. The first technique
is to search for geometrical shapes and
angles in your reference. Instead of drawing a glass, you're actually
drawing a few circles and some straight lines. This works because
your brain knows geometrical shapes and there's
not much variation there. A circle is a circle, a square is a square, a straight line is
a straight line and your brain's
not confused with a bunch of different types of circles and types of squares. Now if you're drawing a
glass with a drink inside, there is a lot of
variation in your memory. You've seen thousands of
glasses through your life and your brain thinks it knows what that's supposed
to look like. We'll try to help you
create your drawing by offering previous knowledge
about a hand holding a glass. You won't be just simply
drawing what you're looking at, you're actually drawing
what you're looking at with the interpretation and filter of your previous experiences
with the subject. When you draw just
your magical shapes, you break the concept
of a glass and a hand into shapes and
lines and by doing this, your memory doesn't
come in between what you see and what
you draw as much. Basically, it's easier for
your brain to interpret and process a circle than
a glass of water. Once you have the main
geometrical shapes down on paper, you can start making
some decisions and adding some extra details. Now, this looks much better
than our first attempt. Now let's bring this
trick to another level. Turn your reference
upside down and sketch the shapes and
angles like this now. I know it feels weird at
first but when you're working on a picture normally
like we were before, even though you're breaking
things down into shapes, you still see a hand holding a glass like you
know what that is. Your brain will automatically associate what you're looking
at to a hand and a glass. There is still some level
of interpretation there that prevents you from
simply drawing what you see. By turning the
reference upside down, you make it a little
harder for your brain to interpret the
reference and connect it with a hand and a
glass and it's easier to see just shapes and lines. I'm just doing the same
thing I did before, but with my reference upside down and breaking
things down into geometrical shapes
and I'm looking forward the main
angles of things. You can also look at
the negative space. Wherever there's no elements
and nothing for you to draw, you can look at those
spaces and think, what is this geometrical shape. You can use that as a guide for you to draw your
shapes and your lines. As you can see, this
looks even better than the first sketch
in terms of proportion. Now join me on the
next lesson so we can start using our ink pens again.
5. Introducing Ink Pens: Let's play with our
ink pens a little bit. When you're working with pens, there is a few different ways to create different
effects in your drawing. First, remember that
this is line art. It's different from a pencil, where you can just smudge the graphite to create
shadows and textures, so with a pen, you're only able to
create lines and dots. You can't really smudge the edge to create
a fade away effect, like you can with graphite. In reality, when you
look around you, you don't always see
very clear lines. You see shapes, you see colors, you see gradients, you see textures, but you
don't really see black lines. The more realistic you want
to get with your drawing, you want to work with more
delicate and discrete lines, using, for example, a 0,0,3 or a 0,0,5 line. The more minimalistic, or cartoonish you want to be, so if you want your drawing to actually look like a drawing, and you want to do
something that's more stylized for example, the thicker you can
go with your lines. There's no right or wrong. It's just the style that you
choose for your drawings. If you are just doodling, or if you actually want the lines to be very
clear and visible, go for the thicker lines. There are a few ways to create a more delicate
and thinner line, using the same pen. First, always save
your old pens, don't throw them away, they are going to be
your best friends if you want to draw
realistic with ink. They are the best
ones for shading, and you can see the
difference on the tip. As you can see here, the new pen has a bigger tip
and the other one, you can see it's smaller, because I used it a lot already, and when you do some
lines within your pen, you will notice it
releases a lot more ink, and your lines are more clear, they're more visible, which
you might want it or not. Remember that you
can't erase the ink, so once the ink
is down on paper, there is no much you can
do to fix a mistake, so careful with new pens, they release a lot of ink. If you want the lines to
be a little light and the little smoother
and more discrete, you can use an old pen
and as you can see, doing the same movement, we get a lot less ink on paper. Your pens are actually
going to change, the more you use them. Now, if you don't
have an old pen, let's try something different. Look how the lines look, when I work with
the pen vertically, like this on a 90-degree
angle towards the paper, and how did the lines look when I tilt the
pen a little bit, and I'm grabbing the pen
farther from the tip. The pressure of the pen on the paper is a
little lighter, and I'm working on
a 45-degree angle. It releases a lot less ink, and the lighter you
touch the paper, the less ink it will release. Go ahead and try
it for yourself, so you can start warming up, and getting familiar
with your pens. The more you practice, the more you're
going to be able to control how much ink
is released on paper, but while you're
just starting out, It's always good to have older pens available
to make sure you don't accidentally release a lot
of ink where you don't want. Let's do some exercises to get a little bit more
familiar with her pens, and build up our confidence.
6. Warm Ups & Exercises To Build Confidence: Now let's [inaudible]
quick exercises together. This is going to be super quick, and you can totally do this as a warm up whenever you want, so just start, let's practice drawing
some straight lines. Just try to draw parallel
lines like this, and yes, this can be pretty tedious, and I don't know about
you, but for me, I noticed that this
is a lot about focus. It's easy to go on like an automatic mode
and get distracted, lose focus and start thinking about what
you got to have for dinner or about that meeting
you have tomorrow morning. When my mind wanders off is when my lines start bending a little, and you can totally tell when I'm focused
and when I'm not, by the way my lines are looking. You can totally call this an act of meditation if you want. Because the more
focused you are, the straighter your
lines will be. Also observe that my whole
arm is moving with the line. I'm not keeping my arm still
and moving just my hand. My wrists are locked, and my whole arm
moves with the line. This is very important. If you move just your hand, it's nearly impossible
to draw a straight line. [MUSIC] Now let's change the angle a little bit and
draw some vertical lines. You're going to feel
a difference here, and maybe you're going
to find this easier. Maybe you're going
to find this harder than the horizontal lines. But either way, you want to
do the same thing and move your whole arm in the direction of the line and not
just your hand. If you want to bring this
up to another level, you can even try to
draw straight lines in all directions and just
see how it feels for you. [MUSIC] Another thing you can do is
draw spirals or circles. This is harder than it looks, but the more you practice, the more you're going to be
able to control your pens, and the more perfect
your circles will be. [MUSIC] To fill the empty spaces. I'm just going to draw some extra random lines like this, until the whole page is filled, Here hear you go, this is our first
warm up exercise. [MUSIC] Another fun exercise
I want you to try out is to do one line drawings. To do this one, let's grab
this same reference photo one more time just for fun and
try to draw what you see, but with just one line. When you touch the
paper with your pen, you can only lift it from the paper when you are
done with your drawing, of course, some lines
are going to go over other lines,
and this is okay. Don't worry about making
anything beautiful, just have fun and
don't judge yourself. [MUSIC] Our last exercise is to draw without looking
at the paper. I know this sounds hard. It actually is. It's very weird to draw
without looking in the paper, but it's a very
interesting exercise to build your
perception of space. Of course, this is now
going to look pretty, so again, just have fun
and don't judge yourself. You're allowed to look
at your reference photo, just not at the paper
where you're drawing. This is also great to
take your brain out of that logical space and get
out of your comfort zone, and this is always
great for creativity. [MUSIC] This is what I
was able to come up with. I hope you'll like
this masterpiece. Now that we're all warmed up, let's learn some shading
techniques with our ink pens.
7. Creating Texture: Hatching: In this lesson, you're
going to learn how to shade smoothly with the
hatching technique. [MUSIC] Looking at
these examples, you can see that you
can be more precise, less precise, you can use thicker lines or very
thin and delicate lines. You can make your lines
very clear and visible, or make them smoother and
create a more realistic shadow. As you can see, you
can totally develop your own style of
hatching with time, and to me, they
are all beautiful. There are many ways to do this, and all you have
to do is shade by drawing short parallel
lines close to each other. The more realistic and smooth you want
your drawing to be, probably the more time you will have to put
into your drawing. That's something to take
into consideration too. Now let's practice together. I can hatch in only one
direction or in many directions. For this exercise, I'm
going to teach you the cross hatching technique, which is one of my favorites. All you have to do is draw a set of short lines
in the same direction, parallel to each other, and then another set of lines in a different direction until
we have multiple sets of lines in all directions creating this interesting
texture you see here. The older the pen and
the thinner the lines, so the smaller the
tip of your pen, the smoother your
shadows will be. If you want to make it darker, you can just add more lines in the directions that are still missing or wherever you
see some white space. Depending on how dark you want, if you want something
to be really, really dark, you can also
upgrade to a thicker pen. If you're working with
a 005 and you want to add a lot of darkness
into some space, you can use a 01 to do that. To fade this shadow
away towards the light, we have to gradually
add less ink to the paper and let the white
from the paper appear more. You can do this by adding lines that are further apart
from each other, you can also use an older pan, you can tilt your pen
on a 45-degree angle, or you can just switch to a different pen
with a finer tip. Notice that each line
is a pen stroke, you are not doing a zigzag. After each pen stroke, you slightly lift the pen from the paper because
this helps create lines that don't have the
beginning and end too defined. This is how you create a
smoother shadow in the end. This is a great
practice for you to get more control over your pen and for you to understand the different values you
can create in your drawing. [MUSIC] Now when you're ready, let's learn another
technique that I love called stippling.
8. Creating Texture: Stippling: [MUSIC] In this lesson, I'm
going to teach you how to use dots to create your shadows. This technique is
in a way easier to control your pen and how much
ink you add to the paper. But it's like five times more time-consuming
than hatching. I also think that with
the stippling technique, it's easier to create a smoother effect on your drawing as you can
see in these examples. Stippling can work for realistic artworks or in a
more abstract perspective too. I love this technique, let's see how this
works using ink pens. To do this, I recommend using a newer pen because you need a nice flow of ink coming out of your pen
towards the paper. All you have to do is add dots to the paper where
you want it to be darker. The closer the dots
are from each other, the darker your shadow
will look like, and when you want to
move towards the light, you gradually add
less dots to allow the white from the paper
to appear more like this. [MUSIC] Of course, I'm speeding this process a lot. This actually took me
literally one hour to finish and that was
just as tickling part. The hatching took me
only like 15 minutes. When you try out
both techniques, you will probably feel more
comfortable with one or another and there is
no right or wrong. It's totally a matter of taste. [MUSIC] As with anything, the more you practice,
the more control you're going to have with
both techniques, and then you're just
going to be able to choose by your favorite style. Now let's go a little deeper
into lighting and shading.
9. Understanding Light & Shadow: [MUSIC] Let's experiment
with some examples. Look at this cube,
as you can see, we have some different
tones of orange and to make it easier to understand
the value of each shadow, let's remove the saturation and make this black and
white, there you go. Now we can see better
each tone of gray, and we're going to try to reproduce these
tones with the ink. To make it easier
to see the tones, you can squint your eyes a little bit and you
will be able to clearly see the different shades of gray you have in
your reference picture. You have multiple
ways of creating the different tones of
gray using lines and dots. You can use the stippling and hatching or you can
do something more abstract by simply drawing parallel lines that
are closer together to make it darker and farther from each other when
you want it to be lighter. Of course, this is more stylized but very interesting
and quick to draw. [MUSIC] Now if you want to
do something more realistic and you want to portray the complexity of
the shadows in your drawing, we're going to take
into consideration how shadows are more imperfect. Using the cross
hatching technique, just add a bunch of
lines in all directions, and where you see a darker tone, you add more lines, and where you want
it to be lighter, you add less lines or thinner lines or lines that are farther away
from each other. [MUSIC] Notice that I'm moving
the paper a lot and I apologize if this makes it harder for you to
see what I'm doing, but you will start
noticing that depending on the angle that you
work with your lines, you're going to feel
more comfortable. Your lines are going
to look better. You're going to prefer a few angles of moving
your hands than others, and it's totally fine to move your paper around to make
yourself more comfortable. [MUSIC] Let's take some practice, especially to create
the lighter tones, but don't give up, you
can totally do this. Now let's try the same process, but with the sphere, this can be a tad bit
more challenging because now you have to fade those
shadows towards the light. Just look at this
reference here, you have the light
coming from here, creating this beautiful shadows, and you also have this reflective
light coming from here. Squint your eyes if you want
to see it more clearly. We basically have our lights
here and our shadows here. When you start hatching, you start from the
shadows and you fade away towards the light. Just create a few sets
of lines on top of each other in different directions
and move towards the light. This is really a matter of practice and the more you
work on your hatching, the more you will
be able to create the different tones of gray
and black with the ink. Also, feel free to
experiment with different pens so you can
see the different results, and depending on the
thickness of your lines, you can see which
ones you like more. This is also a great exercise
for you to try to create this curved effect
that a sphere has. At first you might feel
like you are adding too much ink and
that's totally normal. Just keep drawing and with time you're going to become
so good at this. [MUSIC] As you might have noticed, I ended up adding too much shadow on
the top of my sphere, and that's pretty common when
you are working with ink. It's part of creating
a drawing by hand. You can't always have
everything be perfect and sometimes just have to accept that this is part of
a handmade drawing. Now that you learn how to
properly shade with ink pens, let's go back to our
first reference of that hand holding a glass.
10. Working With Patience: Complete An Ink Drawing: I [MUSIC] name this
lesson working with patience because
I think that this is the biggest message behind all this work we're going to do right now, but
we'll get there. Let's just start
from the beginning. Go back to your sketch and open your reference
picture again. If you're happy
with your sketch, you can start outlining
the drawing with ink and I'm using
a 0,1 for this. Remember to only outline the very clear lines in
your reference photo. You just want to mark
the most important lines so you can start shading and the shadows are the
ones that are going to create the drawing,
not the lines. These first lines
are just guides and once you have them
all down on paper, you can erase the pencil
and work with just the ink. Remember that in real life
we don't see many lines. We mostly see shapes, textures, and shadows, so only outline what
is really necessary. When you are ready,
you can choose either the stippling or a cross-hatching
technique to shade. This is where your drawing will start taking shape
and personality. I'm going to use the
cross-hatching technique. All you have to do is hatch short parallel lines
to create the shadows, always moving from
shadow to light. Start where you have
your darkest spots in your reference
and then fade away the shadow towards
the light by adding less lines or thinner lines where you want it to be lighter. I always get a
little insecure at this stage so if you're
feeling like this as well, know that you are not alone. But we have to start somewhere, and the safest
places to start is always in the darkest
parts of your drawing. Spot those places in
your reference photo, and then start shading
your drawing from there. We can always fix a little
thing here in there later, but not big mistakes. Be careful not to hatch too
much ink right off the back. Start slow and build your
confidence from there. Remember that these
are just shapes in different tones of gray. You can still work with your
reference upside down if you prefer and it
works the same way. You add more lines where the shadows are and less where
you want the lights to be. I know it's really
different than working with pencil and the pens can
be a bit tricky at first. But the more you draw and
the more you practice, the more confident
you will become. Here comes the patience factor. I notice that in a lot
of your drawings when you guys post the
projects on my classes, I can see that you're
really good at drawing but sometimes I can tell that if you just took a
little bit more time and had a little bit more patience
and did things with a little bit more
care and attention, your drawings will be
so much more realistic. If you are in a hurry or if you'd start getting
bored with your drawing, just take a break,
go for a walk, go have a snack. You don't have to finish
this drawing on one sitting. I prefer that you take your
time with the time you have, then try to finish everything
in the time you have. Drawing with ink is a slow process and we have a lot to learn from
this beautiful tool. Just allow your pen to slow
you down a little bit. We're in such a hurry
like in general, and feeling pressure to produce more and to
be more creative and to work on our hobbies and to do all these things and it can
be really overwhelming. I often get frustrated
with how slow this drawing process can be
and whenever I feel that way, I just lose connection with the drawing and I start making a lot of mistakes and the
results are just not so good. Take a deep breath, put on a cool show or a
podcast in the background and just let your mind
relax while you draw. This can be boring if
you let it be boring, but it can also be very relaxing and nurturing if you
create the space for it. Don't pressure
yourself and have fun. That's honestly why we do this. I know that drawing glass can be pretty intimidating because you're trying to portray
transparency in your drawing. But remember that if you
dissociate the idea of a transparent glass into shapes and colors
and in our case, tones of black and white, it's easier to draw. You're not shading a
transparent glass. You're creating
this specific tone of gray in the specific shape. It's a mind trick, when things seem
too hard to draw, it's probably because
your mind is overthinking the process and interpreting what you're looking at too much, so don't let your
mind overthink it, just break things
down into shapes in your mind and try to recreate
those shapes on paper. If you find it helpful, you can still turn your
reference picture upside down again to help
your mind relax. One thing you might
be noticing is that the drawing has a
lot more contrast. It's a bit darker than
our reference and the reference photo has a
lighter tone overall and that's just because we are
working with black ink and our reference doesn't even
have really pure black. Unless you're working
with gray ink, you won't really have
the exact same tones, but you can recreate them
with the black ink and end up with a picture that
is more dramatic and in my opinion,
more interesting. I love realistic art, but I think it's always nice to keep some of the drawing factor. That's where you add your style and your
personality to a drawing. Now join me on the next
lesson so we can talk about creativity and how you can
find your voice as an artist, and how to express
that in your drawings.
11. Creative Drawing: Have Better Ideas For Art: How to have better and more creative and more unique ideas for your drawings. [MUSIC] When I was starting to take my
art more seriously, I wanted to create
things that were original and things that no one would ever see from
any other artists, but I just couldn't do it. I couldn't find
ideas at that time. I used to draw a
lot from reference, which is a great way
to study and practice, but I would take a
picture and then basically copy that
picture in my own style using ink pens or
using pencils and it helped me learn how to draw. Drawing from
reference is amazing, that's why we're doing
this a lot in this class, but unless you're the one that took the picture
and that planned a picture out and
then you use that as a reference to draw,
you're copying someone. [NOISE] Copying someone else's art,
which is that picture. How do you find that thing
that you have to express? The first limiting belief that you need to break is that, "You're not creative, you don't have a message to be sent out; you don't you deserve
to be heard." [NOISE] A lot of us have these beliefs and sometimes
we created these beliefs in our childhood and
I'm here to tell you that it's time
to let that go. Your voice is important. The fact that you're
here wanting to express something through
art, that's enough. You are valid, your story is
valid, your life is valid. It doesn't matter what
is your life situation. You are an important person and no matter what's happening in your life or what
choices you make, your voice is worth being heard, and choosing art to do
this is a beautiful path. I'm going to tell
you how I do it because as I shared
with you right now, it was really hard for
me in the beginning. I would look at artists that I admired
and I would be like, '"I could draw this. But how did they come
up with this idea?'' This was mind-blowing
to me that people would have such amazing
creative ideas. People who illustrate
comics, articles, books. I feel like some people are more natural at turning thoughts and ideas and feelings into
visual representation. It's not necessarily
natural for all of us and it wasn't really natural
for me in the beginning. [MUSIC] That being said, let me tell you how you can have an idea for a drawing
in 10 minutes. This method I'm going
to teach you right now is in almost all of my classes. If you want to follow
along with me and see me doing it from beginning to
end with a specific theme, go to my profile and check
out some of my other classes. But in this lesson
I'm going to show you a less practical side of this method and more
of like the results, I'm going to show you some of my artworks and how
I came up with them. Here's what you have to do find a starting point. It
could be anything. Sometimes you have time to draw, but you don't have a purpose,
you don't have an idea, you don't have a
feeling, you don't have anything to put down on paper. If you use this method, you can just literally
pick something, pick an object in front of you. You can pick a song that
you've been listening to. You can pick a movie that
you watched last night, and then you can turn that
into that starting point for brainstorming and then come up with something creative. Maybe you want to
illustrate an article. Maybe you want to
illustrate a song. Maybe you want to
illustrate a feeling. Maybe you have an
idea in your head, find a starting point. Now, from this starting point, when you think of it, I want you to let your
imagination drive you to visual elements that
just come up to your mind. Maybe it doesn't look
like they are related, but your subconscious
mind is going to make these connections and give you all the elements
to work with. I like to do this by writing. Everything that I
think I write down and then you don't have
that pressure of, I need to find an
idea for a drawing. You're just writing down ideas and they can be the most random, completely weird things,
visual elements, colors, feelings, specific people
you know, animals, literally anything that
comes to your mind, and the most important
thing is not to judge; don't judge what
comes to your mind. Don't filter anything,
spread it out. Most of the things
you write down you're not going
to use anyway so you don't have that
pressure that this has to become a drawing yet. You know what I mean. After you wrote everything
down and you have a bunch of interesting
elements and ideas, you can pick and
choose some of them, combine them into a drawing, and that's definitely
going to be something unique that no one
else would think of. At this point, you might have a clear idea of what you
want to draw or maybe not, maybe you want to do some
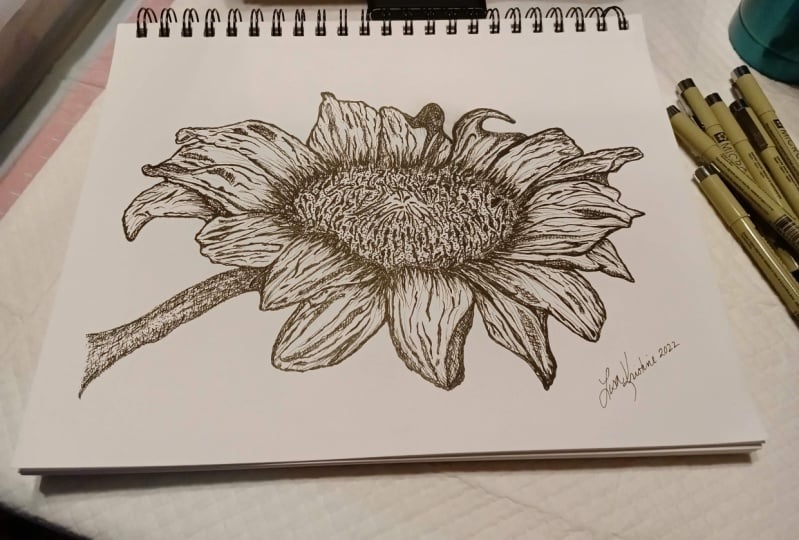
sketches and some drafts. This is why I like to have a sketchbook that's really
not supposed to be pretty, it's more like little
drafts and quick sketches that I do just to put
my ideas together. This is brainstorming
with yourself too. This helps us put meaning and intention to all
of our artworks. To me, this motivates
me to draw more. If I'm drawing just to draw, just to practice, it's a
little discouraging to me. [MUSIC] I like to have
purpose in my artworks. Once you have a draft and an
idea that's in your head, you can look for references,
but at this point, you're not looking
for a reference to copy that whole reference. You're looking for references to support your idea. Do
you see the difference? What? Your idea is your creative, original thing that's
coming out of you, and references are
there to support you, to help you bring
this idea to life. Now let's work with
a few real examples so you can understand
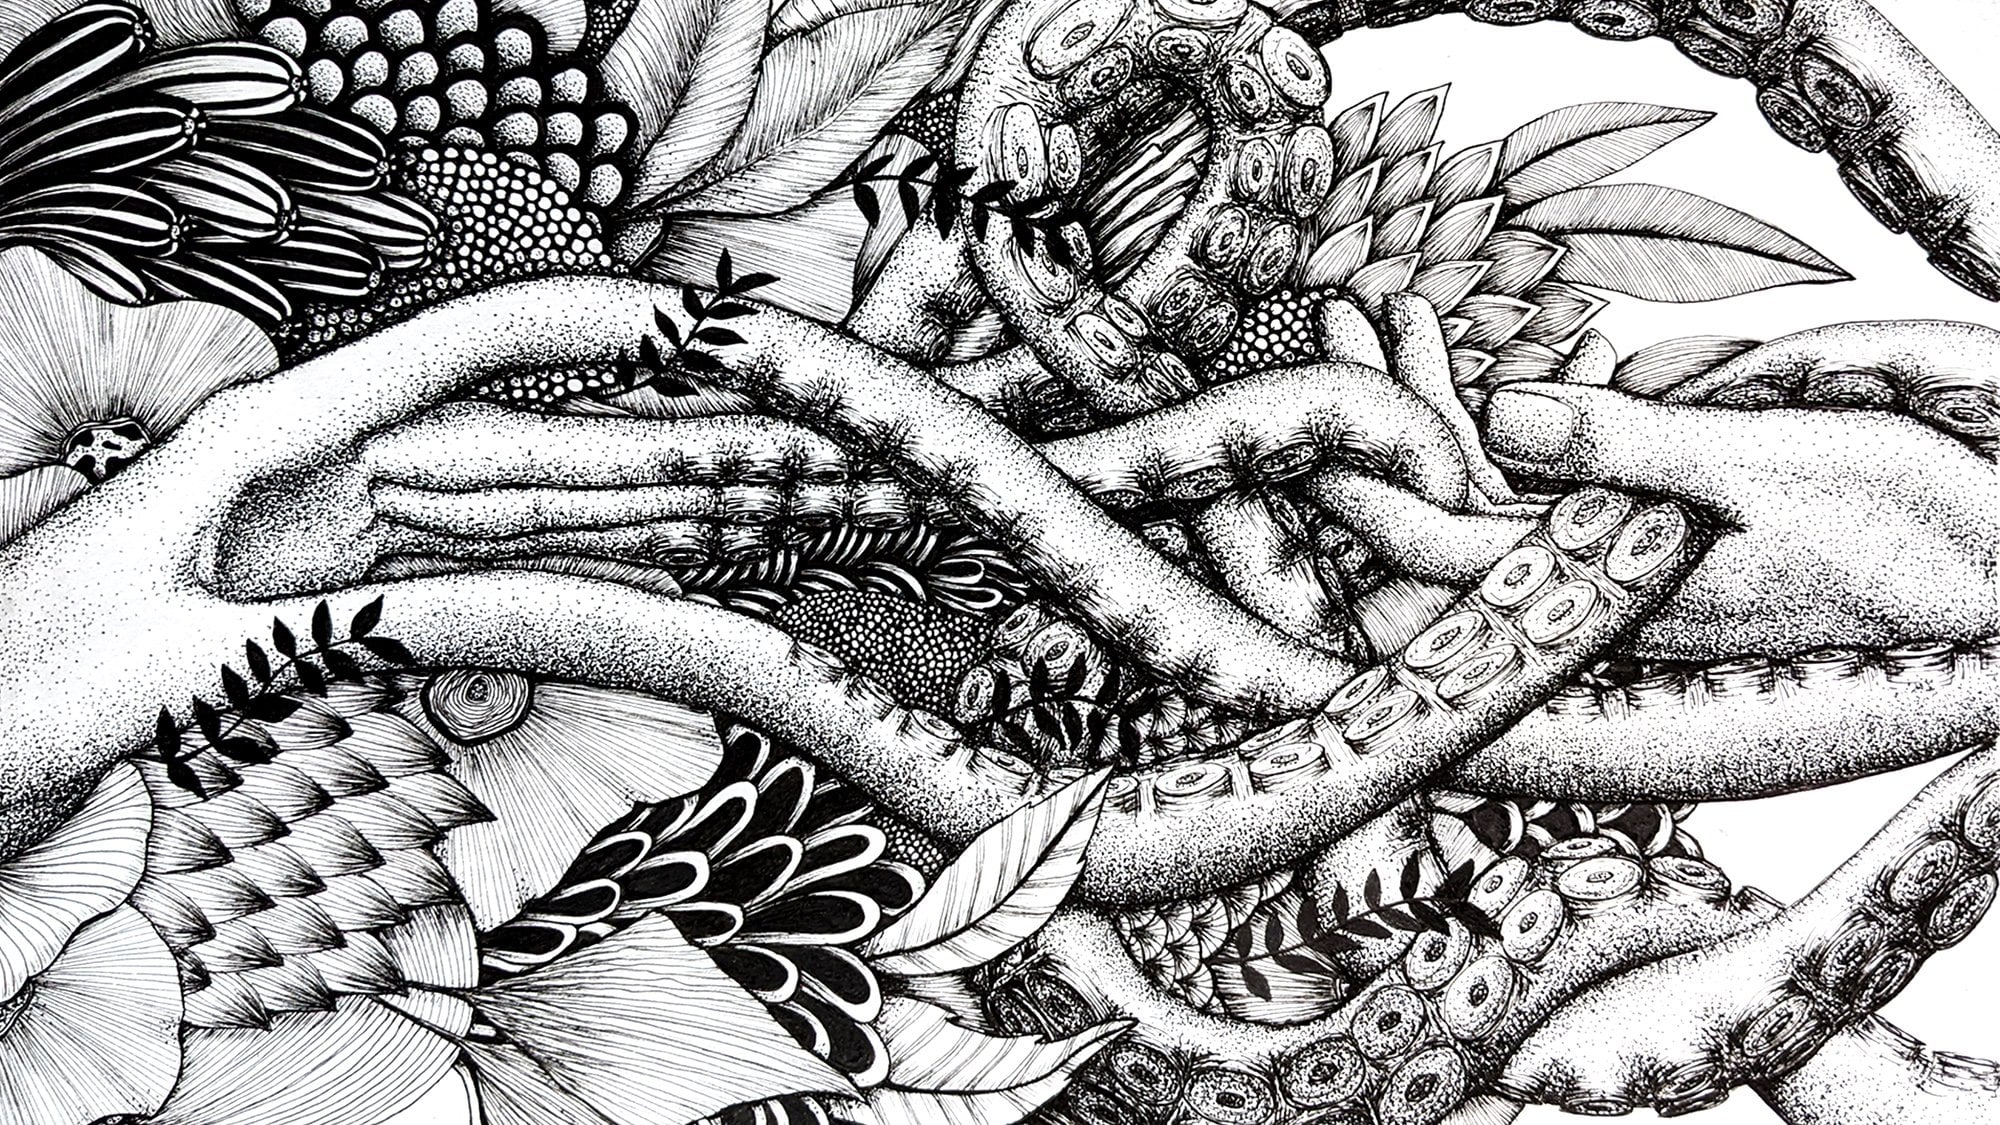
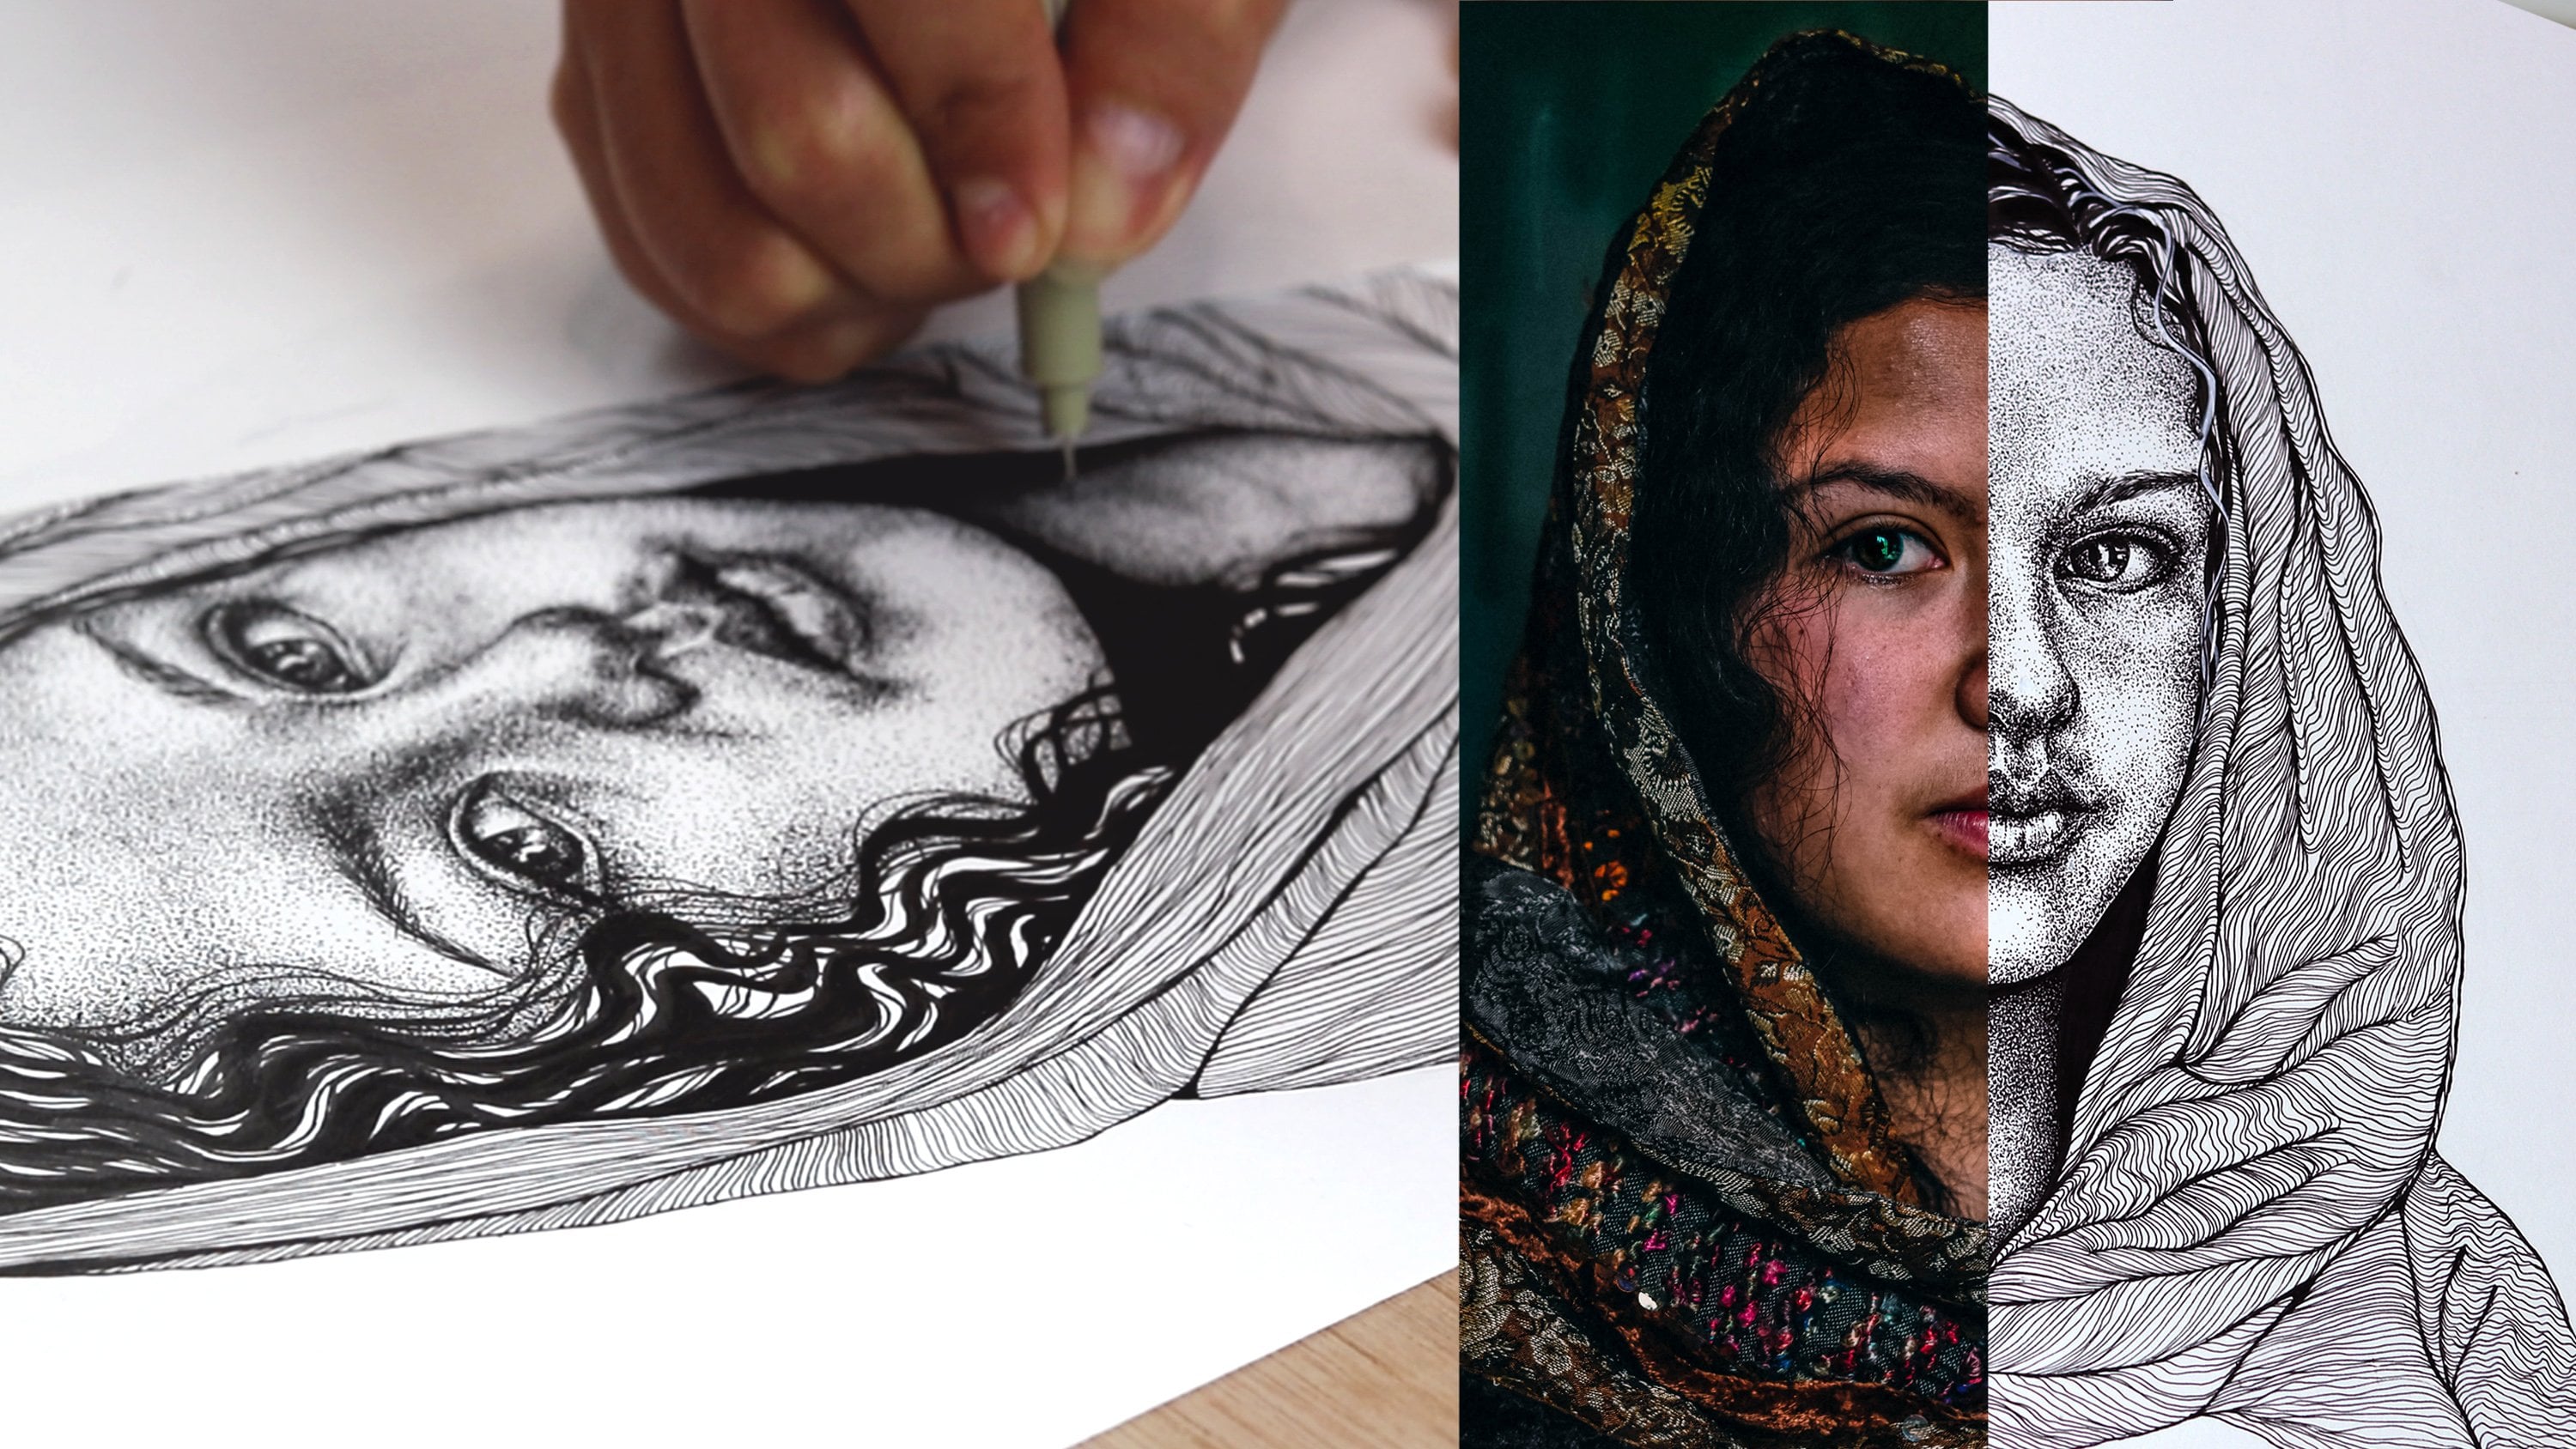
what I mean. This one, for example, this artwork was one of my first ones that I
did using this method, and in my head, I felt like drawing a face. This was my starting point, I wanted to draw a portrait. I wanted to try to do something more creative
with my portraits because at the time I was only drawing portraits
from reference, copying pictures and not
adding anything else to it. It is boring. I was
good at drawing, but there was nothing
special or creative to it. I knew I wanted a portrait
and I wanted to relate that portrait to dreams
and our subconscious mind. These were my two
starting points. When I did this exercise, a few of these other
things came up: nature, eyes, a snake, an
octopus' tentacle. I found a reference for the
face and the hands just to grab all the proportions and the lighting and the
shading correctly, and then the hair it
was completely more of a creative exploration, and during the drawing, I had even newer ideas. It wasn't all ready before I started.
That's another thing. Sometimes you start a drawing and then you're going
to have a bunch of ideas while you
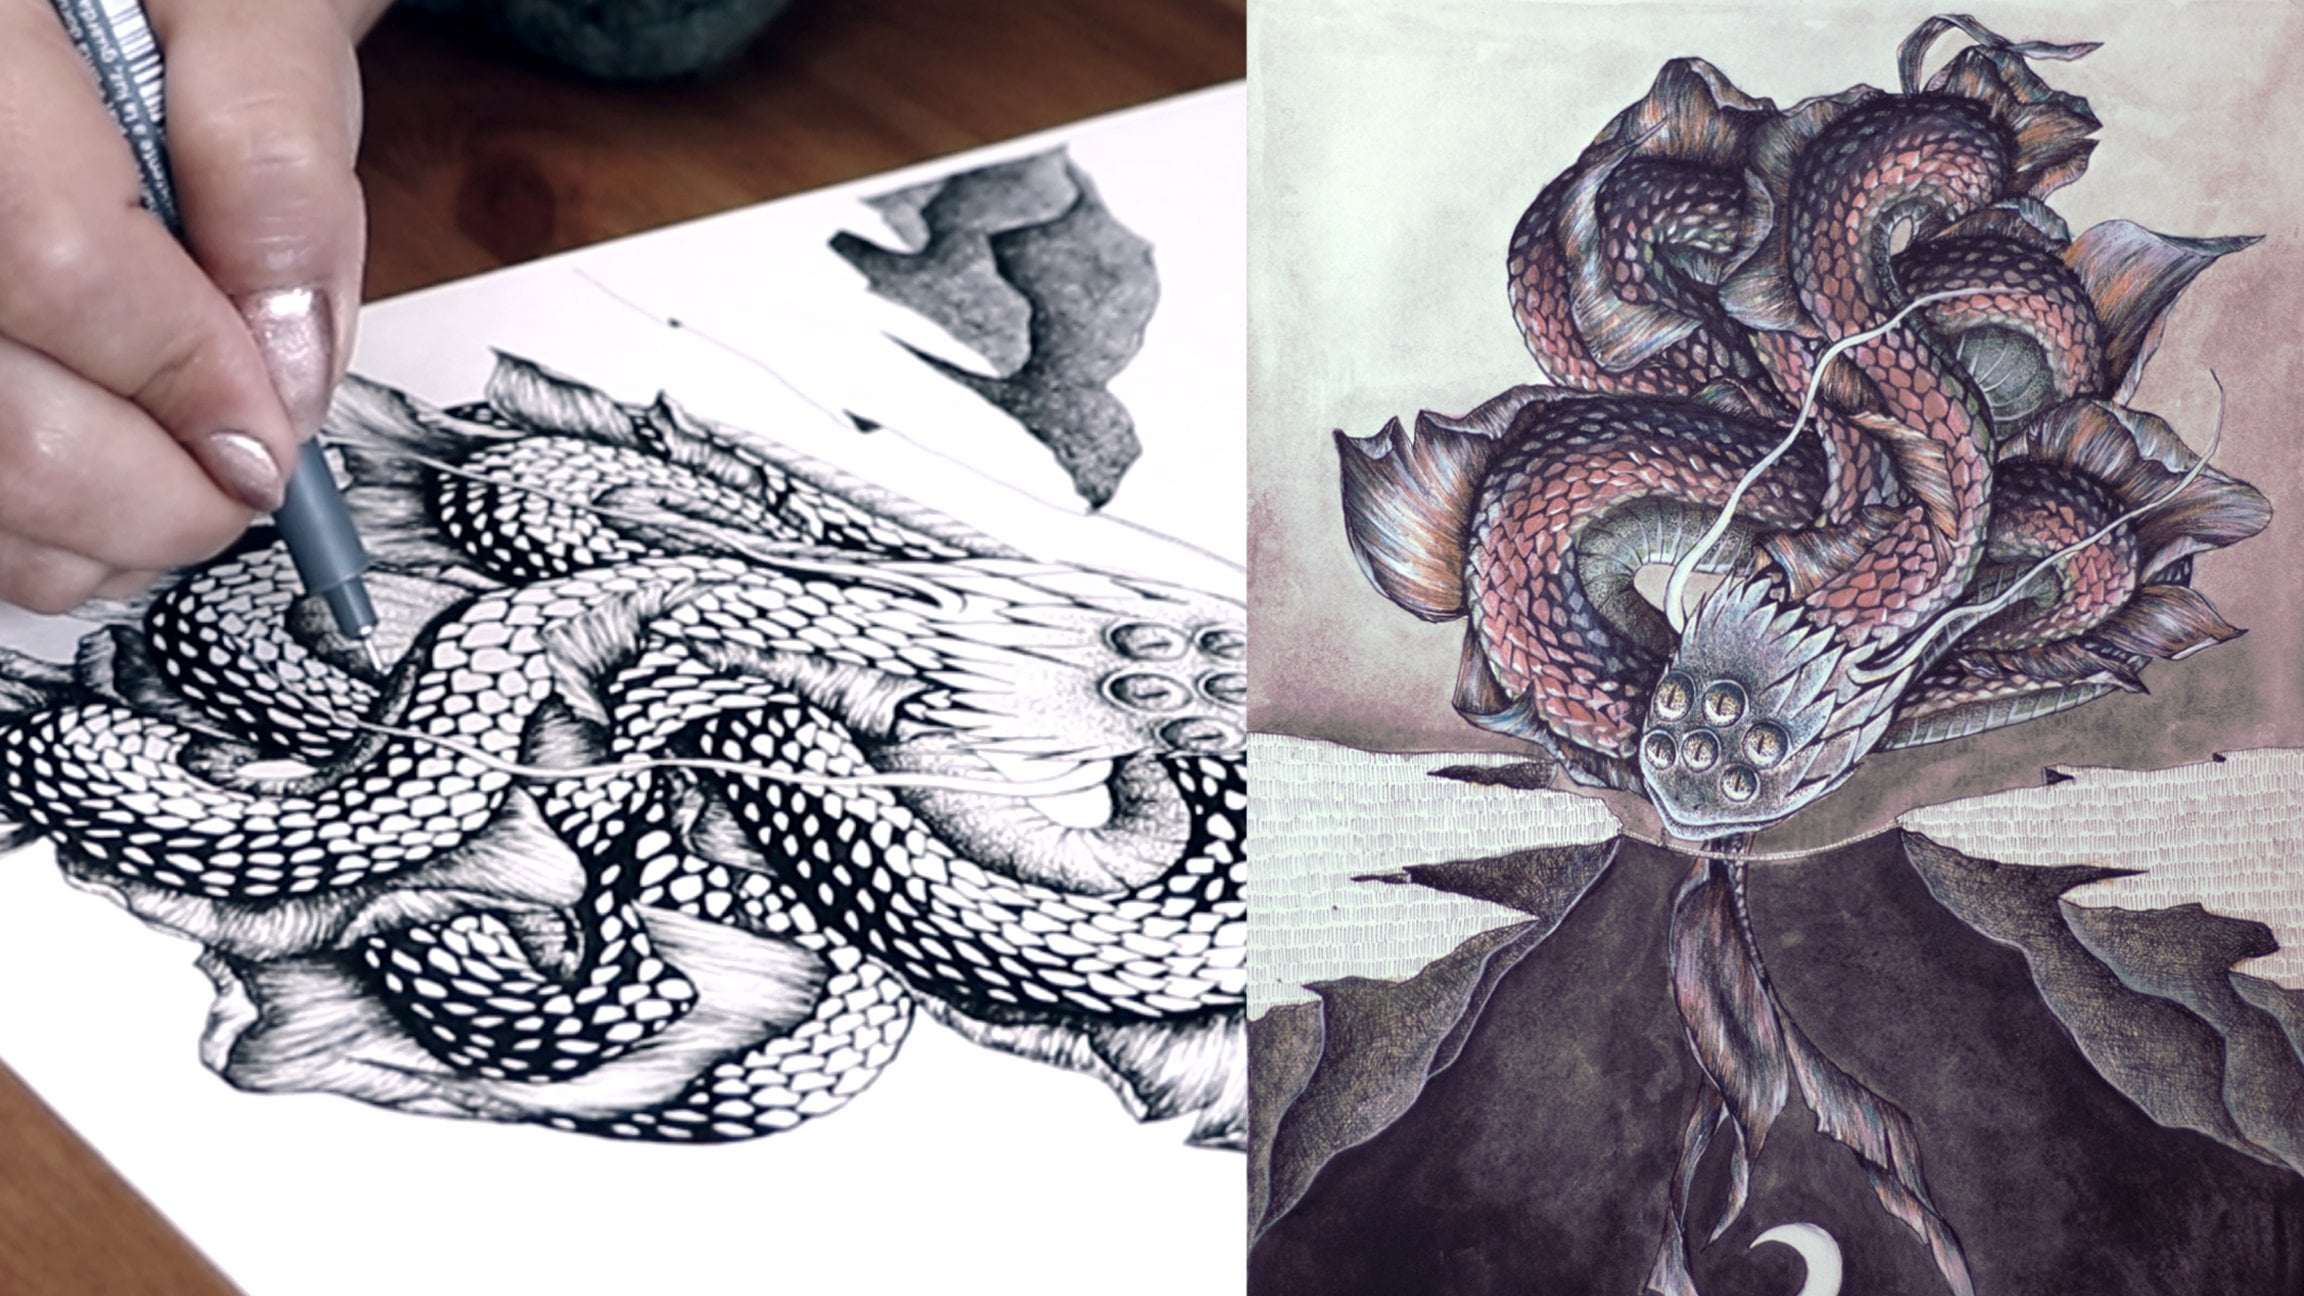
are working with it. Another good example
that I have for you is actually a drawing that I
did for a Skillshare class. You can find this
class on my profile. It's this drawing on this
frog on top of a mushroom, and this class is a very clear example
on my whole process. You can go there and watch
this class if you want to see the step-by-step of how I
came up with this idea. Basically, I did the same
exercise, writing things down, coming up with visual
elements to work with, and then I found a bunch of
different reference pictures. I had a Pinterest board
just for this drawing and I had five different frogs
in different positions, five different mushrooms
in different positions, and I had a moth that
flew by my table, and I took a picture
of the moth and then I added that to my drawing. You can incorporate creating your own references if you
go out for a walk in nature, for example, you could take
pictures of the things you like and then maybe bring those things
together in a drawing. Another good example of that is a drawing
that I'm working on. I'm going to grab it,
just a [NOISE] second. This drawing is
not finished yet. This drawing started
from me feeling really anxious one day
and then I was like, what does anxiety
look like right now? This idea came to
my mind like this. I didn't have to do the writing exercise so much and sometimes that's how
creativity works. Sometimes the idea just
pops in your head. I had this idea, I sketched, I put it on paper, and I'm going to show you all the reference
pictures that I took. This is all me, this as all my hands
and my eye [NOISE], and I had all these
different positions of hands and eyes. I'm not using any references
from the Internet. This is completely
out of my head, my own hands, my own pictures, my own references, so you can
really do your own thing. Another thing that's
interesting is that this drawing keeps changing. I had the idea of the anxiety, but then this drawing was
taking me so long that I wasn't anxious anymore,
the feeling was gone. [MUSIC] It gave me the idea, what else could these
hands be reaching for? I had the idea of drawing a
galaxy inside of the eyes, which is not finished yet, could be a metaphor for
reaching for our dreams. You see, creativity is
not a linear process. This started from an anxious
feeling and it's becoming a drawing about reaching
for your dreams and going after what you
want, really different. I just wanted to give you a few examples because
when I was starting out, I think it would have
really helped me to hear from someone
that works with this and that is happy with
what they're creating and creates original pieces
to tell me in detail, how did they come up with ideas, because sometimes it's hard, sometimes we are out of ideas and there's really
nothing we can do. Another more practical thing that you have to
keep in mind is that you probably won't have the many good ideas if you're tired or if you're burning out, or if you're stressed
or if you're anxious. You can try to turn
those feelings into art and that's a good way to
channel something into art, but sometimes you
just need to rest, you need to take a
break and it's okay. Sometimes you just need to go for a walk, get out
of your bubble, get out of your comfort
zone and all this creates a better environment internally
for you to be creative. It's actually how
our brain works. If you're always doing
the same things, going to see places
at the same times, your brain goes into
automatic mode. It's not where
creativity comes from. Creativity is going to
come from us having to solve a new problem or
deal with a new situation. Put yourself in new situations, put yourself in new
things in our life. Get out of the house,
meet new people, go to new places, go
for a trip if you can. Change a habit, do the things
you do in a different way. All of these really helps maintain ourselves
in creative mode. I hope this is helpful for you. Let me know in the comments if you have any questions about creativity and if you are
interested in this topic, I'm creating a whole class on practical exercises
you can do to actually challenge your
mind and come up with awesome ideas for
drawings every day. Stay tuned for that and I was doing the next
lesson where we're going to talk about composition
and storytelling in art.
12. Fundamentals Of Composition: Now let's say you have an
awesome idea for a drawing. How do you position
that idea on paper? [MUSIC] Will that influence
what it looks like; the message is sends
to the audience? You guessed, it well. You find the best way to
position your elements on paper. You have to be
clear on your goal; depending on what you're
trying to express or how you want your drawing to be
interpreted by the viewer; and maybe you're doing
this just for yourself; so it's the way
you interpret it. The way you position
your elements on paper can help you send
that message across, or it can be in your
and confuse people. Let's see some examples. [MUSIC] The space you
have available to you as your canvas is a frame of what could be a whole universe that you
create for an illustration. The point of view in which you choose to portray the scene, which means how you
arrange the elements on paper so you can have a
harmonious illustration, can actually change the story and how people will feel
by looking at your art. You basically want to guide the viewer through the
picture you're drawing. The first thing to keep in
mind is the rule of thirds; if you divide your canvas in three sections vertically
and horizontally, like this, the intersection of these lines is where the
focal points will be, or basically where the
viewer will look at first. Placing visual elements in
these parts will create a harmonious composition that
looks pleasing to the eye, which brings me to my
second point, which is, is there a difference between vertical and horizontal drawing? Yes, there is. A vertical drawing will create a different tension
for the artwork. A vertical, rectangular shape carries the energy
of growth, movement. It's like a tree
that grows upwards, or like a person standing up. If you compare it to a
horizontal rectangle, you will notice that it
has a much more stable, grounded, calm, energy to it. If we use the same metaphor, it's like the person
decided to sit or lay down. Depending on what you're
trying to create or how you want people to feel when
they look at your art, you can choose the
orientation of your page to help
you tell that story. Now speaking of
story, your pages, all that your viewer is
capable of seeing from this universe or this story that you are creating
in your illustration. So depending on where
you put your elements, the viewer can interpret your
arts in a different way. [MUSIC] For example,
let's say we have this person here on your page. If it's in the center, it's balanced, it's
our focal point. The illustration is
about this person. Now if you move
this person around, it can mean different things: If the person is closer to
the bottom of the page, it feels grounded because the bottom represents
the ground. If the person is
higher on the page, they are closer to the top, which metaphorically
could represent the sky. So it could mean that
they are dreaming or disconnected from
reality somehow, or maybe like they're flying, which could be literally or in their own
imagination, for example. Also, since we are in the West, most of us learned how to
read from left to right. So when you put the person
on the left of the page, it gives that
feeling that they're progressing, they're
walking forward. Maybe they are in the
beginning of their journey. Then you're going to show what this journey is
going to be like. We're going to see what this
person is walking towards. Of course, this is a
subconscious interpretation, and that might not be
everyone's perspective, especially if maybe
you are from the East, or if you learned how to read
from right to left instead. But for this time, let's
keep using this logic. If you put the person on
the right of the page, depending on their position, they could be regressing, like walking backwards in a way, which again could
be metaphorical or maybe they could
be leaving the scene, if they are looking
the other way, and maybe there
are just finishing their part of the
story you're telling; it's the end of a journey. You also don't have
to show everything. You can create movement and make your drawing more
dynamic by using these composition
tricks to indicate that something is about to
happen or just happened. So if you look at this
animal, for example, it looks like it's flying in the air if you put
it in the center. But if you just showed
the head of the animal, it implies the jump,
or that it's running; or if you just show this
side of the animal, it implies that
the animal already ran by and it's leaving now. Another thing to think
about is visual rhyming. [MUSIC] Our brain tends
to group things in pairs, and if you have a
composition with an even number of elements, our brain will naturally
group these elements, and it's not that this
doesn't create harmony, but it can be a bit boring. So what you want to do is to add more elements to create an
odd number of elements. This will shift your composition
from being too stable, and safe into a more interesting
and dynamic composition. This helps your eyes travel
from one element to another, and this creates a
nice flow instead of your brain trying to group
these elements together. You can also think
of triangulation, which is when you create these invisible triangles with the elements you have on paper. This creates a very dynamic
composition as well because triangles have a
very stable base and then two lines that grow
upwards and it's a shape that naturally has a lot of
movement and a lot of energy. Now that you have a
good place to start when planning for a
new illustration, join me on the next lesson so
we can talk about building visual memory so you can start drawing more things
from imagination.
13. Building Visual Memory: [MUSIC] In this lesson,
we are going to experiment with
building visual memory, and I would love for you to do this exercise along with me because it's really
quick and you're going to see results superfast. Just so you know that I
didn't practice this before or chose to draw something
I'm already familiar with, I'm going to open this
book on a random page and try to draw the first
visual element I find. You can do the
same with any book you have available to you. Hard work, it's not going
to work. Let's try again. Husband is also too broad. Let's try it one more time. [MUSIC] Crown. Perfect, we can work with that. I'm going to draw a crown from imagination,
and believe me, I don't think I've drawn a
crown since I was a child, drawing kings and
queens and princesses. My visual memory of a crown
is very childlike still, but let's give it a try. I'm going to do my best to draw the best crown
I can think of. [MUSIC] This is the first tile of
crown that came to my mind, a very basic one, and I thought about
those crowns that are rounded on the
sides, I'm not sure. You know what I'm talking about? [MUSIC] I just have
this image in my head, but it's not super clear and this is the best
I could come up with. Let's build visual
memory for a crown. I found this reference
picture for a crown, and this is the one
I had in mind when I was writing this second
version of a crown. I'm going to draw looking
at this reference now, and I am naturally taking
more time to do this drawing because I have so
much more details and information to work with. When I was writing
from imagination, I didn't have much to
work with because even though I've seen crowns
like this before, I never took the time to
really pay attention and observe the details as
I'm doing right now. By observing and drawing, I'm registering in my mind how to draw this specific thing. [MUSIC] Now that I've finished
this version, which clearly looks better
than my previous attempts, I am again going to try
to draw from imagination. I'm not going to look
at the reference photo, and I'm also not going to look at any of my
previous drawings. Everything was put away, and the only source of
information I'm using this time is my own
imagination and of course, my memory, which
is obviously very fresh because I just
drew it from reference. I am obviously
trying to draw what a remember from the
previous drawing, and I already forgot
a few details, but I'm going to
do my best here. [MUSIC]. This is what I was
able to come up with. If you compare them, I actually think my last
one was my favorite, I thought that the reference
one would look better, but I preferred this less one. This is the comparison
of me drawing without building visual memory, and after building
visual memory, as you can clearly
see the difference. This is your sign to go draw everything you
see in front of you or at least the things that
you like to draw and that you know you
want to be good at. From reference as a study, so you can build a lot of visual memory for this
subject that you love, and then soon you're
going to be able to create amazing drawings
from imagination. Remember that this takes time, sometimes years, so
don't pressure yourself, just keep it in the
back of your mind. Remember that the
more you practice, the better you're going to draw. [MUSIC]
14. Your Project: Now it's your turn. This is where the
artistry comes into play. If you were watching
and drawing at the same time, then
congratulations, your project is complete and I encourage you to share whatever you created
in this class, even if it's just little drafts or one of those quick
exercises in the beginning. Feel free to share
your creations in the project section down below
and don't judge yourself, this is drawing class, and it's not a
drawing competition. Now if you were just
watching the class and you want a specific project to work on, here's
what you can do. I want you to choose
something that you already love to draw. If you're into
drawing portraits, then draw a portrait. If you're into drawing
flowers, draw a flower. Pick a subject that you are used to drawing and
that you love to draw. I want you to pick something familiar because I want
you to see your progress. I want you to compare your new creation with all the knowledge you
acquired from this class with your previous creations
before just for you to acknowledge how much you improved and pretty
be proud of yourself. You don't need to focus
too much on being super creative or
out of the box. I want you to focus
more on technique. Once you've picked your subject, I want you to find
a reference picture for you to support yourself on. Then I want you to sketch
with a pencil using the geometrical shapes or the upside-down method to
get those proportions right. Then with your ink pens, I want you to choose
either hatching or stippling to
create the shading, and the most important part, don't forget to share your artwork so you
can connect with all the other amazing creatives that are here on the platform and we can build this amazing
community of line artists. Also, I comment on every
project that you guys post, so you're going to have
personalized feedback from me. Feel free to ask any questions, and I hope to see you
down in the projects.
15. Thank you! :): You guys, you did it. It is a really noisy chair. Thank you so much for
taking this class. I am so grateful for all
of you and I hope this is just the beginning or the continuation of an
awesome art journey. I hope I gave you
some encouragement and that you're feeling more
empowered with your art. I can't wait to see your
creations down in the projects. If you liked this
class, make sure to leave a review down below. It really helps me out
and, I hope you had fun. If you want to keep
this party going. You can connect
with me on YouTube. I recently created
a YouTube channel, and it's really new. No, I'm just starting out, but you want to go
there and support me. I'm going to be offering more
of like shorter tutorials, and I'm going to talk
about things that don't fit really well
here on Skillshare, I like here on Skillshare, we focus more on improving
your skills and really focusing on the technical side of things and working
on our creativity. But there's a lot more
that goes on behind the scenes of working
with art and making art. I hope I can share a little bit of that with you on YouTube. If you want to go subscribe
my channel, I'd love that. I'm also on Instagram
and TikTok again, total beginner social
media it's hard, guys, social media is hard. But you've got to be there. You've got to be there.
If you want to be somewhere, that's not true. That's not true.
Don't listen to me. Anyway, thank you so much, and I hope you have
an awesome day, and I'm going to see
you next time. Bye.
 Gio Vescovi, Visual Artist