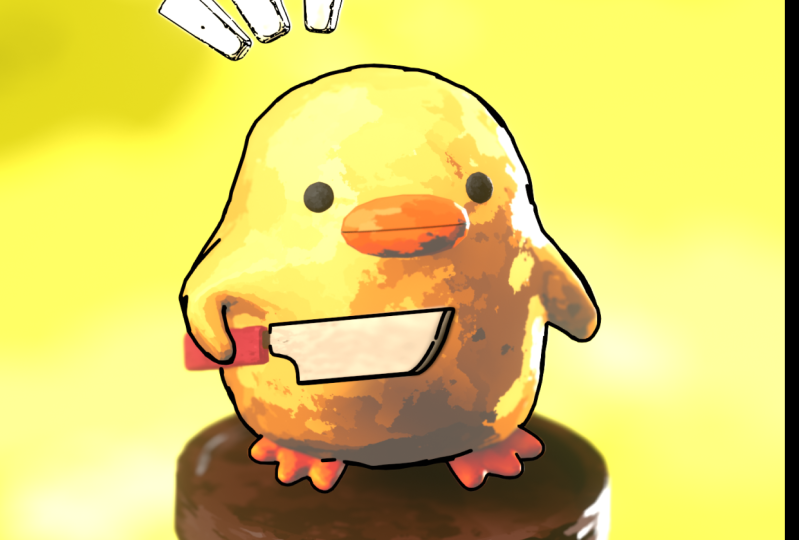
Transcripts
1. About this class: Are you interested in
learning how to create your own 3D character and bring
it to life for animation. Then you've come
to the right place in this class and I'll guide
you step-by-step through the process of creating a
3D character and animating in Blender and powerful
and three 3D software. Whether you're a
complete beginner or are looking to
expand your skills, this class is perfect
for anyone interested in 3D animation,
illustration, or design. Be the end of the
class, you will have created two
different types of animations and gain
valuable skill that you can apply it to
your own 3D projects. Throughout the class, we
will cover everything from Blender interface
and tools to modelling, colliding, shading,
animation, and rendering. You will learn how to use
simple modelling tools to create our character in
environment, setup, lighting, tunicates are seeing great
colorful as toddlers materials and bring your character to life using keyframes and cycles. The best part, you don't need any prior knowledge of Blender or 3D modelling
to take this class. This course is designed
with beginners in mind. I'll provide all the
necessary resources including character reference
images and project files. So all you need is a
computer to run blender, which you can download for
free from Blender dot or G. Stopped dreaming about
creating 3D animations and start turning your
ideas into reality. Join me in this
Skillshare class now and discover the power of
Blender for yourself.
2. Duck body: Hello everyone, welcome to this course and what you
see here, first of all, before we start in
the left corner, you can see completely
everything that I press. So in case if you
have any question, just take a look at
the left corner. The second one for
users who have some good experience and feel very comfortable with Blender. Please be patient because
today I'm going to explain the most simple things where people can make
their first steps, which mean for beginners. Before we start, let's
save our file because blender lot sometime to
surprise us with a crush. So Control S, choose it. Let's name this one. Duck, very simple. Safe, blind, lender file. Rachel, a fortress, everything
and delete it. Good. Under this course you can find the zip file with some
references and texture. Downloaded this one, please. Then open the folder
and you're going to see a duck referenced that we're
going to use for today. Click on the image and just
drag into our blender. And good. There are three main buttons that you're going to
use most of the time. This is S for scale, R for rotation, then
G to move grid. This is our center
of our 3D world. So what I'm gonna do right now, click on your image
alt G to move it to the center Altair
to make it fluid. And let all good. Then you can see we have a red, green and one more blue axis. This is x axis, e Greek axis. And the blue one, is it? What I'm gonna do right now? Again, click on your image. X and 90. Good. What I've done, I make a
rotation or 90-degree on x axis, which is the red one. Then S for scale. And just make this one a
little bit more a bigger, good G, big rig and move
it behind like that. If you wanted to move
yourself around the 3D world, just press on the mouse wheel and move yourself like that. But there are some hotkeys
that you're going to help you a little
bit more, or numpad, you have one from
the front view, three, whether save
you and seven. Just take a look above. So most of the time you're
going to use all of the 31 and I'm in the front view. Good job. Let's go for it. If you want to add
any object which we should to do right now, shift a, mesh and Qp, good, as j Omega, this one
a little bit bigger. And actually what I want, press on your image g and
move it a little bit above g, x n, something like that
will be perfect. Good job. Press again on our cube and go here and double-click
to rename this one. Let's call that duck. Buddy. Good job. Go here. You can see this
icon of the setting. Press it. Let me make this one like this. Quickly take a look and then
you're going to repeat. So this settings usually
is for modifiers. Let me show you an example of
a modifier to the TBI going to use pretty a lot
through this course. So I press Control two and
I subdivided my object, which you can see right now. Long story short. Every object has an
NMR of polygons. And when do you use
subdivision surface modifier? You just increase the
number of polygons, which will allow you to add to make your work more detailed. So you have two options. You can e.g. to
add modifier from here to sear
subdivision and said, But the hotkey control two
is more fester, great. Now we can try L
sequential Chu and now we transform our
cube into a sphere. Good, in this lesson we're
going to do only this body. Our next step is the edit mode. Right now we are in
the object mode. Click here and choose
Edit or the hotkey tab, tab, tab, tap, tap. Good job. I'm going to add
a few more loops. Take a look. I press control air. And if I'm going to
drag my mouse around, you can see some yellow lines. Vertical one and
the horizontal one. I'm going to use my mouse wheel. One more forward to it, one more loop, and then
left-click to press enter edit. Great. Now I can see that our
object change a little bit. He shape, I'm back to the
object mode, which is Deb, or here, I choose my object, you can repeat it
l, so S for scale. And let's make this one, let's feed this one
under our reference. Just use your reference and
don't try to copy everything. Good. Something
like this is okay. Then I'm going to press S. And I'll make it a little bit
bigger only on the z axis. G, a little bit above G. A little bit more,
something like this. Good. Can you see what we have right
now behind the far object? Of course no material you
choose your reference. What you're gonna do, there is an amazing display
mode in the blender. So these two squares, if I'm going to press, I can see whether it'd
be kind of my object. And return. They call it k is Alt Z. So I'll set this one, even have a name
transparent scene display. So I click on this. And then I use step to
back to the edit mode. Actually let me show you
one more thing. Again. If you're a complete beginner, let me explain just
simple things. So we have 12.3. What did this take? A look here. One is vertices every
object contain, let's call this 13 main
aspects is verticals, which is this one, these points and one
on keyboard edges, which is Chuan keyboard, and this is these loans. And also we can basis
which are three on the keyboard and
this third icon, and these are our faces. Good. One on EmpID do the front view. I choose vertices, which
is one of the keyboard. And then I go to the
transparent mode. Great job. Use your mouse and choose
only this one above. And then we're going to
use our reference to make our object in the same
way as for scale. And just move your mouse inside. And then you can see
that our shape start to look more like our,
like our duck. Good lecture, the
transparent mode. I chose this one below. And S juice that
we've a bit inside g and move a little bit above. Great. Then I'm going to
use this one also S. And I'm going to
use only on x axis. So juiced like this, good chap. And also I have implants to
choose these two and make z. X is a little bit like that. Then I'm going to press on tip to back to the object mode. I'm going to move myself out
of the transparent mode, which is outset and
just g, x like this. I'll make it one more step before we're
going to finish our lesson. Perez, Right, The
co-req and shade smooth because we have
some squares before, but definitely the chase
move is much better. Control S to save our
file and we don't, with our first lesson, I don't want to
make them very long just to keep it simple
and entertaining. Thank you so much
for your attention and I see you the next one.
3. Duck wings: Lesson number two, where we're
going to create our wings and probably want
to add some highest at the end of this lesson to. So let's start. First of all, I like to make this one a
little bit thicker, which mean our body S peaks. And like the juice Toledo, the g x, and it's
right here. Good. We can go to Edit
Mode, Transparent. Choose all of the vertices
as inside, like this. Again, no, at least for me, it's a little bit more
and better. Great job. Let's start with our right-wing because how you can
see they are a little bit different because
here in the left one he called some knife. Before we're going
to move forward. First of all, we should to
apply our subdivision surface. You can see the difference. So right now, the amount of polygons that
we have right now. And when we gonna do this
one in the object mode, you can apply any modifier
in the edit mode, only the object mode. So be sure that you are here. Then we go here and apply. Nothing changed. You think we're winning breast up and go
to the Edit mode. You can see that we have way
more polygons. Good job. Three or number, which will allow you to move
on this side view. And I will show you how
we'll choose these phases, which is this icon or
three on keyboards. So three, and then
I choose this, I hold Shift and left-click,
left-click, left-click. Great job. There is a function
like Extrude, which is, which we're going to use also very often in future. Also, let me first
of all show you. So this is extrude region
and the hotkey is, first of all, let me just
show you what it is. So I press E and I can move on. Actually, I don't need z. I
can move wherever I want. And let allow me to
extrude some polygons from my mesh, controls it. And then we're going to choose, we're going to
press E x-axis and extrude a bit like this. Good G movie though it'll
be down air without any xy Griggs edges and
rotate like this. X. Good. D z, d x, k. Remember the function that we used in the previous lesson, which is control error, let alone to add you
additional loop. So I press Control error. I use my mouse. And we should add this loop
right here on the right week. So left-click, good S for scale and make this
one a little bit bigger for rotation. Good job. Then again, choose faces. In that lesson, we just shoot to play a
little bit around. There is no thing like do this, do that, just use
your reference. Use the function that
we learned before. Again, choose these hold Shift,
hold Shift, right-click. And good, make it like this. G, x. If you want to choose
the entire loop, instead of holding Shift
left-click, left-click, just use Alt and
left-click and voila. You use the entire loop to make this one a
little bit shorter. Then I'm going to choose the
only these two edges, 12. And I'm going to move
a little bit above. And the last one that I
want to use these to one, to one and m, But from the front view
and move it like that, okay, back to the object mode. And you probably think that, that look bad and you know what? I'm angry, but we will subdivide this 11 more time control too. You can see that now the
shape is way more smooth. And one more thing
that they want to say, never judge your work, be the way how it look at the first steps when we're
going to add texture winning, going to add camera and
background and things. Even these simple
shapes look way, way, way more betters. Back to the edit mode. Let me just alt. Attribute this loop again. As for a scale, make this one just a
little bit bigger, is not completely like
reference, but something close. And Elsa, let me choose this one if you want to move
yourself around the world. So when you hold
mouse, mouse wheel, you can rotate, but
if you want to move, you hold Shift and mouse wheel. So like that. Yeah, okay. Two on the keyboard. Up here we should to use Alt plus shift plus left
quakes are like here, like here, and here. S for scale. And something like that is good. D, G, and we are here. Okay, so we finished
with our right wing. Again, you probably
can think that, Oh, but this slide is a
little bit more thicker. Y, in our case is more thinner. Again, we don't need to make
it completely like that. It will be something
close, but not completely. Great. Let's move
share our left-wing. Which have a little
bit different shape. And I'm going to show you
one more additional step, additional function that
is very useful in future. So back to the edit mode, which is step before, before we're going to, we're going to
choose our polygons. Just take a look. So there is another
function like a knife, which is K on the keyboard. So this function, so
you can see here, let me show you again now
you can see the letter c0. Good. And you can see that the, even the icon of
our models changed. This function is very useful if you want to add some
additional edges. So I personally want an
edge between these two. If I'm going to use e.g. quantum error, yes, we can add, but you do will be
for our entire, our entire mesh, but
I don't want it. I want only here and here. And then K on the keyboard, J on the keyboard. Then I click here,
here and enter. Now we have one more edge. You can repeat. And then three on the
keyboard for phases. And we're going to choose
this face, this face, this, this, this, and then
six phases in summary, one of the numbers, and let's extrude
and play around E, x momentum, it will be here. Then right here, air
are dated like this. S for scale. And again, and again extrude, again G, something like that. Air scale, g, x nothing card. I just do the same thing
that I showed you before. Just scale, rotate, move, scale, rotate and move. Now, I want to choose this edge loop which is joined the keyboard
for the edge mode, then Alt and press
Alt left-click. And we choose,
yes, we choose it. Good for rotation and just
rotate it a little bit, like from down to the right. Good. G, x, move it a little bit here. Use your reference. One, I'm on the base
mode, which is 300. Gabriel, I chose
this, this, this, this is S for scale, great job. Error right here, g, x, k. Probably one thing
I'm going to choose again, this loop g, and we'll move somewhere here
as for scale their edges, but you can see them right now. You have another function
which is L of Z, which is actually the
same function only there. Another way how you can
use it in the edit mode. So you will see
completely everything, but you should just be
careful because you can e.g. drug here, but you're going
to choose something behind. So be careful just with this function and be sure that you choose
what you want it. I want to choose this edge, this edge, and this
one. Let me check. Yes, I am back which is outset G. And move
it a little bit. Okay, let me check. Yes, this is definitely
what I needed. Let's take a look. I would like here
to take this point. So which is one and
the keyboard G. And just let me move
it right there. Also this one, G, and it's right here. This one's a little
bit above g, x. This K, Great job. So I think we don't
without rubbings, probably want to do something
through the course, but for now, it's okay. So we've finished with
our second lesson. And I guess some of
you probably can think that that doesn't
look really promising, but let me show you just how a texture can change
completely everything. So they could take a look at the shape and take a look
at our final animation. Actually done this
animation before. And then I decided to
create a course about, so, don't worry, everything
gonna be amazing. And I'll see you in
the next lesson.
4. Eyes, Beak and Legs : Hello everyone. Guess what? This is my second time
recording this lesson. Why? Because my blender crush. Thank you so much blender. So let's do this one again. I hope you're in a
good disposition. I keep my disposition good. So what I said, screenshot. Okay. Now you can see
everything that they take, everything that I
press good sharp. So we can reference
in this lesson, we're quickly like under 10 min, we're going to create ice,
we're going to create big N, we're going to create legs. Let's start the first one. You probably noticed
that the objects usually appear where these
3D cursor is placed. So instead of grid you can no, but you can then two more here
here and things like that. There is something more better with Shift
and right-click. I can play this 3D
cursor wherever I want. So I'm going to place it here, shift a UV sphere for the I. And now we save ourselves, we save ourselves a
little bit of time, S to scale and make this one
a little bit more smaller. More. G is g x button, which is right there, Control S in case if my blender look Rush again
to save our file. Right-click Shade Smooth though. It was before, Shade Smooth, it is now great job. Seven are numbered. And then I go for S agaric, NL make a little bit flat
right there, good air. And during it from
there, right, left. Good. And you'll probably
notice right now that the part of the eye,
it will be team site. So you can think, okay, we have x axis and we can
move it like this. I'm going to show
you another thing, also very useful and
also very simple. So the function is x, x, and now you have an
order, another exits. And it will be way more
simple for in that case, I can do the same with
the Greek agaric. So these two options can save
you some time, some time. So I can go X6 and actually
angled one are numbered X6. And now I am going to do this in my eye and in the buddy
Sam seven for both. I like it. Good. Control S, We have
one more I but my recommendation is to
duplicate this part OR, and let's rename
that not a sphere by double-click i
underlying left, great. With hotkey Shift D, you can duplicate any objects. So Shift G, x, and now we have another I Altair to fit the rotation part. I'm going to the seven x and move from the center to the
right, G, agriculture Greek. And I move this one a little
bit inside like that. Great. One are numbered X6 and move
this one and both Control S. Let me check the reference. Pardon, I should
remove this one. G, set up g x right there. And now let's take
a look straight, like in the reference
current trial S, If you want to return
the 3D cursor in the center of the world,
the hotkeys Shift. Shift S. Yes, and you have
coarser to world origin. Now we place it again. Shift right-click. And here. Okay, let's move forward
and let's recall this one. I underline, right? Great. We have three steps. Step one is done and the second
step will be joke, or, I'm sorry, big. So again, I look for
my reference shift, right-click to place
my 3D cursor here, Shift a, and we're
going to choose cube. You probably think that it
doesn't look very well. I'm hungry right now. It doesn't look very
well as a Greek. Good reference. As S, scale G, right there. Great. Then controlled chew for a subdivision surface
and then just check with a reference and
make it a little bit bigger. Just try to fit under
this reference as x. And then I'm going
to rotate like that too much in my opinion. It's like in the reference, but I personally like
something like that. Let me check. As Z Shade Smooth. We're gonna do one
thing that you probably will not see
the necessity right now, but we're going to apply texture or materials,
colors, and things. We should do this one
in our animation, you can see that his big head, the black line in-between. You can see this one
even in our reference. And we're going to add
this one right now. So we're going to apply
our subdivision surface, then destroyed a little
bit more polygons. And then we go to the Edit mode, which is step with a hotkey that we used
before, construal error, I'm going to add one
yellow loop here, more left-click, and
then move it down here, and one more here. Left-click and
move it like this. So it should be illegal distance between them to
choose edge mode. Alt, left-click on this line x. If you wanted to
delete something, is the X on the keyboard. So x, and I'm going
to dissolve edges. Great. Then we're going to transform this line into this one black. I'm good. Control S to save. We've finished. You probably have the desire to click one more time and shade smooth shapes more about genomic control Chu to make this one out a
little bit more smooth. But I wanted to
recommend this one, at least for now, probably wouldn't want to
add some texture. We're going to play
around with this, but for now we don't need it, so leave it like that. Great job. And we have, the last step
for that lesson is our legs. I'm going to leave the
3D cursor where it is. So shift a mesh and it gets
what correctly, another cube. Then we go to the s, z and make it feel
like this, okay? Three or none. But for the sake of u, g, e, Greek, and move this one a
little bit in the front. If you have any
desire to work in the solo mode with any
object, what you can do, you have a slash on numpad, so slash, solo mode
and back slash. Great, nothing character,
just one simple keyboard. Let's rename this one like
Lake, e.g. again, left. We start today with the
left side of their body. Why are numbered as a
little bit smaller than m? Go to the Edit mode. I'm going to choose the
face behind which is three on the keyboard for
the face mode, choose. And we go to the x, S, x, omega, this one more with illegal get the insights we shoot you
have a little bit different. This one is should
to be a little bit more larger than that. I'd say probably a lot of words, especially if you're a beginner, you're probably
thinking that there's so much information, but believe me, there
is nothing current one, week two, and you're
going to do this one for easy without any help. Then control air. Loop. Use your mouse
wheel to double that. Just want to move
forward and then press Left quick one
more time, left-click. Remember we extrude in
the previous lesson, we're going to extrude
them is less than L, So, so yes, you can see like
e letter 0, pardon? First of all, choose this
face and then you go to E and move it a
little bit in front. Then S z omega is one like this, G, and move it on the left. This is a finger
from the left side. Then we're going to choose
this face E and move it in. Front is a little bit like that. And the list1 extrude the
right finger and good, g, x, move it under Rajit, you have a little
bit of space between the fingers as one are numbered. And because this
is someday above stylized duck, we can move e.g. the right finger a little
bit above this one, a little bit down, e.g. this one to make it a
little bit more smaller. Okay, We'll come back
into object mode. And a very, very simple function control done,
right-click shades. And you can, if you'd
like a little bit more, but no one will see that. But wherever if you
want Edge mode, and we can take this
one Shift left-click, and you can dissolve edges. So for this type of shape, so you can maintain leg bit or you can do
something like this. I personally will
leave it like that. Out of the solo mode, which means slash g z. Go down. To orient here, g x on the left air
without any cigarette, just air and rotate. Three for this side view, if d, e Greek, move it under the
wing in the same way, line-like wink, then g, z. And move it up. Take a look at the reference d, z is x, and just play
around. Let me check. Why do we can do is e.g. to move the finger and the
middle a little bit in front. These two we can make
as x error set e.g. and this one is zed, zed. And then I'm going to
move this length is g x. The right finger is
a little bit out, but I personally
don't see this one like like a problem because
we have a stylized duck. And yeah, it'll be it'll
be a little bit different. So these are the same legs. Probably don't want them.
One thing that they want to do is to rotate. I don't like the
way how it does. So g, x. Okay, and now is a good, you have here two options. Option number one, you
can mirror the leg. So I choose leg, I choose the body. And then I press Alt modifier, a mirror modifier appear and I mirror or this
one on the x-axis. But I personally will like, but in this case you don't
have the ability, e.g. to move them apart. So in that case, I will duplicate
their people from my previous courses
who said that the mirror are like all
things doesn't work. So in case, if, in your
case it doesn't work, also, go to the Edit, go to the preferences
for I came up here, check Mirror. Geez more. So we can see mirror
gizmo and take a look. First of all, if you have the
chicken and the second one, take a look at the hotkey. Probably have another hotkey
in my case, is Alt X. Done? Great. I hope I explained this one and you will not
have any questions. So I press on my leg, shift g x, I'm over it out air. And then I'm just going to play, I'm going to use
the same function that you use all the time. Like these aches. Though. We've finished with
our third lesson, and it starts to look a little bit better, more fulfilled. I personally like it. We can remove the grid. In the next lesson, we're
going to add the knife. These things. What
are the things? Is if you look at
the cartons and I'm sure most of that
equals c cartons, this type of
questionable emotion or when you collect questions
and you have three things, they did appear, so I
just decided to add them. We're going to create this 10th. And the background,
I don't know, probably will create an
immigrant also because it's like 1 min of doing this stuff. Thank you so much for
your attention again, I hope everything is good. I hope I keep my corrosion Jordanian can if you
have any review, leave a review for under
the scores and the rest. Let's move to our next lesson. And don't forget to save
in case if you don't want lender to surprise
you with a crush. So I saved grid. See you in the next lesson.
5. New Add on, Background, Stand and Props 4: Lesson number four. Welcome, welcome. In this lesson we're going to create the rest of the things. And then we're
going to play with our animation texture and
we're going to render. So you are very close to finish your work and especially if you do this one for the first time, hope you are still here. So let's start with
our background. Let's start actually true. Let's hide our reference. So click on your image, harsh and you hide it. Good. Then I'll choose
everything with a, everything in our scene, g, z. And let's move this one above L. So I wanted to play the
cursor in the middle, which is Shift S, crucial, Google
search, world origin. Good job control is nice. I think. Let's rename this
one leg, right? Good. Let's start with our background, which is very, very simple. Shift a mesh plane. You want to see
plain S for scale, make this one big like that, and control each reverse. If you want to reverse
something is Control E, G and move it up, then back to our plane. Let's call this one back. Ground control, S,
edit mode, edge mode. Click on that one e to
extrude that we did before. Is it actually tweaks through
this one and the zip line. Then you choose this
one, control B. Control B, either
modifier of bevel. Let me show you, just take a look and then
you're going to repeat. So Control V and I drag my mouse and then using my mouse wheel
and make a few more. If you rotations forward, and I can add additional,
additional edges. Left Greek, done, then I'm
back to the object mode. Right-click Shade, Smooth, that how you created our
background, nothing card. Then I'll lecture and
move this one here. So yes, Control S. Let's make it s x. And a little bit like that. S is going to be
playing this good chap. So right now you
have a background. Then the next step is stent shift a mesh and we're going to create
a cylinder action. Not great, but chooses
cylinder S for scale, make it be gleich vet than S. And move it here. This is our standard
we're going to do right now in case if you asked
like whether this tent, this is our standard. Okay? So S everywhere with
smaller peaks right there, air rotated, g, x right there. You will see this
one better from the side view as zed, zed. This function will return
in the previous lesson. Error like this, G, Zip. Move it down. I think like
if this will be okay, he levitated or it will be, but don't forget that this
is dark, that can fly. So there is nothing
there, nothing wild. And our work history
would have been in the air because he that
that can that can fly. Okay, one of the
non-point controllers, then what I'm gonna
do edit mode, face mode, which is three, I'm going to choose this face e, but not x true there
is one thing else, like Insert, I'm
going to show you, I press E and I move
this one inside though. This one, I will create a
polygon inside of your polygon, in our case, space
inside of your face. So one more time, e, move it a little bit
inside like that. Then we're going to extrude, which is also eat. But only in the letter. The letter is different but
sounds in the same way. And on the Z line and
move it like that. Oh, okay. Right-click
Shade Smooth. Do you like it? Of
course now we go here. We compute normals and be sure that you've checked
on the auto smooth. Now let's look a little
bit more about that. We have here two options. You can leave it like that. Three options actually, you can leave it like that in
case you feel like it. Option number two, you can go to the Modifiers, add modifier, and you have here babble, which you use before like
in a few minutes ago. And navigate to see
like before and after, you can play with
the settings with these settings to make this
one a little bit more smooth. And if you'd like, you
can leave it like that. But I personally would like to choose to do something else. For a beginner,
especially with it'll be, it'll be pretty useful. So think Neo4j is it. Okay? So right now I have an add-on. Take a look. If you like
it, you're gonna do, if you don't know,
one-click damage, you don't have this
one right now. I'm going to explain why and I'm going to show you
how to install. Make damage. I think my work, this then start to look a
little bit more interesting. I have two parameters
here to settings, and you can play with these, I can play with that. So I wanted to slice
something like this. I just think that if you liked it
and if you want to add the same them
into your stent, you go to the blender market. Create an account. This is very easy, very like one-minute male, male passwords receive
a mail on your link, on your mail and adult. Then you search for OCD, which is one-click damage. It's completely free. You click on the purchase
then because it's free, but you can base on, I think if you're, if you're a wealthy like
non-problem but different nodes. So free version, click it, download it, and you're
going to have a zip file. Don't extract anything
from that zip file. You go to your Edit Preferences. Take a look now
understand this is 1 min, very simple. Install. You search for your add-on. So e.g. this is OCD
light zip file, which you're going
to have this same. You just click on it in cell A1 and like 5
s and it's done. Then we're just going
to check here OECD, which is you're going
to have a check-off, be sure that you
make a check in. I know it sounds probably very complicated when you do this
one for the first time, but there is nothing hard. Just choose 3 min,
create an account, download the zip file instead of Adam in the
way how I showed you, be sure that there
is a check-in. And then you're going to find that in the menu
on the right side. How to open this menu
is N on the keyboard. And then you see
which for the OCD, one-click damage may damage. Easy, I think, yes, even if you're a beginner,
just reward this 11 more time. I tell you again, nothing card. I personally like it.
If you don't like it, you have all the righteous
say that you don't like it. It's another problem. If you'd like to move this one, you can see that
something weird. So for that, if you'd like
the damage that rigid, I think I like it. Let me check. I like it. I like this one amount
amount like this. For me, it's good. Okay, Then you go here
in the object more, don't forget and Control S. In some cases it will crush
a player one, player two. And now right-click. Oh, we have a background, we have stent, and now it's
time for knife or this one. Let's start with this one. It will be way more faster in the knife will be the last one. So let me move our
cursor here, Q, G, S to make it small like this, as I said, to make
this one bigger. Here, side view, G, e Greek. Put this one in the center, like wherever beings
and where her legs even more it can move this one a
little bit behind like that. Rotated like this. We go to this other mode, which is the slash
or numbered in case if you forget nothing wrong, if you forget
something, S, zed, zed, to make this one bigger, I'm going to choose this
phase is tremendous. One electrode is smaller, and voila, I'm gonna make
this one a bit smaller. I'm going to move
this one here, okay? Again, you have another
option you can make, make the, make the image. I like it. I really like it. Or you
have another option. You can remove that
one, pick the image, and you can add a
bevel modifier, which will make your work
stylized a little bit. Also. I forgot. You should tell them first the boot being
given name cube. Props. Let's call this one like
probes, underlying one. If you like it, I
personally like it. I'm going to apply, I'm going to apply
then Shift D to duplicate of this one here as to make this one
a little bit smaller, air for rotation and play this one somewhere here,
a little bit longer. The same thing right there. Fence or a notation. The domain like that
as zed like that, G. Great job. Anytime bit blank, please. I hope to that moment
I explained everything very clear because with
much details how I can, because I know it's very important that I know
how it feels when you, when some teacher do something, can you have no
idea what he did? One thing that I don't like it, they all three are similar. So I'm gonna check error z
and make 108 T or a day. And now they're potato might
get errors at 90 or no, I like it, e.g. this one or X. Is it ok? Oh, ok. I just rotate it. Again. You don't need to make this
one completely the same way. You can just play around and make it how you
personally like it. I give you the tools. You work with these tools wherever in the
way how you want. Let's go here, here. Three lecture this face and make this one a
little bit bigger. But no, no. As unfortunately, that will look weird because we applied our one-click dementia
wherever I like it. I like it Okay. Control S to save. And now it's time for the last, for the best. It's knife.
6. Knife: Shift right-click mesh cube. Again. S to make it smaller, S e Greek. To extrude this one. I'm not really good
sharp one are numbered burden G here as it is
inside of the hand. S, like that. Okay, like that, there's good. One, d x, z. And I want to move
this one over Britain. Front leg fit in the hall. One are numbered as x g. This time instead of
one quick damage. Let me take this one off. I'm going to go
to the Edit mode. So the mode, then
I'm going to choose the edge mode, a lot of modes. I'm going to choose this
shift late last week, this shoot locally
this and shift left-click this, then Control V, which is the same bevel modifier only when you're blind
modifier from here, you will apply
bevel on every age, but I want all of
them this fall. So that's why we go
to the Edit mode. We chew them, then Control
V and something well, is using your mouse wheel, you can increase the amount of edges in-between or to decrease. So I'm going to leave like one
in-between or cheer or oh, okay, I like it. Then Edge Mode, choose without left-click this and
lead to the same only, with only decrease all
of the edges in-between. Drag the mouse. You can see that
we have a bridge in-between this
part and this part. So what I'm gonna do, I'm going to duplicate, which is Shift D e Greek to
move it forward S domain, this one a bit smaller
actually, no, excuse me. As S e Greek on. Then I'm gonna go here. I'm going to make smaller. Just place this one in
the center. G agaric. Move this one inside S, Z or something like that. G, x. Now it's good. Let me check. Yeah, the breach is done. Now it's time for the last part. It blade, and we want to
finish with this lesson also. So we go here, shift right-click place in
the middle for each app, shift a mesh, and choose Blaine than air In
Greek, 90 degree. Good job. Let's go right there. S e Greek. Make this one a
little bit longer. Move this one a
little bit in front. Ji, move this one down as
make this one smaller. And now I go to the edges, it just move this one above. Let's go to the solo mode. It will be a little
bit more comfortable. So slash on the numpad. Then I go to the Edit Mode. Then I'm going to
extrude this phase to make this one a bit
more thicker like that. Oh, okay. From the side view, which is three unhampered
edit mode again, control air and add three loops. Left-click,
left-click, great job. Then we go to the transparent
mode or are vertices which has one on
the keyboard and choose only these to be sure. I mean, when you are
under the respire mode, you choose all of
them for g, e, Greek, and move them in front
like that, okay? Then you choose
this one or both. And G, agaric and more of this warning for
arc length this, and then these three d e Greek, move them in foreign
and then air and rotate them like that. This one again D, and move them up. Okay. Now we're going to apply a subdivision
surface control to, and you probably want to make this one a little
bit more sharp. We go back to the edit mode. Edge Mode, choose on this one, x dissolve edge, then Face Mode, choose this face
and press eight. Good. No, I can't now
with more sharper here. And if you want to make
this part a little bit more sharper, control air, add another loop and more
weight up like that. I would like also these two g gripped
them somewhere here. And this one. Let me check. Here. I like it. Now there's a
back seven above are here, g, x and move it. Whereas our bridge
g, z, like that. And I would like to make this one a little
bit more thinner, S X a little bit like this. And again, g x like that. Alright, ***. You probably think
that I don't like this artifacts Shade Smooth. And then you probably think
we can go to the normals, normal subjective, it
will change something normals auto smooth
years has changed. You probably can think
that I don't like that. I want to apply another
subdivision surface. No, there is no necessity in that even if you
have a strong BC, first of all, if your PCM
strong, it will be too heavy. And again, when you're
going to add texture, remember this is glaze style, which doesn't mean
that we should do everything like very
sharp, like that. It's more than enough. Good, G, e, Greek, and good
Control S to save. And let me check the one-on-one. If you will check our reference. Let me check slash mode. You can see that these long
this party lake in the front. So I'm going to get out, I'm gonna choose this, this and this and that. And like that g, x and move it here. And something like that. What do you think it will add? One quick damage. Let me just try. I don't say that. I'm not sure. Scale, amount. Not really. Most green but what
if our clouds? No, we taught delete and delete. Okay. I like the way how
it look right now. Yeah, I like it
probably this one. I would like to turn
this one errors at something like this, or is it just a
little bit inside? Good G somewhere here? Eric said that G in
Greek root chap. We've finished. I hope everything is good. I hope you don't
have any question. In the next lesson,
we're going to set the camera for
the animation. And only then we're going to add texture, colors and things. You probably think that no, I want texture and then camera, but I don't recommend because when you want to add
texture or materials, it will make your file more heavy and animation
will start to lag. So that way, it will be much
better to say the camera right now to make sure that you like the
way how it looks, and then to add texture. So from the point of
the productivity, or it depends on your PC, but much better their color and texture in rest.
Thank you so much. I see you in the next lesson. No, I don't see you because
I want to rename this one, blade burden late. This one. Knife older. And the part in the
middle is rich, rich. K. This one is stand. This one is where we
are props number one, let's call this one number two. And we have probes. Number three, background, whereas our background
or half empty. No, I like everything. Let me check. Good. It looks pretty similar
to our reference. Where is our reference? Here? Your g is g, x. Let me check. Here. They look pretty similar. Or even hour is
better, you know what? Our is better than this. Thank you. This lesson probably
was 4.15 min, but the rest, I hope
everything is good. I hope you're in a good
disposition and I see you in the next lesson and good bye. See you soon.
7. Set lights: In this lesson, we're going
to establish the lights and said the camera for
our future animation. And then very soon we're going to finish with
our first render. So the third thing
first, please close this collection
and double-click. Let's rename this one. Dark, dark, dark. We're going to create another
one with a right-click, new collection, but it
used to be outside. So new collection,
just be sure that you don't have to tap on
that double-click. And let's call this one. Background crops. Good. Here will be Lights, Camera, and other things. Let's start first of
all with our lights. No, I'm sorry. First of all, let's
start with our default setting
for our animation. So I'm going here. And instead of rendering engine first and we will
be with cycles. And then we're going to do
another render with either, we're going to have two renders, I promise it, we're going
to have cycles first. Then we're gonna go here and we're going to
change this size, which will be a square, square root type of resolution. So for this one, we should
have the same number. I personally choose
1,500, 1500s. Another thing, the entire, the entire loop, 100 of frames. So here instead of $250, switch on 100 Control S
to save for each app. Back here to the
render properties in the color management, which is the last one. Filmic choose medium,
high contrast. Great. Another thing is here
are the denoise. Apply on denoise. Be sure that the Euro
have a chicken and denoise or should choose
an open image, denoise. The same thing right there. We have openly mentioned in
this great, One more thing, Mack symbols should to
be 64 here and 2000s, 256 for the render. These properties
can be different. If your PC is very weak,
this one is a good, my Vc is pretty, pretty good, but I just found that
like something like 256 is also very good if you have a desire
to increase this number, No problem, do that. It's not very important is this choice depends
where you. Great job. Now let's go with our lights. We're going to have
three sources of lights. Let's start with a default one, festival Shift S, causal
role, the region, great. The next step, shift
a light point. This will be our
general light G. Move it up. Move this one on the right. Let me check. Yeah, it
should be somewhere on one level with our dark
even a little bit behind, just a little bit like
the one on the numpad. Then we go here on this
source like a lamp click. And instead of ten,
one-thousandths. Great job. Let's check. Good. Here. I think. Gee, agaric. Oh, okay. We have one. Let's go to the next one. Instead of shifts a Adelaide, we just can duplicate this one, Shift D x right there. This will be source in front, so we're going to move this
one in front of a group G. But instead of simple
buoyant, it will be sun. But sun is something
very powerful. 1000s, let me just show
you 1,000 is too much. So we're gonna go with to do as good a Greek and
just move it up. And move this one somewhere
towards the peak of our dark air down. Somewhere Here. It is. Good. Jay, angry. Let me check one. And the next one
will be one behind. So Shift D Z, move it down. Gi enteric, more
this one behind. And it will be another
son with another, I think 1.6, we'll be good. And then it should the light should be in-between
the wing and the body, so somewhere or
above the shoulder. Let's hide our
background like that. Okay, now it's a little
bit more comfortable. So air e Greek and move it up. Errors that, and
go somewhere here. Let's check this. I'm gonna go here, check for the background. We actually can move
background in our collection, in the background
collection also. So for this one, just press M on the keyboard and move
it in the background. Prompts. Great job. So now with our background, we go here and I think
we should try to increase the power
of our two g z. Okay? We tout with
I don't like it, just takes a little bit more
toward the body behind. So now we can see the difference
or something like that. Some were here. Yes. So I don't need this one to be to emphasize very much that
we have a light in behind, but just a little bit so you see just a simple
booleq controls it. Harsh, controls that harsh. Okay, there is a difference and I think it's
enough with our light. Probably. When are you going
to move forward? We're going to play a little
bit around, but for now, I personally say that this
is enough or geographic. Think like that. Air under. Oh, okay. Let's start with our
camera settings. So my recommendation, just take a look onetime to
understand the movement. It's pretty easy. But when you do
this one for that, when you do this
for the first time, a probably it will
look complicated. So please take a look and then you're going
to do the same thing.
8. Camera animation: Now it's time to set our camera. So first thing first,
be sure that the cursor is placed it in the middle
of our three-year-old. For this one shift is of course social world,
the region great. Shift a and empty plain x's. Then shift a hidden camera, grade seven on the numbered g, e Greek, and move
your camera in front. Then we're going to parent
our camera to our empty. How? Just hold down control
and left-click on the MTO will be set
parent to object. Now when I'm going to
move our empty e.g. rotation and the z axis. You can see the camera and
move around and it will make the workflow a little bit more
easy and more comfortable. The next step, let's
set our camera. If you want to see
through the camera, is zero or non but but do you like what
you see right now? I think no. I personally also. So open your empty here is our camera and the icon of
a camera up you're here. Good type right now is
type of perspective. I personally don't
like it and I want to switch this one on
the orthographic. Orthographic is the
same if you're e.g. a. Quick one on the cable, on the numpad or 31. And the same thing orthographic give you the same type of view. Then we're going to
increase her for graphic scale for around 12. Okay, shift e Greek
more this one and both. Okay, we should make this
one for on 15, I suppose. No, this 113.9, 0.9 is good. Let me check. Little bit down here. At 03. Oh, okay, For me, it's perfect. Great. Right now let's
set our animation. I would like to ask you
to not do anything. Please take a look One
time to understand what I do because it will look very complicated and they start, especially if you do
for the first time. But you understand
that this is very easy to understand
their movements. So let me just show you. I drag the timeline. How you can see we have here on the 100 frames in the same way how we
set this one before. So right there. Good. Now I'm gonna go
in this yellow square, which is our object property. Let me just show you
this is location, this is rotation and
scale of our camera, but we need our
empty, which is 000. Why? Because if the center
of our three-year-old, you've got, I'm going
to move e.g. a. Rotation on the z axis. You can see our camera
is moving also zero. What I want, first of all, I want to our animation to start from the left side of you. Something like that
will be, will be good. Then it's very simple movement. I press E on the keyboard. And this is insert
keyframe in your, he asked me, what do you want? Where do you want to play
to place your keyframe? I say I want to place on rotation yellow point appear here and also everything
to only yellow. Let me just show you. Let me move forward. I'm on the frame 30 e.g. and I'm going to
place here minus two. I press E, keyframe appear, I'm going 40, I e.g. switch this one on to E, can frame my pure. Take a look. So you have two choices. The steps are pretty simple. You said the rotation
in our cases rotation, but you also can play
with location scale. You said the rotation. Then you can press E, rotation here for the uterus. Uterus can press E here and everything will
return in yellow. If everything is yellow, vitamin that you
establish the keyframe. Also, the keyframe will
appear right there. Is it easy? I hope
I explained clear. Nothing card said this hitting set the transform
property and then just e for the
keyframe that let me remove this and let's do
this one again together. So go to our camera. Worries are empty and
suddenly I removed my empty. I don't know how
I'm going to check this one. What I
want to add dates. So let me add this
11 more time playing excess camera M2,
Control P, object. Let me check right now. Oh, I honestly don't know, but I don't want to
remove that part because the part of the process, and it's very important to show that sometime you commit errors and how to overcome that. So it was a mistake. Don't know why, but
it's not a big problem. Just create another empty set, this one and everything
will be okay. Now we can do this one together. So z -17 will be good. And I press E, E here, rotation rage up. Let's move to the
frame, keyframe. And let's do this one with minus two e for the
keyframe grade. Let's go here under 40 admin. Those things like these hopes. I think like they're like 6.6 E They came frame
Let's go 65 e.g. no, I think on 77. And let's move on
the right side. Something like this,
e for the keyframe. And then choose the first one, shift T, and more of this
one on the list on 100. Okay? Now let's take a look
at our animation. So okay, this is how you
create your infinity loop. This lesson probably
was a little bit more complicated than the previous one because
we did a lot of things, especially if you do this
one for the first time. But you can see there
was nothing hard. Just say the camera, then E for the keyframe. And at all, I think I would like this one
to move a little bit more. I mean, I want to
maintain the camera, the focus a little
bit at the center and then on the right and
then back to the left. So let me check right there. Oh, okay. Now as good, probably
even under $50. I like it how it was
before, which is 45. Okay. Let me check here. We don't have colors
on the next lesson. Finally, we're going to add our texts are all
probably will not. I will show you a trick
with how we can add the camera shaking and then we're
going to add the texture. So let me show you
one more time. Well, you work with 3D. You can expect anything else. Thank you so much and I'll
see you in the next lesson.
9. Camera Shaking + props: I promised you that
in the next lesson, we're going to do that texture, but I'm sorry. But
don't skip it. Very cool thing that they're
going to add right now, and it will be under 5
min here, I promise you. So take a look and then
they went to repeat, I'm going to add the camera
shaking. How are we gonna do? First of all, if you want to add additional window to your, to your workspace, you go
here and when your icon, your mouse turn into
something like that. Just press right-click,
vertical split, left-click. Know we have two windows which
will be more comfortable. Then here, choose
the graph editor. You're like, whoa,
What are the same, the beginner in this
too hard for me. Don't worry. This one on the right, you
don't need it for now. So this is our keyframes
of our camera. Take a look. I choose all of them
with a on keyboard, which will be like all the time. And then I press V
and choose vector. It will make it a
little bit more smooth. My next movement gonna be next, my next one, we're
going to be an expert. You're smart. And for the side menu, and here we have
modifiers and modify it. But before, before, you have
your object transformation, which is this yellow square. So this is the same. I opened and I
choose x rotation. And then I'm going to
add a modifier noise. Let me just show you
one is how it look. You say like Alexander, you promise as something good
and it doesn't look good. I know, but we're going to
switch our settings on 89. Right now, strength will be 05. And here Check-in
influence reduce to 0.2. Take like that. There aren't some big change. Just because, I mean, you can see that everything you see the world or more
a little bit around. So it just a little shaking, which I didn't have
in place to do this. One very emphasized this a lot, but a little thing like that. Going to make our final work a little bit
more interesting. So you can play
with this settings. You have scaled
strength and influence. I think. What about the 03, whether the same time 88. Let me check. Okay. So I personally like it so you can see how
everything move around. And when we went to render, it will look a little
bit more interesting. Thank you so much. This is all for our camera. Let's do the same thing
with our props right here. It will be an additional thing that is similar with
everything else, will make your work much better than just one simple
animation like this, where the camera shaking Alice, a little shaking lake. Here. Let me just show you. So you can see they
move themselves up and down, up and down. So let's do the same
thing right now. I promise it will help you to remember much
better what we did before. Again, take a look. We go here, e.g. when you go to the object transformation, you can see that the numbers
here are pretty weird. I mean, what are these numbers? We should to apply all of our transformation
that we did before. So for this, I press Control
a and apply all transforms. Now everything is
00001 for the scale, the same thing here, Control a or transforms. Same thing here, Control a
or transfers. Great job. I'm gonna go here. We
are on our timeline. So I'm going to move this
thing on the location. Let me go with the
z one on them, but let's check it. So we are here to insert
call the keyframes. Great. Let's go on the 30 more. This one a little bit up, e.g. like zero to don't
make it too big. And just play around
like 01, okay? E, tracer, the gain frame. I go here, somewhere
like, I don't know, 50. Let's say, let's go a little bit down e for the keyframe
and greater than 70. Let's move a little bit up
again, E on the keyframe. Don't try to copy the same
settings just like something like 001 or zero to just play around and the way you like then to the first one she VD and go to the last one. Great. So no chemo for
himself up and down. But you think it's all, know, we go here and let's do the
same thing that we make with our camera shaking a
to choose everything, just choose all of these
keyframes and v vector grid. And to open the same menu, that first of all, we'll go here Open and
choose x, z location. We work right now with a z. So we need to choose
the location. And now we're going to
have a modifier, window. Modifier. Nice. Our settings, let
me just show you. Right now is go crazy, but we go with 29. Good strength will be 03, phase will be to an inflamed
is going to be zero. Third, here, there are three. And now a very smooth movement
up and down. Do like it. I hope you guys, because
I personally like it. It's not something
very important. Whether they ended
will be much better. Let's do the same thing
right here with this one. And let's move this
time not only on the z, but also e.g. on the x. So came frame of one, choose wherever it
came from you want. And here will be something
like on the right, a little bit up, good, E for the keyframe. Then we go here. Let's go a little
bit on the left. Let's go a little bit up again before they came frame
somewhere here, e.g. 70. Okay, let's make it 75. We go down a little
bit on the left for the gain frame to the first keyframe Shift D and move this one on the list frame. Great. Touches everything from V for the vector
open right there. And this time I can add modifier because we
work, Enrique ends it. So we'll go ahead and
money for noise, good. And 2905 phase to influence 03 location. Let me try one thing. Control L. Now unfortunately doesn't work. I'll like can you
control C, control V? No. Unfortunately, copy or copy
of modifier based noise. So now we have the right. If you want to
copy, I just didn't know before how to copy. I find this one the right node. So although here, you have here a thing like copy f modifier. You go to the z location
and based their modifier. Let's check while
we're here right now. So we have these
things up and down. I personally think that
this one and go too crazy, like to move it like
01 and here like 20 to copy x location
based that check, let's remove this one, apply, this one. Apply. Okay, great. Let's copy that.
Let's first of all, instead they came
frames right there. So one of the game for him, ie, insert the same steps. I hope you do this one
even without me right now, I believe that you understand
this one pretty well. Let's play with the Greek e.g. why not agaric? It can be done that
for the keyframe. And go here, go here
for the keyframe. Go here, go here, e.g. E. For the keyframe
to the first one, shoe di and tri
there, S to save. Then e.g. choose here. Let's copy our modifier to be sure that
your modifier is on just this thing should
be white, fulfill white. We go here and object
transformation. We work with a Greek one
and apply, based and Apply. And now let's take a
look from our camera. So go here. Let's remove this. Again. This one look way more
better than what? Than just a simple animation. I'm going to show you
a few more tweaks, but for now, now, we're going to texture. I know you waited because it's the most pleasant
one. Don't worry. This time for real that we're going to texture in
the next lesson. Thank you for steel here, a C on the next one.
10. Clay texture and Displace modifier: So it's time finally, materials. And on the next one
we're going to render, we're going to
have, first of all, this one, this animation. And then we're going to
create these type of style, more like a toon shader. Great. Let's start
with the first one. So let me drag this one down. Here. Let me drug open and here
choose a shader editor. Good job. We go to our camera and just
to see our final image, drag this one on the right. And let's create
our first material. Where are the materials? So this sphere usually
remind me a planet, but they don't think that
this looked like planets. So just click here new material
and let's call this one. Sorry, yellow, buddy. Oh, okay. The next step is, where is our empty reference that it was before we'll
choose these colors. So moving herself out of the
camera mode and back here. So with Shift a, you can add different
things like always show the shift a Perez Image, Image Texture at click
on this Cohen's d. And you're going
to have this type of properties in case
if you didn't work. And go to the Edit and go to the Preferences and
go to the K-map here, search for textures setup and
this shore so you can see, be sure that the chicken is. So Control T, texture setup. Great job. Then we're going to
add that color ramp. Very useful thing to sit. And then we're going to add
the bump modifier, bump node. Okay, it's all that we
need for our texture. In the same folder
you're going to follow and a few textures. So let's go with this one. Fingerprints. Click it. Then here on the color space, choose instead of sRGB color. And then connect this
one with a color ramp. So right there,
and they're called the rump choose with
a roughness goods. But our reduction
to have a color. So here where the base color, we could choose the
speaker and click on that. So now let's take a look. Okay, we have something. Then we're gonna go
here from the color and drag to the height. Bump, connect with
the normal invert and strength should
to be something like 0251 more thing. Go to the Edit Mode, choose a, which mean everything and
make smart to be projection. You will have here 303266. Oh, okay. Let's take a look what we have. So you can see we applied our, our clay thing I
think is too strong. And the way how you can
set this whole strong it will look at
depend be sitting here on the bump,
on the strength. I think like 0150
will be much better. The distance, the a in
something very important. So just play with it. It's right here on
the color ramp. You see this Blake's
wide Blake's. So we can reduce this one
with dragging this part. And here let's make this one
a little bit more brighter and move its think
like that 0 of k. Now it's not so shiny. You can just play around
with the settings. And one more thing is
here on the scale. So mapping gonna influence on the way how your texts are gonna be applied
on the entire mesh. So if you're going to
make something like, I don't know, 20 2020, you're going to see that
everything look way more, smaller because you increase
the scale of this texture. So the best setting will
be something like 1.11, 0.1, and Y 1.1. So you see right now we have, we have something
more interesting. Let's go forward with
everything else. So the next thing, click Share. Let's take our big
why do we can do, instead of doing the same
steps all of the time, go here to the yellow
buddy, but it's not yellow. We can duplicate this one
with this new material, but actually just duplicate. And now you can
call this one big. Choose the color and this
thing the same like here. So you can choose from here to the picker and take the orange. One. Good job. Now. Remember we have a black
line in the middle. So what do we can do is
go to the edit mode. On the face mode. Then we choose holding
Alt left-click. And sometimes it's gonna be
like this, but you should, should be more close
to the edge and it will choose this
thing in the middle. We create a new
material, mu and assign. Now we have two materials
on the same object. Good job. This thing, you can don't
only in the edit mode, I hope everything
is clear till now. You can do, you can go to the orange material,
copy everything. I mean, drag copy and
go to the material and delete this
one and add that. And now, instead
of orange juice, make it black,
something like this. Okay. But do you think it's too thick? So what we can do, we
go here, Edge Mode, choose this one G, and move it a little bit down. Choose this one, G zed, zed and more with a little bit. If it's too fast for you. I mean, when you move, hold Shift and it will be
a little bit more, a little bit, it'll
be more slower. So something like that. Let's go here. Now. I like it more. Okay, we can play
around with the scale. I think 1.1 is too much. I mean, it's not enough. 10,511.51, 0.5. Let's check. Okay, we're going to check
this one out a bit after. Let's reduce this
white boutiques or K, This one more close
to each other. Great job. Let's go
forward with other things. So what we have, we have
ice there, same thing here, or we actually can choose
the black material because our eyes are black and they
are similar. Actually. Here instead of 1.5, it will be 0.30, 0.30, 0.3. And on this, let me
show you another thing. Instead of doing this, you
can do something else. So can we go on the left? I can weaken the right eye, which have the material. Great. I forgot hold shift. Sometimes you have other
simple things like that. So then you go to the Control L, L and press the link materials. I know they both share
the same material. So this one and this one only the one problem
that if you'd like to make any change here because this line and the eyes
share the same material. So let's duplicate that. And this one will
be for our eyes. Then this shift Control
L link materials. Now our eyes have the ice
material and these have the big middle part. Okay? They are the same only if
you'd like to do some changes. There will be different. So
we have material for that, we have material for that. Good job. Let's go forward. I think legs can share. They they are the
same orange. Yes. So we click on them. Then we go here, Control L link materials. Then we're going to duplicate, because we don't need this one, we're going to
duplicate this one. Remove, don't worry. And let's call this one legs. I'm not sure if it's
likes or wherever. It's like sequential
L link materials. Great job. We have our Allix and now we
can play with e.g. a. Skill. Again, we can make
something like, let's say 1.3, 13.1, 0.3. Good job. What do we have more? We have this thing
that should be brown, yellow, body copy or duplicate. Then we call this one a stent. Then go here. And instead of that, we can choose something, just make it darker. Orange one. This aim brown, but
honestly I like it, but didn't go into
the Camera mode. And one more thing, go to the Edit mode h, which is everything, oh, smart to be projection. Okay, now we will
look much better. I like this color honestly. Didn't play around.
Darker, brighter, and darker mingle here, here. You know what? I like? I like this color. Yeah, I don't have any
problem with that. And it's been
really, really well. Go to the background. Now I do the knife. So again, choose e.g. actually for the background,
we're gonna do gradients. So let's hide our reference. Go to the background. We are on the background. Good. New material called
this one, back ground, whatever the next shift
a and here the thing like gradient
texture, click here. Then we're going to
have a color ramp. Key. Move them up, a base
color color here. But I like this one
to be from here. So we go to the Gradient
textural Control T and we should to switch. Yes. So this one on 180 or 90? 90 degree? Yes, it's 90-degree. Then using the occasion, you will move this one a little bit up,
something like that. Don't worry about color. We're going to switch
this color pretty soon. We're going to switch
this one pretty. So let me play around
like that or like this. I want you to have something
other diagonal, linear. Actually the same results. So I'm going to
leave the linear. And the thing is that
I want this one to be read, something like that. Only more brighter. So I think like this. Okay, let them move
this one a little bit. Don't know, I sit down. And instead of linear, Let's check around it. The best plain, easy. Original know it'd be supplying is more smooth out this transition
between colors. What do we can do? We can take this one duplicate and we'll do something
in the middle, so something like that. So now we have a pretty
decent gradient. I'm going to remove
this one here. Okay, and let's add also clay material
to our backgrounds. So what do we wanna
do? We go here, you can repeat the same steps. I don't see any necessity. We can just copy this part, go to the background
and Control V. Good job. Now we add this color
to the roughness, this normal to the normal. Then we go to the Edit mode too. Don't forget a smart TV
projection of k. Now, we have our clay
material here also. Using the few clicks. I don't know how
much time was spent, but they think for
around 10 min and everything starts
to look completely, completely different. We have our knife and we
hear this thing right there. So materials call
this one props. Props. Yes. All of them are going
to share this one. So it shows this shift, shift, this one should have been
more brighter than this to control L link materials. Then here, instead of on the surface
you have principle be as df. We're going to choose
a mission and they visited like a glow
effect of glowing oleic, the light, so you can
see it right now. I wanted to have
something like one point that's called the 31.3 or two. No, 1.3 is good OR gate. You can utilize that. In our animation, we have
a line, the black line, line art, which make it
look more, more better. So how to achieve it? I'm going to show
you if you are in the version of Blender
under the three, under the Russian three, you will not have this function. Only everything that is above our version
three will have. So e.g. choose this one, shift a grease pencil, and here we have
object line art. And now you edit this part, but it's too thick. So take a look. There, you should check him
where it is or you are. We have an art, a stroke icon appear here. You go to the strokes
open and here, here we have a thickness. Cale, I'll like to make this
one is something like 0.4, which means a little
bit more thinner and increase the resolution with 64. So now it's a little
bit more thinner. We can do the same thing here. Go to the strokes, zero-point, Let's say 35 here, m and Omega like 64. And the same thing right
there, object line art. I think the standard
can play with 0564 and go to your camera. And let's check our
animation for now. So let me do this. Let me do this and
check with colors. We forget about life. Kids, little bit laggy. Of course, but everything
look pretty decent. So let's go to our knife. This is blade part. We can add some. I don't remember. Yes, we have a black
line art here, choose so we can open, control a Grease Pencil
object line art. Sometimes they look very weird like in our case right now. Unfortunately, you can't control the behavior of this part. It is what it is. Let me
try to add one more loop. Either going to
add one more loop, you're going to remove
this thing in the middle. So it depends on your topology. I'm not sure that
I like this part. Let me try to add one
more loop right there. And he is. Now, it doesn't look very sharp. But this is the point
of this stylized work. So I just added one
loop right there, one loop right there. And now I personally
like how it look. Then we can go Here. We go through the materials, the material we're going
to call this one blade. We're going to do the same
thing that we did before, e.g. go to your body? Yes. Choose everything
here, Control S here, control V, color
to the roughness, normal to the normal. Let's check. Then you go to the Edit mode, a smart TV projection. Oh, okay. Great. We have these things. So let's go to our camera. Where is our reference? It's violet. So let's go here. Let's choose e.g. stem, because standards pretty
similar actually much we can hear beaker and
choose this one to make it, sorry, duplicate it first, then call this one knife holder, and then choose
this one and here. Oh, okay. I hope you don't
have any question. And I mean, everything
is good because I tried to I know ties that they
speak a little bit faster, but at the same time,
I do the same thing that I explained in
the first minutes. So nothing, nothing hard. I like this part. Let's go here. Knife holder, duplicate, bridge. Okay, and I want to make
this one more darker. E.g. something. Like I suddenly choose
another color. Let me go. E.g. here. Oh, here. I don't like the scale. 030-03-0550, 550-55-0555. I get more. Let me check the
animation. Like you. But it's good. Okay,
one more thing. Actually add one more thing. We have a triple, a little bit more to make
it a little bit more, much better than it is right
now because how can see that texture switch
themselves here. So I'm going to show
you how I did it. But first of all,
here on the beak, I don't like that these
two is too strong, so let me go to the beak
and make this one a little bit more like that. Something like this writer that I just made this one a
little bit more brighter. A few more things. We go to the Camera series
for the camera. If you if you hear
any noise right now, just know that at both of my
apartment there is a redbud and he probably right now
go crazy in the apartment. So this is why you hear
some strange noise, but I hope you don't
hear anything. And it's only on my site. So go to the camera,
where empty. Here, camera on the icon. Here you have depth of file. Click on that. Now everything. We have some bluer
around this scene. Let me show you here
on the focus object. Choose our, I didn't
even give it a name. So our big which is this part. And let's recall this one. Yes. Big. Back to the camera
settings, camera here. And what did this, you're going to create a
bluer around your object. This thing you're usually
going to see in the movie. So it will be way more easy to explain this one
with a good example. So this is what you usually use. In the film industry. You have any object in the scene where the main
focus should she be in the background is more
with some type of pleura. So here you can see it's
sharp and here is bluer. Let me show you another example. E.g. right there. So more sharp, more blur. Why? This is an industry
standard to use this thing. And it will allow you to focus
more on the main object of the scene and to make it much better the final,
the final compositing. So that's why we added the same thing where he's
our blender right there. The background is
a little bit more. You will not see,
but the line here is little bit more blue or let
me make this one like one. And now we can see the
debugger on things or sharp, even the body of
our dark and sharp. But if you're going to
increase, I lost my camera, a knife on my camera like 3.2, it will be more sharper
on the background. I went to see a little
bit of our background. And then when the
ratio to make 088, which means 883.13, 0.1 is good. We can make our entire world
a little bit more brighter. How now you have this
planet icon go here, background and a little
bit more brighter. So e.g. like, this
will be too much, but somewhere here, it's okay. Else. So let's play right
now with our lights. Let's make this slide a
little bit more like a sun, which means these a
little bit more yellow. Why did it right now, it's a
and streak pattern hydrous. Take a look. I just play with the
settings and try to TV image that I
would like it then. So 1050. Oh, okay, let me go here
to the sun and let me, this one will be too
much about this. Okay? Something like very,
very, very empty yellow. Let me check three. No, 2.3. Okay. 2.3. Good. Let me check this one. How about for no? First of all, like
this color to be a little bit more like a blue. You can see how the color on this side part of the
body start to switch. So the red, violet. I'm going to use something
like like that to 0.2. Now I like that final
image a little bit more. I'm go here, g is up. Go here, G, excel
little bit on the left. Oh, let me check. It's not very clear. But let me just wait. Let me drag this one right here. Drag this one right here. Remove everything can
let me take a look. Okay, the rendering,
the viewport is done. I like everything
except one thing. It's background. I would like to increase the scales so I can
go to the background. Beggar on material. I'm in the background material. E is, I'm gonna go here and on this scale I'm going to make
it like 2.52 point 5.2, 0.5 actually have some
additional texture in our folder so you can
check and play around with them like chicken is
something like this, e.g. but other backgrounds will
not say a big difference. What about our main duck? I would like to try it
just for fun to see. It's interesting. I don't
say that they want to give is right now we should
to play around with it. But let me make
this one like 333. What is cool? What wherever it led
me back to this and let me go back to
our fingerprints. Fingerprints before
we're going to finish our lesson right now, let's go through the material. Let's go to the modifiers. We're going to add
one more modifier. So take a look at our shape. It's pretty, it's pretty smooth. I would like to switch
electric change that syringe for the
displaced modifier. Strength decreased for
something like 0.5, sorry, buoyant 05 or k, then this is the texture. It will be too hard
if you want a copy. So take a look like 2 min to understand and then
you're going to try like always knew when you press knew we had Dexter and
then you're gonna go here. Type of texture, clouds. You see the difference before and after, before and after. Here, instead of the blender original, choose
improved purlin. So here you can see how
this texture look like. And if I'm going to
increase, decrease, you can see how his body start to change them shapes
so it's not so smooth. I think something like Three in depth? No. Actually there for like three. It's okay. Nabla. Honestly, I don't use it. You probably have a desire to do a trip like this when you
fire and everyone else. But you should be
careful because some of them have a
subdivision surface. And if you're going to apply the same modifier
that the body have, the final image can look
a little bit different. So I don't recommend this one. And the second one I want
to say either have found a big necessity to apply the misplaced modifier
on little things, e.g. like eyes or
something very small. We can do this. I don't say that this
will be very bad, but Let's try it
actually, you know what? Troy, no one, no one
prevents us to twice. So we go to our eyes and
Modifier displace mu for the texture
strength should be 005. Okay, you go here, image clouds. Then we go to the
improved Berlin and 03. And at all, Let's go here. Here, Control L, copy
modifiers and great. But there aren't big change. So let me check
before and after. So this is where
you should choose. Zoom in very much to
see the difference. Probably if you want to
do something like that, we will see a difference. Okay, let me do
something like 150. And just for fun,
let's do this one. Control L, copy modifiers. We can try the same
thing right now. Add modifier displays. Neil for the texture is 005, okay, texture clouds, where
quotes here are Clouds. Improved your 0.3. And how it looked before, how it looks right now. There aren't changes. So we can play with
this strength. But I really don't
because I turned off the 012 or three wherever,
let's say 015. So before and after. Remember I said that we
can try one more modifier. If you like. You can apply a one
more subdivision. Know, under, under the displays
to make it more smooth. I personally don't
want to say it. You see it's very smooth. So I like this type
of style on the legs. Honestly, I will not apply the displacement
Enquirer and our legs because I didn't
have any necessity. But again, if you like
if you want keep going. I supported with
all of my hands. Let's take a look
one more time. Good. We're very close to render. In the next lesson, I'll divide. I will show you
how we can achieve this type of switching moment. But for now, thank you so much and I'll see you in
the next lesson.
11. Animate texture and modifier: Welcome back. This is how
our work look right now. One thing that I changed in
between these tutorials, I just, for our,
for our roughness. Move this one, the white one a little bit more
close to the black. So just take a look and it will decrease the shiny
part of our duck. Also one thing that I want you changes to move
our stent a little bit more upward like
that. Oh, okay. Probably with a
bit more in front. Good one. Jake's. Okay. So at least it's
probably the thing. What more I want to
render, we're very close. I I say a lot of
time that I promise. I promise. But at the same time you have a lot of information, especially if you're a
beginner thing that is, this is amazing when
you have a lot of information and I hope that they explain
everything clear. So take a look at the material. Material, switch
themselves, themselves. So this is what we
want to do right now. It will be a short tutorial
or a short lesson. And the technique
will be very helpful. I mean, it will make
more interesting. So we're going to
animate our material and we're going to make
our displays modifier. Please take a look
one time like it's, it's, it's for 5 min. You'll understand. And then you'll
do this one alone because if you're
going to copy it, will you know how I said before? You don't bring any awareness, so you'll just copy and we'll forget after, after one day. So take a look. It's very easy. Let's start with our duck body. So we go to the mapping. And what we're going to
animate is z rotation, which means we have our map. And we're going to do
completely the same thing. Like if you remember
in the camera shaking, I can go to the
frame number one. And every five frames, we're going to
increase our rotation on the z-axis with 90 degree. Let me show you how to
insert a keyframe or I forgot to 1 s screenshot. Now you see, again, now you see everything that they tip on the left
coordinate right here. So how to insert a
keyframe, correct. Great job. Go to the 1234. I'm gonna go here 90. I didn't understood why
when I insert my keyframe, I don't see the gain frame here. And the thing is
that you should, should tap on the mapping. And now we can see clearly your keyframes that was
created. Great job. I go to 12345 and then every
five frames hold here, I'm going to 90-degree. Eat. Great job. Let's go forward. We go here one angry AT
wait, don't practice. Just take a look very quick. Let's go one more time. And 368. Great job. It's enough. You don't need to animate
all of one Hungary's because I'm going to show we're going
to create right now a loop. How? I'm going here to
the graph editor, where if you remember, we, we animate our
camera shaking. So we have our duck body, which is the name of this mesh, yellow body, which is the
name of our material. And we work with our only
with our Z rotation. What I'm gonna do
colleague, I mean, to be sure that
nothing is selected. And then double-click on the x1. So you can see we
select it on the set and then d constant. What are these? This is a thing that will create this dope motion style
in-between of your key frames. So if before your
keyframes was smooth, now it's more like a stop
motion and the last step. And for the side menu, we go to the Modifiers, add modifier and cycle. And how you can see we have
loops for this 2020 frames. So which mean we
don't need to go forward to grade for each one. This is more than enough. And you even don't need to make anything in this cycle modifier. Just let me show
you one more time. Add modifier cycles. Voila. Now let me show you. I will show you in EV
because you will not see any big difference with
EB it, we'll do it a bit. I mean, not like you will
not see a difference. You will see
difference, I'm sorry, but just cycles or require
a little bit more power. So take a look. So you can see how the materials right now
is switching around. You see that this, I mean, you definitely. And that all that we have the same thing to
do for our modifier. Let me take, let me show you. Then we're gonna do the same
stuff for everything else. So in this case we're going to, we're going to animate
our strength setting and only what is translating
in case if you forgot. So that's why I tried to work
between value like 003 e.g. and zero to hundreds. So this is what I'm gonna do
right now and I'll go here. Let me close this one. I'm going to choose my strength. I press here, great job. My first key frame at pure, they then go to 12345. And here I'm going to
do something like, let's go one hungry
too much. Why? I like it? Let's go forward. Sure. Frame number ten, and here will be something
like zeros, zeros, seven e. One more here will be, let's go 100, e and the
list one. Let's go 123. Okay? So take a look, so take a look at the shape. But now let's make this one. Let's try. Let's transform this one into something like a
stop motion styles. So again, click here, be sure that nothing
is selected. You can see strength. Display a beer. Let me just show you so open, dark auction strand is placed. This is why they're
double-click. You can see there they are T constant and for the side menu and
Modifier cycles that all. Now let's take a
look there at all. So nothing card. If you understand, now
we can jump forward, just play around
with the settings. You don't need to repeat the
same numbers if you have any desire to know to
invest your imagination, that no problem, I'm looking
forward to see your works. My purpose like a teacher, just show you the technique and you use these techniques
and the way how you want. So let me take a look. Hokey, Let's check with EV. Oh, okay. The material is on, uh, my recommendation, e.g. we have eyes and because, because IS are very small, you will not see, you not see big change. I mean, Let's do this one. Let's do that. But when we have a
very small object, there is no necessity
to play around e.g. with my legs. I
didn't switch here. I didn't change anything but in the rest, we can do this one. Let's go with our eyes. Now we understand the technique. Just do the same
thing for each one. So I'm going to my eyes which
share the same material. I'm going to go to EB
because it's a little bit more faster render in June, I'm gonna go here,
I'm going to choose my map is z and agaric. Oh, I'm sorry. 1234590 degree
1234518081, 234-53-0608. Leave me a review. If you
if everything was clear, if nothing, if I miss something, please tell me about that
because I really look forward to make my course very
beginner friendly and to make everything
which isn't a very complicated but wherever to
make it, to keep it simple. So this is my purpose. Then we go to the Graph
Editor right there. Take this ice shader,
another Z double-click. Hopes know my mistake. Double-click on the one x1, t constant, n modifier,
add modifier, cycle. Great job. Now we add. Good shop. We can, one thing that I
personally like to change is to make the scale something like 06606,
sorry, zero, yes. Um, let's do the same
thing for the modifier. Let's go to the game
frame number one. Eat with a gain frame. Let's go forward. And here will be
something like two. He said they came frame, something like eight
e for the gain frame. Let's go here. We can go with a belly, little bit more bigger
because I started small, we will not see a big change. So let something like
these can be good. Also. Three. Okay. Three. I was
looking for the left eye, but I make my changes
and on this one, oh, this look bad. I'm not going to
remove this part from the video because I just want to be transparent
with this type of mistakes. Yeah, Sometimes
you've got to meet mistake and it's
nothing pathetic or. Ashamed in this one, let's just come back
and make like 13. Okay, it was too much. Great. Let's go. I actually like this one. The value 108 is good. We can be here with the
r9 and enough grade jump. Back to the Graph Editor. Graph Editor. Whereas our ice
strength double-click D constant N L modifier cycles. That all I will go. Here. We go. We're going to
select our left eye. We're going to select
our right right eye and hold the Shift and
Alt Control L, L and copy modifiers. And now he will share the same modifier I like
the right way, right? I'm sorry, right. I which means you will not have the necessity to animate them. Both. You and I made this
one and now we can animate this one in the same
way. Let me take a look. You can see big changes because how I say
I is very small. But in summary, with
everything else, it make your final composite
in a little bit more better. Let's go forward with our beak. One problem, I think the black the black line
share the same material. Yes, the book wine
share also this one. So let's go first to
go to the big Uno. Yes, we are in the big
we're on the first. Now let's do the same
thing again and again. So e123, 4590, good. 12345100, 881-23-4517 here, 345. Okay. Now we go to the Graph Editor. Choose shader,
Double-click, quick t, constant n, and magnifier cycle. Let me check. Yes, we have. Let's play around
with a reduced place where we can stay in
the graph editor. Go here, displays gain
frame number one, E kit. But let's go five frames. Let's play around with
like two. Alright, Kay? Probably they'll put
some low-fi music in the background because
true here on Lemmy. I didn't know for other sounds annoying for someone a few, but Lo-Fi is a good
type of beats. We will see probably
not, I don't promise. In the comments also can leave a comment about
your experience. If this is your first time
working in Blender or have some experience or what if you're advanced, who know? Probably you want to have some fun cycles or
what do we have more? Let's go with this part. I don't know. Do I
need to animate this? Let me check. I didn't animate it right there. But who said that they
can do this one for here. So let's do this a
lot that look bad. I forgot about this. Tab a. Introduce everything. Oh, smart to be projection
66 OR gate now is better. But then the same
thing right there, dead for the edit mode, which mean edit mode. A smart TV projection, again, now is better, no better. Definitely shader editor. They have legs. This big middle part is
because we copy the modifier, the material from the beak. And he could be also
the big middle part, but you don't have
it on your leg, so don't worry about it. I'll show you. Just ignore it. So let's go with this
leg a little bit lower. Gs. G is the same thing. The same thing. Deb. Okay,
Let's go five frames. Actually, you can
animate the x or e. Greek I, I didn't restrict you, but I just like the Z rotation. I personally like
this one if you want to play around with others. No problem. Shaded editor or, I'm sorry, in Graph Editor, legs, nodes is z, t
constant n modifier. Sake, we created loop. Nice. Let's check. Yes, You can see, great job. I don't want here. I don't want to play
around with the displays. Are even don't need displays
because we don't need it. Or it's so long. Let's play around with
this one. Shader editor. Oops. Good to see the keyframe, 590. Let's move forward. Not so much. 185 keyframes forward,
278.1 more time two, this is 363 is 6.8. Graph Editor, Graph Editor, knife shader is the T constant n and magnifier cycles
UC is very simple. If you're going to look one time Just trying to
understand the movement. You understand that this is way more simple that they
look at the first glance. But the problem
white people, e.g. forget that this one can be more easily is
because they copy, they see something and
they tried to copy, don't copy. Look, understand. Bring awareness and it
will be much better. What I want to do,
I personally don't like the amount of light,
but we are in the EV. And then this one,
let me do this one. You know what, I want you
to do this one right now. I want you to
increase the light. Let me make something
like eight here. And let me do here
something quick. To congruence. Again, let me make
the world a little bit more or brighter. Okay? Do you remember that if you want you in case if you forget, so if you want to make the world Colorado
bit more brighter, you have here icon of the
planet, surface color. And these respond for the
color of our background. And this one behind. Let me go with Chris, I think like, Oh, okay. Two more things to more things. So we're going to finish
with this tutorial. Probably it will
be four on 50 min. But how we can see there is nothing card that
we do right there. So after we gonna render, in the next lesson, we want to render our first
animation, which is amazing. I suppose it's amazing. Um, so right there
and go with it, E for the scale. Okay, let me tap to see. We're going to, right now I'm
the material for this ten. So we go with the 90, good. 180, 273, 60. Graph editor. Standard shader is z, Z, z constant and
magnifier cycles. Let me check. So yes, you can see
the difference. Do we have a displaced modifier? Know? And I don't need it because we add this one if you use I mean, I'm I'm not sure if you use, but remember this
one-click damage, so it was enough for us. And the big rounds
here I want to play around probably
with this scale l. So, so not only rotation, we're going to play
with the scale. So Insert, go right
there and the one, click E and E. Good. So let's go. No, We actually because we, because we check in, the devil file, will not see a big details on our background. But wherever you can
see right there, there are some changes, changes. And this little detail,
again with a similar, with everything else, we'll
make our work a little bit more better so it can
go one more time here. I've got 12345. I'm going to go
out of the camera. I want you to see what I do. I'm gonna go here 98 and here I'm going to
do something like 1.31, 0.3, 0.3, a little bit bigger. Great job. Let's go forward. And here we're going to
do something like 1.71, 0.71, 0.7 E. And
here will be 188. Great job. Five. Let's go 03. Yes, no, sorry. 0303e and here 278
and the last one. Go here. Don't worry about that. Again, we will not see
these details and go like 2.42 point 4.2, 0.4 E. And here 360. We go to the Graph Editor. Again. Graph Editor, bare
ground shader. So choose everything,
actually choose everything to choose everything gets a
on keyboard T constant. Then I would place
n. Should they. Okay. Click on e.g. I. Click on
them wherever you want, then a on keyboard to
choose everything. And then you can
be able to trade the modifier of the cycles. So now we have a loop
cycle for everything. Let's check. Yes, we have, we have so or no. I think no, you know what? We added the modifier all
the way on the rotation. But if we want to try
this one on the scale, choose so what we can do to save our time, just copy here. First, here, faced here. Based. These are rotation. We didn't use x and the group
rotations, so don't care, but so I don't know if you
want, you can paste it, but actually there
is no necessity, but they're basically
just in some case. Let's check our
background. Yeah. So you can see that
our backgrounds read the materials also the
one-to-one thing I want us, they don't like this one. I suppose is that
or yes, this one. So I'm going to
back to the shader, to the shader editor. Too much, too much
from a 0808208. And now let's take a look. Okay. Now is better. Let's go to check
from our camera. We are in the EV or we're in
the cycles were in the EVM. Let's try recycles. But it's a little
bit to be loser FPS. So I'm going to try with EVA. Calm down. Calm down, please. One more thing that I
did a little bit because I did a test render
for our duck. Go here, duck see. And I don't like this lines. They are a little bit true, too thin, so I want to make
them a little bit thicker. We're going to search for them. Here they are. 123. This one are Okay, We go here, stroke 09. Yes. But let me just copy. I'm going here is 0.9 and then we're gonna go
here and zero and i 0. Okay, Now personally I like this type or this one a
little bit more here. I don't want to change anything. We can jump to the next
in our next lesson to set the render settings and
to put it on their own there, I'm gonna give you
just a few advice to make in case if
your PC is weak, how we can resolve for
how we're going to solve some issues or
to avoid some crush. Ladies and gentlemen,
we are officially done. Thank you so much that
he was still here. I hope you went to
here and I hope I was pretty good with
all of my explanations. And let's move forward
because we are in one step in between
finishing our animation, especially if this is
your first animation, it will be amazing. I'm in the cycles. Yes,
I'm in that cycles. Let him play around
with one thing. If you're still here, I
hope you didn't close. I'm going to go to the camera. Camera. I don't like the
profile disorder bit too much. I don't want to see
my legs, honestly. Let me try to choose Object, budget or the beak. Now I think because much better. Okay? And here to
make it like 2.8. Okay? And one thing
that diverse know like day, this prompts. And also it's very important to choose the animation also. So whereas our props, props, props to let me go a little
bit like like that. Okay. I'm going to watch my camera. Let me check the
distance of the stent. Probably move it a little
bit like this and g, z would be the down. See you in the next lesson.
12. Render Clay style: Render lesson. Okay, so I don't want to
close this one completely. So just drawing this
one on the right side, we go to the Render
Settings and in case if you want to do is stop
motion style of animation that you
probably think, OK. I shoot you switch this one from 24 to the 12th FPS because e.g. anemia from '90s and what
are their cartoons from? From years ago, which means
2030 years ago it was, I can frame rate of 12, but I'll recommend you
to not do that because let's render this wine at
a frame rate of 25 beers. And then if you like, if it will be choose move
for you, we can jump. I will show you this one. No problem. We'll go like Premier
Pro or After Effects. I personally working
in After Effects. And then I will show you how we can add a few effect there. And you're going to create
it like a stop-motion way. It's much better. Because you're going
to have options. What if you like
the smooth one a little bit more than
you expected worldwide, if not, at least to have option. Because the render
time we'll go there. Renderable took some time and
will be more easy for you. And advice number two, if you have a weak BC. Bravo, which is okay. I don't judge the thing
that I tried to shame you, it's okay to have a weak BC
At some point of your life. So probably in
YouTube you saw like a recommendation or
advice to render this one in the PNG
sequence where it is being gene like PNG because
you're going to render like Render Animation and
everything from one on hunger will be
like P&G, P&G, P&G. And then you're going to connect them like again in
the After Effects or Premiere Pro or
something like that. Just put them together. I don't recommend this one
because the final speed, if you're going to render
this one link a video, and it will render this one like a PNG sequence will be
completely different. I don't this one before I was
disappointed in the resort and I just will not recommend this one
if you want to try, okay, no problem,
it's your choice. You can try just for fun. But in this case,
take a look, e.g. not all of the hungry, all of 100s frames, but take e.g. 1-10 render. Then in the PNG sequence, sequence, put them together and take a look if you like it. Okay. I personally don't like
it and you can ask me like, what if my PC with a crush. So my recommendation
in that case, because we want to render
this one in the f, f and beg video. Choose it here to the folder so or same
lecture, the folder, I'm gonna go to the duck, see, I'm going to create here
that can new folder, I'll call this one. I can render, move up, exit, control S to
save color management, Do I need a new
color management? We said a medium high
contrast, which is, which was there the color
management menu, high contrast. We can play around
with this one also if you want to try
something goals, but I'm good with this one. So file extension
encoding, encoding. Open them encoding part here, leaving harsh 264 is like
industry standard bar button. The output quality I personally
one day high-quality. In coining speed, good. Amman, keyframe interval. Now our interest terror fingers, good, just check,
okay, it's good. And my solution is next. Instead of trying to render this one from one-to-one hungry, just go with one toward 20 e.g. then 21-40, then 41-60, then 6-1, where if you want e.g. from frame one to frame ten from frame like every ten frames
or every 20th frames. So in this one, you will render in the video, then you can put them together
without lack of anything. It will look in the same way how a fuel random from for render
one to render one hungry. And it will be much better
quality, much better speed. Then if you're going to render this one in a PNG sequence. So actually this is what
I wanted to say before. Even if you have a strong BC,
this is very important l, so blender love to
surprise you with a crash. So if you have a
trust in yourself, in your PC, okay, render the full one
and rest. E.g. I. Personally would like to
do buy it 1-50, 51-100. But first of all, I'm gonna do some test render five frames. Let me take a look
when I what l done. Let me check one more
time the final image, if I'm okay with it. Yes. If you're a beginner, there is very, very important moment. So we have our reference before. Be sure that you
close not only this, but this camera icon. Let's say that you don't
have this camera icon. There is no way, but let's
say that you don't have it. Go to the filter and be
sure that this one is blue. Because if you're going
to turn it off, it's off. If you want to turn
it on its own. Now I can see the background. Be sure that everything
that is here have they have the same
setting because otherwise, you're going to see
something that you don't see in your viewport,
in your render. And use shoe to make
the render again. So I make sure that
everything is good. In my case, everything is good. Okay? Now when everything gets done, make a test render from
I'm going to make 1-10. And then I'm going to
show you what I've done. One to ten Control S to
then go to the Render. Render Animation. In our remaining is like for around 4
min for every image. So in our previous lessons, I show you to keep
the denoising. This is why I didn't spend
our time right now because it showed before but sampling, denoising, these
are the settings I personally max
samples will be 246. You can put a time limit for each sample for around
3 s, which is good. Also, opening wedge to noise. I'll better here I leave like
in the way how they are. So in the rest, I
don't change anything. So only this part
of the aesthetic. Again, if you want to
increase, increase, if you want to
decrease, decrease, all of that depends
on your PC specs. So let me take a look. You probably think
I asked herself, where are my lines? Don't worry. They're going to appear when
they're render, we'll done. So I'm going to come back
when my ten frames will, my ten frames will render. So ladies and gentlemen, this, I actually render
it all of them. Let me show you. So from frame one to frame ten, the next 40 and last 15. It look good. I'm really I'm really
completely okay with it. One thing before you go into
render that I'll recommend, I know that it's one
after I finished. B. The way if anyone
is interesting, it might be C took
it in four or 5 h. So yes, you should
just be patient. Dig your dark body tab
to go to the Edit mode you and choose one
more time squar to be projection and 66 degree of k. And then check one more time. The settings if everything
is good, if you like it. I suppose we spent a
lot of time on that, so I'm sure everything's
should have been done. Be sure here that you
hide the camera if you don't want to see any additional object
in your final render. And then when you choose them, they came frames, frame
start with the first one. And toward, if you want to
render all of the animation, no problem, if you
want to run there, they can pretend, again, it's your choice and go to
the Render, Render Animation. We finish with this lesson. We have one more
where you're gonna do the post production
in After Effects. It will be for
around 25, 10 min. Our final animation
will look a little bit more better than it is at
the moment is right now. So then we have two more
lessons with another texture, with another type of
render like that. One. More toon style. In EV, this one was in a cycle. This one will be
navy and the render will be way, way more fester, I suppose in around 20 to 30 min or probably even
more. And we're done. And we don't want
either Coors and look forward to see
all of your works. But it now we have a
little bit more to do. So. Thank you so much
after your render, Let's move ourselves
into After Effects.
13. After Effects post production: Last lesson. We the so-called type of
render with a clay style, but yes, it will be the
last one for this part. So I personally work
with After Effects. I know that some people
love to eat I doing they Premier Pro, no problem. You probably should. You have the same effects
in the same functions. Only a little bit different, but this should be the same. But I prefer, I personally love to work
with After Effects. So what I'm gonna do, I'm gonna take all of
my three renders, then bring them here
in the project window. Wait for a second. Great job. Then, without usually people like create firstly the
composite composition, you don't need this right now. Just bring it, bring
it them right there. He will ask you to create the
composition without fuel, with the same settings
you'll see OK. And now we have our animation. Okay, First thing first, go here, fit up to 100 process, so to see everything. Then we go to the Layer,
new Adjustment Layer. This, when this, where are
you going to bring our FX? Right-click, rename them. Affects, Grinch app, go to the Effects
and Presets incase, even on habit for some reasons, go to the window and
be sure that you have a check in here on the
Effects and Presets. Then take a look right there
for the Posterize Time. Posterize time. Bring it right there. And it's the end of 24, 12. And here we are with our
stop-motion style of animation. Great job, but we didn't finish. We only start, let me make this one bigger ones related
to save, where we're, let's see, horse
post production one. Okay, great. Then choose these three renders. I don't know, probably
a little bit more, but you still have your renders. Right-click, pre-compose
and call this one dark. What I'm gonna do right now
is to add a little bit more of the shaking. Be the
more of the shaking. Let me show you pay for
the position and hold Alt. Left-click, everything
go turn red. Don't worry about that. Everything is good. And right there we shoot, you. Write an expression,
wiggle, wiggle. And our settings
calligraphers will show you an example of what it this you'll understand
a little bit better. 2020, don't set the same value. So it's too much. Of course, I just wanted to just show what it is. What
are we going to use? Something like the
first value respond be the speed and the second
one be the amplitude. So let me show e.g.
with this one. Oh, okay. I want you to
do something like 1.4. I think to let me take a look. Yes. And again, if you want to
further expression again, just open this arrow and here and the position open
this arrow and you can, you can change the value. One mistake with usually
cook people come into the start and when they do video editing photo diode in Core 3D, they exaggerate
with the effects. Don't do this one like
they try their best to show that I know this soft, I know how to work. And the final image look
a little bit cheap. So that way always bring
just a little approach. But in summary, will give you
much better final result. So that's why I don't go
too far with this value, something like chew
and four is very good. Great. Let's go with
the S for scale, alt, left, left quick. The same thing we go. And let me show you again with the big value is just
how it will look. So you understand it
just make it bigger, smaller on the horizontal
and the vertical. So what are we going
to do right now? I think something
like 2.1 and 22.2. Let me take a look. Yes, I like it. You see the difference. You
perfectly see the difference. And again, it was just
a lethal approach when one thing that I
want to switch right there to make something like 103 because we see black lives. Do you want to receive likewise? In that case, no. Okay. I like it. Great. We have a few more effects that
they want to show you. But if you have sub fear
plug-in, It's amazing. Series for S glow. So this one. But if you don't have it, which I highly recommend
you to download the tree and still is
such an amazing thing. If you don't have
it, you have an MA, you have a simple glow that
you can apply on your ethics. And where we are. Sorry, one more time. Unfortunately, on that
work as simple, glow. I'm from the After Effects
doesn't look very good. And what is glow? It creates this type
of emulation effect. But again, in our case, it doesn't work very well. I think something like 92, it will be more than enough. So without, with,
without anyway. But if you have a
subfield plug-in, take the S glow. I like it more. And here instead of to
switch on a coma for okay, I think comma 3350. So before, after, before, after. I like as globally little
bit more because it gives you some type
of old camera, vintage camera emulation effect of 32 are fixed in millimeters. So again before, pardon, before, after, before and after. But again, if you don't have it, you use the simple
globe Control. S. One more thing, sRGB, it's from sad fear plug-in. It will create this
chromatic color, red and blue line. So here, make minus is 0.02. And here instead of
36, Let's say 99. And take a, take a
look at his eyes. So it was before and it's after, before and after
you see a red line. Now, if you don't have it, there is a there is a free
plugin and the internet that you can search for
her alma abbreviation. Let me show you the full name. So with this one quick
chromatic aberration too, and it will give you
something similar. But I personally love to
work with this storage RGB. I work on these two settings
and it's a little change. But again, little changes in Sumer and give you
a great image. And then one more thing that weekend everyone have
is radial bluer. So we go here, Blur and Sharpen as
estradiol bluer light. And let me show you first
of all quality of 100. And here e.g. if I
make five too much, but we can go with
something like 0.6. And it creates a little bit of motion bluer on the
site, like right there. And let me take a look
at the final animation. So this is how it
look right now. I really like the final results and I hope you're satisfied to. I know I know that
someone of you will say, excuse me, Sasha, but
we don't use that. We don't have After
Effects or we don't have all of this
stuff they're plugin. Well, this course is
about 3D and this is just a post-production
stuff that you can do again in the Premier Pro. And then one of the one thing
that you can remove as, as Glow and distortion, but you have radial blurry here Posterize Time for the
stop motion effect. You can work with the
Beagle expression in the position and scale, and you will have
something similar and also you have chromatic
abbreviation. Let me show you one more time. Yes. Quick chromatic
aberration too for this type of LGBT
alliance around. And one more thing
that I want to say, I hope I really
tried this course to make much better
than it was before. So in case if you have
some constructive critique and you say that you
don't like something, point me believes in
the review of like, I don't like this woman right there or I didn't understood. I'll try my best to make
it much better in future. But at the end of the
day, I hope that it was really useful,
especially for beginners. I try my best to explain
everything simpler, clear, and I hope it was
interesting for you just to spend a
little bit of time to achieve this type
of stylized animation. The one-on-one thing, one little legal thing that probably
they all like to change, but it's not the point. But then his left leg, It's a little bit too up. So one thing that
I would like to do is to move it a
little bit more down. But in the rest,
everything is really good. You everything is a really good and I hope you've
shared the same opinion. Look forward to look
for your projects. I'm really interesting
because usually people do something way
more better than me, so I'm looking forward for that. And now let's render because
we have a render step. Thank you Again if
your deal that moment. So we go to the file, we go to the export, and we have here at
J doc Media Encoder in case if you installed
Adobe Media Encoder, summer of you will not have this one and you are like Sasha. I didn't have this one too. Well, I'd like to say that
this is not my brothers, but I am the teacher,
so I don't have the rights to say
something like that. So you can add to Render Queue. But there is no solution in YouTube when you're going to check the tutorial and
they're going to say, they're going to
tell you that go to the output model here,
choose the QuickTime, and then go to the
Format Options and search here for video codec, harsh, too hungry 64. Then let's take a look together. Harsh too hungry 64. Did you saw this one? I know most of you, me and most of you
will not have that because I'd up After Effects
remove this science. I don't know After
Effects 2020 to 2019, but if you remove this one, so that's why yes, you can e.g. to choose the format AVI
to render in this type, then you should change style, something like a hand brake. And then to bring her
video here, to switch. But there's a lot of steps. There is a lot of
complicated, not complicated, but I can tell you a little bit annoying and something
waste of time. So that way, I recommend
you to spend like 20, 30 min download the
media encoder and everything will be very easy
and very, very comfortable. So one more thing that we
should to do Control S to save. And now let's go
to the File export add to Media Encoder Queue. Let's wait, wait until this one and will there
be a right there? Okay, it is here, go here, and switch to 1,000, the same setting that
you're done in Blender, 1500s, 1005. So the solution that they
found just click here and we'll lose
four or 16 pixels. But in rest, everything
will be good because in that case, we have some troubles. And there's some, you know, some weird behavior from
Adobe After Effects. So quick here, chicken
and everything is good. Then interest
everything the same. You can target bit
rate to increase. I like this one for 24 e.g. you use maximum render quality. Choose the final output file. And when I go here or render, I'll call this one dark
after post production, grade safe and click, Okay. And right there
on the green one, go to 222. Good. Let's take a look. We don't. Let me check one more time. One more time. So we have an infinity
loop with our stylized, dark, aggressive dark. Thank you. Thank you so much. I hope you enjoy it. I hope it was the first
one this course with for beginners who make their
first steps in Blender. And we have one more or less
sand where we're gonna have done this type of tune shading, it will be very quick for
around another 20 min. I know you probably
will say Sasha, you said before 5 min and it usually took 15.
Well, I'm sorry. But at the end of the
day I tried to feed this one too with information. So if looking forward for
this type of stylized duck, we're going to render in EV, not in cycles, which means
a little bit more faster. Let's jump into our next lesson. Thank you. Thank you, and I
see you very soon.
14. Toon shading Eevee: So I'm going to divide this part of the course into lessons
in lesson number one, I'm going to show
you how to create a shading material and
other next lesson, we're going to
apply this material on every object in our scene. And the last one
going to be render, which means three more lessons. And we've finished, you
finish with this course. So first of all, let's save this one like another
file because it will be more easy to switch in
between them in future. Control Shift S and
call this one dark. Ev. Great, save us. Amazing. Then open this window in case if you didn't have just right-click and choose
vertical split, that is rug this
one on the left. And let's start. First of all, let's move
ourselves with switch ourselves from the cycles to EV. Good. I personally want to take, you probably know this
one that the blade is. We have a lot of blue is
because we should to check off on the camera and therefore
filed where it is. Here we are, and now
everything is good. I personally want to
hide my background. I don't say that you
should shoot at this one. It just my personal choice. Let's start with our dark buddy. I'm going through the
material here, delete this. But you will notice that
when you do it here, you still have the
material right there. And it will disappear only if you will not use this material
anywhere in this scene. And when you're going to
reopen blender again, then you're going to have all of the materials that are
used in this scene. Next step is new, and let's call this
one dark skin tone. So first of all,
please take a look, five-minutes, and then you'll
understand how it works. So the first thing first
in-between these two, I need three more notes. The first one, shift
a shader to RGB. Put it here. Do you
see any difference? No, but this is
like the foundation of every donor shading
in EV or render. So this is non-photorealistic
rendering and without Him, trust me, your results gonna be. The next one is called a ramp. We put it here, and let's bring our colors. Choose here B-spline,
and I need five colors. Let's go here, here,
here, and here. The first one on the
left will be black, and this one will be orange, more brighter,
Something like that. The next one will be yellow. More here, more brighter place. I'm going to move
it on there, right, on the right. Alright. One more, something like a
yellow but more close to here. Oh, okay. I need more powerful orange. Great. For more nodes that we need. The first one I'm gonna be
Voronoi texture. Put it here. One more noise texture
here, geometry right there, and mix RGB right here and click on the nice texture or Control T for the settings
in case if it didn't work, go to the Edit preference
here and they came up, look for texture
is set up and be sure that you have a check-in. Great job. Next thing, let's connect our
veterinary checks for the position with normal. Good. Here Let's set something of value in between, let's say 2.3. Then we're going to connect our noise texture
with color too. And we're going to connect
our normal with a color one here from mixed choose
linear light and connect this one with the vector that you probably will
ask me, what is this? And I remember when I
started with a 3D path, I didn't understood
and I couldn't find any good explanation,
at least for me. So it's very easy. This, this setting right there show WHO going to
dominate over whom. We have a nice texture that
we set to the color too. We have this node that
we set on the color one. When you drag this
one on the right, you say that the noise texture going to
dominate over geometry, which mean colored shoe. I'm going to dominate
over color one. Whichever one you're going to
move this one on the left. That means that the
color one going to dominate over color too. So very simple and just
find your balance. I will say this 1.7. Then
we're gonna go here. You can me ask, you
probably will ask me like, why did the geometry not do see a difference?
I think yes. Again, it's something that don't influence on the outlook,
but without him, like in the case
with shader to RGB, the final result is going to be definitely not
how you expect. We go to the noise texture, we are very close for G. And here let's play
with our settings. First of all, let me
show you this scale, this one, you don't need it. Scale one, skill 11, e.g. so you see the difference? I personally want to keep it
for around eight details. Take a look at this h. I'm
going to move it forward. And here and forward. So that's why I wanted
to give it a 6.2. Roughness is something similar, but I don't want something
like 0.6 is good for me. Distortion. I personally
don't like it right there. I don't say that
this is useless, but at least not
for our purpose. So that while keeping
this one I get zero. Then I'm gonna go here. And you can play e.g. 2.4 or let's say 2.2. I like it. One more thing. Why we need this one. You can play with a texture. Just set the location
to see the rotation. But the best one that I found, at least here, the scale. So we can make it like that or we can make it
more smaller like that. I personally want to keep
it like 0.7, 0.7 and 0.7. Great job. And now
we've finished. I show you how to create
this simple material. And let's take a look
at our color ramp. Let me do a little
bit more orange, a little bit more
black like this. You can play around
with this one. Also constant is what
usually people use when they want to create effect of
the animal in the blender. But it's interesting, but I'm not sure that
this is what they wanted and we can play
with easy cardinal. Or the best one I
found is B-spline. The gradient in between these
colors is more pleasant, at least for our purpose. One more knowing that we
can add in case if you want to add a little
bit of glow effect around our object is emission. Because if they start to say
that we need three nodes, but I had only two. So we put emission right
there and make 1.5. You don't see any difference
because we should activate our balloon and now take a look. I want you to keep
it around 1.7. So chicken ambient occlusion and Check-in screen
space reflections. Viewport is good, but
at the final render, I would like to keep it like 128 Control S and L so we can play with the
color of our background. So I'll go here and the planet, you have color, and let's try
to make it more brighter. To stay a little bit more. Either snow like it. How about outline? So there is a different
ways how you can create using solidify playing
with the color ramp. But I like the best one. You might be only
the grease pencil. We go to the Shift a Grease Pencil object
line art. Look into weird. But when you move yourself
into the camera isn't good. So without camera,
in the camera, and then we can choose, first of all, let's
create a collection apart for our line art is because
it's a little bit too messy. What is our line art? I suppose it's here. Yes. M, new collection line art. And let's choose
all of them three. And move into line art. Great job. Now we have this one. Go here, Choose click
on the stroke icon, increase the resolution towards 64 or even more if you want. And I would like to have
something like 1.3, it a little bit more thicker. Now, I'm completely good. So that is, this is how
to create a shader. In the next lesson,
we're going to set the shader to
every material, every object in our scene. So if you want to do this
one alone, No problem. I'm sure that you're gonna
have done an amazing crystal. But if you want, if you don't feel very confident that
they want to play around, okay, Let jump into
our next lesson. One more thing, one more thing. I'm gonna be honest with you. This is my second time when
I create this tutorial, because on the first time, the result was that
they didn't like. And because I want to
provide good-quality, I decided to make it again. So the mistake that
it's not like mistake, I just wanted to experiment a little bit and I held
it will be cool. So I animated the
Voronoi texture, but the final outlook, let me show you how it was. So it's a little bit weird. It's I didn't know this
word it should describe, so I didn't like it that way. If you know what, let me do this one again. And if you want to try to animate something
from here, remember, just go for a gain frame, then go to the
Graph Editor D for the constant modifier cycle. And we don't this
one in the previous. And it was very easy and I'm
sure that you remember it, but I personally don't want it. We still have on our
duck displays modifier. Let me show you. So you're going to switch his body shape. And it's more than
enough interest. I personally don't want to switch here to change anything. But again, if you want it, I believe in you and the patient and work
in your own pleasure. Thank you so much. Let's move to our next lesson and then the
render, and we finished.
15. Toon shading Part 2: In this lesson, we're
going to apply or material that you every
object in our scene. So first of all, let me go here. Frame start. One can question the frame one Control S to save living in the wrong
at this one on the right. And let's start with
our big e.g. I. Activated camera default,
default file again. So took off. And let's start with our beak. I'm gonna go here to materials. So what we're gonna do, hold Shift and
left-click on our body, then Control L. Link
materials now are big, share the same material. The next step is you
click on your big N here, duplicate the material
and call this one. Big underlying tone. Great job. Now, open this one
and let's go to our color around and
play with our colors. I like to have more
orange right there. So something like this, even probably a little
bit of red will be good. Let me try to scale
this mountain, which means you mean
this one out with a bit more bigger one. I say bigger than
ME them smaller. 050504. Okay. But I feel like I can
do something here to let me know
1.91, 0.9 is good. And let me know you'll get more red and a little bit more black. Okay. Yes, I like it. Let's go next. Actually, the gray material on the eyes look pretty
interesting with this one. But we did this one before. So that's why we go to e.g. our right eye, then again in our dog Buddy Control
L link materials, then duplicate the material,
I'll call this one. I don't, and then
choose the left one, right one Control
L link material. Now and go here, let's remove the yellow e.g. let's remove this one. More black. I think I think it's an awfully true colors on them more in black and a little, what if I do easier? I'm going to move to
the B-spline is good. We can make this one a
little bit more darker, something like like this. Okay, Great job. We have our legs. I tried to add a line
art to see how it looks. So let me do it for you. Okay, Let's go char licks our body control
L link materials. Then we're going to choose our right leg duplicate
and call this one leg. Then choose left
one, right down, Control L of ink materials. And then let's do
this one or something similar to our beak probably
should you choose this one, but our ever, let me do
something like that. Yellow, a little
bit more orange. And I need a little
bit more bull know, here you are. Okay. I think that red one is shou, should be a little bit
more towards the orange. Now is good. Go Control S to save stent, body control, L, link
Materials, choose 100. It looked pretty cute. Then we're going to duplicate
stent underlying tone. This one should
be more brownish. So we go here. Next color is this one. We go here and a little bit
more towards orange color. You can see it right now I
didn't do anything special. I just play around, choose the color that
I personally like. And if you give it the
desire to try other colors, known problem, what about blue? I think the blue one
looks interesting, but more toward white. Little bit, more,
little bit more here. And give our, give such a
shiny ethics Control S, What do we get more
of these props? Let's use these prompts,
these probes, actually. Okay, our body control
L link materials. Why you didn't work. Thank materials and
I'm gonna go here. Because we have outline, duplicate, perhaps
underlying tone. Then I choose this one again, this one I can this one again
Control L link Materials. And then actually look, bridge it interesting, but it's too much yellow issue
to remove this one. We should remove this
one and live on. No, no, no, no. We can go here. This one I can drag
it with with more toward black and yellow. It's enough with white. Oh, okay. We can increase the mission something like 2.2 going from S. But we lose. No, actually we have this. Why did the name of this thing something like a grunge effects. So I don't completely opposite. Why do we have more
our knife holder. Shift Control L link materials. So then you go to the
holder, then you duplicate, then you hold is called this
one holder underlying tune. Is it hard? Tell me please. Is it hard? Especially if you're a beginner? Of course, Though
Jews the same things look once, understood. And then it will
be way more easy to do this one without any help. So I'm going to bring
this one to violet, but I need to make
it more darker. And in this one to share this same violet on
the more variety. And you, my friend should, should be also violet on
the more towards red. Now let's talk a bit
more alike toward white. Oh, okay. Let me play around with this. Let me play around with that. A little bit more in Bullock. It's good. Now we have the bridge
here, but actually, I don't have any
necessity to change because we will not see
any changes is too small. So that why I personally
believe how it is. So then I'm going to go to our blade Control
L link material, then choose blade, duplicate,
blade, underlying. Doing great job. Remove this one,
remove this one. And something like that. I'm going to play with scale. Let me do something
like 1.41, 0.41, 0.48. Good. Let me play here with a Ralph
Nunez, something like 0.7. And then one more thing that I'd like to do is scale to make 2.4. Oh, okay, a little bit
more of our emission, 1.9. Oh, great job. We have our background. Where is our background in case if you don't
remember where it is, but actually it is here, but you always have
this search step when you can click
like background. Then open, good. Here, Control L, link materials. It's interesting. We go
here to the background, duplicate background, Rachel. And I think I want something
more towards the red. Lead me to y with this. Let me remove this one. A little bit more black. Let me play around. Let me try a more darker. No. What about yellow, orange, or red one done a very good. There is a solution.
Always when you don't feel confident in the
color that is used, you can move yourself
to the color.com, and here it will be. It's very useful tool. You're going to
help you to choose a right colors are right
palate of the colors. So let me choose the yellow one. And what if I'll try it
and know these but e.g. this one triangular
and he had these blue, let me copy this blue and let me try to bring it right there. So Hicks and not really What if you're
going to activate the dip of filed of k, But bag and one other color. Let me try with
something like here. Recommend blue one, I
will don't want blue, I wanted something else. Let me try with, let me to write with blue. So we go here, here, hex, copy control V. Let me try to make this one a little bit
more towards white. So go here and drag
as toward left. Good. And let me activate
the deaf are filed. Okay. Okay. You know what? I like it? What do we have to done more? We actually did everything. Let's try to bring the
outline for our legs. Shift a grease pencil just to take a look if
we like it or no. I personally like it. Whereas our line art is here, here, where you are. You are. Let make this stroke resolution 64 and this 11.1 a
little bit more thicker. Unfortunately, when you try
to copy the gradients pencil, I don't know why
it doesn't work. So I'm go here and go here, Control L and you have here
coping response or ethics. But no, so that's why you should to create a bar degree spans. So we'll go here,
object line art, go down 1.1 and a
resolution of 64. And to not forget my settings for the
camera there for filed. So I activated where
you are deaf are filed. And I said the f-stop, which means the bluer
effect around on 4.5, 0.7. Rachel, you probably will
have something like 800. This one on 0.7, you're
going to have a 0.800. So during this one on 0.7 hundreds and this is the
final outlook that I like. In the rest, you can increase the sampling
of the render for around 128 is good,
it's a good quality. You can go down and instead
of filmic, standard, work more better
with the EV medium, high contrast now and
just a medium contrast. And lets the gentlemen, we've finished with
another type of render. So let me see what we have. We lose a little bit of F beers, but you can see it's more
easy than the cycles. Great job control S to save. I hope this lesson
was useful to you. It was very easy. I show you two types of renderers for cyclists and even
different materials, especially if you're a beginner, you probably are like
a lot of knowledge, but these knowledge is
more than enough to create cute 3D
illustrations in future. So now let's bring
herself to the render, but let's bring this one in. Our actually, we don't have and they're in they're
going to be very easy. So that's why I don't need
to create a lesson apart. So just be sure that you have
taken here, here and here. Then play around with
the color management, then increase this
render samplings. And the final resolution
gonna be, in my case, 2005 hungry, it's
a little bit more. And then frame, Start Frame, and let me try with
one towards 50. Choose the final outlook. So let's call this one. Don't duck. First part. My recommendation. My recommendation is to try
if you are unsure in the way, if you like or not. So do this one from
frame one to frame ten. Take a look, make
this test render. You're going to be
very quick and if you like it, then go forward. If you don't like it, make
your change and come back to the Render Settings and one more thing, open
them according. Then be sure that here in the video codec you
have harsh 264, you have high-quality, and
here you have FFmpeg video. Remember, don't render this one. They can PNG sequence because
the result gonna be awful. I'm going to come back
when I'm going to finish both of my, when I'm going to finish to
render this loop animation. See you very soon.
16. Toon Precompose After effects: So I've done it was
for around 20 min. So let's back into After
Effects and weight. Hide this one. And actually we should to create another composition because we render this one with a
resolution of 1500s. This, the EV-1 is 2,500. So let me go here and
change like that. And like that. Good one. Rename this one and dark. And let's bring our
files right there. Oh, wait a second. Move it. If you want to move this one
inside of your timeline, just hold Alt and move forward, or move forward with
your mouse wheel. And instead of trying
to set this one, right, what do we finished? It will be much better. You can click on the first one, then hold shift and click on
the second one, right-click. And here we have keyframe
assistant and sequence layers. And then you say, okay, and now the second video, we'll start straight where
the first one was finished. And you don't need to
waste your time trying to fit this one under
the right second. So let's take a look
what we have right now. Fit up where we finished. We're finished here,
copy this seconds, then go char and duck
compositing settings here and the duration Control
V and Control S. Back to our first compositing
where we did our clay. And here the Effects
Control S or control V, put it above how we
can do this one and hold Control and this
arrow, square arrow. You can see this weird part right here is because
the resolution of the layer is smaller
than the videos. So what we can do is Control
Alt F. And now it's so good. But do you think is true? Right? We can go here
into our settings. We have posterize time on 12th, which allow us to create effect of the motion. Stop motion. Then let me check off
the distortion as Glow. How about a simple glow from the default of the
After Effects? Go here. Here. I can say that I don't like it. Let me try 88. How about 92? Checkoff, check in. Again, 95, checkoff, chicken. How about S glow from
the software plug-in? 0.4. I think it's too bright. What about 015? Without with without know, I honestly I don't
like it right there. But this glow, I'll say 97, which will create just a
small difference in between, but I still am not sure that they didn't want it and I will not activate them. Let's go to the
distort their GB. If it wasn't in the
lesson before I saw that this is from
the software plugins. So you don't have this one on
default into After Effects. And if you want some, there is a free
plugin and internet. You can download chromatic. This one, quick chromatic
aberration to it. It will create this effects
of LGBT alliance around. Let me take a look. I think it's pretty interesting. How about to make
this one like three? Too much? How about shoemaking this 115? What if not minus
plus the red one? I like a little bit more. So without, with, without. Great job and we have to
do two more things, true? So both of these files, right-click,
pre-compose, dark, tone. Good. We go to the p for the position hold
Alt, left-click. Then we're gonna write the wiggle expression
and we're going to make this one
like two comma two. Oh hey, it requires a
little bit of time S for scale out wiggle expression. And then they write
two comma two. And let's see what
we have right now. I like it. They want the one thing
that I forgot to do is to increase here with
a value of three. So hungry. Three, no matter
you will have like 98 or 99 just increase with
just add three more numbers. So let's take a
look one more time. Okay. Let me check off the effects because it's
a little bit too heavy. And this is what we'd done. Great job. Lumetri color change a
little bit of saturation. So we go here at belie, move it above of everyone, then open the basic
correction temperature minus ten and x plus or 0.3
and the saturation, more hungry to five. Drinking. Oh, okay. Without with, without and with a vilest
one that I want you to try. I didn't say that we will
use this one, but why not? There's definitely a color Rama. You have this one on
default for sure. You can put it here. And you have here
L lot of settings. Open the output cycle. So we have here use braces, pilot and look how
much of them you have. Let's try fire. Let's dry clay around. Blue. No fire and smoke. Horizontally. Stevia. That is where I fire. Gordon littlest one,
fire and smoke. And here we have
cycle repetition, which you can, which also will don't go too far
with the numbers. So 1.2 or its interesting, 1.1. What about 1.04? Okay, and you have few more settings under
the modified here, modify all and you can choose again for
examples, iteration. So all of these settings, they play around with the colors. How about the green? Help? How much red? How about in blue? I like it the green, honestly, but what if I'm going to
keep this one on one? And no, how about
the blue budget? Keep this one on one. Now, why did not fire
a small bud, e.g. solarized green. How about so there is red. How about solarized blue? No big difference. Deep ocean, I remember like
just weren't else. So no fire and smoke
is pretty interesting. And you can move this one L, so somewhere right there. Okay. I didn't think that
they have a big desire to play with all of
these colors right now. But at least I showed you
another tool that you can use. And I want to say
that I don't like it. Let me take a look how it, how it look completely
the entire animation. It's actually the
Louver interesting, and we can render
this one and we can render to the previous
version we talked with color. I'm also so this is what
we're gonna do right now. Control S File Export. We go to the head Media Encoder, way to Media Encoder to open, open here and the preset, it will try to increase this one here when I
came here with €1. So what do you
shoot should do is go here and match source. And then you have
2,000.500, thousand 500s. Put a tick in here and they
use maximum render quality. And let's increase this one on 20 and the lower one, door 25. Then here output name,
gotcha the duck, see render, dark tone. After postproduction, save, OK, and click right there. Four render. Wait a second. Great. Let's move to
the After Effects. Check off of the collar Rama, gone through S file. Again, export it
to Media Encoder. The same thing, much source
use maximum render quality. Let's go here. 2025, dark tone. Go there to the folder. Dark tone. Let's
call this one or regional or region now, safe. Okay. Let's check. This is why we have it then. One more time. Array. The second one, oops, this one, this one. Open. Look into every single. So
for their more realistic one. We done the last lesson
in the next one, I just want you to say if
you go towards the word you and if you want
to listen them, go forward to the
next lesson and we've finished with this course. Bravo.
17. Congratulation: Congratulation, we
finally finished, and it was really a fun project. I hope you found this one
and don't do any good news. There's also, but my
main purpose was to help especially beginners to make their first and
confidence steps. In this amazing world of
Blender, we're module, we create materials,
we create animation, we create animation in cycles. We create animation and navy, even a little bit of
post-production in After Effects. So at the end of the day, we did a lot of thing. And your final project,
you have three options. How you can dawn, you can make a clay
style animation. You can make a dark
tone shading animation, or are you just can
make an image rendered. So choose wherever you want, if you want all of the three. Well, I'm looking forward for everything that you've done. And leave me a review, please, because I really try my best to be much better teachers
than there was before. So if you give some
constructive critique, e.g. I. Didn't like this or if you like everything and it
will be just amazing. Thank you so much. I
wish you the best. And we're going to see
each other very soon. Thank you and goodbye.
 Sasha Luvr, Work in third dimension