Transcripts
1. Introduction: Hello and welcome to this
intermediate watercolor glass, where we are going to paint
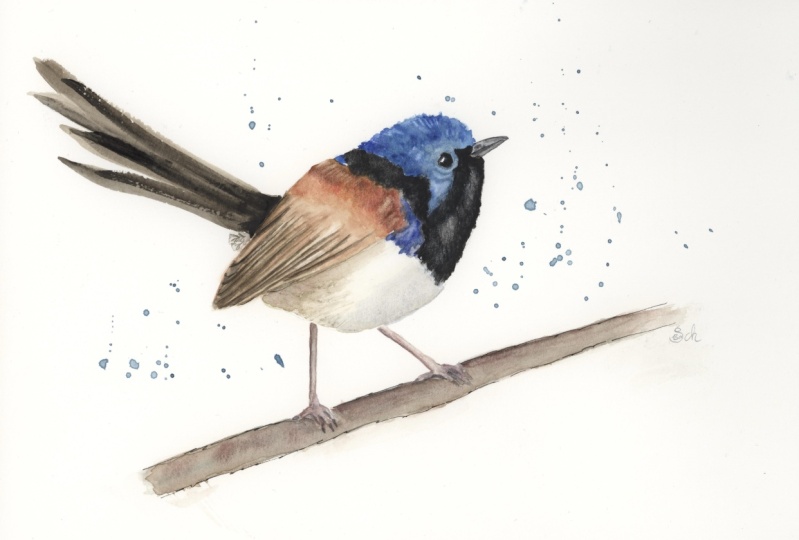
these cheerful, fiery red. This class we will
explore how to painting loose and expressive style
or without pencil sketch. It's a pure magic
to see how ANCA, The literally white
paper first step here is a dot which evolves into Bird. Hello, I'm Nina. I'm a watercolor artist, painting in loose style, also known as music
art on Instagram. I started my watercolor
journey in 2015 and spend quite time mastering
my watercolor skills and searching for my style deal, I have discovered the
beautiful expression of loose style. I'm inspired, whereas
the beauty of nature, and you may know me for my
expressive flowers glasses. Now it's time to
explore new subject. And this is my first
class where we will paint expressive birds. Loose style may look a bit
challenging at the beginning. But in this class,
I will show you in real time all stages from the shape study till the final painting of
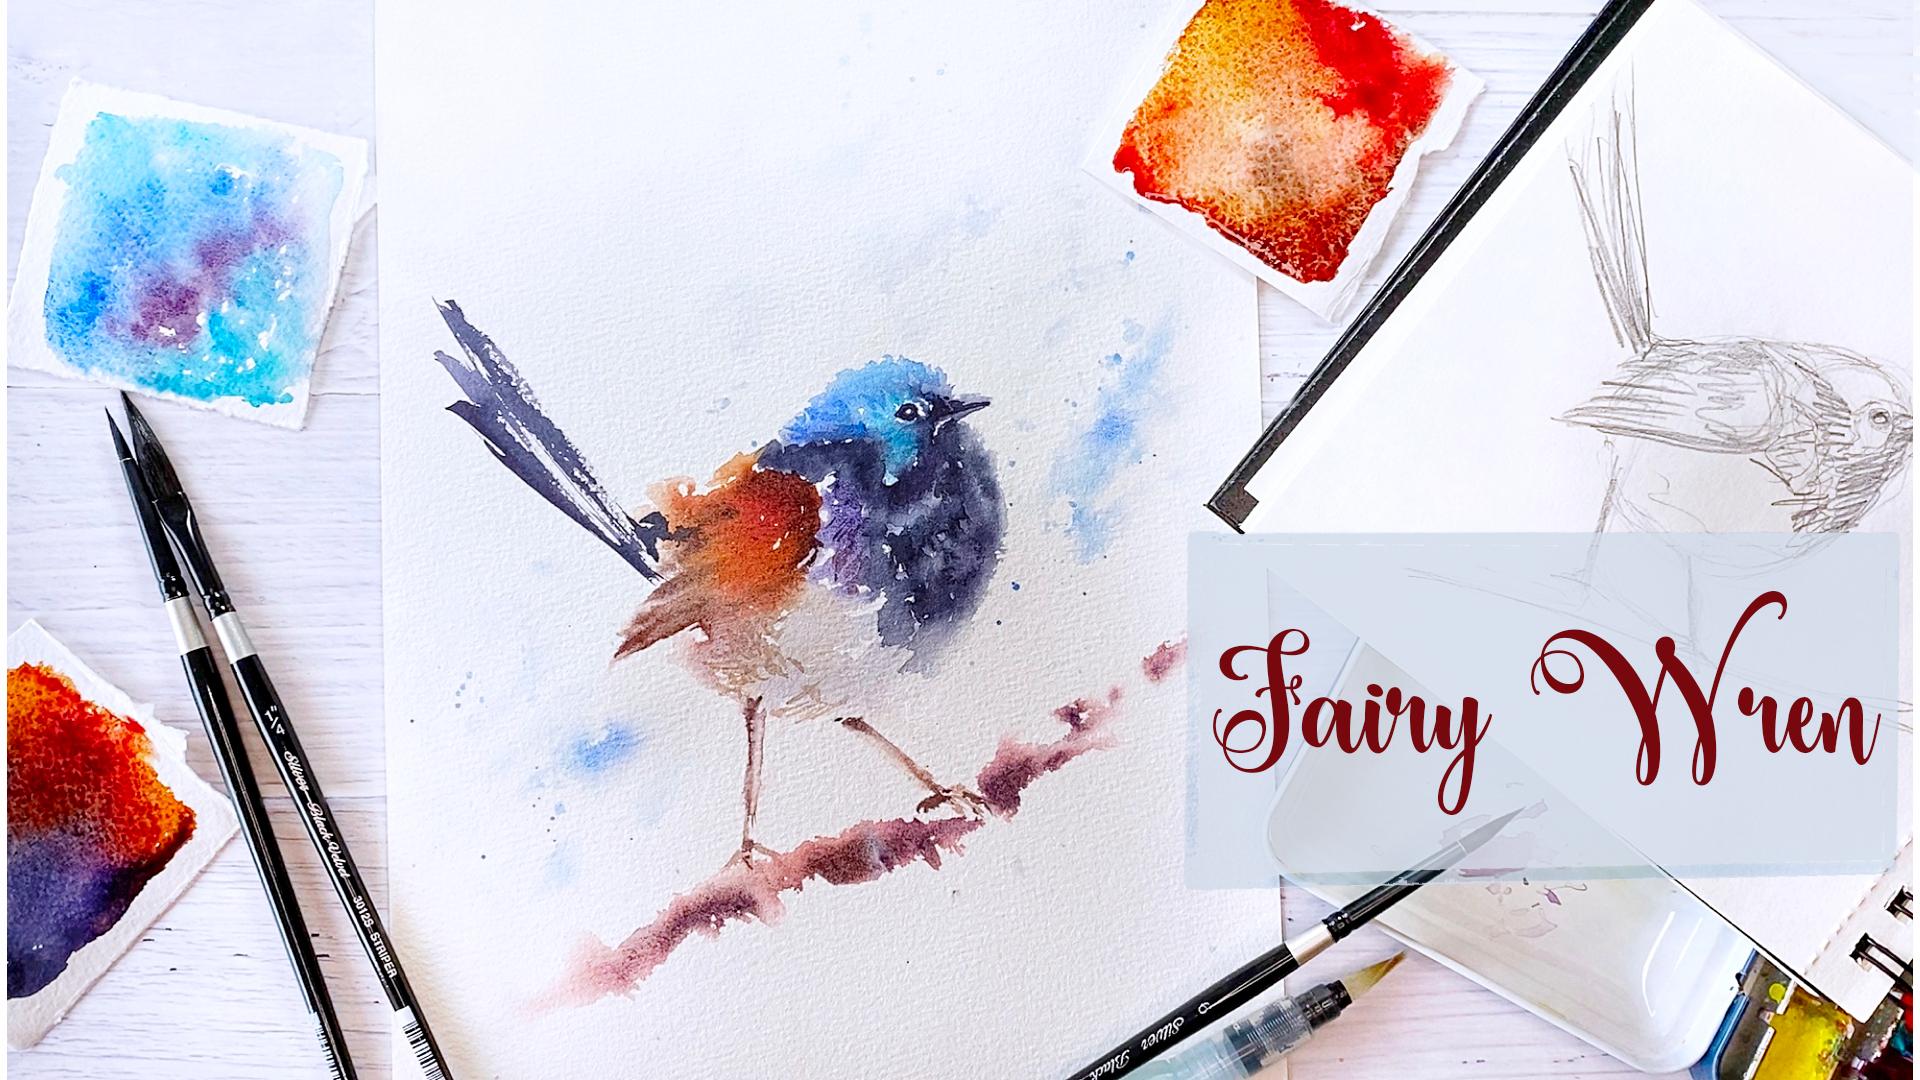
this gorgeous ferry ran, where I share with you
my tips and tricks. We will be painting inferior, ran in one layer, then add in some details. So his gestural brushstrokes. If you are new to my technique, I will suggest you first watch my brave well with the
paint with water class, where I show in detail
at how those in-app your style and to discover the beauty and flow
of watercolors. Once you add more water, to make your watercolor
experience more joyful, I have added the
template of their ferry ran in the class
resources section. I really hope you will share all your paintings are on
the class project page. I enjoy seeing them. And remember, I am here
to help you in case you got stuck or
have any questions. If you are new to this channel, welcome Professor Follow
button on the top. The join me in this
creative journey. And in order not to
miss my new glasses, grab your brushes, and
let's explore loose style.
2. Supplies: Hello. Now it's time to
prepare your materials. In this class, I will use
the following materials. First, we will need some paper, a sketch book, and pencil. Practice simple shapes. Will need watercolors,
watercolor, palette, and some brushes. I will use brushes number for number six and also striper, but it's not so important
to have striper. You will manage all so we Sam, rounded brushes
with pointed deep. I will use also water
brush in my case is that this size beak. If you don't have a water brush, it's not a problem at all. You can use just normal brush for making wet certain areas. I will use watercolor paper. This one is 100% cotton paper. Gold breaths at A4 size
or answer a 100 grams. Think my main advice will be that here it's really important, is the quality of them,
watercolor paper. And you will see the difference
once you will use it. Really good quality
one and not so well. Also, you can prepare
some squares of paper for swatching your colors and to see how they are blending together. Have your materials ready. Let's move to our
first warm up state.
3. Fairy Wren. Simple Shapes Study: Welcome to shape study lesson. In this lesson, we will see
how using simple shapes, we can construct the
body of the bird. This is, you can have
this knowledge you can, and skills you can apply
to any birth painting. So I highly suggest you
not to skip this part, however, are the beginning. It could be a bit boring because it's just
pencil drawing. But you will see that it's
really important to have these warming up sketching before you will
move out those air. What the color part? Because he knows that
we are going to paint without any pencil Sketch. So we'll start just
with white paper. If you feel like you
really want the breakfast. Watercolor is a button
not drawing skills. In the class resources section, you can find the template of a very red Let's create as a
guide mapper for our minds. Before I will start
painting in loose style, usually I make really
rough sketches so that to have my subjects studies and
then to have it clearer. This helps my mind to have a clearer idea about
reference points, which to keep in
mind before I will start painting just
on white paper not. So that's what we
are going to do now, is we will start with
some simple shapes, like for example, circles. Because here we can see here one circle and head is
another circle here is there. That is quite good exercise when you are painting circles
and loose style. Then it makes like exercise
your hand and together, free movement in your hands. So that's why I really
suggest you to do this. You can see that it's a bit, they're crossing like this. More or less know,
here is like this. Another thing, what
we can see here is that triangular of the wing. More or less. This way. I think that is the
shape of the triangle. Here we have. Then it would be possible
to join these shapes. Let's see here the
line, how it goes. This line goes quite way. We think more or less like this. Here you can see
all these shapes, like whether you're
ones correspond to those ones are more or less. Here. That is really
rough because I mean that Z is for our mind to find
those reference points, which we will have
to keep in mind while painting already
with watercolors. Another, and it's
really important for painting loose style, that the most important
part is an I. So it should be located in the right place or at least more or less
in the right place. Here we can see this circle
and we will make gross here. It's almost, almost in the
middle, in the center. So I think it's almost like z's. Be a bit higher. This then another important
part is the shape of an eye. So that pay attention. I think that though with birds
it's not really a circle, it's more oval shape. Here I have an I really rough. Next part is really
important in that it says their relationship of
the beak with an eye. One of the things to keep
in mind is whether an eye and the beak at the same line. So here you can see
that beak starts on the lower part of an eye. So it starts somewhere for here. But then you can see that actually this part is
outside the body and there is small part which
is inside no more or less, that is the shape
that it starts here, but then it goes up. So the line is going
to be like upwards. If you will. Compare this point to the eye, It's going to be higher
than this point of the beak here this has
all these lines or would you here is this one where it starts a week
and then where it says their middle
line of the big it goes more or less
in the lower part. Overnight. Here it is. And another important
thing is that the length of the beak here you
will have to pay attention to this point
where it's growth in the body and where the z is
distance equals to this one. So in my case, yes, it is. In this case usually I
don't draw all these lines, but I think this is
going to be easier for you to understand. The C. I like for my, for your minds, which
points needs to fix. Here is a big, It's important also to
have the shape correctly. Sometimes say here at the pointed end bandsaw
or all these points, you need to keep in mind
while drawing your mind-map. That's important part, that is like a reference I is really, really good reference point. So let's see where we will
have to place his leg. That is a of i. So here is my line. Here is going to
be more or less. Now, another point is worse, leg connects to the body. And here we can see this negative shape
of triangular year. So it's going to be
more or less like this. And the leg is going
to be this way. Let's see whether
we are right there. And another leg, we can
see that it's almost, it starts here where they're triangular grosses as is circle. That should be more
or less this point. And I will have them to go down. So it's almost here. And it's really important to
use as a negative shapes. It's all shapes which are actually not the
shape of the leg, but those areas which
are between subjects. So in our case, so that is going to be this
shape between the legs. You can see it's
a bit like this. More or less. Z is a shape. I think quite should be
here the body a bit lower. And this one goes a
bit like this. Here. As this one goes back. Here we have here we have
really, really cute ran. I really like how turns out. And then the final
line is also we will have to find where we
will need to connect the tail. You see that that is a
corresponding point here. Could be the leg
that more or less, or is there also you can see here where it
connects so that it's already somewhere. These lines. Then you create already
for your mind to have a look at different shape. So for example, now
I'm noticing that this should be a bit more
in cleaning it. So it should be Z's. Here is going to be our Dale. What else I usually
do with my sketches is to indicate as
the darkest areas. Here we have around
this sound feathers. They have some color, but not really a lot. And then the darkest areas for sure here like
black feathers. Let's see the shape it because actually it's also
some spot, some shape. With watercolors. We won't get it exactly like this because
we will allow at watercolors do bleed and fusion. So to get fusions or four colors so that we won't
get it completely. This locations, but more
or less to have an idea. Here is going to be the
darkest area here also adsorb bag is going
to be really dark. So here are some feathers. And here is a wing shape. Here we have our very
simple shapes study. I, you will see that the your mind while you
will start painting, that it will remember those
points which will end. It will be like
checking all the time, whereas I am correct with
the proportions or no, whether it was my eye is on the same level of
the beak or not. So just play with this. And you'll see that it's really, really helpful practice
was your simple shapes. And I'll see you in
the next lesson.
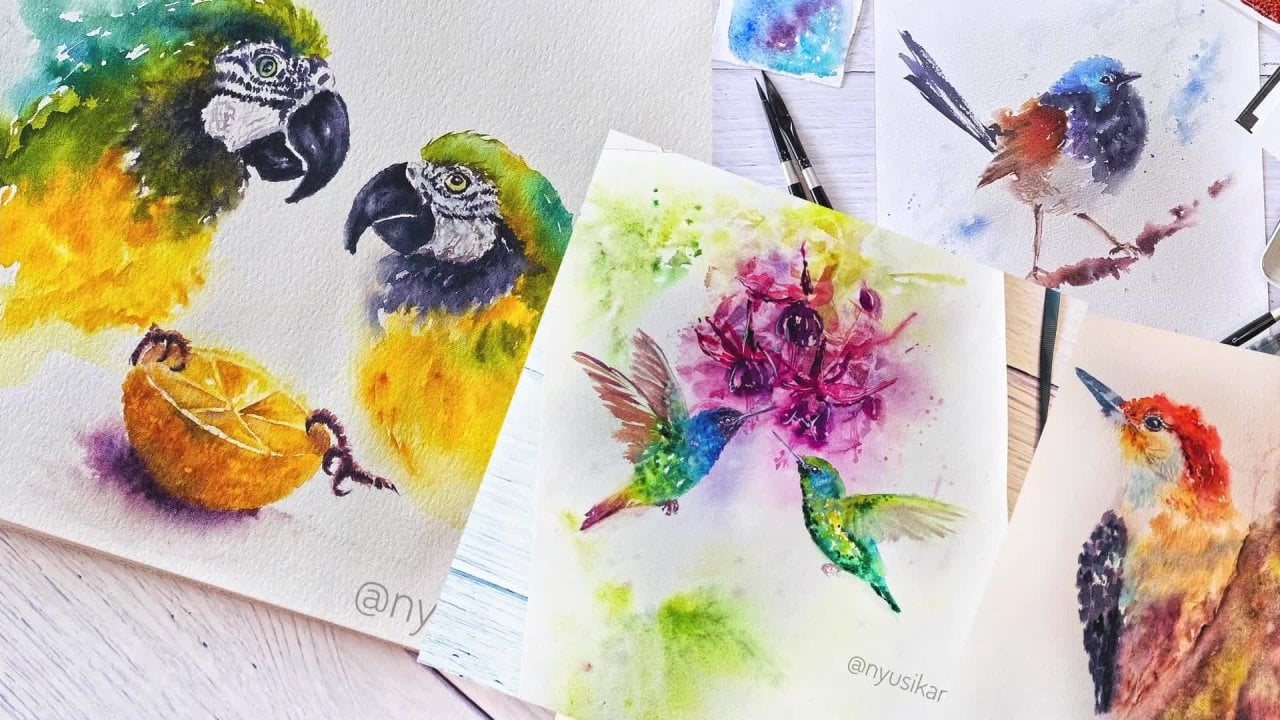
4. Colors: In this lesson, we are going
to choose the colors for our failure and prepare
your color palette. And let's play with scholars will see that mainly
all of them they are, have very similar colors. So one of these is really
beautiful, light blue. In my case, I have one
color from Daniel Smith, which is called the
you can see that it's called the electric blue color. I really, really
like because you will get some shimmering effect. Another color I think that
I will use ultramarine, blue, in my case, it's called French ultramarine. Here I'm adding some how it will look like a
mixture of these colors. And also you can choose, you can try different blues
and see what you will get. One. As a choice. For my blues, I can add a bit of this yellow,
blue, green shade. So you can see that. Then we can add
some purple cells. Those purples which
you have here, for example, is this one is
called the imperial purple. So you can, we can add x0, x1. It looks nice. You can mix. You can make. So just like up to you. Another beautiful color which
I think that I may use. This is probably not. This color doesn't feel no, I don't have here is this color, so I want to use it for
this beautiful orange. We can use burnt sienna. Here it is, the color. Here is the color. We can add. For example, mother read that it would
get more like brownish. Or I have one beautiful
color which is called the BMR, the genuine. So I can add Z
scholar also here. And to see what will happen. Let me check another color. This goal took in
acridine, burnt Scarlett. Here is this color. And I think that the one
which I'm going to use, this color is really, really similar to that one. We'll need to get this
really beautiful color of their wings. So for this, we'll need to
make some beautiful Z's shade, warm shade of like
brownish, I would say. For z is probably it's more
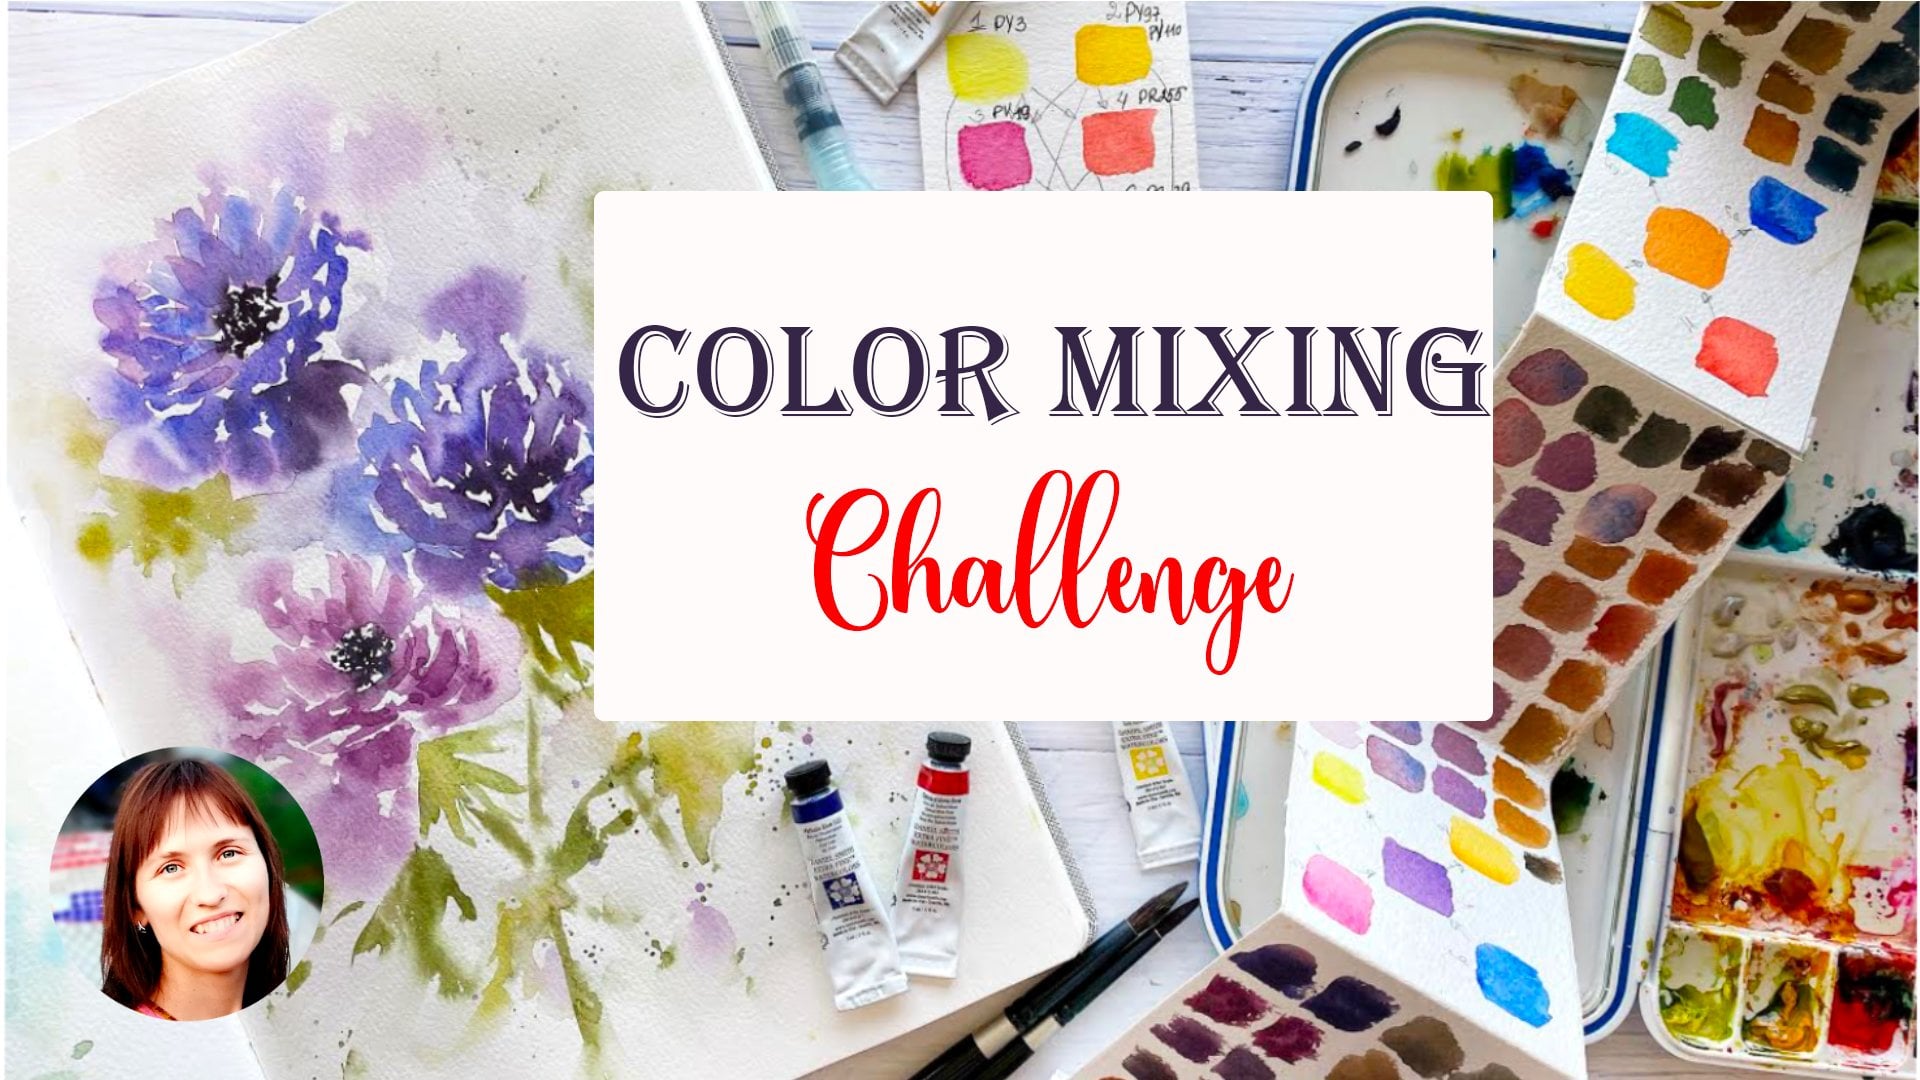
or less like this color. This one for z. So I think, yeah, I think that is a color. So we can mix colors. That is from color mixing
basics classes is my swatches. According book. Or we can mainly orange
mixed with blue CTO. In my case, I will mixer. Here, I have one color which is gold, ocher, burnt orange. And I think that I will
add a tiny amount of while it here I have this
beautiful color. Yeah, it's really similar
to the color on the wings. Just to play with your
oranges and mix them with wireless or with blues to get some kind of
this muted shade. And this one is really
like beautiful gray shade. The main body I will use as
a mixture of three colors. You already know this. If you have taken my color
mixing glasses, here is, again agreed on rows
with a bit of yellow, blue, really tiny amount. Hansa yellow light. We really need to mix blue, yellow, and red, and then
we get some beautiful. Yeah, so if you wanted to
make it a bit cooler shade, you can add a bit more
of the yellow and blue. Here we have cooler shade. For the black one. I will use Payne's gray
that I haven't told you that here is my
really, really dark. And probably I will mix this Payne's gray with
a bit of violet, with a bit of violet. That is Payne's gray, mixed it with violet and we get this gorgeous,
gorgeous color. So it's not like gray, but with some
beautiful shade in it. Prepare your colors, play with them as their combinations. And then let's move those most exciting part is
that is what a color bar.
5. Watercolor Techniques: Welcome back. In
this lesson now, we're going to have a look at the basic watercolor
techniques which we are going to use while
painting the outline. They are quite simple. That for water I will
use water brushes. One of there, you can use also just normal
brush, that's fine. One of the basic things is
going to be that when we are going to mix
different colors. So this is blue, whereas my here is
my electric blue. And here is what we
are going to do. Wet-on-wet technique
is called wet on wet. First we make a wet surface
and then we add wet paint. Here. What we are
going to do work, that is for head and for the
main body or what we can do, we can make bleed out. So usually when you are where you place water and you attach in a bit so you are creating the layout for your paint that, and that is how we create different
beautiful watercolor bleeds. So that is how you
are just with water. You are making your
opens a door and you're inviting the paint to
move into that direction. So the paint won't
move itself unless you will make our water bath and then the paint
will follow the water. That is nice tip
to keep in mind. Another technique which
we are going to use, that is some brushstrokes. I will use brown. That is, for example, when we are going to
paint some links here, it's really important to keep a different direction
so your brush and just play with your brush
and brush strokes so you can play this way. So you can turn your hand and then it will
go in this direction. So you can move out example
to make feathers on the head. That is z kind of brushstrokes. Just play, play with your brush. Then when you are
adding more color, by the way, the second color
should be more concentrated. More concentrated. And then we'll get light
ones are and dark shades. By the way, this is
Part D is about also what are bleeding to make
really, really fluffy edge. So you then you are passing your water brush
or your brush with water just near the
surface is wet. And then there you will see is that it's not
really hard edge, but the water starts to move
and then we get soft edge. So that is another
technique which we are going to use for our Ran, does a normal way of
painting with paint on dry. That is Just as a way which we'll use for
painting eyes and big. Break this also with your brushstrokes with
watercolor bleeding, and see you in the next lesson. We're finally, we will start
painting our favorite ran.
6. Fairy Wren. Eye and Beak: Welcome. So finally we are going to paint with watercolors. I have this scheme in front of me in order to keep in mind about my steps for
painting with a brush. And I will start with
really small brush. And we will start the first with the most important
part of the bird. That is eye. For an eye, I will use the
same mixture of indigo. Payne's gray permanent
mixed with violet. Here is quite dark mixture. It's really beautiful right now. The most scary moment that
will have to place somewhere, one dot and start to create
the shape of an eye. Here I have remember to leave white areas for the highlight. Here we have an eye. Our next part is
going to be dead. These beautiful turquoise color. You can use some turquoise. Or my case, I will add. By the way, we are, we'll start to add
already water just around that blue shape. Here we have this man was, my one is electric blue color. You see it with water. It starts to spread and I'm helping with water
to spread it more. I'm leaving some
white area around. I select this shape. You can add some other color. For example, here I have
ultramarine to requests. So I think that also it will add some beautiful
areas. Here I have. Then it will start creating
first as a shape of the head. With first, I will go with
a light colors like blues, and then we will
add the dark areas. First, I'm creating, I'm
checking reference photo. I'm going to create the shape that goes actually their colors first time making with water. I will add more. Here is first I will
add ultramarine blue. Just in certain areas. I'm placing the really, really light and with water it gets really nice effect. This way. I'm creating a
with brushstrokes. They're filling of the feathers. More of ultramarine
blue over here. Probably a bit more. Another blue I will add. Yellow, blue, but quite diluted. It won't make my bird
Luke really. For here. I think this blending,
it's really exciting. Spot. Now we will have to add, Let's have a look. We'll have to add the
big Z is a shape. First is this shape
I'm making with water. First. Like this. I am adding first, making first is a shape
and length with water. And the ones, I'm happy
with my water sketch, let's say like this. Then I start to add that
color in my case is going to be the same mixture
which I have used for knife. Here it comes that this
Payne's gray with wireless. If you weren't happy
with some areas, you can remove just
always paper towel to correct the shape. I will mix a bit
more of this color. That is indigo is
a bit of violet, blue, violet and quite
concentrated paint color mixture. Let's add more color here. Just around. In this area, I'm
adding this color. And in the lower
part of the beak. Here we have. Then we will add more
water somewhere. I'm leaving white areas. Mainly year we are adding
and making the shape. I'm adding more more
water first is a shape. Then we will add the color. I was the same color.
Really dark one. Here is quite big
contrast towards the red light areas
and the dark. So I will mix more concentrated Payne's
gray with wildland. Here I see that it's
really, really dark. So I'm adding more. You can see that it starts
to bleed and create really, really beautiful
this fluffy effect. Here we have that, what we were talking that
here you can touch and you can create even
more fluffy effect. This lower, in this lower part. Let's add a bit of wireless. Wireless. That also it will start to bleed more concentrated color. We are adding these areas. Now we will finish the shape. Here in the middle part I
will make a bit like bleeds. We're finishing here to
make it really round shape. This way. Here we'll
go there, the wing. And let's, let's
add this mixture, which we have here. For the lower part we have
had mix quinacridone, rose, phthalo, blue, and hansa yellow light
cool shade of yellow. Mix your yellow, pink, and blue ones which you have. Here we have some shadow. We are making fluffy
that I'm putting just what sells it
to make it bleed. Like this. It's
really, really nice. Probably in this area I will
add a bit more darker one. Because yes, it will bleed and we'll create
also beautiful contrast. Just a list like this, brushstrokes, I'm
more concentrated. Color will bleed and also will create here
beautiful professors. Here we have this part.
7. Fairy Wren. Main Body: Let's hear, will already
start making the wing. Here we have my color
mixture of quinacridone, burnt orange with swell. But for here, let's add a bit of this
color, this color mixture. It's a really also
really fluffy somewhere. Oh, yeah. Yeah, I think it's
really, really fluffy. My one. The next one is our wink. So here is going to be our wing. First time making the
shape with water. Then we will add
already the color, the same color mixture. I'm leaving some areas light, and I will mix more
concentrated color to add more contrast. The same. Quinacridone,
burnt orange. You can use any orange
which you have. Just mix it with violet, will get these kind
of beautiful shades. And with brushstrokes. From this side we
are adding more. You can see I would say that even more
concentrated color, because you may notice
is there are some lines which are really, really, really dark and
really releasing. Working by the way with
size number for my brush. Here will be B when
darker, I think. A bit more orange so that
it would be neutral. Color here, beautiful brown. I'm adding more of these
really, really dark lines. While at the wizard orange. From this side also, the most funny part is the funniest part
was then we will add this first with water. And then I add burnt sienna. This really beautiful
orange color. Join you. When that here
we will create some bleed. Then we're missing some red. I will add matter read properly. It could be also really nice
if to use venetian red. Let me try it here. I have one in red. It also could make. Here I have the color. In some areas we can
introduce this color. Here I have venetian red, and also here I have this
integral doesn't burn Scarlett. That is another kind
of brownish color. Brownish red, even
dark brown in my case, is that this BIG genuine
that is here I will add in this area because it's also granulating paint and it
splits into two colors. So I think that that's going
to be nice combination. So here is my wing, maybe like the shadow. So I will place a bit of more like while it
here in the shadow. You can see under the
wings are some shadow. I would like to make
it more like wireless. Behind we can see some fluffy feathers,
more obviously, shade. It. Is this color. We are missing legs. Tail. First. I would I would
suggest you the first thread. The legs here. First, I will make
it with water. Let's see. My one is a bit
not the same in clean it it more or less this way. And you can see that one is over here and then
another one is like, like z's, so forth
here somewhere. So for this one, I will use the same color. Maybe a bit more of dawn
rose could be nice. More of these brown mixture. Here is going to be
not so straight, so it's like this. And another one over here. If you aren't happy
with something, you can remove this paper towel. Because each one like this. What we can do, we can
add some, I would say, while it here in the shadows. Concentrated wireless and
acrosome burnt orange. So I'm making it not so strong. Again. So here it's like this. Making some volume, creating
some volume for here. Like this. I would say that my one has
really, really sick legs. For this probably it
would be nice to remove some layer with scientific
brush, just clean water. Let's try to remove some part. One B-cell, heavy
legs, clean water. And also you can see
some white lines.
8. Fairy Wren. Adding Tail and Branch: Now let's add a tail that it should be
quite expressing one. Here I have one brush which
is really expressive. What does the Dale, I will use the same mixture of Payne's gray with while it will add them. Let's see what we will
create with this brush. First, practice
these brushstrokes because otherwise you make it. So here you see that it's too thick paint and
it doesn't allow me to make these kinds
of brushstrokes. Here is like this one's just practice them first because
it's not so easy to get them. So here is the brush stroke. Or you can take a bigger brush. I think it's too watery. My color mixing, color mix. Again. So practice like this. Like this. From outside towards is there
point and here is going to be my point like this. So he's going to be a
woman the moment this way. Let's, let's try. We want how many drives? Here is 1. Second, 1. There is 1 third 1, I will get more concentrated paint so that it will be also
the difference in tone. Know, now, here we have our day. We can add some darker areas and here it's where it connects. It's also a bit
like darker area. Here we have a really, really amazing, I will add
the same dark shade here. Where I see is that the RES like dark areas around the beak. Under Nice, the central line. I will make it
softer with water. We almost have finished here. I would like to make
it also softer. Incorporation of the
colors won't be so hard. There. Here are the same. Here. Some textures, some areas, and we can make it darker. You still can correct
the shape of an eye. I think it's more like
rounded here also, I have darker here. I have more like darker areas. With water. I'm making it bleeds
or that it will look more, more fluffy. The effect of feathers and sage. Same indigo is while it. Okay, so here he is really, really beautiful and dark. What we can do dead more
textures with some liner or really pointed,
pointed brush. The same while it makes Show is hi again, everyone
burn orange. Here is my color mixture. I will add here. There are some lines which
will remind us their feathers. For here also some lines. Just texture. So I didn't some textures here. I would say that I'm missing
a bit more with this blue. I will add some over here. Some textures with
a bit darker blue. This is ultramarine blue. So with ultramarine blue also, I will add some more
texture on the head and z, we will finish with
a bird. Textures. With water. I will
make it bleed. Here we can add some really, really loose, very
loose style branch. Here would be stay in. Sitting. Here would
be some range. And I will make it
some beautiful color. This is not ridden growth of ultramarine, wispy
Almaty, genuine. So just like sound
while it takes some color could be nice. Like this. Way we can add also
some violet color here, some textures, freezers as
a branch with some brown. Really beautiful. This is BMI did genuine
with some maybe deaf. Why lit, then it will be
darker in some areas. Here. This looks fabulous. And let's add some splatters told that it will be
a really beautiful, I would say is that Let's
add blue splatters. Here. I'm making quite big. Quite big. Also, you can make some areas width so
that's split AS will fall, some of them will spread. And a bit more concentrated. As this is electric blue
mixed with ultramarine blue. One side, if you don't like some of them you just can remove. I think here we have our chap here, we have some letters. Gives her abdomen,
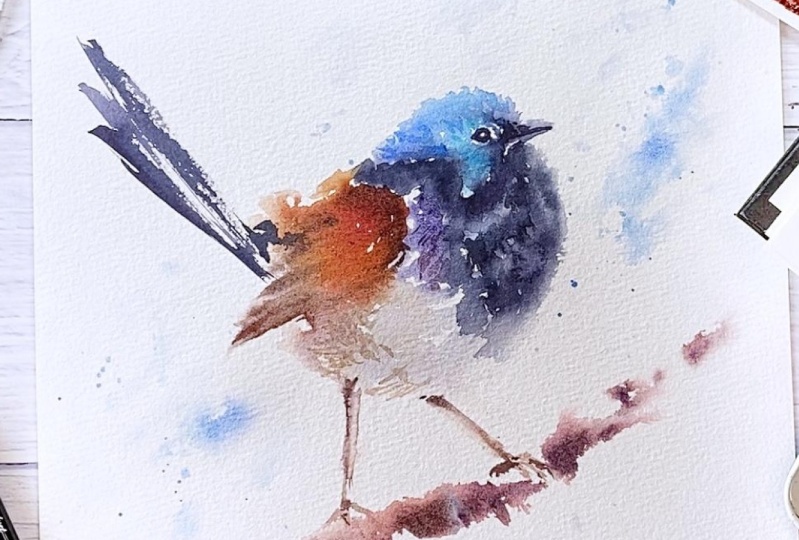
you can remove them. Here we have our
favorite ran ready. I hope you have enjoyed
the enzyme really looking forward to see
what you have created.
9. Final Thoughts: Thank you for joining
me in this class. I do hope was that I have
managed to transmit you the joy of painting birds
in loose expressive style. And how inspired you to keep on practicing those
a day practices. What makes a difference? And my main advice would
be, enjoys a process. Once you enjoy the process and then it actually inspires you and motivate you to
paint on daily basis, and that's how you
improve in your skills. I will be thankful
if you could find several moments to leave
your class review. As disease really inspired me to create new classes
and to improve them. I'm super excited to see
what you have created. Please upload your
class projects for the class project gallery. I will be glad to
deliver your my feedback and to support you
in your journey. If you are going to share
your artwork on Instagram, please do not hesitate to
take me to use this hashtag. Sounds that I won't
miss your artwork. If you feel like I
keep on creating, you can check my
other glasses and z are in the next class. Bye.
 Nina Nyusikart Watercolor, Artist| Art Therapist | Loose Watercolor