Transcripts
1. Introduction: If you are inspired
by nature as I am, and who would like to
draw what you see? It could be intimidating and seem to be difficult
to paint what you see. But it's definitely
worth trying. And I would like
to share with you a simple technique and a fun
way to create an easy way, modern and fun illustration. Because I live by the sea. It is often the seed
and inspires me. But I think I enjoy the
most what is underneath it? I often go to aquarium and I'm standing by the colors
of the underwater world. I'm hypnotized the
colors and plie, it's officious plants or
electric shine of jellyfish. And I always wondered
how to paint it, how to represent this
vibrating colors if you'd like to discover
it with me and also see a fun and playful way to
overcome your fear of illustrating water
worlds, natural world. Then I invite you to this class. Hi, my name is Anna. I'm an illustrator
and graphic designer. And on my Skillshare profile, I teach classes on multiple arts techniques
in my illustrations. I'm often inspired by nature. So I'm very happy to
welcome you in this class. I will join those
two favorite things, exploring art techniques
and painting nature. In this class, you will
learn how to create an effective illustration
just with two mediums, liquid watercolors and bleach. And with this technique, we will paint two different
underwater scenes, underwater plants and jellyfish. But of course, you can apply it in your future artwork
with other subjects. I also hope that with this
class and with this technique, you will approach
more playful way to your art, to
your illustration. And if you need to, also, that it will help you
to overcome the fear of creating this class
is for everybody, It's no difference if you're a beginner or
advanced Illustrator. If you're new to
liquid watercolors, then maybe you can watch my other class about basic
of liquid watercolor. But it's not necessary. All you will need are a few art supplies and a
lot of will of having fun. So I hope to see
you in this class
2. Class Project: Welcome to this class. I'm very happy you joined me. I will explain you what we will do for the class's project. Basically, we will play
with three ingredients, water bleach and
liquid watercolors. And we will paint modern
fun illustration. It will be water
plant and jellyfish. So there are few reasons that
I made this class for you. The first is to share
with you a fun and easy technique to represent
not only water world, nature scenes, but also to
use in your other projects. And also, I hope that
with this technique, you can enjoy creativity and
overcome a fear of painting. I want you to have fun and to explore and to play
for the class project, we will paint two illustrations. First will be water plant, and the second one
will be jellyfish. You can choose to paint
only one of them, or you can paint both of them. It's up to you. If the subject is
too complex for you, you can paint, for example, just one jellyfish
or a simple plant. And there are a
few ways that you can paint your final project. You can follow my steps and
paint the same illustrations, or you can search for your
own photo references. I will also leave you some
photo in the class resources. So be sure to check it out. Or maybe you have possibility
to go to a query them to the zoo and do the photo of your own search for
your own inspiration. It would be really beautiful. So here are the steps that
we will take in this class. First, I will show your art
supplies that we will need. Then we will do
simple exercises to see how we can apply water
bleach and liquid watercolor. And those techniques though simple exercises
later on we will apply in order to create our
plants and our jellyfish. Once you've finished
your final illustration, please be sure to upload
it to project gallery. All you have to do is go to the project section
of this class. Click Create, project. Make a photo of
your art uploaded. Share with us your
process if you want, your steps may be doubts that you have and then click Publish. I think it's important
that we share our projects so we can
inspire one another. And I also invite you to feedbacks on other
student's project. It will be very
encouraging for us. Grab pure liquid watercolors, search for a bleach
in your home. It can be bleach that you use for your laundry or maybe you have a detergent in your
kitchen that contains bleach. It could work as well. And I invite you to see the
other lesson where I will explain better what art supplies we will need for this class. So see you there.
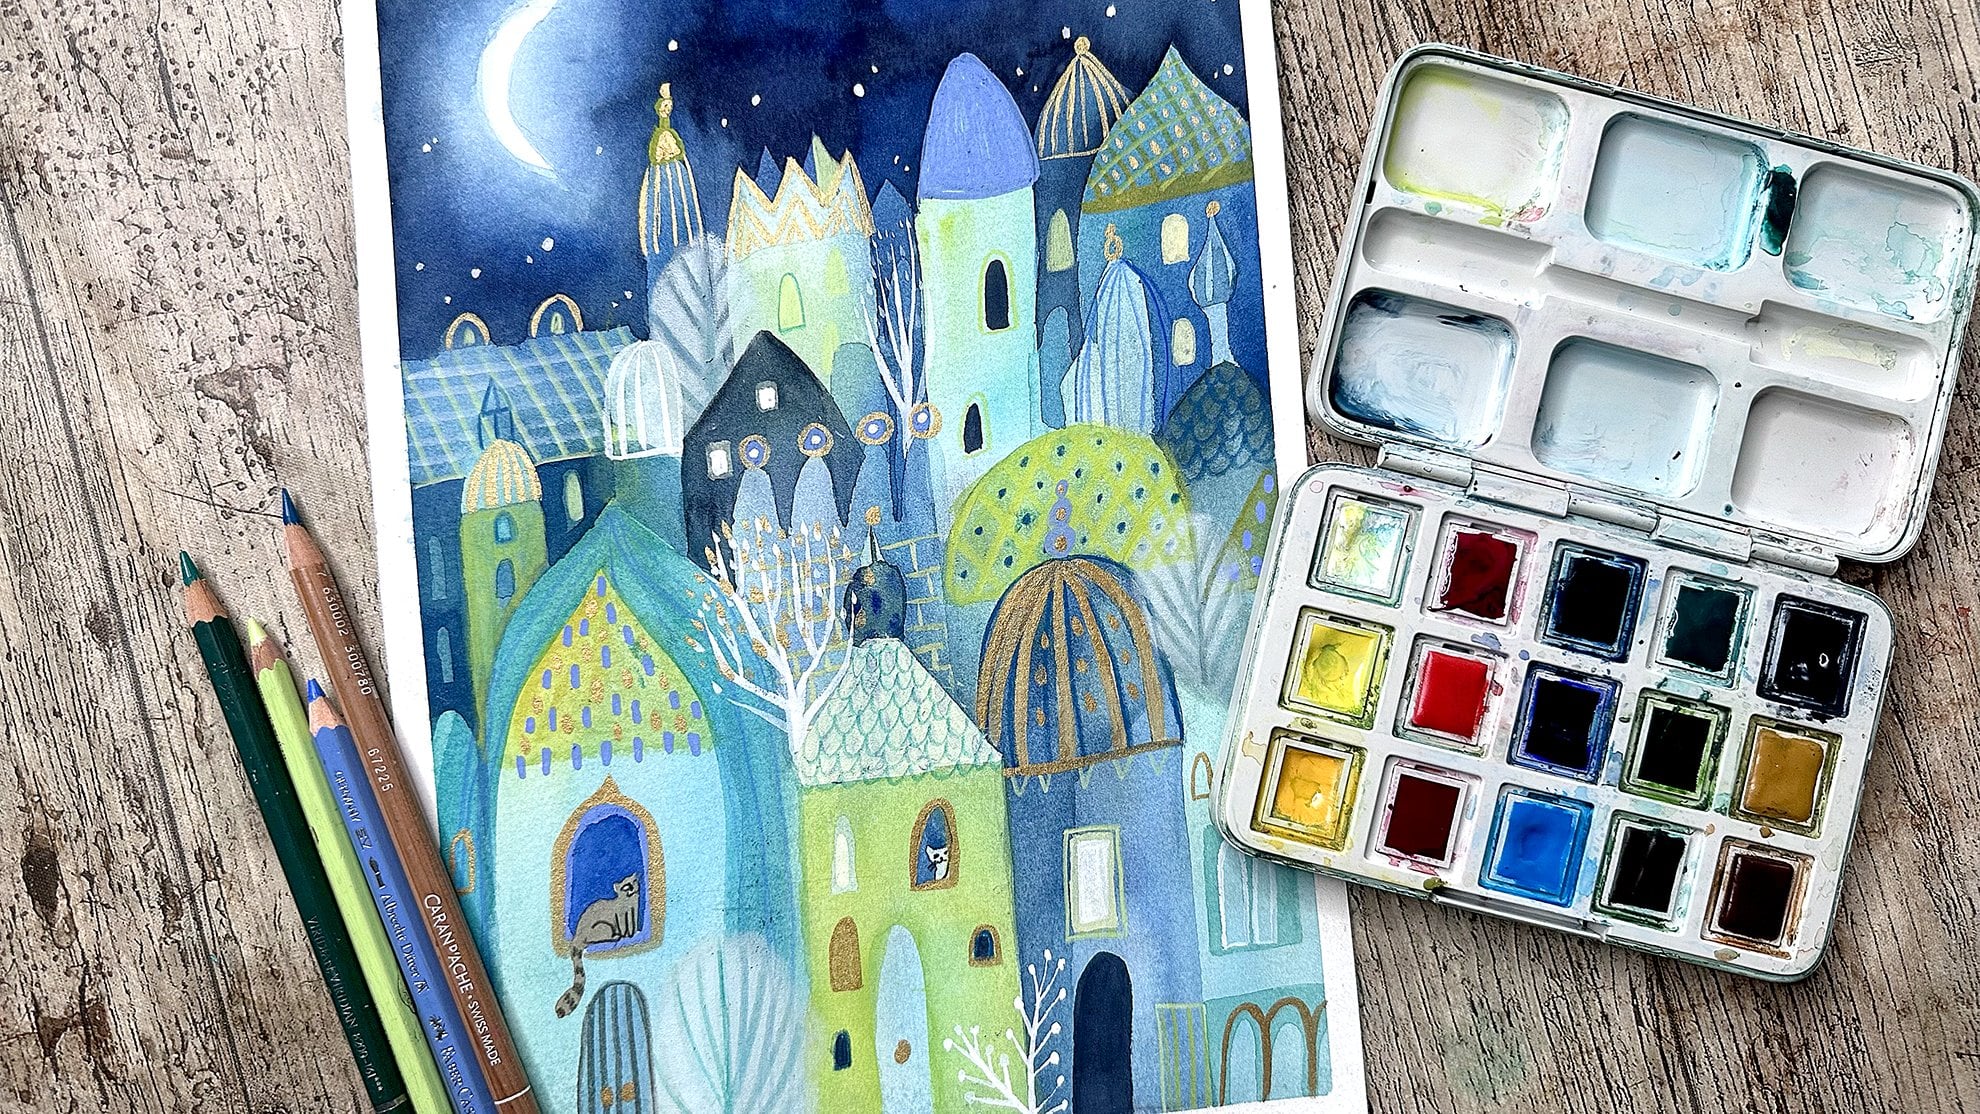
3. Art Supplies: Welcome to the art
supplies lesson. I will show you briefly what
we will need for this class. First of all, a sketchbook
or other watercolor paper. I will use a sketchbook
as I find it quite good. It's not the best
quality sketch book, but it works fine
as you can see, I use all the exercises with echo lines with,
with liquid watercolor. And it works really good. Otherwise you can use
watercolor paper. That brand is not important. The important thing,
or that it should be cotton paper or 300 g, or at least 200 g, I would say. And a paper that
you usually use. And that works good for you. Also to jars with water, I will use two jars because
we will use the bleach. So in one jar, I will clean my
brush that I used with bleach and then
I will clean it again in the clean water
because I don't want to contaminate my
colors with bleach. So I think it's
useful as bleach. I will use a regular, normal bleach from my
laundry bleach that I use for laundry and I
have this spray bottle. I think I took it
in a flying tiger, but I'm sure you can find
it also in other places. I also will use this
little container to dilute bleach because
we will use bleach, concentrated bleach, and also diluted bleach
to see other effects. So it can be handy. And I will also use the pet to pick all both bleach
and clean water. It's really handful. Asked for the brushes, I will use a variety
of sizes and forms of brushes to see different
textures and effect. You can use a synthetic brush. Maybe it's better because
with bleach it will be safer not to use
natural brushes. I will use different forms, for example, this fun
and discomfort brushes. Those also have different
kind of resource. I will use them to see the different
textures and effects. Also this bamboo and tip. And you will see
during the exercises, if you have this kind
of tools at home and it will be cool to use
them and try them. And finally, our
liquid watercolors, I will use three brands at Caroline's from royal
talents, Dr. Ph. Martin's concentrated
liquid watercolors because they have two
different watercolors. I have this concentrated
one and also PBL. So short. And important to
notice is that those are dye based watercolors. I'm not sure how pigment
based watercolors, liquid watercolors,
Sorry, works with bleach. So if you're not sure
what I'm talking about, reach out my discussion or I explained to those two kinds of liquid watercolors and explain better the brands and the
types of liquid watercolors. Also, if you haven't worked with liquid watercolors so far, then I invite you to see my other class
where I explain you the basics and I introduce
to this paint medium. So crap, you're painting supplies and see you
in the next lesson, where we will start experimenting with liquid
watercolors and bleach
4. Playing With Bleach Part 1: In this lesson, we will
test different techniques, different ways to apply bleach
with liquid watercolors. We will play around two
different experiments. For example, here you can see the swatches and different
experiments that I did before. I won't go into details to explaining different
techniques if you wish to see it better than jump into my liquid watercolor
basics class. Okay, so as you can see, I tried different ways
of applying bleach. For example, we'll apply it with prepared with different brushes, with different tools, diluted bleach or
concentrated bleach. So let's jump into the exercise. In this exercise, I
will swatch circles and try out different
techniques and play around. For example, here I do
the wet-on-wet technique. I apply concentrated
or diluted bleach on the wet color and
see how it will blend. Second swapped. I will do I will blend two colors with
wet-on-wet technique. So first, I paint
swatch with water and then I apply two colors that will blend into each other. And later, I will
also add bleach into the color that is still wet
and let it blend altogether. I will repeat the
same two swatches and this time I will apply
bleach in a different way. I will make dots with bleach. So to do that, you can use your brush and just
live prompts of leech, or you can use a pipette. I already painted some circles because I want to try to use
bleach on the dry color. So first, I want to
try this comp brush. You usually use it to paint
hair or fur or grass. So I was really curious what
effect it could create, what's texture it could create. If I were to paint the bleach
with this, with this brush. The next one will be simple. It will be simple strokes
painted with brush. I just wanted to
see the difference between the upper swatch width. I also painted strokes but with wet color and try to now I
will paint over the dry color. So obviously it will be
it will be different. The bleach want blend
into the color. The other two circles I will
use the lifting technique. I will paint or
with clean water. It is just clean
water without bleach. And after a few seconds, I will lift it with tissue. If you don't know
this technique than I invite you to see
my other class when I explain the lifting techniques with liquid watercolors,
it's really fun. So I wanted to give
it a try and mix it with in different
ways with a bleach. So for example, I
want to overlap this part with leech
when it will be dry. So right now I will
leave it to dry. And then we'll paint a circle in the other swatch also
with water and lifted. And then I will paint
with bleach over it. So it's all about
exploring, playing. Feel free, obviously
to play around and experiment whichever
direction it will lead you, which the ideas that he
will have to explore. Bleach. So feel totally free
to play around. There's no schemes to follow or any theory just playing around and this
exercise is really fun. I will use this technique to create jellyfish for
the jellyfish exercise. So first, I painted water. As you can see, it's
quite a lot of water. I will leave it, I want lifted up and then
I will apply drops of bleach into this little
puddle of water. So I will, we will use this
for the jellyfish exercise. I wanted to do once again
strokes with bleach because the strokes over the
green upper swatch, they reacted as you can
see in a funny way. I love it, but I wanted to try
it with this yellow color. As you can see, it Works differently. Probably. There was
still some water when I paint it over
the green colors. So that's why you can
try different colors and try the same technique
with other swatches and see that they will
never be the same. Once again, lifting technique. Because later on I want
to paint with a bleach. And I also want to use a spry. The bleach that I
have in my bottle. And the spray, bleach spray can create
really, really lovely effect. For example, you can create
a beautiful sky with it. Or for example, Sparkling
Diamond effect. I use it quite a lot. So here's the swatch of this, of this particular technique. I really recommend it. It's really beautiful
and try it now, I will paint with bleach over the the lifted part and to see how the two
parts will overlap. And the same here in the circle
lifted with water rights. Now, I will paint with bleach. I would like to create the
dark to light effects. So this one will be lighter. The lightest part of the circle. And on this one, I will paint little
dots with bleach. I was, I don't know. I'm just playing around also, this technique can be easily applied to create a
jellyfish or maybe a flower. It's just thing around with forums and whatever imagination
will suggest to you. I will just continue
with playing around. Another cool technique
that I tried. I painted the rectangle and
underneath I painted with a clean bleed just to bleach and painted while the
color is still wet. It just as you would
do with normal water. And see how two colors and bleach are blending
into each other. And also, I will use later
the bamboo pen to apply. Details. Here is
wet on wet color. I really like this effect. And also I will try
it on the dry color. Also, you could try to use pen to paint tiny
details with bleach. Let's see how it works out. Use whatever tools
you have at home. Play around. And I'm really curious of your ideas, of your
experimenting. If you want, you can share it with us within your project. And in the next part, we will continue experimenting and trying out the bleach with liquid watercolor.
See you there?
5. Experimenting with Bleach Part 2: Welcome to the second
part of experimenting with bleach and
liquid watercolors. In this part, we will continue exploring
and experimenting. But I encourage you to actually
try to paint with bleach. You can do just a simple forums, nothing fancy, simple shapes. And also you can try, continue to experimenting
with different tools. And also how you can paint with pure bleach
and with a dilute bleach. You can see the differences between how it will
affect the color if you use just pure bleach and what will happen if we
will dilute it with water? So let's jump into the lesson. My first tip for you would be to use different colors
for each sample. In this way, you will
see the effect that bleach will make on
a different colors. So if you have more
colors in your home, then use all of
them if you want. It's really, it's really good to see already the effect that bleach will make
on each of them. I prepare the diluted bleach. I added few drops of bleach and diluted with few drops of water, more or less 50, 50 scale. But you can experiment, make it more diluted,
less diluted. And I will swatch my paper
with different colors. You can swatch
rectangles as well. Or you can use whatever
type of switches, the two arms, you can also
paint the whole page. You can blend more
colors if you want, or just make one color swatches. It's up to you. Important thing is to have quite a big swatches just to be able to paint shapes on it
and try painting with bleach. So as you can see, I
prepared normal bleach and diluted bleach and also
water for this exercise. So I want to test both normal bleach and diluted one and see the difference
that it will make. So for example, here I painted this shape with normal bleach and I enter the same shape with a diluted bleach and we'll, we'll see if it will make
some difference right now. I'm adding a little
bit of water because I think it was still too strong and maybe the bleach
wasn't really diluted. As much. The same exercise, but I
will try different shapes. I will paint fish and see the difference
between painting with a normal bleach and diluted
bleach on this color. Later on, I will write
down which color I used. I, I would advise for
you to do the same. So in the future you will know what color you use and
if you liked the effect, then you can repeat it and you already know what
color you used. Also, I will write I will
write down which one, which swatch was made with normal bleach and which
one width I looked at one, I think it's a good, it's really useful
cheat sheet for you, for your future projects. Again, I want to
try my fan brush and try to paint
OAuth with diluted. And it's normal bleach. Also with bamboo pen, just again, experimenting
and playing around. And now I'm painting with
diluted bleach fish again. And I will paint over it with normal bleach and see the
difference between those two. It's now I'm painting
on the swatch where I blended two colors to see the effect that I
can achieve with the bleach over two
different colors. Trying fan brush again here to see the effect on
the different color. And then I am trying to spray over the black
color because I was curious how what color the beach would create
on the black color. For example, if I
would like to make night sky and this
is the effect, it turns out yellow, usually. This exercise again, we will use in the
jellyfish project. First, I apply that diluted
bleach and I will leave it. I will dip it but I will live with wet in while
it's still wet, I will use the normal
bleach and see how to solutions of bleach will
blend into each other. This time, I will try to paint a plant elements and I will use this kind of effect
for the plant project. So first, just a pure bleach
flight with fresh and later on with a dip brush to
create tiny, tiny strokes. Now I wanted to try the bamboo and to apply strokes as well. And this time I will
paint the fish again. Okay, so I will call it done. This is my, those are my
swatches with experiments. You can proceed, make
them as many as you wish. Have fun. Explore, play. And if you want, you can upload it as
well with your project. And in the next lesson we will start to paint our first
project of this class, which is the abstract
plants. So see you there.
6. Class Project Painting Abstract Plants: In this lesson, we will paint our first final project
for this class, the simple shapes, which
reminds me of water plants. For example. I use
them to create those aquarium since I
think it is really cool. Because just by
simple brushstrokes and the lifting technique, by using both water and bleeds, you can create really, really lovely, lovely effect
and that is really relaxing, not difficult way to create. Really nice illustration. If you're not sure what is the lifting technique
and how to use it, I invite you to see my other
class where I teach what is the lifting technique and how to use it with
liquid watercolors. My water plant project, I decided to use
warm color palette. That's because I was inspired
by some plants that I saw. But feel free to use colors
that inspire you most, even the less predictable ones. This feel free to experiment. First, we will paint
the background. I will prepare my colors. I will use those
three warm colors. And you can use whatever
colors you wish. And to paint the background, I will use wet on wet technique. So first let's paint the
paper just with water. You can paint a background
in different ways. For example, you can apply
color with the brush. I will apply directly from the bottle because I have
bottles with pipette, you can do it the same. So apply the color while the background is
still wet directly in the water and just let
it spread and blend it. Really cool and nice gray. I will use a brush to
blend the colors together. But you can leave it as it is, just as you prefer, or just to finish the process by applying the drops at the end, I also will leave some drops to create extra textures and
then I will leave it to dry. You can leave it to dry
or use a hairdryer. Obviously, the background is dry and I will start
to paint plants. I thought that I will use the lifting technique for
this project as well. Again, if you're not
sure what it is, then jump into my other class, but It's nothing difficult. I will explain you briefly. You have to paint with
water over the dry color, leave the water for
awhile and then lift, lift it with a paper
towel or tissue, paint, whatever subject
or shape you wish. So for the purpose
of this class, it will be this grass
or branch shape. Obviously you can skip it, you can paint it also. Later on. I thought the show it to
you because I think it's a lovely effect to alternate lifting
technique with bleach. It will create really lovely two-dimensional
and translucent effect. So let's jump into the
painting with bleach. I will start with the dip pen and painting with pure lead, a tiny strokes that we did
in our second exercise. Just a short notice that usually after
painting with bleach, I will try it with
paper towel as well. It's not the lifting technique. It's just that I will lift it up for the practical purpose. So usually I will do it
after painting with bleach. Right now, I will paint with
a brush and pure bleach. I want to show you
what kind of effects bleach can create over,
over the background. That is why I use this
colorful background. I use more colors
because bleach will Be different over
different colors. You can already see how
lovely gradient it creates. For me, it's very
hypnotizing, relaxing. And really, I really enjoy this process of
painting with bleach. And now you will see
the difference between the first branch and the second that I'm
painting right now. How different it is, how different color
it creates it. It will be different over orange and brown and different
over the purple color. It will be different over
the color that you will use, because obviously you can use other colors for
your background. I will also switch between pure bleach and diluted bleach. Also to see different
reactions, different colors. Basically, this is what I will do during this illustration. During the process of
illustrating this project, I will use different kind
of bleach, different tools. I can turn back to lifting
technique with water. In this process, I am creating layers, I'm
layering shapes. I create different gradients. So I invite you to do the
same around, explore, enjoy this layering technique which is really
full of surprises. And it can provide really a lot of surprising
moments for you. I will speed up the process. Basically, you already. I explained everything that I will do in this illustration. Right now I'm painting
with diluted bleach. And I wanted to
anything new here. So I will speed it up and I will see you at the
end of the lesson. So here is the final outcome
of my plant illustration. In the next lesson, we will paint jellyfish
seem. So. See you there.
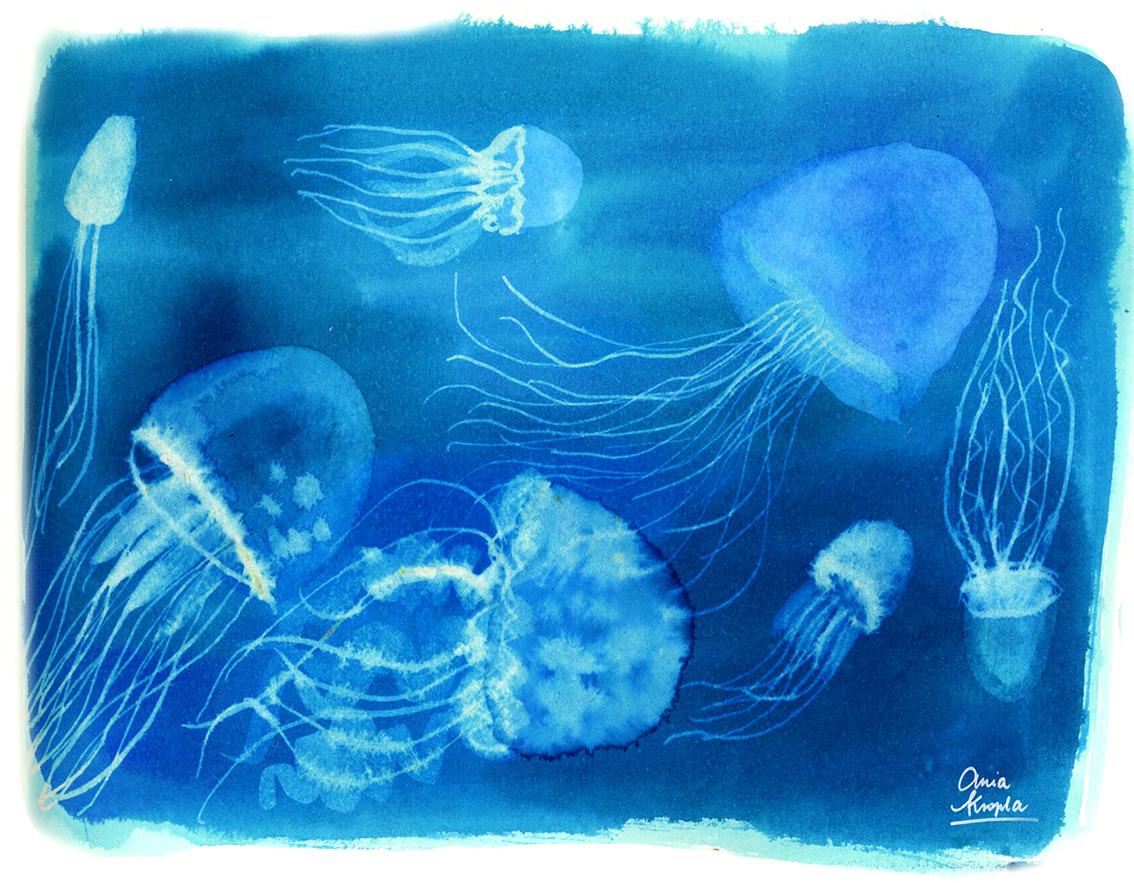
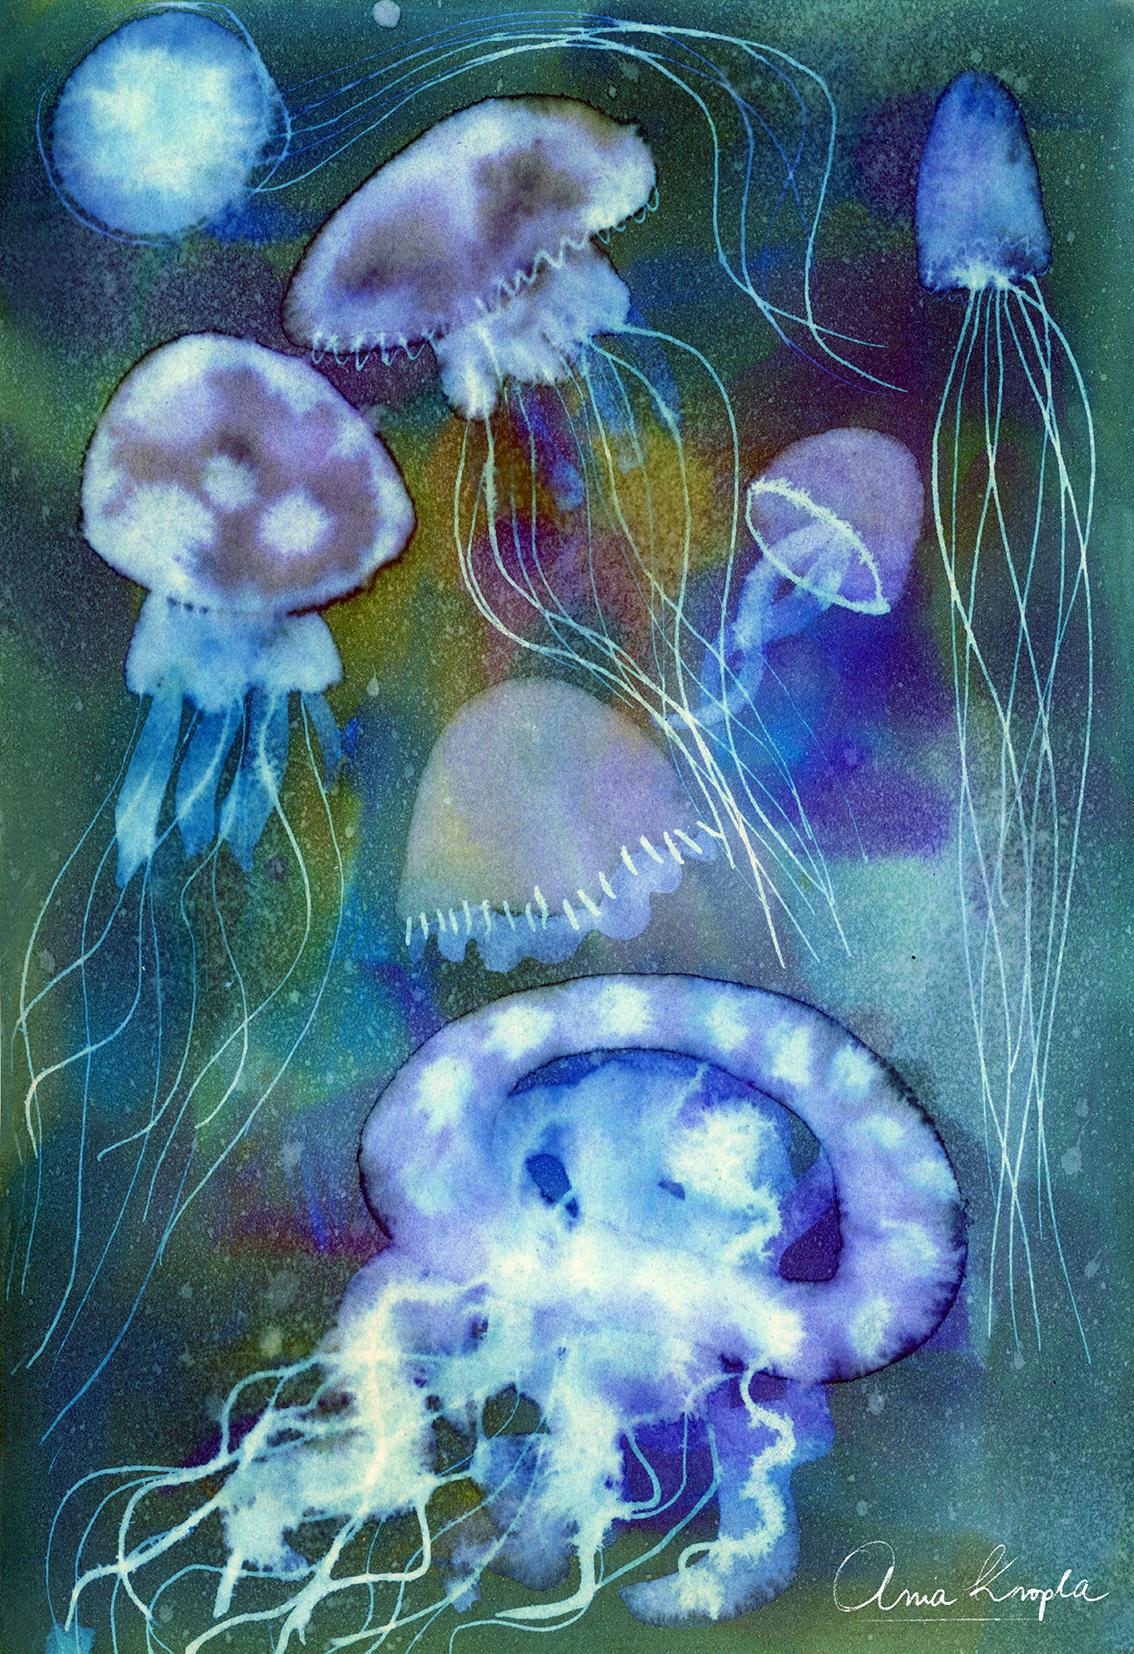
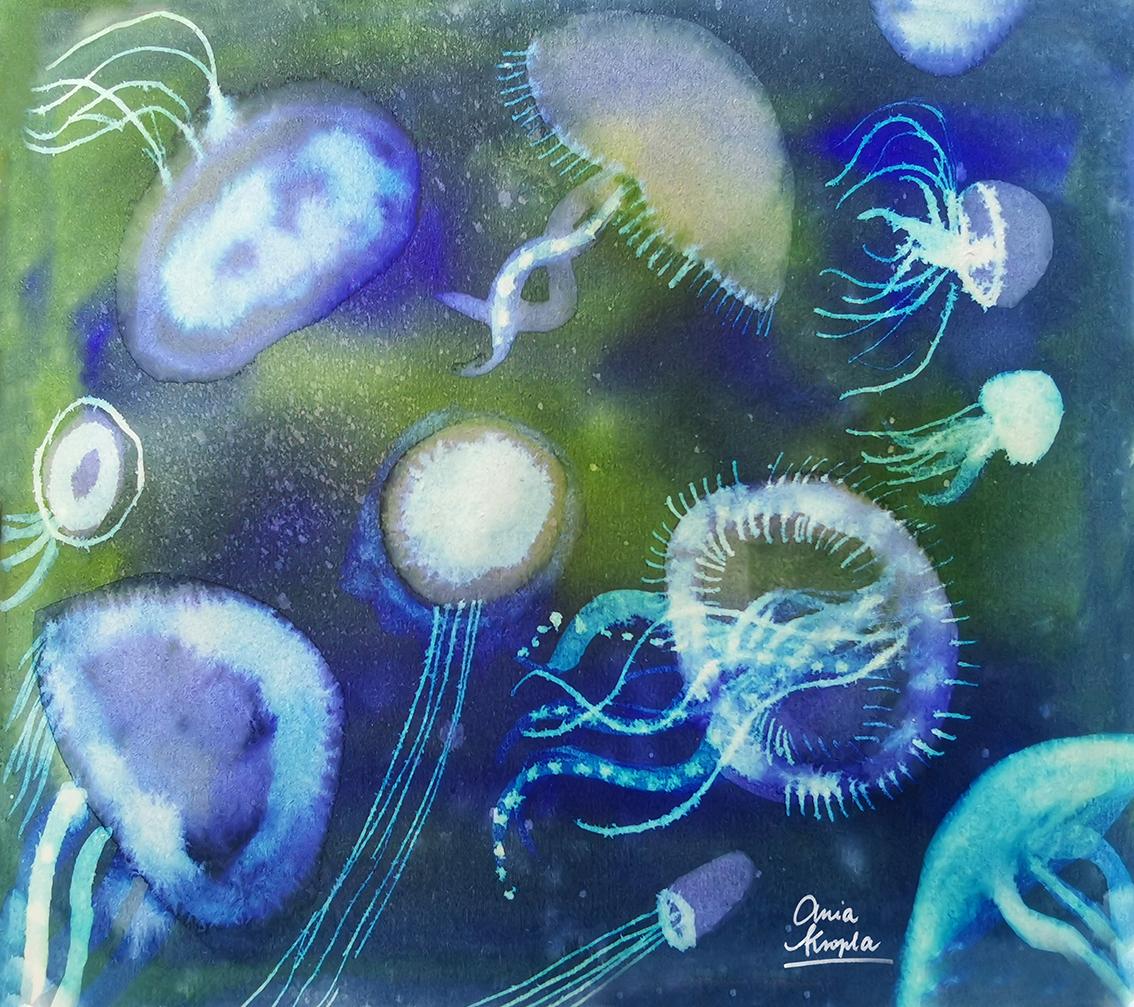
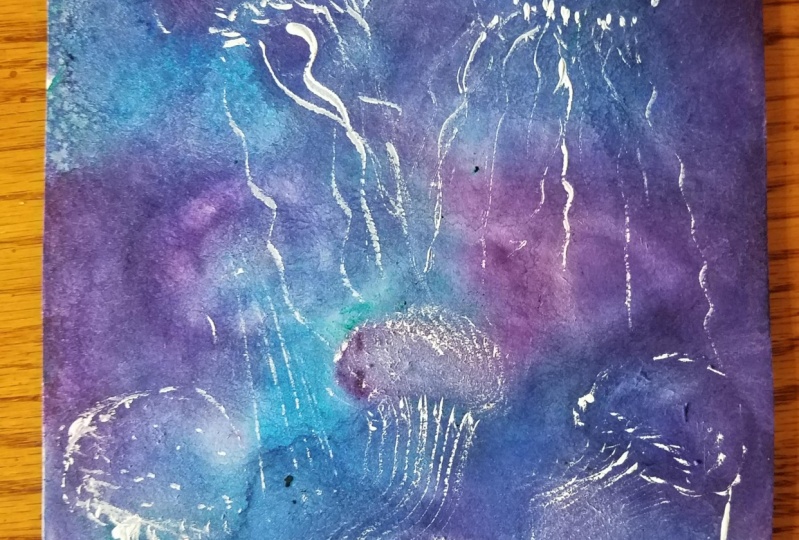
7. Class Project Painting Jellyfish: Every time that I visit
aquariums in the zoo, I am hypnotized by jellyfish
and their colors and light. It seems that they are
made of electric light. So this is what I
want to represent. Most of all, I want
to be realistic. I will use simple
shapes and forms. And I invite you to
do the same and play. Or if you prefer, you can be more realistic
as far as the colors, I will use dark
greens and blues. But again, feel
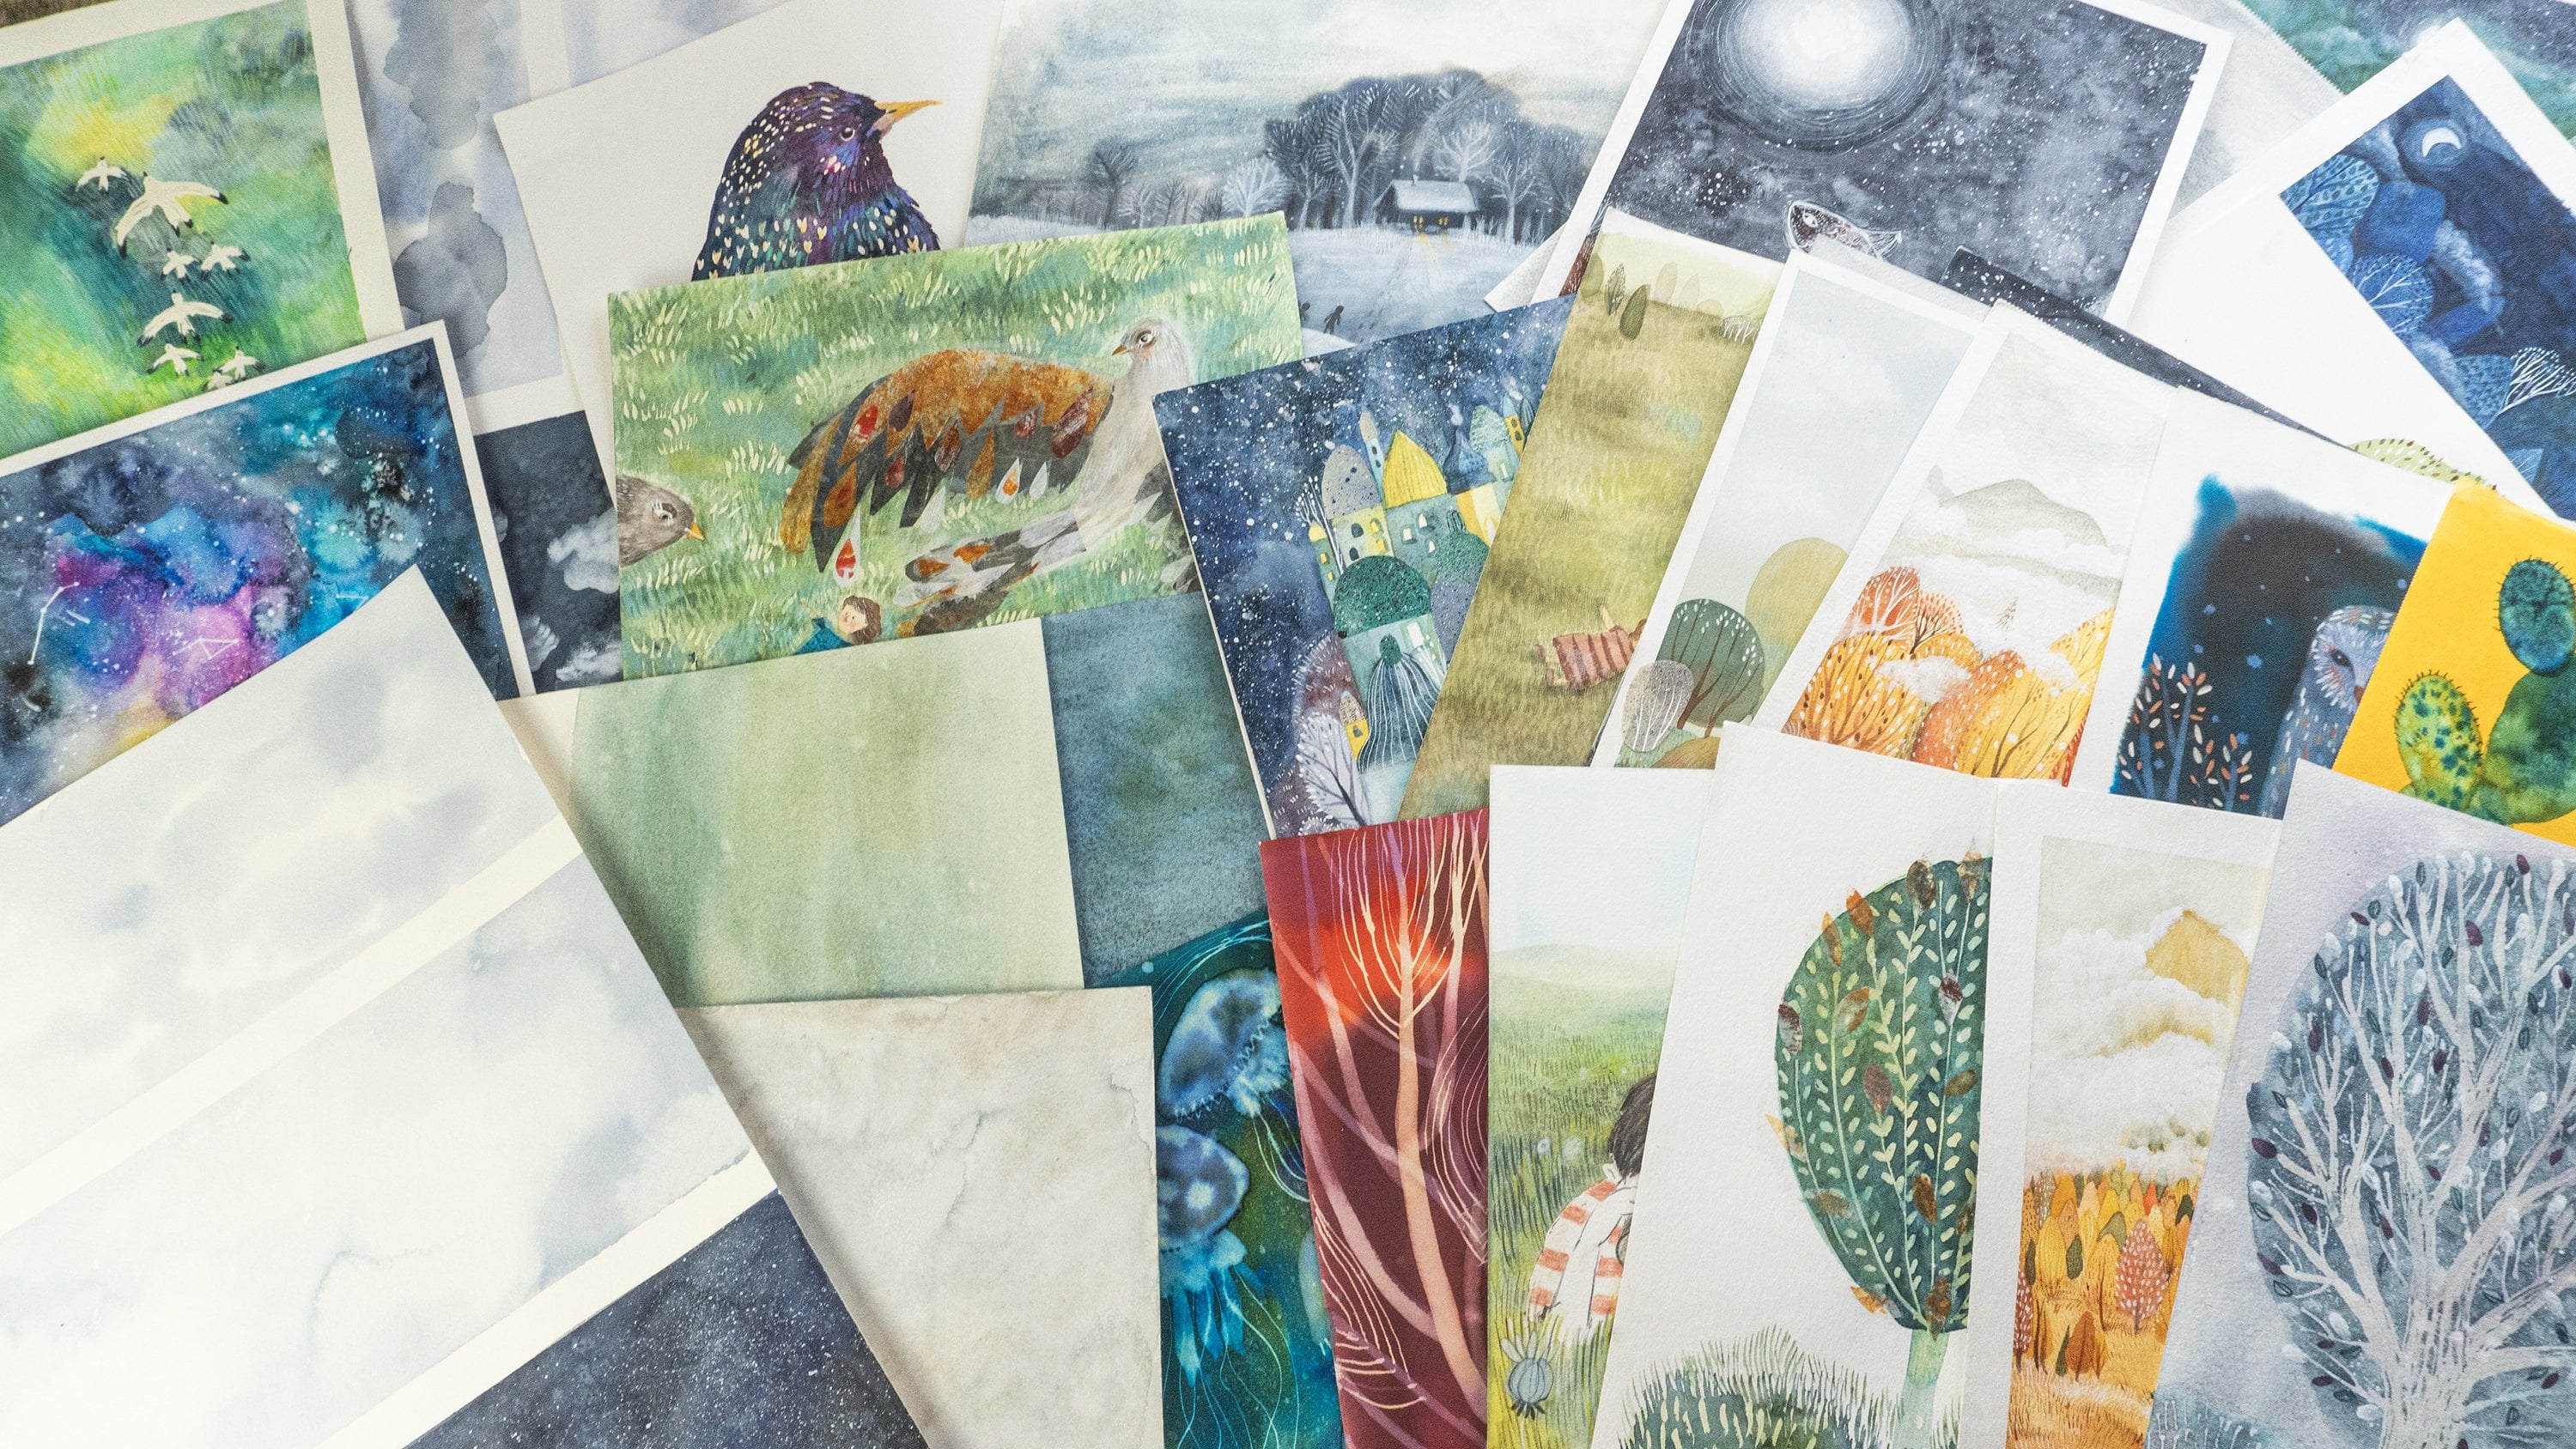
free to experiment. I will leave you some photos for inspiration in the
project resources. Those are some examples of
my jellyfish illustrations. I really enjoyed the
process of painting them. And I think that by
applying bleach and water, you can achieve this electric
effect and vibrant colors. And I think it's really perfect
to represent jellyfish. So we will try to make a similar illustration and we
will apply the techniques, the experiments that we used
in the previous lessons. I will just show you briefly
which techniques can we use? For example, here where I landed diluted bleach
with pure bleach. Other exercises that we
can use, for example, that so bleach leach
into the water, bleach over the lifted color or drawing with bleach
and with bamboo pattern. But there are different
ways and different kinds. So let's test it directly
onto our final illustration. I will use those four colors
for the background, Dr. Ph. Martin's blues and
greens and PBL blue, indigo, violet, indigo blue. And I will use the
same technique as for the background for
the previous projects. So wet on wet technique, but we will see it later on. And before I will
start to paint, I will prepare my
diluted bleach. So I will be ready. Once my background, I
will be ready to go on. My background is dry. Let's prepare the background. First painting with
water and then applying color with wet-on-wet technique. The same as before. I will blend the
color with the brush. Wants the background is ready, we can start to paint. Previously, I did a light
sketch of the jellyfish. You can do it as well or
you can paint it directly. I use as a reference my
previous illustrations, but I also watched for the photos that I did in the zoo when I was in
the zoo and aquarium. You can watch also for
the photo references in the internet to see how
jellyfish are made, the shapes, the light effects. So first, I will start
with wet-on-wet technique. I start to paint with water, and then I will apply a leech. You can try the difference. When you apply pure bleach, it will be stronger. It will create more contrast. Maybe it can be too strong
or spread too much. So decide when it's better
to use pure bleach and this, and when the diluted
bleach in this case, I'm using that they
looked at bleach. Here, I'm repeating
the same process. So first painting
with water and then I will apply bleed drops. Now I'm making the light
frame around the shape. Now I will do the lifting
technique with water. So I'm painting with a
clean water and then I will lifted and I will leave it to try to finish
the jellyfish later on. My next jellyfish,
I will paint with diluted bleach
directly on the color. So I will explain you more or less each and every
step that I take here But it's not that you
have to copy it, copy it, copy all the techniques
or my illustration. You can use totally
different patterns, totally different
Jellyfish shapes, and your own experiments and techniques that
you can apply, obviously, by your own way, by your own imagination. And now I'm painting an
oval stroke and I will apply trucks of
bleach on wet water. This is water that
I'm painting with and then I will apply bleach. One more time lifting technique. I will lift up the water and
leave it to try to paint, to finish the
jellyfish later on. Now it's time to
paint some details. So let's paint
tentacles and arms. The dip pen will really
work, work perfectly. So I dip the pen and the niche. You can see that it
creates really fine lines. So here it is. This time I will draw
them really long. Obviously, you can look
at the reference photos. Just draw what's
your imagination? Ranks. I will use again, my pen to draw tiny
arms, will tentacles. I'm not sure the right word
for those parts of jellyfish. And use pen for painting lines, tiny dots, and tiny details. For your jellyfish, you can
use normal pen or bamboo pen. It's up to you. And now painting the lower
part with water and then dropping inside the drops of bleach or the
second jellyfish, I will paint directly
with bleach. You can also use pen to
define shapes and edges. For example, I drew is at in the way that it seemed that the
jellyfish is lifted. And you can see
the bottom of it. And again painting tentacles, but this time they directly with brush and diluted bleach. Adding tentacles here and
also with the dip pen, you can use both
brush and dip ban. Adding some extra
details and shapes. At this stage, there
are no limits. You can play around. And at whatever
details you want. You can try to be
more realistic. If that's what you prefer. Now, I will paint
with bamboo pen. It keeps another
type of texture. It's a little bit
different as effect, and I will paint with with it while the paint is still wet. If you can remember. It's the exercise
from the rectangle. When I painted with bamboo
pen over the white color. And I thought I would like
to recreate this effect on this jellyfish because I
found it really, really cool. For the final touch. I will use prey. They will spray
the diluted bleach to add just some extra texture. You can do it or you
can skip this step. But I thought it will create lovely texture
for the water scene. It fits good. What I will call it done. This is the final effect. I invite you to see the
last lesson where we will just share some final
thoughts. We'll see you there.
8. Final Thougts: Thank you so much for
taking this class. Congratulations, you made it. I hope you had fun. So those are the steps that
we took in this class. First, I showed you
the art supplies than we did simple exercises when we played with water
bleach and liquid watercolor. And then we apply
the exercises and techniques into our
final illustrations. And we painted water,
plant, and jellyfish. If there's one thing that
I would like you to take from this class is that
I hope that you had fun, that you enjoy the process, that you discovered a fun
technique that may be you will enjoy to use in your
future creativity. Final reminders, I
would like you to post your final project
into project gallery. It will be really lovely
to see what you create it. Please share also with others. And I invite you to
give feedback on the other student's
product because it's very encouraging where we
support one another. And also, I would
like to ask you to leave a review for this
class if you enjoyed it, If you liked it, it will be very helpful for me. So I thank you in
advance for your review. Thank you once
again, and I hope to see you in my other classes. Bye
 Ania Kropla Malinowska, Award-winning illustrator