Transcripts
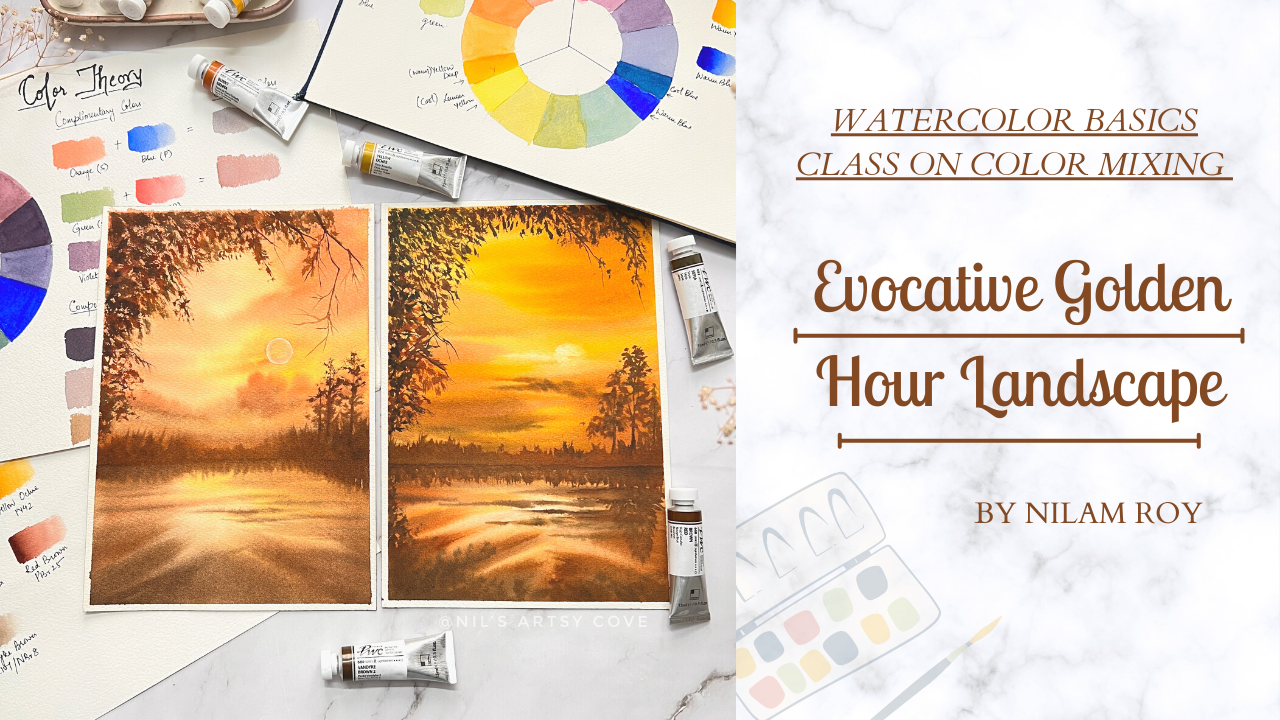
1. About the Class : Twice per day this guy is
diffused with golden light, bringing in an essence
of regal wander and timeless beauty to eat and
everything that it touches. Shadows lending colors
deepen and reflections on the water shimmer with a
striking luxury and glue. Golden hour is known as
the magical period and is perhaps the most evocative of naturally
occurring phenomenon, providing inspiration to
artists across the edges. Does Golden are
inspired YouTube? If yes, then you are
definitely in the right place. Hey guys, I'm Neil and Ryan, artist and an art educator
based out of Bangalore, India. In case if you are
joining me for the first time and don't
know much about me. I go by the name at the rate, Neil's artsy underscore
Cove on Instagram, where you could discover my
passion to paint nature. You could also find
me on Pinterest, YouTube and Facebook,
the link to which is given in my
Skillshare profile. I welcome you all to yet
another Skillshare class, which is inspired from nature. In this class, we
are going to capture the essence of this magical
art by painting it on paper. Using are just earth
warm pigments, confused or doesn't ring a bell. What do I mean by oath pigments? Don't worry, I have
got you covered. To begin with the class I have listed are explained
in great detail about all the supplies
we are going to need for creating
our class projects. Followed by a section wherein I discussed the very
basics of color theory, properties of color
and color mixing, which would really be helpful, laying a strong foundation
in your watercolor journey. If you're an absolute beginner or an intermediate
water colorist, I would recommend
you not to skip this section. Pause this. I have added in a
section wherein we learned about the
different pigments, most commonly used pigments, this synthetic alternatives
and how to identify them and used to paint nature
inspired landscapes. And using are just few
of our warm up pigments we will be creating our dreamy
golden hour by the lake. Sounds interesting. Then come join me in this
class and let's together learn the fundamentals and paint and evocative Golden
our landscape.
2. Materials Required : Hello, hello. Welcome back. In this section, I'll
be briefing you about the materials that we're
going to need for our class. The first and the foremost
thing that you would need is to have a
sketchbook handy with you. Now, if you do not
have a sketchbook, there is another option. You can always go ahead
and offer this block, bads the watercolor block pads, or have a sketchbook
handy with you so that in just in one place, all your color theory and
mixing charts of colors are at one place
so that when you flip open anytime in the future, you can just go through it. Flipping the pages
and reference, this becomes really
handy and you can carry it along wherever you go. You know, this can become your holy grail for your color theory and
your color mixes. You can either keep
your color mixing or color theory sketchbook
separate from us. What journal? So this has become my swot journal formation
and our PWC Panes. Now, if you would like to do, you can create a
swatch Journal of all the pains that you want
and swat them brand by brand, or buy the colors that you
have from each brands. Okay, this becomes
really very helpful and a future guide to your
colored swatches. Now both of these journals are customized and I
have customized them using 100% cotton Fabriano
cold press, 300 GSM paper. Now, if you would like to customize and make
your own sketchbooks, it is a very good technique and Fabriano paper is the paper
that I always recommend. Or instead of that, you could also use
a paper which is 100% cotton acid
free mold resistant. Okay, 300 GSM should be the thickness and
it should be white. Always prefer for whiter papers because there are
some toned varieties available in the market. But when you are
painting some landscapes and you want the
people to be exposed, it is recommended
that you go for a paper which is white in color. Now, this block pad
is also from Sunda forward and you can see the thickness of the
paper is 300 GSM. Now the size of the paper
is ten into seven inch, and this is how the pad is. It is glued to all four sides. So you can directly
use this, okay? You'll see the
thickness of the paper, the multi-color the paper, the more is this water
holding capacity. Now, if you want
to know more about watercolor papers and
the different brands, then I would recommend
you to go visit my class. Monsoon inspire dreamy
landscapes where I have explained elaborately
about the papers. Next is up paint and a pallet. So first we'll look into pains. In this class. We will be using our primary. So there will be some
reds, blues, and yellows, which will be off cooler and
a warmer shade respectively. Okay, so I'll show
you in more details about warm and cool shades
in the next lessons. You do not have to
worry about them. And also I'll be
showing you there and describing the
pigment information of each of the colors
that I'll be using. Okay, so apart
from these colors, there will be some
earth tones that we are going to use
for our final project. Now, in case if you do not have artist grade watercolor tubes, but have artists grid pan set. The one here is from Vanguard. You would see that in a
basic watercolor palette, all your basic primaries
will be there. Especially there will be warmer shades and cooler shades
of respective primaries. Okay? Cool. Yellow, lemon yellow,
cadmium yellow, which is a warm yellow and
red and queen quinacridone, red or magenta carmine. So these are all your
Walmart and cooler reds, along with some blue pigments, as well as some
greens and pigments, which are your sienna, yellow, ocher, and black. If your basic pan palette
is of artists grade, you could find all the
pigment information in their respective
brand website or Google down your brand's
name and search for the pigment information of
your basic palette rate. So this is how you can get the pigment information of your basic palette if
you are having one. Now, if a student grade
than you will not be able to get this pigment
information labeled anywhere. It has to be artists great for you to know your
pigment information. So our next material of
interest is brushes. These are quite common brushes. If you've taken
my other classes, you would know that I
love this hake brush. This is my absolute favorite
to lay flat wash. Now, in case if you do
not have this kind of soft goat hair hake brush. Then the other alternative
is to use flat brushes. I have this one that is 3.4 inch flat wash brush from
Princeton Neptune series. This is a watercolor
brush and it's Brazil's a really
soft, they are. If you do not have this, you can also go for any
synthetic flat brush, which could serve
as your wash brush. Okay. So feel free to use
whatever you have. So if you have even this half an inch wash brush that
will also do just that. It will take more time to cover larger surface AD as okay. So that is all these
brushes also from Neptune series and this is
squared imitation brush. Next coming to my magic ones, which are my silver black
velvet round brushes. I absolutely love this brush,
especially for watercolors. Now I have it Me size number 812 and
size number two brush. So, and also I have this angle shader brush from
Princeton just in case if I want to use it for creating any angles or especially the ray of light or something like that. I always keep this
brush handy with me. This bristles are equally soft. Brush goes by the range aqua allied series
from Princeton. And I love creating the
strokes which are angled. It serves to be a great tool for your watercolor paintings. This brush always finds its
place in my watercolor kitty. Okay, The next to it make it d is this stationary liner brush. So stationary is a very
local brand, urine India. I love using them liner brushes because of their pointed tip and it is a great tool for
some precision detailing. So that's all about our brushes. Now, the next
important thing is, are two jars of clean water. I always recommend you to have two jars of water
handy by your side. Next very important thing
is having a tablet or your tissue papers to soak up any excess amount of water
or to clean up your brushes. Another important
thing is masking tape. So I have this bunch
of masking tape. So these are half an
inch masking tape that I like to use to
create thin borders. These are also known as washi tapes that I'm
showing you here now. So they also come
in various sizes. You can either go for this
carpenter tip like this, or you can use washi tape. Washi tapes are generally
smoother on your paper. Do not rip out your paper. In case if we're using
handmade papers, I would recommend you to
go and use washi tapes. Next, you would need
a surface to fix down your paper and tape it down
and all four sides, right? The board cure is an
acrylic sheet board. I have not removed this
brown covered from the transparent
board that I have. I, it just gives me
a good field when using this brown
sheet on top of it. Last but not least, we would be using
a scale or a ruler and eraser or compounds
with a pencil or a pencil. Okay, so instead
of all compounds, you could also use a master so-called for creating
round because circles in the
upcoming next lesson where we will be
drawing color wheel. So that was all
about the materials. Get your materials sorted and let's meet in
the next lesson.
3. Traditional Color Wheel : Hello and welcome back. In this section, we are going to discuss and look
into what exactly is a color wheel and
how we can create a color wheel from the scratch. Okay, before we move
into the process first, let's understand what
exactly is a olivine. Hello, we'll sometimes
call the color circle, is a circular arrangement
of colors are organized by the chromatic
relationship to one and onto. The primary colors are generally equidistant from each
other on the wheel, and the secondary
and tertiary colors sit in-between them. Color wheel describes
the relationship between the colors, right? So understanding how colors
relate to each other are of significant importance
for all the artist or anybody who has to deal
with colors in general. Is the process where
I'll be showing you step-by-step on how you can
create the color wheel. I have already created
the bigger circle. I have used seven centimeter as the radius for
the, because a cool. Now I'm going to use half of that seven centimeter
as the radius for me. So this is how you
create two circles, two consecutive circles, which
are spaced equally apart. Now that we're done
with the circles, now it's time to create
symmetry for the circles. I'm going to divide the circle
into first four-halves. So here I'm going with
the center point, connecting the center point, the radius point horizontally
as well as vertically. So in this way you get four equal segments
of the circuit. Now using this four points, you will be creating the other segments which will
be equally spaced apart. Okay? Now, using the same radius from the symmetric points, I'm going to create this
segments half semicircle acts. And from those points I'm
going to go again and create the other segments,
respectively side-by-side. So you'll see there will be a semicircle acts that
we will be creating. I'm just pointing out the mugs because that is what
will be needed. Once you have got all
your 12 symmetric points, it's time to join them in a straight line using
a ruler and a pencil. Once you're 12
segments are ready. Now it's important to
mark yard primaries. That is your red,
yellow, and blue, which will always
be in a triangle. This can be positioned
anywhere in the triangle as long as
they are forming our triad. The primaries that
I'm going to use here will be my
cadmium red light, which is ER 108. Yellow will be my
cadmium yellow light, which is PY 35, and ultramarine blue,
which is PV 29. The colors that I have
selected out here is the basic red,
yellows, and blues. I have not considered whether these colors are my
warm or cool colors. You're Walmart cool means the temperature of
the colors, right? So I'll be explaining this in more details in
the coming lessons. So far now, I'm just filling in my segments of the so-called, which will form a triangle
relationship with each other. Okay? So I have filled in the circus now comes the secondary colors, which will be positioned in
between these primary colors. So the first secondary color
that I'll be forming is by mixing red and yellow
to form my orange. And this will sit in
between red and yellow. So in a traditional color wheel, when you are mixing two primary colors to
form secondary colors, you shouldn't be mixing them in equal amounts will give
you the best color, secondary color as possible. I'll explain you why. So now you are noticing, right, I'm going and filling the
secondary colors in between two primary colors
which are next to each other,
leaving gaps, right? So this is how you are going
to feel and you can see this secondary colors
are also forming our triad relationship with
each other. Can you see? This is how all the
colors will be placed. Now it's time to form
our tertiary colors, which will be formed
when I'm mixing my secondary color along
with my primary colors. So the first one that
I'm going to go is mixing my orange
with my yellow now, or your yellow will be
more than the orange. So use one part of orange and do parts of yellow because it
is sitting next to yellow, so that's where it will have
more of yellow dominance. Now the other tertiary colors, which will sit in
between orange and red, will have more orange-ish tones. Here you'll have to make same two parts of red and
one part of audience. Are you getting the logic here? So this is the reason that your secondary colors should be made up with equal mixtures of your primaries in
order to give you this other corresponding
shapes, the analagous colors. These are the warm colors
that you can see over here. Now it's time to combine
art greens with my yellow, which will give us yellow green. So it will sit
in-between yellow, which is a primary color, and green, which is
my secondary color. See the shade of yellow, green that I have
obtained here, right? It has more of
dominance of yellow because it is sitting
closer to yellow, right next to green. Now, your next color
is blue green, okay? So here it will be more
of blue dominance over here because it is
sitting next to blue. Now the other combinations as
though purples and violet. The one which will be
closer to the blue, the purple shade will
have blue dominant small. So it is, it will be
much more darker. Here I have, I think, use too much of water. So you see the difference
that it can make when you have not mixed
your colors, right? Right. So this is how it will be. And when you mix the lead in your secondary, primary color, you will get more of
radish mixture of violet. This is how you are 12 colors
in the color wheel are, and all the 12 colors that are equidistant
from each other. Now here comes the
interesting part. All of these 12 colors, especially the
complimentary colors, which are sitting right
across each other, will form neutral tint or grayish mixture
depending on which colors, warm or cool colors
you are mixing that we will be going ahead
and looking into. And then next section, let's now understand
water analagous colors and water complimentary colors. The colors with just
sitting diagonally opposite to each other
are complementary colors. Each color in a
color wheel that are placed side-by-side to one another are analagous
colors, e.g. yellow to the green range, followed by blue, then purple. These are all analogous colors. Join me in the next section
where I'll be showing you how you can create
some very interesting, or the tones are color mixes using just your primaries are
your complimentary colors. See you in the next lesson.
4. Warm Color Wheel : Hi, welcome back. So you're in this section, we will be taking a
look how you can create some warmer colors just by
using your warm primaries. So the warm primaries are
listed here in the description. It's the same drill that
we are going to follow what we had done for our
traditional color wheel. Three primaries in a triad
formation in the main, so good, followed
by the secondary. And then tertiary is. Now it's time to
mix our tertiaries, which will be one primary
and one secondary color. So this is how we have filled the analogous colors
of red and yellow. And now look at the granulation
that we have gotten, the greens and blues
and the purple. This is because the blue here, Pb 29 pigment is a very
granulating pigment. So whenever you use a
granulating pigment to form your secondary
or tertiary colors, there will be some
granulation present in the other colors mixes
that you produce. We're done filling in. All the colors are primary, secondary, and tertiary
colors in the color wheel. Now it's time to form our mixes, which will be brown, gray shades and tints of
red and green here will give you a unburned kind of mix. So I'll show you how. Similarly when you mix the
other tertiary colors, the complimentary pair of tertiary colors are the secondary and the
tertiary colors. You would get this
neutral tint or your browns and blacks
feeling confused, let me break it down. So when you mix yard
orange and blue, you would get this burnt sienna, which will tend towards
orange because you are mixing orange and
then later blue. So this is how we will be
going across the circle. Now we will be
creating an OD tone using our yellow and violet. You can see this
weighing more towards the umber and the
last was tours, little bit of burnt sienna. Now, all this intensity or the saturation
of this colors will depend on what values of the inherent color mix
that you are using. If you're using lighter shades, you will get lighter mixes
of this are the tones. If you use more saturated tones, you will be getting
more saturated colors. Now, even in the
traditional color wheel, the red that we had
used was PR onesy rate, which was cadmium red deep
and it was a warm red. Okay. Now, if you were to do
a cooler color wheel, so you would be opting for a red which will
sway and will have little bit of pink
undertone so you could use your crimson, right? So whenever you are
picking your color, make sure that you go for
just a single pigment color. That is the color which is
made from one single pigment. Try avoiding colors which are made up of two
or more pigments. Because in that way, you will ensure that whenever
you are mixing us again, Jews and tertiary is your
colors are clean and brighter.
5. Properties of Color: Part 1 (Hue & Value): Now that you have a
fair understanding about the relationship between all the colors and how the colors are placed
in a color wheel. It's time to go deeper
into the matter. I will be explaining you four important properties
are elements of color, which are hue, value,
saturation, and temperature. Now, I will be explaining, you hear about the difference
between color and hue. So color is the general
term to describe every hue, tint, tone, or shade. Vc, right? So white, black, and gray are often referred
to as colors wearables. Hue is reds, yellows,
blues, and greens. It refers to the
dominant color family of the specific color
that we are looking at. In short, whatever colors
our eyes perceive to be. Those are referred to as Hughes. Next, moving on to the second most important
property of any color, that is our values. Now value here is the lightness or darkness of our
colors on a gray-scale. Black is the darkest value and white is the lightest value. In watercolors. We generally tend our paints using water and make it
too transparent, right? Almost to white. The easiest way
to experiment and see different values
for any color is to paint of basic fight
point value scale or ten point value scale. Now, five-point value scale
is better to stick with it, because not all the colors, we'll have a 10-point
value scale. Different colors will give
you different values. Scales are ranges. This is because the pigments
that are used in here, some are darker and
some are lighter. To create this scale, first, start out with the purest
are the darkest tone. And then add little
by little water to your existing paint
mix and try to create this lighter versions
of your darker shade. This is how I'm going to try and see by mixing a
little water into my existing brush and see how
lighter this value can go. The beautiful thing about watercolors is that
within one color you can create many other colors just by exploring its values. This is also the reason why
painting with watercolors, you generally don't need to use white rate because the
more water you add, the more you allow the
white of the paper to show through and the
lighter your colors become. So here's another example
that I have swatch tau, I have used here, my permanent yellow deep. And you can see the
range of this color is comparatively lesser
than that of my black rate. So this is the reason why
most of the artists prefer to follow and go with
five-point scale. Because byte then you
generally have the idea of what's the range of
your color values, right? How deep and how
light it can go. I'll meet you again in
the next lesson where we will be looking
at and I'll be taking you through step-by-step
process explaining everything about the
term saturation. So I'll meet you in
the next lesson.
6. Properties of Color: Part 2 (Saturation) : Now let's take a look at the third most important
property of our color, which is our saturation. Now, you may often get
confused and think, what is the difference
between value and saturation? The differences value describes the overall intensity of how
lighter, darker color is. But saturation is though overall strength or
dominance of the EU. All the colors, the colors which are out there on
the color wheel, our PR, less saturated colors. They are very
dominant and they are respective use like the reds, yellows, and blues, right? The saturation of
this colors will be unsaturated once you start mixing the other
complimentary colors, and that's how they
become unsaturated. They become the intensity
is reduced, right? So this is what
exactly is saturation. Now there are ways by which
you can alter the saturation. That is either by
mixing white or you can mix your paints gray or black also and get the
colors to be saturate. Or by just mixing the complimentary
colors with each other, you can unsaturated the
respective are lowered, the dominance of that
respective color. Let's quickly take a
look how you can do it. The first way is by
adding your blacks are your grace to your
main dominant color, that is your red, your, I'll be just using a square
shape to fill my red color. Now try to use here the most saturated or the pigmented
value of your red. And then we will start
to D saturate it slowly by adding little amounts
of gray or black to it. So in my existing polemics that you can see in that, well, I am adding just
a tiny amount of my Payne's gray into
that mix of red here, you really wouldn't
be able to make out any difference in change of the saturation because we just added a tiny amount of gray. But now when we start adding more grays exponentially
in the same mix of red, you will be starting to
notice the difference in how dominant red hue is getting desaturated into
more of that neutral browns. Now, we will keep adding grays little by little
into our mix until the entire hue or
the color of red Chen changes into
the black or gray. You can see rate how the
intensity from the red has changed to this more
muted tones to Payne's gray. Because we have
been adding Payne's gray slowly increasing
exponentially, right, till we attain
this Payne's gray shades. So this is how you and saturate a color by mixing black or gray. Now, next method is to add
the complimentary color. So whatever you are, the dominant color
that you have chosen, choose its complimentary
color so far, red, the complimentary is green. So I'm going to get a good amount of red
into this other way. And I'm going to make sure
that the first color, we're going ahead with a
fully saturated tone of red. Now here I'm going
with circle shape. Feel free to go ahead with
any shapes that you want. You can add a star
triangle rectangle that is totally up to you. Get creative into ways that you can bring
out your creativity. It's the same drill. I have added a tiny
amount of green into my, this dominant red mix, but you can see we
can still not able to see the undertone of green yet. Now, when I mix my green
into the red mix now you can see the color is losing its slowly in density
rate. This is. Because we are adding the
green exponentially each time. Look at the shade that
we have got out here. So you can see red intensity is reducing the vibrancy
of that red is reducing slowly and
slowly as we are adding increasing quantities
of green into the same red mix that
we have started with. At this point, the red has been totally unsaturated and
we have got the green, which is the complimentary color that we had started
adding to read. The next method is by adding white to your dominant color. So I'll be squeezing out some of my white watercolor paint. Or if you do not have
white watercolor paint, you can very well use your
white gouache as well. So I'll be using this white, titanium white, which is
an opaque white to red. And then we will slowly start
mixing little by little white into our reds until we
get the similar combination, until we attain the
full byte here, you won't be able
to get full white. But at least similar to white kind of thing we
will be aiming for. I'm going to go ahead and repeat the same drill that we had done for the other
two processes. So keep watching. So whenever you add white to
your dominant color family, you always turn it into a
more shade of the color. Okay, so this stands good for all the other
mediums as well. Not only for watercolors, but in watercolors
unless and until we really want to go
for pastry chefs, we generally try to avoid this method of adding white rate since your water does
the job of lightning, the values rate, reducing the tonal intensity or the saturation of
the colors, right? So this is in those cases where you want to go
for a pistol kind of color to your landscape or any painting
that you are doing, you could use this. So here is the terminologies
that you should know. So when you add yard, right to your dominant
color family, it is known as stint. So all your pistol color
shades are shades and colors. You would see that it is
written in most of the brands, pastry shade colors as well. So here I have fuel from my
Shanahan Art PwC colors. So these are all tints. Now, when you add gray into your dominant color value
or dominant color family, it is known as tone. Now, instead of gray, if you try to mix blacks with
your dominant color family, then it is known as shade. Shades and tones are mostly used to create
underlying shadows. Depending on the blacks
that they are using, you will get the corresponding
unsaturated colors. In the upcoming lesson, we will be dealing with the
last property of color, which is the temperature. And I'll show you how warm and
cool colors are described.
7. Properties of Color Part 3 (Temperature): Let's try and understand
in very simple terms, what exactly do you mean by
temperature of the color? Temperature is how warm or
cool or calories to whenever your primaries are inclined or bias towards his
own secondary color, those are your warm
primaries, e.g. here you can see
your red and yellow when it is biased towards
the warmer orange, you get your warm
reds and yellows. Similarly for blue, when it is biased towards his
own secondary color, by mixing warmer red and blue, you get the warmer purple, so it is biased towards purple. So in that case that
blue is your warm blue. When you read, will sway towards or be biased
towards the purple, which will be a very bright
and beautiful purple. That red is more or
less your cool red. So it will have that purplish
pink undertone to it. When you are yellow, will have a greenish
undertone to it. So it will stay more
towards the green. That yellow will be your
cool yellow and the blue, which will have greenish
undertone to it. So that will be your cool blue. Now that we know the
basic principle of how you can identify your color, temperature, whether it's
a warm or cool colors. So let's try it out. You identify these
colors where we can see exactly how cool you are, reds, yellows, and blues are. Okay. So I'll be
starting with my red. So you can see here, right, the cadmium red, deep scarlet, and
vermillion you are, these are all your warm
reds because they're swinging more towards
your warmer orange, they're giving you that warmth. But where else you come
to your pyrrole, red, crimson, and madder
lake and crimson lake. These are having that
purplish undertone to it, which are rather pinkish. So these are swing towards
your cooler shades. Viral red is just an exception
because spiral red is neither swing towards
the warmer red, nor it is totally swing
towards purple red. Okay, so that's why
it's a neutral read. Some colors are neutral in, based on the pigment that I use. So this is an idea about how you can
identify your colors, whether they are
neutral or they have a biasness towards his
own secondary color. Now that you know how
to judge your color, whether it is a cooler
shade or a warmer shade. And also you have an idea about the color wheel and its respective secondary
and tertiary colors, it will be easier
task for you to identify which shades
are cooler and warmer. So take out all
your existing reds, yellows, blues, greens, and try to do this exercise
of judging a color, whether it is Walmart cool. Your lemon yellow here is
a closer towards green, so it is a cool green. Similarly, cadmium yellow
pale is also a cool green, but permanent yellow deep, made up of PY 83 is
much more warmer color. You can see the
swing towards it. Orange color. So that's why it's
a warm yellow. So similarly, try to
figure out which are your warm yellows and
your cool yellows. In this way, you would have
a better understanding about what colors to go forward
to create brighter mixes. Similarly, identifying
your blues, especially your
ultramarine cobalt blue, which is made up of PV 28. Our yard warmer blues
because they tend to have a biasness towards his own secondary
color, which is purple. But when you look at the
colors like peacock blue, turquoise blue, Prussian blue, they will all have a
biasness towards green. And hence these are
your cooler blues. So I now hope you do
understand how you can determine the biasness of a color and hence
determine the temperature, how cooler, warmer color is.
8. Split Complementary & Color Mixing: Let's take a look at the split
complementary color wheel. In this color wheel,
instead of three primaries, there would be six primaries, meaning warm and cool shades
of each of the primaries. Now here try to understand
what I'm trying to do here. I'm just going and mixing colors which are biased
towards each other. Remember that
temperature lesson, I had talked about
this biasness. This color wheel is based
on similar concept. Now that we're done
with the cycle, let me first explain you
what exactly happened here. Cool red is biased
towards purple. So when a cool red
combines with a warm blue, which is also biased
towards purple, you get vibrant shades
of purple since both the primaries are
biased towards poeple. Now let's get to oranges. So one read along with warm yellow is both biased
towards orange. So when you mix both the shades, you get vibrant warm
oranges, right? So the warm red is
placed on the left side. And similarly it
is combining with the warm yellows on
the left side, right? So that's why you get those
vibrant orange mixes. So split complementary,
we'll add some the principle of combining colors which
are biased to each other, giving rise to beautiful
vibrant colors instead of very dark
neutralize secondaries. So we have placed yellow, which is a cool shade
towards the right, which is swing
towards the green, since this is bias towards
green and cool blue, which is also biased
towards green, when combined together
will always give you beautiful, bright,
vibrant green. So this is the overall concept of the split complementary
color wheel. Using this same split
complementary concept, you can now start combining colors with each
other and try to find out the best possible
vibrant bright colors or your neutrals
are your brands. When a cool red combines with
one blue, it gives purple. Now purple is
complimentary to yellow, that will give rise to a sienna color of a new
combined purple too. It's cool yellow, which is
a school complimentary, you would get a greenish,
green, gold color. Similarly, when I combine
my warm red with cool blue, I get Payne's gray color, which is the intense
black color, which you can see now that
try combining with yellow, you get an olive
green color, right? So sap green and your orange will
similarly give you burnt sienna and orange and warm blue will give
you a similar greyish. Payne's gray, orange
and cool blue will give you a shadow green color because
of the biasness of blue, which is towards the green. Similarly yard purple and
your yellows will give you raw CNS and raw
amber light colors. Try doing this exercise with all your pigments,
reds, yellows, and blues, and try to
mix with water there and see the resulting
combination that you get. Now always remember the
thing when you make both warm and cool reds are
your warm and cool shades. You always end up getting a neutral version of
that particular primary. Once you understand these
concepts of mixing the colors, this journey becomes
really very addictive. Color mixing is a very
addictive process. Once you get the hang
and understanding of each of the biasness
of these colors. You can really play a lot around with this pigments and create
beautiful, stunning colors. I would always advise you to maintain color mixing journal so that all your color
new color phones are recorded in the journal. And you can always refer back to them whenever you
want to look at it. So I hope now you know how to create your own
color palette. In a color palette, your basics of cool
and warm primaries should absolutely be there.
9. What Are Earth Pigments?: Earth pigments and naturally
occurring minerals, which contains metal oxides, principally iron oxides
and manganese oxides. So they are mainly
your sienna and umber. Now let's take a look at the brown pigments
used in artists watercolor paints
today according to the pigment color index, NBER, it is usually derived
from Ireland Pete containing natural
clays and iron oxides, but it is considered to be a fugitive pigment
nevertheless is, or the alternative BBR aid is considered to be
highly light fast. Another big men, PBR seven is
a natural brown iron oxide. Now they include sienna numbers. This pigment when it is treated by burning
or calcination, it is known by the name as
burnt umber and burnt sienna. Now let's talk about
the pigment VR1 01101 is a beautiful
transparent red oxide pigment, which is extremely light, fast and synthetic pigment. Depending on how the watercolor manufacturers
treat this pigment, BR 101101 will
elicit wide range of opaque to transparent
colors that usually displayed little
to no granulation. Now you must be wondering
why the manufacturers are preferring those
synthetic compounds over the natural compounds. This is because the synthetic
compounds being made are more stable and
light fast pigments, while their natural counterparts can contain impurities and free radicals that affect the behavior and
handling of the paint. Now that you know about
this pigment information, next time when you come
across different brands labeling their oath
pigments with PRs and BBR z would not be
surprised by so I hope now you are more aware
of your brown pigments. Now see you in the next lesson where we will be
painting our project.
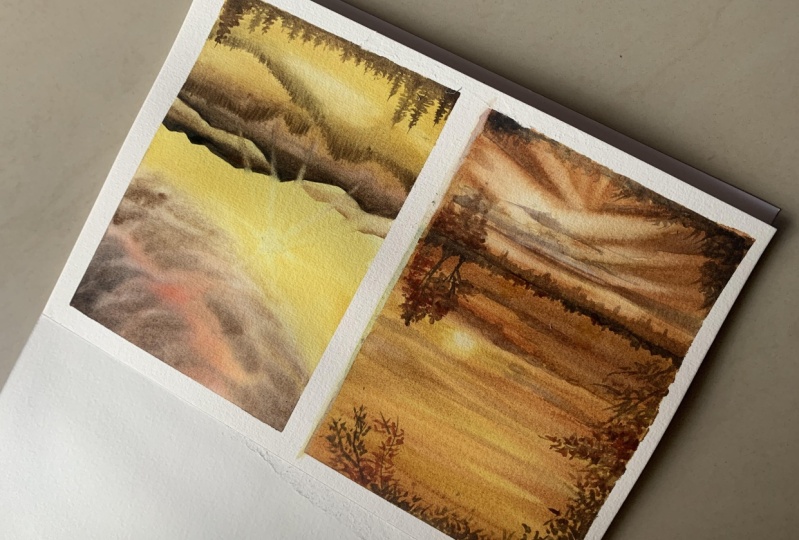
10. Golden Hour By The Lake- The Sky: Hi, welcome back. Now let's quickly get started
with our main project. So far, our project, I'm going to use 100% cotton, 300 GSM cold press, watercolor paper
from Sunda Fords. The sizes, then into seven inch, roughly an A4 size. Next, looking at the colors, the colors that I'm going
to use are from Sudan, our PWC earth pigments. But if you do not have
this, do not worry. You can make use of the
colored theory fundamentals that I had just shown in
the previous lessons. And get to mix your own browns. I have selected mostly my
warm browns and warm yellows. So the pigment information
is shared on the screen. You could note it down. Next, we will be moving on
by taping my paper down. We are going to go and create the landscape
in portrait format. Makes sure that you have tape the paper down firmly
onto your board. But if you do not want
to tape down your paper, if you are using for glue pads, then it's totally fine. That's totally up to you. I'm beginning by pre
wetting my paper. We are going to go
with wet-on-wet technique for our
dreamy golden sky. So I'm making sure that I caught my papers with this
flat wash of water. There are no pools of water standing or forming
puddles over there. Be very mindful of that. Now, taking just add
some words center, somewhere near the horizon. I paint this so-called and I leave the white
empty space out there. Be very careful when
you go and do this. Just use the tip of your
brush to create the circle. You do not want the paint to go in, but eventually loosens. The paper is wet all around. The paint will start seeping in, but we'll make sure that
we have the white people, white routine for
the sun over there, the setting sun over there. Now I slowly start by
spreading my Indian yellow, which is py1 50. Or instead of that, you could mix a little bit
of your orangeish yellow with yellow ocher and you could
get a similar color tone. My Indian yellow is a
beautiful PGY1 50 pigment, which is the warmest
yellow that you can have. In case if you do not
have this color pigment, there is nothing to worry about. Go ahead and pick
your transparent, warmest yellow that
you have with you. Now using my smaller size, size number two brush, I'm trying to go
around the sun and fix those areas where the colors are bleeding into the whites. I'm trying to fix that up. So you too can do that in case if you feel that
your paper is still wet and the colors
are moving into the whitespace that
we want to retain. Now, just go and clean brush, try to remove any excess color
that might be bleeding in. So just use the wet brush. So this is the
lifting technique. Okay. Somewhere just below the sun, I had kept certain whitespaces, but since the papers, all the colors have
covered those whitespaces. So what I'll do is with
the help of lifting technique and using my
size number eight brush, I lifted some of those
areas just around the sun, makes sure that your paper is sufficiently wait for
you to go and create this very soft looking sky with our warm yellows in
case if you feel that your paper has
started to dry out, just stop over there, led the areas get
completely dried out. Then you can go and reweight
the entire areas leaving, leaving the white center
portion of the sun. Start again with wet on wet. But if you feel that your paper has started drying
up only in patches, be very mindful of the areas because if you do not
have the paper wet, this soft glowing effect
of this golden R will not be coming through now to
create some darker shades. So the top right of this guy, I have used burnt sienna mixed with little bit of
Indian yellow for me. Now, use swatch out your bones here now before
you start using if you feel you're burnt sienna tends to go more towards the orange Uganda, unsaturated by
mixing a little bit of your warm yellow,
and that's it. Now I'll be going and painting even more darker shades
towards the horizon line. So it will be more
darker because the sun will be almost
setting out here. Okay? So use very controlled
brushstrokes over here and see how likely am gliding the
brushstrokes through here. You will be very mindful
of that you do not want very strong strokes are there because the soft glowing
effect won't come through. In case you have joined
me for the first time, I would recommend
you to go back and refer back to my some
basic watercolor classes. That is watercolor
sunset cityscapes, where I had demonstrated all the basic watercolor
techniques in great details. You can always refer back
to the class if you want more clarity on the techniques that I'm using for this class. But this here also I am
trying to explain you. But in case if you want
to paint more sunsets, that class could be
your go-to Class. Now here, when you are
painting these clouds, be mindful of the
amount of water. The water is to paint ratio
that you have in your brush. If you have too much of
diluted paint in your brush, you will not be able to create this certain darker strokes
that you would want. You would create excess
back runoff from your brush on the wet paper and there might be an
unwanted bleeding. So exercising water
control is really, really very crucial in all
your watercolor paintings. And I'm using just the tip of my brush to create those
drugs. Did you see that? Now, using a very toned down, a mix of my burnt sienna, I'll just go and cover up the left side where certain
whitespaces where retained. And I feel that my my paper
has started to dry off. So I leave at that
here I notice that our son has completely
disappeared from the sky, right. So it's time to bring him back. So just grab your dry tissue and start taking off the are lifting off the excess
paint from there. Now use a circular
motion and just with the help of your
**** tip of your brush, try to blend in the
colors over there. The paper at this
point has to be wet. You cannot be lifting the colors once your
paper has dried. At this point, my
paper is still wet. Hence, I'll just go and using
very soft tip of the brush, I'll go and add some of that darker tone of
my burnt sienna. I've mixed in some of that warm blue to get this Van
**** brown shade.
11. Golden Hour By The Lake- Reflection on Lake- Part 2: Let's continue with our lake. So for the lake to we are
going to go wet-on-wet because we are going to paint
reflections on the leg. And this has to be very
soft and dreamy effect. Especially the glow
of the sun spreading out on the lake should has
to be very prominently done. Hence, make sure
that your sky line around the horizon has dried out and then you start
watering it down. Okay? So first I start
with my Indian yellow. I'm going with a very medium
to light tone of the yellow. And then towards the bottom, I go with some darker strokes. Now here you see I'm creating some slanted strokes as well. I'll do the same at
the other side also. Keep observing my brush
movements out your UC, I'm not entirely
covering out though. You know, whitespaces am retaining some of
the whitespaces. We're going by the layering
technique first day went with a very light tone
of Indian yellow. Now I'm increasing
the tonal value. I have now used the medium
tonal range of my yellow. Later on on this, we are going to go
with red brown or your bond sienna and
start darkening it. Now, I'll be going ahead
with red brown to build though tonal value or increased
intensity of the colors. Later on, on top of this layer, I'll be going with
my Van **** brown. You can see I just mix both
this red browns and Van **** brown to create this
reddish, darker brown shade. Okay, this is how
you are going to add in the shade and the lighter parts respectively to the reflections of the
leg, to the intensity. Now here try to work with intense tone of your color
like your saturated pigments. Because if you use too diluted
or watery paint over here, the intensity will just go down when you're painting
starts drying up. I'm happy with how this looks so far now it's time
to go ahead with those soft damp
brush here I'm using half an inch brush from
Princeton Neptune series. And I'm just going to lift out the colors very light handedly. So this is here is the
lifting technique and this would only work when your
background is wet enough, makes yard when do
before doing this step, you check whether your
paper has started to dry out or it is still wet? Using the very same flat brush. Now, I'm going to layer
my darker browns just to mimic the Cloud where it
is below the sun dried. So I'm trying to mimic the exact same thing
here in the leg. It is just that the clouds also are getting
reflected in this water. Now I'm going to use my silver black velvet
size number eight brush. And just with the tip, I'm just going to
spread out the shapes a little bit more mimicking
the clouds in the sky. So just using the tip and very soft handedly gliding the brush. Just in case if you are new to Skillshare and you have
just joined for this class, there are some other
classes which I had recently released,
especially the monsoon. The monsoon inspired the moody
landscapes where we have seen how to paint really very
dramatic skies with clouds. Ok, so you can go
check out that class. That would also help
you get an idea. If you are a beginner
struggling to paint skies with dramatic loud, is that class is
surely going to help. Now I'm just going to go and
create some shrubby growth, so just above the horizon
line and the very same will be getting reflected
in the lake as well. Okay, so for now, I'm going ahead and just using
the tip of my brush here. Always remember about
the water control in your paint and your brush. Okay. Never have your **** brush filled are loaded with too
much of water or neither. Your pin should be loaded with too much of water because
if that's the case, too much of watery
paint when you start applying in the sky
idea, the paper. If it is not still fully dried, it will start bleeding into the sky and you
wouldn't want that. Water to paint ratio in
watercolors is very, very crucial and it can
either make a painting look outstanding or just
lead to disastrous one. This time, I'm going
with an intense tone of Van **** brown and just
using the tip of my brush, I'm creating this
shrubby growth here. I'm trying to create
a sense of depth, okay, so darker colors, I'm using it to bring the
subject to the foreground. Lighter colors will indicate
the sun's setting res. That's where the background
things are going lighter. Now, I'm going to
add some tall trees just right at the
right-hand corner. Okay. Not too many
trees I'll be using. Just said this right
side that'll be going ahead and
creating some trees. So make sure you switch
to a brush that you are comfortable with and
create this thin strokes. Now, I'll be creating
the foliage of the tree. So one trick to create
this foliage in a faster rate is to have
a brush handy with you? Yes, hog brush because those
bristles are really stiff. They are mainly used
for oil paintings, but they come in handy, especially with special
effects in watercolors. When you create this kind
of growth in the trees, it helps us to create
bushier trees in no time. And also the depth can be
really brought out with varying colors like using
lighter and darker shades. I'm going to go and create the same foliage pattern on
the smaller tree as well. You're always remember to create the illusion of
depth and distance. Always create trees which are in the background
and varying height. Now here My, those areas had
guard, little dull, right? So I went with another coat of burnt sienna, red brown mix. So you can also do that and also this would help us
to keep the people wet for a longer time and let
us work on the reflection of the trees that we are
going to paint later on. I'm using my liner brush. Are the size number two brush. I'm just going and softly adding some darker clouds in
there because when I had applied water and started to go with another quote of red brown mixed
with burnt sienna. Those clouds had disappeared, so I'm making them back.
12. Final details- Painting Trees & Shrubs: Now it's time to paint
the reflection of the trees casting a
shadow on this lake. We are going ahead with
this lake part first because I want the shadows
to be soft and blurred out. I do not want them to be
very prominent and that is why I am doing this step when the
background is still wet. Now creating these reflections, I'm going just
along the direction of those slanted rays
that we had done, right? So I'm just going along
those same direction and painting the reflection for
this reflection of the trees, just keep dabbing the
tip of your brush. Always note that your brush
should not be too much lead in with watery or diluted
paint because in this case, you need your water control in your pains as well
as in your brushes. Here, I have fast forwarded
this areas because it's the same repetitive step
that we are going ahead. Now with the same dabbing
motion of my brush tip. I'm going to go and
create the other trees where we were waiting for
the sky area to get dried. I went with the dry
brush technique. Now, we are going to
create some reflection of this growth just
below the horizon line. You're my people is in
a very semi dry state. I mean, it is not
exactly dried out, but is still wet enough
for me to create the soft blurry reflections below the horizon
line in this lake. Ideally, when your
paper is wet, it, it should not be too too wet where the colors will
start bleeding instantly when it is little
dry but still wet enough for you to create
this blood strokes. You should be going
ahead and doing always the reflections
first and then go out and do the other elements in the background because
your reflections in the water should always
be done when your paper is still wet enough for you
to create these results. Once you are done with
mimicking the shrubby areas, now it's time to mimic
our taller trees. So for that reflection, go with this little
horizontal as well as haphazard or dabs of your brush to mimic
the tree shape. Okay, so this is how you
create the tree shape, just spread out towards
the lateral edges. Let's bring those foliage part out and hence you get the
reflection of the tree. Now it's time to go ahead and
create the shrubby foliage, which is hanging
out from the sides. Okay, since our
sky has dried out, now, it's a perfect time
to go ahead with it. So for sure I'm
using the colors, the Van **** brown. So if you want to turn it into a much darker shade
of Van **** brown, then use either your black
turned it into a shade, or used its complimentary color, that is your blue. So either way, you can create this color or if you want to
create some lighter shades, go and use burnt sienna or lighter raw sienna mix to create the sun rays
hitting on the leaves. For those areas alone, use the lighter colors
and for the others, which will be like
casting a shadow, use the darker shades which will be always close to black. I have now switch to my
size number two brush, which has a sharp pointy tip, which will allow me to create this thinner lines which are emerging out from
this trees, right? These are the thinner
branches of the tree. So use varying
strokes, you know, varying pressure and just create the dabbing
strokes all over again. Now makes sure your
brushes dry and not too loaded with watery paint. We'll be adding few
more thinner twigs like shapes jutting out from this foliage are the
branches of the tree. And some more last
finishing touches. And I think that's all
we are done with it. We'll let the paper
dry out completely. My people look straight up. Yes, it's right up. So now it's time to peel off the masking tapes from it's
all four sides do this always at an angle and with patients do not be
too hasty about it. Let your paper dry
out completely and then start peeling
off the tapes. Last one to go. Yes, I have got this perfectly
clean, beautiful edges. This painting is radiating
so much of warm red. I really like how
this has turned out. Do try it out and
upload your projects in the projects and
resources gallery. I would love to
see your projects. Feel free to reach out to me on my Instagram ID or
here on Skillshare. If you have any doubts in, at any section or
lessons of the class, I would be glad to help you out. I'll see you again
in my next class.
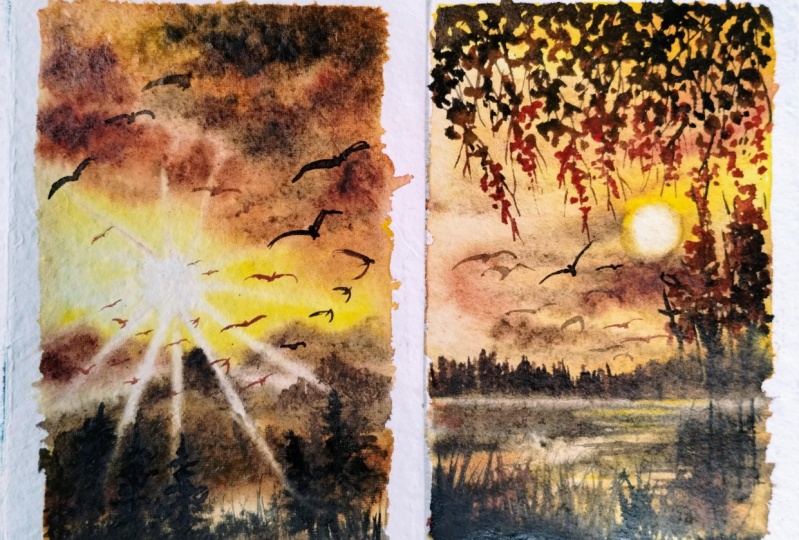
13. Bonus Lesson: Color Palette : Hey guys, welcome back
to the bonus lesson. In this lesson, we
are going to paint this gorgeous Andres landscape. Let's quickly take a look at the colors that we are going to need to paint this
beautiful sunrise scene. I have listed down
all the names of the colors along with
their pigment information. So you can pause the
screen out here, or you can watch
the entire video, pause the screen
and take a note of all the colors that you
would be requiring for this. Now, in case if you do not
have the color purple, you can always mix your cool red alizarin crimson or any cool red with
your warm blues, that is your ultramarine and get this vibrant purple shade. Next is sepia. Now, when you mix a little bit
of black into your browns, you get a similar
shade close to CPR. Noun. Other two colors are raw, umber and sap green. When you mix both of
these colors together, you get a beautiful
earthy green color, which we will be using
in our landscape. Now remember the split
complimentary color wheel that we had seen
earlier in the lessons. So whenever you have
your basic primaries, you can always go ahead and
create your secondaries when you mix yard cool
yellows with your cool blue, you get this range
of greens rate. So similarly, when you mix your secondaries
with your primaries, you get again a set
of another color, which is the tertiary color. And that is how we can obtain this beautiful combinations of greens and neutrals as well.
14. Bonus Lesson: Golden Sunrise - The Sky: Without any further ado, let's quickly get
into our project. First and foremost,
we are going to tape down a paper
on all four sides. I'm going to use the
same people that we have used earlier
in the project. And I'm going to
tape it down using my masking tape on all
four sides on this board. My paper is ready
and taped down. Now it's time to go wet on wet. In case if you are a beginner
and you are not aware, what exactly is
wet-on-wet technique? Wet on wet is nothing
but applying or preventing your paper with
an even wash of water. So here I'm using
the three-fourths of the paper for this guy
and wetting the idea out. This process is also known as stretching your
watercolor paper, wherein you stretch your
paper and wet it as much as you want to without having
to worry about the paper, to buckle your paper generously and go over again and
again with coat of water. Because the more the
paper absorbs the water, the better you will have
time to work wet on wet on your papers since
the beeper will be wet for a longer
period of time. But also makes
sure that there is no standing pools of water standing at one
corner of the paper. So that's why you need to have a broad flat brush to spread
out the water evenly. Now, I'm going to switch to my silver black velvet
size number 12 brush. And I'm going to prepare
first my yellow. We are going to start with
the lightest shade of the sky and then shift
to the darker colors, wild reactivating your color. Always make sure that
your paint mix is not too watery because when you
have two watery paint mix, you will not be able
to control the amount of paint bleed that you
have on your paper. Now it's time to get started with the top
part of the sky. For the same, I have
mixed little bit of purple with my yellows
to get this brown shade. And I'm mixing it
uniformly to the yellow so that there is a smooth gradient
transition rate. Have a tissue paper handy. We're going to lift
out certain color from that yellow gradient
to indicate the sun. Here I'm going to use the lifting technique with
just the tip of the brush. I'm going to make
the shape even more round to indicate the round
circular shape of the sun. Now using my Princeton Neptune
one by four wash brush, I'm going to lift out the colors indicating those sundries
emerging out from the Sun. In order for you to
lift out the colors, it is necessary that your
papers should remain wet or else you will not be able to lift out the colors
like I am doing. You're here. I can feel that my
paper is drying out. So what I'll do is I'll grab my **** pig brush and
run over the brush onto this empty white patches that we have yet to
cover with colors. So this will make sure that
these areas are wet enough for us to go create this
mood dramatic clouds. But my **** size
number 12 brush, I'm going to go and
gather some of my pains, especially my warm
red and warm yellow, and start layering it on the
paper and this cloud forms. So observe my
brushstrokes out here. I'm going with some
circular and slanted strokes to indicate the
movement of the clouds. Now using just the
tip of my **** brush, I'm going to load
some of my warm yellow with cool
yellow and start layering it just beneath where the orange clouds had been led. So in this way, it will create a
beautiful contrast of light and dark
shadow of the clouds. During this process, it is very imperative that your
paper is still wet or else you will have
some hard edges and the colors won't just blend
together on the paper. Here I observed that my
paper has dried out. I'll go and revert this areas
one more time with soft, gentle strokes using
my damp paintbrush. Do not worry if your sun
and the sun rays are gone. We will be again creating them back when our paper
is still wet. Now, I'm going with
the darker shades of my sepia mixed with a
little bit of red brown. You need to be little
quick in this step because if your paper
starts drying out, you will not be able to blend the colors and the
clouds will be really showing up with hard edges which you
really do not want. Here. On my left, I'm going to create the smaller fluffy clouds using
just the tip of my brush. So keep observing the
brush movements here. Whenever you are
painting such kind of dramatic, intense guys, always remember that your brush should not be loaded
with too much of water. Neither your paint mixture
should be too watery. You should have the
optimum amount of water to paint ratio balanced so that you can create this dramatic effect of
lighter and darker contrast. Keep observing my brush
control over here, especially my brush movements
on how I'm creating this darker values of the Cloud while retaining
some lighter values to. Now I'll switch to my size
number four damp brush and using just the tip, lightly, try to remove some of those
darker Browns over there so that my yellow
background that we had is showing
through those areas. So this will give that beautiful contrast
to our clouds, right? Every time that you remove certain areas or lift out the
paint to always make sure that you clean your
brush and rub it off on your tissue paper or tissue
terrible never go back. Using the same brush. You will spread those colors into the other areas as well. So it is very important
that you clean your brush tip every time
that you remove the colors. Now, I'll be switching to my size number eight
brush and I'll go with my lemon yellow mixed
with my warm yellow. And I'll get this beautiful
bright yellow, right? So I'm going over those areas where we
had painted her son. So this area will be the
brightest area of the sky. Hence, I'm going with this
intense tone of my yellow. And as I'm moving up towards
those dramatic clouds, I'm using just the tip to just lightly blend out
the colors over there. And here I'll be using my lifting
technique all over again, grabbing some tissue and
using just my finger, I'm going to lift out the color where I
want to place my son. Now, I'll try to make
this more rounded. So I'll just try using my
tissue paper technique. If not, do not worry, we will later fix it up. But for now, I just grabbed on my **** flat brush some little of that very light,
orange-ish yellow. This is to denote the bright, warm sun rays that is
emerging out from the sun. And then the rest, I'll just go, go ahead and do the
lifting technique. Now, look here. I'm lifting off the color, rubbing it off on this tissue
paper or tissue table. This is very essential
because I do not want the same color
to be spread around. Those are the areas where I want the people to be exposed, right? So every time you
lift off the color, rub it off in a tissue paper
or tissue level so that the excess paint on your
paintbrush tip is cleared off. Now that we are
done with the race, we will be now redoing the
circle shape of the sun. For that, I'll be using my white gouache using
just the damped IP. Redo this circle shape. My paper is still wet, so it gives me an
advantage to blend it off evenly with the
yellow in the background. And using just the tip of
that white gouache brush, I'm fanning out the white
gouache into the race as well. So that's it for
us if we will be soon starting with
them misty mountains.
15. Bonus lesson: Part 2 Misty Golden Mountains: Let's get started with
our misty mountains. For that, the colors that I'm going to use for
this background, misty mountains is burnt sienna mixed with a little
bit of my light red. Now, instead of light red, you could always go ahead
and mix little bit of Alizarin crimson to your browns
and get a similar shade. Now here, remember that your
paint mix should not be too watery because you're my
background is already wet. If your paint mixes too
watery or too runny, you are going to spoil your
sky because there will be uncontrollable bleeds
from this browns. That is the mountains
that you are painting. I'm going to start
painting another mountain which is kind of behind the sun. Hence, I'm going to go ahead with much more
darker shade here. I have mixed little bit
of purple into my brown to create this darker
shade off brown. Now instead of this mixing, you can directly
go ahead and use your CPR with little bit
of fear been sienna, and you will get a
similar shade to have definite control and precise
shape of this mountains. I'm going and using
my size number four, round brush from
silver black velvet. Now I'm going to go and record those bleeds that I had
from the previous mountain. Just using light brush
movement over here and using the same my brush at the same color mix that I had for the
background mountains. So just use that now. I'll clean my brush
and I will be taking some more warmer browns for creating the next
misty mountains, which will be just below
this background mountains. I'm first going to
go ahead and create the basic outline of the
mountain that I want to create. And then I'll start filling up the ideas for
creating the outline. I'm using my same
size number four, brush from silver black velvet. Now to fill the areas
of these mountains, I will switch to my size
number eight brush. Now once I fill this
bigger mountain range, which is kind of close
to the foreground, I'm going to create
a misty foggy effect in-between the mountain on the left and this bigger
mountain on the foreground. So I'm going ahead and using
damp brush to lift off the colors that I had from the mountain in the
left corner, right? And to make it look
seamless, and even, I'm going to blend those
colors with the help of my brush so that it gives us
a smooth transition right? Now, in order to create a
little bit more sharp edges, I'm going to go and use the size number four brush to create an outline
to these mountains. I'm going to repeat the same
process for the mountains which is there on the
right with the damp brush. I'm just going to
revert the area beneath the mountain and
drag the colors down with the help of the ****
brush into those areas so that there isn't
even transition of these two layers of dark and
light colors right there I tried painting further faded out mountains just
beneath the sun. I will switch to my flat brush and try to do the
lifting technique to create the sundries
through this mountain since these ideas are still wet. So this is the chance for
us to create this Andres. Once the paper or
the areas dry up, it will be very
difficult to create this sundries through
these mountains. Now using my size
number eight brush, I'm going to create this background colors of the mountain just
beneath those rays. Okay? So observe the steps or the brush movement out here. Here, I'm going with
wet on dry technique. My background here was not wet, so I'm just going
around those rays of the sun using my watery
paint mix of burnt sienna. Now the watery paint mix here, I mean, it's not too watery. It's a medium tonal value of the burnt sienna
mix that I have. This bigger mountain, which
is there in the foreground, is starting to the loud as
the areas are drying up. Hence, I will go
with one more time with the same color mix that
we had initially applied. Just to give this mountain of definition and
value with the colors. Since I want to differentiate this mountain with the
other background mountains, which will be
little faded out in the background rate since
it is in the foreground, this mountain should be a
little darker than the others. Here, if you have noticed, I'm going around the sun rays to certain extent
wherever it is possible. But if you are not
able to do this or if you have already smudge
the rays, do not worry. We can again go back and use a damp brush to lift
off the areas again. Okay, now using my size
number eight brush, I'm going to share some of that bright and beautiful orange by mixing my cadmium red and
cadmium yellow together. And I will mix it with those mountain drowns
that I had already. I will gathering
some of that yellow, warm yellow also and try to
blend these areas together. Here, I am going ahead
with wet on dry technique. My paper is not pre wetted. But with this, the watery
paint mix that I'm using, I'm going to wet around this area so that we
have time working on it. Now using just my
damp, watery brush, I'm going to spread out these colors till the
bottom of the paper. And I'll mix some more
of that yellows towards the right corner and try to create a blend and mix
of these colors together. Now, when you were filling
this warmer shade, the sun rays might have
gotten a little disturbed. So I'll just go clean it
up again using my wet, damp brush and perfect
this edges of this Andres. Now I have mixed my browns
and greens to give me that, or the green color, right? Or the brownish green color. So I'm going to mix the colors
and I'll simply swapped it out on this separate
sheet of paper to show you guys so that
you have a better look. So this is the very, it's more of green dominance. I do not want this, I want to use this rate. This has little bit of
brownish undertone to it. So I'll go ahead and use this mixed burnt sienna and sap green together
to get this mix. So for your convenience sake, for the colors that I'm using, I'll keep the palette over here. I will just go and use the lifting technique one more
time to read perfect dose. Andres. Let's start painting our misty pine mountains using are these greenish brown mix. I'm going to go ahead with my size number for silver
black velvet round brush. And using just the tip, I'm going to create
this vertical, upward strokes, denoting
them misty pine mountains. I will be repeating
one more time. Exercise water control
in the amount of water that you are mixing
in your paint mixtures. Because this is very
essential in order to create this perfect yet blurred
shapes of this pine trees. In order to create
depth into this trees, I have used a little bit of sepia and using just
the tip of my brush, I'm creating this vertical
strokes in-between. I'm not doing this
for the entire range, just a little bit
here and there. Now I'm going to get this
hill slope downwards. And this is how I'm going
to create the same. Now using my light red, I'm going to go ahead
and blend the browns and this color together into
the bottom of the paper, making sure that there
are no hard edges formed. I will go and try to smooth out the areas
using my damp brush. Because of the
wetness of the paper, the sundry has again
gotten smudge tool. I will go and gently lifted
out using my flat brush. Now, even the pines and looking little
smudge doubt, right? So I will go and just use the
tip of my size four brush and using the darker
mix of my browns, the greenish or the
brown color that we had. I'm going to go and create this long vertical lines in-between some of
those Blurred Lines. Now I'm going to go ahead and
use the same mix and create a mountain behind
these mountains filled with the pine trees. Being careful to go about order around the
sun rays over there. And I will just create a small, shorter one out here. Using the darker mix, I'm going to go and create some pine trees with long vertical lines
on that mountain. Oliver, again,
using the same size number four brush because it has a very good
sharp pointy tip. Use a brush that has pointed
it for you to do so. Here I can see that two
distinct layers are formed, the browns and the yellow. So with the damp brush, I'm going to fade it out in so that it looks all well blended.
16. Bonus Lesson: Final Detailing of Foreground Part 3: Our topmost part of the paper
has started to dry out. And because of that, you can see that our
mountains has faded out a shade lighter than
it was supposed to be. So I'm going ahead and relearning the mountain with
that of my light red mix. Since this area of the paper
has already dried out, you can see that the lead, the new layer that
you put on the paper, it will have two
distinct layers. So in order to fade it out and blend it out
into the background, try using yard **** brush, wet around the
areas which are dry and try to bring down
the colors smoothly. So this will ensure that
there are no two distinct, separate, the separation
of these labs. I'm going to repeat
the same process for the other side as well. You know, all these
kind of small, small minute things
that you observe in a painting makes a lot of
difference at the end. So just be patient and bear with me till we finish
or complete this painting. Now to create
foreground pine trees, I'm going to go ahead and create my mixture
of my Audi greens, sap green plus my light red little bit of burnt sienna
and a little bit of sepia, I will mix together To form
of very darker shade of my green so that our
foreground looks much more brighter and darker
using the same green mix. I'm going to start from
the bottom part of the paper and create
this vertical, upward strokes indicating
the bushy outgrowth present in the foreground. Now to create foliage
like patterns, I'm going to use the tip of
my brush and just dab it, creating some shorter
and longer strokes to indicate the foliage
leaves are the structures. So another shortcut
of doing this is that if you have a fan brush, round brush, which the tip of which has got very much
rounded and frayed. You can just keep dabbing
the tip of that brush. You know, you have to go ahead and use the dry brush technique. Just load your dried it with the paint and just keep dabbing on to create this
full each pattern. It's time to create a pines, which is the main
subject of a foreground. Okay, So for the pines, I have switched to my liner rigger brush
now instead of this, you can always go ahead and
choose your round brush, which has a sharp pointed
tip to help you get this smaller detailing parts
of for the pine trees. The pine trees always
remember that the apex of the tree is always narrower and the base
is always broader. So it is like a triangle shape, just like how you paint
your Christmas tree. It is similar or
something like that. Following the same process, I'm going to add couple of more. Pine trees are varying
shapes and sizes to give the illusion of depth. I have fast forwarded
this alias because it is the repetition of the same steps that we have done earlier. In case if you want to
watch this in real time, you can adjust the speed from your Skillshare browser and
change it to 0.5 x speed. Towards my right corner to, I'm going to add a
longer pine tree. Now, instead of this pine trees, if you wish to add
any other trees, please feel free to go ahead and add it
in your landscape. I would love to see
those recreations. Once we're satisfied
filling in this pine trees, we will move on
to the next step. That is, we will
try to create much more pronounced foggy
or the misty effect. Here. For the fog
and mist effect, I'm going to go ahead
and let some of my bright and
beautiful orange mixed from cadmium red and
permanent yellow deep. And I'm going to
create this kind of Wet on dry process. Here, I'm using my damp brush to spread out the paint evenly throughout the areas where I want the foggy effect
of a pronounced. Here, observe the pressure that I'm exerting on the brush. I'm going with very soft
and light handedly making sure that I do not lift off
any colors from the surface. Because of the mystery of the fog effect
that we have done, it will be now easier
for me to create the outgrowth are in the foreground because
the area is still wet, so the paint will get blurred into the
background more easily. Here I observed that
I have some patches, so in order to fix those up, I go and use the dam tip of my brush and start
pulling the paint upward. So in this way, I will be doing away with
those patchy formations. We're really done
with a landscape, but I'm really not happy with my Skype because
it has dried out. Very light faded out almost. So I'm going to go ahead and show you the
re-weighting technique. I do not recommend this
technique for these guys because sometimes the shapes and the clouds that you get along with, the beautiful white pockets. It is sometimes ruined when you go ahead and try to do it
in wet on wet process. But this has to be done
very carefully and gently because you do not
want to lift out the colors which is there
in the background, right? So be a little
cautious about that. Once the ideas are wet, start going over
those same areas where you want some
darker shades to be done. I have gone here with my CPR
for the intense dark tones and with those same following the same movement
or the patterns that I had initially created, I'm going to go ahead and
create the same clouds. I'm in-between those
darker shades. I want to have some brighter
and lighter shades as well. So I have gone ahead
and mixing my red along with my yellow to create
this brighter orange mix. Now, I'll be adding some more of that burnt sienna in-between these areas just to create that volume and dramatic
effect in this clouds. While the paper is still wet, I'll go quickly and create
some fluffy clouds on my left-hand corner using the same burnt sienna
and light red mix, repeating the same at the lower right-hand
corner of the sky. The top part of the sky still looks little
faded out to me. So I am going to go ahead and leverage with
CPR one more time. All the time my paper is wet, because as soon as my paper
is going to get dried, it will be impossible for me to get this softer looking blends. Follow along and try to do the steps quickly
before your paper dries out because that is really
very crucial to have such a dramatic and
softer looking skies. If in this process, if you notice any hard edges that is formed in the painting, you can go ahead and use your damp wet brush and try
to smoothen out the edges. And that's all about
this painting. I will not overwork it anymore. Our paper is drying out. We will let it dry
out completely before we start
peeling off the tapes. Finally, our paper has dried, it's time to peel off
our tapes at an angle. Always peel off the tips
from the paper when your paper has completely
dried out flat. This is very, very important
guard to clean edges. Now let's see the third one. Yes, this is also perfect. Now coming to the fourth one, Let's see how we have
guarded or ****. Here we have some bleeding
through the tapes. Okay. I'll show you a
technique how to fix it up some of that
white gouache onto your flat brush and just start letting it like
this way and cover off the runoff. And that's it. That's a wrap. I hope you have enjoyed painting along
with me this bonus lesson. I can't wait to see your
recreations until then. Bye.
 Nilam Roy, Art Instructor