Transcripts
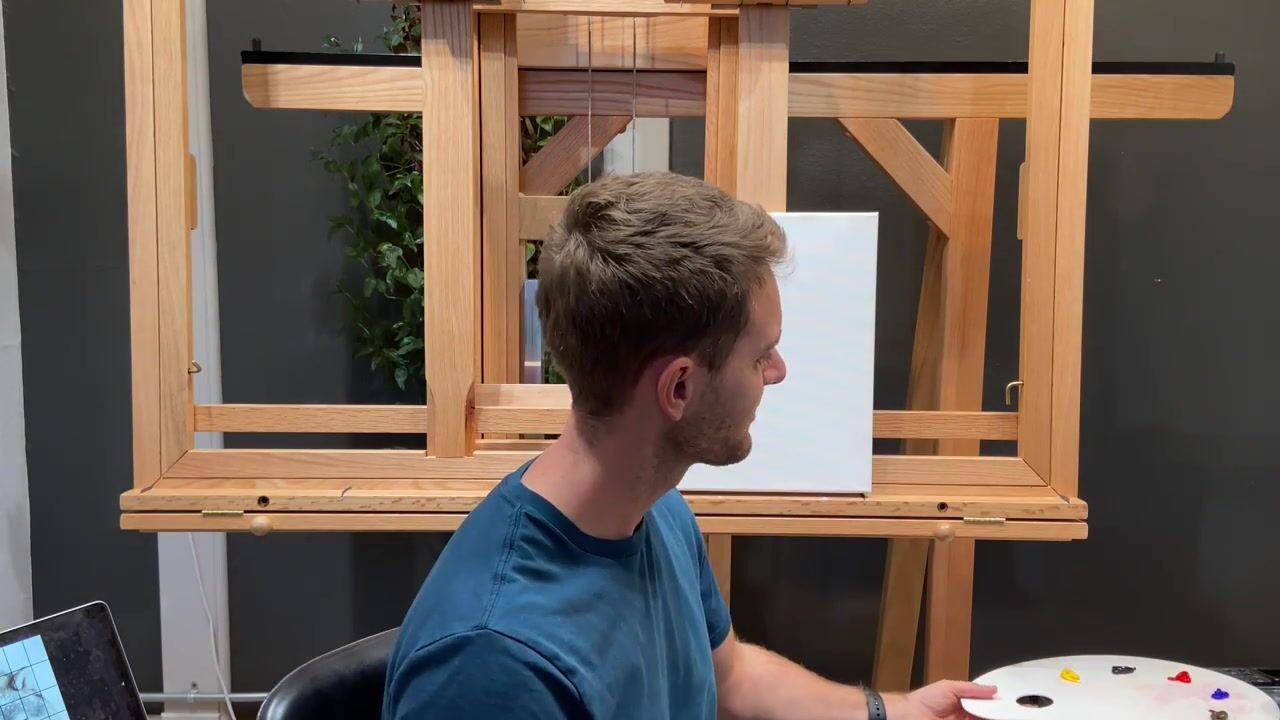
1. Step-by-Step Elk in Mist Painting Art Class Introduction: I'm wildlife artist
James Corwin. We will be painting a
majestic bull elk walking through autumn mist and
steam in the early morning. Actually photograph this elk
in Yellowstone National Park and it was such a
beautiful scene and I couldn't wait to bring it
to life again on Canvas. I will take you step by
step through this painting, demonstrating here
on the Canvas, and then giving you a chance to complete each step
before moving on. In your video, you will see a prompt that says
pause a video. And when you finish that step, just press play and move
on to the next step. You can rewatch any
section you need to if you've missed something or if there's anything you're struggling with too and
questions that you have, please message me
in the comments. I'm super happy to help. This class is great
for all skill levels, even if you've never
held a brush before. We will finish this painting in the time that
we have together. We are using acrylic
paints and the colors that we have are an ivory black, titanium white,
ultramarine blue, raw umber, a cadmium
red, and cadmium yellow. I also have three brushes, a large brush,
medium flat brush, and a small quinty brush. The acrylic paints
are super forgiving. So if you make a mistake, there's two ways you can fix it. You can take your
paper towel and dampen it with some water and
just wipe it away, or you can just wait
a few minutes and let that paint dry and then
just paint right over it. All right. Let's dive it.
2. Elk in Mist Painting Class - Placing the Grid: In this first step, we will
begin drawing out a grid. I like to start painting with this grid and then connecting
the lines and shapes within it so that we all have a elk that's proportionate
and drawn accurately. To do that, we will take our small pointy brush
and use our pure black. Go ahead and get that
paint brush wet with some water just to help it
flow a little more easily. And with that pure black, we're going to find the
center Mr canvas and draw a very faint light line going
down the center vertically. Don't worry if your lines
aren't perfectly straight. These are just reference points. We also don't want
these lines to be very dark because we don't want them showing through in
our final painting. We'll also do a line horizontally cutting
the canvas in half. Next, we're going to
focus into this section, and we're going to break
that up into thirds. Just eyeball where it looks
even from here, here, here, here, and even thirds and draw
those vertical lines down to the bottom
of your canvas. Now moving into this section, we're actually going to
divide this into force. Again, eyeball helps to
get the halfway point there and eyeball in where you have four equal
parts going across. If you want, you can do that vertical line that
divides the section in half and then do
half of the halves. Coming into this
bottom half here, we are going to divide
that into thirds. Mark out your best
third measurement and draw a line horizontally across with both lines. And up into this section, we'll divide into force. Again, from here to here, find that center, draw a
line horizontally across. And then divide those
halves in half. This grid structure
will all make sense when we begin
placing our elk within it. But there's a lot of
angles and parts of this elk that we want to make sure we get drawn correctly. Even though my lines
aren't perfectly straight, as you can tell that
shouldn't matter too much. Great. I do this step now
and we'll begin to place our elk within this
grid in the next step.
3. Elk in Mist Painting Class - Drawing the Back of the Elk: Continuing to use our small
pointy brush and the black. We're going to find this
point here on our first line, two lines down and mark that. Now we're going to draw a line across following this line. Right before you get to here, going to drop it down and just do a Boeing curve that
goes back up to here. And this line is our center
line two lines down. Now, from this point, we're going to end up over in this line here and this section. We're going to come on this
line, one, two, three, down, make a little
dot there in between. We're going to do a
slope that comes down, runs along here, all the way
over to that point there. And now, this is going to
just a slight bending curve down to this horizon line here. Actually, I made a mistake. This is a good example of what you can do when
you make a mistake. Take your paper towel in some water and easily
wipe that away. Great. Now I can
return this line here. What I actually meant to do is do a Boeing
line to this point, and that's one, two, three, four, five sections
down in between. And that occurred there. Rewatch that section so
you know not to make that mistake and then when
you're ready to move on, press play, I'll meet
you in the next step.
4. Elk in Mist Painting Class - Finishing the Drawing of the Elk: Black. We're going to come
back to this point here. We're going to come down
halfway down this line. Now we're going to
do a Boeing curve that ends right here, which is technically the
center of our canvas, center line, center line
where they intersect. And do a line that goes down. This is more of an
organic curve here. This is the neck of our elk. We have a little bit of the chin here coming in and then curves down following along this line
to that point right there. Now for the belly, we're going to come
to this point here, and we want to end
over here with her belly sagging right about
in the middle between here. That's right about there. If we were to count
this out it be one, two, three, four, five
sections halfway. Now, just a bending curve here. That drops down to that and
then back up to that point. Great. Put those lines in now and then I'll
reach in the next step. We're going to put
it in the hind leg. Coming back to this point here, I want to come out to
the halfway point here. This is one, two, three, four, five sections down. I'm just going to
curve out to that and then halfway down into
this bottom line there. Now back to this point, I'm going to come to this
point right here where this belly line intersects
with this line here, curve to that point and then back down paralleling this line right here for a back leg. Now we have one
more leg to put in, and this is going to be
taking a step forward. We're going to
come back and just imagine this line continuing
down right about there. We're going to
come to the center here between this
line and this line. And draw a line connecting
that and then keeping the same width of leg going
to come up to this line here, the curve back up
to this point here. Let's put in some
front legs now. Coming back to the
center point of our canvas down to this line, we'll find that halfway point. From there, we're going
to draw a line that goes straight down to
this bottom line here. Now, keeping that
same width of leg here going to go drop up paralleling that line
until you get to this point. When you get to this point, just curves up into the body like that
and same thing here, curves up, forms a chest
into that line there. You can darken those
lines if you want to, so it's easier to see them
against the grid line. Then we can put
in our front leg. For this front leg, we're going
to find this Section one, two, three in and find
the halfway point. Now as if we're
coming to this line, we're going to draw a line to that and coming to
this line here, draw a line to the
here to this line. But then both lines drop down almost straight just
slightly at an angle. Right before it gets to this
bottom, just curves back. Same thing with this line. Curves back. Coming back to the
top of the head here. Just coming off the top. We're going to come up to this
halfway point right here, 12 sections down on
the second line. Just draw a line that
curves up to that point. This line is going
to run back along to the center line here when
it reaches that point, it will now curve up
to this point up here. You can finish that off with
a little point if you want. Extends up about halfway. From this intersection, we have another point that continues down towards this point here. Now, about halfway through here, we have another point. It's going to continue
down to this point here. I'm making these lines pretty thick so we can paint over them, but also see them. We don't get confused
with our grid lines. Off the top of the head here, coming back to our antler. There's one other line and adds about halfway
between here and here, that points just going to go
up towards this line here. Now, back to the head. Go ahead and draw a
curved line that curves up to this top line here. There's actually three of these. We're going to mimic all three. I didn't mean to do that line with a smaller one right there. Okay. Now, our second antler goes up to right
between here and here. Then it's going to curve
back down towards this line. There's another horn off of this two point coming off
of here goes straight up. Now at this intersection
here and here, another point at this then here, point that goes up
towards this line, which is right up near
the top of our canvas. And lastly, right
here at the back of our head paint the ear.
5. Elk in Mist Painting Class - Drawing in the Land: Wow. That was a lot. There was a lot of
technical drawing and getting out that elk, especially finding it in
our grid work, well done. Thanks for bearing
with me through that. Let's keep using
our small brush in our black and bring out
our shapes of land here. We're going to come to
this main center line to the edge of the canvas. And just draw in a bank here
that comes in diagonal line, then back to this line. Now from this line down here
at the edge of our canvas, it's just going to do a slope, goes right up to
where the feet are, then that continues on past our oak all the way
up to this line here. It's also bit of land
right back in here. I'm going to come actually
halfway between here and here and draw a line that goes towards
the neck and then it follows on this line
and slopes back up going off the canvas there. All right. And after you do that step that
completes our drawing, we can begin adding some color and our first layers of paint.
6. Elk in Mist Painting Class - The First Layer of Paint Added to the Elk's Head: Take out your medium
flat brush now. We're going to use
our raw umber paint, and coming here in the face, just going to begin to fill
that in with some paint. This is just our first layer. So we'll be putting
more color over this layer and it doesn't
need to be perfect. I'm going to take my
small pointing brush if I black and just carve out a little here because I do
want my elk to bugle. I don't want to paint
that. In there. I can just paint around that. We'll be able to
bring it back out with the misty background later. Where I'm ending this is here's the shoulder and it comes
right down to this line here. That's where I want to take
that paint for right now. Put it in the ear here, and then also just brush it over these antlers
so we can start to get some color into them and get them distinguished
from the background. Great. Do this step now and then I'll reach
in the next step.
7. Elk in Mist Painting Class - Painting in the Body: We'll keep using this brush. And this brown, we're going to add a little
bit of white to it just to lighten
it up slightly. That color is going to
go here in the body. And we can begin to get rid
of those grid lines now. And again, this is just
the first layer of paint, so I'm just going for
coverage right now. Just getting paint down
here onto my canvas. There's actually
a little section here of white in the back end. I'm just going to
leave this little area here unpainted right now. Great. We're going to leave these legs in this
area unpainted. We're going to paint
those in this next step.
8. Elk in Mist Painting Class - Painting the Legs and Rear: In this next step, we'll
keep using this color. We're just going to add
a bit more brown to that color just to make
it a shade darker, that'll go here into these legs. Because these lakes
will be in shadow more. Once you do that,
rinse off that brush. And give it a good dry. We're going to take white into that color and make a
lighter version of it, and that'll go right
here into the backside. You'll notice with
acrylic paint, it does go on transparently. A lot of the colors are
transparent colors. If you see your grid
lines and the color doesn't seem so
pure. That's okay. We'll be able to add
more layers of paint and enrich in that color as we progress
through the painting. Okay. Do those steps and then we will start to paint
in on our background.
9. Elk in Mist Painting Class - First Layer of Misty Water: I'm going to take out
my big brush now. I'm going to use that same
color taking my white, just a hint of that brown. That's going to go all in
here in this water area. I can see it's
just an off white, a beige creamy color. Same color we had up in there. Just getting this
first layer down so we can start to hide
those grid lines too. As we get up into the sky here, doing your last little bit
of carving around on elk, we're just going to let
this color just fade and just peter up into about
this top line up here. Now for these more
intricate areas, I'm actually going
to get down to my more smaller brushes here, the medium sized brush. Then finally, the
last little areas we'll do with that small
point keeper reuse. But I just didn't want to
paint over any of my drawing. Now, I'll switch to my
smaller point here brush. Bring out that mouth. Okay. So put in all that background there and then we'll move
on to the next step.
10. Elk in Mist Painting Class - First Layer of Paint to the Land: For this stuff, we'll use
our medium sized brush. Rinse that off if you need
to and give it a good dry. We're going to take our
brown and mix it with just a hint of black to
darken that brown down, make a more chocolatey brown. I'm going to take
just a bit of my white and lighten that up now. That's going to be my
bit of land over here, filling in this section. Now I'm going to break
it up just a little bit so I can start to see some vegetation coming through. Same color down here. Bringing out some vegetation
as I break this line. For this area up here, just add a little
bit more white to that color and make a
lighter shade of it. Just throw it back in the
distance a little bit more. Beautiful. Looks like
all we have left is right up in here and then we'll have the first
layers of paint down. We'll do that in the next step.
11. Elk in Mist Painting Class - Painting in the Sky: Keep using that
medium size brush, rinse it off, give
it a good dry. We're going to keep using it, and we're going to
take some black, actually get some white. We're going to use that. I'm going to take that black. Mix just a hint
of blue into that and also the brown
and now some white. A little bit more brown. Test that color there. What I'm looking for is
just a warm gray color. Perfect. Starting at
the top of the canvas, I'm going to scrub this stem and as it intersects
with that other color, let it peter out, just fade into a bit of transparent cloud
like brushstrokes. Heavier at the top and then letting that
paint just run off the brush down into the
more light beige color. Again, I'm taking in black, mixing it with some white, hinto blue, hinto brown. Scrubbing this color in. Do that step now and then we'll move on to the next step. O.
12. Elk in Mist Painting Class - Adding Warm Mist to the Sky: So I rinsed off my medium brush and I'm
taking my raw umber brown, missing it with just a
little bit of white. Make this color here. This time bringing
in just into yellow into it to warm it up. That's going to go
right in where this gray meets that beige
transitionary colors here. My I just make up a
word, but I like it. Then just rub that
painting right in. Letting that colours fade
out into the other colors. Taken a white, a little bit of that brown and
a hint of yellow. M. This color also right in the water just a little bit. Just pulling out
these streaks here. Beautiful. Okay. Two.
13. Elk in Mist Painting Class - Adding a Layer of Dimension to the Elk: Okay. We have our
background colors in. Let's return to painting
in our elk some more. Take out your medium brush and make sure it's
nice and clean. We're going to revisit
our neck here. We're going to take our brown and mix it with just
a bit of black. We're going to add just a
hint of blue to that, too. It's going to enrich that color. I'm going to do another layer with this color going
over that brown. And while we have
this color mixed, add just a little
bit of white to that color and hint more brown. I'll add another layer to this leg here and this back leg. There's a little bit of
shading I want to do here too. Just right on the back of this leg and a little bit
up here in the shoulder. Very lightly brushing
this color in. Here on the backside. I'm using very little
paint on the brush. Beautiful. All right, positive I do that S.
14. Elk in Mist Painting Class - Adding Another Layer of Paint to the Elk: Clean off that medium
brush. We'll keep using it. And to take our white and make this color again
with a bit of our brown. This time, add it
into blue to that just a touch and begin to add that
second layer of paint. But this time, I'm going to
also bring it up here into the neck very lightly
brushing it in, letting it fade out, staying more in the
center of the neck here. As I get to these
shadowed areas, very lightly bring
some paint over it, but not painting
it out entirely. A little bit on the
front of this leg. Now, with this color, go ahead and just a little
bit more black. Do this step now and
then we're going to make a new color with that same
color in the next step. We'll move right into it, the paint was already
wet and we don't have to do too much more
color mixing. O.
15. Elk in Mist Painting Class - Finishing the Antlers: Okay, so I brought
a little hint of black into that color. And I'm just going
to bring a touch of blue into that as well. Actually, I might use
my small pointing brush for this step. We're gonna come right up
here into the antlers, and I'm going to
make that a little bit darker with some more black, some more blue, and
some more brown. I'm tracing over
all these points here giving our
antlers another layer. And finish them off
and take just a bit of white with that color and do
the tips with this white. Not all the tips. Just these top ones here. Wonderful. All right.
Do that step now, then we'll move on
to the next step.
16. Elk in Mist Painting Class - Adding a Layer of Grasses: Let's keep using
our medium brush. Take your white now
and mix it with that brown to make our ever
so crescent tan color. Just a bit darker
than this background. We're going for more of
that color of the body. But this time, we're going
to bring just a hint of yellow into that
to warm it up, make it a little more golden. That's going to be painted
here into our land. And I'm brushing it on
as if I'm doing my blade of grass very lightly. Brushing that in, still leaving that other brown
visible underneath. And we'll do that same
color over here, too. And lastly, right up
into this land up here, give it some more
depth of color. Just getting rid of that line black lines
it's not so visible. Perfect. Pause the video now and do that step.
17. Elk in Mist Painting Class - Adding Another Layer of Mist: Clean off that big brush, give it a good dry. We're going to take white
into that color if you still have it that we just use and
make the lighter version, we're revisiting this color
here in the background. If you need to
remake that color, it's white with just
a hint of that brown. We're going to new another
layer of this color now. But there's something
we're going to do with it start to bring out this mist. So first, we want to get the
base of this color down. Then we're going to move up into where it meets
the land and then very lightly start to pull this color up using just whatever
paint is left on the brush and on the
canvas to lightly scrub this color
up into that land. And as we get up
here into the sky, we'll do that same thing. Now, this lightly
scrubbing this color. As the paint comes
off the brush, you can get more firm
with the pressure and scrubbing as we create the mist and back down
here, same thing. Let's continue our mist. We won't need to do too
much of it around the help. We're going to be doing more
mist into this section in a later step that you can soften the grasses
that come into this area. Back up into the sky now. Letting that residual
paint run off the brush as we scrub this color right up
to the top of our canvas. If you need to use
your smaller brush for getting around the antlers,
you absolutely can. Takes a little bit
more precision getting around in
these areas here. Okay. Go ahead and
start scrubbing in that mist and I'll meet
you in the next step.
18. Elk in Mist Painting Class - Finishing the Misty Sky: We are going to finish
off our sky up in this area using
that medium brush. I'm going to revisit
that color we were just using with the white. This time, bringing just a little bit more
brown into that and a hint of yellow bring back that golden
color we had up in here. I'm going to bring a little bit more of that back through. I'm actually darkening it with a bit more
brown and yellow. And very lightly
brushing this color on just giving it that
slight tinge of gold I'm going to get that paint off my
brush and switch back up into this dark color while the paint is still
wet on the canvas, taking my white and mixing my black into it
with some blue and some brown darkening that down some more black
blue and brown. I have that color again. And working that down into
those gold and colors, creating a nice even transition. I have very little
paint on my brush. Just so it's easier to
control the scrubbing and getting the layers to
blend evenly together. I don't want a lot of paint. I have to push
around and gloves. Go ahead and do that step.
19. Elk in Mist Painting Class - Adding Detail to the Head: Keep using that medium brush, rinse it off, give
it a good dry. We're going to revisit
that same color of black with a
little bit of white. And a hint of blue. This time, I'm going to work quite a bit more brown
into that color. I can do my final color
here into the face. You can see it almost
matches the antlers there and just gives a
nice solid even coat That's all we're
going to do with that color there and that step, do that and then we'll
move on to the next step.
20. Elk in Mist Painting Class - Making the Body 3-Dimensional: This step, we're going to add
some dimension to the body, taking a clean medium
brush and some white, mixing it with our brown to
make our tan of the body. But with the white, can
see slightly lighter than the previous color we have
down and using this to just round out the
body a little bit, put some roundness in
the shoulder here. Down the front. Leg to the hip. And lastly, adding well, making a new pile of pure
white and a little bit of that tan to bring
in the white rear Do that step, and then we
got one more little step. We're going to do the help.
21. Elk in Mist Painting Class - Painting the Eye: Taking a small
pointy brush again. We're going to take
that color we're just using but add quite a
bit more brown to it. Just a little bit of
black. Darken that down. Going to come right here right under where these
antlers meet the head. And just do a light circle actually darken that
down a little bit. I want to blend into the face so that
it's not very prominent. But we can still see where
the eye is right there. Then just a little
variation here in the ear. Like that. Beautiful. Yes, I think that is everything I want
to do with the elk. We're going to revisit back in the foreground here in a little bit more of the
mist and then we'll be done.
22. Elk in Mist Painting Class - Adding Highlights to the Water and More Misty Grasses: Okay. Take out that
medium brush again and take some white with
a hint of that brown, just like we did with
the watercolor in here. Finishing off. Just
a hint of that mist. If you need to smooth out any hard brush
strokes and lines, you can do that
now bringing out. Well, last minute passive mist hiding away. Any last drawing grid
lines that you see. And taking this same
color down in here, I'm going to start letting this area fall
into the mist now. And this mist is going to
come up over the legs, letting those legs
fade back more. You can see I'm going more vertical up and down
with my brush strokes, so I can still leave some of
that grass texture in there. Same thing with these legs. Letting the mist start
to overtake them. I'm just adding a
hint of pure white to this water just to bring
out some glimpse of it. I'm just pulling streaks of pure white over the
top of the water. So it looks more like
water to the eye. Returning to my mist color
with my light brown hand. It's going to bring into
this mist up into the neck, just to soften it
a little bit down. Very lightly, person
Evin very lightly. I mean some of this
mist into the neck here ever so slightly. Careful not to overdo it. Using it as a bit of
highlight again in my body because I want to bring out that two dimensional
form a little bit more. Just a little bit
more weight right there so it stands
out a little better. All right, go ahead and
do those steps now and then I'll meet you
in the final step.
23. Elk in Mist Painting Class- Finishing the Grasses: For this last step, we're
going to use a medium brush. We're going to take our white and add just a bit more
of that brown to it. Till a hint of yellow to make our golden brown
we had up in here. We're just going to
paint in a few of these golden brown grasses
that we lost the mist. And then taking our brown, I'm going to add just a bit more brown and some blue
to that color. A little bit more blue to bring back a few of these grasses towards the
bottom of our canvas. Just taking a bit of white
and softening these. Just so they're not
so present and focal. I'm also going to take a
bit of my darker blue gray and just bring this leg back a little bit more
like it got lost. Beautiful. I think that completes
that painting. All right, go ahead
and do that step. Rewatch that section if you
need to because I know I did a last few final touches there and then I'll meet
you in the closing.
24. Elk in Mist Painting Class - Outro: Wow. What a complex painting. There were so many
drawing elements to that and different
techniques and textures we created
with the mist and the grass and the different
layering of colors. There was a lot to that
painting. How did it go? I would love to see
what you created, so please share it with me in the messages in the comments. I'm here to help
you with anything that you were struggling
with and questions you have. So please reach
out and subscribe. Follow along. I hope to see you in a future
painting video. Thank you so much.
 James Corwin, Professional Artist