Transcripts
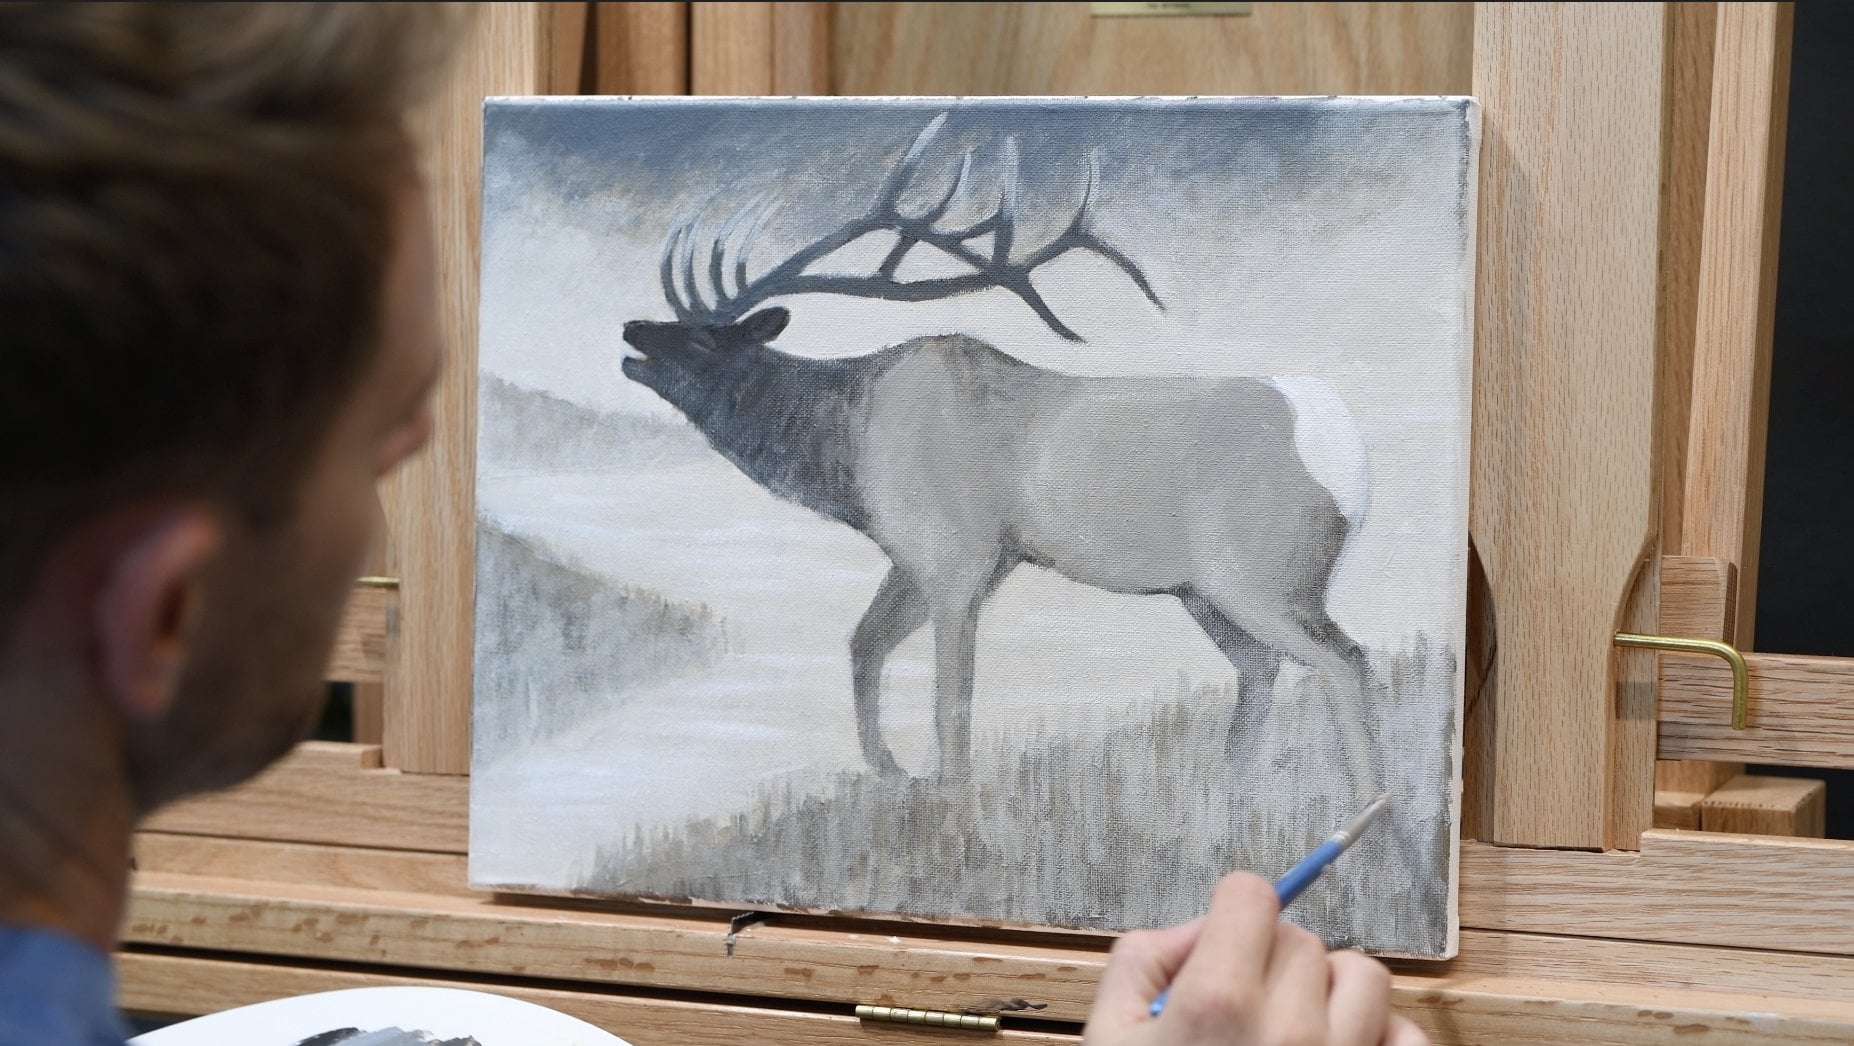
1. Step-by-Step Wolf in Snow Painting Art Class Introduction: Hi, I'm wildlife
artist James Corwin, and I am so excited
about this painting. We will be painting
a snowy wolf. I will take you step
by step through this painting demonstrating
here on the canvas, and then giving you a
prompt on your video that tells you when to pause so
you can complete that step. When you're ready to
move on, press clay. We will be using about
2 hours to complete this painting and we'll be
using these acrylic colors, the titanium white, raw
umber, ultramarine blue, cadmium red, ivory black,
and cadmium yellow. I like to use acrylic because it's very
easy to work with. The colors dry fast, and as we build up the layers
of paint in this lesson, we want those layers
to dry quickly so that we can move on
to the next steps. Also, it wipes away
easily with water. If you make a mistake, you can just dampen your
paper towel and wipe it away. We're going to be using
three brushes today. We're going to use
this large flat brush, medium flat brush, and a small pinky brush
for all that wolf fur. And I also have a cup of water for rinsing my brushes and a
paper towel for drying them. All right. Well, shall we begin?
2. Wolf in Snow Painting Class - Drawing out the Grid: You start, take out your
small pointy brush. We are going to draw out
a grid on our canvas, this is an 11 by 14
inch size canvas. With my pure black, that's the ivory black. I'm going to draw
a very faint line dividing my canvas in half. Now, I want these lines
to be very thin and transparent so that they don't show up in
our final painting. And a line going across
the canvas horizontally. I'm just eyeballing where
these halfs of the canvas are. Now, we're going to come to this first half
and we're going to eyeball where the thirds are so that we get
three equal parts. Again, on the bottom, and then draw a vertical
line connecting those. We do this grid because
it allows us to find our way around to drawing this wolf so that we aren't just free handing it
on an empty canvas, but we have some
reference points. But we need to establish those reference points
in a grid first. I'm dividing this half
into thirds now as well. Okay. Now we're going to come to this bottom half and
do the same thing, but horizontally,
dividing it into thirds. And again in this upper half. Great. That's a grid we're
going to work with, and then we're going to start drawing our wolf within that. Pause video now and complete this step and then we'll start drawing the
wolf in the next step.
3. Wolf in Snow Painting Class - Drawing the Head of the Wolf: Continuing to use our black
and our small pointed brush. Let's draw out our wolf. We're going to come up
to this first section up here and find a halfway
point between here and here. We're going to draw
the back of the wolf, but our destination
is over here one, two, three lines down. We're going to also cut that
in half from here here. We're going to draw
big arcing line that connects through
this point down here. So the slope up the back
is a bit level right in here and then starts
to slope down even more as we get down
to that point there. Now, once we get
down to this point, we're just going to
drop straight down into that box and right here. Here's halfway between
here and here, and then halfway again, we're going to cut that
in and that's going to come all the way to this
line here like that. We're going to come to this
section on a vertical line. We're going to come
between here and here and cut that in half. We're going to do
a slope that goes to this point here, like that. Another one that goes from
here to here halfway. We're going to arc this
down to that point there and then that line's going to continue
all the way to here. Then again, coming
halfway halfway here, it's just going to poke out beyond this line and then
come to that line there, which is level to this line. That's going to
slope down to here. This one also slopes down
there a little bit too. We'll just add that in there. Then we're going to bring out some of our snow
right in here first. We're going to
count up one, two, three sections and
find a halfway point. This is just going to
come into this box about halfway, drop down, unloms line all the way to here where it drops down again about a
quarter of the way down. Comes to our center
line a little bit of curve from here to here halfway, it's just going to slope down to that and then just
run along that line. Do these steps here and then we'll continue drawing
out some more of our wolf, but I just want to get
caught up with that for now.
4. Wolf in Snow Painting Class - Adding Snow Lines: All right let's draw
some more of our wolf. We're going to come to
this section one, two, three in and divide
this third box in half. Then over here, we're going
to also divide this in half, but then this half and half
again with the quarter mark. Because this nose gets
tucked behind the snow, we're going to just
drop this down. Then this is just
going to come down and slope behind the snow here. We're drawing in
the nose right now. If we come back to this line
here and cut that in half, you can just bring that up and this up to that same level, which is middle of the box here. Then within this box, we're going to come just about this line about a
quarter of the way. It's going to drop through
that half line there, and then drop all the way down, just touching the snow. Same thing halfway
from here to here, down, touching into that snow. Then about halfway, you can trw this rounded box
that we made for the nose and then do a black dot there
for the nostril. Break. Draw that nose, rewatch that if you need to, and then we'll put the
eyes into the next step.
5. Wolf in Snow Painting Class - Drawing the Face: Let's continue with the Is now. Coming to this line here, this is our third column
three lines down. Divide that in half
and then half again, and then come to this line, divide that and half
and half again. Then from here to
here also do in half, we're going to get
accurate eyes here. I'm bringing that
up. That's where the corner, my eye starts. This is where the
other corner ends. These are almond shaped eyes. Or little footballs. We got that one.
Now, we're going to divide from here to here and
half and then half again, and then half here
and half again. From here to here, we're
going to start that I. Then it's going to come in and drop down again and create another little football. Then within that, you can just round out the pupils
or the eyeball, I should say, inside. Then you can put a
black D hut up in the top and that's
where the pupil is. But we'll be able to
bring more of that out. This just nice to
see where it is. Well, I'll let you
get caught up with those eyes and then we'll start working on more of
the wolf ears and stuff. Go ahead and do that now.
6. Wolf in Snow Painting Class - Adding Ears: Let's put in the ears. Coming up to this corner
here where our ears going to start
from here to here, just find that halfway
point there and our ears going to pass through
that point into our head. Now it's just going to run down this line all the way down, but still we want to
curve back into the head. Right about a
quarter of the way. That's half and then
half again comes down. There's just a little
bit of an ear lobe right there too, so
we can put that in. Then it's split down and that just intersects right
to that point there. Now for this year, we're
going to come up to this line here and we're going to
divide that in half. Then from here to
the top of the head, we're going to divide that
in half and then half again that year is going to start there and go through that point and then drop more drastically
down into the head. Then it's going to come up and then drop straight
down onto the head. Again, there's just a
little bit of split here that runs through that halfway
point down into the head. Next, I want to bring
out some variants of where the dark fur will be. I'm going to come
into this line here and about a quarter of
the way to the end, bring that and it's going to wrap up and through this point here and then back
down into that line. Same thing here from here
to here about halfway, it's going to wrap up curve
going through this point. And then down this time is
close to about a quarter. Actually, we'll just
make it down to this line here and then off. Then everything above in
this area will be gray. This will be more white. You do that and then
we're going to add in just a couple more things to our wolf and then we'll
be done drawing it out.
7. Wolf in Snow Painting Class - Drawing the Legs: The last things
we need to do for our wolf in the drawing portion is come back to this snow bit here and just run it off
down to that corner there. And then also put in the pas, which are going to
start from this line here and run down to
that point there. That's one of them. Then the other ones from
that point down to here or close just running off
the canvas there. Great. Do that quick step and then we'll start putting
color into our wolf.
8. Wolf in Snow Painting Class - Putting in the First Layer of Dark Paint: Well done on drawing the wolf. For the pinking portion, we're going to start
working dark to light. Pull out that medium
sized slap brush, and we're going to put in our
darkest areas of our wolf, starting with the black and just a little
bit of that blue. It's just a very
dark black blue. That's going to go right here
behind the ears to start. This paint can go on. Some of these colors
can be transparent, they're going to go
on transparently, but that's okay because
we'll be able to put in some more layers to build up
the opaqueness of the color. It's a little bit right up in here and you can see
I'm already bringing out my fur texture just by using the bristles of the brush
to carve in the paint. Be it goes on transparently, you can see the brush stroke. That's why I'm using
that to my advantage by carving in that fur. The direction of the brushstroke is very important as well because that's going to bring a realistic
look to that fur. It were going
straight up and down or the other direction
or horizontally, it wouldn't look natural. The direction of the fur brings out the natural
form of the body. I'm just laying all
this paint and color in where the darkest areas
of the fur are to start. H. We're going to keep
working with this color, but I'm going to switch
to my small panty brush. I have more control in
these detailed areas. That's going over those lines
for my eyes to darken them. But just leaving the
eyeball still unpainted, Then lastly, right here into
the nostrils of the nose. Beautiful. That's all we're
going to do with that first layer of dark, do that step and then in the
next step adds more layers.
9. Wolf in Snow Painting Class - Adding a Layer of Gray to the Face: For this next step,
we're going to return to that
medium size brush. We're going to make
a lighter blue gray for the mask in the forehead. I'm going to take my white
and actually just bring it in and add it to that color
I was just working with. If it's already dried, that was black with a
little bit of that blue, but now I'm adding white to
it to lighten it up to make a medium blue gray
by taking black, mixing it into the white
to make a medium gray, and then bringing
blue into it to give it more of a blue tone. And this color going
to paint all into that mask area here
above this line. Again, being very mindful of my brush strokes and the
direction that they are going so that I can create
a natural look to the fur. I fans out from the top
and then as it reaches the sides of the face
here, it falls down. And I'm breaking up this line a little bit to softening it. Great. That's all I'm going
to do with that color. Do that step now and then I'll
meet you in the next step.
10. Wolf in Snow Painting Class - Painting the Nose: Since we're working with
that black blue color, we're going to use our
small poinky brush and revisit that color but make a different shade of it by taking our black and
adding blue to it. But this time, just a
little bit of white. It's not as light as this
and not as dark as this. That's going to be
here in our nose. Feeling in that area
around the nostrils, just to get that
base color in there. Perfect. Do that step and then I'll meet
you in the next one.
11. Wolf in Snow Painting Class - Painting a Layer of Brown Fur in the Back: We're going to add some
warm brown for wolf now. Heating that medium
brush out again. We're going to take our raw
umber this time and mix it with some white to lighten
that up a little bit. I'm going to make
it a little darker. Want it to be a darker
brown to start. I actually just
bringing a hint of black just to make it a
little bit more gray. Great. Starting here
between the ears. I'm going up and over, but leaving a bit of
white here and between Then another band appear to get this fur
cacture I'm doing, I'm just using the blade part
of my brush going straight on and then as if
I'm taking grass, and then I'm Sorry, I had to get that in there. The direction on my
brush strokes, again, is very important and you can see the direction that
they've been shifting. Copy that in your painting. I want to extend some of
these out because it was a bit more long fur in the back here and some up in here
I want to bring out. Then there's this
color right here into the ear that little split
area that we need there. Just bringing some
of that brown in. Then lastly, right here
into the middle of the ear. Great. Maybe a
little bit of warmth right in there too in that
middle of the ear. Beautiful. All right. Go ahead and mix that color and then I'll
meet you in the next step.
12. Wolf in Snow Painting Class - Adding Light Tan Fur: We're going to keep
working with this color, but we're going to add white
to it to lighten it up. Taking white and that raw umber, create a lighter
version of it now and start to bring out
some more variations of color in the
wolf starting here. This is going to go all
the way down to the nose now a little bit under the eyes. Give me a little bit here under the face just
so we can start to get rid of those black drawing lines
and the grid lines. Now, adding even more white
to that color can go here in between and paint in those white spaces
with that color. Don't worry too much
about losing some of these breast strokes
that we already have in. We're going to be
bringing those back out in future layers. We're just looking to get all of our color down onto our canvas, getting rid of that white canvas so then we can start
building up our layers. All right. I'm
going to leave then these other wet spaces
for the next step. Do that now and then
in the next step, we're going to be
adding a little bit more white to the color. So keep it wet. O.
13. Wolf in Snow Painting Class - Adding a Layer of White Fur: Okay. For this step, we're going to take the white
and bring a little bit of that light Raw Umber
into the white. But really, it looks quite
white on the palette still and just a slight off white on the canvas,
as you can see here. Breaking up these lines and areas so it
looks more fur like. Painting no dark drawing lines. Break up this just a little bit. And lastly, up here in the ears. I love it. I can start seeing the wolf fur coming together. All right. Do that step now. O.
14. Wolf in Snow Painting Class - Painting the Legs: For this step,
we're going to use our small pinky brush and take our raw umber
with just a little bit of black and a little
bit of white to make a medium gray brown color. We're going to paint some lines here into the paws just to break up that white
just a little bit. I'm going to add a little bit of blue to the color
for these back ones. Just so I know that
that's a different leg. I'm just breaking
that up there with that color so I can let that dry and go over it then
with this white color. We're going to go back to that white that
we're just using in the face and paint that
right over that color. You can see it's created this nice effect here where you can still see bit
of the fur coming true. But then the white softly over it. Do that step now.
15. Wolf in Snow Painting Class - Painting in the Background and Snow: For this next sep,
I'm going to use my largest brush and take my white and bring in just a
hint of that blue, a hint. Because we want it
to read as white and you can see, as I put it on, it has a little hint
of that blue in there without being too blue. It's not even a baby
blue, an off white. I'm going to bring that
into the background here getting rid of
those grid lines and even bringing it into the buy I wolf a little bit so I can break up that black drawing line. It only takes just a
hint of that color. It's easy to overdo. Okay. And lastly, this color goes in right here that
little bit of snow. For this one, you can add a little more blue
to it if you want. So we know it's
snow and not sky. This stuff, however,
is pure white. We're going to rinse off that big brush and just go right with that pure
white and paint it in there, getting rid of those lines. We'll be able to do
more layers too. No worries if you can
still see those lines. Can probably hear
my cap wondering, Where are you? Where's dinner? Well, she's already had dinner, but I should be out for dinner. But I'm putting in a late
night into the studio, and that's great. All right. Cool. All that we have left for our on your painting
is the eyes. We'll do that in the next step.
16. Wolf in Snow Painting Class - Painting the Eyes: For our eyes, we're going to use our small pointy brush and the raw umber was
a little bit of the red to make a red brown. That's going to go right
here inside our eyes. I find it look like beady
red eyes right now. That's at all scary,
but don't worry, we're going to be adding
some highlights into there and getting
rid of that red. We're just working
dark to light. If you want your wolf to have blue eyes or yellow eyes,
you can do that too. Four.
17. Wolf in Snow Painting Class - Adding a New Layer of Dark Fur to the Face and Details in the Nose: All right. Let's move into Addi's new layers into our wolf. This is second go around now. And all these colors
should be dry, which is why we
use acrylic paint. And we're going to start with that small pointing brush
again, taking black, mixing it with blue to
revisit this dark color. But this time, I'm going to
add just a little bit of white to it to lighten it up. So it's darker than this,
but lighter than this. I'm going to begin to pull out some more fur but finer details now on a edge a little
bit more black to that. And This gets darker right here in the
center of the face with smaller brush strokes
as I work my way up, this forehead just
scrubbing that color in. The paint starts to get gummy and sticky as it's
drying on you, you can add a little
bit of water to it to help make it flow more
easily on the canvas. Uh, Just going over that area just a
little bit more. Also breaking that up
just a little bit. Then also this color into
the nose one more time. But this time, I'm going to add a hint of white
to that color to it up a shade so that I can bring out the nostrils more and get some three
dimensional shape to the nose. That goes right over the top. Then again, some more highlight
right here on the top. With a little bit more of the white catching the
light on that side. I think that's all
we're going to do with that color right now. All right. So do that step now. A
18. Wolf in Snow Painting Class - Adding a Second Layer of Dark Fur to the Back: It's off that small
pointy brush. You're going to revisit our raw umber with
a little bit of black in it and some white to lighten it up slightly a little bit more black back into that and again, bring out these hairs here between the ears,
slightly pulling them. Up. Me across the back. Great adding the browns. And
19. Wolf in Snow Painting Class - Adding Another Layer of Paint to the Background: Take out that
biggest brush again. Let's use the pure
white to bring out another layer in the snow and finally get rid
of those grid lines. Then use this color to add just a little
bit of glue to it. Add another layer into this snow patch and
then the background. I don't know what that was. Okay. I love that. You want to work
on the eyes a little bit. Let's be that in the next step. Love that. You want to work
on the eyes a little bit. Let's be that in the next step. Down in there a little bit too. We'll just add that in there. Then we're going to bring out some of our snow
writing here first. We're going to
count up one, two, three sections and
find a halfway point. This is just going to
come into this box about halfway, drop down. Run aloonms line all the way to here where it drops down again about a
quarter of the way down. Comes to our center
line a little bit of curve from here to here halfway, it's just going to slope down to that and then just
run along that line. Do these steps here, and then we'll continue drawing out some
more of our wolf, but I just want to get
caught up with that for now.
20. Wolf in Snow Painting Class - Detailing the Eyes: Taking out that
small, pointy brush. Let's take our black and add just a little bit of blue
to it and a little bit of white to make a dark blue gray and paint that into
these eyelid areas now. And I want to bring
down this eyelid more. So I'm going to take white
Just run it right off at that. Great. Now I'm going to take tear black go around the eye one more fine. The eyeball and the pupil. I'm going to take blue and add it to that black
blue color we're just working with just a
little bit more blue, a hint of white and
just put it right there in that pupil. I'm going to rinse
off that brush. Take my white, a hint of the Raw Umber and paint over that red ever so slightly. But you can still see a
bit of that red in there. Rinse off that brush
one more time and take pure white and put
a glint of light. There glint of
light right there. And one red up here. And on the edge. Actually, tunnel down this
white dot just a little bit. Fun. A more Black in here. Cool. Starting to come to life. Rwatch that section if you need to. There is
a lot in there.
21. Wolf in Snow Painting Class - Adding Highlighted Fur to the Face: Let's keep using our
small pointy brush. Take the black and
make a lighter gray with it this time and bring
in just a hint of blue. This lighter blue gray, maybe a little bit more
blue, a bit more black. You don't want it
to be too light. We can begin to bring in
the lighter hairs now into the forehead lightly brushing them around being mindful of the direction of
our brush strokes. U uh, a you can see the areas now where
I've left it a little bit darker and put in those lighter fur there,
follow along with that. Then we're going to
add some fur into the background into the back of the wolf and the next sp. Some.
22. Wolf in Snow Painting Class - Adding Highlighted Fur to the Back: Salt that small pinky brush. We're going to use pure white, and you're just going to get a little bit more
here on my palette. And we're going to do a layer of lighter fur over the back here. And I'm just very lightly
brushing this color on to break up that
brow a little bit more. But you can still see through
it or through the white. Brown shows through that white, which is great.
It's what we want. Okay Great. And all we have left to do in the following step is
putting snow on our wolf.
23. Wolf in Snow Painting Class - Adding Snow to the Fur: We can keep using our small pointy brush and appear white. Let's put snow
onto our wolf now. It's going to start here
in the forehead with some bigger globs that go
into smaller little dots. I'm just randomly
placing it in here. But still going with the direction that my
brush strokes are going. Continuing up into the back my ears down the nose. And on top of the nose, Hang out a bit. I like that snow there just
to break up that blue ort. Make it look like
chunky snow. Okay. Well, I think that's
just about it. I don't want to to overdo the snow 'cause that
can easily happen. So I'm gonna leave it at that. And I like that.
Alright. Do that step, and then I'll meet
you in the closing.
24. Wolf in Snow Painting Class - Closing Remarks: Wow, what a fun painting. I love painting
wolves and there was a lot of fur texture to
practice on in this painting. I hope you enjoyed it, and please share your
pekings with me. I would love to see
and I hope you'll join me in a future painting
video. Thank you so much.
 James Corwin, Professional Artist