Transcripts
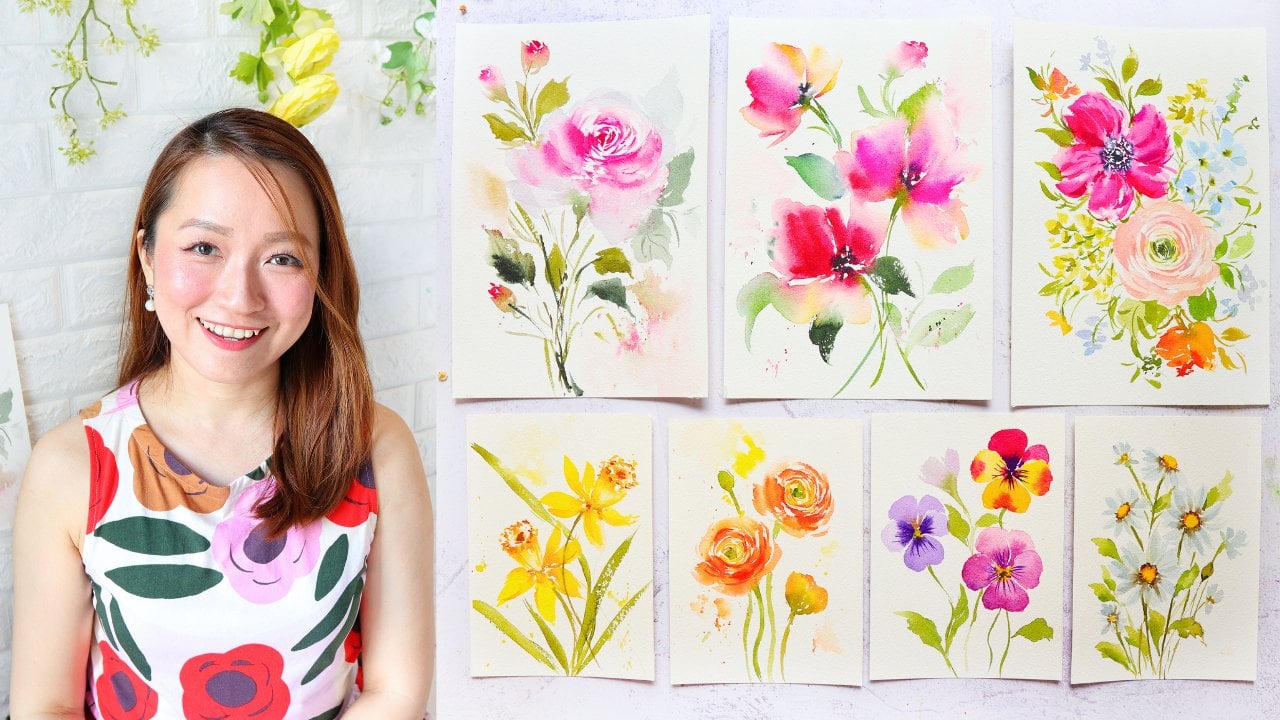
1. About the Class: Have you ever wondered if a single brush could
transform your painting? Well, I recently discovered the magic of a size
two round brush. Well, it's commonly
used for fine details. In this class, I
will show you how this versatile tool can create delicate leaves and
botanical elements that are more difficult to
achieve with a larger brush. Hi, my name is holly, and I'm a watercolor artist, 110 creator and a
skelta top teacher. I have been painting
for about a decade now, and my arc involves
around painting flowers in a loose
watercolor style. One of my goals in
teaching is to simplify challenging techniques into
an easy step by step process. In this class, we are
going to master how to use a small round
brush to create thin and wispy strokes that will add a light and airy
touch to your artwork. Next, we are going
to practice painting small, delicate leaves, flowers, and fillers, which
we will form into an elegant circular wreath
as a final project. You may even add a coat in the center or simply display
it in your own home. Whether you have little
painting experience or you're a seasoned artist, this class will surely add a unique touch to your
own artistic style. All right, so let's get started.
2. Class Overview: Welcome to the class overview. In this class, you'll go
through the materials and some colors watching for the
paints that we will use. We'll paint botanical
elements to practice first, and then we're going to
turn them into a wreath. The aim of this class is
for you to be able to use a small round brush and
add that to your toolkit. So you can add some
nice wispy strokes to your floral
arrangements because it really does make a difference. I've always believed that a
good medium sized brush can paint broad strokes and
also thin hairline strokes. But I also realize that using a small round brush can definitely create
wispier strokes, and just a nicer touch to your painting and
gives that airy feel. So you understand
that more later on as we practice using
this small round brush. Don't worry as, I'll be
sharing this step by step process in a
real time video. All right, so let's get started and move on to the next video. Oh.
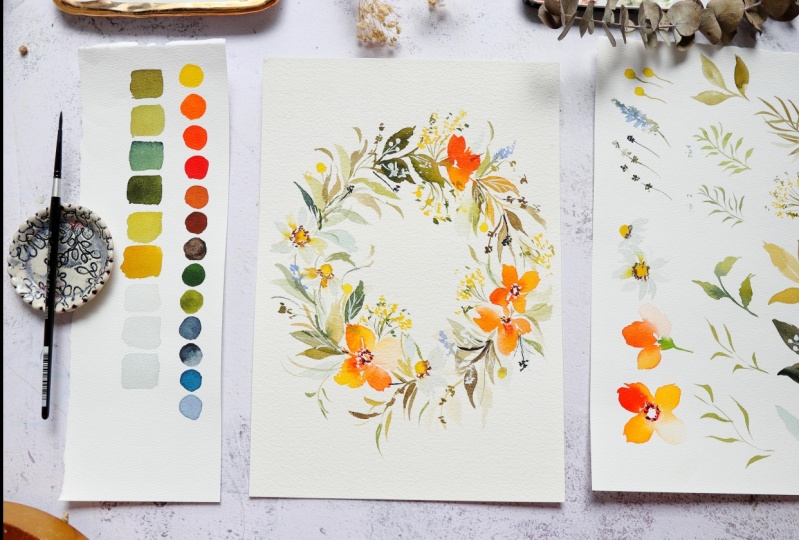
3. Materials : Let's talk about the
materials that you need. Way to start with a paper. I'm using Bau Hong
artist grade paper. This is 100% cotton paper. The thickness is 300 GS M, and it's a cold pressed paper. This is in a watercolor
block style, which means all sides are glued, except for this part right
here where you can use a palette knife to slide off one sheet once you're
done painting. I'm just going to
quickly show you guys the texture of this paper. This is cold press paper, and you can see a little bit of roughness there,
and that's okay, that's actually very good for
loose watercolor florals. For the paints, I'm
using Sheen hand PC, it's an artists grade
Korean watercolor. So you can definitely use
other paint sets as well. I'll be doing a color
swatching video separately, so you can also
watch that to find out the colors that we
will use in the class. Of course, we need
a mixing palette. This is a ceramic
palette, but right here, I'm using the top lid
of my watercolor pan. This is from the brand core, and I love the little wells. Core is a different
watercolor brand, but I just switched
the colors in this palette and made
it en and PWC instead. I will also be using white Cash. This is whole bin
in permanent white. You can also use a white pen, or even if you use poster paint, that's okay for this class. It's a great way to
add some highlights and also some details to
your floral paintings. For the brushes,
I'm going to use the silver black velvet in
sizes two, four, and six. This class is going to focus
on painting a dainty wreath. And going to use a size two
round brush to achieve that. We're going to use it to
add some whisky strokes. Also size four is a good brush
to add some small flowers. So if you only have two sizes, I would suggest getting
a size two or a size four or size two and a size six. So you can definitely use
whatever brush you have. It doesn't have
to be this brand. And we also want
brushes that are pointy so you can create those nice,
beautiful whisky strokes. Lastly, we need a
jar of water and also some tissue paper to blot out the excess moisture
and our brush. All right, that's it
for our materials. Now let's move on
to the next video.
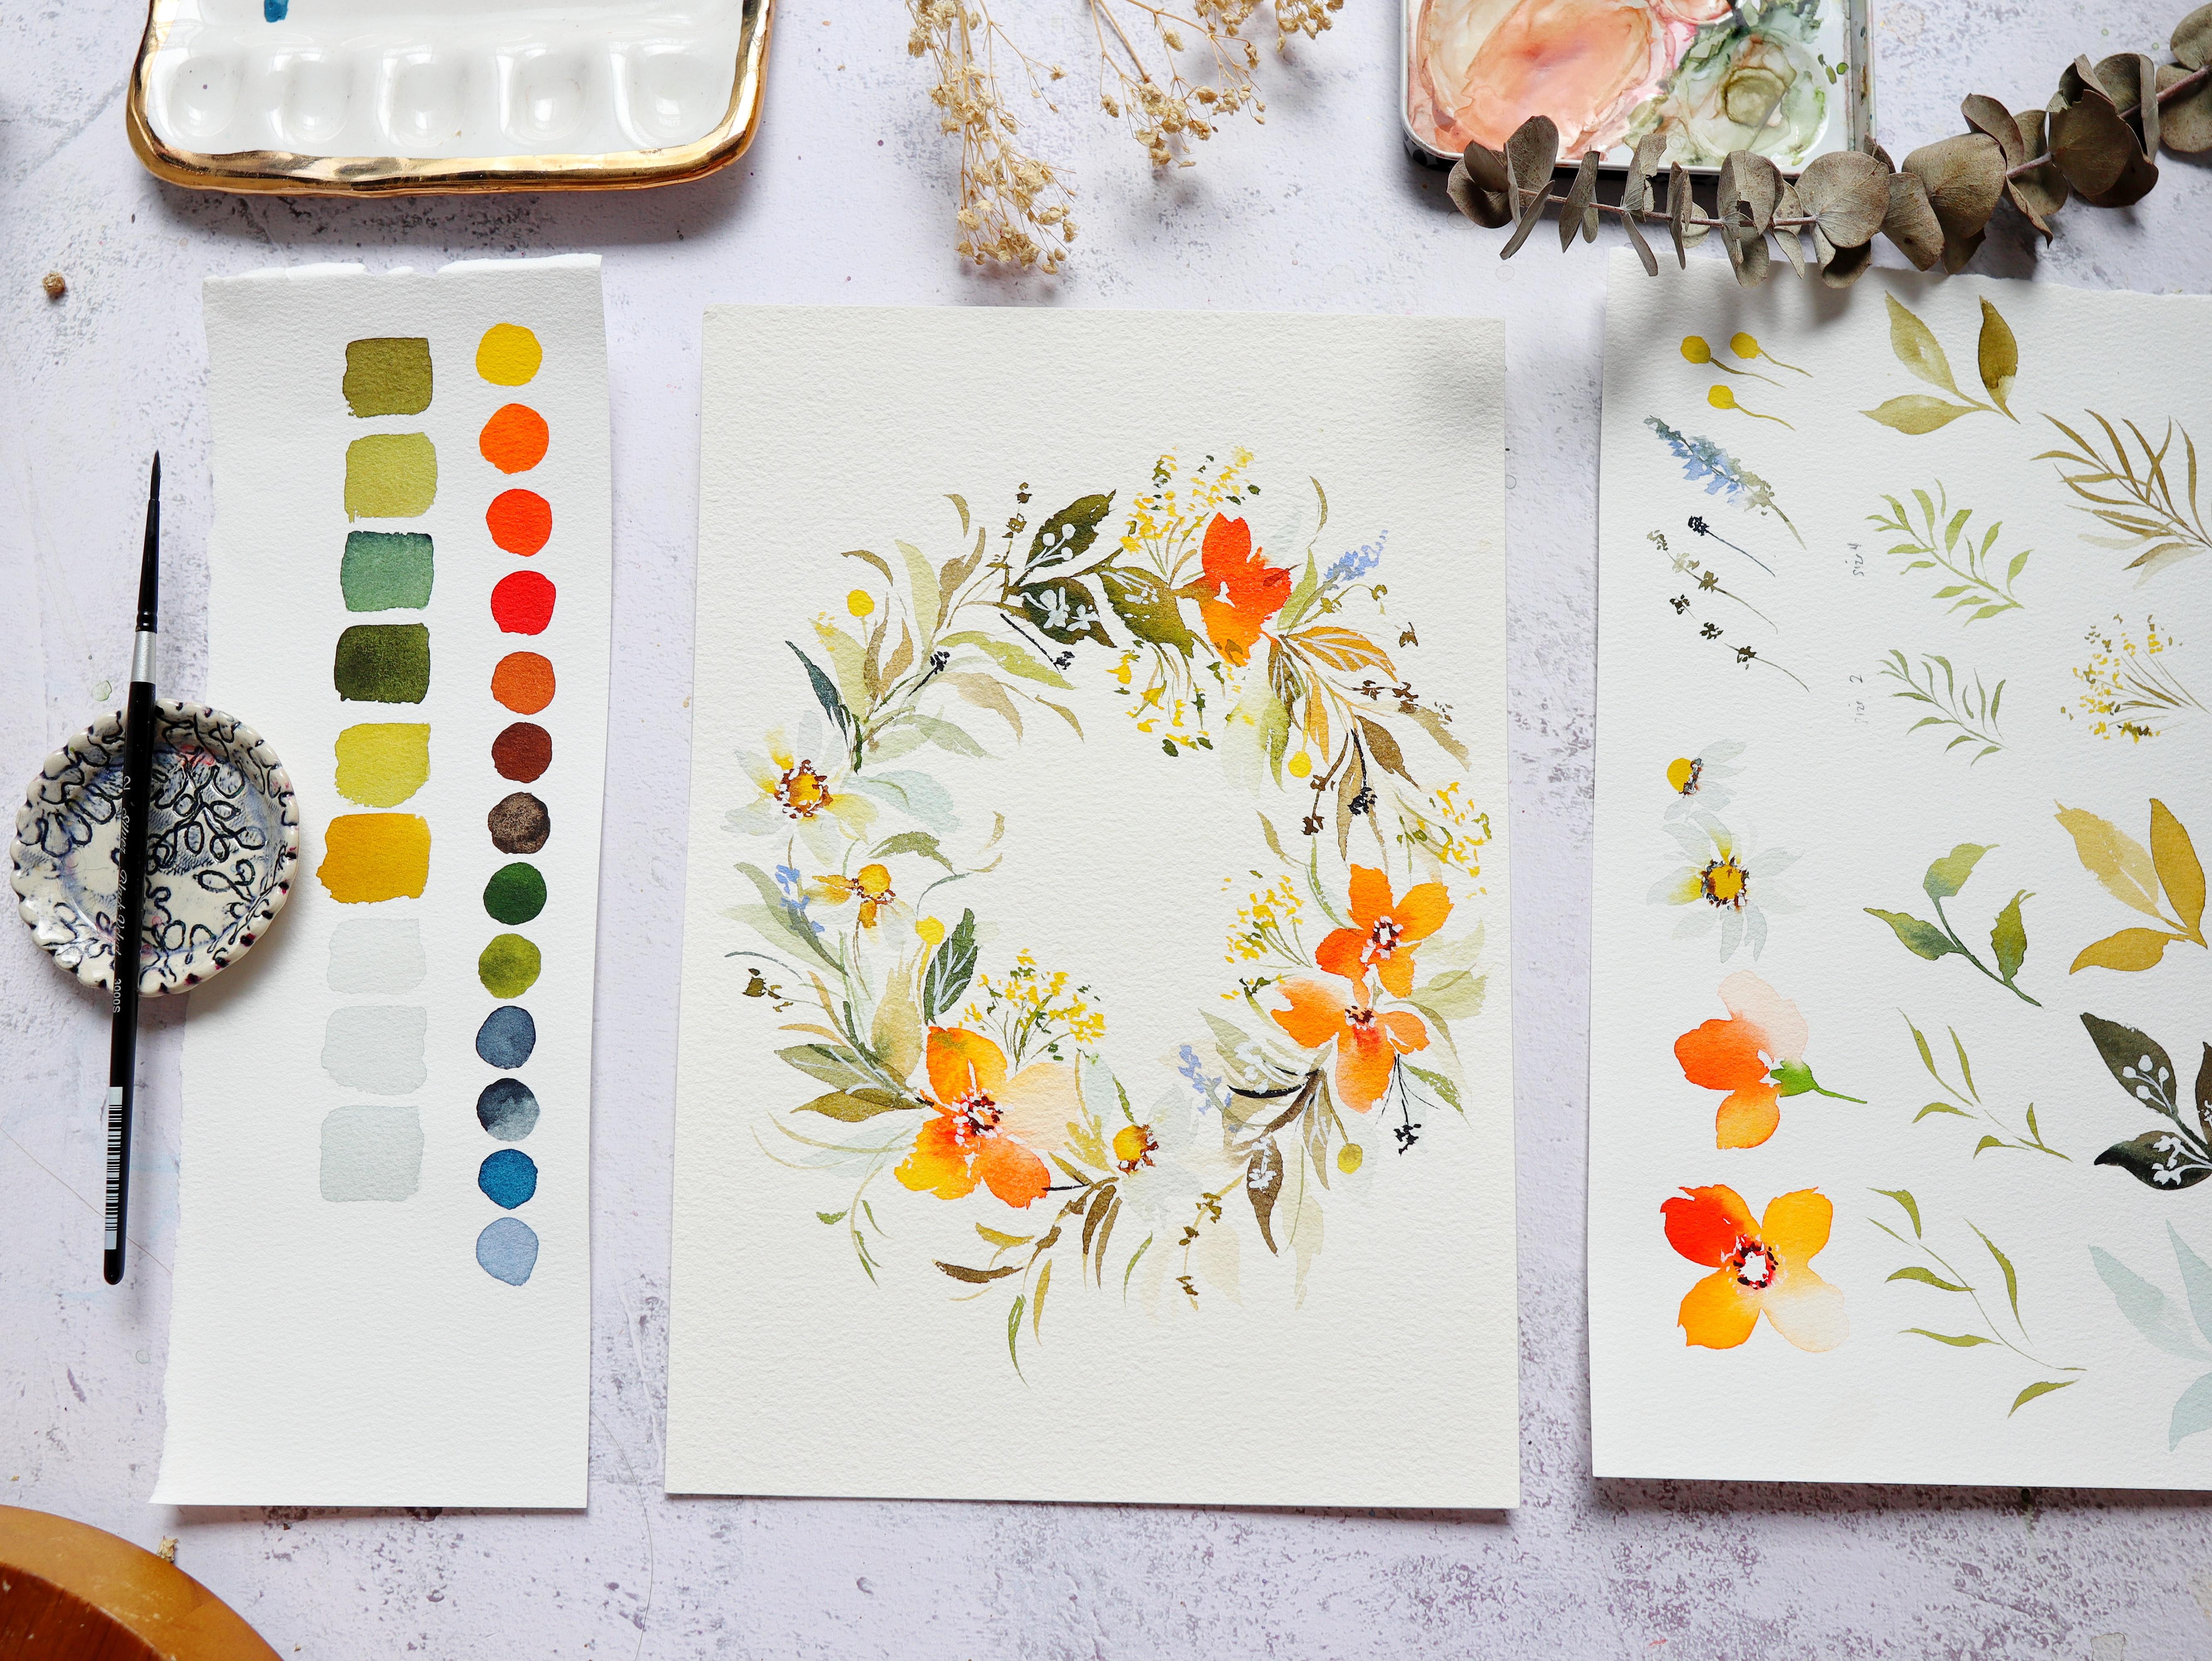
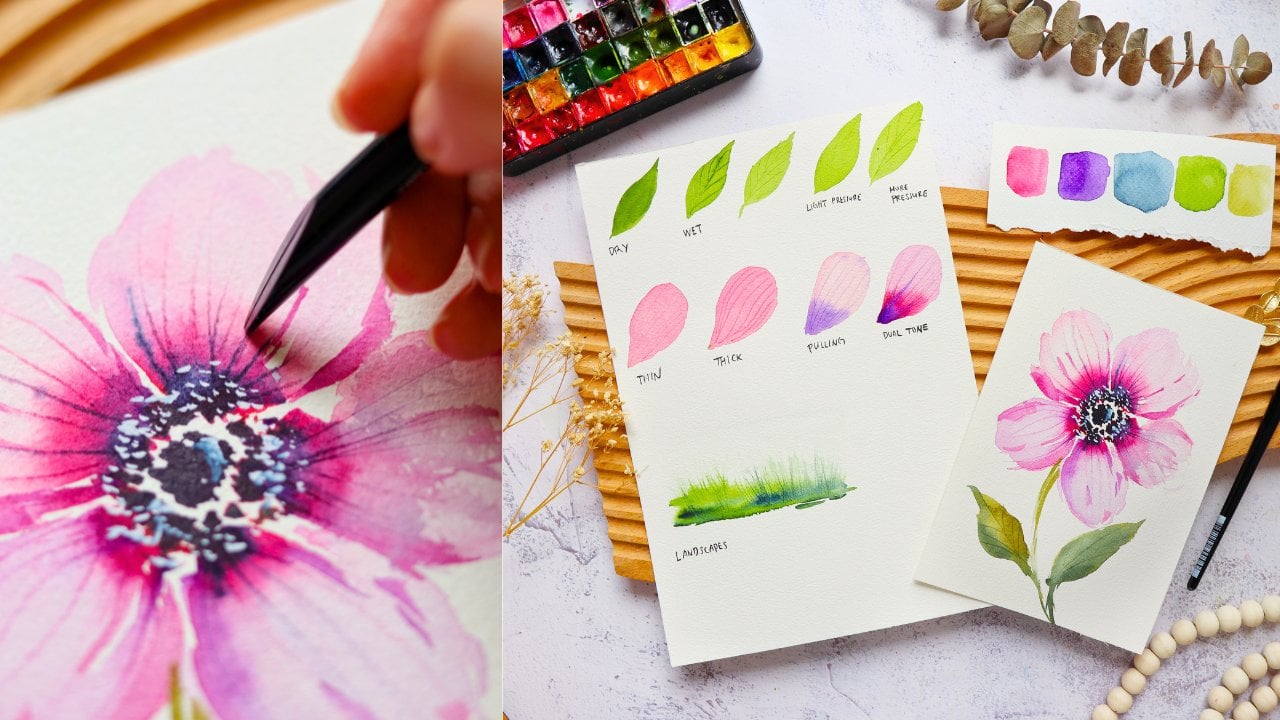
4. Color Swatching: So before we start, let's do some colors watching of the palette that
we will use today. So when I did the color
palette for this wreath, I thought of a summer palette, and I wanted some
yellows and oranges. So I'm missing
permanent yellow light, and this is yellow orange. And then I usually like a variation of the colors
for the main flowers. Instead of using
just yellow orange, I'm going to use vermilion and also some permanent red to add some depth in the
center of the flower. Next, let's go to the browns. So I have here burnt sienna
and also burnt umber. These are the browns
that I love to add to my green colors to give
it an earthy green tone. And sometimes I also use CPA. All right, let's
go to the greens, and I'm going to start
with the Sap green. That's my favorite green. And then next, let's
add some olive green. So you can actually
skip olive green. You just use sap green and
add some browns to it. And of course, I love indigo. It's going to be there
in my palette always. Next, I'm adding paints gray. The difference
between these two is that indigo has more blue in it. Paints gray is more
of a neutral color. It also looks a little
bit like indigo. Now you can see I'm trying to lift some of the color so
you can see it better. I want this to be a dainty
summer floral wreath, but I don't want it to be too orange or too bold in color. I decided to add some lavender just to make
it look a bit softer. Now let me show you some of the color mixes that we'll
be doing in the project. Here I have a sap green
and I'm mixing it with burnt umber to
give it an earthy tone. I'm going to mix the
other sap greens with different browns. Next, I'm going to
add burnt sienna. And you can see that
this will produce a happier shade compared
to the burnt umber. Next, I'm going to mix
indigo with sap green. It's going to produce a darker
green with a bluish tone. Another option is to add a
sepia to your sap green, which I'm going to show you now, and you'll notice it's
more on the brown side. Still a deeper green. If you have taken my
previous glasses, you probably know these
color mixes already. But in case you're apicular, this is just a great
warm up exercise for you when it comes
to mixing your greens. So I'm going to give you
another tip when it comes to creating a more
harmonious color palette. One tip is to add the color of the main
flower to your greens. I'm going to show you
the final project. So you can see the oranges here. You can add that color to your green shade and use
that as your leaf color. So you'll see now it's going to be more on the
orange green color. It still looks very pretty, and it's going to make the
colors pop up on your wreath. Now, let's just do the color for these white flowers
or these daisies. The easiest way for me is to grab some paints gray
and add a lot of water, just dilute that color. You can see very,
very faint shade, and you can add a
little bit more of that paints gray if you want
it to be more pigmented. This is nice to just play around depends on how deep you
want the color to be. You can try to
practice this as well. So that's it for our
colors watching. It's really important to vary the green colors in a wreath so that it
doesn't look flat. You can see in
this final project that we will be painting. You can see some
movement and you can see some depth because we
added different green colors. Now let's move on
to the next video.
5. Small Round Brush Demo: Okay, let's grab our
small round brush and paint some leaf exercises. I have here some green paint, use any color that you
have in your palette. And you can see right here, you have a nice pointy tip. You're going to hold
the brush right here a little bit closer
to the bristles. And going to paint
some thin line. You can see it's a
nice hair line stroke. And then we're just going
to paint some leaves, just slowly press and then
lift towards the end. You can even drag your brush
to create an elongated leaf. And with this brush
because it's small, you can easily create
a nice wispy stroke. Let's try it again in a more close up version
so you can see it better. Let's start again
with the tip of the brush and slow de
press and then lift. And you can see that it's just
so effortless to do this. This is the magic of a
size two round brush. You can really create some nice small leaves that will add some light and
airy touch to your painting. Just try to play
around with the brush. You can paint it in
different angles. You can paint leaves that are detached from the main stem. When you're using
a smaller brush, you will most
likely have to hold it near the bristles
to gain more control. Usually when you want
to add some details, we hold our brush
near the bristles. Again, that is to gain more
control for the brush. When you're using
a smaller brush, you will also likely
dip your brush in the palette more often because it cannot hold a lot of water. Using the tip of the brush, you can just easily create
these nice thin lines, and then just add a little
bit of pressure and you'll be able to create
some smaller leaves. You can see here I'm just playing around with the pressure and also dragging the
tip of the stroke. That I have that
nice elongated tip. L et's grab some more paint
and just play around, dance with our brush, create some nice movement, do some wavy strokes
using this brush, and try to get to know your small round brush to make it easier to move on the paper. If you're wondering what's
the difference between a size two and the size four
round brush, here it is. I have here my size
four round brush. You can see that it is
noticeably bigger than size two. Let's try to paint using
this size four round brush. You'll notice that we
are painting larger size of leaf compared to the
size two round brush. But even if I'm
using a size four, I can still try to manipulate my brush and paint
some tiny leaves. But you will notice that the effect is a
little bit different. With the size two round
brush, you can see, the strokes are more wispy, and it has a different movement. I'm pretty sure you
can notice it here. Yeah, I think we can move on to the next video to paint
some botanical elements.
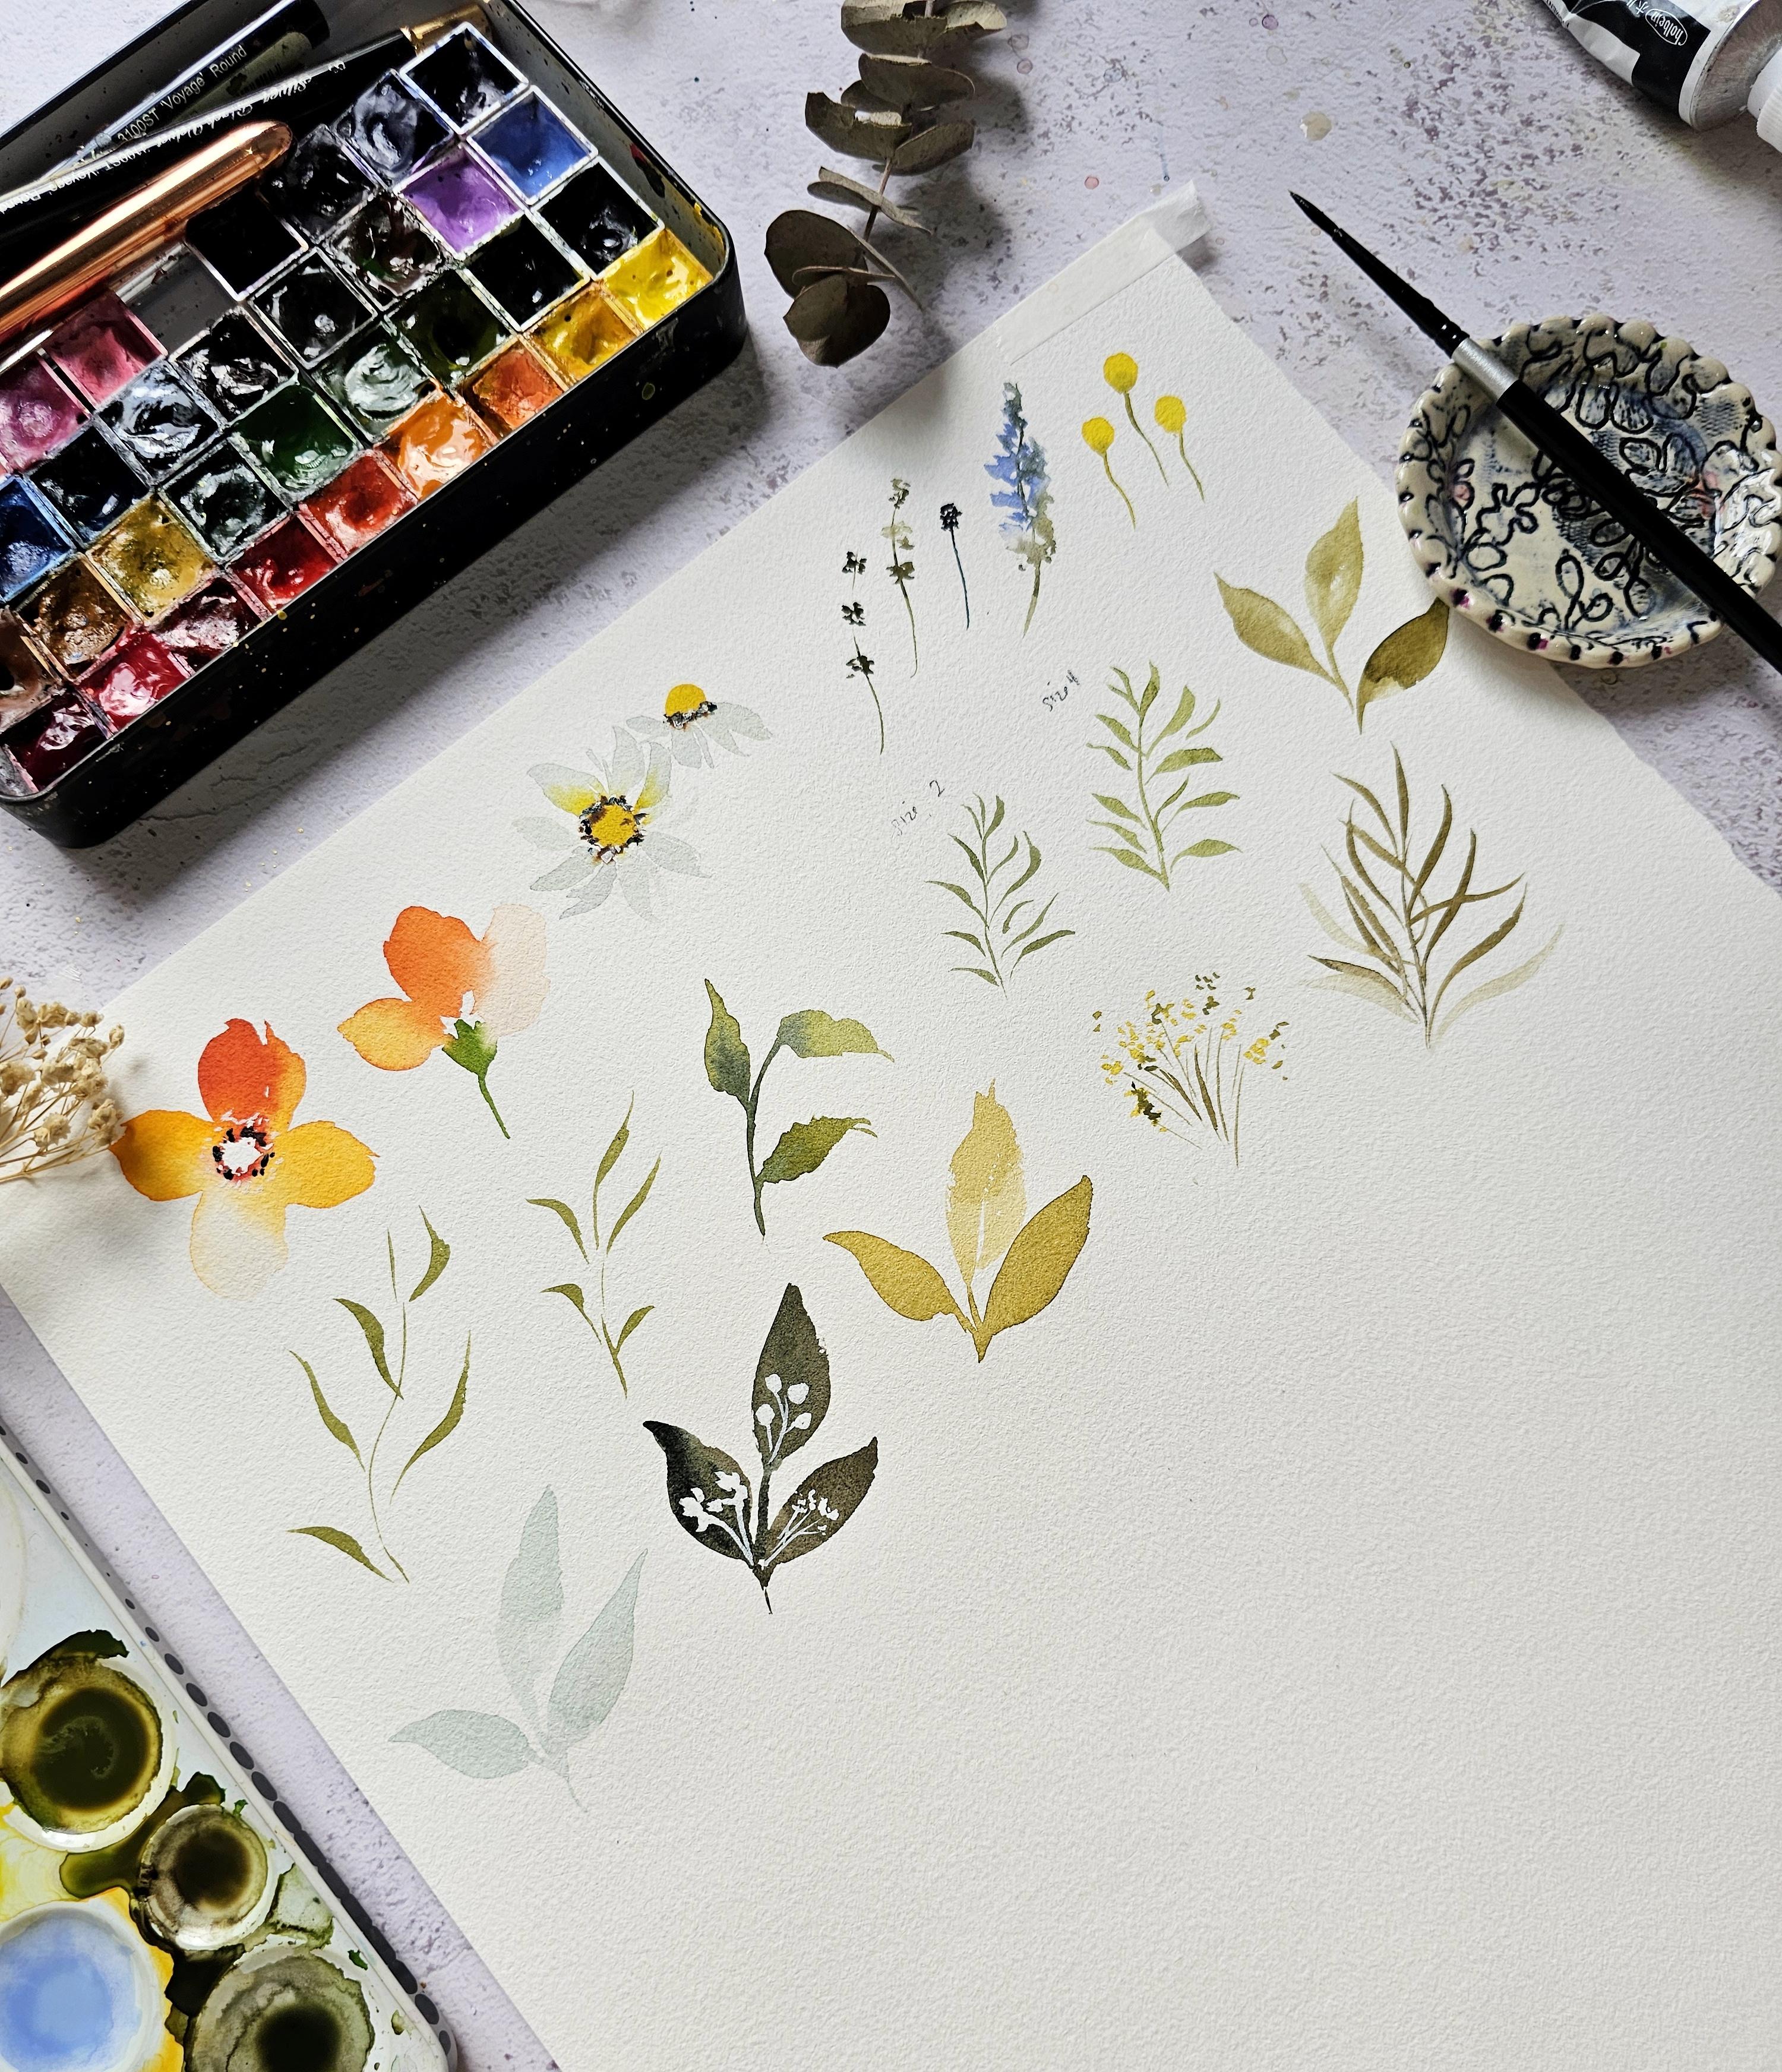
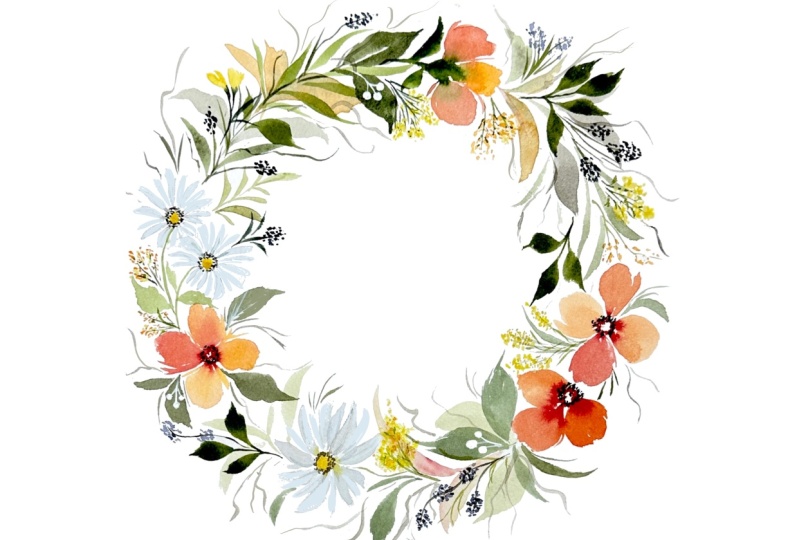
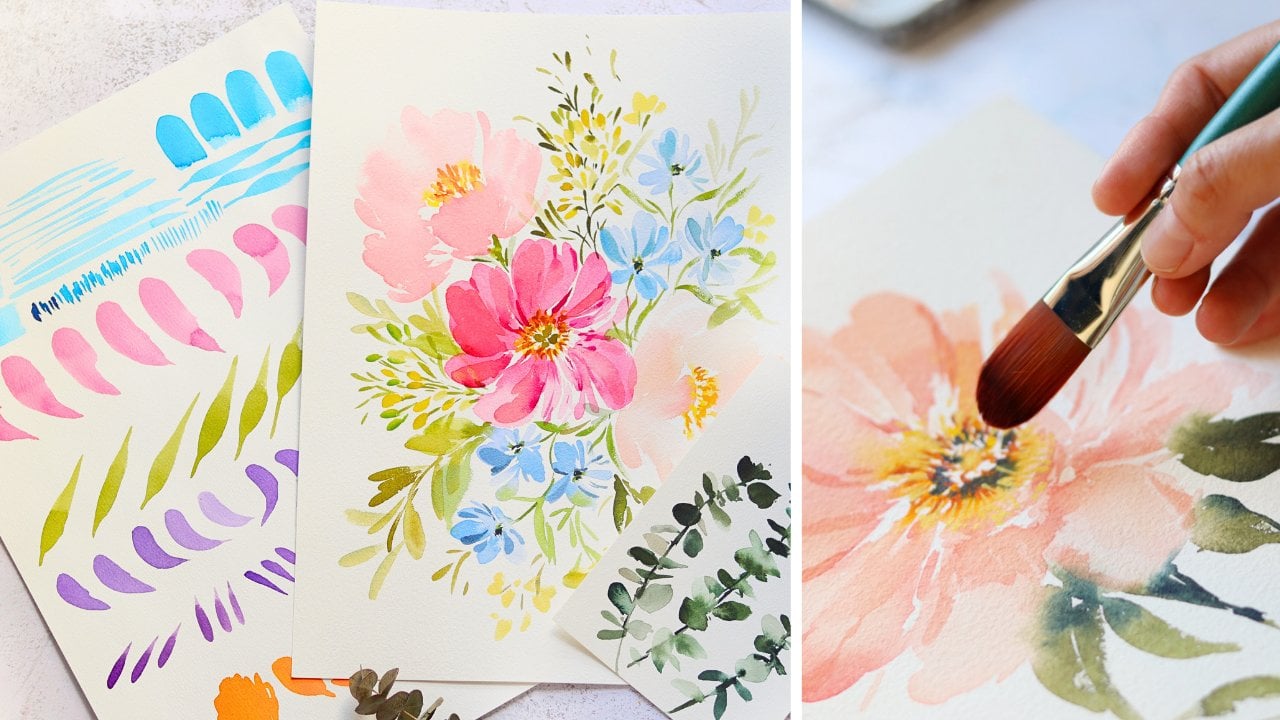
6. Botanical Element: In this lesson, we
are going to paint the different botanical
elements that you can see here in our final project. So we are going to combine all of them into this
beautiful dainty wreath. And let's start with some
of the main flowers. So these are still going
to be smaller flowers, and I'm just going to use this size six brush,
but you can use size. I'm going to start with
the yellow orange. Let's rinse our brush
and grab vermilion. Usually like using two colors for a flower so that
it doesn't look flat, and then let's just
paint the petals. So this is just a simple
four petal flower, so just lightly press your brush and just
move it up and down. I'm going to grab vermilion
for the other petal. So I'm just going to slowly
fill in this petal shape, then rinse my brush. Next, I'm going to
paint the petal using just water and let the colors
bleed into this petal. Now it's looking really good, and we can just try to adjust the shape of the petals
while it's still wet. Now, if this is optional, we can grab permanent red and just blot out
the excess moisture and add this to the center
of the flower again, while this is still wet. The reason why we want to blot
out the excess moisture is because we want the pigment to be concentrated
in the center, we don't want it to
move around the petal. Let's paint another flower. This one is on its side. Let's just paint three
petals beside each other. And on the last petal,
I'm using just water and just letting the colors
bleed into that petal. All right. Now let's
grab some green. An green will do. And we
are just going to paint the base of this flower and just connect them all
into this green base. Okay, so we're done
with our flowers. Let's move on to
this daisy flower. I'm just going to show you. We're going to
paint this flower. I'm going to start with
the yellow center. You can grab permanent
yellow light or any yellow in your palette. So you can see I'm really mixing a thick mixture here of paint. I don't want it
to be too watery. So let's just draw some circles. So this is going
to be top facing. It's going to be a circle. And if you want it
to be side facing, you can draw a half circle. Next, let's paint the
petals of this daisy. I am going to use
this smaller brush, is a size four round brush, and let's grab paints gray. What we need to do is we
need to add a lot of water. This is going to serve
as our white petals. That's why we need to really add more water because we don't
want this to be too dark. And there are many ways to
create a neutral color, but this is one of my cheats. I use paints gray, and I think it's the
easiest thing to do. So now I am just painting some loose petals all around this round shape or this center. And you can see that
the yellow center is still a little bit wet, so I'm trying to
avoid touching that. What you can also do is
to wait for it to dry before you add these petals. But of course, sometimes you
get impatient, just like me. I will try to still
paint the petals, even if the center is wet, I'll just try to avoid touching the yellow part so that it doesn't bleed too
much into the petals. Just try to move
your brush around and paint some thin strokes, mix with some broad strokes
so that it has more movement. You can just try to vary the
pressure in each stroke. It's looking really good. Now we can add some definition. I'm going to grab
this burnt umber. You can use sepia
and I'm going to put some small dots all
around this yellow center. So make sure that you blot
your brush in a tissue paper. You don't want a lot of moisture
in your brush right now. You want it to be a
little bit dry so that the paint will be
concentrated where you put it. Now let's move on to our greens. I just put some sap
green on my palette. Now I'm mixing burnt
umber and sap green. Then let's rinse our brush. Now I'm grabbing burnt sienna and mixing it with the
sap green on my palette. And then we can grab
some more sap green here and mix it with sepia. What I'm doing is I'm preparing
different shades of green because we want to vary the colors in our
fiddlers and our leaves. Now I'm using the
size two round brush. Let's start with
a simple filler. I'm using Sap green with sepia. Actually, you can use any dark green color in your palette. You don't have to
follow what I'm using. I'm going to start
with a very thin line. Then we're going to
put some small dots using the tip of our brush. This is really easy to do when
you're using a small brush like a size two round
brush. Let's do it again. You can see I did put
spaces in between these small dots or the
small cluster of dots. You can vary it by
rinsing your brush. You can see some of
them are lighter. Some of the clusters are
lighter, some are darker. So you can also use indigo or sepia or paints
gray or even just black and just try to vary it. I'm grabbing indigo. So I'm just showing you
what it looks like. Let's move on to another filler, so this is a lavender. And I'm going to start
with a thin line again. Using the tip of the brush
to create your thin stroke. It can be a broken line
like what I did here. Then grab lavender. And I'm going to start at
the top and just slightly tap your brush to create
the small strokes. Then we're going to
go all the way down. You can leave some spaces
in between your strokes or add some diluted green
to the lavender. Right here, I'm just
using water from my brush to slightly blur
out some of the edges. If you want to do
something more expressive, this is a technique that
you can do in your florels. All right, so I want
something darker. I grab a little bit
of that indigo, but any dark color
you can use it. Another filler that
I love to add would be the small little balls. So I usually do this
in different color, sometimes it's yellow,
sometimes it's green. So let's do some
yellow ones here. So just paint a little ball. Right there and you can add some more depends on
how many you like, but it's a nice way to add a
pop of color to your wreath. It's also a nice way
to add some contrast. If you want something
dark in your wreath, you just add this filler
in a darker color. I also think it makes the
wreath look more dainty. Now I'm just picking
up the extra green that bled into the yellow. I'm using a clean brush
and trying to absorb the excess paint.
That looks great. All right, so let's move
on to our green leaves. You can see all these
nice wispy leaves that makes the wreath
look very dainty. Let's try to
practice that first. You can see I'm using
a size two round brush and I'm going to hold it a
little bit near the bristles. Grab any green color. This is sap green
with burn Ciena. So just paint a thin line, it can be a curvy
line and then just try to press and
drag your brush. You can also try to paint
it in different directions. So try to create quick
strokes and then try to lift your stroke towards the end so that you have
that nice pointy tip. So I think it's all about the movement of
your hand as well. And right now, I'm
just going to do some wiggly strokes to
create a bigger leaf. So even if you're using
a small round brush, you can still paint
a medium sized leaf. But it just takes a
little bit more effort. So as you can see
trying to wiggle my brush to create
that jagged edge. And then grab a darker color and paint it towards the
base of the leaves, just to add some depth. Now, let me show you again
the difference between the size two and the
size four round brush. You can see with the size two, it's really effortless to
paint thin wispy strokes. It almost feels like
the brush is just floating on the
paper and you can create these hairline strokes. Okay, so I'm doing this up close so that you can
really see the difference. Let's move on to our
size four round brush. This is a juicier brush. I'm going to try to paint a really thin line and just paint some thin
strokes as well. You can see the leaves are
a little bit fatter and not as wispy or as a thin as
the size two round brush. But definitely, you can still work with a size
four round brush. So the main tip when it comes to painting these
wispy leaves is to really vary the pressure in your stroke and hold
your brush lightly. All right, now let's just paint some more leaves using our
size four round brush. So this is my go two leaves, and we're also going to
use this in our wreath. You can try to vary
the colors as well. Now, let me show you
a technique that I do when I make or I paint wreaths. I usually add a bluish
leaf that's really, really light in color. And I'm using here
Prussian blue with a little bit of green.
An green will do. As long as when you
mix the proportion, it should be leaning
towards the blue color. So I'm just going to
paint the leaves here. You can see how light
it is on the paper. It's almost transparent. This is what it looks
like in our project. So these are the
light blue leaves, and it looks like shadow
leaves in the background. It's going to make your wreath
look a little bit fuller, but it's not overwhelming. It's not a bold color. And another tip I could give when it comes to
painting a wreath is that you can add some darker
leaves to create more depth. So this is sap green with CPA. You can see that it's
noticeably a darker green compared to
the other greens that we painted earlier. So I'm just painting some
simple leaves using two, three strokes to create them. So you don't really
need to paint leaves, using just one stroke. You can build the leaf shape. Something that we
will do in our wreath is that we will add
the flower color. In this case, it's yellow, orange to the green paint
that we have in our palette. And that is to create a better color balance in
our wreath. All right. So the reason why
I wanted to break down all of the
elements is because I wanted you to be
more familiar before you start painting the project so that you can
practice beforehand. So these are the
leaves with orange. So I really love it. It just creates a beautiful
characteristic to the wreath. Let me go back to our
size two round brush. I forgot to add another
filler for practice. Just paint a bunch of
thin lines like this, and then you can grab any
color for the flower. I'm going to use
permanent yellow light. You can add a little bit of gouache to make it more opaque. And then just paint
some small dots, tap your brush onto the paper. And this is going to look
like they are small flowers. They're like a spray
of small flowers. I think this is one
of the fillers that will make your wreath
look very dainty. So I think it's all about adding these small details using
a size two round brush. If you don't want yellow, you can use other colors as well. You can even add a
little bit of green just to add more depth
and more contrast. You can see I'm going to put
a small dot right there. That's a little bit detached. It's going to look very
pretty in a wreath. Another classic example of a dainty leaf are these
elongated leaves. Drag your brush, you
can create a wavy line, and this is going to look great in any floral arrangement. I usually try to do
overlapping leaves, as you can see right here, and then sometimes I rinse my brush to paint a
lighter colored leaf. So, all the leaves are dry. Let's add some details that we will also be using in
our final project. So right here, I have white gouache and I'm using
a size two round brush. So you can add some
details like veins. You can add some small
bunch of flowers, just like what I'm doing here. I'm painting some small flowers. And then I'm putting it on top of these dark colored
leaves so that it will pop up. You can also put
some small dots, you can put some berries. There are so many
things that you can do with a white gage. Just make sure that
the background is dark enough so that the
white will show up. Because if I paint on a really
light colored background, you won't see the details
of the white gouache. We also add some small dots
on top of this daisy flowers. And for some contrast, let's grab some burnt umber
or you can use CPA or any dark color and add some small dots in the
center of the flowers. And that's going to make these
flowers pop up even more. So I think when it comes
to painting wreaths, it's all about layering and just adding all
these tiny details. All right, so we are done. Let's now move on to
painting our final project.
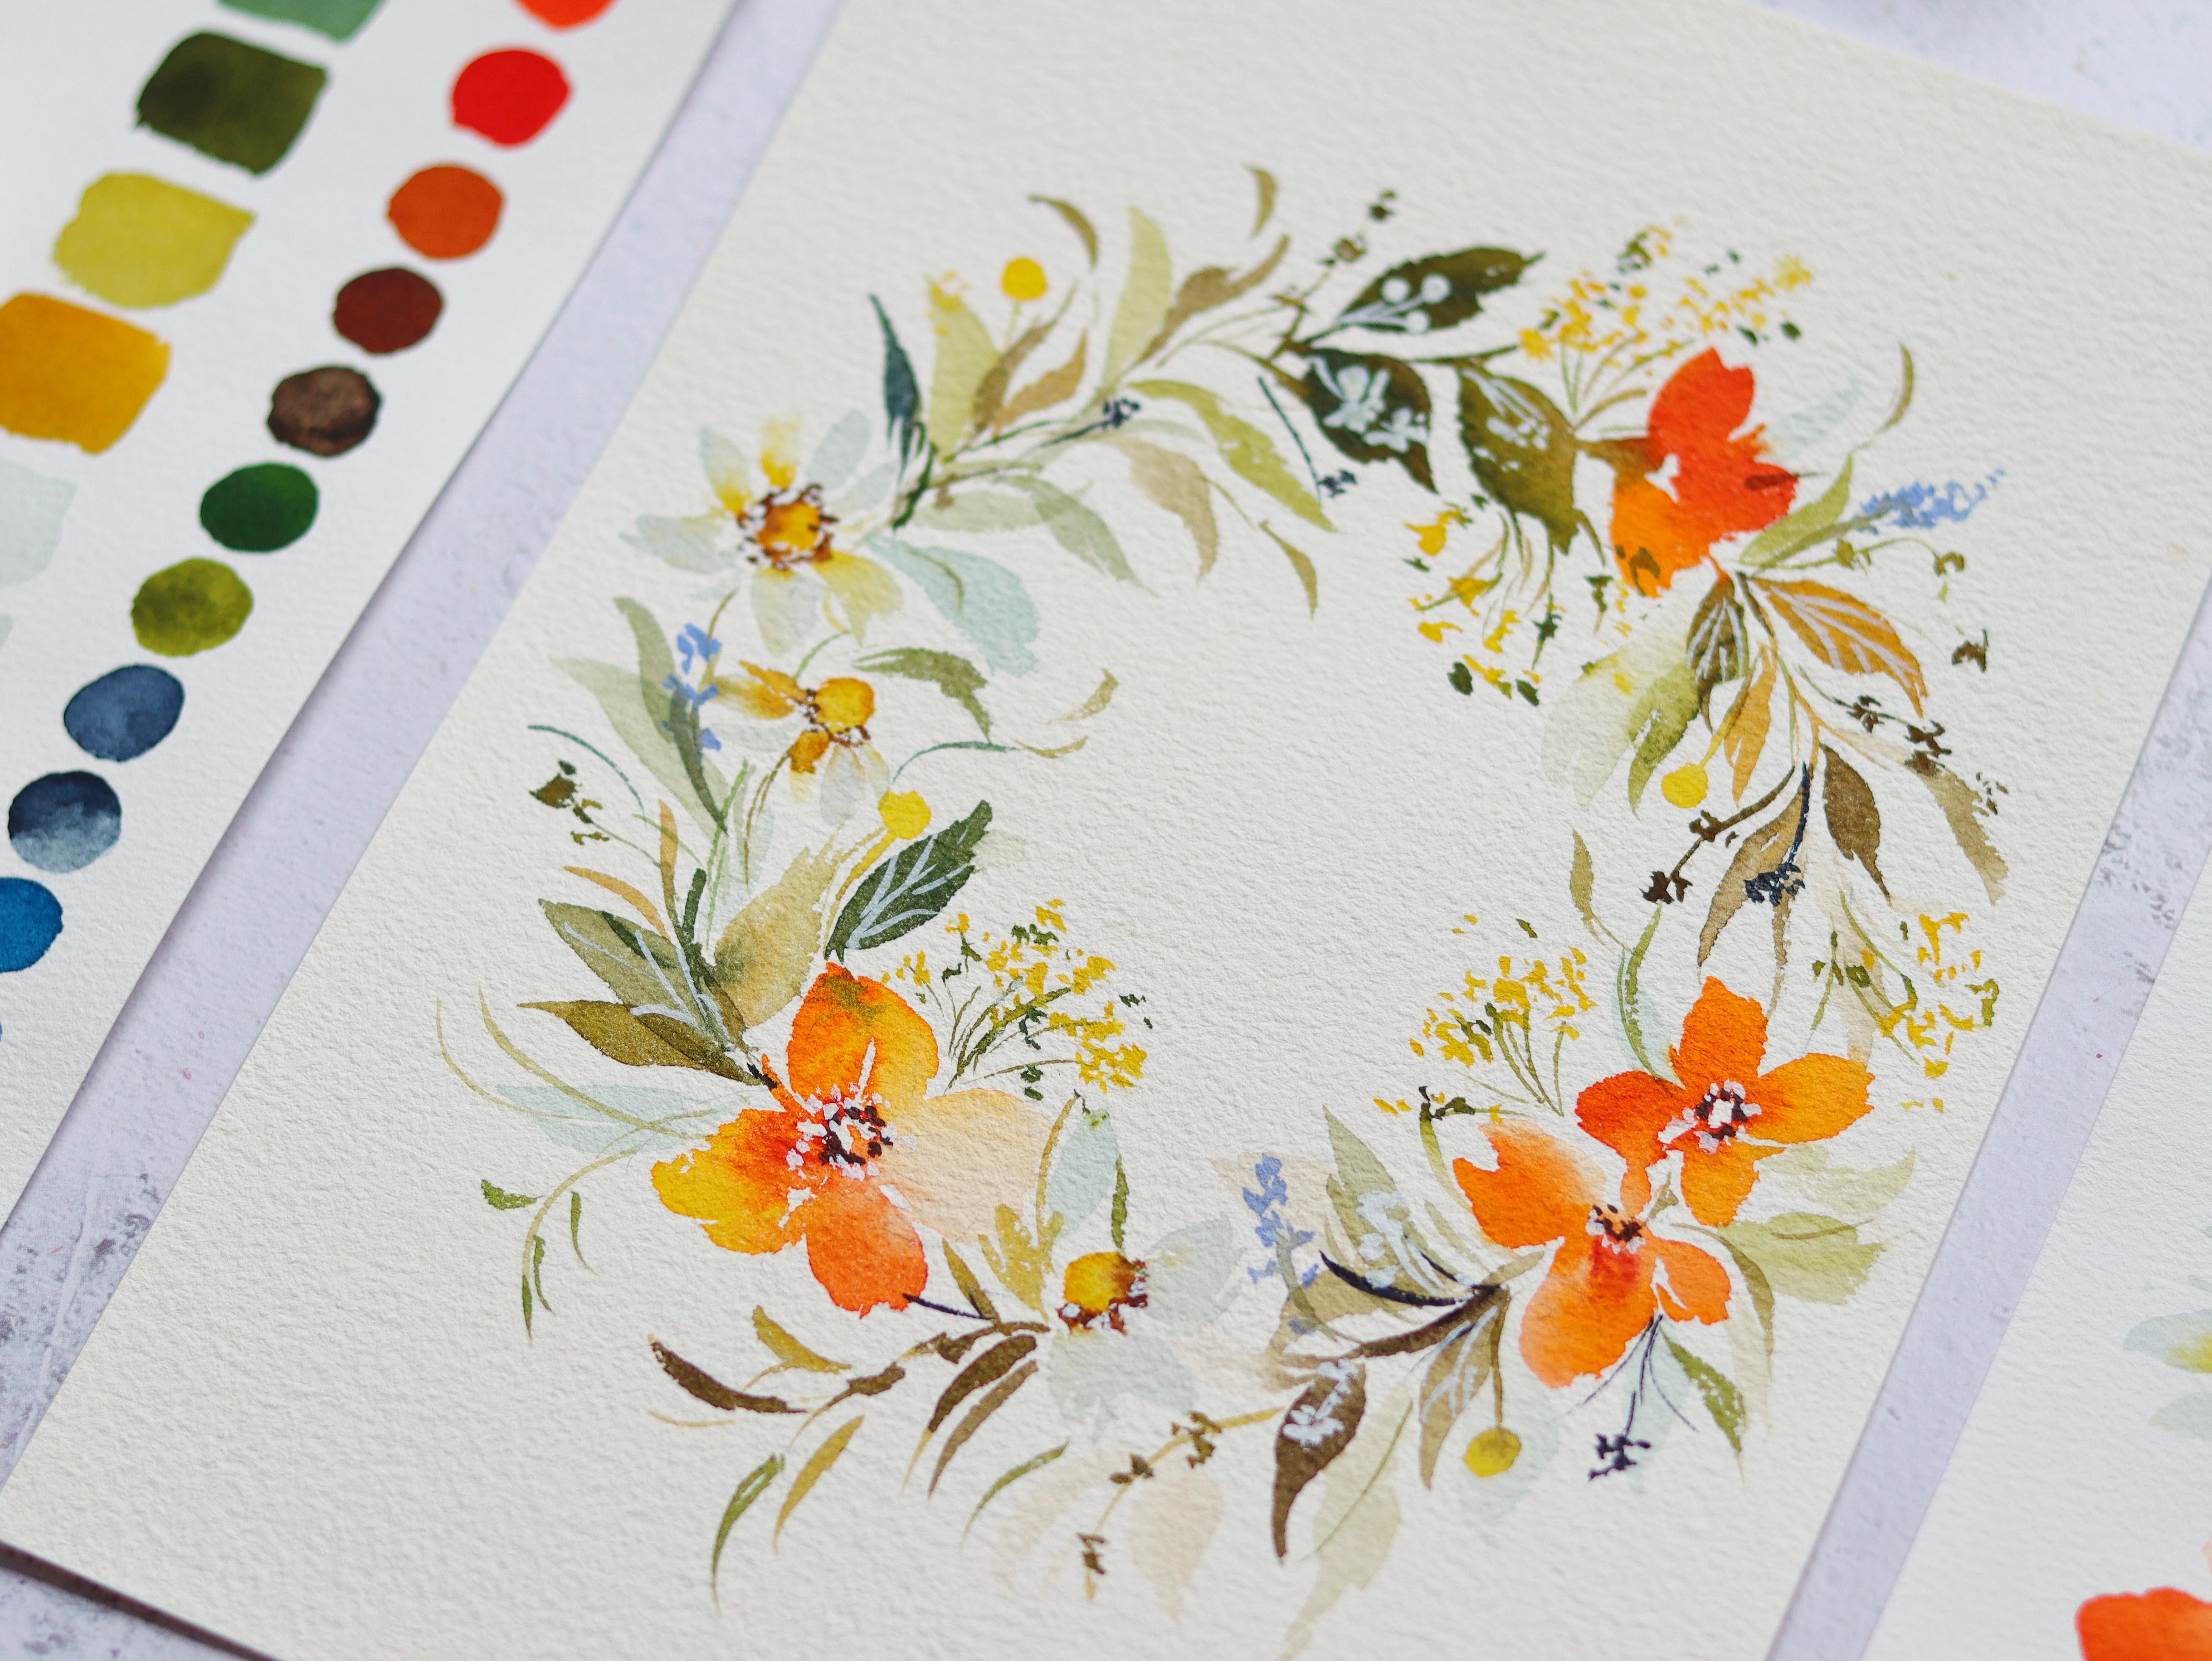
7. Final Project: Dainty Wreath: When I was looking for reference
photos for this project, I looked for different
books with some nice, dainty details, small leaves, small flowers to finally
form this wreath. So I tried to grab different elements from
different reference photos. So let's start by drawing a circle as a guide
for our wreath. I'm using a regular pencil. Just make sure that
you draw lightly because once you paint
on top of the pencil, you won't be able to
erase it anymore. Okay. I'm going to start
with the main flowers. Let's grab some yellow orange
and also some vermilion. So I usually like preparing
the colors on my palette. Once I have determined
what I want to use. It's definitely easier to
create your own painting. Once you have determined the
color palette that you want. So in this case, I wanted a summer palette that is
not too overwhelming. I know I wanted some
yellows and oranges, but I don't want it
to pop off the page. I don't want a
really bold color. Just want it to look dainty. So right here, I'm
going to paint the four petal flower
that we practiced. Make sure to leave a
space in the center. Then next, let's grab our red. This is permanent red, and just try to concentrate
the color in the center. You can dab your brush
in a tissue paper so that it doesn't bleed too
much around the petals. Now let's grab our
yellows for our daisies, and I'm going to just add a little bit of permanent yellow deep, but
that's optional. If you want it warmer, you add permanent yellow, deep, and then let's just
paint an oval shape here and maybe another one
that going to across it, but definitely not in a single straight line so that
it doesn't look too stiff. Next, let's grab
our paints gray. You can see this
is very diluted, and we're going to use
that for the petals. I'm using a size
for round brush, and we're just going to
be careful not to touch the yellow because I don't want it to bleed too
much into the petals. You can try to vary the stroke in each petal so that you
have a different shape. And then right here, this is a flower that
is facing on its side. So I'm just painting
all the petals towards the bottom half. For the second flower on top, this is going to
be front facing. I'm going to paint the petals
all around the circle. You can see, I'm trying to
also leave spaces in between my petals and trying to move the petals in
different directions. I'm just going to
dab my brush in a tissue paper because
it's a little bit wet, and I just wanted to blur out some of the
petals because it looks too dark here and
also has a bit more yellow, so I want to lift that color. So I'm trying to
show you guys also how to troubleshoot
and not going to delete some of this
footage because I want to show you how
to fix some problems. Right here, I'm
using a burnt umber. Just dab your brush in a tissue paper and then
add some small dots. You can see it's still
spreading too much. So I need to blot
out my brush again. And I'm going to grab
some more paint. In this case, you want
your paint mixture to be quite thick so that it doesn't
move around on the paper. So just keep blotting
your brush in the tissue paper if you feel
like it's a little bit wet. I'm going to mix the
greens in my palette. So this is sap green
with burnt umber. Next, let's mix sap green
with some burnt sienna. So I just like all the greens prepared ahead of
time before I paint. I'm also using sap
green with some indigo. Let's rinse our brush
and grab some green. This is sap green
with burnt umber. And then I'm going
to paint the stems, I'm going to try
and connect that to this orange flower and
just paint some leaves. Let's start to add
different greens, grab the greens that you
have mixed in your palette, and going to vary
the strokes as well. Some are going to
be thin leaves. Some are broad leaves. I'm going to start adding
these details in between the two flowers that we
did. It's looking good. I think we can try to move around using a size
two round brush. I'm just going to grab some more green and paint some thin lines. We're going to work
our way up going to the right to form
the top of this wreath. I'm just trying to paint
some real thin leaves. You can try to wiggle your brush to create
some wavy leaves. I usually use the
size brush to also add some stems that
are sticking out. Right here at the top, I'm
going to paint a larger leaf and you'll notice that it's
quite dark. That's okay. It's going to look a little bit awkward now, but later on, we're going to add some white
gouache to those areas. We are intentionally adding
some really dark leaves. Let's move on to another flower. This is a side facing flower, and I'm using the
color vermilion. You can also use yellow orange. I'm painting three petals, and then we're going to paint the base and try to connect
all the petals together. You'll also notice
that this flower is diagonally across the
first one that we painted. I added some orange there so that it looks
a little bit more balanced because the bottom feels heavy because
of the orange color. Now we want to bring
some of that weight up. I added some orange in the
upper part of this wreath. All right. I just mixed
green with some orange, and you can see the variation
in the leaves right there. It's really very beautiful when you add different
shades of green. And now I'm using
my size to round brush to just extend the leaves, create some elongated ones. Now I'm adding some
fillers, adding some dots. Okay Let's see it more up close. So just add these
small fillers in between the leaves or
in the small gaps. So it's always nice to
look at your painting from afar before you move
on to the next detail. So you can see
here we are almost done finishing up the
main base of this wreath. We are about two thirds done. And I think we can add some
yellow flower right here. This is a yellow orange
color with some vermilion. Again, it's nice to use two colors for the flower so that it doesn't
look too flat. Then you can also
rinse your brush to create a lighter colored petal. And I think we can add one more. But this time it's a flower
that is on its side. So I'm just going to
paint three petals. So it's always nice to vary the angle of the
flowers in a wreath. Some can be front facing, some are side facing, some can be just small buds, and just grab some
permanent red and add it in the center of the
flower to add some them. Now, for the last flower, let's paint a daisy right here. It's going to be side facing. I'm going to grab
my yellow and just paint a dome like shape
or a half circle. Then with a size
two round brush, let's grab some paints gray, and you can see that
this is really diluted. So we want our light
color and just try to press your brush and
then paint some petals. I'm just going to paint
on the lower half of this flower since
this is side facing. I'm also going to
make sure to leave some spaces in
between the petals. Now let's add some depth. I'm going to grab burnt umber. You can see it's a dry
paint mixture here. I'm just going to
put some small dots around the base of
that yellow center. Now, let's fill in this
part with some more leaves. Just going to grab
my green paint here with some brin umber. Let's just paint some leaves. I'm using a size
four round brush, and you can add a darker color
just to make it less flat. And I'm going to add a stem here and add a
couple more leaves. You can even add some yellow or add some
orange to your greens. To add an ay touch
to the wreath. You can add some broken
lines or stems sticking out. And also these leaves that look like they are detached
from the wreath. You can see it's not fully
connected to the stem. There's a space in between them. Now, if you don't have
a size two round brush, you can definitely work with
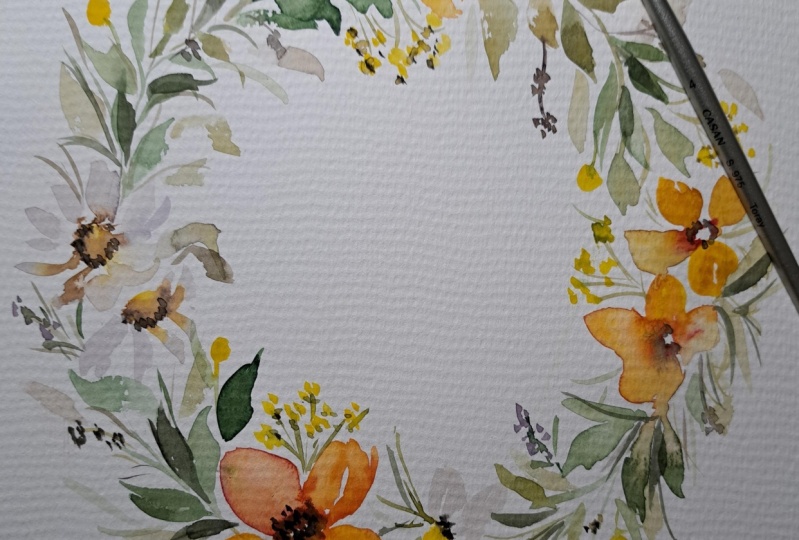
a size four round brush. So at this point, you can see that the wreath still looks a little bit bare, and I did that intentionally because I don't want
to overdo this wreath. So we just want to lay the
base of the wreath first, add some flowers
and a few leaves. Then later on, we are going
to layer this wreath. I'm going back to this
size two round brush. We're going to paint
some thin stems near this orange flower. This is one of the fillers
that we practiced earlier. Now I'm grabbing some
permanent yellow light, and I'm just dabbing my brush, creating these small dots that will look like
they are small flowers. Later on, you will see a huge difference that this
made in the entire wreath. It's going to make
it look more dainty and makes it look lighter. It's looking really good. Now I'm just going
to add some more of these fillers all
over the wreath. You can add some more thin
stems near the main flowers. Adding these small
fillers can help fill in those small gaps and also add a little bit of weight in
different parts of the wreath. Now I'm describing some more yellow and trying to
scatter those dots. You can see that some of
the dots are a little bit further away and they don't look like they're
connected to the stems, and that's going to make
this wreath look very light. You can also use a different
color if you like. Think this is one of
my favorite fillers. I will probably try to
do another version of this painting using just this
filler in different colors. I will also try to give you guys different reference photos that you can use to paint
your own composition, and you can also try to look
for your own photos as well. My aim is to help you
paint your own composition by learning the techniques
from this class or from my other classes
because eventually, I still want you to
find your own style. All right. It's looking
really good and very light, and now I'm going to
add some more fillers. I'm just using my green paint. You can use sap green
or any other color. I'm just adding some small
dots on those stems. When I'm adding these fillers, I like to extend
the stem a little bit further away
from the wreath. Then I add those small dots
towards the tip of the stem. This is a technique that
you can also apply to your floral bucse. Okay. Now we can start to layer
some of the leaves. I'm using a size
four round brush just to create some
fuller leaves. And at this point,
just feel free to use the colors in your
palette to layer the leaves. It can be a darker color
of the base leaves. It can be lighter, or maybe you can add some purple or orange
to your greens. I think we can add some shadow leaves or those
very faint colored leaves. I'm using here, Prussian blue with a little bit of indigo. You can also add a
little bit of green. Just make sure that
it's very diluted. You can see the color
is almost transparent. I'm using this shade to layer on top of the leaves that
I have painted earlier. This is another technique
that you can apply to your style to create a
lighter floral arrangement. Now I'm going to
add some lavender. This is also one of the
easier fillers that you can apply to your paintings, dab your brush and create
this elongated filler. And adding a pastel
color can also help give that dainty
vibe to your paintings. That's why I added the lavender. And as you can
see, I'm trying to add these colors all
around the wreath. I'm trying to distribute it so that it looks
more balanced. All right. So these
daisies are already dry. We're going to add
some more depth by adding a dark color. So this is just sepia. I'm tapping my brush. We can also use
burnt umber as well. We can also continue to add a dark center to
the orange flowers. I'm using a dark color here, but you can also use
red or also brown. When you're painting a
loose style of flowers, it's important to add some definition to the
center of the flower. I like adding this pop of color
by painting some circles. Of course, we're going to
add some stems later on. But I usually like adding
yellows or greenish yellow. Sometimes I use intego if I want to add some
contrast to my painting. But in this case, I still
want this summer vibe. That's why I use yellow instead. I'm just adding these
fillers in between the leaves and I'm trying to scatter them
around the wreath. But of course, don't
add too much or else it will look a
little bit cluttered. You don't want this to
be a very full wreath. You still want it to breathe, which means that we cannot
put so many details. Okay. I'm just going to add some more fillers
that looks like this. I'm just trying to
extend the stems so that it looks a little bit
of detached from the wreath. Right now, I'm
just going to grab some more greens and try to paint some
stems sticking out. Next, let's add our gouache. I'm using white gouache, but you can also use a acritic pen or even
just a poster paint, and we're going to add
some white details. I'm going to add some small
ad the center of this. All right. We can also add some small flowers on
top of the dark leaves. So if you remember, we painted some dark
leaves earlier. And the reason why I
painted darker leaves is also because I wanted to
add some white coach detail. So we can paint
some white berries. We can paint some small flowers, we can put some small dots and even some veins
on the leaves. H. Did you notice the glow up of this wreath, because we added those
small white details. It's a really nice way to add some dimension
to your painting. I'm going in with my
size two round brush, and you can see I'm
holding it towards the end of the brush handle. That's because I
want to create these as that are from the wreath, you can see, I'm just
painting some sm leaves. Holding the brush
towards the end of the handle because I want
my strokes to be loose. I'm just going to
add some more leaves and make sure that they're
very small and thin. I also want it to be facing
in different directions. That's going to give it a nice light and airy touch
to your painting. You can definitely add some more random
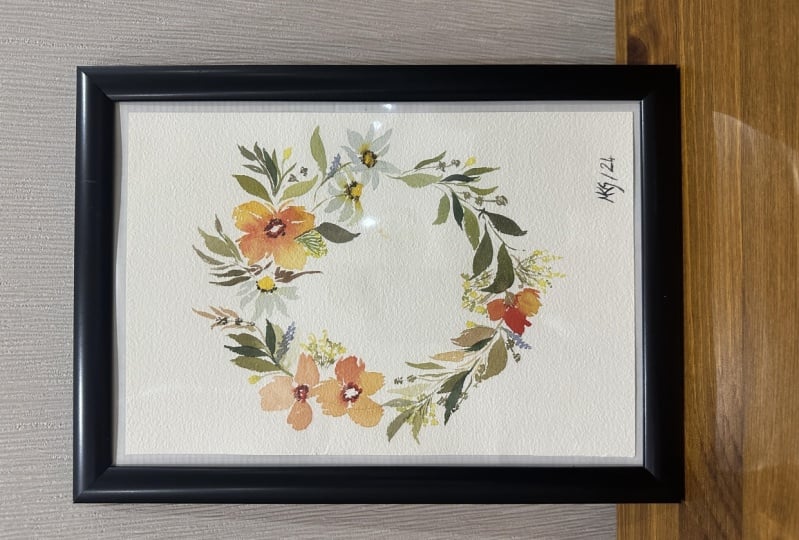
leaves sticking out. Okay, so I think we're done. Congratulations for
finishing your project. I hope that you enjoyed it, and now let's move on to the
conclusion of this class.
8. Lets Wrap Up: We have reached the
end of the class. Thank you so much for watching. To sum up what we have learned. We practice some brush drop
rills, make some colors, and learn to paint delicate botanical elements
using a small brush. For the project, you may follow
the wreath in our class, or you may create
your own arrangement. I look forward to
seeing your projects in the project gallery
section of the class. Simply take a photo
and upload it there. So under the Projects
and Resources Tab, Hit Create Project
to share your work. I'm excited to offer feedback
and words of encouragement. Feel free to also tag me on Instagram using this hashtag
so I can see your work. VA class review would
mean a lot to me, and we will also help
others discover how this class help you in
your watercolor journey. If you want to learn more
about watercolor florals, you may check out my other
classes here on Skillshare. So that's a rap. I'll see
you in my next class. Don't forget to hit
that follow button so that you'll be notified every
time I have a new class, an update or a new
giveaway. All right, so by
 Joly Poa, Watercolor Artist