Transcripts
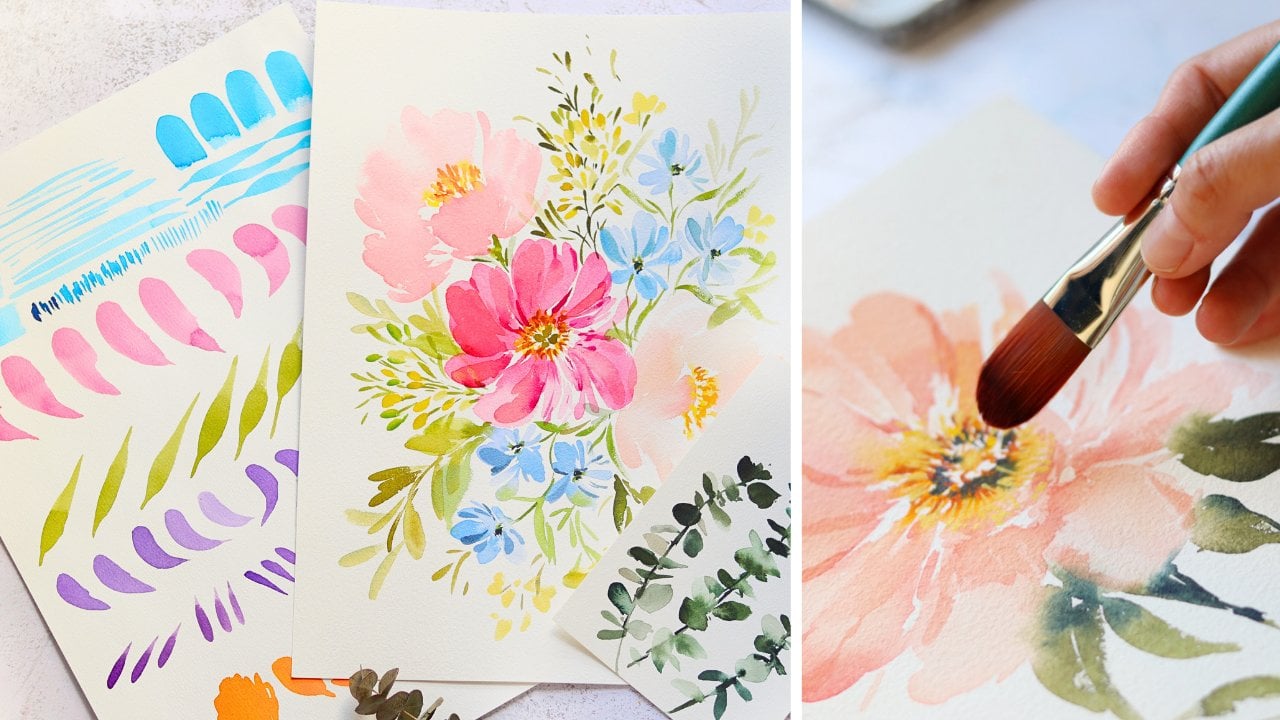
1. About the Class: There are many ways to ad
texture to your painting, and one of them is the
scratching technique. It's a creative approach to
bring depth to leaves and petals by using a
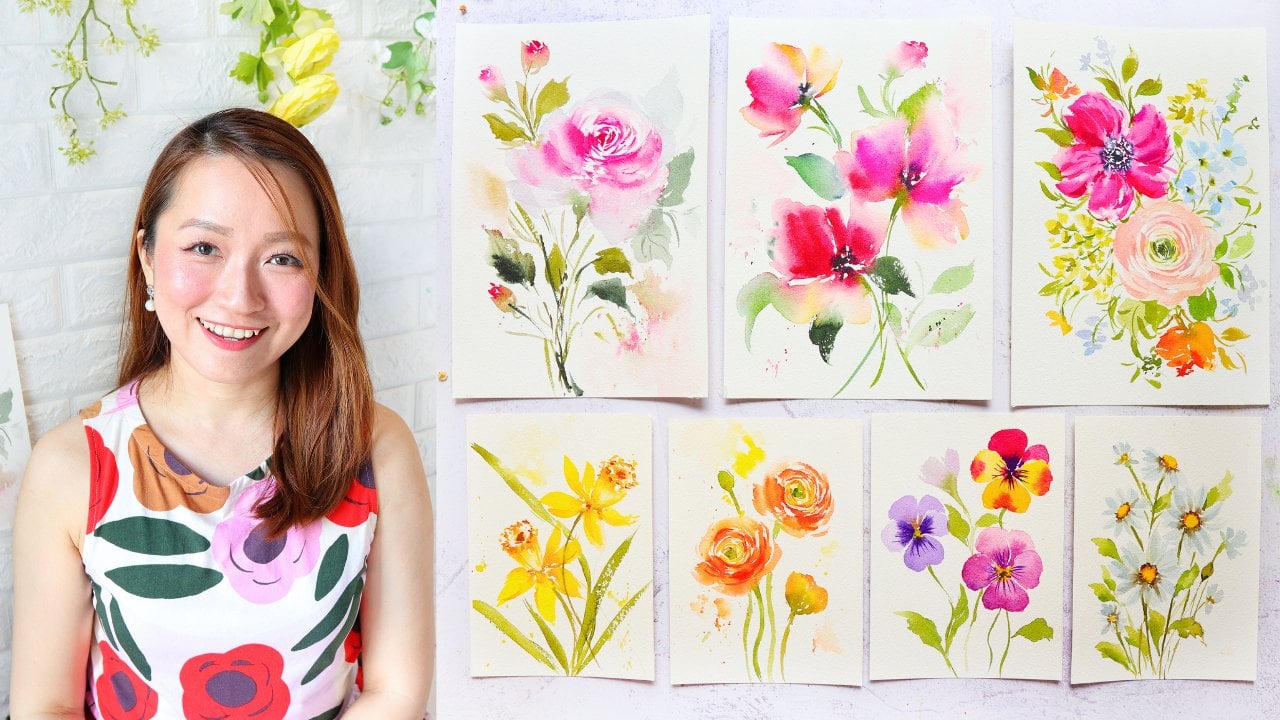
sharp edge object to scratch the papers surface, creating natural looking veins. Hi. My name is Jolly, and I'm a watercolor artist, content creator and a
scale share top teacher. I have been painting
for about a decade now, and my art revolves around painting watercolor
flowers in a loose style. One of my goals in
teaching is to simplify challenging techniques into
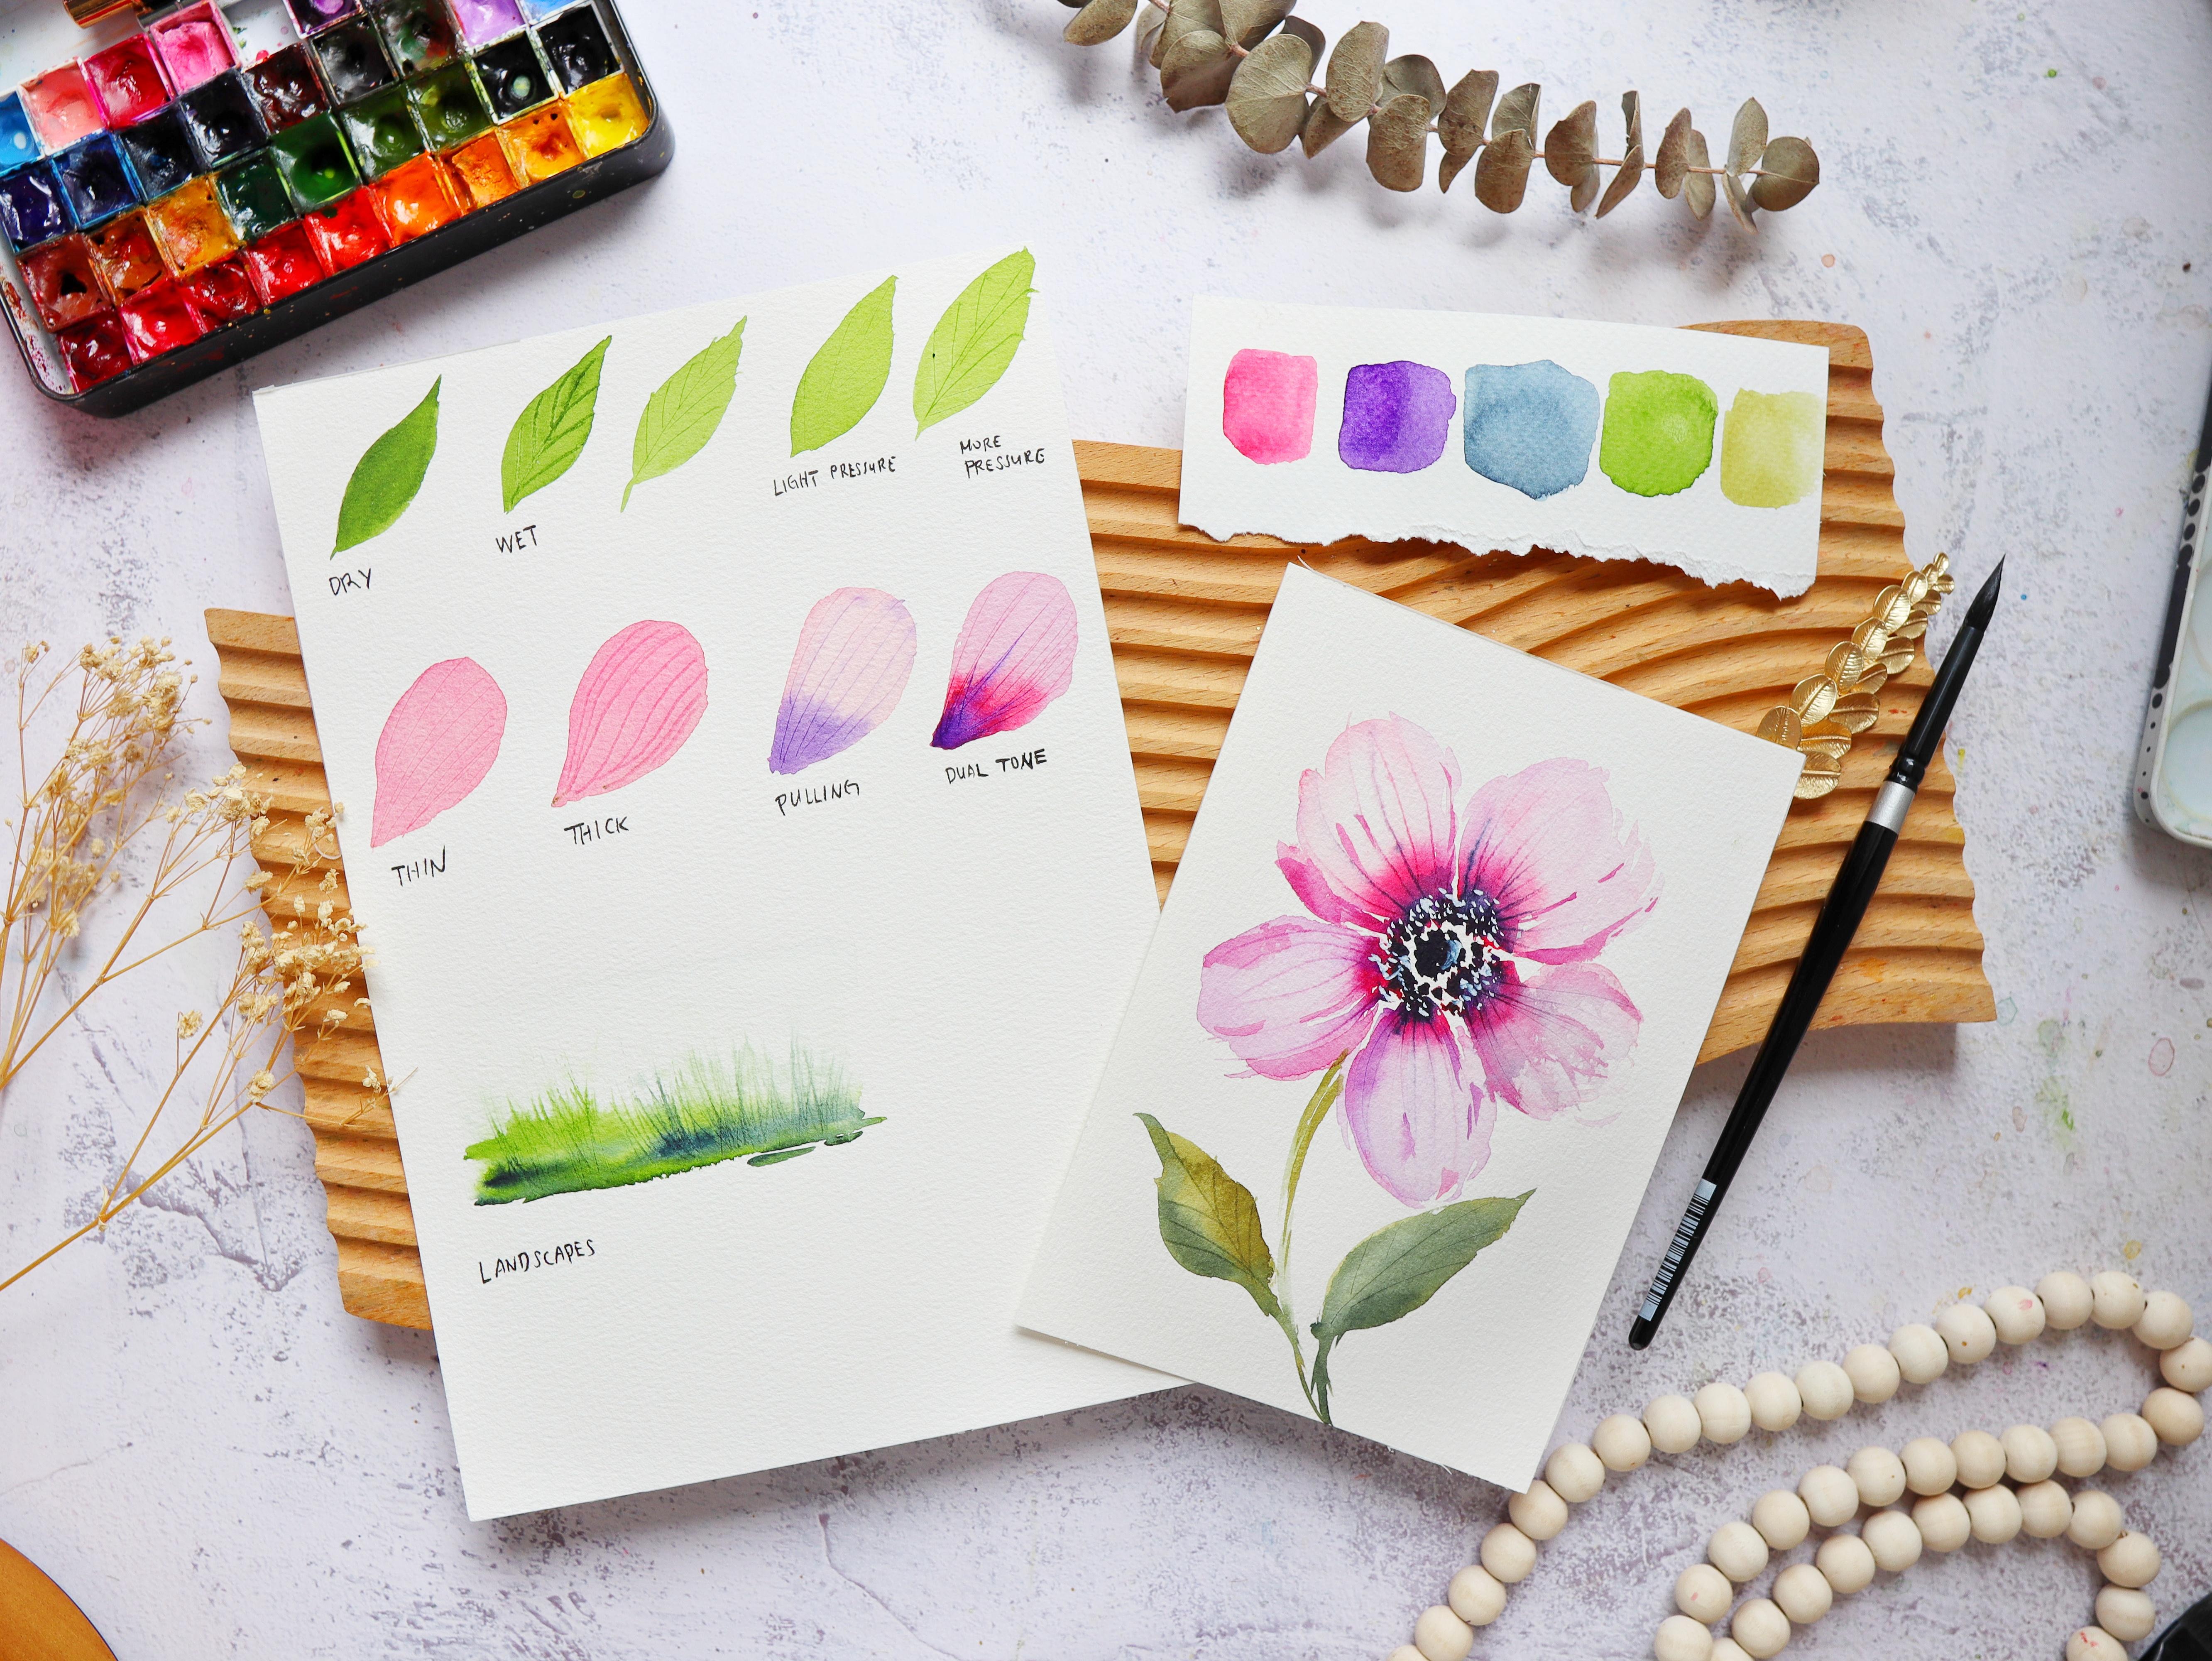
an easy step by step process. In this quick watercolor class, we'll begin by exploring various tools you can
use for this technique from a spatula to the handle of a brush or even
an old credit card. Essentially, any object
with a sharp edge can work. That you'll learn the
basics of adding veins, such as how to vary the
pressure of the stroke, and how to pull the
color within the petal. These techniques are
perfect for adding that extra bit of detail and
interest to your paintings. For our final
project we'll apply these skills to a simple yet beautiful
floral composition, giving you the
chance to practice and perfect your vein
creating technique. Aside from botanicals, you can also add this texture
and landscapes, such as adding grasses. Whether you're a season
artist or just starting out this technique is a great
addition to your toolkit. All right, so let's get started.
2. Class Overview: Welcome to the class overview, so this is going to be a
quick watercolor glass focusing on just one technique, and I'm really excited
for you to try this out. We don't really need a special
tool in creating the vase, and yet we can create
something really beautiful. So first, we will go
through the materials. You can use any
sharp edge object, but not too sharp like a knife that it can
cut into the paper. So we just want to really just scratch the top
part of the paper. So I'm going to share tips
on how to do these vases. And then we will
apply these skills to a flower that looks
like an anemone flower. So the goal of this class
is to help you bring in another scale or
another technique that you can apply to your
own personnel style. All right, so let's move
on to the next video.
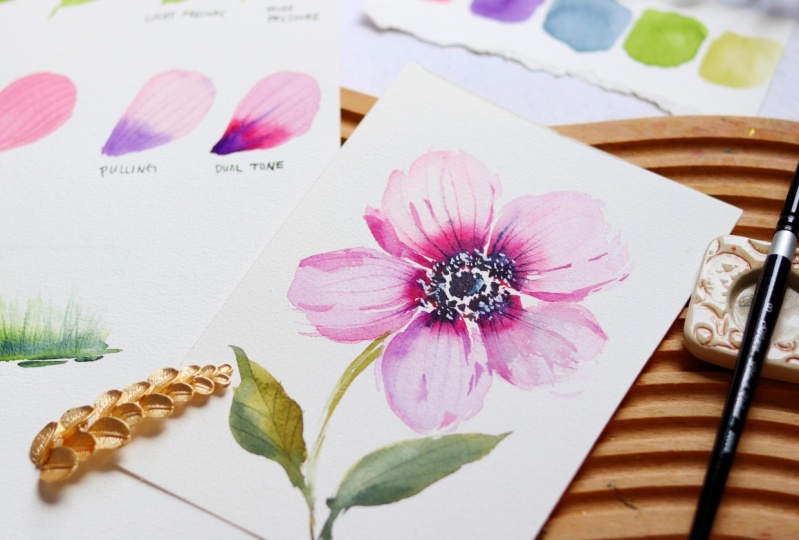
3. Materials and Tools for Adding Veins: Let's talk about the tools
that we need for this class. I'm going to start with the veining tools
that you can use. These are regular items you
can see in your household. The first one is
a metal spatula. So the metal spatula actually
comes in different shapes. You can check out what
you have at home, and you can see that
nice thin metal tip. It's a great way to
add those thin veins. Next, you can also use the other end of the
handle of your brush. You can see it's a little bit pointy towards the
end of this tip. You can also use that
to add some veins, and then there are also
brushes with a bevelled tip, just like this one
from silver brush. It's a flat brush. You can see the other end
has this slanted tip, and that's also what I use
for adding those nice veins. This one is actually
a little bit thicker than my other tools. I end up getting thicker
veins when I use that. Next, I have this
Suri koi brush. It's a Japanese brush, but I think this will also
resemble a chopstick. You can see this other end, it has a square in shape and use that edge
to create those veins. Again, you can use a
chopstick as well. Now, this is called
a leaf blade, so we use this to take out a sheet from a watercolor
block just like this. And I also sometimes
use this to add vines and texture
to my paintings. Lastly, if you have
an old credit card, you can also try to
use it and maybe cut it in half so that you
get a nice sharp edge. These are all tools that you can find at home and
I just wanted to share different options
so that you don't really need to buy anything new
anymore for the class. Okay, so let's move on to the other materials that we
need to paint our project. In this last, I'm going to use the paper called Bajo Academy. This is actually just
a student grade paper, but it's also 100% cotton paper. It's really, really great. The thickness is 300 GSM. So it comes in a
watercolor block form. It means all the
sides are glued, except for this part
where you can use a metal spatula to slide off the sheet once
you're done painting. And I forgot to mention
that I also use cold press papers for loose
floral styles of painting. Now, next, I am also going
to use this paint brand. This is the Shin and PWC, and they come in tubes, but I just tried to pour them
into half pants like this, so it's more convenient to use. For the brush, I will be using
silver brush black velvet, so this is my
favorite round brush and just make sure that you used this big size ad brush to paint these
beautiful soft petals. I'm also using a slightly
smaller brush size four. You can also use size
six for those details. Next, I will also be
using a white guh. This is from the
brand hale pine, and the color is
permanent white. So if you don't have this, you can also use
a poster paint or maybe white pants to add these white details in
the center of the flower. Of course, we'll need
the jar of water and also some tissue paper to plot out the excess
moisture in our brush. All right, so that's it for the tools that we
need for the class. Now let's move on to
the next video. A
4. What is Scratching Technique: So what is the
scratching technique? And how different is this from adding texture
using a round brush. So Scratching technique involves scratching the
surface of the paper. Well, the paint is
still wet or damped to create fine lines or
just a textured effect. So you can use any sharp tool or any pointed object like what we have discussed
in the material section, you can use a palette knife or even the end of the
handle of your brush. Adding a scratching
technique gives wer petals and your
leaves more depth. Depending on the
tool that you use, sometimes you'll
get a thinner vein, sometimes you'll
get a fatter vein just like what
you're seeing here because this end of the handle is a bit thicker compared to
the palette knife. We will definitely
learn more about the technique and it'll give you more tips
in the next video. This is a great technique
also for landscape. If you want to add
some real life looking grasses or maybe add some texture to the
tree, add some barks. So it's a very useful technique that you can apply
to your own style. Now let me show you
what it looks like to add veins using a
small round brush. When you're adding
these small details, the petals or the
leaves should be dry. You can see right
here, I already painted some leaves
that are already dry, and I'm adding some
really thin veins using a round brush. This is also a great
technique to add some veins. But I think that adding veins using the scratching technique
gives it more depth. So you can see that
on the left side, that's a scratching technique, and the veins look a bit deeper, and it has a more real
effect on the veins. So on the right side, you use a small round brush to add
some veins and texture, and you can see it
slightly thicker. So if you are used to doing the texture using
a small round brush, I think that this is such
a great class for you to explore the
scratching technique. You can even apply
both techniques to your painting so that it
looks more interesting. Alright, so now let's
move on to the next video as I give more tips on
how to add some veins.
5. Tips on Scratching Technique: Okay, so in this lesson, I will be sharing how to do
the scratching technique. When doing the
scratching technique, you need to work on a
wet or a damped surface. So first, I'm going to
show you what it looks like if you try to do
it on a dry surface. So I have here a leaf that I had painted earlier
and it is already dry. Now let's try to just scratch the surface and see if the scratching
technique will work. So I'm using the other
end of my brush. So it is a bit
slanted and pointed. So now I'm doing the
scratching technique, and you can see that there is
a slight dent on the paper. But it's not really
that obvious. You cannot really see the veins. You can just see the
small dent on the paper. So this is what
happens when you try to do it on dry paper. So it's supposed to look
like this on wet paper. You can clearly
see the veins when you're working on a
wet or damp paper. Now, let's try to paint a leaf. I'm going to use sap green, but you can definitely
use any other color. It doesn't even
have to be a leaf. You can try to practice
with any shape. Okay, so let's just paint
a simple leaf here, and I want it to still be wet. Let me just lift my paper and let me show you the
sheen on the paper. I'm going to use
this flat brush, and it has this bevelled
or slanted tip. I'm going to just scratch the surface of the paper
to create the veins. At first, you might
not see the lines, but once it gets slightly dry, the lines will be more obvious. I use a different
brush for that one. So you can try to
experiment with your different brushes and see which tool
works best for you. If you want the veins
to be more of us, you can also try to paint on top of the veins
while it's still damp so that the
paints will go into the crevices of the
scratches that you did. Let's do another one and
this time I'm going to paint leaf that's a
bit lighter in color. Now let's use a palette knife. Because this palette
knife is thinner, you can see the veins are also thinner and they
look very intricate. When it comes to
scratching veins, it also depends on the size or the thickness of the
tool that you are using. All right. It looks like this, if you want a cleaner vein then use a tool that is
thinner as well. Now let me show you what
it looks like if you add a light pressure on the surface. When you apply light pressure, you also will get
a vein that is not as deep looking or
it's not as obvious. It will look like this. I
personally prefer applying more pressure to the surface so that I can really
see those deep lines. Now, let me show you what
it looks like when we add more pressure to our veins. All right, so I'm
going to really press my spatula and create that
nice scratching technique. And immediately, you can
see a very obvious line. It's very deep, and the
veins are very clear. You can see that varying
the pressure also has an effect on the
output of the veins. As previously mentioned,
if you use a thinner tool, you'll also get a thin vein. Let me just show
it to you again. I'm going to paint a
simple petal here. I'm using the color
permanent rose, but you can definitely
use any color. So we want the surface to be damp so that you can
really see the veins. Now, let me use a thin tool like this metal spatula and let's
try to scratch some veins. I like using this
metal spatula for petals because it
creates some fine veins. As you can see the
details are very thin, and it looks really great. Now let's try to do
another one that is thick. Let's paint another petal. Again, we want it to be damped as we work on the
scratching technique. I'm also making sure that
I don't have puddles in this petal that I'm doing so that we get
a nice even vein. I'm going to use the other
end of my brush handle and you can immediately tell
that this is a thicker line. That's because the
tool is also thicker. Can also use a chopstick. This is actually
a Suri koi brush. It's a Japanese brush
for stenciling. The other end looks
like a chopstick. I'm guessing that
you can also use a chopstick to add some details, and then this is a different
brush with a pointy tip. So I'm drawing you
different ways to add some veins
using different tools. Let's do a different
technique using this vein. So this is called pulling, and I just coined that
term for this class. But when we're doing
loose florals, usually the center
is quite dark. So now I want to pull that
color into the veins. I'm painting a base first
and then I'm adding this violet here towards
the bottom part. And then we're going to do
the scratching technique. What I'm doing here
is I'm pulling the color from that bottom part, going up to the top
part of the petal. You can see that I'm grabbing that violet color and just
adding that into the vein. The effect is that we have
this base pink petal, but you can see the
veins are violet, and that violet came from the color at the bottom
part of this petal. This is going to make
more sense when we do our project or when you apply this to a
five petal flower, where in the center
is quite dark. Now, let's do another one. So I still have here
my permanent roof, so I'm adding more color
towards a bottom part. And then next, I'm
going to add a violet. Towards the tip, and you can see we have different
colors here. What I want to show
here is that you can pull colors that
you want to use. If I want a violet, I'm going to start at the
bottom of this petal, and then if I want
just the pink one, then I'm going to start
in that pink area. Let me just add some more violet just to make it
look more obvious, so you can really see the color. Going to start at the
bottom and go up, and you can see that I drag that violet color
into the veins. Now I have multi colored
veins on this petal, and it's going to look
great if you paint a p petal flower or if
you paint an iris flower. So you can definitely try this with different
color combinations. Now we have a dual tone vein, and this is just
a great technique to add to your paintings. Lastly, I also
wanted to show you that you can apply
this to landscapes. I'm just going to paint
a simple landscape here and add some grasses. So I'm going to start with a clean brush and just
paint water on the surface. So this is just a
rectangular shape, and you can see the
sheen of the paper. It means that the
paper is still wet, and let's just grab
some green color. This is just sap green, and maybe add some indigo
towards the bottom part, so we have different colors. So this is still wet, I'm going to grab my
tool and add some grass. I'm going to start at
the bottom and just really press my brush
to create a deep vein. Now, let's just add
some more dark areas. I'm using indigo so that we can see some dual tone strokes. I'm going to just start
from the bottom going up. You'll be able to create some nice bs grass strokes through this
scratching technique. If you want the thin line
towards the end of your stroke, make sure that the top part
of this landscape is a bit d. I'm just going to add
some more greens in different areas and going
to add some more grass. You're probably
wondering if you can add the scratching technique
to an old painting. The answer is yes. So I have here an older painting
and it's definitely dry. What you can do is you can wet the area that you
want to add the veins. So I'll just grab a
light green color, but you can also just use water. I'm just going to
paint on top of this and make sure that it's let's grab our tool. I'm using the other end
of my brush handle, and I'm making sure that
I'm really pressing onto the paper to
create these veins. Don't worry, you're not going
to cut through the paper. You are just creating a
small dent on the paper. There you go, we have
those nice veins. If you work on dry paper, like what I'm doing here, you cannot see those veins. You really have to re wet the surface in order to add
the scratching technique. I hope that you learned
a lot in this lesson. So now let's move on
to our final project, and let's apply the
things that we have learned to a beautiful
lemony flower.
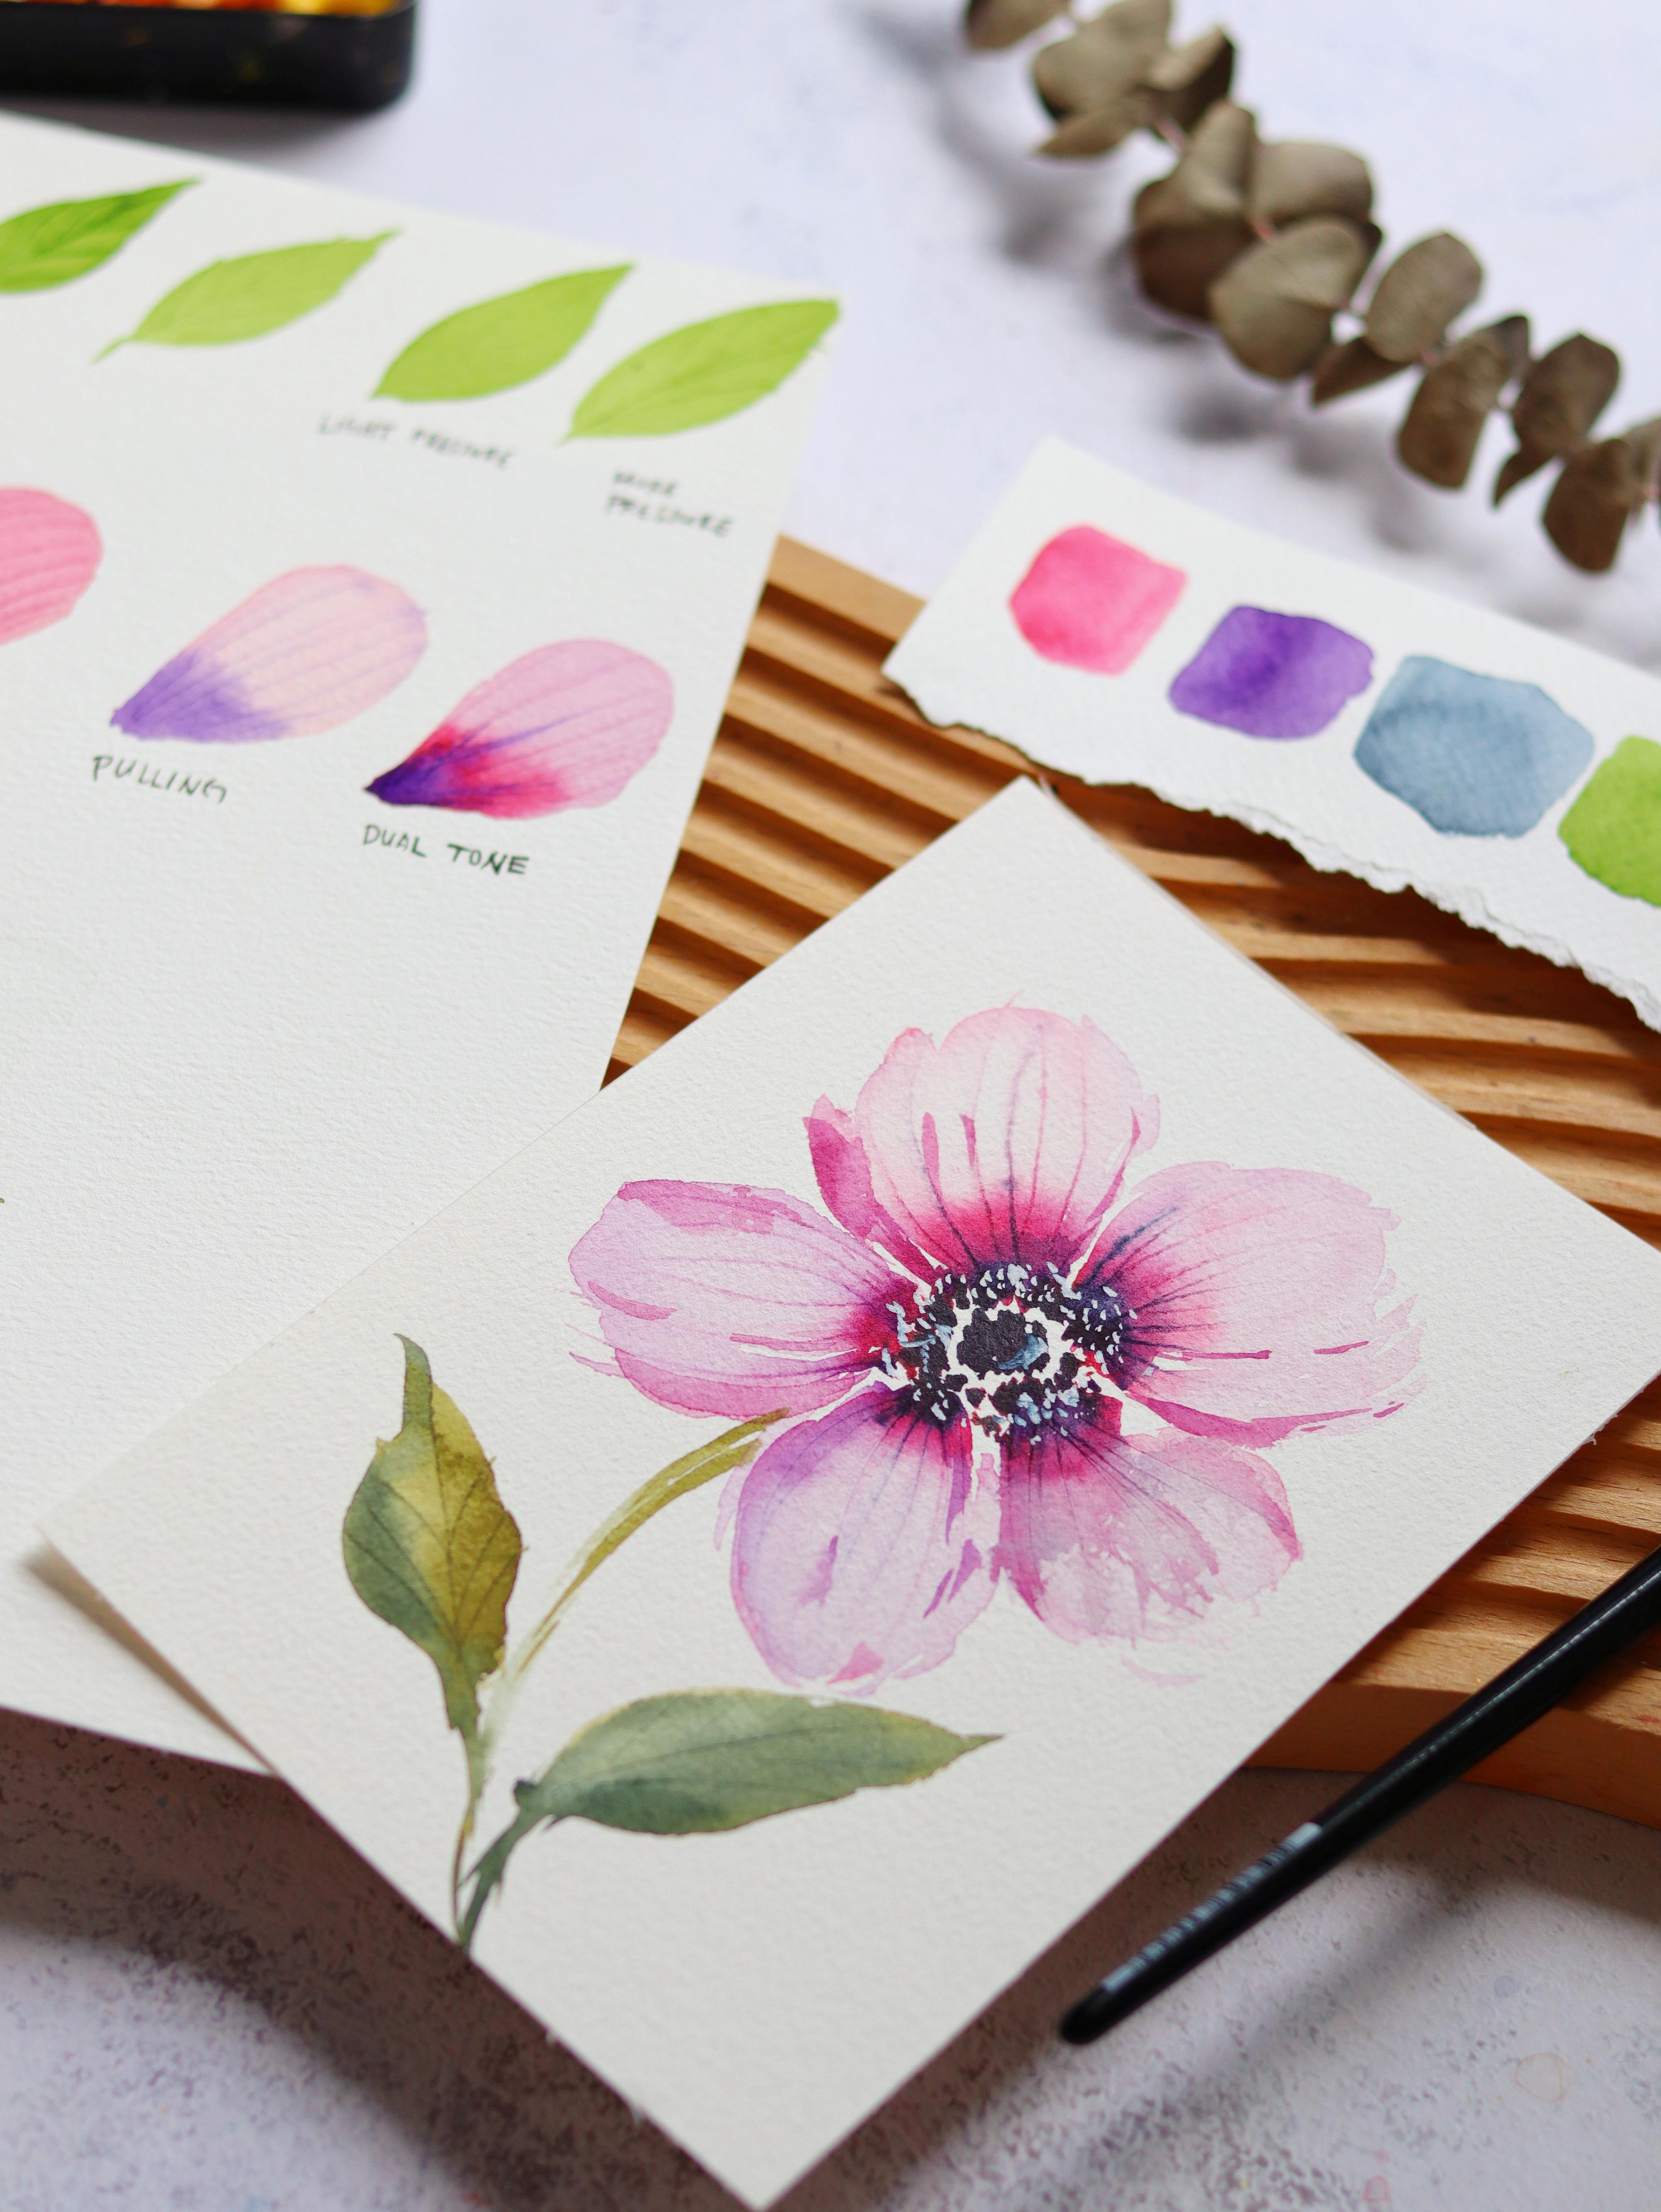
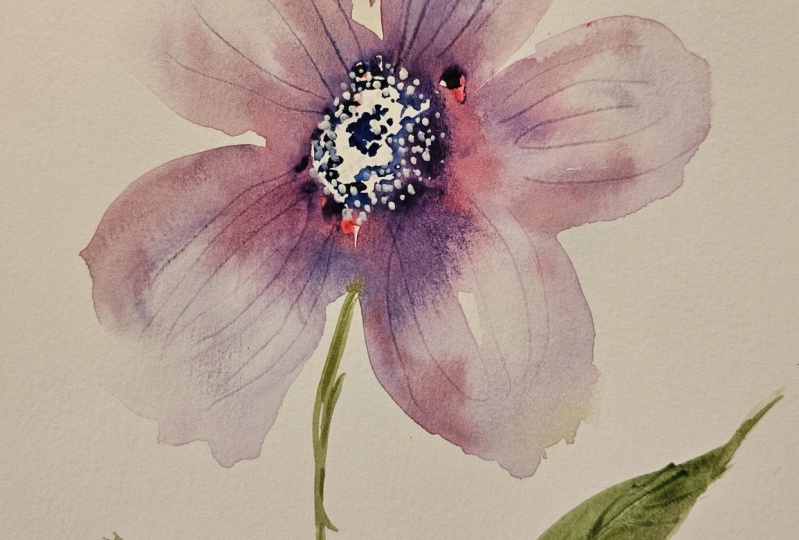
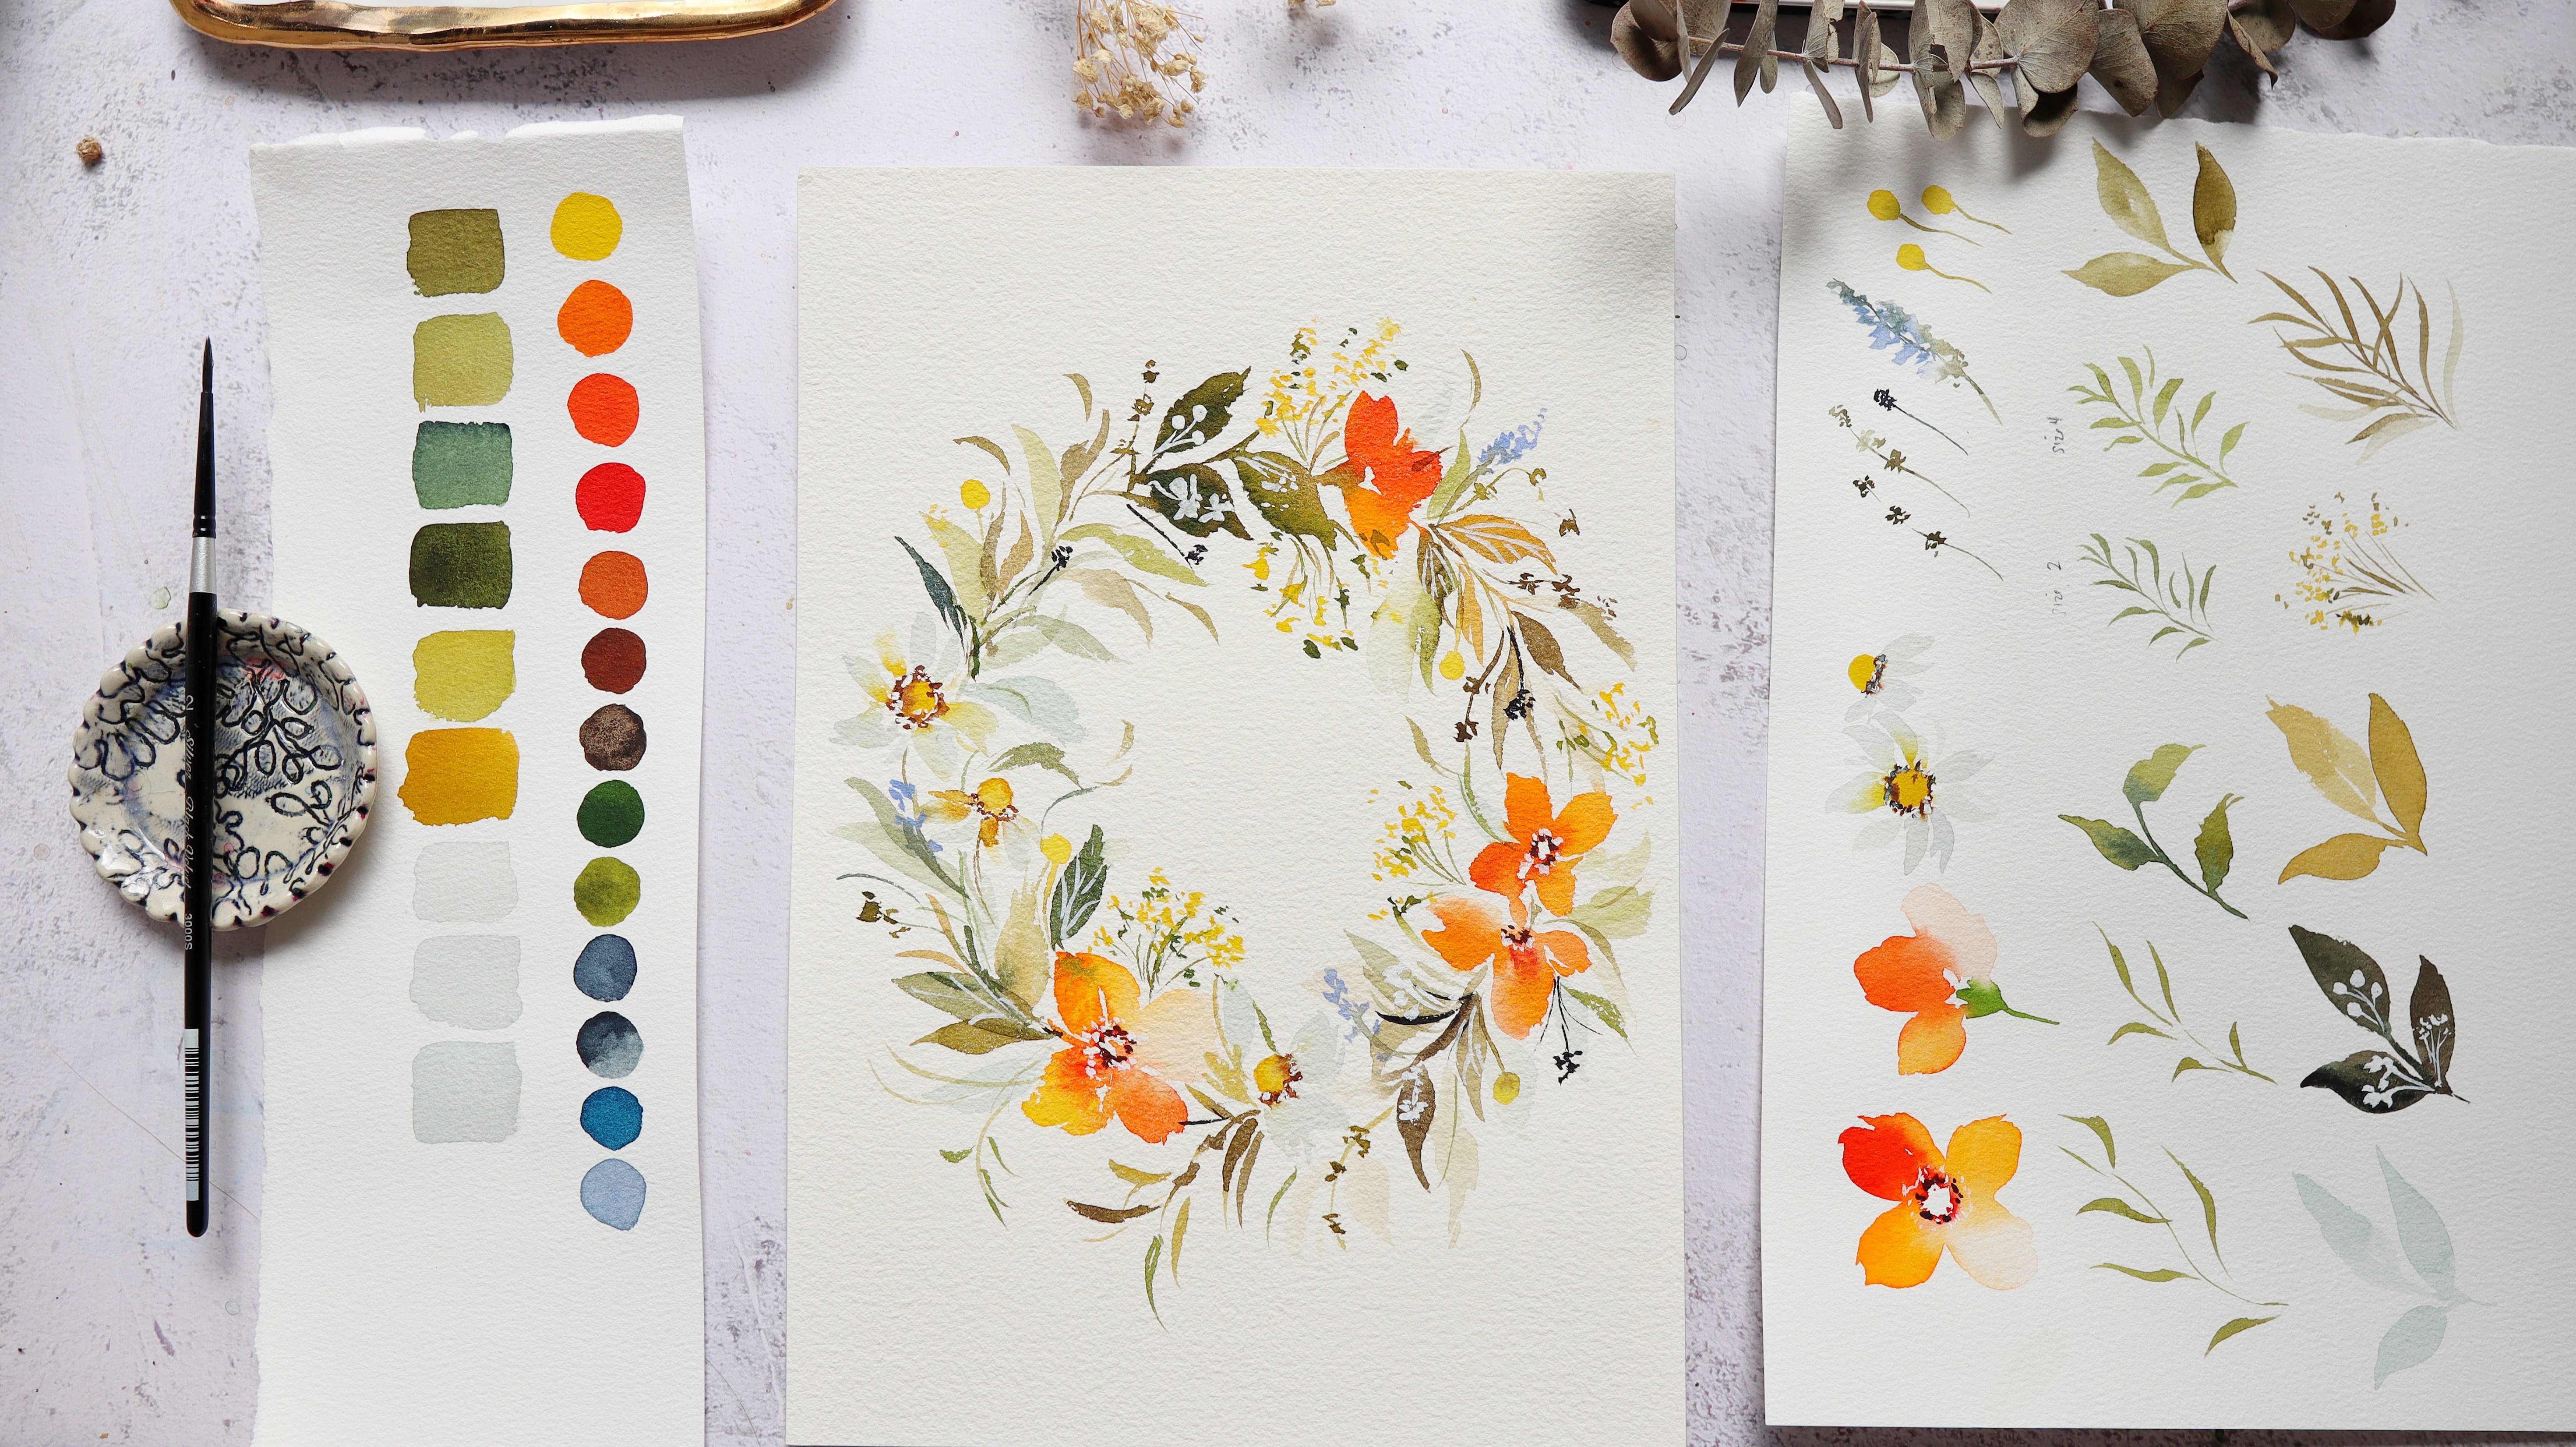
6. Final Project: Applying Veins on a Flower: Before we start here are the colors that we will
use in this project. In this project,
we're going to paint a loose flower that
looks like an anemone, and you can do different color
combinations like this blue violet flower. It's a similar style, just in a different color. Let's do an overview, so
we're going to start with a ring of small
concentrated dots. And then we'll grab
a big juicy brush and paint some petals. We're going to let the colors
bleed into those petals. It's going to look very soft. Then in the center, we're going to add
a darker color just to give it more depth. Then we're going to start
adding those nice veins. Next, let's paint some
nice loose petals, and we're also going to add
some veins that later on. For the details,
I'm going to use a white coh to add some
small dots in the center. That's it, very easy to do. Now let's start painting. So you can definitely finish this project in less
than 10 minutes. I'm going to start by
grabbing some permanent rows. So we want a
concentrated mixture. Next, I'm also going to
grab permanent violet. Let's start with
the permanent rose. I'm using a size
six round brush. For the center of the flower, we want to paint
some small dots. It's going to be a cluster of small dots and we're going
to form it into a ring. You can try to vary the
sizes of those dots. Then next, we're going
to add another color. I'm going to use
permanent violet. Again, we want this to
be very concentrated. You can see I'm just
grabbing some more color, and I'm going to put different
dots in different areas. I just want to spread
around this color so that we'll get two toned
petal later on. I'm going to grab
a bigger brush. This is a size
eight round brush. You can see I'm
grabbing some water. And I'm going to touch
the tip of the dots and let it move into the petal
that I will be painting. Let us lightly touch
the dots and then move your brush up and down until you create the
desired petal shape. For this flower, I
decided to make it simple and just
paint five petals. But you can do more if you wish. We're just going to repeat
the process again right here. The color actually just
comes from those small dots. You can go around
the petals and paint some smaller strokes to
make it look looser. Okay, let's grab some more
water and paint more petals. You can see that the petals
are a little bit watery. That's going to make
it look more loose. I usually start with the center. So I'm just grabbing those
small dots and then moving away from the dots to
create the petal shape. All right, so we have all
five petals. Right now. I'm just trying to
fix the shape of the petals and just
adding some more strokes, making them look more
towards the edges. When it comes to loose florals, you want to Tarker center, and I'm just going to
grab crimson lake. You can also use permanent
rose and then just dab your brush in a tissue paper before
you add the pigment. I'm doing this because
I don't want the color to spread too much
on the wet petals, so we want to control the
way the pigment moves. It means that your brush
so be a little bit, not too wet, Next, let's add some more
contrast. I'm using indigo. Again, you saw that I dabbed
it in the tissue paper, just to absorb the
excess moisture. I just want the dark indigo
in the center of the flower. Now let's grab our
scratching tool. I'm using the other
end of my brush, and just grabbing the
color from the center, going out to the petals. You can see that
the veins are dark. I I grab the color indigo. But if I grab just
the pink area, it's going to
produce a pink vein. Make sure that the petals are a bit damp when you're
doing the veins. In case the petals become
dry just like this. Just grab some water and
paint on top of the petals. Now let's get our
scratching tool and you can see that I can now
start adding my veins. I'm getting some color
from the indigo, some from the pink area. And it's just a nice
way to really add some texture and also
color to the petals. So now I decided to use my metal spatula to
create some thin veins. Let's grab Indigo and add some small dots in the
center of this flower. Okay, so it's looking great. Now let's move on to painting
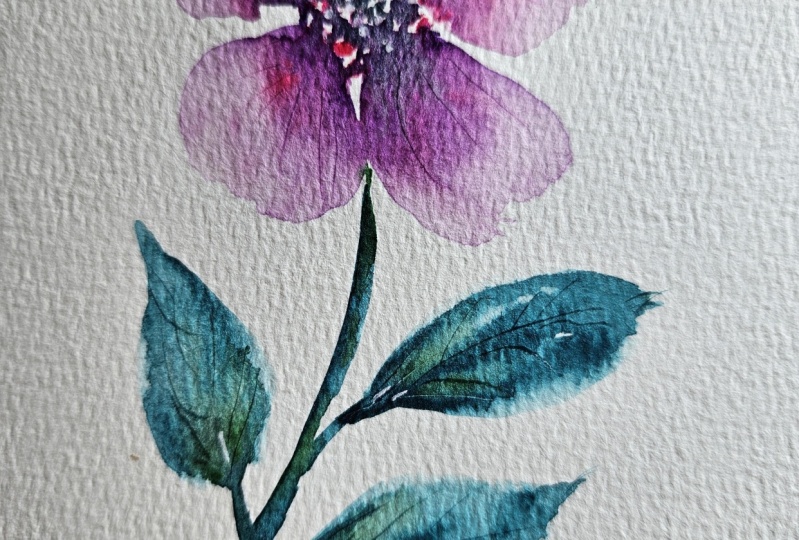
the stem and the leaves. So I'm just mixing se
green and burnt umber, but you can use any
green in your palette. I'm just going to
paint this curvy stem, and then we're going
to add the leaves. I usually like to
wiggle my brush to create some movement
to the leaves. And now we can add
just a darker color. I just added some
indigo to my mixture and just put it on top of the existing leaves
that we painted. While the leaves are still damp, let's grab our veining tool
or our scratching tool. I'm using a metal spatula, and I'm really trying to press my spatula onto the paper
to create those marks. You can use a different tool. This is the other end
of my brush handle. Now to add some more
depth to the petals. We can also add some details. I'm using permanent rose with a little bit
of that violet. And I'm just going to
paint some tiny strokes. I usually like adding this
in between the petals just to separate them and
give it more depth as well. We don't want this
color to be too dark because it's going to be
overwhelming to look at. So these strokes are just
going to look like they are shadows or they are
folds in the petal. If you don't like the
stroke that you did, you can always go back in with a clean brush and try to lift that area or fade away the
stroke to make it look softer. Okay, so right here, I am trying to fade away the
strokes and blotting my brush in a tissue paper to take out the
color in my brush. S. Now let's grab
some white gash. I'm using the white gah
from the brand hole pine. This is permanent white, and let's just add a
little bit of water. I'm using my small round brush, and we are going to
paint some small dots. This is a great way to
add some highlights or some texture to your florals. I'm using a size
two round brush, so it's best to use a
small brush so that you can create these sm dots, and I'm going to put a small highlight in the
center of this flower. Alright, so you can see
that this flower really came alive when we added
these white details. Okay, so we are done. Congratulations for
finishing this project. I hope that you
enjoy doing this, and you can definitely apply this technique in
different flowers as well. Let's now move on
to the next video. As I share my final thoughts.
7. Final Thoughts: So we have reached
the end of the class. Thank you so much for watching. To sum up what we have learned. We talked about
tools that you can use to scratch the
veins on the paper. We also did some exercises
to learn more about this technique and applied
it to a floral painting. For the project, you can follow the floral painting
in this class, or you make your own
floral composition or even a landscape and apply the vein creating technique that we have learned
in the class. I'm excited to see
your project in the project gallery
section of the class. Simply take a photo
and upload it there. Other the projects
and resources tab, it H project to share your work. I'm excited to offer feedback
and words of encouragement. Feel free to tag me on
Instagram using my handle at Tipo and use this hashtag
so I can see your work. It will also mean a lot if you can leave a
review for the class to help others discover how this class help you in
your watercolor journey. If you want more
floral tutorials, you can check out
these classes as well. So that's a wrap.
Don't forget to hit the follow button
on sce share so that you'll be updated
every time I have an upcoming class or
maybe a giveaway. I'll see you in my
next class. Bye.
 Joly Poa, Watercolor Artist