Transcripts
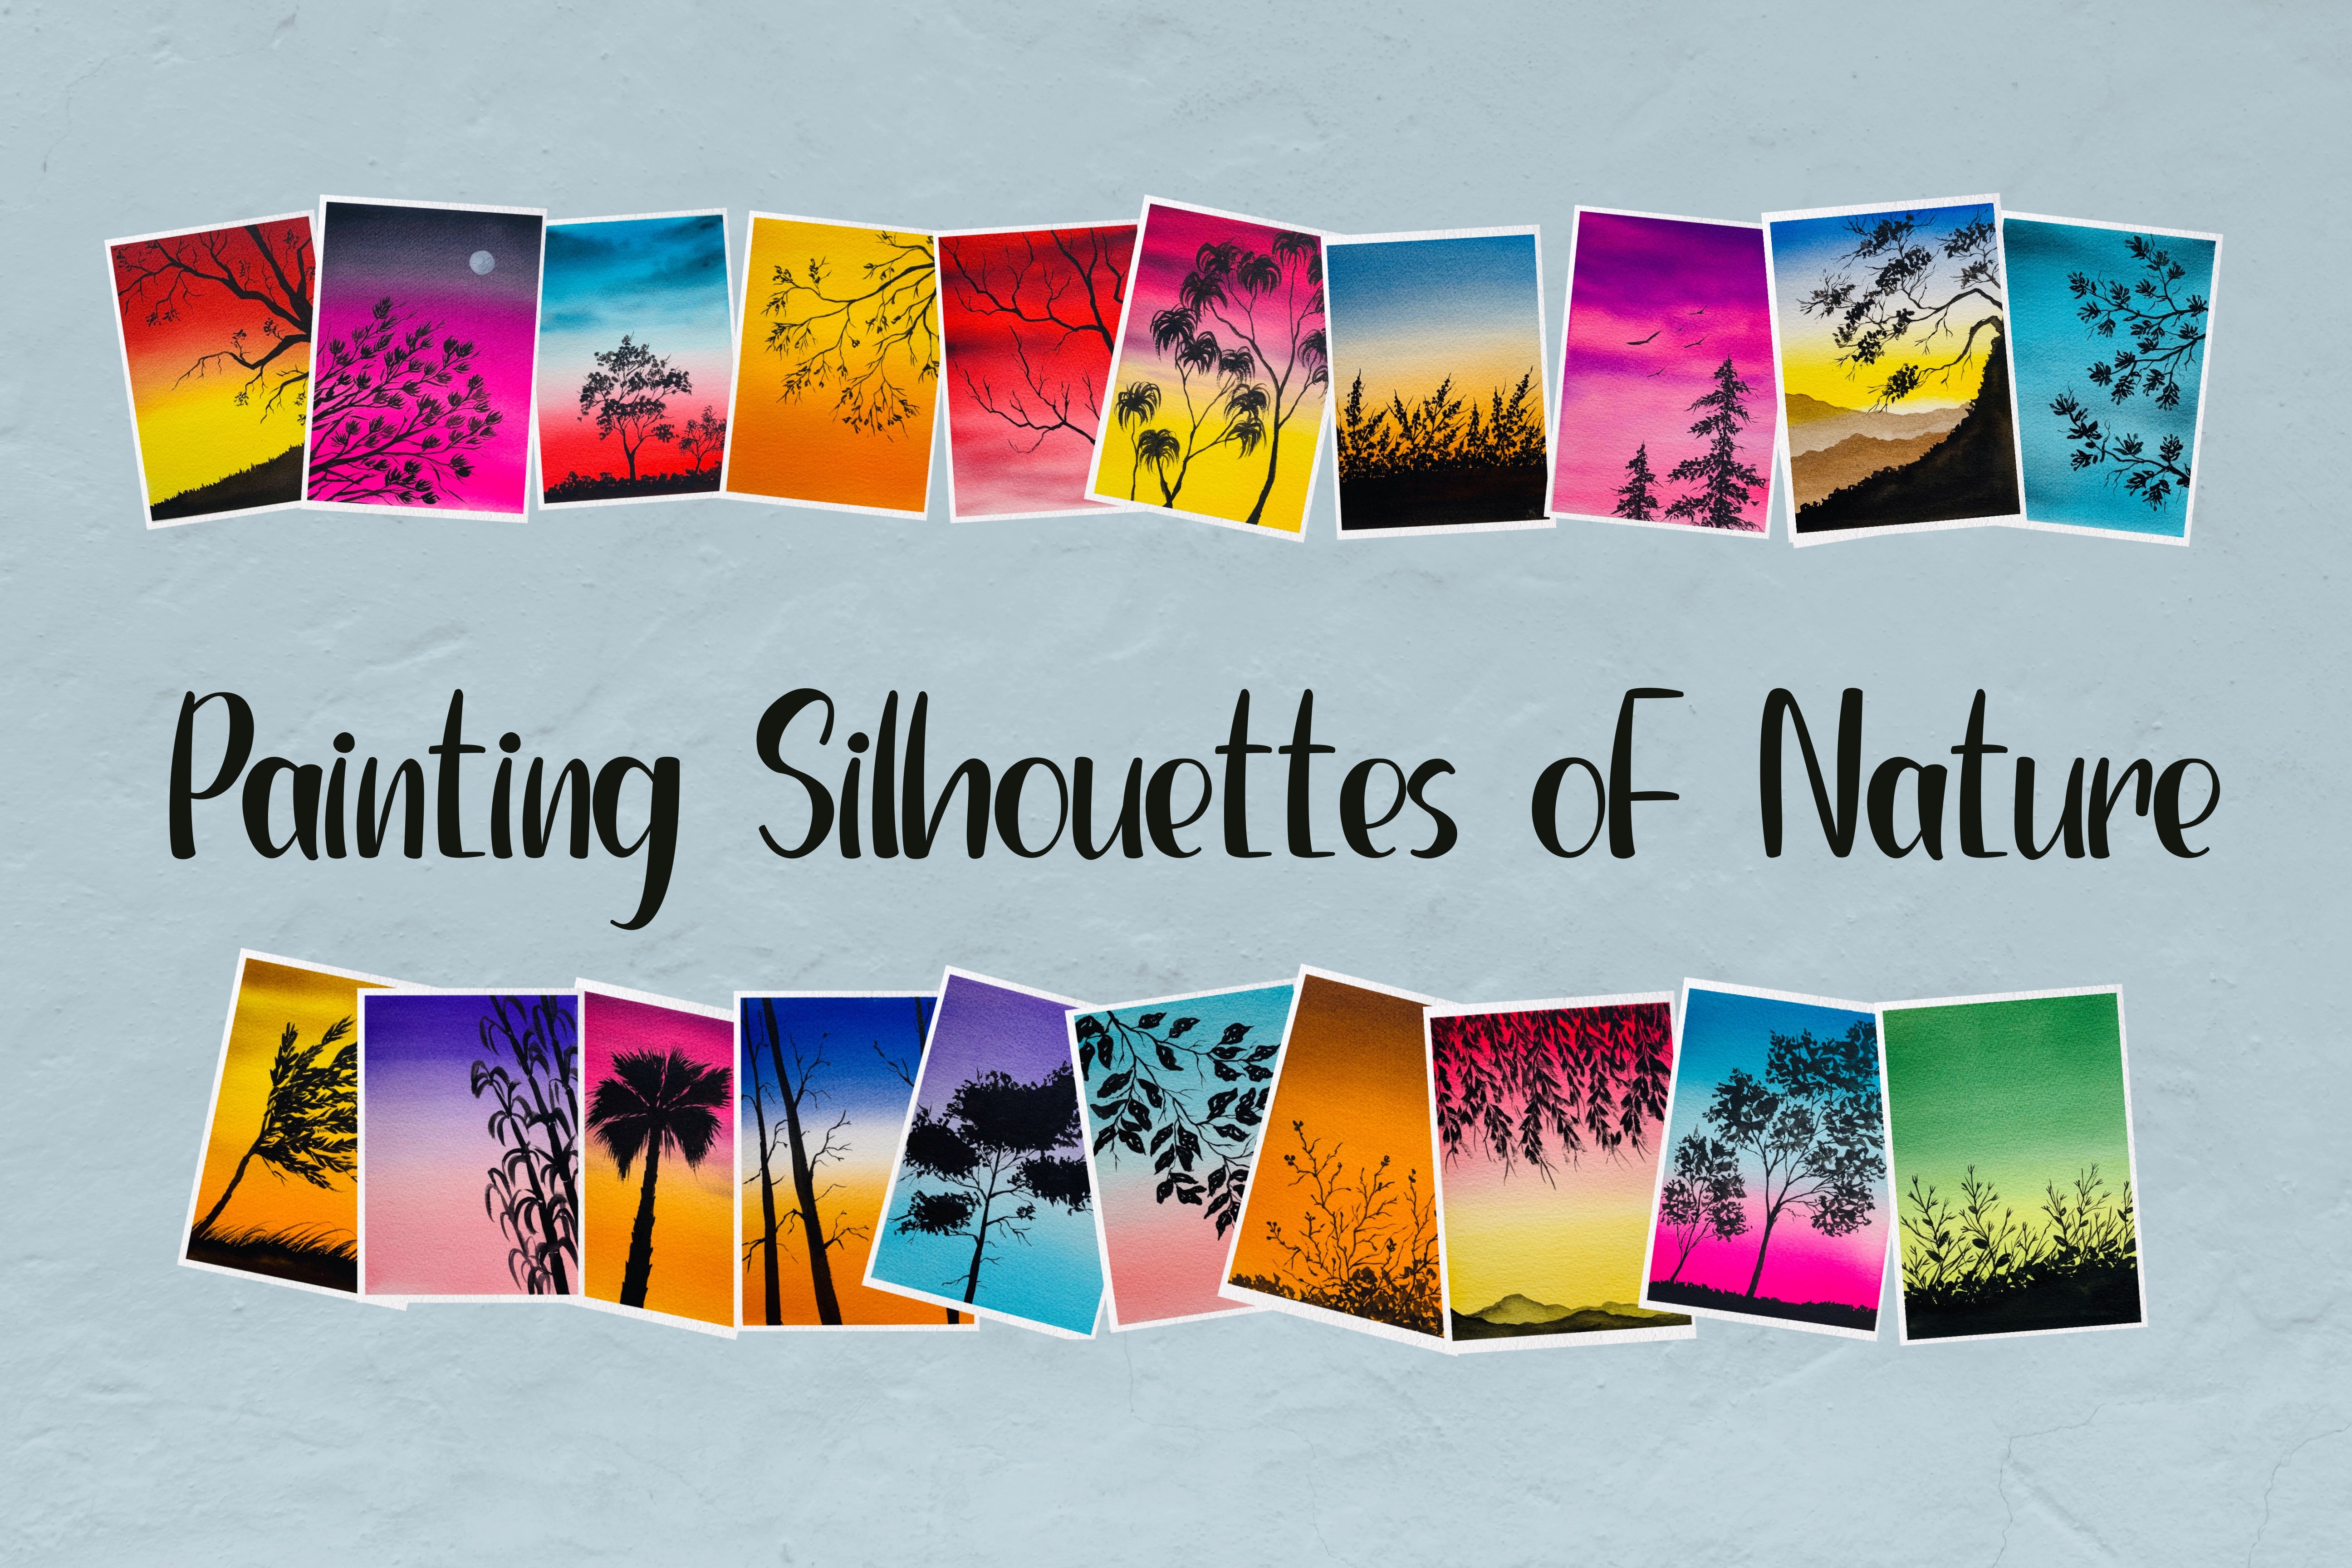
1. Introduction: Sunset. It's a gorgeous site and it's one among the most beautiful things that we get to see. Every day. Each one unique and beautiful, emits only if you are a sunset lava just like me and you are up to learn some beautiful, vibrant Sensex guys. Then you have come to the right place. Hello everyone. I'm shifting a watercolor and digital actors from India. In today's class, we will learn how to painful, beautiful, vibrant, and gorgeous sunsets. This watercolor class is perfect for you to get started and will also help you to create some easy watercolor paintings. This class is great for beginners where you will enjoy learning how to paint some amazing sunsets. And so how mastered a simple sunset and watercolor, you can get creative and gain some really stunning and amazing sunsets. Without wasting much time. Let's first look at the supplies needed for the class.
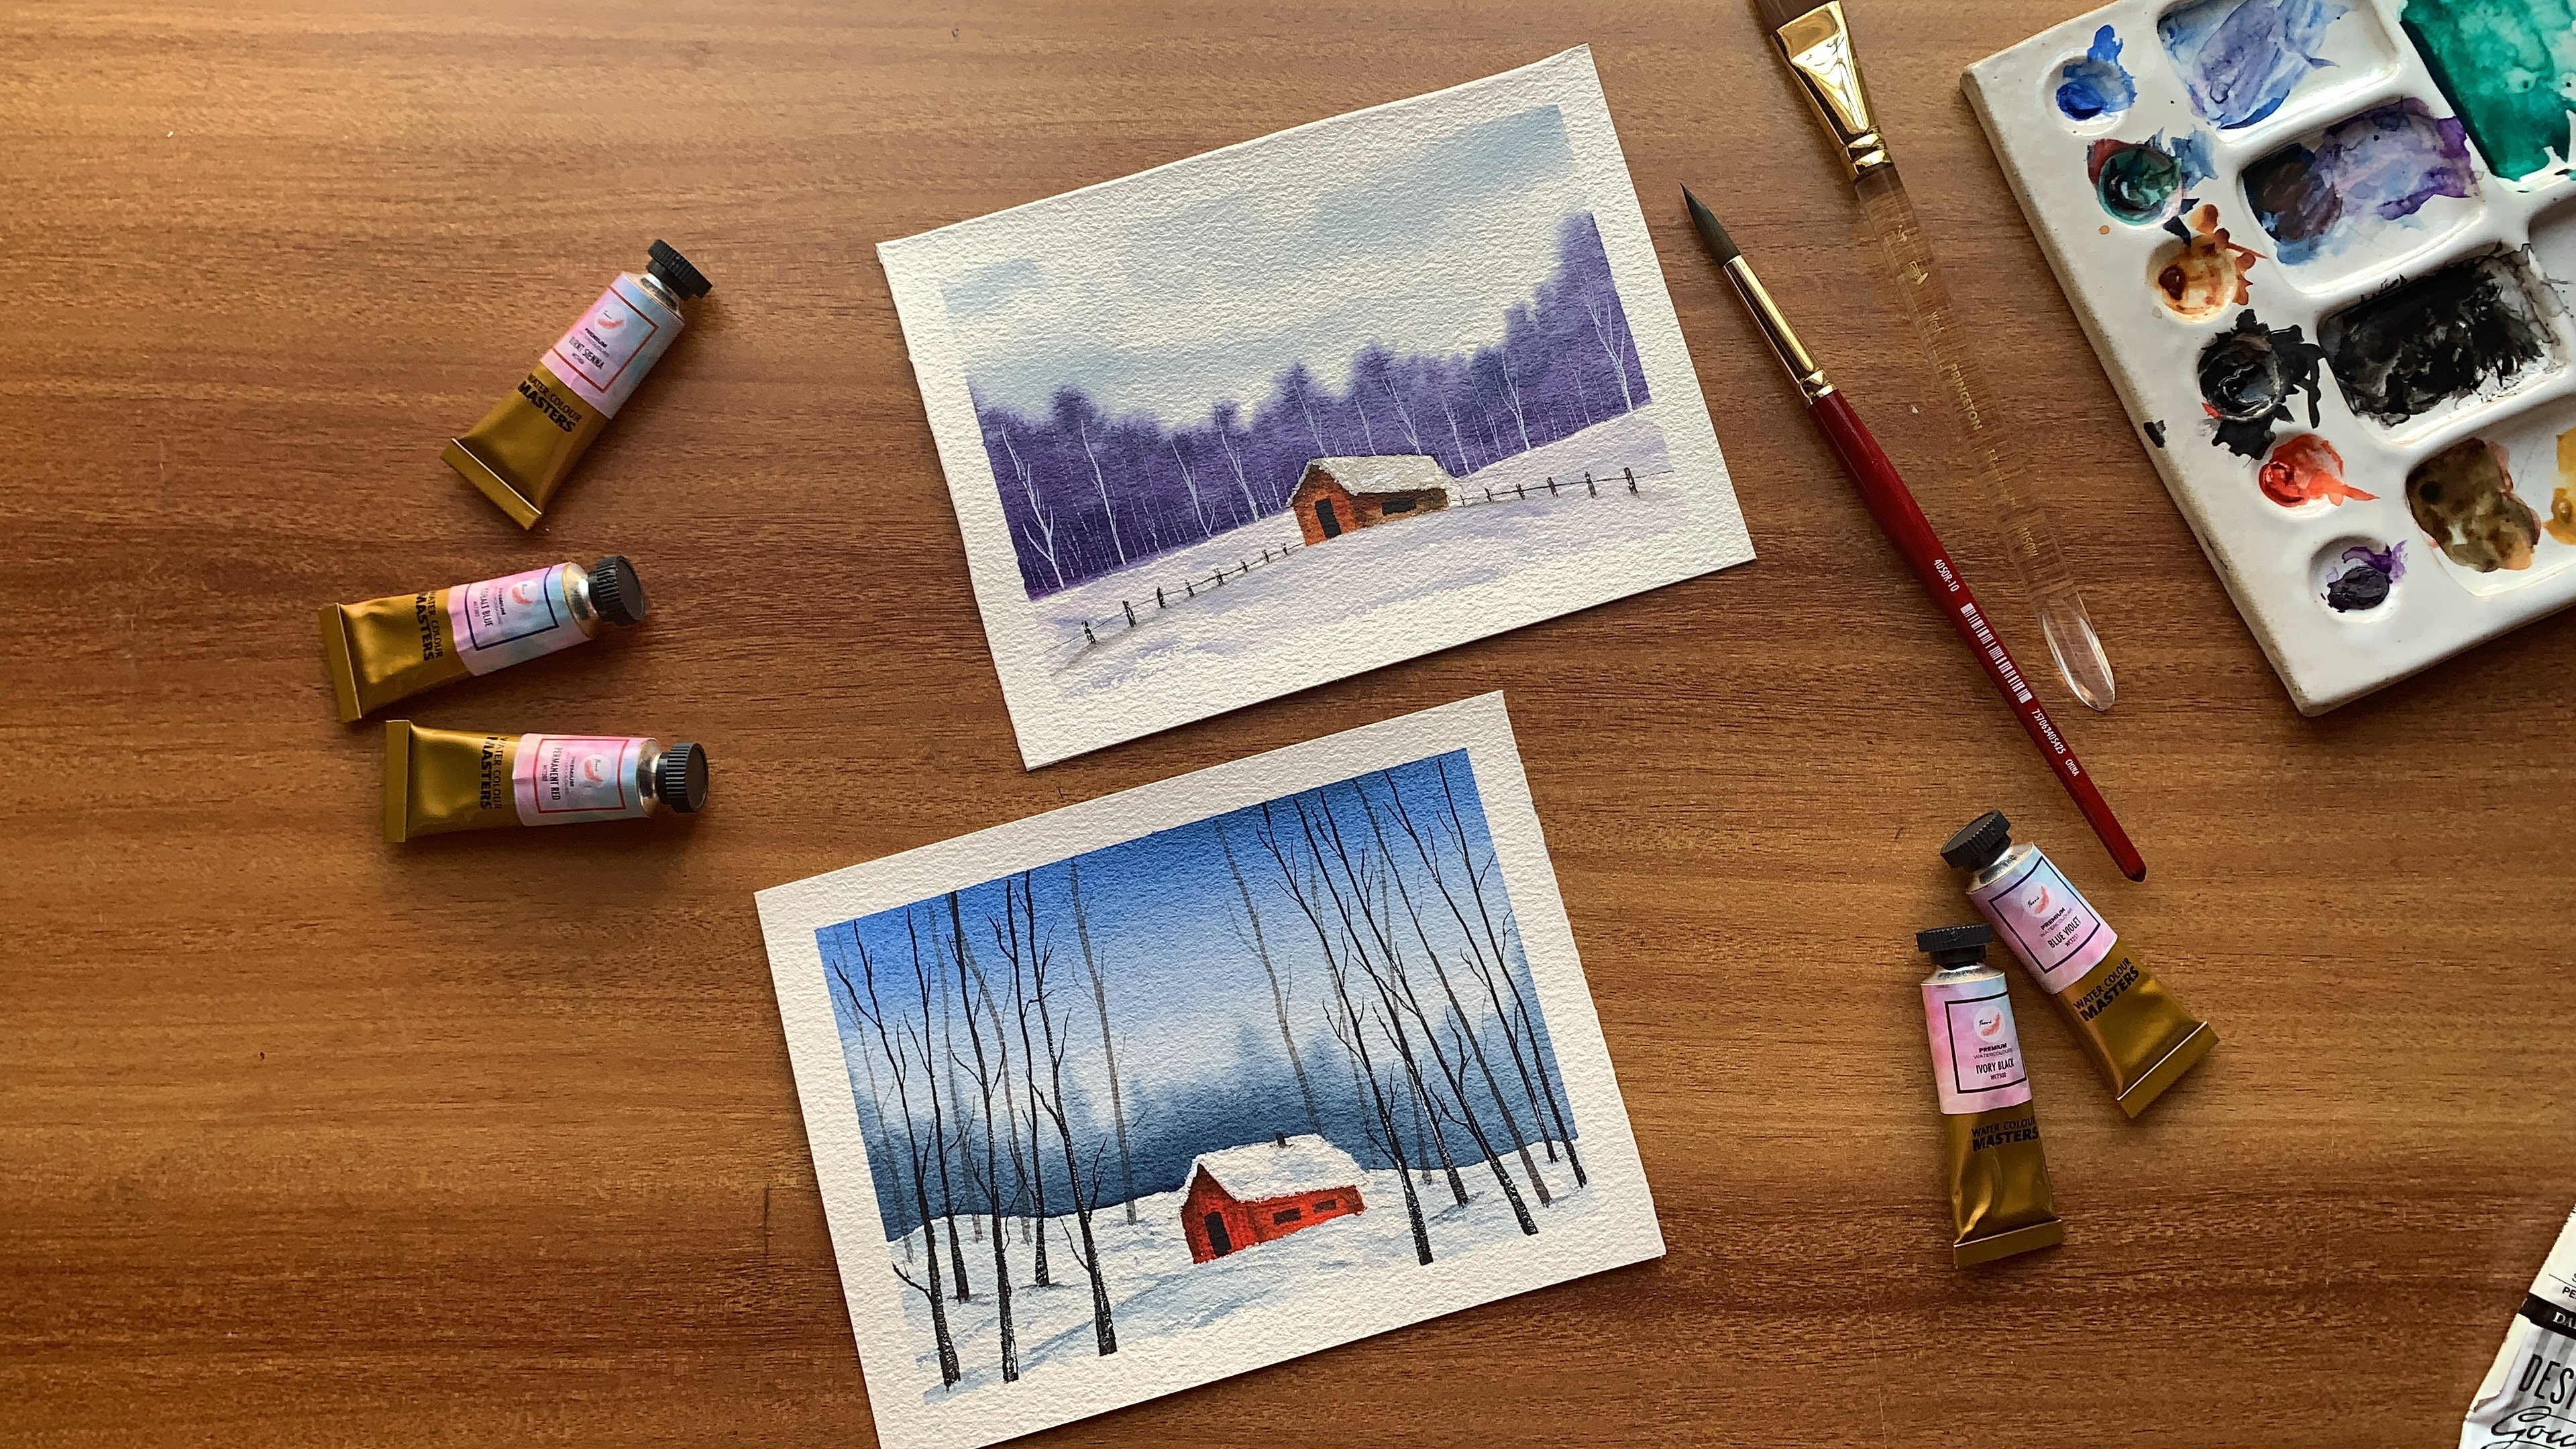
2. Materials needed: Now let's have a look at our supplies that we would need for the projects. First, we'll talk about the paper. I'm using Fabriano, artistically, traditional byte, 100 percent cotton paper. And this is called, and it is 300 GSM. Size of the paper is nine inch by 12 inch. But for our projects, I will cut down the single paper into four equal parts, each of the size 4.5 inch by six inch. You can use paper from any brand and size that you prefer to work with. But I recommend that it should be 300 GSM or 140 LPS so that it can handgun watercolors. Well, now coming to the brushes, I will be using the Princeton Heritage Series brushes, which includes a three by four inch wash brush, size 10 round brush, a size three round brush, and size 3 by 0, round brush, which will be in use for detailing. Now, again, you are free to use brushes from a new bank, but these are the brush sizes that we would meet. So you will need some paper towels to clean and white the brushes. We will need masking tape to tape down the paper. Next, arr2 low, it is. And economical or a micron pen. Next, o clean palette and do jars of water. One for cleaning the Russians and other one for the painting. And finally, the colors. I will be using few colors from White Nights mentioned gone, and suddenly, you're free to use colors from any brand that can have. Now, if you do not have the colors that are being missing for the projects, It's absolutely okay. I have mentioned that alternate onto substitutes that you can use that. So let's begin with exercise before we start with the project.
3. Practice Exercise: So in this section we will see how to blend two colors for the beautiful sky. So first, let's see how we can use two primary colors for the sky without creating a new color on Skype. And the other one would be how to use a primary and a secondary color for the sky. Which blends Though perfectly. So. Let's do that. For the first section, I will pick two primary colors, that is blue and yellow. As you know, if we mix these two colors, it ends up with the green sheet. Now, we do not want a green sky. So let's see how we can use these two sheets. Also, we are learning one of the most widely used watercolor technique here, which is wet on wet, that is wet paint on wet paper. So what we are basically doing is first we're going to wet the paper with clean board, go like this. We have to make sure that it gets evenly spread and there are no patterns on the paper. Now, I'm going to load the brush with the Vet blue pane. So I'm applying the color to the top section of this guy. And as we come to the main part, we have to reduce the intensity of the color. So in order to do that, we need to clean the brush in water and then remove the excess water from the brush using the paper double and land skies mostly. So it should be almost pale when it reaches the midsection. Now I'm loading my brush with the second primary color that is a low, and apply the paint from the bottom section. And repeat the same step that gets reduced intensity of the color as you move towards the mid part of the paper. By cleaning the brush and remove any excess water that is in the brush using paper double and landed him. So since watercolors are almost pale in this midsection where they meet, it's not going to generate a new color that is, and not get green color. So that's how I do it. So you can apply the same technique when you are working with any primary colors. Now let's see how we can use a primary and secondary color for the background sky. I'm taking a loan which is a primary color, and I'm take orange, which is a secondary color. Again, we're doing wet on wet technique is wet paint on wet paper. This technique provides solved get complex effect in your being in that as you apply watercolor on paper after moistening it with clean water to create a beautiful wash. I'm applying a layer of clean water down on paper and splitting it out evenly. Now I'm loading the brush with the law and applying the color in the bottom section. And I'm not reducing the intensity of the color as we age the midsection, and like we did earlier. Now I'm loading my brush with orange and starting from the top section and remediate to the midsection, keeping the same intensity and blending the two colors. We are working with wet-on-wet technique. The two colors blend with each other beautifully. You don't have to put a lot of effort to blend two colors. When you're working with wet-on-wet technique. The technique would remain the same even if you want to use multiple colors for this guy. So before we begin with the projects, try these techniques to get a better understanding of how to blend the colors using baton wet technique.
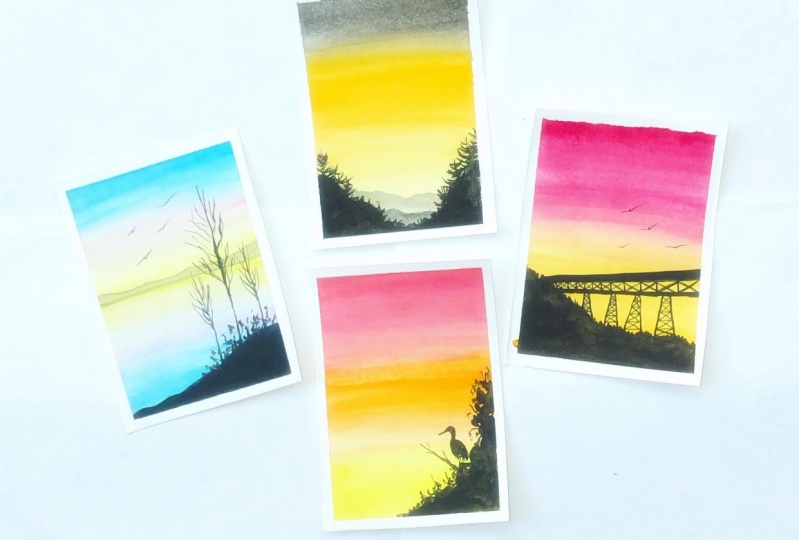
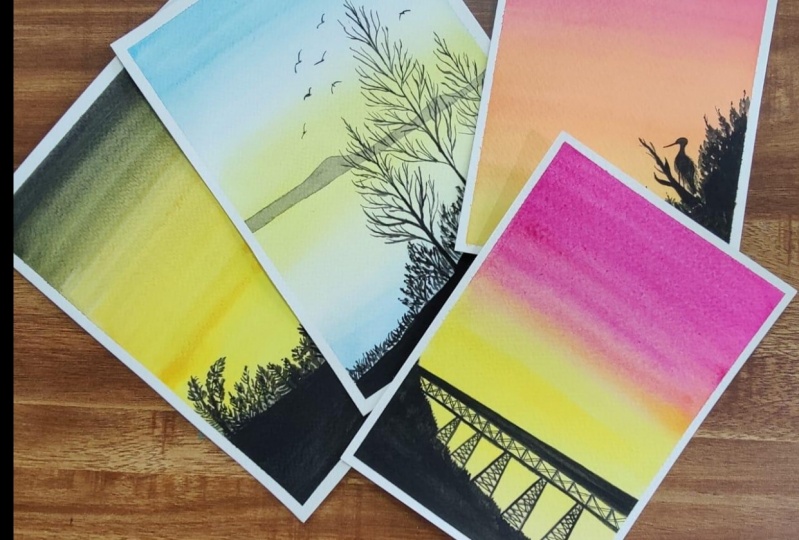
4. Project 1 - Sunset over the hills: Let's begin with sensors, guy. I'm taping down the paper using masking tape, dorsal surface. I'm your fingers through the mask and paper to stop the pain from bleeding under the masking tape. Now, let's look at the colors that we will need for this project. So I'm going to swatch the colors. First up is cadmium yellow. Next color is golden, or cadmium orange. Next color is Payne's gray. Finally Black Swan, the silhouette. I'm just writing down the names of this gallows so that you can refer. Also if you do not have the exact sheets, I have mentioned the substitutes that you can use instead of this gallows in the project section. For each project. I'm starting by laying down clean water on the paper using my wash brush or a flat brush. Make sure that the water is evenly spread. Once your paper is evenly coated with what DO lot size 10 round brush with gag men and low and applied the colors living bottom portion of the bar. Now for 1 fourth of the above at this gala. Next load the brush with cadmium orange or golden and traded the next 1 fourth of the paper. But this column, since this token, let's go with each other really Valley, I'm just blending this to Hell. No, clean the brush and load it with Payne's gray and start to blend this color to the dark portion of this guy and get it all the way. Cadmium, orange and land boat the colors. Since the paper is still wet, I'm able to blend these two colors easily. I'm going to apply another layer of colors on top of the previous layer for me to intensify the colors. Repeat the same step that with this first blue, cadmium yellow triggered mindful of the people. Next node, cadmium orange and touring the next 14 section and blend. This is really meant to make the blending of these scholars even more seamless. I use the wash brush or the flag brush and wipe it clean and start blending the colors like this, starting from the bottom section of the paper. And then you have a beautifully blended background sky. Once the background, It's time to add the silhouettes and the foreground. So I'm going to load my brush with a very light shade of black that is little pigment and more water. And among vein range like this. Make sure that it is really light. If you're not comfortable drawing the street of a painting amount in drains straight away. You could also sketch and before starting the painting, you again refer to the big shot in the resource section and do the sketching. Once this layer is dry, I am going to add one more layer of Montaigne. Using a shade little darker than the previous layer. That is a little more black pigment to the previous mix and make it a little darker than the previous layer. Are great for DA previously or to try. And carbonyl now view's size three round brush to add some tree trunks in the ground. Oven. Now add some binds in upward direction like this. I'm filling this buying beliefs only in the top section of the tree. And the bottom section is going to be covered by black completely. If you notice it is just some leaves shaped leaves. I'm speeding up the process here are sensitive or repetitive steps. So you need to same thing for all the drugs that you haven't drawn. I'm adding some more beeping branches here. And the beeping the same step of adding the pine leaves. Now, I'm just drawing an outline to fill the bottom section, complete vivid black. So fill in this area and fill it with black completely. I will switch to my size 10 brush and fill this. I think some more. Now would it be the same process for the other side of the plasma, adding some to Xcode and debt and filling the lag. You can go crazy but adding details and add as many details as possible. I'm done with adding details to this painting and being doing this now complete. So let's build off the masking tape. And this is how censored or the hill. And it's beautiful.
5. Project 2 - Sunset over the mountain: Let's begin with our second project. So first let's dip down the paper, do a step selfies, and I'm running my fingers through the tape so that the paint doesn't bleed. Once the system, Let's now look at the colors that we will be using for this project. Scala that we will be using for this project is a red violet. I have used a straight violet from Mission Gold. Next color is the cadmium low. And we will be using black for the silhouette. So again, if you do not have the exact sheets, it is. Okay. I have mentioned the alternate colors that you could use. Instead of this. You can find the details about the Gullah in the project description section. We will first do a light sketch before starting the painting. So I'm going to add my well-being. Now, I use a ruler to sketch the bridge. I have added this final painting in the resource section. So you can therefore do that and do the sketching. If you cannot understand more than actually doing. So, it becomes easier for you to do this get. So I just drew four lines and now I'm adding the legs for this bridge. I'm leaving some gaps and adding feel more support for this bridge. So it's a rough sketch of the blood cell that we are doing. Now let's begin by quoting a layer for dog. Do the paper using wash brush or the flat brush. Make sure there are no water puddles on the paper and spread it out evenly. Now, load your size, Dan John Bradshaw, red, violet, and apply the colors to the top section of the paper. Fill half of the AICPA and stop it somewhere in the middle. Now we are going to fail the other half of this guy with cadmium yellow, now load the brush with cadmium yellow and the bottoms guy with this guy and bring it all the way to read you stop the red violet and blend the two colors really well. I'm going with the second group of the color and intensifying this guy. Now, these two colors blend with each other really well. So you can see a shade of orange where the two kilometers. Now I'm loading my brush with GAD a low and applying my second layer and blending it. Since my paper is still wet, it is so much easier to blend these two colors. Now for the seamless blend, I've been a my wash brush or the flat brush and start from the bottom section of this guy and blended all the way to the top. I'm wiping my brush to remove the excess water that discipline CSM, blending with again, since there was a lot of work on my wash brush, the intensity of the colors have reduced, so I'm going to apply another layer of colors. Since the paper is 300 GSM, it can hold multiple washes. So it's always necessarily what it is advisable to use watercolor papers, which is 300 GSM or ago. Applying the red violet to the top section of the sky. I'm switching back blue wash brush to create a seamless blend. And then we have lived in blended sky. Now it's done the silhouette. So I'm switching to my size two round brush and loading it with black and filling the bridge with this black. So it's better to use a smaller size brush for the ailing since they are very minute. The things. If you use a bigger brush while you may or may not get the details as you are expecting it to be. So always use a smaller size brush for detailing. I'm filling the gap between those first two lines of the bridge went black. At this done, I'm going to fill the gap between the bottom two lines there. You could also switch to the smallest size brush. Size three brush. Since it is ready pin line that you need to draw. Once this is done, I'm switching to my round three by 0 bore size brush for the legs, which are going to be like really thin lines. Now, if you're not comfortable to add this thin line strokes using the brush, you can use still technical bench or two micron black pens and add the details. Now let's add some beam students lakes. So I don't know what exactly is it going drawing some well, what is on those strokes on the, on this lakes? Now, let's add some crisscross Bactrim on this and make it more interesting. I'm going to speed up this process of adding backends. Do the bridge. Now ready to add some more horizontal line between those cross backends like we did earlier. Now. Completely up to you how you want to add the details to the bridge. You can leave it simple or you can make it complicated or however you want it. I'm going to add some more begins to br tag that's left here, which is appearing blank. So I will switch to 0 or micron pen, not the technical pen. And I'll add some patents to the gap that you'll find here by drawing some lines like this. Please note that I'm increasing the gaps between as I come towards us still, right? And I'm drawing some Sidak Bactrim or word the lines. Just making all the lines that I drew a little pico. More beatings. Once we are done with the bridge detailing, Let's move on to the next part that is adding this mounting dreams. So I'm switching to my size 10 round brush and filling it with black and adding some attributes like using the People have to brush. Now if you don't rationalise more towel or pointed like this, you can use a smaller brush and add the tree beaks. F1 status done. This complete API using the black color for the sky looks blank, so I'm switching to my round 3 by size brush and adding some tiny boards. Just draw a shape and add small and dark. In between. There we have the flying birds. The project is complete. Now let's speed of this masking tape. Was sunset or the mountains and a blood cell maturity.
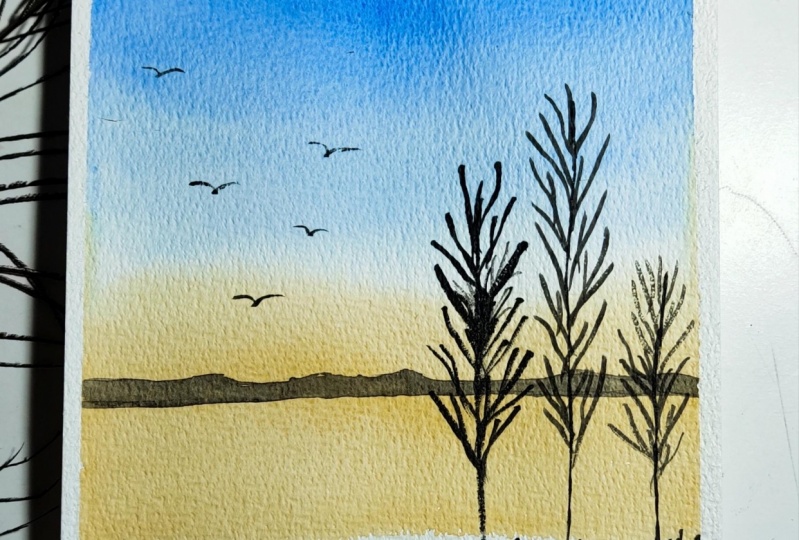
6. Project 3 - Sunset over lake: Let's begin with done next. And beautiful sunset or delete. Project. First, tape down your paper too. Stiff. So praise using masking tape. Now let's look at the color that we would need for this project. First one is, next color that I'm using is a low ocher and black for the silhouette. Now, you can find alternate colors, um, that you can use in case you don't have this exact sheets. I have mentioned them in the project section. So have a look at it and use the colors that it is available with you. I'm going to start with the light sketch using a ruler to draw a horizon line in the midsection. Not draw and mounting what the horizon line. Or let's add echo ground here in the bottom section where we will add some trees and bushes. I'm adding some tree trunks here. Don't worry, it doesn't have to be a straight line. So some random lines. I'm going to start by applying a quote of clean water on people using my wash brush. I'm now loading my size 10 round brush with cobalt, turquoise. And then in the top section of the sky, snow leader, using the intensity of the color as I come down. It should be almost white. In the mid section of this guy, because we are using the primary colors here, which will end up creating a shade of green on Skype, which we do not want. So keep the darker shade at the top section and it should be almost white in the midsection. So I'm wiping out a nice extra that is left on the paper by cleaning, wiping my brush using the paper double. Now, I will load the brush and start applying the beam from the horizon section, follow the same method that is used in density of the Gullah. As you come towards the decoy section, just wipe your brush using a paper towel and remove the extra colors. We're going to follow the same method that we did in the practice section where re-used blue and a low. Repeat. The same step for the link section that goes, the section below the horizon will be low and the bottom section of the people that have the cobalt turquoise color. And we have to make sure that they do not mix with each other by reducing the intensity in the midsection of that is by keeping it almost all white in the midsection, by wiping the extra colors that you have from the brush using a paper towel. My paper is still damp, so I'm going with my second layer force. So to bring densify the colors for loop the same step and make sure that you don't mix the two colors. By keeping it almost white and midsection in-between cobalt and a low occurred. Once the background sky is dry, we will mourn and add the silver its size three round brush with the already liked sheet of black for the distant mountain here. Don't make it too dark. It doesn't have to be jet-black or diluted black should be enough for this mountain. Now, once the infection is, and then I'm loading my size 10 down Burdash with the black paint. I'm going to fill this ground section completely black. Now, I'm switching back to my size three down brush and adding the tree trunks. I'll make sure that the mountain is dry before you add this trunks mine as David, and you can see the transplanting that we're going to paint some entries in audit, So add some dead branches to the chunks that can we do. I'm just adding some slanted vertical lines. Again, you can go ahead and add as many branches as possible on. You can keep it simple. Just being, being some do three branches. I'm going to speed up this process of big tensor distributed you. Now I'm going to add some malicious in this area, so I'm repeating the same process, but it's going to be a little shorter than the tree. So add some condoms or lines. I'm in now use my size 10 round brush and add some leaves to this bush. Using that off to brush, all you have to do is that it off the brush and add you use to those blanches. Now, I'm applying an adult group of black bean to this section. Now I'll use my three by 0 size brush or the detailing brush to add tiny boats. Just drawing of V and then adding a small dot in the middle. And we have the flying bird. So in the painting is now complete sled speed, the masking, the lakes onset brain thing.
7. Project 4 - Sunset behind trees: Now let's start with Nick, spectacular sunset. So first I'm going to tape down my paper. Advantages of it being done to beef up is you not only get crisp clean edges, but it also prevents the paper from coiling menu paint. Now, Let's have a look at the colors that we would use for this project. First up is cadmium yellow medium. This is from White Nights. Next would be golden orange, cadmium orange. Next column would be the Scarlett. And finally black for dose below it. I'm just writing down the names of this color so that you can refer. I have also included the colors for each project in the resource section. And also if you do not have these scholars and that I'm using, I've also mentioned alternate colors that you could use. It's sort of this. Once we have the colors ready, let's begin with the rough sketch. So arms good to know Bush at the bottom right corner here. Oh, I'm just outlining the bush so that I know better. I'm going to paint the bush. And then I'm drawing a branch like popping out of this bush. You can refer to this painting uploaded in the resource section to see the actual sketch. And always keep this sketch as light as possible. So once the brand just ready, I'm going to draw a bird. I can say a green standing on top of that branch. I first started with the head and long neck. I will now draw the body and go feathers at the end and add the two legs. So Madison, schedule for God. So you can do it without any difficulty. So once we have the rough sketch ready and let's get painting. So I'm going to first begin by applying even coat of water on the paper using the wash brush or the flat brush. I will now load my size 10 round brush with DAG mmm and low and applied doping to the bottom section of the paper. Now, we will have to divide the paper into three parts for three colors that we're using, the boredom, but it would be for cadmium yellow, the middle section, or B for cadmium orange and dark section or before Scotland. So next I loaded the rash red, cadmium orange or golden. I'm applying the paint to the middle section here. Once that is done, I will load the brush with Scarlett and apply the wing to the top portion of the paper. So this three colors we get badly gated wash for the background Skype. I've been knocked me was my wash brush all flag blood. Rush. To blend these three colors beautifully. All you have to do is start blending from the bottom section of the paper or from the top section of the pie doesn't matter because these three colors blend with each other really well. And you do not have to worry about the colors getting mixed and creating muddy colors. So you can start either from the top or from the bottom and blend these three beautiful colors. Now, I'm going to intensify the colors by going with the second wash. So I'm just holding my brush again with cadmium yellow and thrilling this bottom portion. Next style dorm, load my size, Dan John blush with cadmium orange or golden and when the midsection. And finally, when node scarlet and apply the paint to the top section of the paper. So notice that the paper is still wet. So that is why the colors blend. Adopt without creating this drops the paint strokes. So always make sure that the paper is wet when you want to blend the two colors seamlessly. So I switch back to my flat brush to blend the colors. So once rehab, though, background variegated wash prepared me and it's dry, I'm loading my size then down brush with black. And being this bush in the corner. I'm using the tip of this brush to do the outline first of this bush. So it's just again, create an impression of leaves on the globe on this bush. Now, I will fill this area completely, made the black paint, leaving some gaps here and there. I will now add some dimension. Children, they're using the tip of the brush. To give it some more definition. You can add as many details as you want and make it look more interesting. It's up to you. Now I'm using my size three round brush. Add the details for the brands that we drew earlier. So since it is a tiny branch, using a small brush is better. While I'm doing this just for lingo, filling this blanch with the black pink. Now, using the same brush, I'm going this bird here. Now, I'm, I being the thin legs here. I'm adding some feathers. Do today. I'm now going to fill the head and the neck. Now slowly filling this long beak. Adding some more feathers to the boat. So just wipe your brush with the W and remove the excess B and just add the strokes here, the dry brush strokes. And we are done with the bird. Now I'm switching to my size 0 brush to add some more details to this bush. So I allow adding details and I can stop and I don't know when to stop. So I'm just adding some branches or the tweets. I think I will stop now with the details. Let's build the masking be repeated. Find that painting. And we have an Adobe, beautiful and spectacular, vibrant, censored.
8. Thank you!: Thank you so much for joining me in this class. I hope you enjoyed painting the sunsets as much as I did. Please leave a review and post your projects here on Skillshare or on Instagram so that I can share them on my stories. Take care, and keep painting.
 Sheetal Shetty, artjauntwithsheetal