Transcripts
1. Welcome to the Class: Are you someone who loves
to paint with watercolors? Then this class is
definitely for you. You're going to paint
a simple landscape using easy painting techniques. Hey, everybody. You're
most welcome to my new class, myself
Rudwik Patel. I'm a self taught, independent artist and an interior
designer by profession. I personally love to explore different art forms and styles and not stick to
one particular thing. So if you are joining
me, you'll find a variety of classes
that I create. We are going to start
by understanding the class project and all the elements that
we are going to paint. Then we are going to talk
about all the art supplies that you will need
for the entire class. Then we are going to
learn how you can apply a masking tape on all the
four sides of the paper. We are going to start by drawing a basic sketch using a pencil. Then we are going to
paint an abstract sky using wet on wet technique. We're going to paint
a snowy mountain that you'll definitely
enjoy painting. Then we are going to paint
foreground mountains using a gradient effect, followed by some
beautiful houses that we are going to paint
and add some details. Then we are going to
paint the pine trees and the landscape in detail. Mining these elements together, you'll have a beautiful
watercolor painting in the end. No need to worry
about the output, enjoy the process of creating. We are going to paint with
easy painting techniques. So without any delay, grab your art supplies and join
me on this creative journey.
2. Class Project: Hey, everybody. Now
let us talk about the class project that
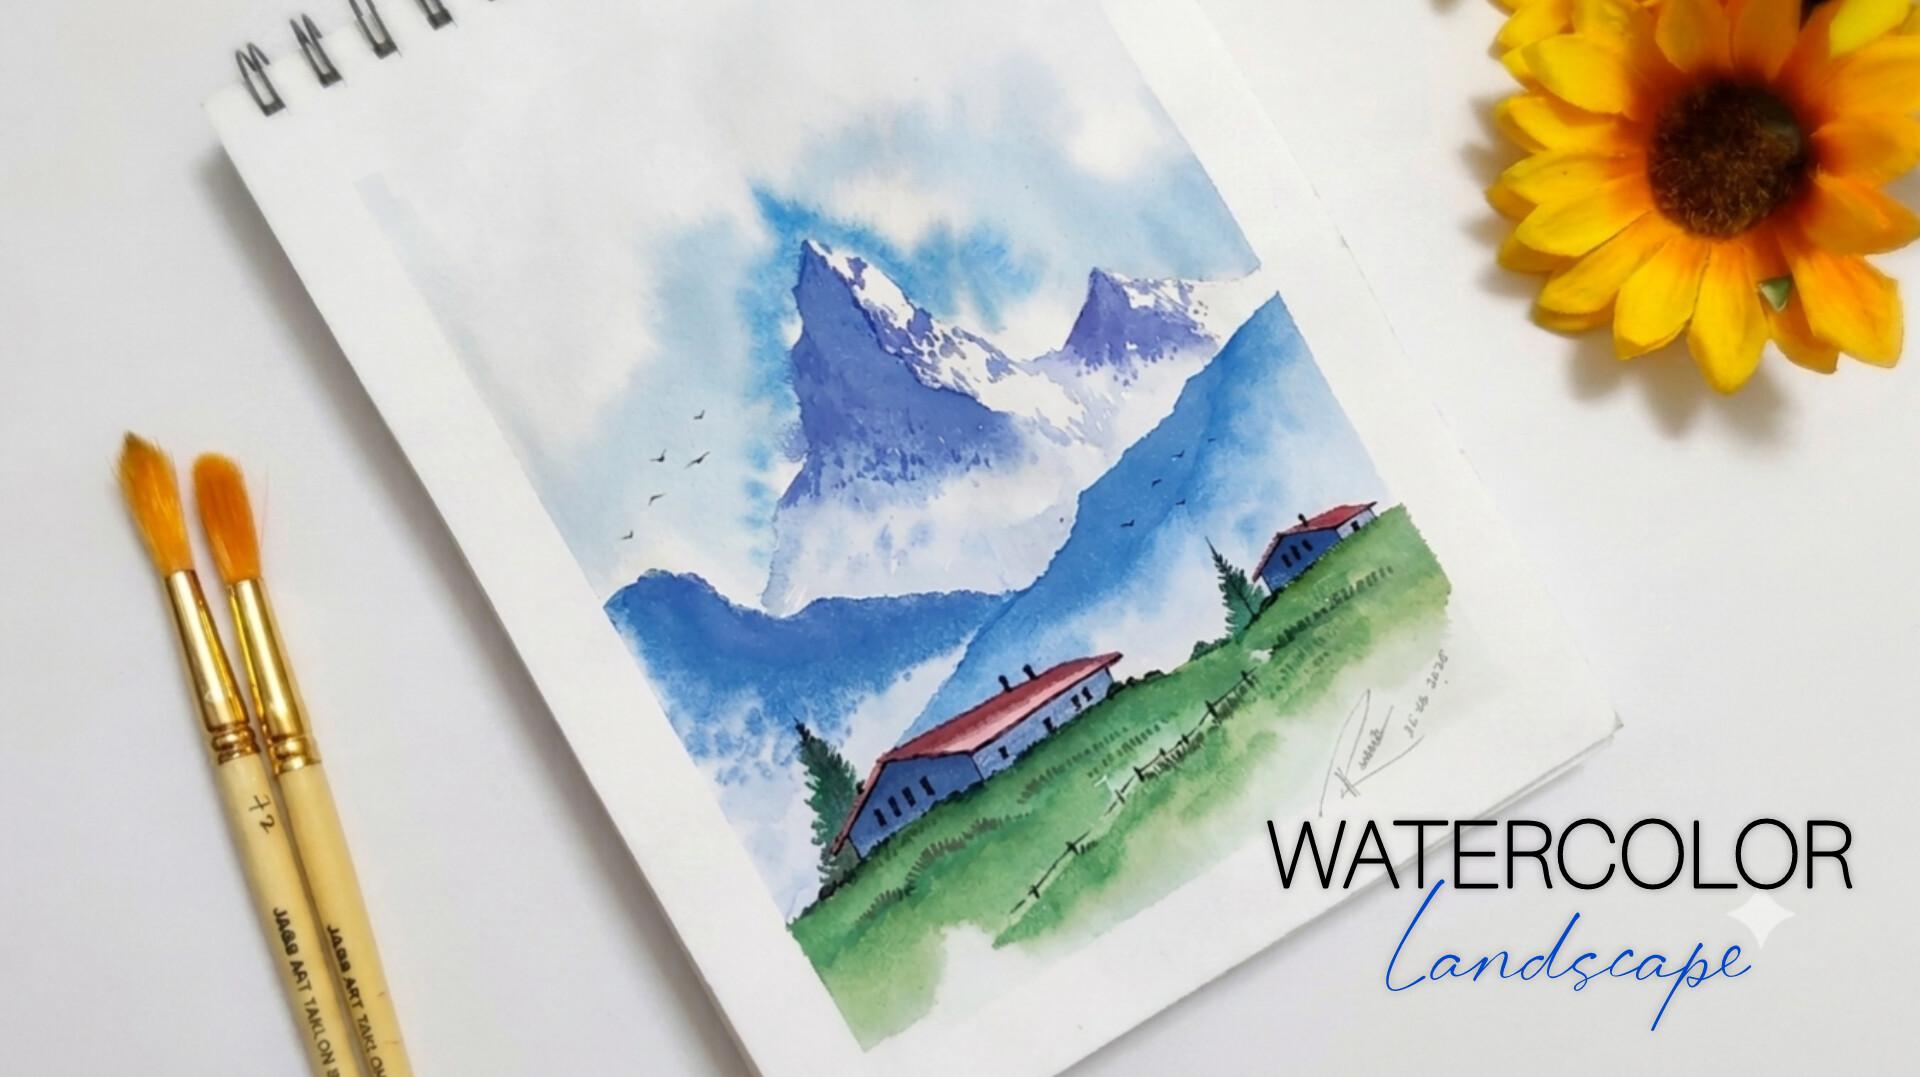
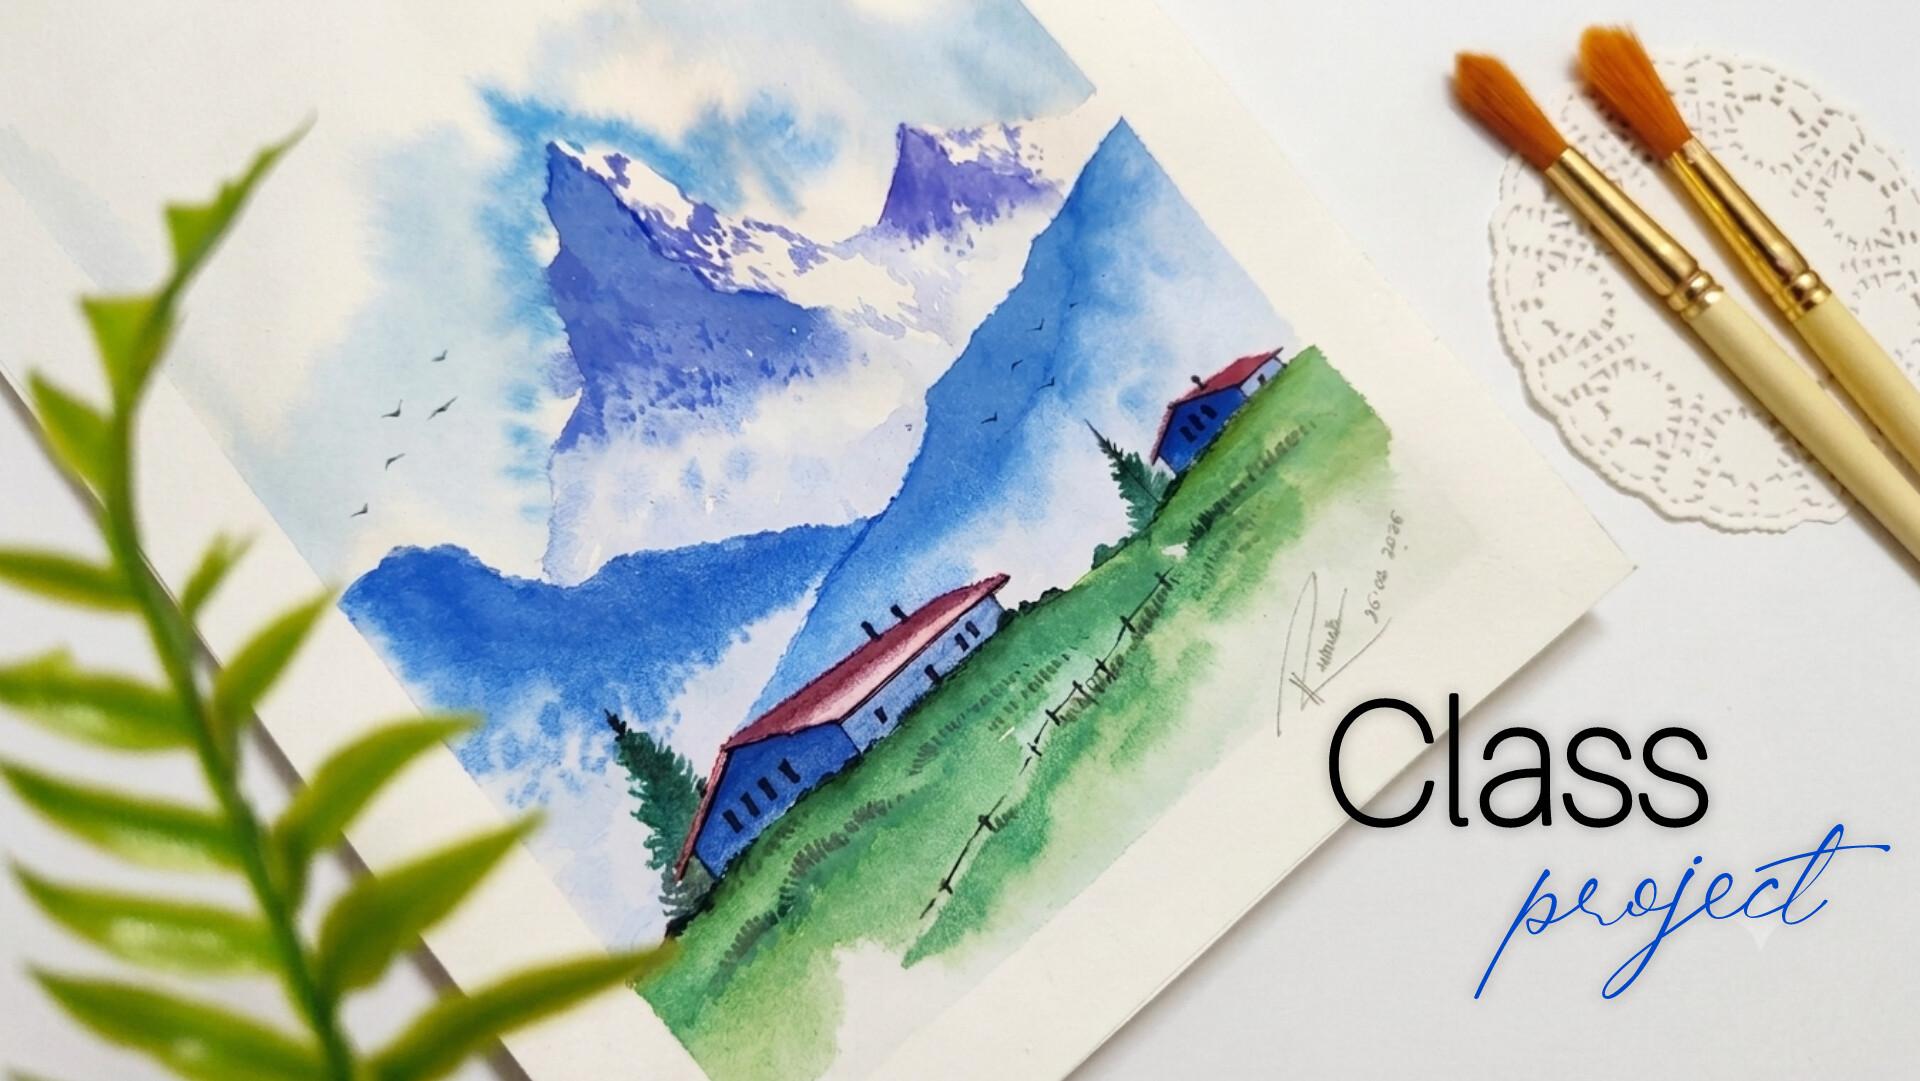
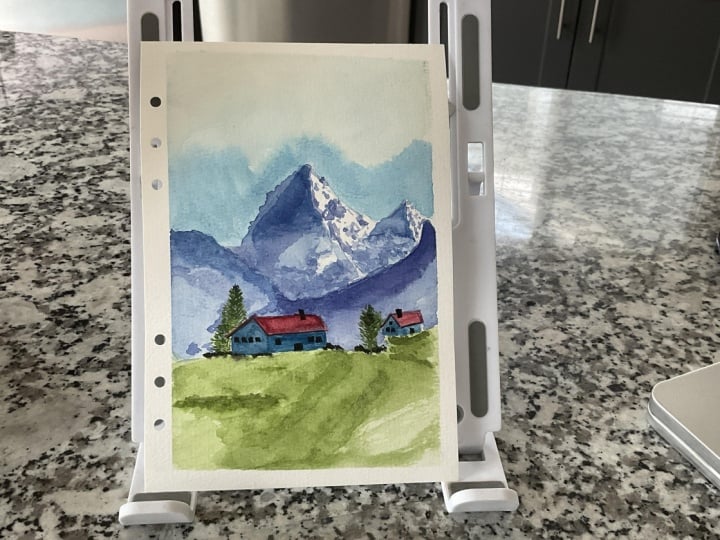
we are going to create. So you can observe I have placed the entire painting
on the desk surface. The first step is to create this beautiful abstract sky area that you can observe carefully. It is having this random light blue shade in
the entire surface. Then we are going to draw these little birds that
you can observe, and we are going to draw
them using a black ink. Now, if you observe the
background mountain, it is having a noise
gradient effect. It's a snow mountain. That's why you can observe
a lot of texture in it. Then when we come towards
the foreground mountains, you can observe a
nice dark blue color, and it is also having a
nice gradient effect. The upper part is darker and
the lower one is lighter. So this we are going to use a wet on wet
technique and paint. Then we have these
beautiful pine trees using a nice green color, followed by these beautiful houses that we are
going to paint. We are going to add minu
details in the houses, and you'll definitely
enjoy the entire process. So there are going to be
two houses, basically. One is going to be a
little bit bigger, another one is going to
be a little bit smaller. Then we have this beautiful
landscape area having a nice, vibrant green color and these little grassy texture
that we are going to paint. Then we're going to add
this fence element, and combining all these
elements together, we are going to form a subtle watercolor
landscape painting. No need to worry
about the output. You just have to
enjoy the process, and you can create your own version of the
painting as well. Now let us move
towards the next part.
3. Art Supplies: Hey, everybody. Now
let us talk about all the art supplies that you will need for this
particular class. No need to worry at
all in case you are missing out on any
particular art supply, you'll find it very easily in
any nearby local art store. So let us start with
the first art supply, which is going to
be a masking tape. You can observe that
we are going to use this particular masking tape to apply on all the four
sides of the paper. Now, once we are done painting, we are going to remove
this masking tape, and it will give you a
beautiful white border. If you want your painting to be in a perfect rectangular shape, then you can apply
the masking tape, and if you want to paint it directly, it is absolutely fine. Now, you'll need a
simple tissue paper whenever you're working
with watercolors. It helps you to remove excess amounts of water
or color from the brush. Then comes the next art supply, which is a simple pencil
that we are going to use to create a basic sketch. This sketch will
basically help us to locate the position of the elements in the
entire scenery. Then comes the
beautiful art supply, which is a nice black
ink from Artline. So you can use any
good alternative. It is absolutely fine. You can observe that tip
of the marker or the ink. It will help us to give minute details to
the entire painting. Then comes the most
important art supply, which is the brushes that
we are going to use. So there are going
to be two basic brushes that we
are going to use. The first one is quill
brush of size four. Another one is a round
brush of size two. In case you do not
have a quill brush, you can use a round brush
of size four as well. Then we have a
simple container in which you can already
observe some blue water. So definitely, we are going to take some clear water initially. So the container will help
us to use water wherever required whenever
we are working with watercolors and clean
the brush as well. Now this is the sketchbook
that I'm using. It is having 170 GSM. Now, generally, whenever you're
working with watercolors, you can use a 300 GSM paper, but this will work as well. So on this particular paper, we are going to complete
our entire scenery. Now, whenever you are
using watercolors, make sure that the thickness
of the paper is good. It should be at least 170 GSM so that you can apply heavy washes
of color and water on it. Now, let us talk about the watercolors that
we are going to use. I'm going to use the
watercolors from Bonfll. You can use any other
good alternative as well. It is absolutely fine. So let me give you
the details about the colors that we are
going to use as well. There are going to be seven basic colors
that you will need. The first one is black, then
the second one is dark blue. Then we have purple, red, white, sabgreen and deep green. So these are seven basic
watercolors that you will need. In case you want to use any
other good alternative, it is absolutely fine. So these are all
the art supplies that you will need for
this particular painting. I hope that you got an exact
idea about the art supplies. Now let us move
towards the next part.
4. Tape the Paper: Everybody. Now let us tape the paper before we
start with the painting. So you can observe
that I have placed my sketchbook on
the desk surface. Now, we are going to use
a simple masking tape, and we are going to apply
the masking tape on all the four sides of the
paper. No need to hurry at all. You have to do this
particular step in a very careful manner. So we'll take small pieces of
the masking tape and we'll start applying the tape
from one side of the paper. So let me start by applying the first masking tape
on the right hand side. So you can observe
that I'll align the masking tape
with the paper edge, make sure that the masking tape is parallel with the paper edge, and simply use your thumb or finger to apply
some pressure. Make sure that the masking
tape is nicely stuck with the paper and there
is no gap left in between. Then I'll place another masking tape on the left hand side. I'll align it carefully, make it parallel
with the paper edge, and simply apply some
pressure using my finger. So we are done applying masking
tape on both these sides. Now let us apply it on
the topmost portion. Again, I'll align it
with the paper edge. Make sure that it is parallel
and apply some pressure. And similarly, I'll be adding the last masking tape on the bottom part using
the same steps. So the reason behind applying the masking tape is that
once we are done painting, we'll get a beautiful
white border when we remove the masking tape. So I hope that you
got an exact idea about how you have to apply the masking tape on all the four sides of the
paper. No need to hurry at all. Try to do this particular step in a very careful
and good manner. Now let us move
towards the next part.
5. Basic Sketch: Hey, everybody. Now let us
start with the painting. The first step is to
create a basic sketch. So I'll be using a simple pencil and let us start with
the background mountain. So I'm starting with a very
rough and random line, which is going to create a
nice hill in the background, and it is not at all
compulsory for you to paint or draw in
the exact same way. You're free to compose, and you can experiment with
the entire scenery as well. I have created a center line, which is the separation and makes the mountain a
little bit more in three D. Then we are going to have two more mountains coming
in the entire scenery, which is going to be
in the foreground. These are not
complete mountains. It is a half portion
of the mountain. Then I'll be having a big
house in the bottom area. So I have started with the roof and I'll just create the walls. You can add a simple
ground line to separate the mountains
and the ground area. I'll be adding a little door and some windows in
the house as well. Now, once we are done
drawing the first house, we are going to have
another house as well, which is going to be
a little bit smaller. We are going to draw
it a little bit smaller and in a
different perspective. I'll be adding little windows in this particular
house as well. I'll be drawing two
vertical lines which will help us to locate
the position of the pine trees that
we are going to paint and a simple road coming
out of the landscape area. This is the basic
sketch. Now let us start with the painting and move
towards the next step.
6. Painting the Sky: Hey, everybody. Now
let us paint the sky, which is going to be the
first step of this painting. I'll be using my quill
brush of size four, and you can just simply rotate your painting so that you can paint in a comfortable manner. Now take some clear water
in your brush and start applying a thin coat of water on the entire
surface of the paper. Now, make sure that you do not move your brush
inside the mountain. So we are basically
using a wet on wet technique in which we
apply a thin coat of water initially and then
apply the color so that the color will
spread automatically and give you a nice
abstract effect. So now in the surface, you can observe that I'll be taking a little
bit of blue color, and I'll just apply
these random strokes. You can observe that the
color will not move inside the mountain because we have not applied
water over there, and we have to consciously not move the brush
inside as well. And you can observe how
beautifully the water spreads and creates a
nice abstract effect. No need to apply the color
in the entire surface. You just have to randomly
apply it near the mountain. In case you find
that your brush is having excess amount
of water or color, you can dab it onto
the tissue paper. This is how you can paint
a beautiful abstract sky. Now let us move
towards the next step.
7. Painting the Mountains: Hey, buddy. Now let us
paint the mountains, which is going to be
very interesting part, and you'll definitely enjoy it. So I'll be using my quill
brush of size four, take some good amount
of water in it, mix some purple
and blue together, and we are going
to fill the brush completely with color and water. Try to create an
equal composition of water and color together, load your brush completely
with the color, and then start applying from the top portion
of the mountain. You can observe there's a
separation line in between, so no need to move your color
towards the right indside. So slowly, I'm applying the color and moving
towards the bottom part, and midway, you have to
stop applying the color. No need to hurry at all, take your time and slowly
apply the color. Now in this particular
part, I'll stop, and I'll just clean
my quill brush quickly and apply it with water. You'll observe that
the color will spread automatically in a
very beautiful manner, and it is called a
gradient effect. It's a beautiful
technique that you can use when you're
working with watercolors. It helps you to give a
nice gradient effect, and it is a very
satisfying process. Now you can observe that
we have a darker shade on the topmost portion and a lighter shade in
the bottom part. So I'll use a little
bit of color, and I'll use the tip
of my quill brush to add these little texture
in the surface area. It helps us to create a beautiful snowy effect
in the entire mountain. You just have to randomly
apply these strokes. No need to worry
about perfection. I'm not using a color
palette this time. I'm directly mixing the
colors on the tiles surface. In case you are using a tiles whenever you're working
with watercolors, you can directly use the colors
in that particular area. It helps to mix in a
comfortable manner, and in case you want to use a color palette it
is absolutely fine. So again, I have mixed some
purple and blue together, and I have created the shade, and I'll fill the color in the next mountain on
the right hand side. These steps are absolutely same. You just have to stop midway, then clean your quill
brush in water, load it with water, and simply
apply in the bottom part. The color will spread
automatically, and you'll get a
beautiful gradient effect in this particular
mountain, as well. Now, you can slowly apply
these little strokes in the bottom part to create some variation in
the entire mountain. No need to hurry at all. Try to paint in a very slow
and steady manner. Take some more purple
and blue together. Now, this time, try to have less amount of water
and more color. In case you find that there is excess amount of
water in your brush, simply dab it onto
the tissue paper. Now, we are going to add
some beautiful variation in depth on the right hand side,
which is completely white. Now, we are not going to
fill it with complete color. You just have to use the tip of your quill brush and start
applying these little strokes. You can observe that I'm leaving some spaces white in between, which gives us a nice
texture of snow. No need to hurry it
all, take your time, and in case you find
that your brush is having excess
amount of water in it, simply dab it onto
the tissue paper. Similarly, we'll be using the
same step on the mountain, which is a little bit smaller on the right handside as well. You are definitely going to
enjoy this particular step, and you can observe
how beautiful both the mountains are looking. It is creating a
beautiful snowy texture, and you'll definitely observe
a nice gradient effect. Now, once the entire
mountain is dry and you want to add some more
texture using a nice, highly saturated blue
and purple color, you can do that, as well. And in case you want to leave it subtle only, it is
absolutely fine. So I hope that you got an
exact idea about how you have to paint the mountains
in a gradient effect. I have to tell you this
that you have to not worry about perfection or painting
it in the exact same way. It is absolutely fine. You are free to explore and experiment. You can, in fact,
change the shape or composition of the
entire mountain as well. Now, let us paint the
mountains in the foreground. I'll take a little bit
of more blue color. So whenever you find that your colors are getting finished, you can take some more color. No need to take a
lot of color in advance because we do not
want to waste the resources. So now, again, I'll mix some blue and purple
color together. Try to have a nice composition of water and color together. Let us start with the mountain
on the left hand side. So we are not going to apply a complete dark blue color
on the entire surface. It is going to be
gradient as well. So on the topmost surface only I'll be applying
the darker color. And then I'll be
cleaning my quill brush, load it with water and apply
on the bottom surface. Again, you'll observe that
the color will spread automatically and create
a nice gradient effect. No need to hurry at
all, take your time. Now slowly, I'll just apply
some more blue color on the bottom part and you'll observe a beautiful
gradient effect. You are making the mountains in the foreground a little
bit darker because we want to create
a variation and make it look that it
is in the foreground. You can use the tip of
your quill brush to add these little strokes in the bottom area to create
some variation and texture. We are almost done painting the mountain on the
left hand side. Now in the similar manner, we are going to
paint the mountain on the right hand side as well. The line is still visible, so we are going to
use the same process. Again, we are going to use some more purple and
blue color together. Try to create a nice
composition of water and color together and apply the outline
of the entire mountain. No need to at all, use the tip of your quill
brush carefully, then clean your quill
brush and load it with water and apply it on the entire surface
in the bottom part. So you can again observe that the color will spread
automatically. Make sure that you do not move your brush inside the house and just use the tip of your quill brush to apply it
on the remaining surface. You can observe that I have
moved a little bit of color in the house that
is a little bit smaller, but it is fine. We are going to
fill it with color, so it won't be visible. I'll use the tip of my quill brush and add
these little strokes. So we are done painting
the mountains. Now let us move
towards the next step.
8. Painting the House: Hey, everybody. Now let us paint the house and the
foreground elements. So for painting the house, we are going to
create the roof of the house a little bit vibrant red so that it comes out nice and it looks really
vibrant and attractive. So I've taken a
little bit of red, and I'll be using my
round brush of size too. It's basically a
detailing brush so that you can apply the
color in a smaller area. So you can observe that I'll be applying the color
in the entire roof. No need to hurry at
all. Take your time. You can apply a darker shade
on the topmost portion, and then you can
apply some water to create a gradient effect. No need to hurry
at all, paint in a very slow and steady manner whenever you're painting
in a smaller area. All right, so we have painted the roof of the first house. Now, in order to increase
the saturation of the color, you can take some more red color and try to have less amount of water and more color in your brush and apply it on
the entire roof surface. In case you find that your brush is having excess
amount of water in it, just simply dab your brush
onto the tissue paper. This will help you to
remove excess amount of water and get a nice,
highly saturated color. Now, similarly, I'll be adding the red color on the
second roof, as well. No need to hurry at all, paint in a very slow and
steady manner. I have to tell you this again. So now you can
observe that the roof is creating a beautiful
contrast with the background. Now, similarly,
we'll be painting the walls of the house as well. If you find that there is any space left for
painting the roof, you can apply the color in
that particular area as well. Now, to paint the
walls of the house, we are going to take
some dark blue, add a little bit of water in
it to loosen the color up, create a nice composition of
water and color together. Now start applying the color onto the walls. No
need to hurry at all. Again, it's a round brush. That's why you'll have
a beautiful small tip to paint the entire area. Once you have applied
a darker color on the topmost portion, you can add a little
bit of water to your brush and create a
nice gradient effect. Similarly, I'll be
applying the color on the remaining surface
of the wall as well. It's a little bit
lighter because I have used a little
bit more water in. So the more you'll
explore watercolors, you'll understand
that the more amount of water creates a
less saturated color. And the less amount of
water that you'll use, you'll get a highly
saturated color. So you can observe
that we have painted both the houses
with walls as well. And in case you want
to create some depth, you can apply some
darker tone of the color in areas
wherever required. Now, if you find that your brush is having excess
amount of water in it, you can simply dab your brush onto the tissue paper so that excess amount of water
will be removed and you'll be able to get a
highly saturated color. Now, once we are done
painting the houses, we are going to add some minute details using a black ink. I'm using a black
ink from art line. It is having a 0.8 tip
in case you want to use another good alternative like a black pen, it
is absolutely fine. So I'll just enhance the roof
by adding a simple line, and I'll be drawing the windows and doors using the
same black ink. So the black color basically
creates a nice contrast. We could have done this
using watercolors as well, but it is easier to use
black ink directly. Now, similarly, I'll be adding
the details in the house, which is a little bit
smaller, as well. You can add the vertical
lines in the walls as well, and it will create a beautiful contrast
with the background. You can add these little
chimneys, as well. So we are done
painting the houses. Let us move towards
the next part.
9. Painting the Landscape: Hey, everybody. Now let
us paint the landscape. It is the last part of
the entire painting, and you'll definitely enjoy
this particular step as well. So let us start by
painting the pine tree. It is a very easy
and simple step. You can already observe the pencil line that
we drew initially. So I'll be starting
with a little bit of solid black color from
the starting portion, and then slowly, you'll add a little bit of green
in the bottom part. So it's a simple and easy step. Start by applying small strokes
from the topmost portion. And as you move towards
the bottom area, you just have to increase the size of the strokes
that you're making. So this will help you to
paint the entire pine tree. It is a very satisfying
and peaceful process, and you'll definitely
enjoy doing this. In case you are not that
much confident enough to paint the pine tree directly
towards your final painting, what you can do is
you can practice it on a rough scrape
of paper initially, and then you can come
towards your final painting. It will help you to
develop confidence and the chances of making
mistakes will be very less. Now, similarly, we have
another vertical line near the smaller
house, and there also, we are going to paint
this pine tree, but it is going to be
a little bit smaller, but these steps are
absolutely same. So this is the
easiest technique to paint the pine tree using
a round brush of size too. You can decide the
position, shape, and size of the pine tree
according to your convenience, as well. It is absolutely fine. In fact, you are free to compose the entire scenery, as well. Now you can observe
that it is creating a beautiful contrast
with the background. In case you want to
enhance the pine tree, you can make the tip of the
pine tree a little bit black. So we are almost done
painting both the pine trees. Now let us move towards the landscape area
in the bottom part. I'll mix a little bit of
green and black together, and I'll just enhance
the ground line first. So I'll just create
a rocky texture. No need to hurry at all. You just have to apply it
in a very random manner. And slowly I'll be moving towards the smaller
house as well. You can observe that I have just created these little black, small patches, which basically represents the rocks
on the ground area. Now let us paint the
landscape in the bottom part. I'll be mixing some deep
green and sap green together. I'll be using my quill
brush of size boo. Use the tip of your quill brush to apply a darker
tone of the color. We are just randomly applying it on the bottom
part of the house. Now you can add a
little bit of water and you'll observe that the
color will blend together. No need to hurry at
all, take your time, take some good amount of water and apply it on the bottom part. So you can already observe that the color starts spreading. We are creating the landscape in a very random and natural way, so no need to worry
about perfection. Once we have applied some water, I'm going to take some
more saturated color, and you can observe
that the color will spread in a very
beautiful manner. You can randomly apply
these strokes and you'll observe that it will create
a beautiful green effect. Watercolors sometimes
looks very complex, but it is very
interesting to explore. Sometimes you might
even not think of the output that comes when you are working
with watercolors. Now, I'll be taking some
saturated green color, and I'll be using the tip
of the quill brush to apply it randomly and
create these green patches. Don't worry about
the abstract form. We are going to add some
little grassy texture and make it look a little
bit more attractive. Also, no need to
worry about painting it in the exact same way. You're free to explore
and experiment. In fact, it is
absolutely fine if your landscape is not
looking similar to mine. So now once we are done applying the background for
the landscape area, what I'm going to do is that I'm going to take a
little bit of purple, add it in between deep
green and sag green, and we are going to
enhance the entire area. So we are going to
create a grassy texture using the round brush. It is a very satisfying process, and you'll definitely enjoy adding these beautiful details. In case you want to add
a little bit of black, also, it is absolutely fine. So the step is to create
these little strokes combining together to form
a beautiful grassy texture. And there is no specific way
of applying the texture. You can do it randomly
wherever you want to. It is good if you apply these little strokes on the topmost portion of
the dark green patches. I will enhance the entire area and create a nice
shadow effect as well. So we are done
applying a beautiful grassy texture in the
entire landscape. I hope that you
got an exact idea. Now using some
solid black color, I'll be creating these vertical lines around the landscape. Then you're going to connect
it using a horizontal line. I basically creates
a fence element and it enhances the
entire scenery. Creating a nice element. You can decide the position of the fence according to
your convenience as well. I'll be using our
black ink again and I'll be painting these
little birds around. So I'll be creating the cluster
of birds in the sky area. It is a very simple
and easy step. You just have to
create a V shape. Make sure that you create a variation in the
size, as well. Now, similarly,
we'll be creating a cluster of the birds in
the bottom part as well. So little elements enhances
the entire scenery. So we are done with
the entire painting. Let us remove the masking tape. This is a technique of
removing the masking tape. Try to remove the masking
tape in an angle and in a very slow and steady
manner so that you do not end up tearing your beautiful painting that you have created. Once you remove
the masking tape, you'll observe a beautiful edge, and it is very
satisfying as well. So no need to hurry, remove your masking tape in a very
slow and steady manner. You can observe how beautiful the painting edge looks once you remove the
entire masking tape. So that's why I
told you that apply the masking tape in
a very nice manner. Make sure that there is no space left between the masking
tape and the paper, and try to apply the masking
tape in a parallel manner. So now I'll be removing
the last masking tape. And we are done. Now let me take you a
little bit closer so that you can observe the
entire painting carefully. Combining all these
elements together, we have formed a beautiful,
subtle watercolor painting. I hope that you enjoyed
the entire process and got to learn something
new and creative. I'll be super excited to see
all of your class projects, so feel free to
ask any questions or doubts in the
discussion section. No need to worry
about the output or painting it in the exact
same way I have painted. You're free to explore and experiment with the
entire painting. Enjoy the entire process and keep practicing,
keep learning. Now let us move towards
the class conclusion. Y.
10. Class Conclusion: Hey, everybody. You're most welcome to the class conclusion. I hope that you enjoyed the entire class and got to learn something
new and creative. While I was creating
this particular class, I made a lot of mistakes, and that is something
that I always tell my students never to be
afraid of making mistakes. It's part of the
learning process. It would be really great if you add your projects into
the project gallery. I would be really excited to see all of your class projects. It would be truly great if you leave a review
for the entire class, as it encourages me a lot and my class can reach many
more students like you. At the end, I would like to say, keep learning, keep practicing. Thank you so much for
joining the class, and no need to worry
about the output. Just enjoy the
process of creating.
 Rutvik Patel, Artist and Instructor