Transcripts
1. 1. Introduction to the Class : Hello, and welcome everyone to my very first
Skillshare class. My name is Nishita, and I'm a mixed media artist, but I have a special place in
my heart for the beautiful, unpredictable world
of watercolors. You can find me on social
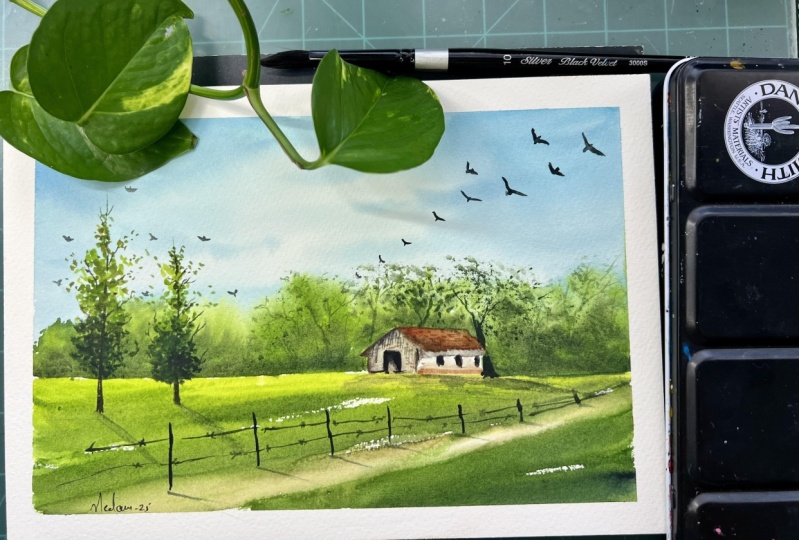
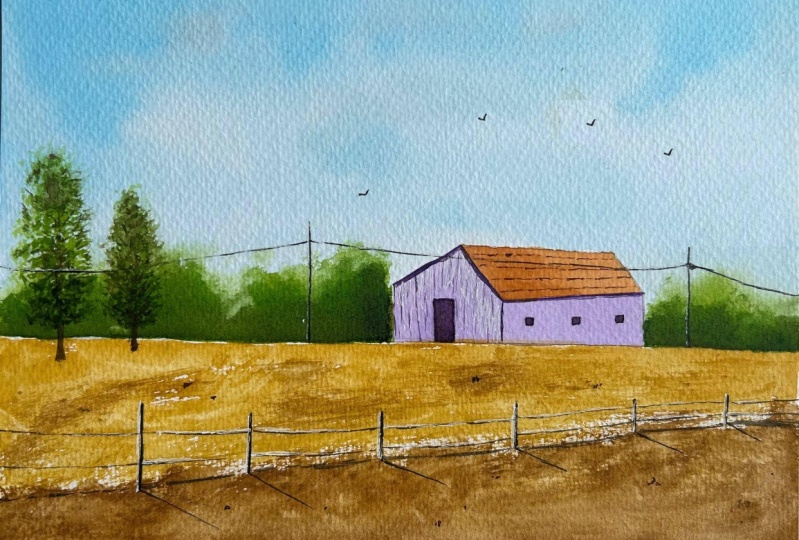
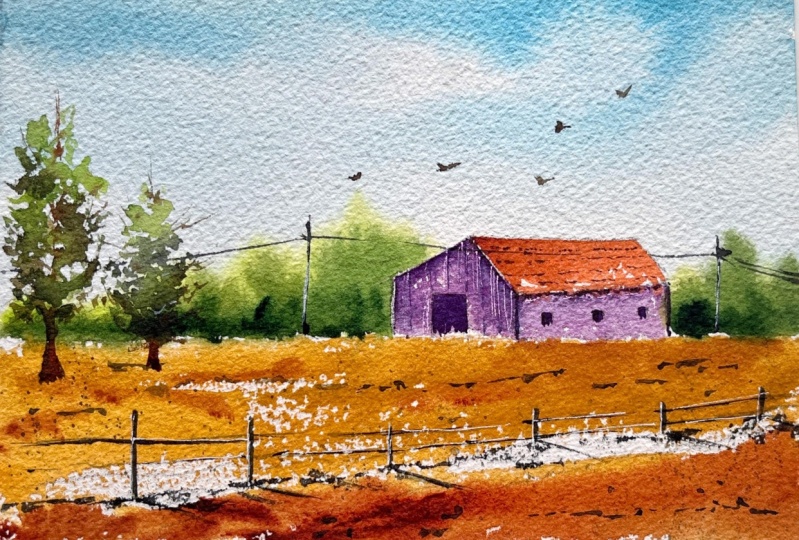
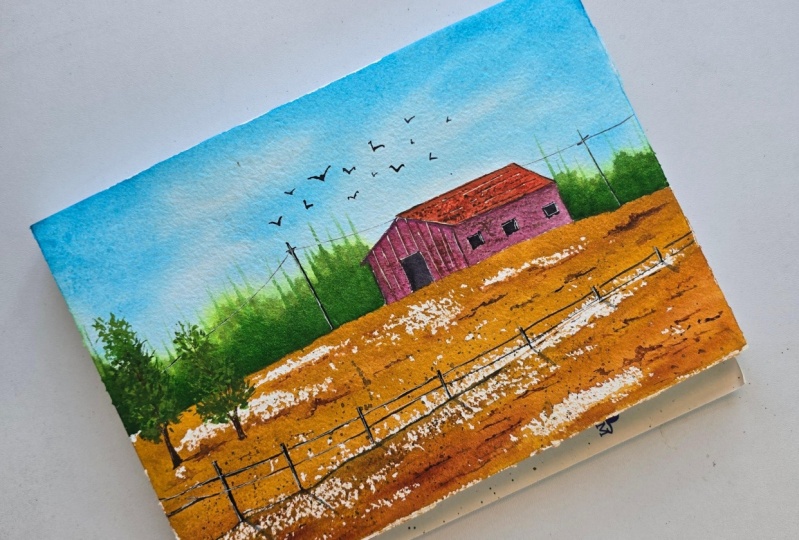
media as Bombay Painting Club. In this class, we will paint a countryside scene using few simple watercolor
techniques. We'll cover essential
techniques such as wet on wet for soft skies, layering rich textures
in the fields, and adding fine details to
bring our scene to life. I've broken down
every step to make it super easy and fun for everyone, whether you are a
complete beginner or looking to refresh
your watercolor skills. This class is for you. So grab your paints
and let's get started on this creative
journey together. I'll see you in
the next section.
2. 2. Materials Required: Hello and welcome.
In this section, I will take you through
all the materials that we require to
complete this class. Firstly, we're going to
start with the paper. So I'm going to be using a
nauseous watercolor paper. This is rough grain, 300 SM, that is 140 pounds, 100% cotton, and this is in AFive size that is
5.83 " by 8.27 ". You can use any watercolor paper that you have at
home from any brand, as long as it's 300 GSM and 100% cotton works best
with watercolors. Okay. Let me quickly show
you how this paper looks. It's got a beautiful texture. I absolutely love
a textured paper. This paper works best if you
like to have some texture in your painting and works very
well with dry strokes, okay? Now, let's look at
the other materials. Let's have a look
at the brushes. So this is a three
fourth inch flat brush from Princeton Heritage Series. Okay, works well with
the backgrounds. Next, I have a Rafael mop brush. This is a soft aqua size zero, folds a lot of water, one of my favorite brushes. Next, I have silver
brush black velvet. This is in size six. You can use any round
brush that you have. Now, this one is a Chinese
calligraphy brush. I absolutely love this brush for making trees and branches. It does not belong to any brand. I just found this on Amazon and thought of giving it a try. And let me tell you it's become my most favorite brush to
make trees and branches. Okay, so let's move on and have a look at
the other materials. We need a pallet,
a glass of water. A spray bottle to
moist the paints up and get them ready to paint. A masking tape in case you
want to have a clean border. I'm not going to be
taping down my paper, so I'm just going to be
using the paper as it is. Next, we need a pencil
for the sketch, a white pen for the details. This is from UIB Signo, and this is size 0.7. It's completely okay if you
do not have a white pen, you can use white
watercolor or white gosh. This one is titanium white from master class, NevskaPalata. Next, I've taken a wooden pin, but you can take any small
object just to place it under your paper to have
the paper at an angle. You will also
require a napkin or a paper towel to dab the
excess water of your brush. So this is it. These
are all the material that we would require
for this class. I'll see you in
the next section.
3. 3.Color Swatches: Welcome back. In this section, we will go through the
color palette and swatch out all the colors that are required to
complete this painting. So what you can see here is a custom palette of white
knights watercolors. That I mostly use
for my paintings. This is my go to palette. Apart from this,
we are going to be using Holbein
artist watercolors. Just these two colors. These are burn Sienna and
yellow ochre. Don't worry. If you do not have
the exact same color, you can use any color that is close to the colors that
we are going to swatch. So let's start with
the first color. So the first color that I'm
watching is azure blue. If you do not have Azure blue, you can use a Thaler blue or any lighter blue for the sky. Okay. So next, I'm going to
swatch this beautiful green. It's a bright neon green. This is called My green. If you do not have this color, just mix any green
with a lighter yellow, say a lemon yellow
or a yellow light. So you would get a
nice yellow green, which would be somewhat closer to the color
that we are swatching. Just go to quickly write
the name of the color. Okay. So next, I'm going
to take some green. I'm not sure whether this is the primary green
of white knights, but it's just called green, as you can see, it's
a darker green. So you can use any dark green on your palette or in your
watercolor set that you have. So I'm going to quickly
remove yellow ochre and burn sienna on my palette. So they are ready to swatch. Okay. I'm just gonna
write the name as well. This is green from
White Knights. Okay. And let's watch out local. Okay. I'm just going to
quickly write it down. Next, we're going to swatch Sabonsiena Okay. The next color that we're
going to swatch is orange. If you do not have a
ready mix of orange, you can always mix your colors
by mixing yellow and red. Okay. Lastly, I'm going
to make some violet. So I'm going to
take some non rose. You can use any pink or carmine, crimson, anything that you have, and mix it with a blue. I'm using azure blue. This makes a beautiful
reddish violet. I'm going to just add
a little bit more of that pink. Okay. And I'm going to
search this out, and you'll see this is
such a beautiful color. Okay, if you have
a ready violet, you can use that as well. It's completely optional. Okay, so this is the color palette
that we're going to be using to complete
this painting. And, uh, I hope you
keep your colors ready, and let's dive into
the next section. I'll see you there. Bye bye.
4. 4. Draw the Sketch: Hey, everyone.
Welcome to the class. Let's begin by drawing
a simple sketch. I'm going to draw an horizon
line a bit off center. And just above it, I
will draw a house. Don't worry for your reference. The final sketch is added
to the resources section. Just a simple sketch of the
house. Nothing complicated. Okay, the house is ready. Now I will roughly draw some
background trees or bushes. Yeah. And now I'm going to
draw two slanting lines. This is just a markup for
leaving some white space. Finally, at the fences. I'm just going to
lighten the house a bit. And here we go. We have the
sketch ready to be painted. See you in the next class.
5. 5. Paint the Background: Welcome back. I'm going to place a small clip
under my paper. I like to keep my
surface at an angle, say about ten to 15 degrees. This helps the paint to slide down and mix wealth
at the water. Now, let's start painting the sky by wetting
the paper first. Make sure you do not leave any white spaces and give the
sky a good wash of water. Going down all the
way to the bushes, carefully wetting the
paper around the house. We don't want the
blue running into the house. I think we're done. Now, I already have azure blue in my palette
from my practice. With my flat brush, I'm going to start painting, leaving some white
space in the center. And as I go down,
I will not load my brush with more color, as I want it to appear more lighter as I reach
the horizon line. So I love the soft
tones and the sky, and I think the sky is done. Now let's paint the trees. I'll be using a mop
brush from Rafael, but you can use any round brush. Now, while the
paper is still wet, I'm taking some may green and very loosely painting on
the portion we have drawn. You can use any
bright green that you have and just covering
up the entire section. I already have green and
Burnsiana on my palette. I'm just going to mix these
two to get a nice warm green. Start painting from the bottom. You want that lighter
green to be seen, so don't cover up
the entire thing. And keep painting all the
way through till the end. At the bottom, you can add
more concentrated color, which will be a
little more darker, just to give depth and variation
between the three tones, light, medium, and dark. I'm just going to add a bit
more concentrated colors here on the right and
finish off the background. So all this we're doing
while the paper is wet. That's why having 100% cotton
paper is very important. With this, we're done
with the background. I'll see you in my next class.
6. 6. Paint the Foreground: Welcome back. Now since
the greens are still wet, we will come back to
the house a bit later. Now with yellow ochre, I'm going to apply this color on the entire foreground using
wet on dry technique. As you can see, I've taken thick consistency of this color. So I'm getting those
dry strokes in between because there's not
much water on my brush, and I really like this effect. I'm going to leave that
white space in between. Yeah. And next, I'm going to take some burnt sienna and
add that in the bottom. At some places, I'm going to add some darker streaks
of those color. Again, very little
water on my brush. And I'm just going to blend
this in with the yellow. Without washing my brush, I'm just going to create some tiny streaks here
and there, very loosely. Now, as we have used a thick consistency of yellow
ochre and burn sienna, you can see that the
foreground is vibrant. And with this, we
finished our base layers. Now we'll paint the house in the next section. See you there.
7. 7. Paint the House: Welcome back. Since
the trees have dried, we can proceed with the house. I'm going to mix neon
pink with this blue on my palette to get a
beautiful violet. You can use violet directly
if you prefer that or just simply mix any red
with blue to make violet. Now we will start painting
the house with this color. We're going to take some
water and blend that in. And we'll paint all
the way through. The doors and the
windows will be painted on top of
this, so it's okay. Just paint that entire block. Do this slowly at your pace. No rush. Just get these lines perfect because we don't want the house to look distorted. And here we go with
the base color. Now for the roof,
I'm using orange. You can also paint this
with a flat brush. I'm just comfortable doing
it with a round brush. I'm going to take
some burn sienna and going to add that on the roof to show some
depth on the roof. Okay, I'm going to
bring this down a bit and spread that off. Next with a darker
value of the violet, I'm going to add a few details. I've just added
some more blue to that mixture to get
a darker violet. And we'll be painting
the doors and the windows with this color. Just blocking this out, making these tiny windows. I will paint on the
edges of the roof. And once we're done
with the roof, we'll be just darkening the edges of the house
from both the ends. Okay, here we go. And little bit under the roof. And I'm creating these
small tiny vertical nines. Adding some details. If you're happy with the house, you can completely
skip this step. Little bit here just
darkening these. Yes, I think I'm
happy with this now. D now for the roof, I've taken a darker value of burn sienna and just making
these tiny ziag wavy lines, short lines on the roof. And with this, we are
done with the house. In the next section, we'll
be painting the land area. I'll see you in the
next class. And
8. 8. Foreground Details: Hello, everyone,
and welcome back. In this section, we will start adding the details
in the land area. So I'm just taking
my burn Sienna. I'm just mixing it up with all the colors that
I have on my palette. That is the green, the bluish, purple,
to get a darker tone. And I can still see my drawing, so I'm just going to go over it. Here, we have drawn the
fences in perspective. As this fence moves
away from me, it appears to reduce in size. So basically, we have painted the fences from tall to short. Now we will add the shadows
to these fence post. And very lightly, I'm just
adding these diagonal lines. Once we're done with this,
we'll add the fence boards. Again, very loosely,
I'm making this line. And as you can see, I'm breaking this line at some places. So these were basically
just markups. Now I'm going to go back
in and darken these lines. I'm going to start from here. I'm going to go over these
lines and just darken them. Okay. I'm going to darken
the shadows as well. Now we will work on
the shadows under the fences and very loosely
with a very dry brush. I'm just making these tiny
strokes to create shadows. And yes, we're done
with the fence. Now with my napkin, I'm going to cover
the top part of the painting and loading
my brush with some colour. Again, the same mix. And I'm just going to splatter around the foreground,
and that's it. Now we can remove this and just go to clean
that off quickly. Yeah. Now with the same mix, I'm just going to add
some tiny stones, some dots, some lines
very loosely again. I'm going to take
more of that color and gonna make some more here. Okay, we're almost
done with the land. At the next section,
we will paint the trees and the birds. And we're done. I'll see you
in the next class. Bye bye.
9. 9. Elements and Details: Hello, and welcome back. In this section,
we'll be painting the trees and the other elements to complete this painting. I've taken some burnt
sienna on my palette. I'm just going to
give it a good mix, getting all the colors and different values of the
green to paint the trees. I'm going to paint these
trees very loosely. I can see I'm just making these loose
strokes with my brush. G to take a little darker
color now as I go down. Continue making
the same strokes, leaving some gaps in between. Okay. Now with the
lighter green, I'm going to paint
the top of the tree. Just continue to make some brownish swirly shapes by dabbing your brush lightly. And now we'll paint
the trunk of the tree. Just take in some brown, and I'll be painting in between the trees to
show some branches. A towards the end, I'm going to darken the
tree making some branches. Yeah. Okay. Taking a darker value, and I'm going to add that
in between at some places. The trick with these trees
is to keep things loose. Okay. I'm just going
to talk in this a bit. Now we will paint
the second tree. O I'm going to start painting with a
lighter value from the top. Again, just making the
same roundish strokes by having the brush. And as I go down, I'll be
taking a darker color, a darker value of the
same green. You can see. I'm leaving some white
space in between. Going to add a
little bit of brown and I'm going to take some
brown and add the trunk. Okay. Next I'm going to take
some burnt sienna, and I'm going to extend the
branches outside the tree. Random thin strokes. Okay. I think I'm going
to fix this tree. It's looking a bit incomplete. Okay, so I'm going
to take some lighter green and mix it up with
the darker green mix. I'm gonna take a bit more
of that and fill this in. Okay. Just gonna dark
in this bit as well. Yeah. I think now it's
looking much better. Oh So with this, we're done with the trees. Now let's move on with the power poles
or the electric poles. So I'm going to take
some lamp black, and I'm just going to
make a straight line. Yeah. Two of those. You can use a thin brush for making the wires or you can
also use a black pen. Just join these
wires to the poles. Okay. And we're done adding
the papa poles as well. Now we'll finish the painting
by adding the birds. Okay? But I take the same
brush and the same mix. Making these tiny strokes
to make the birds. Just a wee one shorter
hand and one longer hand, a simple way of getting
the birds right. And here we go. Done
with the birds. I'm going to take a white pen. You can use white quash as well, and just going to add
some highlights on the poles on the left side. Okay. And in between the
fences as well. I'm gonna highlight the house as well, making straight lines. Okay. And under the roof. Okay. Yep. And with this, we're
done with the details, and we have a beautiful landscape painting
in watercolors. I hope you've enjoyed
painting along with me. I'll see you in the
next section. Bye bye.
10. 10. Final Thoughts : Congratulations on completing your beautiful
watercolor landscape. I hope you found this tutorial, easy to follow along, and more sooever had fun
painting along with me. Thank you from the bottom of my heart for joining
me in this class. As you continue your
creative journey, remember that every painting is a chance to learn
something new. Don't forget to upload your
project to the gallery. It's an incredible way to get feedback and inspire others. You can also tag me on social media at
Bombay Painting Club. So keep creating and I look forward to seeing you
in my next class. Bye bye.
 Nishita Kashyap, Artist, Art Educator