Transcripts
1. Introduction: The season of autumn is
nature's grand masterpiece, a stunning, fleeting burst of color that reminds
us to slow down. It's a time for
warmth, reflection, and capturing the vibrant
whisper of change. Hi, my name is Ishida. I'm an artist, an art
educator from Mumbai, India. I've worked with many mediums, but currently on a beautiful
journey with watercolors. You might know me as the artist behind Bombay Painting
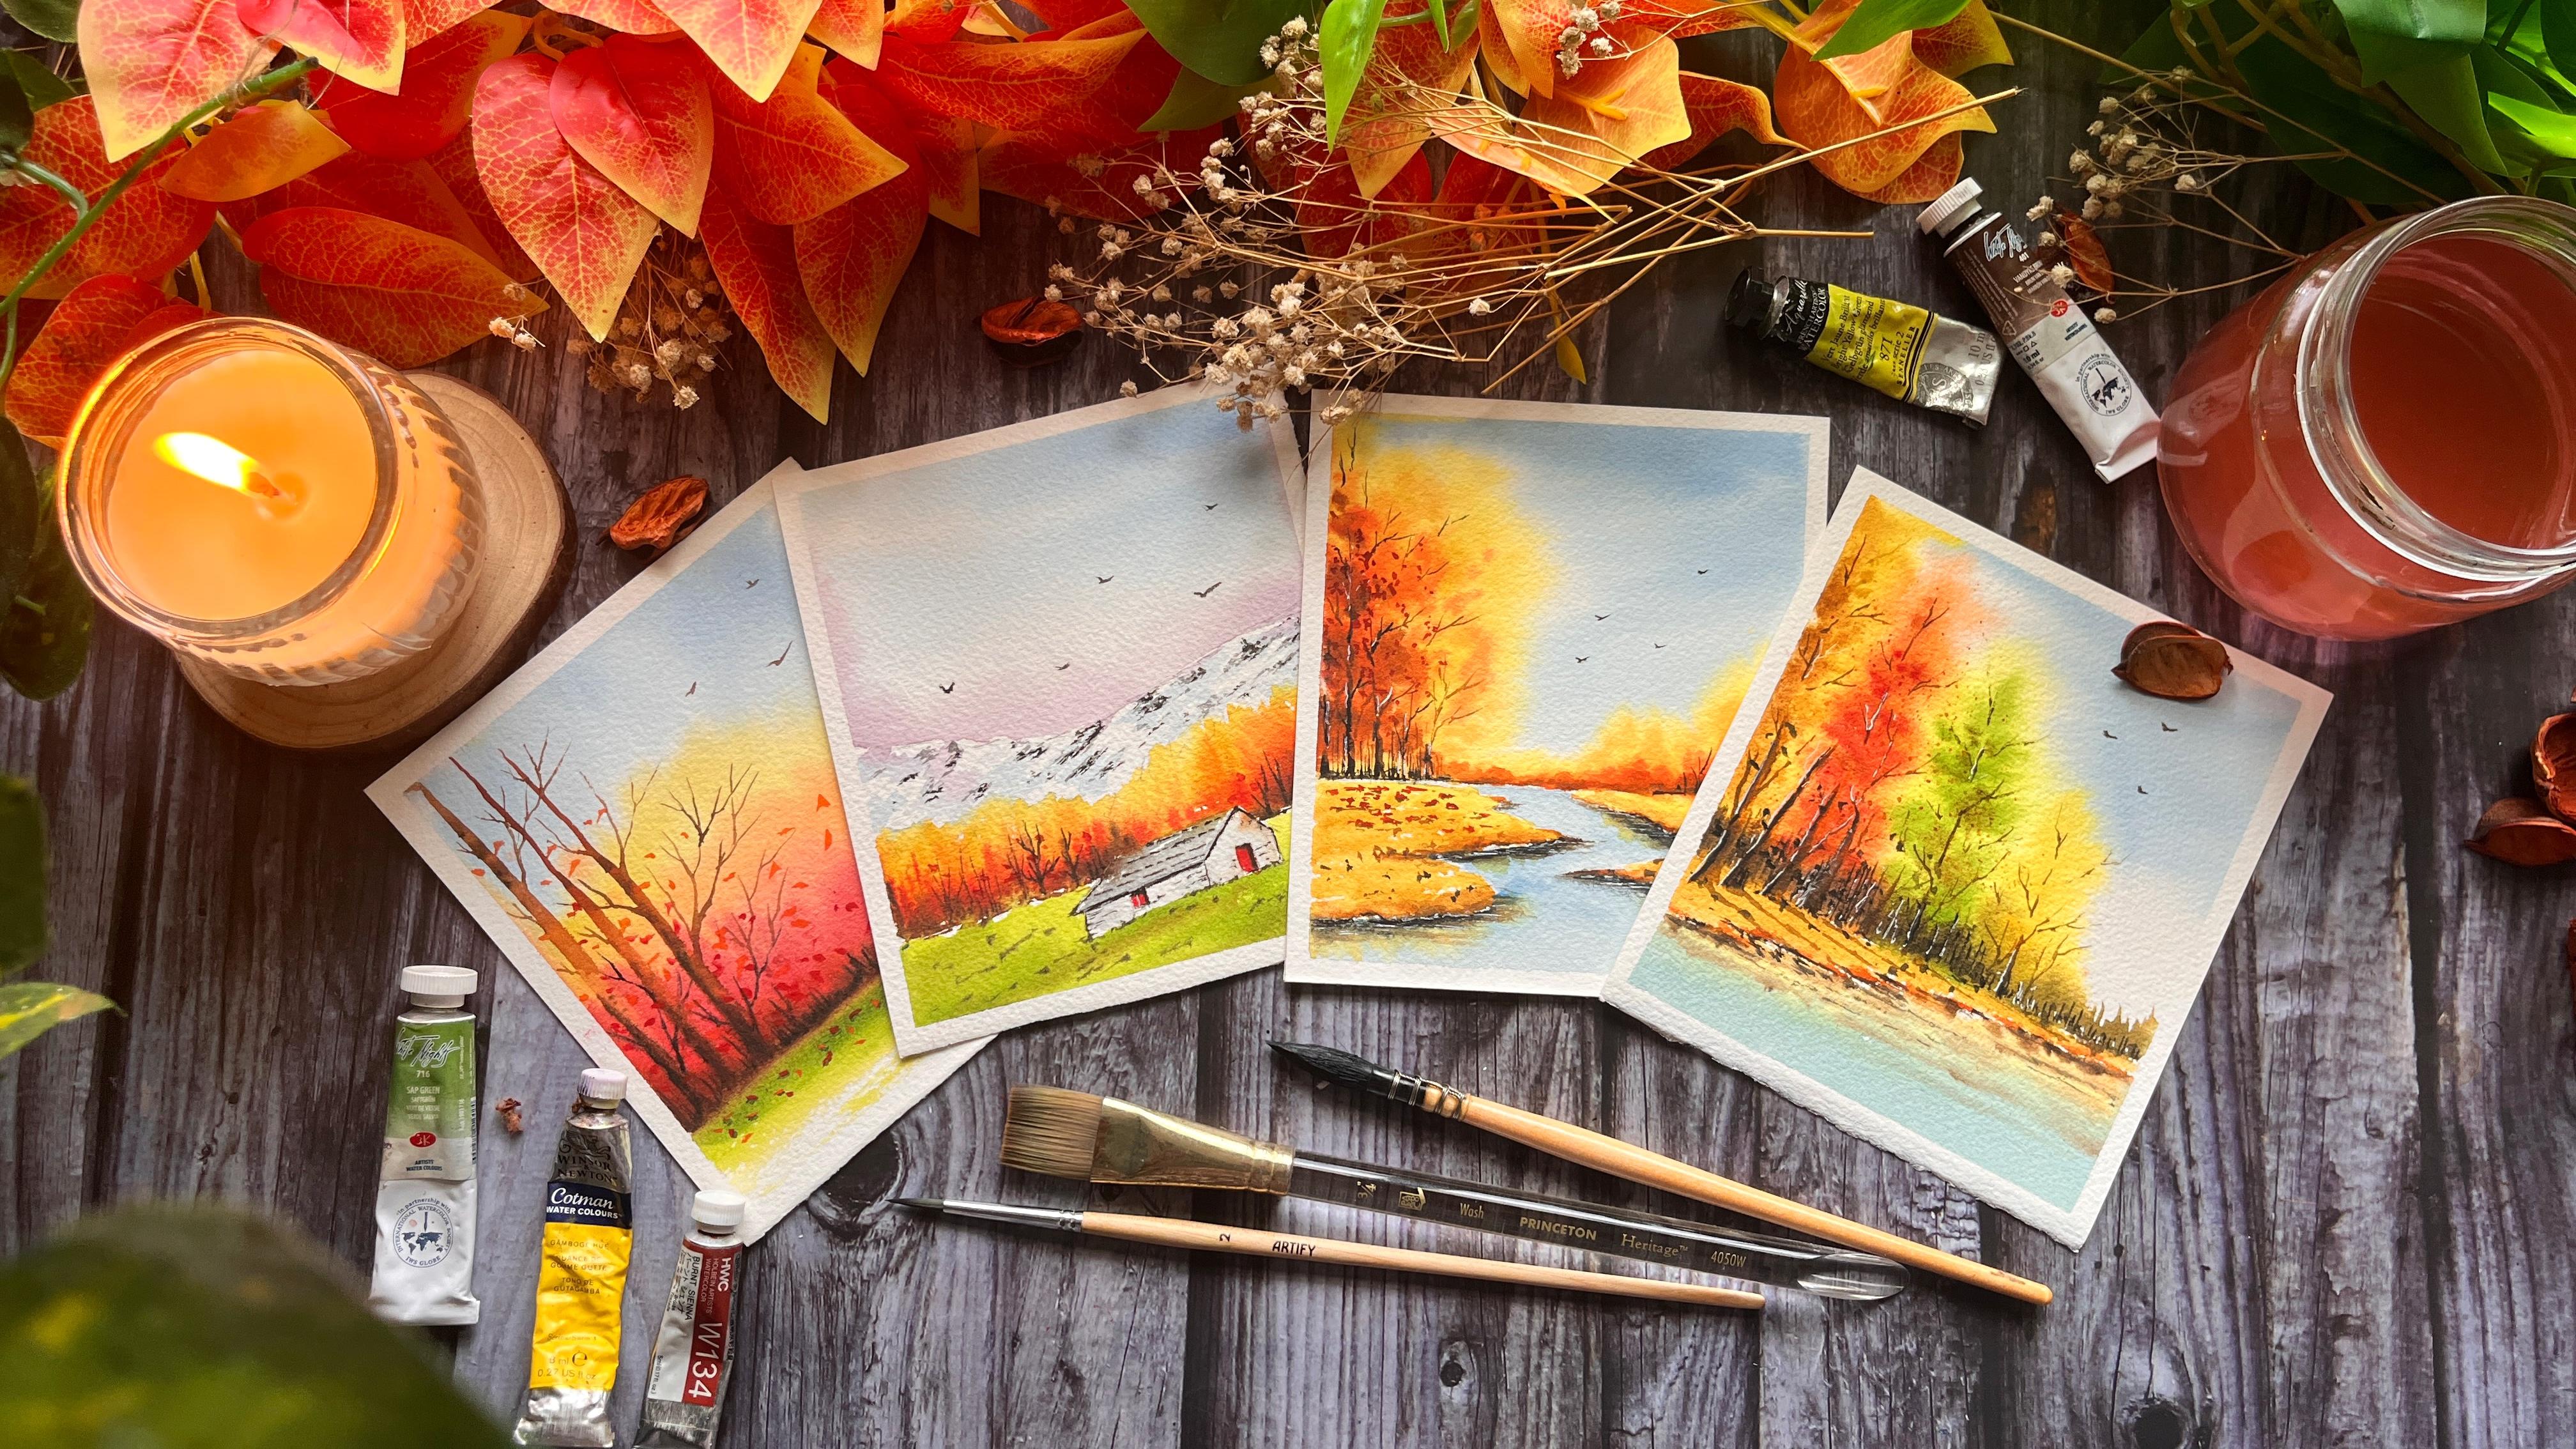
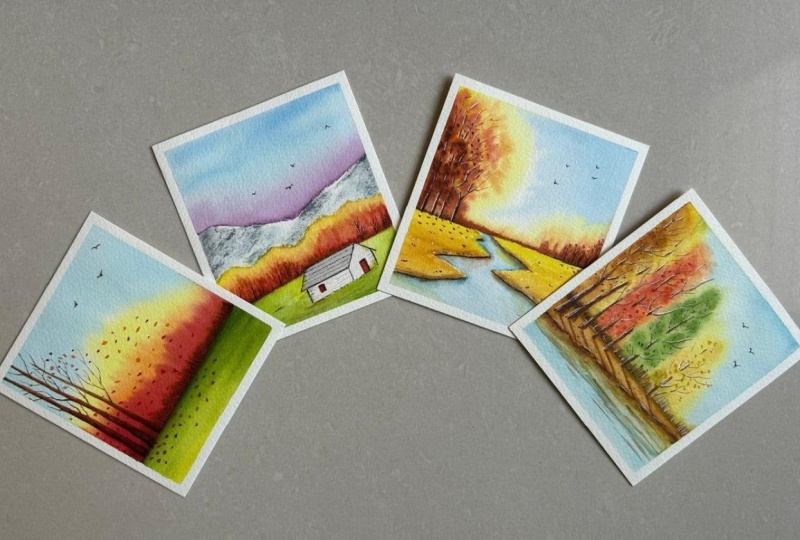
Club on social media. In this class whispers of fall, a watercolor journey
through four landscapes. I'll be your guide
as we translate the rich expressive beauty
of fall onto paper. We learn essential
techniques while painting four unique atmospheric
autumn scenes together. This class is perfect for beginners just starting
with watercolors and for experienced
artists who want to focus on small
scale landscape, compositions and
vibrant color blending. We'll start by going
over the materials and create a beautiful autumn
color palette together. We'll go through some basic
watercolor techniques and project examples before we dive into painting the four
beautiful autumn projects. I can't wait to get started, and I'll see you in
the next section.
2. Materials Required: Hello, and welcome, my friends. And in this section,
I'll take you through all the materials that you'll need to complete this class. Firstly, let's
look at the paper. Okay, so I'm using
Ash's 300 GSM. That is 140 pounds,
cold press paper. So basically, I have this
entire sheet of paper, and I've cut them
into several parts. And this sheet here, I've cut them into
four equal parts to get this measurement. So this is roughly around 14 centimeters
by 12.5 centimeters. Okay? So this is almost
close to a square, okay? So you can either have your own measurements or you can use the measurements
that I've just shared. Now let's look at the brushes. So here I have three
fourth inch flat brush. This is from Princeton
Heritage Series, which is perfect
for backgrounds. Next, this is a mop brush
from Brusto in size too. This holds a load of water, makes it perfect to
cover larger areas. Okay. Now the next two
brushes are from artifi. Okay? This is a
small flat brush. I really like using
these flat brushes, and the other one that I have is a small round brush
in size two again. This is a Chinese
calligraphy brush. It makes a nice thin stroke. Now, you can use any liner brush or any thin brush that you
have for finer details. This one is one fourth
inch flat brush. This is from the Neptune
CDs from Princeton. Now I'll be using
this brush only to sort out the
colors to show you. But you can use any
brush that you have. You don't need to have
the same brushes. You can use whatever you have. Let us now look at the other materials
that you will need. Okay? So this is an acrylic bow. You can use any flat surface that you have to tap
down your paper. Okay. Next, you will
need a mixing palette. For this class, I've removed all the colors in this palette, so I'll be using this palette. Okay, we'll talk about the
colors in the next section. Next here, I have a small clip which I use to place
it under the board. To keep my paper at an angle, you can use any small
object that you have. You will also need a pencil. This is a mechanical pencil. You can use anything
that you have. Now for the highlights, you can either use Guash. This is from Windsor
Newton White Guash. Okay? Or you can
simply use a pen, which I'll be using
for this class. This is from UIBL Signo 0.7. Okay. Next, you will also need a spray bottle to
moist your paints, okay? You will also need
two jars of water. Use one jar for your initial
brush rinse and second for your final rinse in clean water to ensure pure vibrant
colors without mudding. Next, you will need a masking tape to tape down your paper, a paper towel or a napkin, whatever you have at home. Okay? Now all the
materials that you need are also uploaded in the resources section
for your reference. In the next section, I will take you through all the
colors that you will need and create a beautiful
autumn color palette. For now, you can have
your papers ready, cut them into the sizes
that I've shed earlier, or you can use whatever
you have at home. Please feel free to paint in landscape mode or
a portrait mode, anything that you like. Okay, I'm going to leave
that open to you guys. So this is it for the materials, and I'll see you in
the next section.
3. Autumn Color Palette: Hello. Welcome to
the section where we'll be creating a
beautiful autumn palette. I'll take you through
all the colors that we need to
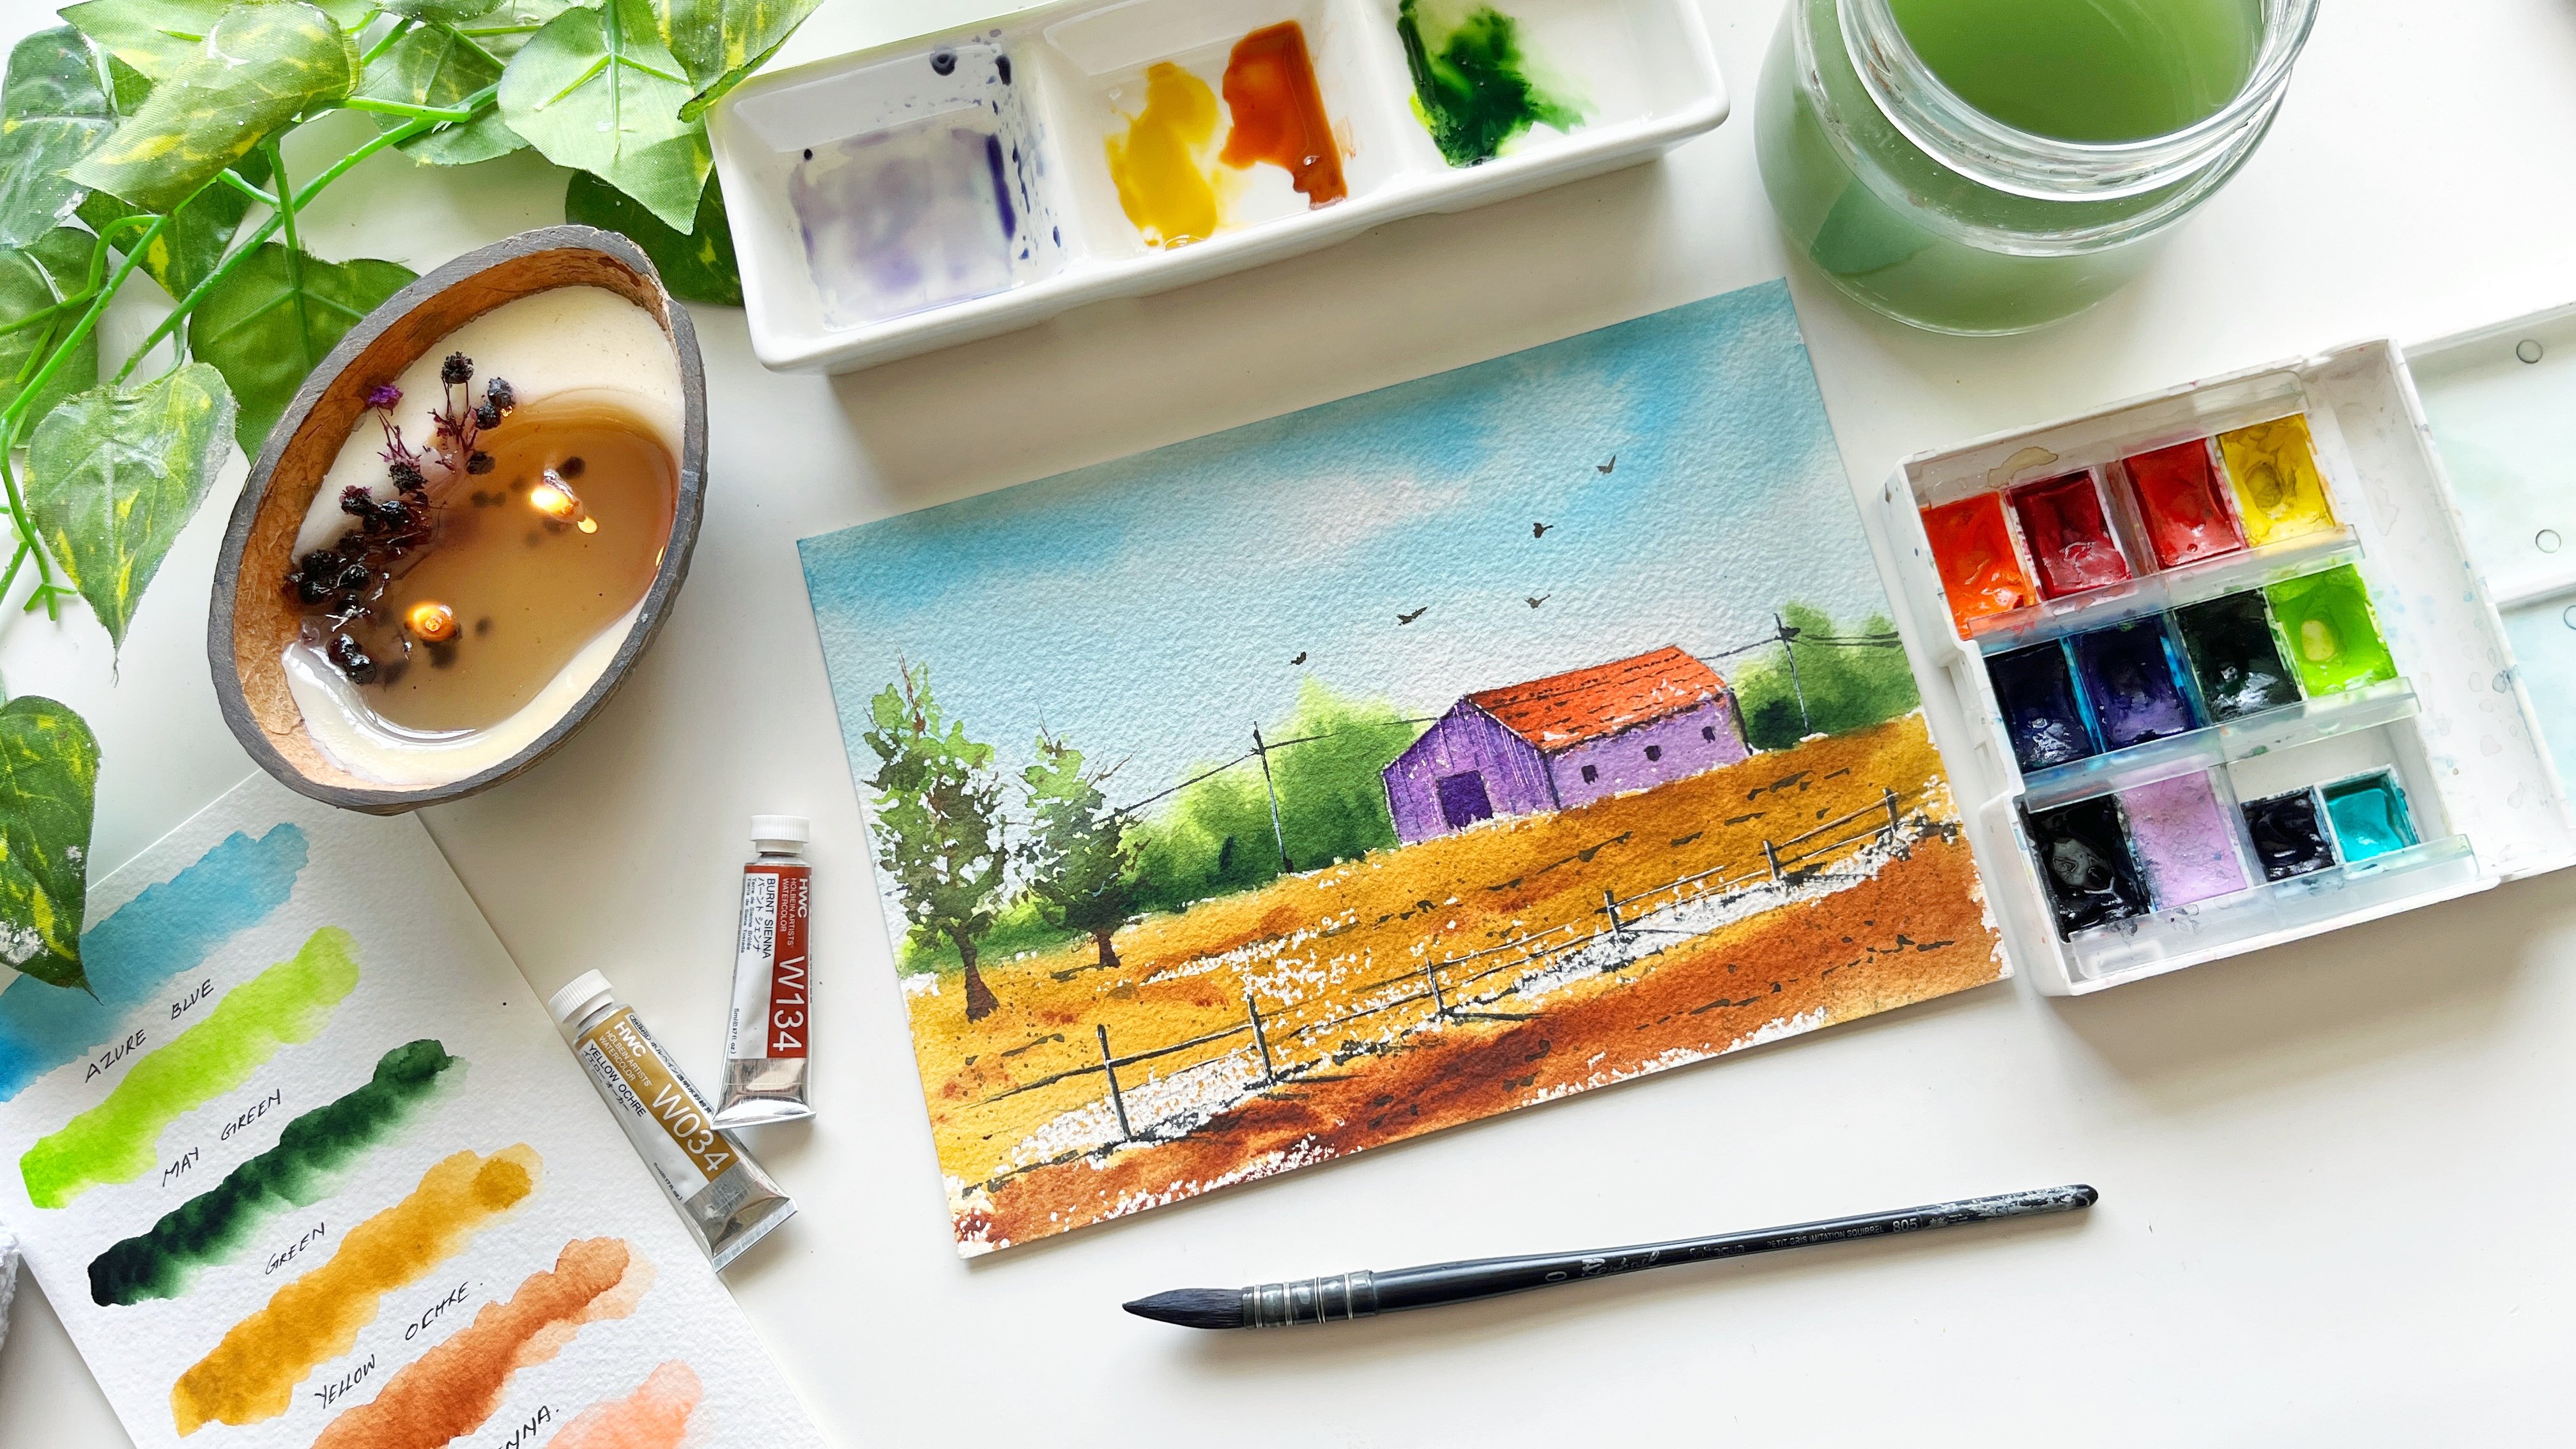
complete this class. Okay, so the colors
that I'll be using today are from various brands. This one is from
Windsor and Newton. This is the Cotman series. These are Snela and then I
have Albin and white Knights. Okay? So I have these
white Knights tubes and I also have these white knights pants you
can see on the left. The first three are full
pants by white knights. And one more color that we'll
be needing is ivory black. This is also from white Knights. As you can see, all the colors
are there on my palette. Okay. I'll just quickly
swatch them out and show you the colors that we'll be needing to
complete all the four projects. Okay. So now, when
you're working with watercolor pans or you have the colors out
on your palette, you need to lightly spray
some water onto your pants. Okay. And then you wait
for about 30 seconds to a minute so that the water
reactivates the pigments. This process releases
more pigment, making your colors look
more vibrant and saturated. Let me quickly show you
the difference between a dry watercolor pan and
a pre wet watercolor pan. Okay? So I'm just going to take one of the pans
from this palette. Okay. Let me show you how
the first coat will look. Just directly applying
water to the dry paint. Okay? Okay, so that's
the first coat. Now I'm going to lightly
spray some water, and I'm going to let this sit
for about 30 seconds, okay? Okay, so now the pain
is ready. Let's try. Okay? Just loading my brush. Okay. And let's see
what happens now. Can you see how vibrant and
saturated the color is? Adding a little more water, and we'll try this
out one more time. Okay? So there's
a big difference between the first and the
second and the third coat. So always remember to spray some water to reactivate the pigments before
you start painting. Okay, so let me
move this quickly, and let's focus on today's autumn
color palette that you'll require to complete
all the projects. So the very first
color that I'll be swatching today is
gamboge yellow. This is from Windsor
Newton Cotman Series. Okay, you can see this is
a highly pigmented yellow, one of my favorite yellows. Okay, so let me just show you
the lighter value of this. I'm going to spread
this off with water. Okay, so this is a
super bright color. Now, in case if you do
not have gamboge yellow, you can use yellow deep, cadmium yellow, Hansa yellow. Anything that is a bright, rich yellow that you have
in your palette. Okay. Next, I'm going to
swatch yellow occur from the brands earlier. Okay. In case you do not
have yellow ochre, you can make small
amounts of red and blue to your yellow, any
yellow that you have. Okay, so that will give
you a nice warm yellow. Okay, so the next
color that we'll be swatching out is
bright yellow green. This is also from
the brands ener. Okay, so this color can
also be achieved by mixing any light yellow that you have in a
palette with green. Okay. Okay, so next we'll swatch out sap green from white knights. Okay? This is a beautiful color. I think most of the
palettes have this color. So it shouldn't be a problem. You can use any dark green
that you have with you. Okay. So the next color that we'll be swatching
out is Bern Sienna. I love how bright this color is. This is from the brand
Albin, Albin watercolors. Okay. I'm gonna wash the brush and show you the
lighter tone of this color. Next, we'll swatch out orange. This is also from white Knights. Okay, it's a beautiful
color. Okay. Next, this is Ruby from
White Knights again. In case you do not
have this exact color, you can use scarlet lake. You can use Crimson. Any red that you have in your
palette is completely okay. Okay. Next, we'll swatch out
blue from white Knights. This is my go to color
to paint the sky. If you do not have this color, you can go for a thalo
blue or a bar blue, any light blue that you
have in your palette. Next, I'll be swatching
Van **** brown. This is again from
white knights. If you do not have Vandyk brown, you can use burned
tamber as well. Or you can add a little bit
of blue to burn sienna or a very small quantity of black to your burn sienna
to get this color. Next, I'll be swatching
out ivory black. This is, again,
from White Knights. Okay, so basically,
these are all the colors that you will need to
complete today's class. Okay, so let me just quickly write down
the names of the colors. Okay? So you do not need to
have these exact same colors, use whatever you have come a little closer to the
colors that we are using. Okay? So use whatever
you have at home. With this, we're done
with the color swatches and we have a beautiful
autumn color palette with us. Okay, so keep your colors ready, and let's dive into
the next section. I'll see you there. Bye bye.
4. Part 1 Basic Watercolor Techniques: Welcome, my friends
in this section, I will take you through the basic watercolor
techniques that you will need to
complete your class. Okay, so we'll go through all
the basic ones wet on wet, wet on dry, dry
brush, and splatter. The first and the
most common technique of watercolors is wet on wet. Wet on Wet is basically applying wet paint
on wet surface. So that is why it is
called wet on wet. Let me apply the color and show you you will see how
the colors bleed, blend and create
soft edges. Okay. Let me make a bigger
one so you can see. This technique is
excellent for soft washes, large background areas,
skies, et cetera. Next and the most common
technique is wet on dry. This is basically loading
up your brush with wet paint and applying
it to a dry surface. Okay? So this technique
creates crisp, sharp lines. Okay, it is used for
detailing and also for layering after your
initial wash has dried. This technique produces more
vibrant and opaque colors compared to your wet and wet. Okay? The next technique that we will look at is the
dry brush technique. I will change the
brush for this. I'll be using a mop brush so you understand
this better. Okay? So I'm going to wet
my brush and take a paper towel and remove
all the excess water. Okay? Because this brush
holds a load of water, so I need to do it
a couple of times. I'm going to load the
brush with the color. Okay, go to load it up nicely and dab it onto my palette
a couple of times. You can also use a
paper towel, okay? And I'm going to paint from
the belly of my brush, okay? Can see it has to be flat. And that's how you get these
beautiful dry brush strokes. Now, moving on to the
next technique and the last one here is
the splatter technique. Okay? So I'm going
to change the brush. I'm going to take a thinner
brush because we'll be creating smaller splatters. So depending on what kind
of splatters you need, you will choose your
brush accordingly, okay? So larger the brush, we'll
create larger splatters. Okay? So I'll just
cover the other area. I don't want splatters
on the other section. So I've already loaded my
brush with some paint, and I'm going to
take another brush which is bigger and heavier, and I'm just going to
tap on the brush gently. And this will create some
beautiful splatters. Okay. You can also use your finger, okay, to gently tap it. Now I'm going to take
some more water and paint and show this
to you one more time, this time creating
larger splatters. Okay. You can see, it depends on the
paint on your brush, and you can control the size of your
splatters accordingly. Okay. With this, we've covered these basic four techniques that you'll need
for your projects. Next, we will cover
water control. Okay? So I'm going to show you a
small exercise for you to practice and understand the
behavior of water to paint. Okay? So how much water is the
right water on your paint? Let's figure this out
with this exercise. Okay? Now, without removing
the excess water, I'm going to apply this
directly onto the paper. Okay? So let's make a
small square here. Okay? You can see we've got
a pool of water. Okay? Now, without adding more water, I'm going to continue
making another square. And a third one here. Okay? Let me show this to you. You can see that
on the first one, there is a pool of water. The second one looks more even, and the third one is
a little bit dry. Okay? Now let's apply some
color and see what happens. I'm going to take a darker
color to show this to you. Now you can see when I'm
applying this on the edges, the color does not disperse, because there's so
much water that it will let the pigment just
stay on the surface. In the second one,
you can see that the color is dispersing, but I'm controlling the
movement of the color, and this is what
I'm looking for. Okay? Now the third one you'll see that this is almost
very close to drying. Okay? So let me show
this one more time. Okay? I'm going to show
this with more water here. Okay? Again, a pool of water. Now in the second square, I'm going to load my
brush, o, with water. But I'm not going
to have a bead of water on the edges
nor a pool of water. I'm going to apply a flat wash. Okay? Let's continue to apply. Okay. Until my brush goes dry. Okay? So this is the third one, and this is the fourth
one, almost getting dry. Okay, here. Let me
show this to you. Okay. So the first one, you can see there's
a moment in water. The second one is quite okay. The third one is also pretty
much close to a flat wash. Okay. Now let's apply a
different color, and let's see what happens. Okay? You can see
that the paint is not dispersing and it is just
sitting on that pool of water. Okay? I'm going to just tab this quickly onto the paper towel
and take some more paint and apply it on the
edges here. Okay? You can see that there's a
more controlled moment here. Okay. Let's see what
happens on the third one. Okay? So this also works, okay? It's not going to
disperse a lot of paint, and you can still
control your paint. Okay? And the fourth
one is almost dry. So anywhere between
the second and the third works for us. Okay? In loose style paintings, we take a lot of water because it creates
beautiful effects. But when painting a detail
elements in a landscape, such as a foliage of a tree, you must actively control the amount of water
mixed with your paint. And to keep the color
precisely where you want it to avoid spreading and merging
with the other sections. So with this, we've covered
the basic techniques, and I hope you find
this helpful and practice the water
control exercise. In the next section,
we will cover the project examples.
I'll see you there. Bye bye.
5. Part 2 Project Examples: Welcome, everyone.
In this section, I will take you through all the project
examples that will help you paint the four
autumn landscapes. In the first
section, I will take you through the
different kind of skies that we'll be painting
in your projects today. Okay, so I'm going to apply
an even coat of water with my three fourth
inch flat brush. Okay. Now since I'm painting
a smaller area, I will switch to
a smaller brush. Okay. And I'm taking a very light value of the blue that we're
going to be using. And I'm making these
vertical strokes, ok? Okay. So now in that
square section, you can see that I've only
applied the color right on the top because in
the bottom half we will have the other things. Now I will wet the
paper similarly I'll show you two more of the other skies that we're
going to be painting. Okay? And I'll make
one here. Okay. The second sky is more
like a flat wash. Okay, so it's a simple one. Just go left and right
and apply that color. Okay, it'll be more darker on the top and lighter
at the bottom. Okay. So I'm just going to blend the bottom part
and just lighten the suck. Okay? The third and the
fourth project will have this kind of sky where
we are going to be painting from right to left. Just like this because
on the other side, we're going to have the foolage. Now I'm going to go back
in, wash the brush, remove all the excess water, and then I'm just going
to blend that in. Now, the upper part of
the sky is going to be more darker compared
to the other area. Okay? So this is it for the sky. This is just to
give you an idea. You can practice
these small swatches before you dive
into your projects. Okay. Now, next
we're going to cover is the foolage of all
the four projects. Okay? So again, I'm going to
apply an even coat of water, switching to a
smaller flat brush. Now I will start with the sky. I'll just show you how to
paint the sky here. Okay? So here we have the
same vertical strokes. Okay? So I think there's
a pool of water, I'm just going to even that out. Okay. Okay. So the first color that we'll be using
is gamboge yellow, and we'll apply the
first layer here, we're going to leave
some gap between the blue and the yellow. You can see there is some
white space in between. And once you've
applied your layer, you can now slowly pull that
off at certain places. Okay. Similarly, we're going to
apply a layer of orange. Okay, just above this. Some overlapping the yellow. And some at the bottom,
on the white space. And third, you're going to apply red in a similar way. Okay. And right at the bottom, you're just going to darken
this with burn sienna. Okay? This is just to give you an idea on how you're going
to be painting the foliage. Okay? And now I've added some Van **** brown to
give this more depth. Okay, washing the brush, going back to the
bigger flat brush. Okay. Applying a quarter of water here and we'll paint
the next foliage. Okay, so taking gamboge yellow and apply a
layer of yellow, o in a similar way, how we painted the first one. Okay. Now after this, we will change the brush to a thinner one using a
Chinese calligraphy brush, and I'm just going to create these strokes with this brush. Basically just creating
these vertical lines. Moving on to the next layer. I have taken some red, and I'm going to apply this
color in a similar way. Okay, can you see the difference between the first foilage
and the second one? Just by changing the brush, I've created this effect. Okay? The first one is more flat and the second
one is more streaky. Okay. Now we will move
on to the third one. Once again, applying
a coat of water, taking the smaller flat brush, this one from artifi
and with yellow, I'm just going to apply
on the left side, okay? Okay. And on the bottom. Okay. So we'll start painting from the
left to the bottom. I'm going to take
some yellow ochre, and I'm going to darken
some of this part. Next with burn Sienna. Okay? Going to apply it here and
there, making small dots. Okay? For a brighter value, I will add some red to this. Okay. Basically, you'll get an idea on how we're going to be
painting this foliage. Okay. I'm just creating more
depth on the left side, with more concentrated colors as compared to the right, okay? Now, moving on to the next
one and the final one. Again, wetting my surface. As we're covering
a smaller area, I will change the brush
to a smaller one. Okay. And for this one, we'll be working in
a descending order. That is going from big to small. Okay? So first, I've
applied some yellow here. Okay. Now to create depth, I'm taking some yellow ocher. Okay. Next, burn sienna. It's the same way that
we're going to be building up the trees. Okay. Go to wash the brush and I'm
going to take some orange. Now, this one is going to
be smaller as compared to the yellow since
we are going to be painting in descending
order, okay? After applying
orange, I'm going to take some burnt sienna
and give it some depth. Okay. Then going to
apply a darker value of the orange to make it look
more vibrant and saturated. We add red at certain places. Okay. I go to wash the brush
and apply the next color. That is the bright yellow green. Okay. Now this is smaller
than the red one also. Okay. And finally, we
ladd the gamboge yellow. Okay? So you basically got an idea
on how we'll be painting. I'm not adding more
details, and at the end, we will add the same
burn sienna and a layer of Vandyk
brown to give depth. Okay, so you have got
an idea on what you'll be painting on your
final piece of paper. So I would like you
to practice this before you dive into
your class projects. Moving on to the next
element, the mountains. Okay, so let me just
sketch this quickly. Okay. A simple shape
for the mountains. Switching to a
smaller flat brush, and a lighter value of blue. Okay. Can you see
how light it is. Now with the edge of my brush, I'm just going to create
these tiny lines, covering some area, mosever leaving some white
space in between, okay? This is going to be
the first layer. To this, I'm going
to add some black. Kd a lighter gray, in a similar way, going to
apply it on the mountain. Okay? But this is going
to be smaller strokes, some small dots and lines. Okay, adding some on
the right side as well. You're at the bottom. Next, I'm adding the
darker value of the black. Okay? Can you see this? What I'm doing with my brush, creating these tiny strokes. The same way, you're
going to be applying a lighter value and
a darker value. Okay, with this, I hope
you have understood how we layer the mountains
with a lighter blue, a lighter gray, and some dark
value of the black. Okay? Now switching to a thinner brush and I'm loading the
brush with burn sienna. We will make some branches
and the trunk of the tree. Note the movement of my hand and how I'm breaking the lines. Okay. And I'm going to
take one out from here. And maybe one from her. Okay? Basically, you have to make these alternate branches. Now with a darker brown, I'm going to darken the
bottom part of the trunk. You can add some as well. Do practice this with
a very thin brush, okay, your thinnest of all. Okay? Even if you do not have this Chinese
calligraphy brush, you can use double
zero or a triple zero, a line of brush, okay. And take a scrap piece of paper and practice these
branches, okay? Note that the motion of my
hand stops, okay, in between. So after I make one, I will
change the motion of my hand, and I will break the
lines in between. More practice will help
you loosen up your hands. Okay, and you'll be able to
make the browches freely. Next, I'll show you
how to paint birds. These are very
easy. Just make a. But instead of a normal, we're going to just pull one of the lines below the
first line, okay? One here and one below. Now, understand the
pressure of the brush. So the first one is made
with the tip of the brush, but the second line is made with applying pressure
on the bristles, okay? Okay. Easy to follow. Okay. The last thing I want to show
you is a color pull. Okay. So basically, I'm just
creating these strokes with my flat brush,
horizontal strokes. I'm going to wash the brush, remove all the excess water. Okay. And I'm just going
to pull that out, okay? Okay? This gives a perfect,
streaky edge. Okay? This brush holds a lot of water, so I'll try and show this to you with the other flat brush. Okay? Okay, apply a darker
color on the edge, and dab the excess water and then just pull
the color out. Okay? Can you see the nice
treaky effect that you get? Okay, let me show
you your as well. Now with the damp brush, I'm just going to
pull this color, creating a very soft gradient. One more thing that
we'll be making in all the projects are the
fallen autumn leaves, okay? So just make these randomly. I'm just wearing the pressure on my brush to create
these strokes. Okay? Now with a darker color, at the edges, I'm going to drop this color to
create some shadow. Okay. With this, we've completed all the project examples that will help you
complete the class. So do practice this
and once you're done, get your paints and
your paper ready, and I'll see you in the
first project. Bye bye. Okay.
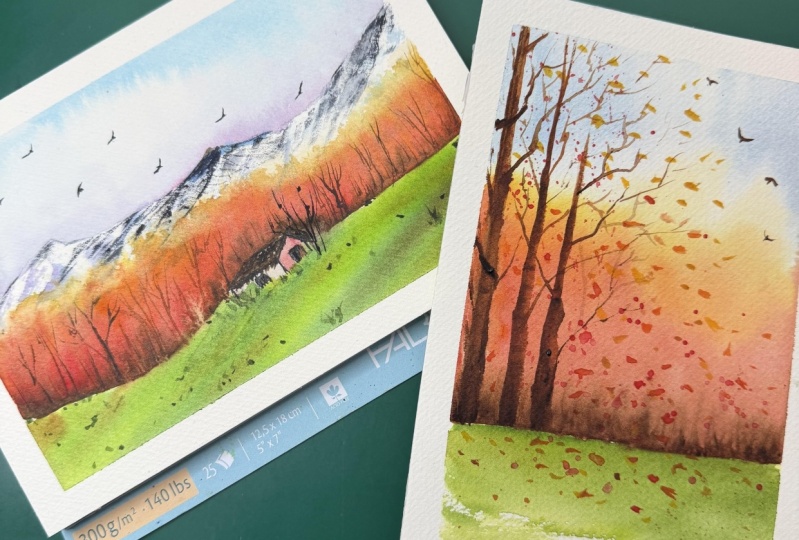
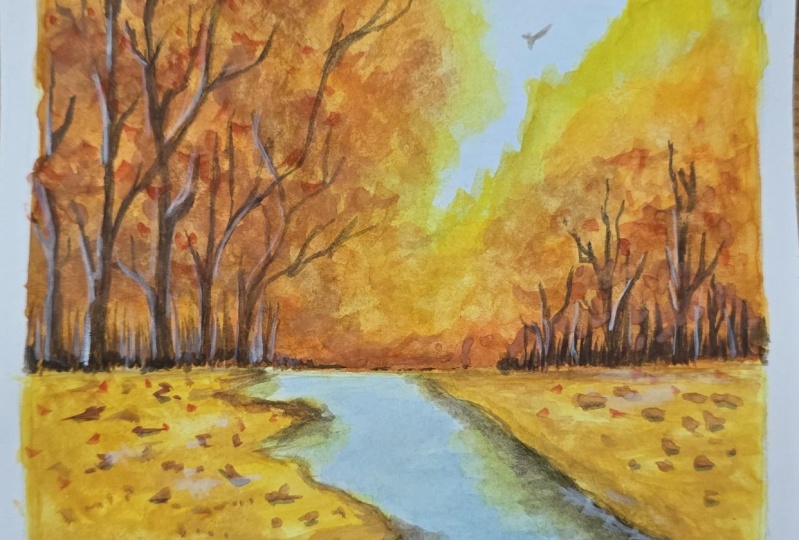
6. Project 1.1 The Last Fall: Hello, and welcome to
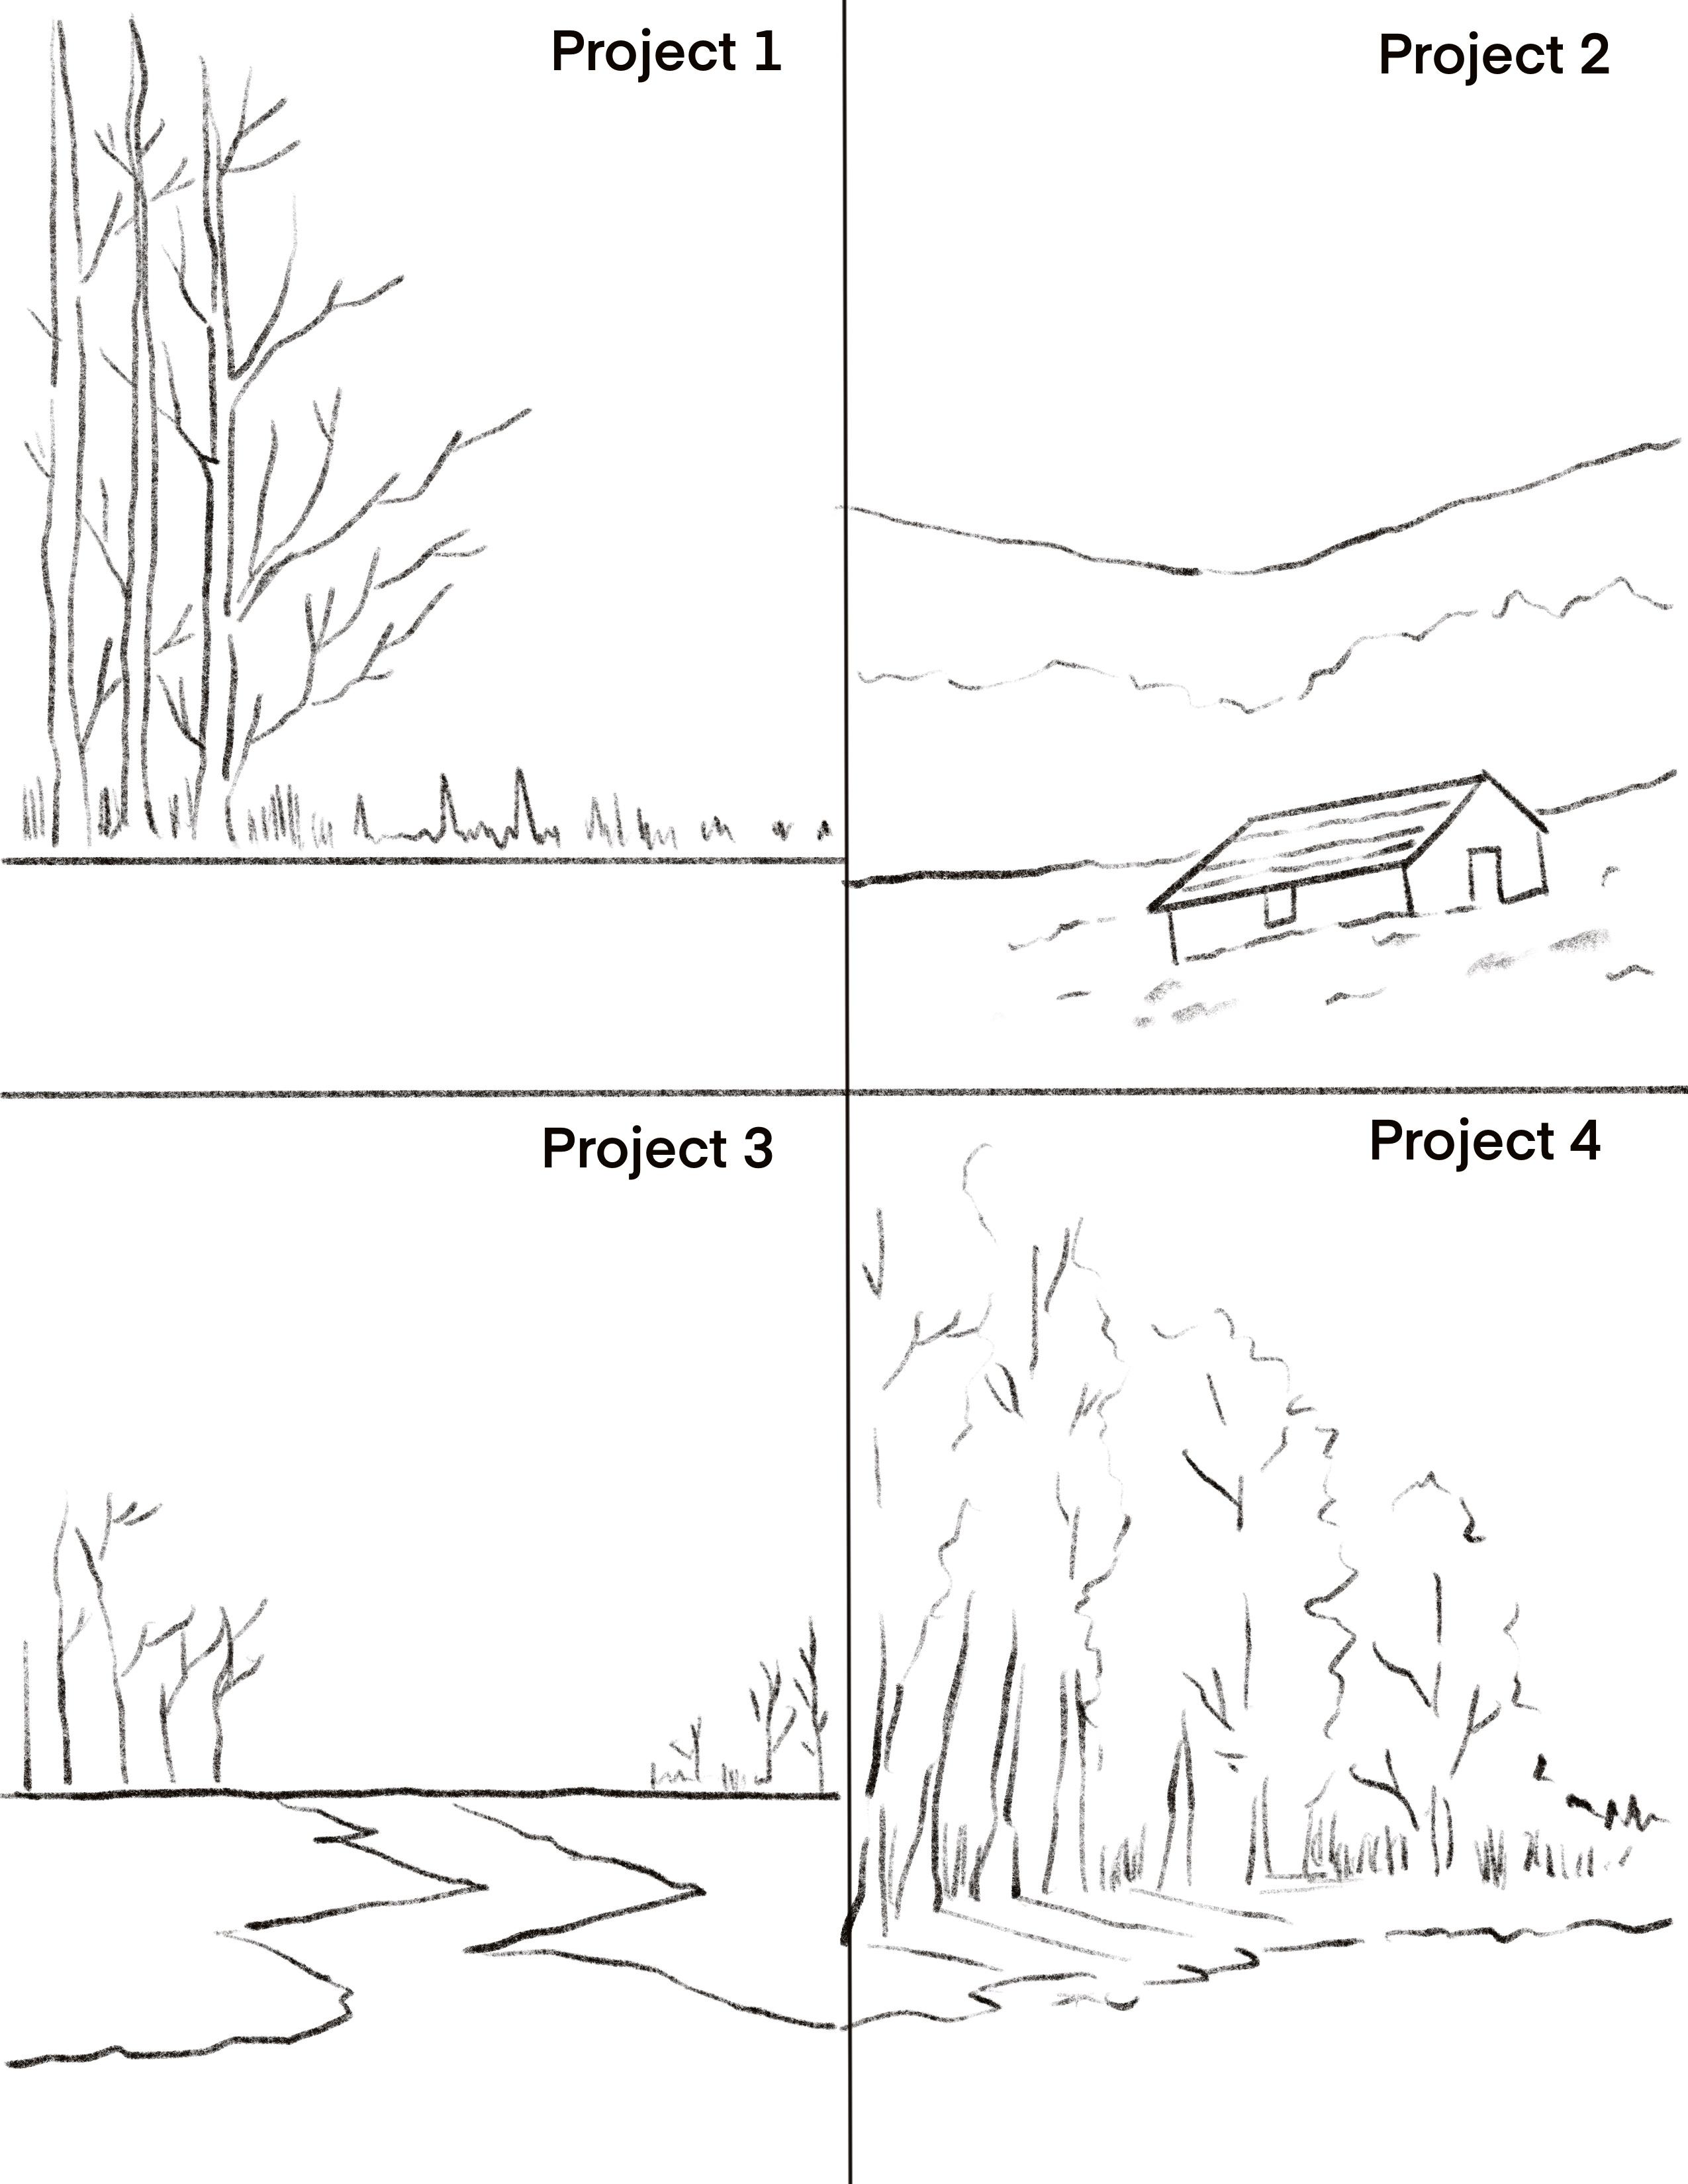
your First project. So for this painting,
we'll only need to draw a horizon line. That's the only sketch
that we require. Okay. Just going to quickly place the
clip under the board. Take some water, and let's
start by wetting the paper. Make sure to cover
the entire surface, especially the corners, going down all the way to
the line that we have drawn. That is the horizon line. Mm. Okay. You can see there's
excess water in the corners, and I'm just going
to even that out. We don't want too much of water, just a shiny core.
Can you see that? In case you see there
is a movement in water, you can just run your brush a couple of times and even it out. We'll start with the sky. And I'm just going to
make vertical lines. We want the sky
to be very light, so I'm not taking
much color a little bit here and there,
and that's it. Okay. Next with gamboge yellow. I'm going to do the same thing, can see making these
vertical strokes. Oops splattered some
yellow on the sky. I'm just going to
rectify that quickly. So I'm taking a damp brush. I'll take a new
brush, and it's damp. I'm just going to
lift that color and cover it up with blue. Okay. I'm just going
to talk in this area. Okay, now without
washing my brush, I'm going to take some orange and continue making
these same strokes. Again, there's a splatter. Okay, I'm not going to
worry too much about it because it's going
to get covered, and just going to continue
making these strokes and have another layer of orange
on top of yellow. Okay, and I'm just going to darken the orange at the bottom. It's nice bright orange. I love this orange
from white knights. Okay, so the third layer
is going to be of red. Keep painting all the
way until the end. Now, at the bottom, I'm going to add some
burn sienna as well. I'm going to take this
up a little more. Next, I want to darken
the bottom area. So I'm going to take a
mix of Vandyck brown, burn sienna, and some red. Can I take more of that mix
and duck in the bottom area. Yeah, so that's the
red that I want. Nice and vibrant. Just making these streaks. Okay. And next, I'm going to
add some burnt sienna. Okay. I'll just quickly load up my palette
with van **** brown. And without any
water on my brush, I'm going to take that color and apply it right at the bottom, making a thin stroke. And I'm going to spread
that off a little bit. Just at the edges. Okay. Going to pull that up so
we get a little depth. Next with a clean damp brush, I'm going to pull this color. There's not too much water, so you can see it's not going
to pull the color so much, giving it a smooth edge. I'm going to load my brush
with a bright yellow green, and I'm going to paint
this entire section. Okay. I've not wet the bottom area, so you can see some
dry strokes as well. It's a nice concentrated
color that I've used. I'm just going to
smoothen that out and I want some of the
brown coming down. Okay. Now with the darker green. I'm just going to darken the area just below
the horizon line. So I've taken a thick
consistency of this green. And you can see, I'm
just going to pull that off on top of the lighter green. With this, we've
finished painting the background and
the foreground. In the next section, we will add the trees and the other details. I'll see you there.
7. Project 1.2 The Last Fall: Hello, and welcome back. In this section, we will
start adding the details. Okay? I'm gonna take a
little bit of black, and I'm going to make
these thin strokes to show some loose bushes. A little bit here as well. I'm going to take
this flat brush. Okay. And I'm going to
load it up with Burnsiena. Now we're going to
make the trees. So I'm just going to
make a straight line. Yeah. Going for the
second one now. Pull that off from the top. You can have some moment
in making the lines. It's completely okay, needs
to look natural like trees. Okay, so now I'm just
going to darken these up taking some vandyk
brown and from the bottom, I'm going to darken the
bottom of the tree. Okay. Adding some
details by making some vertical lines and horizontal lines just with
the edge of the brush. Just turn the brush
once you're making vertical lines. It's okay. Just go slow and take your time. You can also use a thin brush. I'm just comfortable doing
it with a flat brush. Okay. Next with a thinner brush, I'm adding black on the
left side of the tree. Just going to darken that out. Okay. Now I'm going to
make some branches, thin strokes with black. This brush is excellent for
detailing to get thin lines. Just start from the bottle. Okay. I'm just going
to darken this out, and then I'm going to
make these branches. I'm going to add one at
the bottom. Maybe one. I'm going to take a mix of burnt sienna
and Van **** brown, and we're going to make
the lighter branches on the top near the sky. So the branches on the
top will appear to be lighter as compared to
the ones at the bottom. Okay. Pull that out from you. It's really fun to make
branches, isn't it? Sometimes we get too happy, and we just keep on adding
more and more until we know until you reach to the moment that you have
added way too many branches, and you have overdone that part, so you should know when
and where to stop. So the best way is to just keep making
these alternate strokes. Some big and some short lines. That's the easiest
way to put it. Also, the branches
are going to be thicker wherever it's
connecting to the trunk. It's going to be thicker and darker at the connecting point. So I think I'm happy
with the branches. Now, with the same brush, I'm going to take
some orange and make these tiny strokes just
to show some leaves. Okay. Just very randomly I'm
making these strokes. Okay. And I'm going to do the
same thing with red. Okay. Go to add some on top as well. So taking orange
and adding some re. Just doing this up a little bit. Okay. Next with orange,
I'm going to show some fallen leaves on
the ground as well. Okay. First, I'm using orange. Wash the brush and
take some red. Okay. I'm going to add
some here as well, and maybe some on top. Okay. Just gonna take some black and mix it with the brown
and make some birds. I like adding birds
to all my landscapes. So Feel free to skip this step in case you don't like adding birds
to your landscapes. Okay, almost done. I'm going to take a little
bit of black and blue to get a nice grayish tone to make shadows for the
fallen leaves on the ground. Okay? Just a straight, tiny line under your leaves. Just on few of them. Okay. Okay. And with this, we are done. It's time to peel the tape off. Absolutely love how this
painting is looking. Love the bright
colors of the trees. And the contrast in the ground makes the painting
look even more appealing. I hope you've enjoyed
painting along with me and more exciting projects
in the next section, so I will see you
there. Bye bye.
8. Project 2.1 Autumn Hillside Cabin: Welcome back to
your next project. Let's start with a sketch. Some good, make a slope line. And on this, we're going to draw a simple house like a cottage. Just a simple sketch
of the house. Okay. For your reference, the sketch is also uploaded
in the project section. Okay. I'm just going to
make a window here. Okay. You don't want too
much of drawing, but I'm just going to
straighten that out. And just above the
midpoint of the paper, we're going to draw
the mountains. Okay? Just two simple lines, one sloping down and
one sloping upwards. Okay. And we're going to
have these trees here. You don't need to draw this, but I'm just going to show
this for your reference. Okay. That's about it with
a sketch. Now we can start. By wetting the paper. So for this painting,
we'll break down the background
into three parts, the sky, the mountains,
and the trees. So first, we will work
on the sky and we will wet this entire section
until the mountains. Okay. I'm going to load
my brush with blue. So with a diluted blue, I'm going to make
a nice soft sky. Okay, I'm just going to
darken it from the top. So I'm just going to apply
more color right on the top. And as we go down, I'm
just going to blend that in. That's it. Next, I'm going to add a little
bit of red to that blue. Okay? Just trying to make
a good reddish violet, adding a little more of the red, and this is the color
that I'm looking for. Okay. Now, the
paper is still wet. So I'm going to apply
this right at the top, basically on the line where
we have drawn the mountain. Okay. Taking more of that color and just going to
drop that in here. Okay? Now with a damp brush, I'm just going to lift
up that color from here from the side, basically. Okay. Now with the blue, again, a very light blue, so it's going to be
a lighter shade. Okay. And I'm just going to make these flat strokes and spread
that off at certain areas. Just thin strokes, and
then at some places, you're going to just
spread that off. Now, you can do this with any
thin round brush as well. But if you try this with a flat brush and
you're painting with a tip, you get those nice
straight lines. And you can also use
the belly of the brush to spread that off just
like what I'm doing here. Okay, so very light color, and we go to paint
this entire mountain. At some places, note that I'm
leaving the white as it is. That is why we are
working with wet on dry technique here. Okay, so we're done with the first layer
of the mountains. Now with my mop brush, I'm going to wet this
area of the trees. Okay, so I'm just going to
wet this entire section. Carefully apply water
above the house. Okay. Okay. Now, while the
papers still wet, I'm going to load my brush
with yellow and going to make these vertical strokes. They're going to look
like distant trees. You can see how
bright this color is. Absolutely love gamboge yellow. Okay. Just continue
making the strokes all the way through until the end. Okay. So we've got
our first layer. Now I'm going to take some an
**** brown, a darker brown. Okay, I'm just going to
apply it at the bottom. Okay. Is above the roof as well. Okay. I'm going to change my brush to my Chinese calligraphy brush. You can take any thin
brush that you have. An round brush would do. I'm going to make these
small vertical strokes. We want the yellow trees
to be seen as well. So this one is going
to be shorter. Going to leave some
gaps in between. Okay. Next with red, I'm going
to make these thin lines. Okay. I'm going to be
taller at the edges. Okay. Finally, we will
add the deck brown. Okay? Continue making
these same strokes. We've used four colors for
the trees, the yellow, the orange, red, and
now Vandyck brown. You can also use
burned tumbo in case you do not have Vandyck brown. Okay. I'm going to take some more concentrated color of Vandyck brown and just going
to apply at the edges. First, okay? Now to show some
depth in the trees, I'm going to take
black and apply it at the bottom and make it a
little more darker, okay? Can also make these small
lines right at the bottom. Okay? That's it. Happy with
how the trees are looking. Next, we'll work on the cottage. So I'm going to take some black, change my brush to a flat brush, and I'm going to paint the roof. Okay. Now with a damp brush, I'm just going to pull
that color. Okay? N a nice light gray. Okay. So I'm going to dilute this further and add a
little bit more water. Okay. You can see that yellow
has seeped in to the house. That's perfectly fine. We need a little bit of yellow. Okay? And we're going to
paint the rest of the house. Just going to darken
the edges here, just a little bit at
the bottom, as well. Okay. So for now, we're good with the house. We'll come back once
it's completely dry, and I'll see you in
the next section.
9. Project 2.2 Autumn Hillside Cabin: Welcome back to part
two of this project. Coming to the foreground now. We paint the green fields
with bright yellow green. Okay. We're just going to cover that entire section
with this color, okay? Love this bright green. In case you do not have
this green, like I said, you can mix lemon yellow with any of the
greens that you have. Okay? Just be careful around the edges of
the house. Okay? Now with sap green, I'm going to paint over
the lighter green. Okay. Just making
these random strokes. Okay. Next, I'm going to apply a
few strokes of Vandyk brown. Weigh randomly here and there. Okay, and spread that off. Okay, so that's it. Next, we add the details
to the mountains. I'm going to take the
flat brush again. Just dabbing the excess
color on the paper towel. Just with the edge of the
brush, take some more colour. Okay, so we'll add
these tiny strokes. Okay. Only the tip
of my brush is touching the paper to
create these lines. Okay? So just continue making these tiny strokes
of short lines, maybe lots at some places on
the entire mountain. Okay. Leaving some gap in between. So I'm just adding these
very randomly, okay. At certain places, I'm just
going to add these tiny dots. Okay. And I'm going to have more of these towards this end. Could make some bigger ones now. Just trying to show tiny stones and rocks on the mountain. Okay, now with a darker
value of the black. Okay, I'm just going to darken
these at certain places. Please feel free to use any brush that you're
comfortable with. I'm just going to continue
doing this with a flat brush. In case you're more comfortable with a round brush
or a liner brush, you can use that as well. Okay, so almost done. Adding some here as well. Just going to talk
in some of these. So this is it. The
mountains are ready. Now with the same
black on my brush, I'm going to add
details to the house. To this little cottage here. So working with a
flat brush really helps once you want to
achieve a straight line. So just by touching the tip
of my brush to the paper, I'm able to create
these straight lines. Okay, I'm going to do this on the other side of
the roof, as well. Okay? Now I'm adding these tiny dots just
by touching the brush. So Okay. Did the dark in this bit. Okay. Now with red, I'm just going to make one single stroke here and just going
to track this. Okay? Now with a thinner brush, I'm going to take
black and add that on the top of the window. Okay? In the top and on the
side of the door. Okay? Okay, that's it. Okay. I'm gonna take
some more black, and I'm going to
darken the edge. Okay. Okay, on the side as well. Okay? Making these tiny
lines on one end. Okay. And maybe some as well. Ye. Okay. So at the bottom. Okay. You want to add some dots here on
the fields as well. Okay. Just very randomly. Okay. So that's it with the
green fuse as well. Butter take some
more of the black and finally make some birds. Okay? Okay. One yoke. Maybe one yk. And one yoke. Okay. Lastly, we go to
add some branches. Okay. Maybe one yk. Adding one here on the right. This brush is really helpful
in making thin strokes. You can also use liner brush for this section for
making the branches. And in case you're not
comfortable working with a brush, you can also use any black pen waterproof pen like a micron or a NIBll Okay. Now with red, I'm going
to add some leaves. Okay. Just randomly making these strokes in
this entire section of where we painted the trees. Okay. And not too many, so this is it. It's time to peel the tape off. I've done this so many times, but tape always
makes me super happy and so excited to see
those clean edges. It just adds more beauty to
your painting, doesn't it? In case you like
to have borders. Yeah. Okay, so with this, we have another beautiful
autumn landscape with us. I hope you've enjoyed
painting along with me. And I'll see you in the
next project. Bye bye.
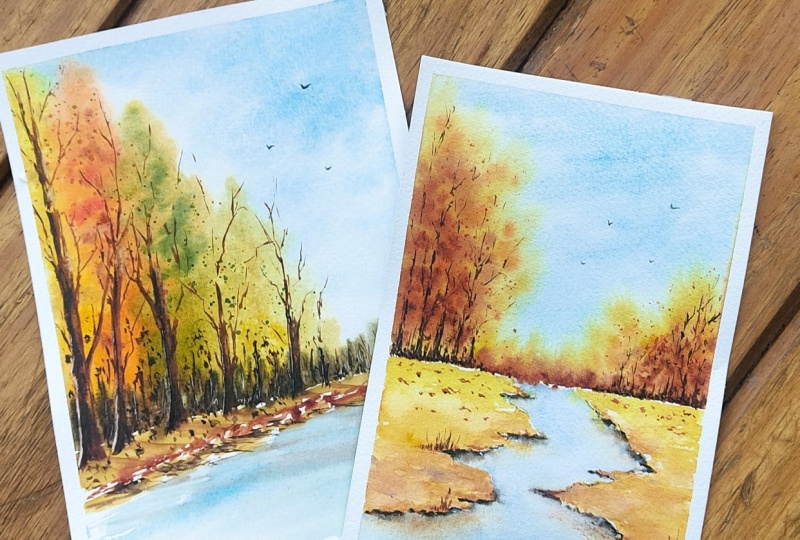
10. Project 3.1 Autumn RiverBend: Hello and welcome to
your third project. Let's begin this painting
by drawing a simple sketch. Below the center of the paper, we're going to draw
on the horizon line, and from there on, we'll start
working on the land area. Okay? A bigger bump and
a smaller bump. Okay. I'm just going to
pull this out a little bit. The sketch will be uploaded in the project section
for your reference. Now we'll start making the land on the other
side so we get a nice, exact shaped river
in between the land. Okay? You can draw this
shape anyhow you like. Me not copy this. And with this, we're
done with a sketch. Let's start by
wetting the paper. Okay. We don't want too much water, just an even coat of
water on the paper. Just get a shiny coat. Okay. Next, I'm going
to take some blue. And for this sky,
we're going to paint from right to left, okay? I'm going to add a little
bit of blue on the top. It is going to darken
this bit. Okay? And as you come down,
I'm not loading my brush with any more color. Just going to smoothen the so and we're done with the sky. Okay, so now the papers still wet and I'm going to
take some gambogyello, and I'm going to apply
it from the left side. Okay. Just keep making these
tiny strokes, okay? Leave some gaps in between and continue to make these strokes until you
reach the horizon line. Okay? I'm just going to
cover this entire section. I'm gonna pull that out. And I'm gonna make some as well
on the right side. Okay, so just showing
some distant trees here. Okay. So now I'm going to take a little more concentrated
color of gamboge yellow. Okay? And I'm going to just throw
that in at certain places. Now with yellow ocher. I'm going to make
these small dots. Maybe some as well. Okay. Okay, so almost done. Note that I don't
have much water. I'm just taking
the damp brush and making the dots with
the damp brush only. Now without washing my brush, I'm going to take some orange. Okay, and I'm going to apply this here on the
corners, especially. And as you go out, make these dots smaller. Okay. I'm going to take a little
bit more of orange. I'm gonna apply it
here at the bottom. Okay, and stretch it all
the way until the end. Okay. And now I'm going to add some random dots here just to show some scattered
leaves of the trees. Okay. Next, I'm going
to take some red. Okay? Note that I've not
washed my brush in between. And since I'm using a mop brush, this holds a lot of water, so the brush is damp enough for me to start
painting with the next color. Okay? I'm just going to
add these scattered dots. Okay, so note that I'm
leaving some space in between these dots because I want the yellow beneath this
color to be seen as well. Okay, I'm going to
take some more color and just going to
darken this bit. And we'll continue to
paint until the end. Okay. Broader strokes at the
end covering larger areas. Okay, so note that though I like layers for this
painting from light to dark. And if you see all the colors, all the layers are visible, just makes the painting
a little more appealing. Okay? Now I've taken
some burnt sienna. I'm going to add
the darkest towards the and on the left side. Okay, we'll make small
strokes, small dots. Okay, take a little
bit more of the color, and going to add it
at the bottom here. Okay. Next, I'm taking Van **** brown. Again, the same way we
painted burn sienna, darkest on the left side, and add small little
dots here and there. Okay. Okay. And now I'm going to add some
here at the bottom. Okay, again, the darkest
towards the edges. Okay. Okay, so almost
done with the trees. Okay, now I'm going
to wash the brush and and I'm going to load
the brush with blue, and we'll start
painting the river. Okay? So here amusing wet on dry technique because
it's a very small area. Okay? So I'm just going to
first add a lighter blue. Okay, more of water, less of color. Okay. So now I'm going to take a
little bit more of the blue, and I'm going to just
drop this at the edges. Now with a damp brush, I'm just going to
spread that off. Okay. Get nice. Different tones in the water. Okay? Same thing we're doing
on the other side as well. This edge. And again, going
to wash the brush, and with a damp brush, I'm just spreading wherever we've added the darker
value of the blue. Okay. So this is what I was saying
that whenever you add different values of
one color, okay? Or you're building up your
subject with multiple colors. It just adds a tremendous
depth to the subject that you're painting instead of making your painting
look flat, okay? Okay, so we're done
with the river, as well, and go to
wash the brush. In the next section,
we'll start painting the yellow fields.
See you all day.
11. Project 3.2 Autumn River Bend: Welcome back to the section. And let's start painting
the yellow fields. I'm going to load the brush
with Gambogello first. Okay, and I'm going to start
painting the yellow fields. So I want to lighter color
near the horizon line. That's why I'm painting
with Gambogello. Okay. Now I'm going to
take some yellow ochre. I'm just going to
apply it to the rest of this entire white
area that you can see. Go to paint all the way to the edges and I
let some of that paint seep into the water to show some shadows and we continue to do the same thing
on the other side as well. I'm going to drop some
color here as well. Go to pull that
out a little bit. Okay. Is a nice way to show
reflections in the water. So do this only when
your papers still wet. Okay? So it blends easily. Okay. Next, I'm changing my
brush to a smaller brush. I'm going to take
some burn Sienna and add it to the
edges here, okay? Okay, I'm going to just
spread that off a little bit. Okay? Okay. C take more of this and add
some here as well. Okay, spreading that off, trying to blend that in. Okay. Now I'm going to
take Van **** brown. Just trying to create depth. I'm going to create these
little streaks in water, okay? Same thing on this side as well. I'm just going to blend that in. You saw I wash my brush, and with very little water, I've just blend that in. Okay. The same thing, creating some small strokes to show
some streaks in water. Just trying to show
some shadow here. And we continue to
do the same thing on the other side first with burn
sienna, the same process. Okay. Paint here on the edges. Now, with a damp brush, we'll spread this area. Always keep your paper towel, your napkin handy
whenever you're working with a damp
brush technique. Okay? You don't need
a lot of water. You just need your bristles
to be damp enough. Okay? Now I've taken
some van **** brown. You can also use burnt tumbo. If you do not have
burned tamber as well, you can add a little bit of black maybe to
your burn sienna. You can also use blue to your burn sienna to get
a darker shade of brown. Okay. I'm going to wash the
brush and spread it off. Okay, next, I'm going to take a little bit more of the brown and start working on the shadow
by creating some streaks. Same way as we did
on the other side. I'm gonna pull some
from here as well. Take some color, and you can see we've created so much depth towards the edges. Gonna buck in this part as well. Okay? I think we're
done with this. In the next section,
we'll add in the trees and the other
foreground details. See you there. Okay.
12. Project 3.3 Autumn River Bend: Welcome back to this section. Let's start painting the
trees and the other details. Okay, so next, I'm
going to take some more of van **** brown, a darker value, okay. And going to make the
trees and few branches. Okay? Would you add one here, two straight lines and then
just add few branches. Okay. Just some
scattered branches. Use a thin brush for this. We don't want very
thick branches, okay? Okay. Take your time,
do this slowly. A one here and one year as well. Okay, go and add some here
in between the trees. Okay. And now we'll add few of the branches on
the right side as well. Go to add one small one here. Okay. It's almost
done with the brown. Next with black. I'm going to create
some darker branches. Okay. Just add black
at certain places, not everywhere. Okay? Okay. I'm just going to darken this. Okay, applying black on
the left side of the tree. Sading some tiny
branches at the bottom. Gonna pull this up a little bit. I'm gonna add one on the top. Okay. Continue to make some branches on the
other side as well. Okay. Just some short
ones here. Okay. Just some small tiny lines. I'm going to add one
year towards the end. Okay. I'm just going to darken
this horizon line, okay? Just showing depth
towards the bottom. And we're going to
do the same thing on the other side as well. Okay? Okay. Take some more of the black, and I'm going to add it here. Okay, adding some highlights
with black on the land area. Same thing on the other side. Okay, now I'm gonna
pull that off. Yeah. So finally washing
the brush, and next, we will add some leaves with a mix of red and the brown
on my palette, okay? And just randomly, I'm adding
some tiny strokes, okay? So small dots here and there. Okay, good add some as
well on the other side. I'm going to show some fallen leaves on the ground as well. Some dots and some lines. Okay? Same thing on the other side, just a little bit here, okay? Not too much. That's it. Next, we're going to add shadow with the Vandyck brown
to the fallen leaves. Okay? So just below the
leaves that we've painted, add a small line of brown, okay, just to show shadow. Not on all of them,
just a few of them. Okay, now I've taken some
van **** brown on my brush, and I'm going to show some scattered brass
ein there just to add a little bit of
texture to this area. Okay, I'm going to add
this here as well. Just very randomly making
some dots and lines. Next, I'm going
to wash my brush, and I'm going to just tuck
in these leaves here, and then add the shadow to the leaves on
the side as well. Next with the mix of red and little bit of
black here on my palate, I'm going to make small
tiny birds. Okay. Go take a little bit of the darker brown and
mix it with black. I just talk in this. They're super tiny, so you can
also work with only black, so that's completely fine. Okay, so we're almost
coming to an end. Finally, let's add some details. I'm going to take
my NIBal white pen. You can also use white gosh or a
thick consistency of white watercolors as well. Okay, so just near the branches. Only on some of them, I'm just adding
these white lines, and here as well on
the river. Okay. Just at the edges, just highlighting some areas. Okay, so that's it. And let's peel off the tape now. Okay, so with this, we've completed
our third project, a beautiful autumn river bend. I hope you've enjoyed
painting along with me. In the next section, we will finish the class with
our fourth project. See you in the next
section. Bye bye.
13. Project 4.1 Forest In Fall: Welcome to your fourth and the final project of
painting autumn landscapes. Let's begin with a
simple sketch again. So we'll start
with Horizon dine. Okay, and I'm just going
to draw some trees here. Okay, so I'm just going to draw the trunk for
your reference. Even if you don't draw these, it's completely okay. Okay. Just going to add one here. So we're going to show there's a whole series of forest here. Okay, so let me just put the clip below the board,
and we're good to go. Okay, I'm going to
move this aside, and with my flat brush, I'm going to start by
wetting the sky. Okay. Apply a good even coat of water. All the way to the horizon line. There should be no bead
or water anywhere, so just run your brush
a couple of times, especially in the corners. Next, we're going to take the blue and we'll start
working on the sky. Again, I'm going to start
from the right side. Just the way we have painted the sky in the
previous projects. Okay. Wash your
brush now and dab the excess water on your paper towel and
smoothen this part. Okay? So we'll be
painting the forest now. So the first color that we
need is gamboge yellow. Okay. Go to take a little
bit of water. Okay. And very randomly,
I'm going to cover the first section
with this color. Okay? Next, I taking some burn sienna, and I'm just going to
randomly make some thoughts. Okay, on the edges, especially, and some tiny dots to show some scattered
leaves of the trees. Now adding some darker
value of the brown, so I've taken Van **** brown. Okay? Very randomly,
I'm painting this. There is no right or
wrong way to this. Okay? So just the three colors, the lighter yellow, burn
sienna, and andyke brown. Next, I've taken some orange. And again, very randomly, I'm going to be
painting this section. Okay. I'm going to take
the darker value and dark in certain areas. Next, I've taken
some van **** brown. And at some places, I'm going to drop this color. Okay. After this, I'm
going to take some red and drop that color in. Just making some small dots. Okay, so we're done with
this tree, as well. Next, I'm going to
wash the brush and load my brush with
bright yellow green. So I'm going to make
this tree shorter, as compared to the previous one. Okay, dropping that color. Okay. I'm just going
to pull that little bit off on the top. I'm using the same color, but it's a little
more concentrated, so you can see a darker value of bright yellow green. Okay. See Next with Sam green, I'm going to drop that color in certain places and leaving
some gaps in between. Okay. We want the lighter
green to be seen as well. Okay? I'm just going to darken this bit
with the same color. Okay. So done with a
green tree as well. Next, I'm going to
take gambos yellow. This one is going
to be the shortest. Okay. Just going to pull that
up a little bit more and almost done with this
little yellow tree as well. Okay. Now I'm going to change
the brush to thinner brush. And with yellow ocher, I'm just going to
add in some details, going to drop in a good
concentrated value of yellow ochre. Okay. Next, we're going to take Van **** brown and
add in more details. Just making some notes and some random strokes on the tree. Okay. Same thing we're going to do with the
next tree as well. Going to take a good mix
of red and burn sienna, a little bit of vandak
brown to get a darker red. Okay, you can see
that. I'm working while the paper is still wet, so it blends easily. Okay. Just throwing in
some dots here in there. To show some scattered
leaves, adding red. Basically, with
these three colors, you have to keep adding these details on
top of your tree. Okay? Similarly,
with a darker green. I still have a red in my brush. I just mixed it
with the sap green, and I'm going to make
these small strokes. Okay. I'm going to just pull that
off a little bit here. With that green, I'm just going to overlap it over
the yellow tree, the smaller one, and I'm
just going to create these small tiny branches
here on the side. Okay. I'm taking Vandyke
brown and at the bottom, The paper's still wet. So that's why it's
blending easily. Okay, now add it
black to that mix. Okay. And with this, we're going to paint
this entire section, the bottom of the trees, all the way till the end. So this is it. In
the next section, we'll proceed with
the foreground and complete the other details. I'll see you in the
next section. Bye bye.
14. Project 4.2 Forest In Fall: Welcome to part two
of Forest in fall. Since the trees are still wet, we'll start painting the and
area connecting the forest. Okay? So just below
the horizon line, I'm going to take
yellow ocher and paint this entire section. Okay, I think I'll just change
the brush to a flat brush. Okay. Continuing
with the same color. Okay. You can see now I'm
trying to pull that out. It gets thicker
on the left side. I want to have that uneven edge. So that's why I'm just pulling
the yellow ochre outside. Now with burn sienna, I'm going to add this on the edges with the
tip of my brush. Okay? You can see making these
small horizontal lines. Now, you just wash the
brush and keep it aside. Now apply a coat of light
yellow right on top here. Okay? And you can see
I'm pulling some of that burn sienna just to
create some soft edges. Next, we'll wash the brush
and load the brush with blue. Okay. I'm going to apply
it here at the bottom. I take some water
and blend that in. We want that shadow to be seen, so I'm not going to go
over the yellow much. This is it. Now, I change
the brush to a flat brush. I'm loading the brush with
Vandyk brown and I'm going to apply it here at the
edges to add more depth. Again we're working horizontally,
creating these lines. Okay, only at certain places. Going to talk in this
bit and pull that out. Okay? And now I'm going to
create some streaks in water is continuing with the same color that I
had picked up earlier. That's why I'm getting
these very light strokes. With this, we're done with
the reflection in the water. Okay. Next, I'm going to take some yellow ocher and mix
it with burnt sienna. Okay, we're going
to start working on the trunk of the tree. I'm going to just make this line here these vertical lines. Okay? Okay, so we've got
the first one here. Okay, good to have the
second one here, maybe. Okay. And as you go down, you're going to
broaden the trunk. I have a third one here. So I use a light color first
just to have some markups. Now I'm going to darken this up, and I'm going to take a mix
of anti brown burn sienna, a little bit of black, and I'm just going to darken the first trunk that we painted. Okay. I'm going
to make one here, a small one here. Okay. Going to go over these
trunks that we have painted. Okay? So you can
see it just gets easier and maybe one you. I think I'll have a small
one here and one here. So the green tree.
Okay. Now I've removed the excess paint, and I'm just going to blend the black with the brown
that we had painted earlier. Okay? I'm going to take some more
of it and add some here, go to darken the bottom part. Okay. A little bit here as well. Same thing will apply
to all the trees. You can see that I'm
applying it only on the left side and then
slowly blending it in. Okay. Pulling that out. All this I'm doing
with Van **** brown. Okay. Okay. Taking more of the
color and just continuing. Okay. Okay. Do it twice slowly. One branch at a time. Okay. You can also use your line of brush to
get those fine strokes. I'm going to load the brush
with more of the color. And I'll add branches on
either side of the trunk. That's the easiest
way to understand how you want to add the branches. Okay, so I'm going
to add one here, a thicker one in the bottom. Okay. One on the other side. Moving on to the next tree. Okay, very randomly, I'm
adding the branches. Okay. One here on the bottom. Okay. Next, we'll add
some on the green tree. Okay, so just taking the same mix and continuing
to make the branches. Okay. Going to darken that bit
and make these branches. One on the right, and
one on the left. Okay. Okay. Okay. Finally, we add branches
to the smaller tree. Okay. Just go to
branch one out. Yo. Go to add a small one here. Okay. Just go to take some black, and I'm going to darken
some of the trays. In between the trees now, I'm adding these vertical lines. To add more depth than to show some distant bushes
or trees, branches. So keep adding all the
way until the end. Okay. Okay, I'm just going to pull
that out a little bit from the bottom and go to
darken this part. Okay. And I'm going to add these same vertical lines
on the right side as well. Okay. I'm going to
add random dots. Okay. In between the trees. Okay, next with Vandyck brown and a little bit of
the yellow ochre. I'm going to create the
shadow of the trees. Okay? All right. And I'm just going
to add little detail to the edges here,
taking some black. Okay, making some small dots and lines just to show
some tiny stones here. I'm going to make some
horizontal lines on the water as well to
show some reflection, going back and adding a little more black in
between the trees. Next, I'm going to take
some gamboge yellow. And we're going to splatter some of this color onto the trees. Going to cover the sky. Don't want anything
on that area. I'm going to splatter
some of this color on the trees next, I'll be adding a
splatter of red. Okay, same thing. Just use a brush or you
can tap your finger. Okay, very small
splatters that we need. The last thing that
we're going to add is some highlights
with a white pen. You can also use white quash. So only adding these highlights on the left side of the tree. Okay. And some to the branches. Okay? We'll add some branches
here at the bottom. Okay. They add one on the top. Okay. D adding some details
near the tree. Okay, so just taking a little
bit of black and mixing it with the brown and the
yellow on the palette. And I'm going to create small
tiny birds here on the sky. Okay. Okay. I'm just
going to take some black now and going to add some more dots here
in darker ones here, adding some on the
ground as well here. Just creating some dots. The bushes and on
the ground. Okay. Going to add some on the top. This randomly adding these. And with this last bit, we're done with this
painting as well. It's time to peel off the tape. Okay, so it's a
beautiful contrast between the forest
and the water. Absolutely love how
the colorful foliage is defining the
shape of the trees. And with this painting, we will wrap up a class. I hope you've enjoyed
painting along with me. And thank you so
much for joining me. I'll see you in the
next section. Oh
15. Conclusion & Final Thoughts: We've made it. Thank you so much for joining me on
this beautiful journey through the expressive colors of autumn in our class,
whispers of fall. Over the past lessons, we've mastered the essential
watercolor techniques needed for the four
distinct projects. The last fall, the cozy scene of the autumn hillside cabin, the flowing waters of
Autumn River Bend, and the dense foliage
of forest in fall. You now have the skills
and confidence to approach any expressive
layered watercolor landscape. Remember this most
important lesson, the magic of watercolor lies
in embracing its nature. Don't worry if a wash
didn't turn out perfectly. Embrace those happy accidents. Keep practicing
the techniques and your confidence will grow
with every brush stroke. Now for your class project, I encourage you to
choose your favorite of the four scenes and complete
your own unique version. Once you're done, please
take a clear picture of your final artwork and upload it here in
the project gallery. I truly look forward
to seeing every one of your colorful autumnal creations and offering my
personal feedback. Please follow me here on Skillshare for more
classes and feel free to connect with me on social media at
Bombay Painting Club. Happy painting. Until then, take care, and I'll see you in the next class. Bye bye. And
 Nishita Kashyap, Artist, Art Educator