Transcripts
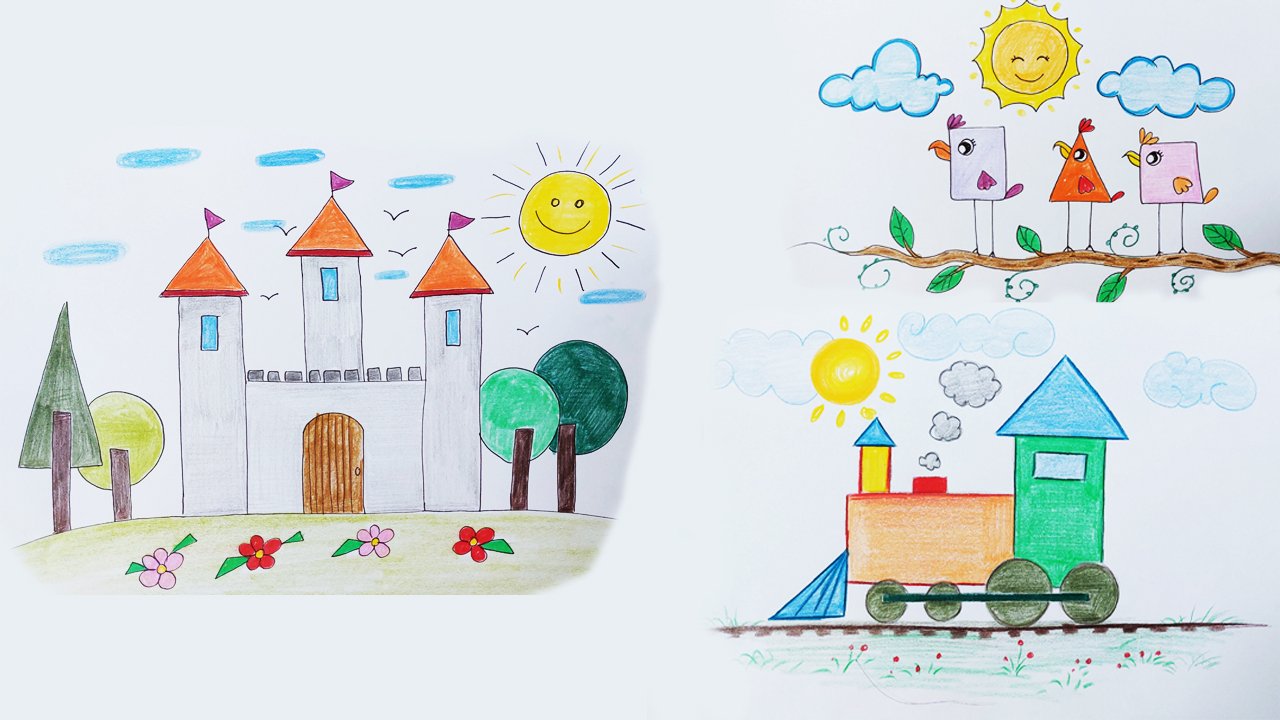
1. Introduction: Welcome to my children's
creativity in drawing art class where
imagination knows no bounds. Here, I believe that
every child is an artist. Through fun and
engaging methods, I teach kids how to express their creativity using
simple tools like pencils, colored pencils,
and what to colors. My little artists explore The joy of creating just their fingers and
the basic supplies, discovering the magic in every stroke and
splash of color. The main goal of my class
is to nurture creativity, encouraging children to think
outside the box and use their imagination to turn even the simplest materials
into masterpieces. With just a small plastic bag, their hands or a few
simple lines on paper. Children learn to create delightful and charming
characters on scenes. I hope this class sparks endless creativity and brings a word of fun to every child, Janas and watch your
child's imagination. Saw
2. Drawing by numbers: Hello to you, my dear friends. Welcome to another drawing to
T with my my dear friends. This time, we want
to know how we can create drawings with numbers. So we want to turn each one of these numbers into acute animal. So first of all, just like me, write the numbers and then start making
them into animals. Start turning them. So what do you think I can
create with number one. Well, I want to turn it into
a pretty little animal. You're still thinking. I'm still drawing. What do you think this is? Well, maybe you should look
a bit further a bit more. I think now you've
got it. That's right. This is a turtle. We've got a turtle here. So with number one, we can create a turtle easily. Then we also create
some legs for him. Let's move on to number two. Let's see what Amore we can
create with number two. Well, you can see where
I'm going with it. What is it? You're asking? It's pretty obvious now. What do you think this is? Don't you think it
looks like a snake? That's true. It is a snake. We've created a snake
with number two. All right. Let's see what we can create
with number three. What beautiful animal I
can get with number three? Let's see. Pay attention to it, creating an other two
ways in the front. Well, what's your guess? Doesn't it look like a
chim pansy. A monkey. A cute monkey is created
by number three. It looks so cute there. See, and this is the
end of its face. Okay. Now, let's move on
to number four. What? Oh, my God. What can I
create with number four? Well, look at those two ears. And it's very easy to create and it's very
cute to create as well. So it got two wings, armed. It's got the rest of its body. I've created a rhino with this. So you can create a big
rhino with your number four. What can I create
with number five? You should guess.
Unless I create it. I can create an animal
famous for its teeth. Look at its teeth. What do you think it is? What animal I'm creating here. That's true. It's a squirrel. Squirrel with a big tail. It's looking a bit angry. I agree with you. All right. Here we go. And then we get to
number six here. What can we create
with number six? Let's see what does it look like I place the eye here
under mouth here. What does it look like now? I think it can turn
into a very cute fish. It's a fish here. Okay, cute fish. Then we move to number seven. You see how easily we can create cute creatures and animals
who had only numbers. Did you know numbers could
be this one? All right. With number seven,
I'm going to create a donkey like the
one in Shrek maybe. Anyways, it is a donkey. Do The mouth. On the neck. It's so cute. All right. Then it's number eight. Let's see what can we
create with number eight. Well, what does it look like? Well, what do you
think it looks like. See, two round ears,
two round eyes. I think the eighth number can be a big chubby, fatty beer. So it's a bear with a
big nose, with a face. It looks so cute, that would be the mouth. All right. Let's move
on to number nine. Mm, well, does it look like now? Well, Pay attention what
I'm creating over here. What does it look like?
What am I creating? It's got a long neck. I think you've almost got it. What has the longest? That's true. That's right. It's a giraffe. So are giraffe with a long neck, cute porker dots
and cute nose area? Now, it's our last
number number ten. I want to create a
piggy out of it. Number ten is going
to be a piggy. I place two eyes for it. The nose I'll continue. It would be one ear
and another one. It looks so cute. Then from here, I its mouth, which is smiling or laughing. Okay. Okay. We've got a happy piggy. How are the pigs? They are chubby as well. I created a chubby body and a cute chubby hand and
another one over here. We've got a complete piggy
and around the spring tail. Cobby legs. Don't forget them. See, with ten numbers. We created ten
different animals. It's like a zoo here. So now, let's start coloring them in our
beautiful colors. So they would look
cuter even cuter. F Turtle I'm going to
use a green color. F it's home on his back. That is my turtle. Then I move on these
lines to make them, sorry, to make them darker
with my green, ain't it nice. All right, I use a
lighter green for its head and its legs Okay. Then with my black collar. I quit some to nails for him. And maybe I'll go
over his mouth. Okay. What should I
do with my snake? I want to collar
my snake orange. I call this side of it orange. And then I call the bottom
part of it in yellow. Because if you've seen a snakes, they are usually two colors. I use the two. Then I use my black to create
some spots and dots on her. I don't know, can be either way. You decide Oh, let's
get to Ponzi monkey. I use a very light pink on my monkey's face inside
of my number three. Okay. I also colored
ear in light pink. And then I use my purple
for the rest of it. See. It's just easy to do. Here we go. You say
when we color them, how cutter they get? It's just so cute. So our rhino. I use my gray color
for my rhino. I create the ear a bit darker. Then I get another
gray color for calling the horn area and
also the teeth. All right. That's my ho. Then I should move to
color the squirrel. Hm, squirrel. They should be brown. So I choose one of my browns
and I start covering it. Also on the ear, coming down. And I cover the whole area. I also color the nose. Also, the arms. They are going to
be darker brown, and it's standing
in a brown area. I also color its tail,
a different brown, or I try to make it a bit more different or you can
color it the same. That's on you, my little ones. Just let your creativity
go free here. Be creative and don't be afraid. All right. Let's move on
to create the next animal. I want to create
a goldfish here. Have you seen goldfish? It's actually red, not gold. But the name is gold. I don't know why either. So it's a red fish here. I'm going to color
it. Totally red. And for this area, the mouth part I'm going
to use my pink pinky pink. Okay. So where is my fish? Of course, it's in the
sea or any kind of water. So I color the background blue. Well, I cannot live
outside of the water. My right. The water is necessary
for the fish to live in. All right. Now,
what should we do? We are cute little donkey. Well, I'm going to use
my gray color for my For my donkey. Okay. So I use it for the ears and back
of its neck, darker. But when I get to
its face and neck, I use it lighter. To get a betsy. Okay. Now let's work
on our chubby bear. I'm using my brown dark
brown specially on the ears. But the face is
going to be lighter. It's a steel brown,
but it's lighter. So I'll just continue this way. Call ringers whole face. Almost done with it. Then I switch to my pink, and I color this area for
its eyes and above its nose. But the main part of its
nose is going to be brown. That will be the
main of its nose. Here we go. Let's start coloring
our giraffe. First of all, I'm going
to color it's polka dots. It's got orange
spots on its body. So there are some orange spots here and also the
ears are orange. Maybe a bit of its
nose and mouth. Then I've got my yellow
color giraffes are yellow. That's right. Actually, Giraffe. Actually, Giraffe, it's my favorite animal. What is your favorite animal? Let me know or if it's here, maybe you should draw it. In a bigger size. Okay. What is missing on my giraffe, of
course, tentacles. They've got to be placed
here also in yellow. Then for the last one, we've got to our piggy. The pigs are pink, of course. So I choose my pink, and I go all over my
piggy with my pink. I color it cutely So, have you seen any
piggies in front of you? They are so cute and pink. Do not forget about the legs. So I get the gray color. Then I work on the
arms and the legs. So do not forget about the nose. Just as easy as that. Okay. Here we are. It was the first one with
the animals and numbers. I hope you've enjoyed
it and see you later.
3. Characters coloring: So now let's start coloring
them in our beautiful colors. So David look even cutter
for Turtle I'm going to use a green color for
its home on his back. That is my turtle. Then I move on these
lines to make them, sorry, to make them
darker with my green. Ain't it nice. All right, I use a
lighter green for its head and its legs. Okay then with my black color. I quit some to nails for him. And maybe I'll go
over his mouth. Okay. What should
I do at my snake? I want to color my snake orange. I call this side of it orange. And then I call the bottom
part of it in yellow. Because if you've seen a snakes, they are usually two colors. I use the two. Then I use my black to create some spots and
dots on b her bag. I don't know can be either way. You decide Oh, let's get
to chimpanzee monkey. I use a very light pink on my monkey's face inside
of my number three. Okay. We also colored
here in light pink. And then I use my purple
for the rest of it. See. It's just easy to do. Here we go. You say when we color them, how cutter they get? It's just so cute. So our rhino. I use my gray color
for my rhino. I create the ear a bit darker. Then I get another gray color
for calling the horn area. And also the teeth. All right. That's my ho. Then I should move to
color the squirrel. Hm, squirrel. They should be brown. So I choose one of my browns
and I start covering it. Also on the ear coming
I cover the whole area. I also colored the nose. Also, the arms. They are going to
be darker brown, and it's standing
in a brown area. I also color its tail,
a different brown, or I try to make it a bit more different or you can
color it the same. That's on you, my ones. Just let your creativity
go free here. Be creative and don't
be afraid. All right. Let's move on to create
the next animal. I want to create
a goldfish here. Have you seen goldfish? It's actually red, not gold. But the name is gold. I don't know why either. So it's a red fish here. I'm going to color
it. Totally red. And for this area, the mouth part I'm going
to use my pink pinky pink. Okay. So where is my fish? Of course, it's in the
sea or any kind of water. So I color the background blue. Well, I cannot live outside
of the water. My right. The water is necessary
for the fish to live in. All right. Now,
what should we do? We are cute little donkey. Well, I'm going to use my
gray color for my donkey. So I use it for the ears and
back of its neck, darker. But when I get to
its face and neck, I use it lighter. To get as donkey. Okay. Now, let's work
on our chubby bear. I'm using my brown dark
brown specially on the ears. But the face is
going to be lighter. It's a steel brown,
but it's lighter. So I'll just continue this way. Call ringers face. Okay almost done with it. Okay. Then I switch to my pink, and I color this area for
its eyes and above its nose. But the main part of its
nose is going to be brown. That will be the
main of its nose. Here we go. Let's start
coloring our giraffe. First of all, I'm going
to color it's polka dots. It's got orange
spots on its body. So there are some
orange spots here. And also, the ears are orange. Maybe a bit of its
nose and mouth. Then I've got my yellow
color giraffes are yellow. That's right. Actually, Giraffe. Actually, Giraffe, it's my favorite animal. What is your favorite animal? Let me know or if it's here, maybe you should draw it. In a bigger size. Okay. What is missing on my giraffe, of
course, tentacles. They've got to be placed
here also in yellow. Then for the last one, we've got to our piggy. The pigs are pink, of course. So I choose my pink, and I go all over my
piggy with my pink. I color it cutely So, have you seen any
piggies in front of you? They are so cute and pink. Do not forget about the legs. So I get the gray color. Then I work on the
arms and the legs. So do not forget about the nose. Just as easy as that. Okay. Here we are. It was the first one with
the animals and numbers. I hope you've enjoyed
it and see you later.
4. Playing with lines and drawing: My dear friends. Welcome to another part
of drawing to altogether. Well, this time, we are going to play and draw at the same time. We're going to draw but we're
going to play a game too. You should think a
bit more and create different shapes and fight
them. The way you can. Just take a black
pencil and then very easily create lines. See, I'm just dragging my
pencil all around my paper. Just make sure
it's not too much. We're going to fill
everywhere with lines. But it's enough, all right. Now that we've
completed our lines. Now we should try to find
something amongst these lines. We can actually seek and find new shapes and some
things inside of it. For example, I would to
find a shape inside of it. I'm searching, I'm seeking. For example, over here, I can have a frog. Let me just use another color to show
you I'm using green. These are my frogs eyes. So I'm using my green color
to show the frog I found. There it is there goes
the top of the face. And this line comes down. To be exactly like a frog, and my frog is even smiling. So I found a smiling
frog amongst my lines. You can now add some
more lines to it. So your frog would
look better prettier. I'm just completing
my frog here. Completing the eyelids,
coloring them. Okay. Or for example, I create two lines
below its eye. Then I use another green
two color, its face. See how fun it is. We are finding things
and shapes together from all these lines that we created without
any special purpose. See we can even create our
frogs tongue. Here it goes. Did you know that the
frogs tongs are this long? They are really, really long. So this goes my frogs tongue. Do not forget about the
eyes? Who needs yes? Of course, it does. There goes the eyes of the
frog with the longest tongue. With the longest tongue. There we go. Here you are, and here are pretty frog here, smiling and looking at you. Now, let's search a bit more and see what else
we can find here. Oh, look here, we've
got a balloon. Oh, a purple balloon. I just color it well. So you can see it clearly. Let's see if you can find
any balloons in your lines. I'm sure there is
one in yours too. Let's see how many of them you can find in your own painting. I think I can have
even more than this. See? Another one is here. I color this with this
coolor lighter purple. It's a purple and
thing together. Definitely, you're going to find different shapes
in your own lines. So don't worry about it. These are my lines. I've got my shapes from it. You might find so
many different things and new things in
your own lines. Oh, my dear friends, we also found a fish. Look here. It's a little fish. I can have one here. See. Here goes my fish. Above my frock also. Here's a s. Okay. I'm sure there is a
fish in your lines too. S there is another one here. Oh, look. We've got
a lot of fishes. I've got so many of them. Let's see how many you can
find, how many fishes, how many balloons, or any
other shape from your own. So I also call these
fishures one of them green. Another one I want
to call her pink, just to make them all different. Why place their eyes, of course. Se. It's so fun. We are playing a
fun little game. And we're drawing. Oh, my God. Look at this one. Now, I found a whale. It's a smiling, happy whale. Oh, my God. See how easy and fun it is. I can create my whale
Looking like this. It's a smiling. It's just getting water
coming out of its back. And of course it needs a lie. Well, I'm going to use this
light green for my wail. Let's see if you can
find a wail in your own painting your own
lines, actually. So here we go. I'll go all the way. And I collar the whale. This is the water
coming out of it. All right. Let's see if
there is anything else here. Now, what else we can find search and search until
we find something else. Oh, my God, I found
even another fish. It was hiding over here. So I make it orange
to show it more. Inside of your lines, there are so many cptes in
shapes which are hiding. So you just have to go and seek. It's called hide and
seek in the lines, they hide, you find
them Let's see. Let me just search a bit
more to see what I can find. Searching and searching
searching is fun. I'm sure it's fun for you too. Oh, my God, look at
this cute little thing. I found a butterfly here. See, I'm just coloring
one of its wings for you. This is one of my
butterfly wings. There she goes and another one, we'll be here on this side. This is the butterfly I found. I'm sure you're going
to like it too. I create another tentacle for it and complete my butterfly. Well, the butterfly
is next to the frog. Oh, my God, please don't eat
the butterfly, Mr. Frog. I hope not. It's
got a long tongue. Maybe he would. But I wish not. Let's see what else
we can find here. Well, what can we find? What can we find? Something pretty,
something exciting. For example, over here, I can find even another fish. What? It's full of fishes here. We're probably in the sea. We've got fishes,
a frog, a whale. I didn't know why a butterfly and balloons are in the sea. What's What it is. Don't overthink it. Just go with the flow. Okay. There goes my blue fish. I've used the dark blue. This is my fish's tail. It's connecting to
the whale's tail. They are connected by the tail. Okay. So here we go. It got two little ones. I call the man. Then I
place some mouth for it. So it can eat something. Obviously, All right. Let's go back and see what
else do we need here. What else do we have here? Well, I want to create
some water for my fishes. So I turn this shape
into a sea wave. It's totally a sea wave. It's so fun. See how many sea
waves we've got here. It's the easiest thing to find. All of my lines look like waves. So they can actually
live in the sea. Let's see that. All of
this area is the sea. So I call it all of
it blue light blue. That's the color of water. Here we go. And here they are. Right over here, again, I can have another wave. There goes the sea wave. Coloring it all in light blue. Okay. Here we are. You see how beautiful it got. It looks like a great
painting. But don't forget. We started with only lines that we have drawn with
no goal literally. So should just let your go
free, create some lines, some lines, and then you can get a beautiful painting
like this out of it. I'm just creating some
little sheeps. Sorry. Little fishes. Where did the
sheep come from in the sea? We're just creating
little fishes. Okay. Let me see if I can
find anything else in here. I think it's done. I've got most out of it. Okay. So you should find
shapes in your own lines. You can even find more
things than I did here. So don't be afraid
and go explore and go seek and find the shapes which are
hidden in your lines, good luck and enjoy this game
and drawing. See you later.
5. Playing with brushes and watercolors and drawing cute characters: Hello, my dear friends. Welcome to another one of
L Tutorial episodes. Okay. We are going to start again. But this time, we are going to play the games and paint
with water callers. So we are going to just create some shapes
out of water colors. So place your brush into the water than in
any color that you like. And then bring it into the paper in any
shape that you like. It doesn't have to be
any special shape. Then again, for example, I want to use another color. I want to use red or
dark orange the same. And then I bring
it onto my paper. See? These are just some
really random shapes. It's not anything special now. Then again, I use another color. My dear friends, you should
choose your own colors. I'm using purple though. You can choose any
color that you like. Just put your brush in
the water, wash it, and then put it in another
color and bring it onto your paper in a very
random shape like this. All right. Then I can even
use my blue color. Like this. Okay. So this time we are
just playing some games. We want to colors, and we are going to draw
and paint at the same time. It's going to be much more fun. So I can also use a red color. For example, like this. Well, it's got so much red. But it's such a beautiful color. So you should guess
three more colors. What am I going to use now? Yes. Another green. Then another darker
green. Like this. Just using different
greens, different reds, different blues, whatever
color that you like? Or, for example, what
would be our last color? A beautiful purple. It's different from the one
I used in the beginning. All right. You see? I've
got nine colors here, and now I want to turn them into specific shapes
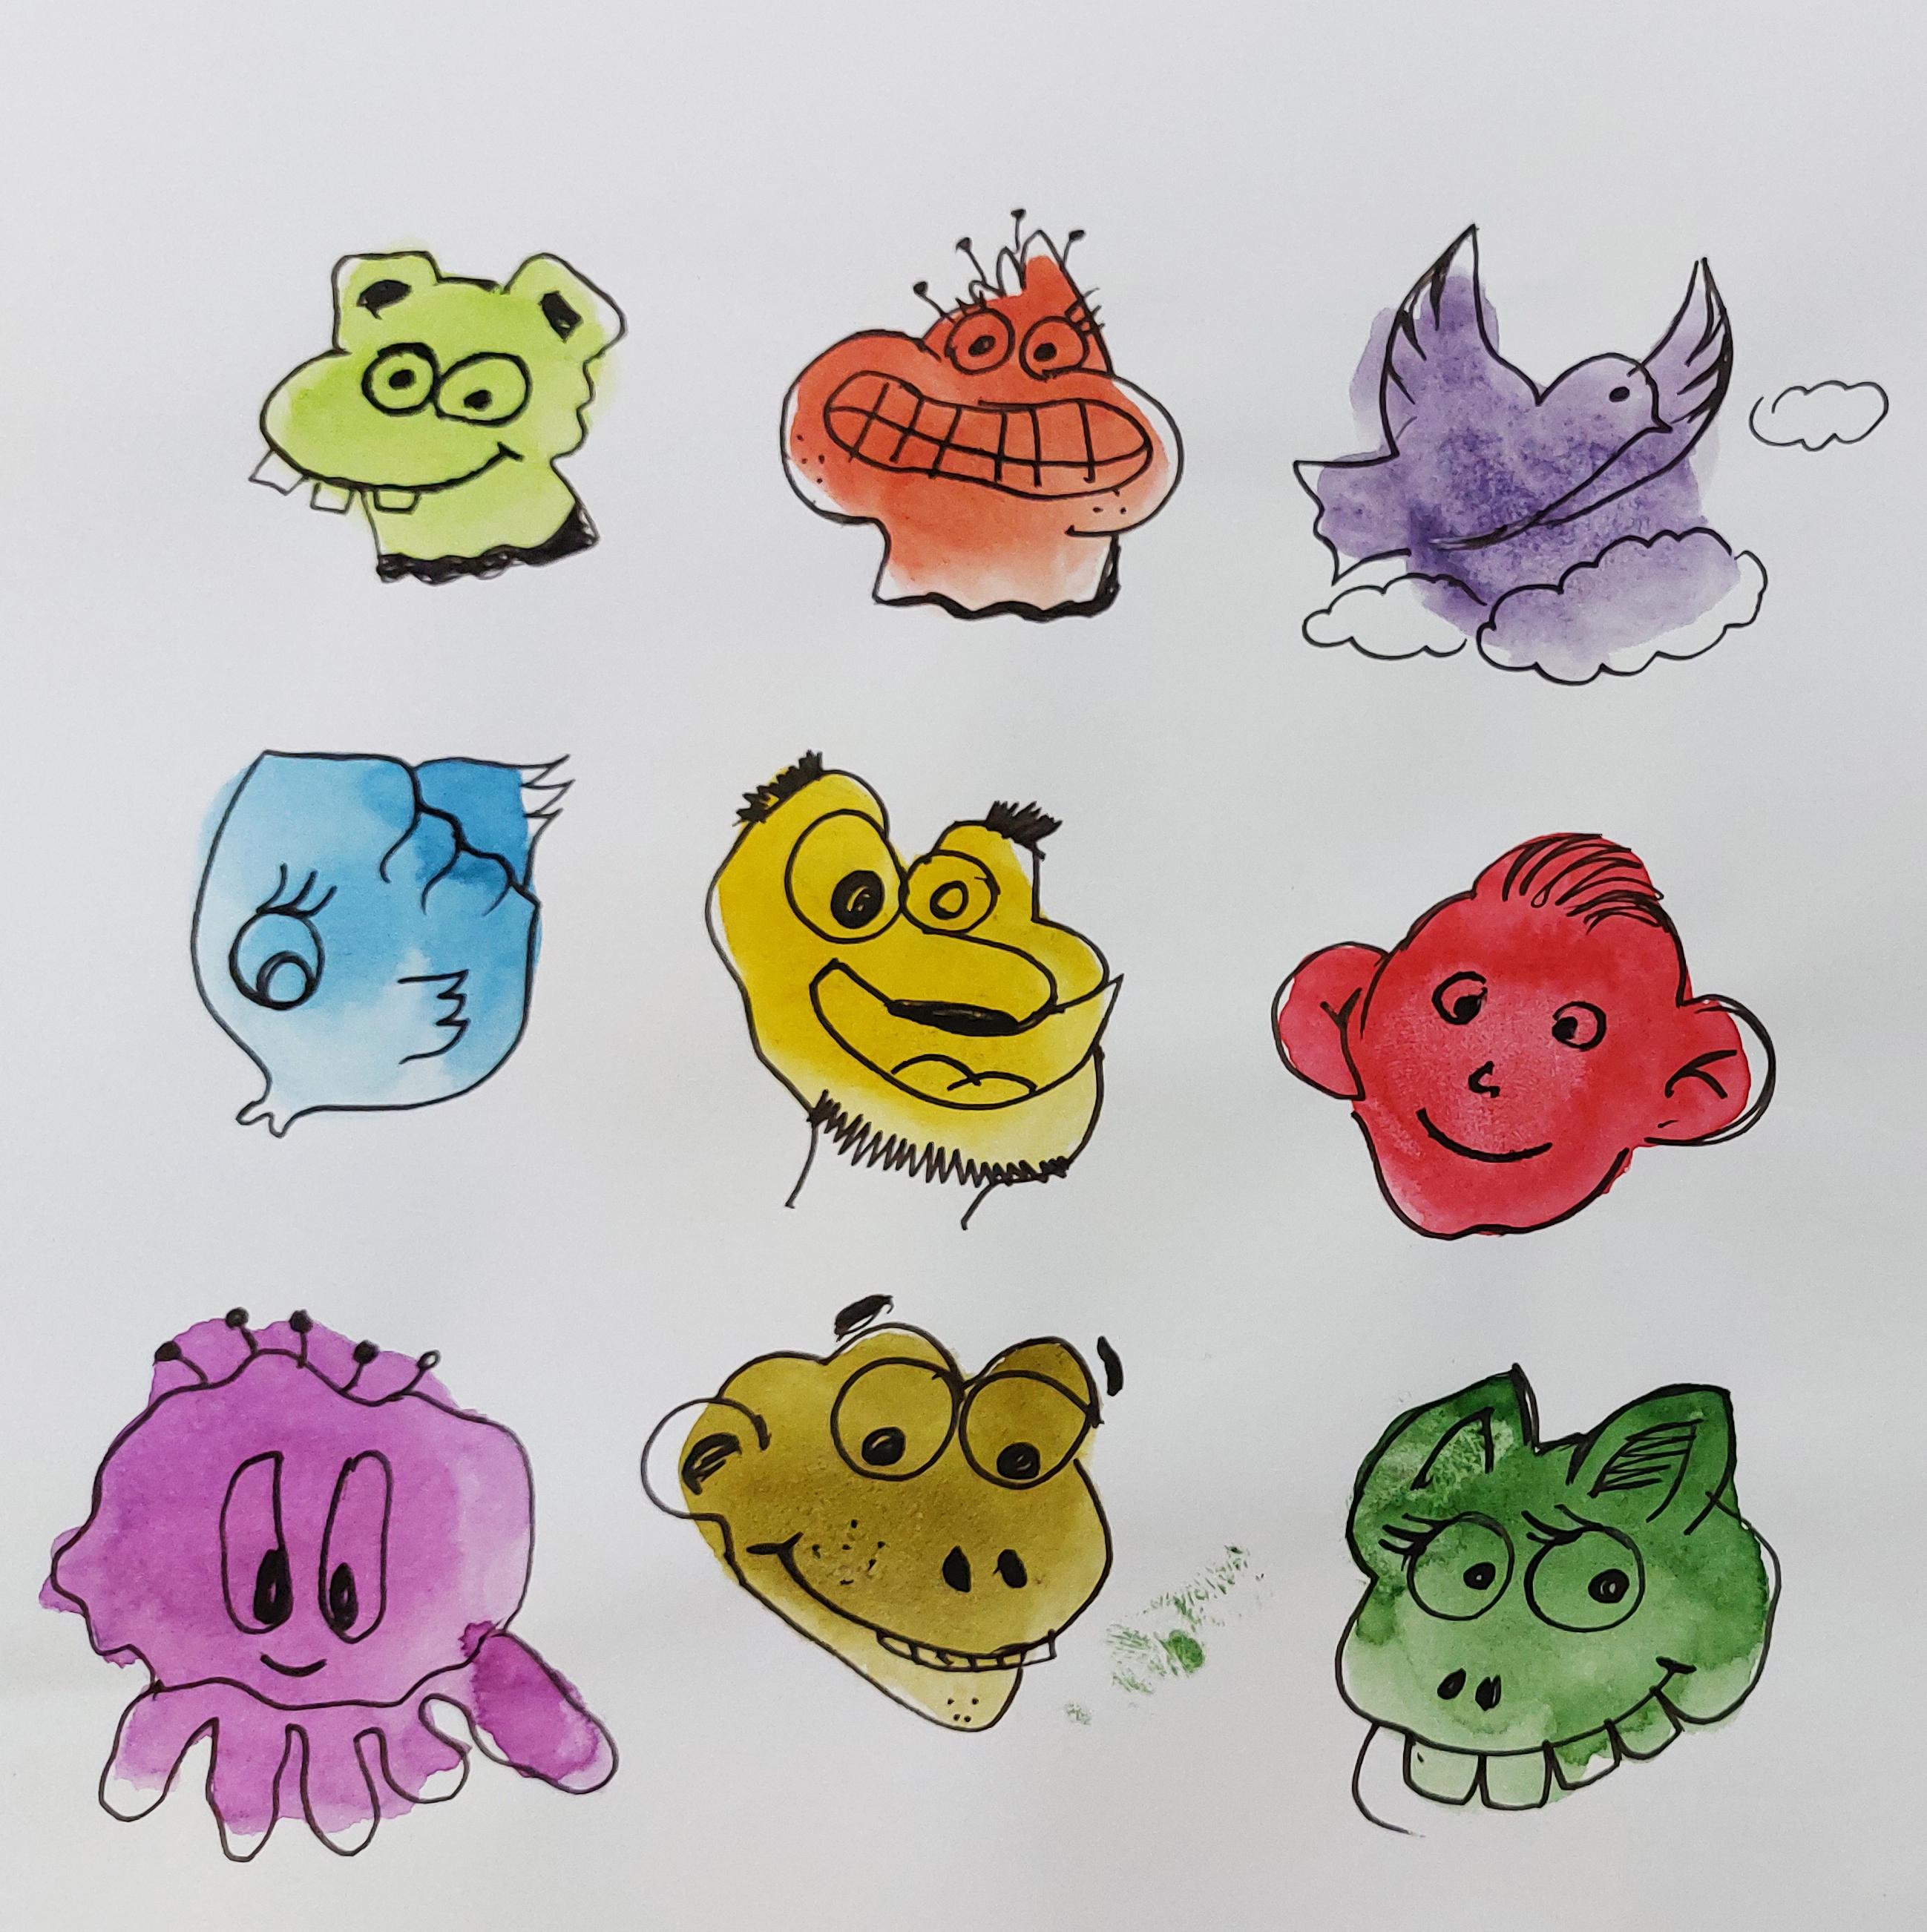
aren't creatures. First of all, just let
them dry completely. Then after that. Let's see
what does it look like? What does the green? For example, I want to
place two ears here. This would be the mouth. These would be the eyes here. This will be the neck. So see? I turned into a
very funny shape. So we are just going to get different shapes and
different creatures out of our random. Water color spots. I can even get
some teeth for it. You see how funny its. It just looks so funny and cute. Making the eyes looking better. Okay. This is our first one. Let's move on to the other one. What can we create? For example, here, I
can create two cheeks. It's just like a character
with two big cheeks. Two eyes, that would be the hair It's just he is
smiling this way. Wow. Look at those t. Okay? This is the neck. So however you can create these shapes. However you want, you
can create these shapes. So, what can I do with this
blue one? Let's think. See, what can we do? This blue one can be a
very pretty fish. See? Like this. With big eyes here. Oh, she looks pretty And
that would be her tail. Look at those on my lashes. She looks so cute. Okay. Hmm. Now let's
move to work on these. Let me just check if
they're dry enough. Make sure they are dry. Totally. See what we can do
with this yellow one. For example, let me just create two one big eye here and
another smaller next to it. And it's just looking
in different ways. Again, a funny character. We also place the
eyebrows like this. Again, so funny,
a big nose here. And then as big as a smile
just below it, he's laughing. Then I complete His face. You see how funny
and cute it got? I can even get him some beard. It looks so fun. You see how easy
and funny it is? We are having fun. And very easily, we are creating beautiful
shapes and creatures. A lot of different
ones with random, what it cool spots. Ain't it crazy? I mean, let's just do it. So I'm going to be struggling
with this one, but maybe. I can turn it into a birdie. Yeah. There it goes
a birds flying, there goes the wings, two wings up high in the sky. There I would have its body. I turned it into a
beautiful birdie Okay. So we could get a bird
out of these shapes. It can be even the rest of
the sky like the clouds. Now, this one would
be this purple. Well, I'm just thinking
that this paper one just looks too
much like an octopus? It got eight legs already. I didn't even have to
try to create them. These are two octopus eyes. Big ones. And you see, we've got a cute
baby octopus here. It looks so cute. See. We've got three
more colors to go. With this one, what can we create Maybe this
would be the mouth. These are the teeth. This would be the
chin or the jaw. Here, I create a big ear for it. Then this is or
these are the eyes. We could create a
face out of it. It's a weird face, but still, it's a face. Looks like a frog again. Almost. Maybe it's something else looking like that either. All right. We've
got two more left. Let's just get more creative. The red one is still
a bit wet so I'm going to work on the
Lower one a green, and then we go back to the
red again. Don't worry. These two can become
two ears like this. Then two here. Well, it's turning into
something I really like yes with eyelashes. Then a big, big smile there. And even some teeth. It call big teeth,
ladies and gentlemen. So be careful not to
let it point to you. Looks like a dragon
already, ain't it? Okay. Now let's work on the
red one here can be the hair. These two will be
turned into ears, one on each side. And this is the rest
of the face two eyes. And it's a cute little boy. As easy. We've created
so many cute characters. I hope you've enjoyed it, and you create your
own characters. Take and see you later.
6. Cute Knuckle Characters with Fingers and Watercolors: Hello to all of my dear
friends and welcome to another part of our
playing and drawing together. All right. Now, this time, again, we are going to play
with a lot of water colors. Place your color
next to you and then place your finger into the
water and in your collar. I just place your
finger on your paper. And do it with different colors. Try to place your fingertips
next to each other. So we would have our
colors next to each other. So just like me, to your little fingers. Just place the colors
next to each other. We are going to do
some finger painting. I'm sure you all love it. So I love it, too. Just as cute to this. I've got purple, I've got blue, I've got orange, green, red, even lighter blue. Any other color that you like
though after we've done it, Now, you should
wait just a little bit so that your
colors would get dry. After that, they got dried, Choose a black pencil and start creating a different phase for each one of these finger colors that you've created all color
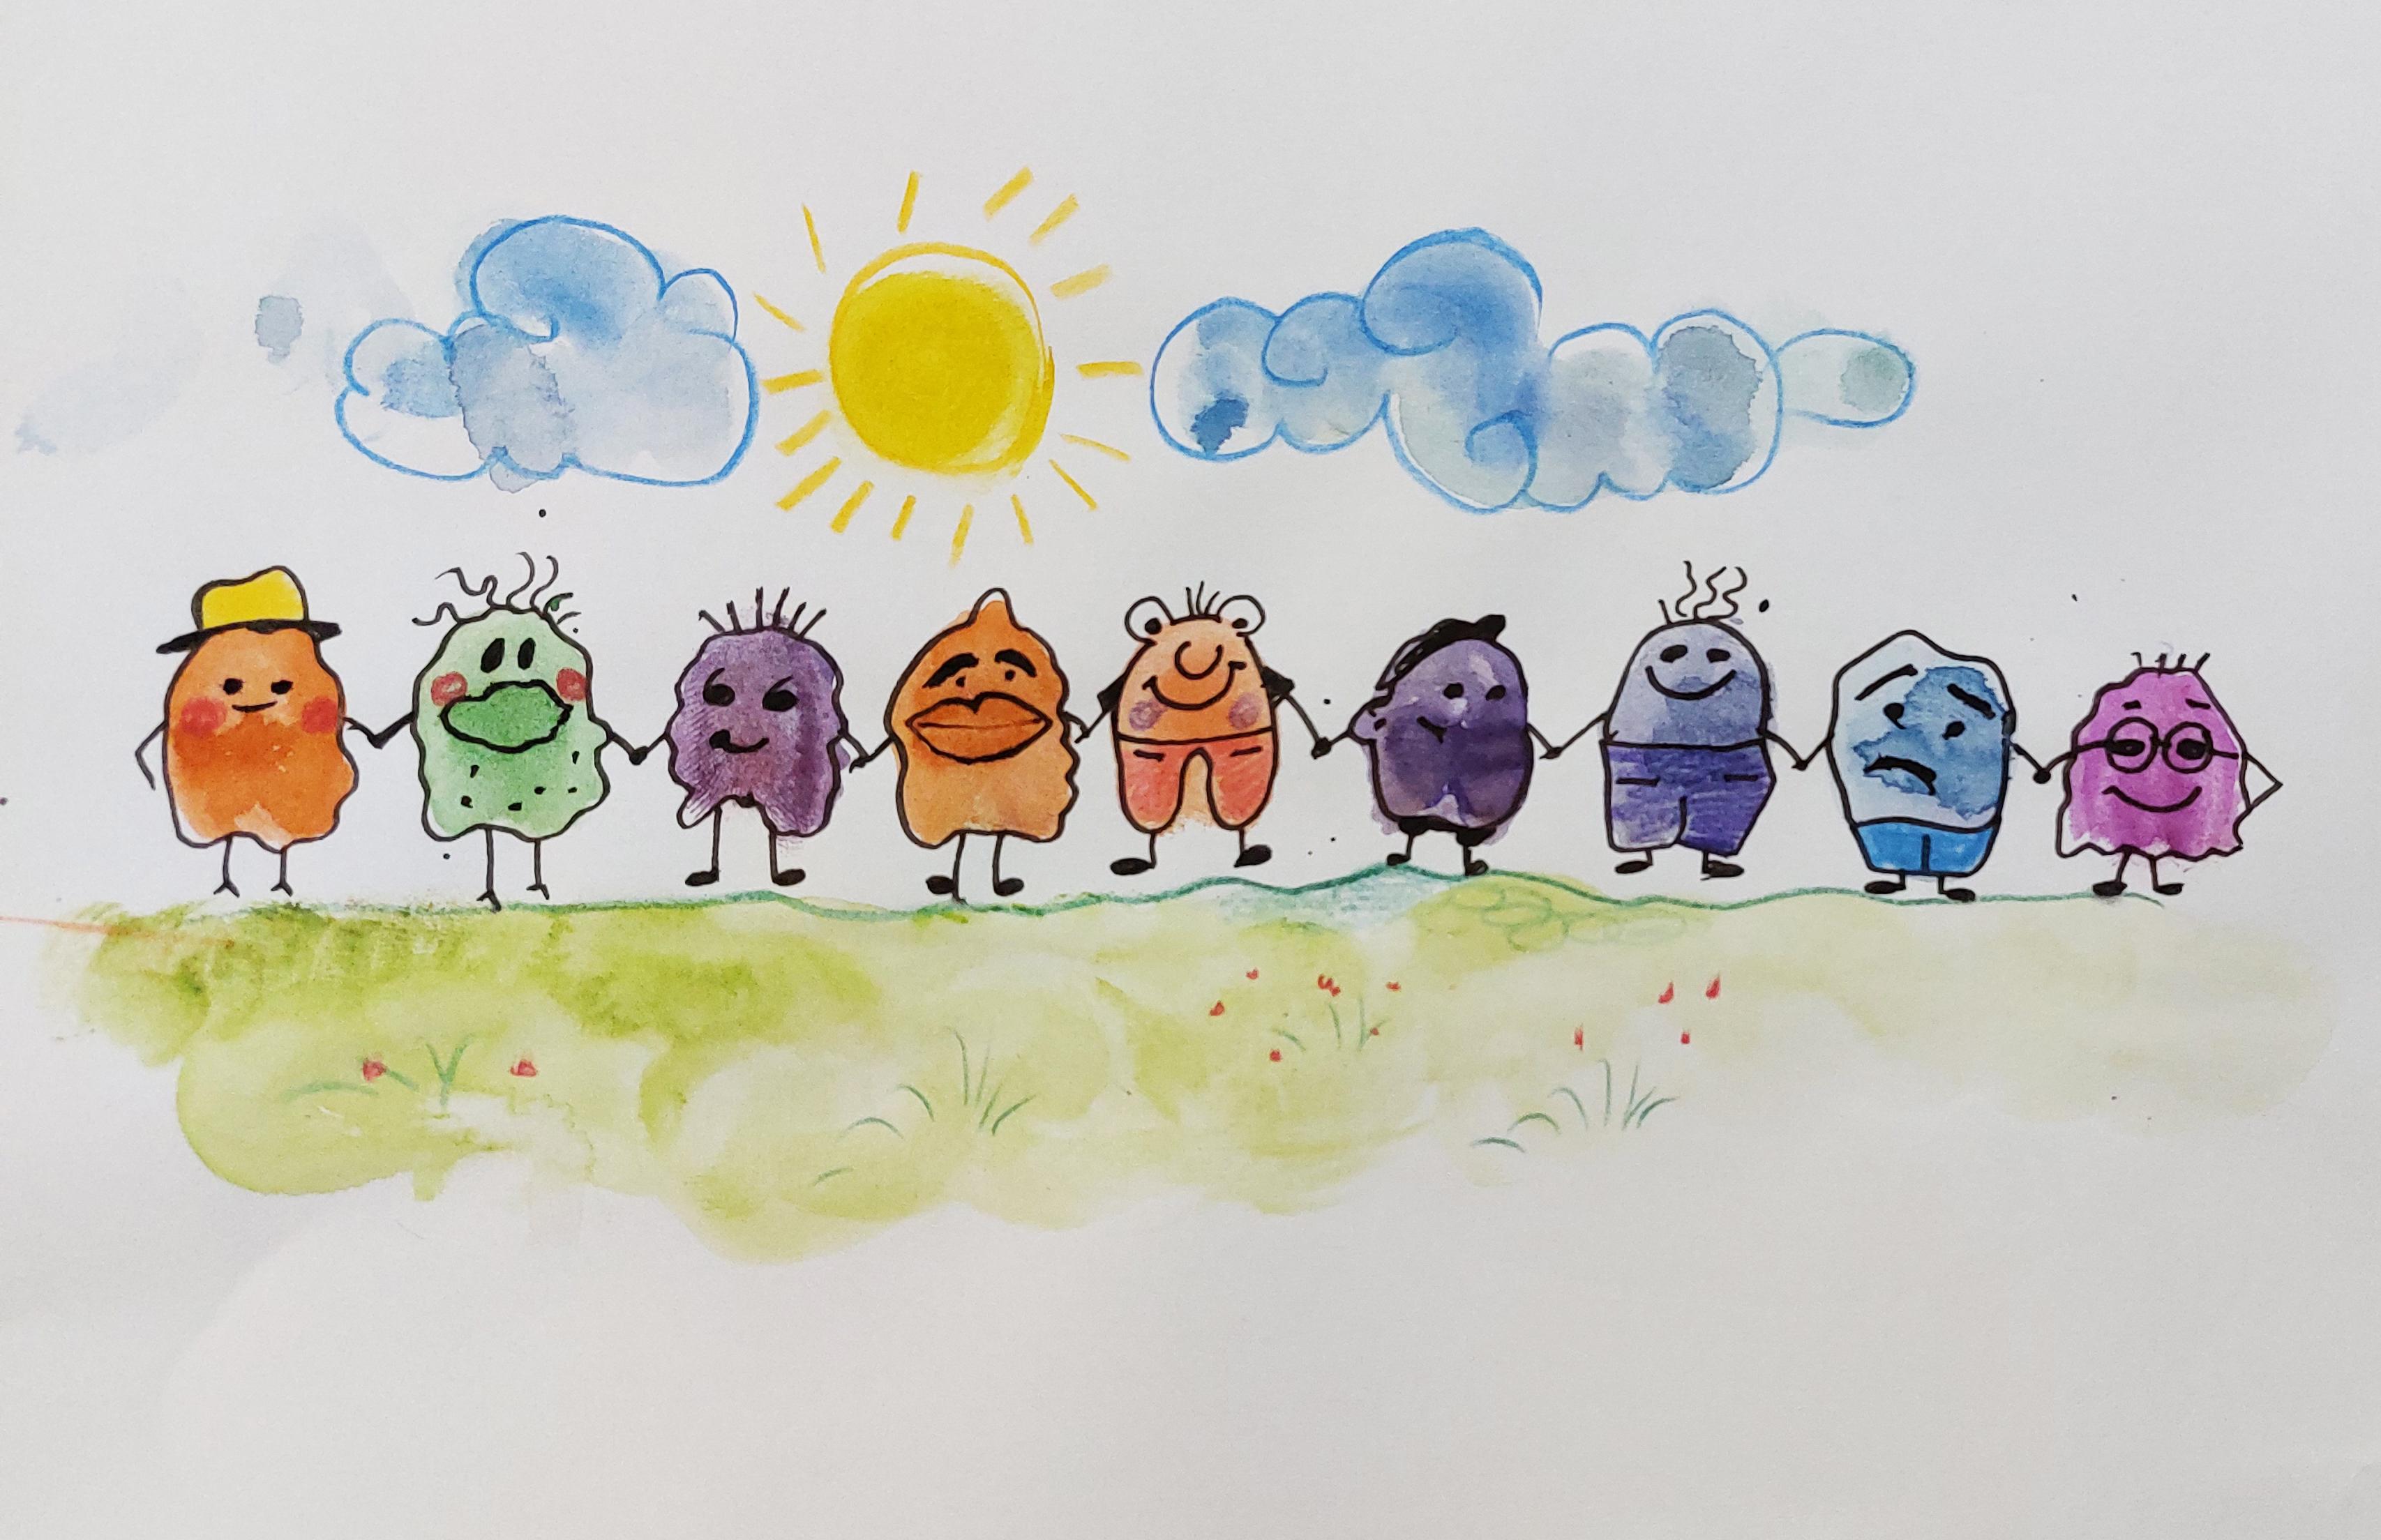
fingers, better say. So for example, I create
my phase like this. I want to create
even a t for it. But it's going to be cute. They're like tiny little
finger characters. That's what we're looking for. Even something like this. I create two legs for it. It's got a whole character. They are finger characters, cute little small ones. Okay, for the next one, I want to create hair going
all the way up to the air. A very big mouth. And two cute eyes, of course. I also want to create
some spots on this body, and of course, two legs. Now, I connect their
hands together, so all of them would be holding hands because
they are all friends. They are little
finger characters, which are all friends, and they all came to see you. See how cute it is. Then the next one, I create yep. Cute mouth. For example, for this swan, I want to create hair like
this and not a lot of them. The legs will be here. This one has worn shoes, nice. Then again, they are going
to be holding hands. How can I create this one now? Well, you should just
try to think and say, what different
phases I can create? Well, I think this
would be nice for it. It looks cute again. Then again to. We've got
the big mouth and the eyes. Again, the joining hands. Now, the next one this time, I can place the eyes here
on the top of the head. That would be
different, wouldn't it? The nose mouth. At even the body
looks like this. It looks like a tooth, ain't it? What anyways, it's just new. I can even place the sleeves for it just to make it different. I can even place two pockets, two little teeny tiny
pockets for his pants. For his trousers. Then this one. I think
it's got a hair like this. It's got an ear. Then the rest of the body. It's wearing shorts maybe. The legs are like
this. The eyes. So just as easy as that. With our fingerpainting, we can create little cute creatures, which are each
different from another. See? Please use a lot
of your creativity. Go wild and create
what's on your mind. So your characters can even
be more different from mine. Well, last one is looking
so handsome I guess. Creating s, of course, and forget about it. This one, it can be like this. It's a bit shorter. But if I create
some parts for it. It's going to be as long
as the rest of them. One eyebrow is going
up and another down. It's like this one
is a bit worried. I even create the mouth
like an upside down. And then forward the last one, I create it like this, the body, the legs, the eyes. And I even create some tiny, tiny glasses for it. I need one. Okay. These two, of course, are joining hands. Now, all of them
are holding hands, and we've got nine
little finger creatures. Okay. What else we
can up to this. Well, again, we can place
our finger into the collar. I just tap it onto
the paper like this. This way, I can have some
grass underneath the feet. This is what we call
finger painting it? I'm just loving it. Working with fingers
and colors are so fun. Place your finger inside
of your color and then tap it on your paper or
spread it like I did. Then again, I tap my
collar and my yellow. I tap my finger and
my yellow collar. And over here, just
by moving my hard, I'll create some I can
even create clouds. Oh, look. Oh look at my fingers. I'm a blue collar, of course. I'm creating cute
clouds for them. It's just a happy
group of friends. They've come to see you. So you'll be happy too. Okay. Then we can also get
our color pencils and play some spots
here, read the spots. Making the flowers
inside of the grass, and then with our dark green, I just create a line
underneath the legs, making it more colorful
and better looking. Some grass is even. Then with my blue
colored pencil, I frame my clothes, making them look better. I'm sure you're loving it. Then the sun, of course, I'm going to use my yellow to create the sunshine for my sun. But my yellow colored pencil, see how be beautiful our
finger painting could be? Oh, let's not forget
about his heart. Or for example.
Let's just create some rosy checks
for some of them with our red or for example, color the pats of one
of the characters, making them, you know, more colorful as I set. I'll get to blue and
work on this one, or the purple and the
trousers of this one. See? Just like that, my characters would get
more beautiful and cut. With your little fingers, you can create this
beautiful finger painting and with your own creativity, turn them into this happy
group. See you next.
7. Painting Nature with Plastic Bag and Watercolors: Hello again, my dear friends. How are you? Welcome to another
drawing tutori with me. I'm sure you're going to
enjoy this again. All right. This time, we're going to
use a bit a little plastic. First, tell you mommy to
create something like this, just blow into a plastic and
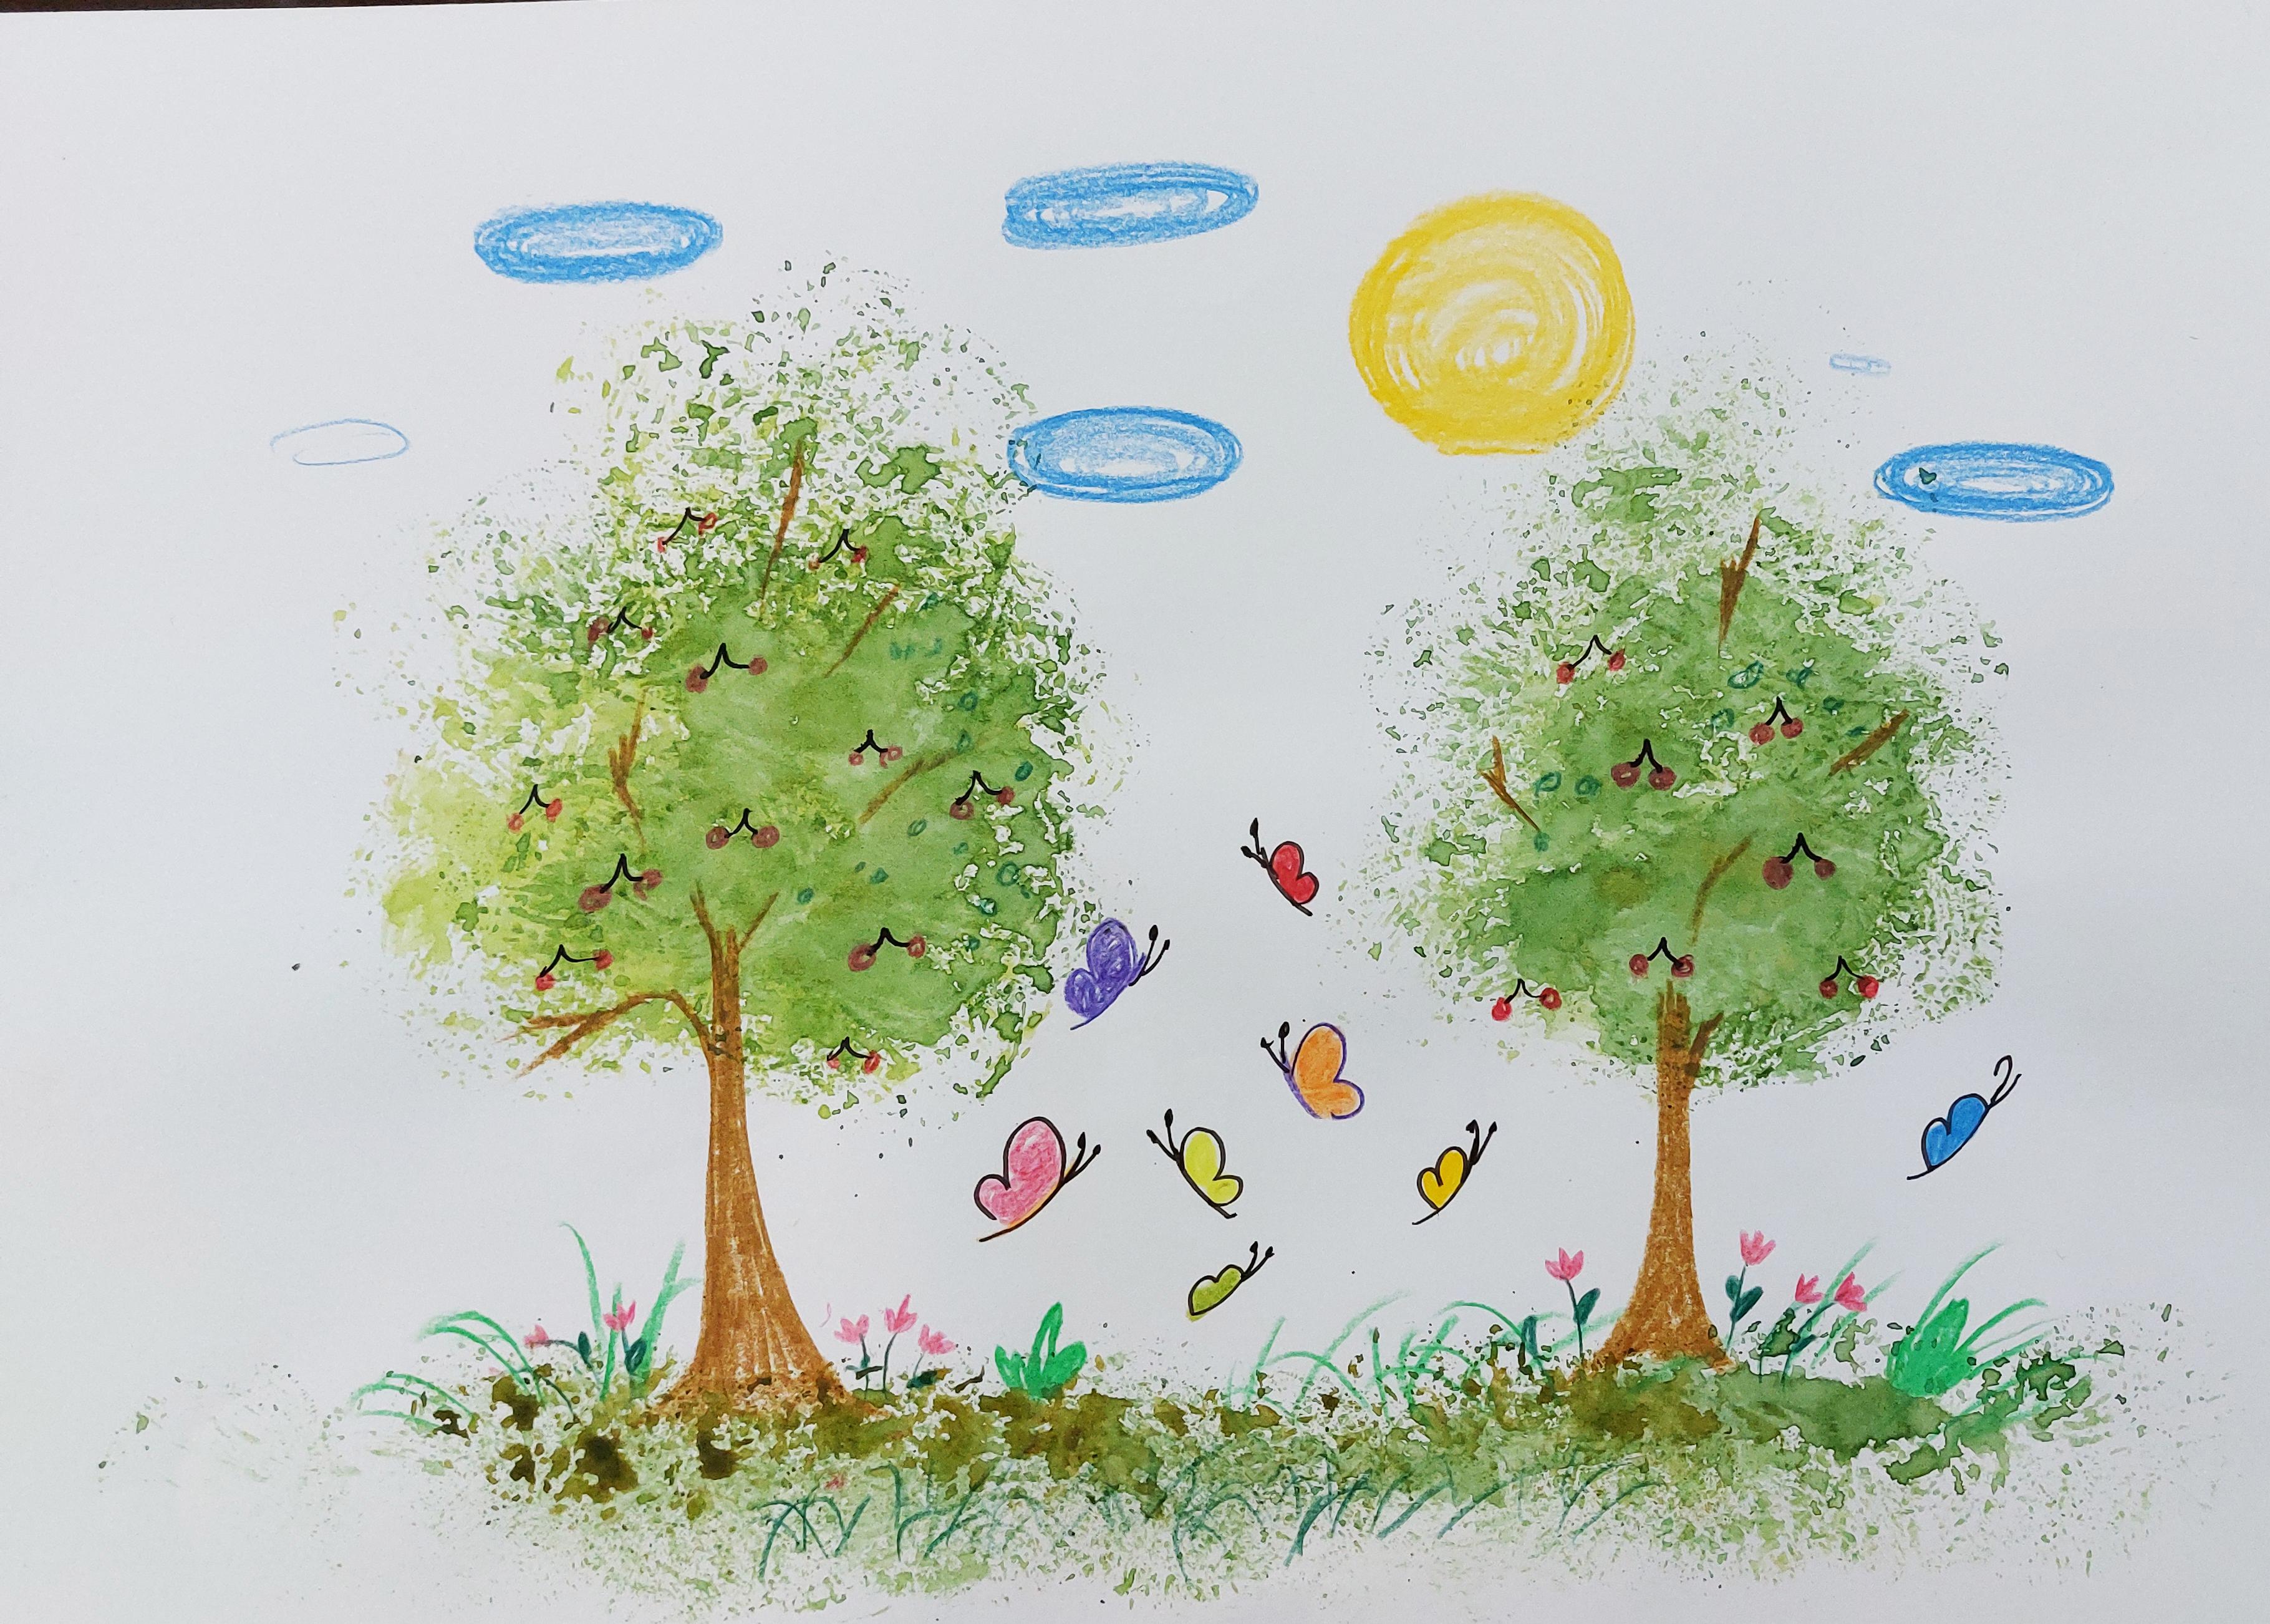
just wrap it up for you. Then, first of all, over here, I create
a tree trunk. Then after that, I call
my tree trunk. No. After I've colored it, I'm going to use my plastic and I'm going to
place it into color. When you put it in color, it looks like this. Then we tapping it on the paper, you can create a beautiful tree. This, you are creating
your beautiful tree, then I'll use a dark green and make it even more complete. Now, again, I create
another tree over here. So first, I create
the tree trunk very easily normally
with my brown pencil. Then I put my plastic into
water and into my water color. Then I place it and tap it
on my paper. Oh, my God. Then, of course, after that, I use the darker green, see how cute they are. So just keep tapping until you get the tree
that you want. See? We only a plastic, a plastic bug and some
water cooler we could create this beautiful
art work. Okay. I also create some grass underneath them with
the same process. With the same way, I mean. Okay, there. Just as easy. Now, we're just let our drawing. But just let it dry and
just give it some time. After we waited and it got dry, I'm going to use my cole pencils in order to make them
prettier as always. As you can see, I'm
using my green in order to create grasses here, then use my pink to create
some pretty flowers. They are all coming together. It's just looking so good. All right then. We've got it. All right. Then after that, we are going to
use our dog green. And with our dog green, we play some leaves for
our pretty flowers. And then I feel all parts
with grass again. Okay. See the grass, see the flowers. They look so pretty. Then you can get
your black pencil. Then inside of your trees, create the shapes like this. They will look so Trust Just make sure they
wouldn't be too much. As you see, I'm just
creating upside down weeds. So these s are going to
turn into pretty cherries. That's why I said do not
make too many of them. So create some
cherries on your tree. See how pretty gets. It is awesome. So it's the same way here. I just continue the same way. And no. What do we create here? Over here, I want to create lots of f, lots of butterflies. Sorry. Because I don't want to just leave
this area empty. I want to complete my painting. So I'd be just creating
beautiful butterflies here. It just makes a whole painting. Cut and beautiful. Do you like butterflies? I think they are so pretty
and they are full of life. Okay. Tentacles as well. Making them as much as I can. There we go. Now, I should color them in
different colors. I do one of them pink or
do one of them purple? I use yellow for another one. Another one would
be, you know, maybe. A maybe another yellow, a lemon yellow, another
yellow, another blue. You can just color them As you like the way that you
like them to be really. That would be so
real, so pretty. It can even be green. Okay, what else do we need
beautiful nature side Well, of course, we need a sun. So a butterflies will
actually look better. They could fly more. They could fly in
a warmer place. So don't forget about the sun. Never. Here we are. We are done with it. Also created clouds, of course, and my son would feel lonely. What else we can, for example, or plants on the ground
among the grass. We can use other plants. That's how we use it. Then we can also place these little dark green
leaves inside of our trees. Well, how about creating
some branches here. The trees and branches. So I'm just going
to work on them a bit with my brown. Okay. So that's my dear friends
with the plastic. We created a beautiful
nature. See you later.
 Mila Keller, Drawing Artist and Cartoonist