Transcripts
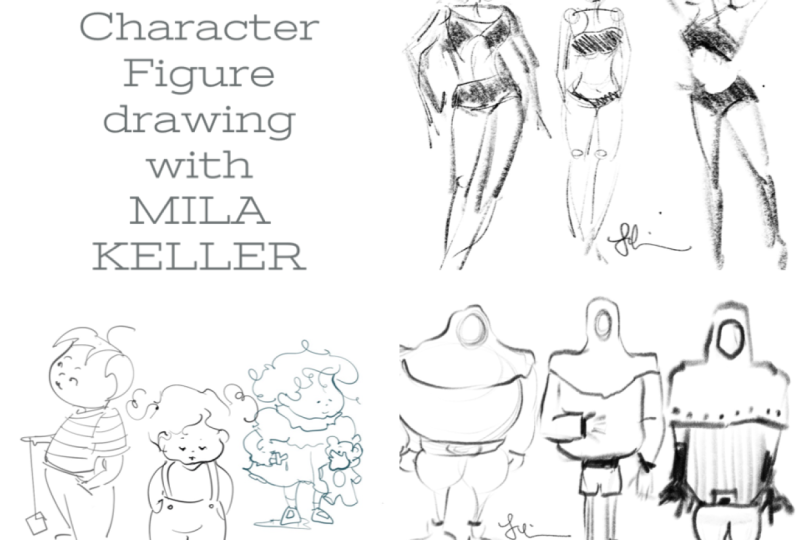
1. Introduction: What a skills and
abilities are required for an artist to sketch a character figure
In this course, by using different techniques, you will be taught the
anatomy and sketching of male and female
figures in overweight, right weight, and slim physical states in a
completely basic way. Also, this course includes
drawing cartoon characters. This section allows you to draw and create
different figures for attractive
cartoon characters using special techniques. Join us and gain new skills in the art world or figure
drawing and human anatomy. Don't miss out. Hello everyone, and
welcome to our new course. In this course and
in this episode, we are going to learn how we can create different figures
for different characters. Before we start our work, I'm going to tell you about the tools you need
for this course. You need an full paper or
anything you'd like to work on. You need a normal pencil
and a normal rubber. You don't need any other tools for this course. Let's move on.
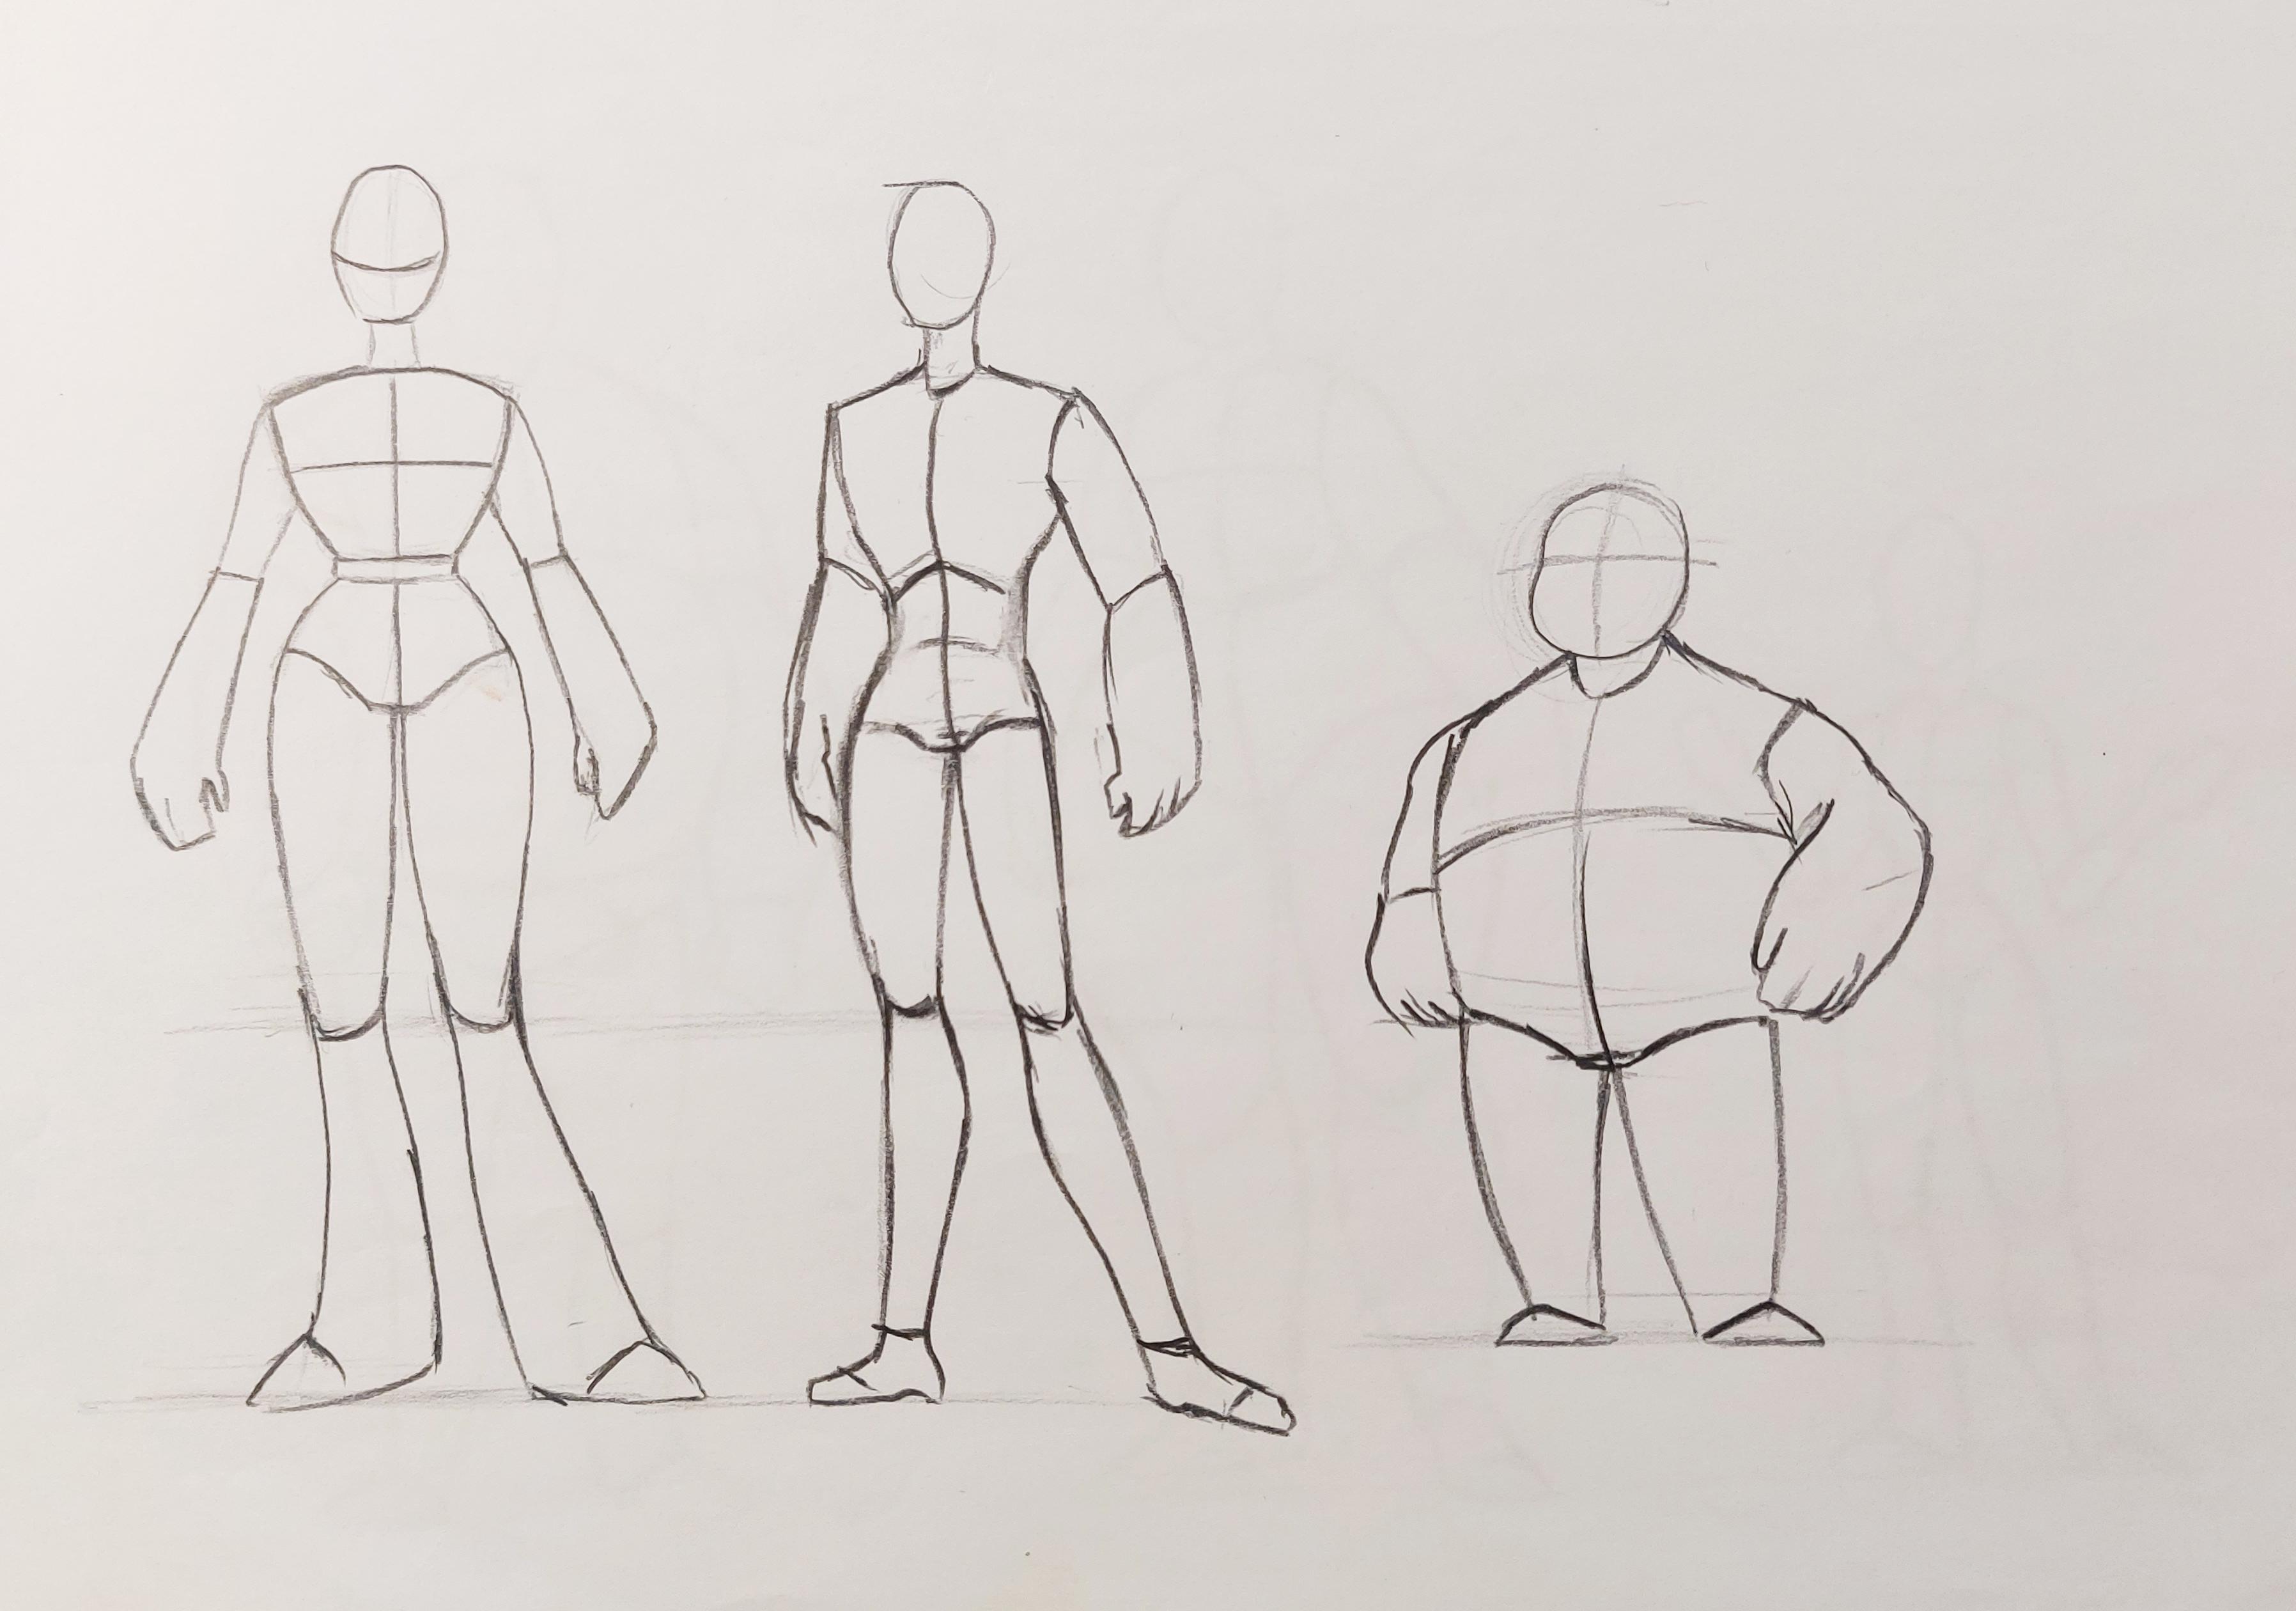
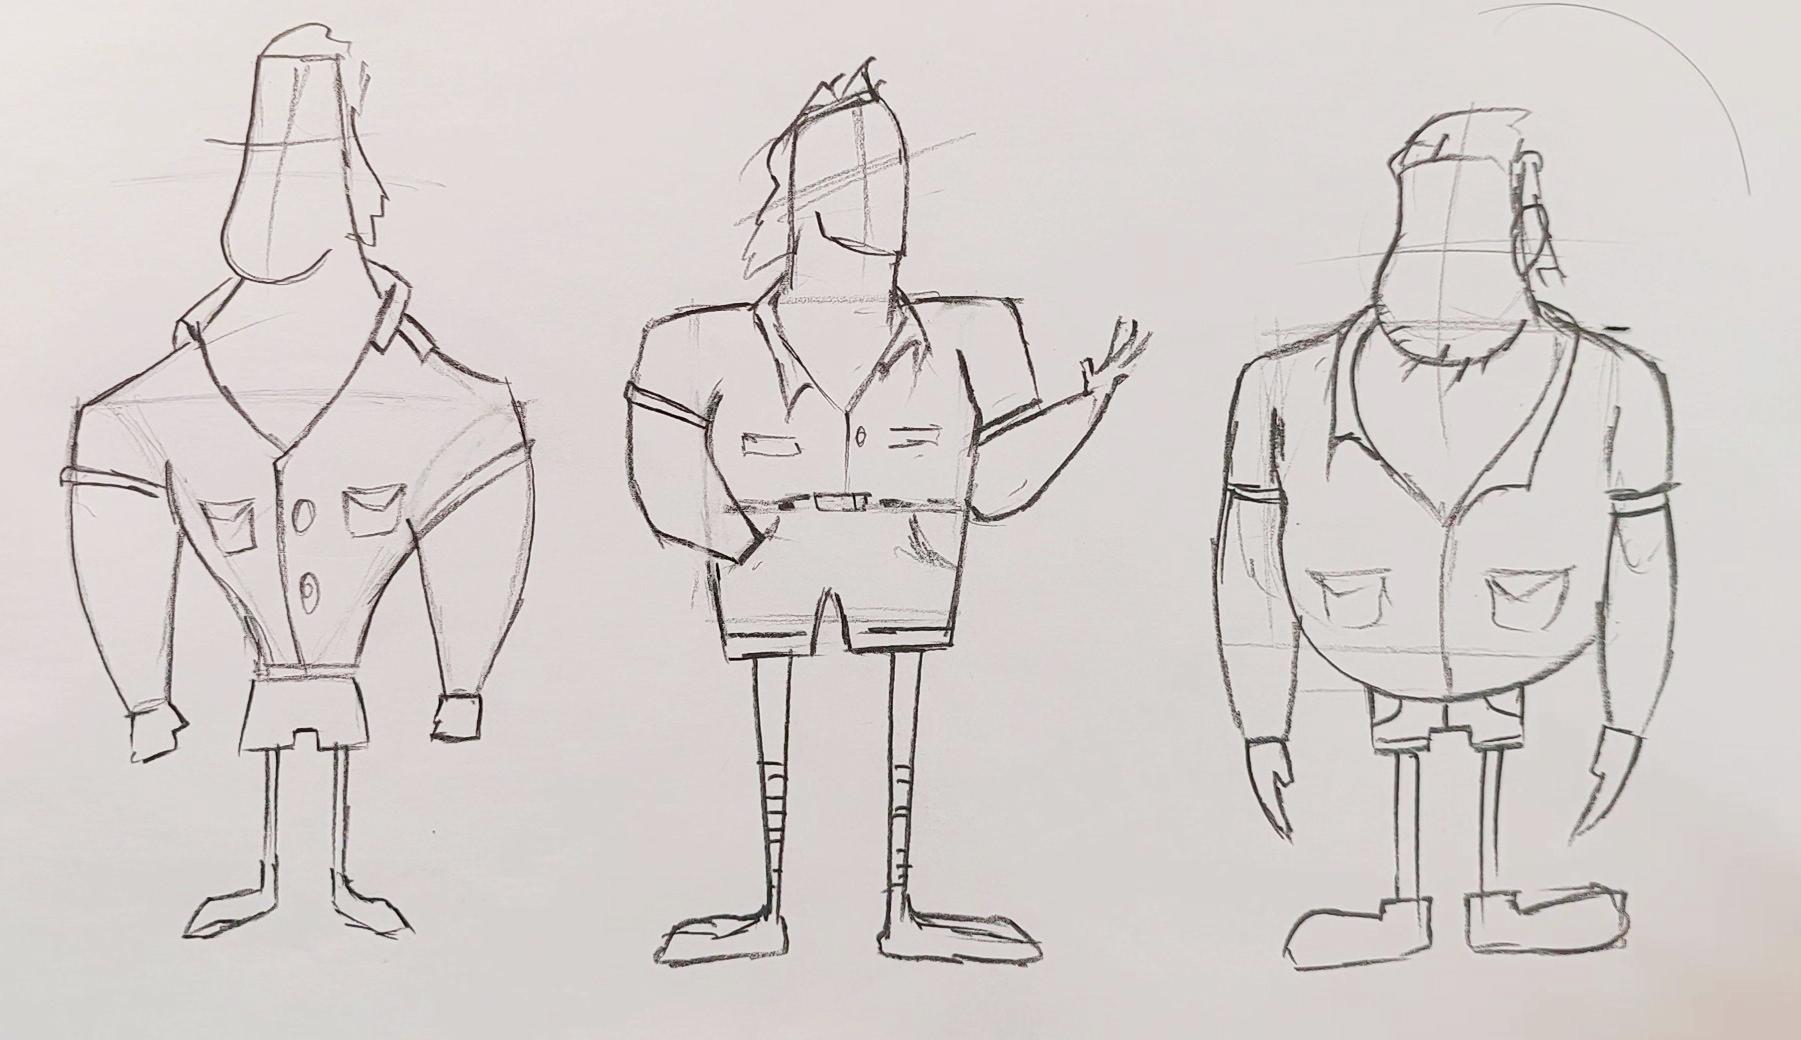
2. Figure Drawing by Linear Method: Hello. Agenda. Welcome to a first episode of
our tutorial course. In the first episode, I want to create deformed and
big character body shapes. We're going to do that together. First of all, I'm going to start with my character's head. And just as usual, I start making my character. I want my character
to be a soldier. I also consider a
uniform for my soldier. Now when I want to get to
the main part of the body, I'm going to tell you how you
can create a big body part. You can show your
soldier is huge. The shape of the
body is in a circle. I want to show he is
deformed and fat, or be, say, overweight. I want him to be standing
in a three faces way. I create this line
in the middle, then I start creating
the body From here, I bring these lines toward inside in order to
shape the chest area. Then with a bit of space, I try to create the
rest of the stomach. He goes the stomach I consider
here. All right, then. Now, based on the body shape that I've considered
for my figure, I've created the circle
and shaped it a bit. I also want to create
an arm for him. One arm is going this way. I'm also creating
big arms for him. But try to move a
bit more freely. You shouldn't just
get to attach to the size and everything else, because you are creating
caricatures and characters. As you can see, the arms are
very long, it's not normal. But I'd like to
create it this way. Now I want to work
on the other arm, on the other side, the left one. But as you can see, this other arm cannot
be seen completely because he's standing
in a three faces view. I only create a part of the arm that we can
see from this angle. Then we've got here I am
going to complete his outfit. He's an old time soldier or squire or
something like that. I do not want to work on the character's face because
our main point here is to learn how to create different body shapes and different figures
for your character. I am going to move
on and work on legs. First I've got to
create the pelvis area, then I've got to
come down creating two triangle shapes with
around tips for his legs, just as you can see here. Then I also continue, as you can see as
I brought it down, I made it thinner and smaller. This is something that can
actually give your character some personality and it
can make it different. See that? All right, now we are going to work
on the next figure. On the contrary of F want this one to be
in a square shape, I want it to be also taller. So this would be the head, that curved line
made my shoulder, there was the placement
of the shoulders here. I want the body to be
shaped as a square, as I told you before then. I am considering a square here. This would be the
center of the body. Therefore, I've got
to create big arms. Because as you can see also, it's another big character. It is different in the
body shape and figure. I've got big long
arms on both sides. Here we go. Now, again, on the contrary of the
previous character, I want him to have
a smaller waist. I don't want him to
have a bigger stomach. You can see I want
him to be more fit. There goes the pelvis and
I've got the legs over here. Again, thin legs here. They look like coin sticks. That would be the knees. And coming down again, these would be the
boots he's wearing. This character can be in
so many different shapes. For example, we can actually give it some sword or anything. It's like he's a
knight is more fit. That's how he goes. This is our second character. And the third character
I'm going to create, I want him to have a
rectangle body shape. This time again,
the head would be the same shape and it's
the same character. I want the figure to be
in a rectangle shape. As you can see, I
put it like that. That would be the chest area. The ending part of the
body would be here, the pelvis. The bottom. Also, don't forget about
the arms, I never do. Sure, you are going
to create it as well. Also work on the
legs the same way, very easily, with him
wearing some boots there. As you can see, this guy
has bigger legs there. More proportion here. Therefore, considering
different geometrical shapes, we can create different, many more different characters. And each of them would
have a different backstory and characteristics,
special personality. It's just the point that how
you can get to this point of creativity with practicing and practicing over and over again, as I told you, try to increase your creativity while you're working
on a character. All right, we are going to continue on the
next episode then.
3. Drawing Thin and Fat Characters in a Linear Way: Hello that everyone. Here we are with a new episode
of character tutorial. In this episode we are going to create a boy character in different figures and in
different body shapes, just like the previous parts. I'm going to start
with the head. I'd be working on the head, also even create
some hair for him. But of course, I
don't want to add too many details because I'm not going to work on
the face too much, the ears, the neck, which would be actually a
tato neck from his clothes. Then I go for his, I am going to consider a
wide shoulder for him. I want his shoulders to be
white and strong looking. I also want his body to
be kind of a rectangle. I want the upper
part to be wider. As it gets down, it would be more narrow. Say it's a rectangle there, very easily, I work on it. This would be the bottom
part, the pelvis area. There it goes. The arm, I want his arm to
go in his pocket. If this would be pocket on his trousers, I can place his hand like this. Over here, there goes the arm
and the hand in the pocket. Just as easy as that, I could have created a beautiful figure
that goes the Ts. Before I get to the
other side of the leg, I'd have to work
on the other arm. It's like the other arm is also coming all
the way down here. It's like he is holding something like a pen or something like that, a pin, a brush. Then I want to create one
of his legs straight, and the other one a bit bend. I want one of his
knees to be bent over. I create this leg straight. Who goes the knee? And that would be the shoe
now for this other one, the other leg, as I told you, I wanted not to be
straight in to bend. So I want to show that the
knees are on the same level, on the same line, if I have to create one. But there it goes
right from here, comes toward behind it
is bending his knee. All right. See, there goes the other foot. The other leg. Just as easy as that, I could actually create my
character for the next figure. I want to have an old man there. I want my old man to be
coined of overweight. He is an overweight, elderly. He's got round face, there goes the mouth area. I don't want to work
too much details, I just want to show
that he is old. There goes the neck area, again, creating a
turtle neck for him. No the color of his clothes. There it goes. I also want to work on the body, and as I told you, I want him to be overweight. So he's got to have a
big belly, big stomach. All right, Then this part of his body and the lower
part of the clothes in the body goes the round
shape of the stomach. There goes the legs. Also, I can easily bring
down the arms again, putting one arm in the
pocket of his trousers. Then I bring a sleeve down here, creating the other
hand over here, not in the other pocket. One of them is in the pocket
and the other one is fray. All right, then I work on this other
leg of my old man. As you can see, this
leg in this foot is a bit more in the back. It's further in the back comparing to the
one in the front. I can also create kind
of a perspective with this way of placing the legs. All right, then I'm trying to work on my
figure a bit more, making just some more details. Here we go, it's all done. All right, for continuing this, I'm going to create a boy
which is almost skinny and tall, here it goes. Can also have a hat here. Then I've got the neck, I designed a cap a little, then I've got a
long neck for him. Because as I've told you, I want this character to be tall and skinny. Tall and thin. I consider the end
of his body here, that will be his bottom. Then I try to shape it. I'm just going to
do that so easily. I'm not going to emphasize
or overthink any parts, just move your hand
easily the way it goes. For example, I can have his waist very small
and going down on the legs normally see just wearing boots. And the other leg
is also, again, very normal wearing
another boot. Here it goes. All right, then we can work on the arms
and the hands coming down. I can have them like this. All right, just as easy, I've got my boys figure, let's move on to
do some more then. This time I want to change
it a bit and I want to create a Gus figure here. Of course, I start with
the roundness of her face. That would be the
head in the face, this would be the neck. Neck, I can consider shoulders going up in order to make
it a bit more attractive. I bring the shoulder tip of the shoulders higher than
usual, as you can see. Then I bring down the
chest area and I consider a very small waist for her in order to make her
attractive in the cartoon word. From here I come down, I bring it a bit toward inside, I bring arms from here
toward outside mats. I just bring the
arms down and extend them again for the bottom area. I'm going to go a little
bit bigger comparing to the waist because I want my figure to be even
more attractive. I consider my figures height up to here to this line that I've
created at the bottom. Here goes the bottom
and the legs. As you can see, she's got
bigger thighs and bigger bot, then I bring it here. From here I can
create her shoes. Also, I go for the other leg. I bring it out from here. I get the knee on the same
level as you can see one leg. This leg is in
another direction. It's like she is
posing for something. Then for her hands and arms, I want to place her
arm on her waist. Tiny, small waist. I want to bring the other
arm down and leave it free. As you can see, she's also
got very tall and long arms. I can now edit it a bit, maybe some hair, and make
her even more attractive. Just as easy as that. We've
created this one too. I hope you've enjoyed
them as much as I did, but they're worried
it's not over yet. Let's move into another episode. Let's see what we've got there.
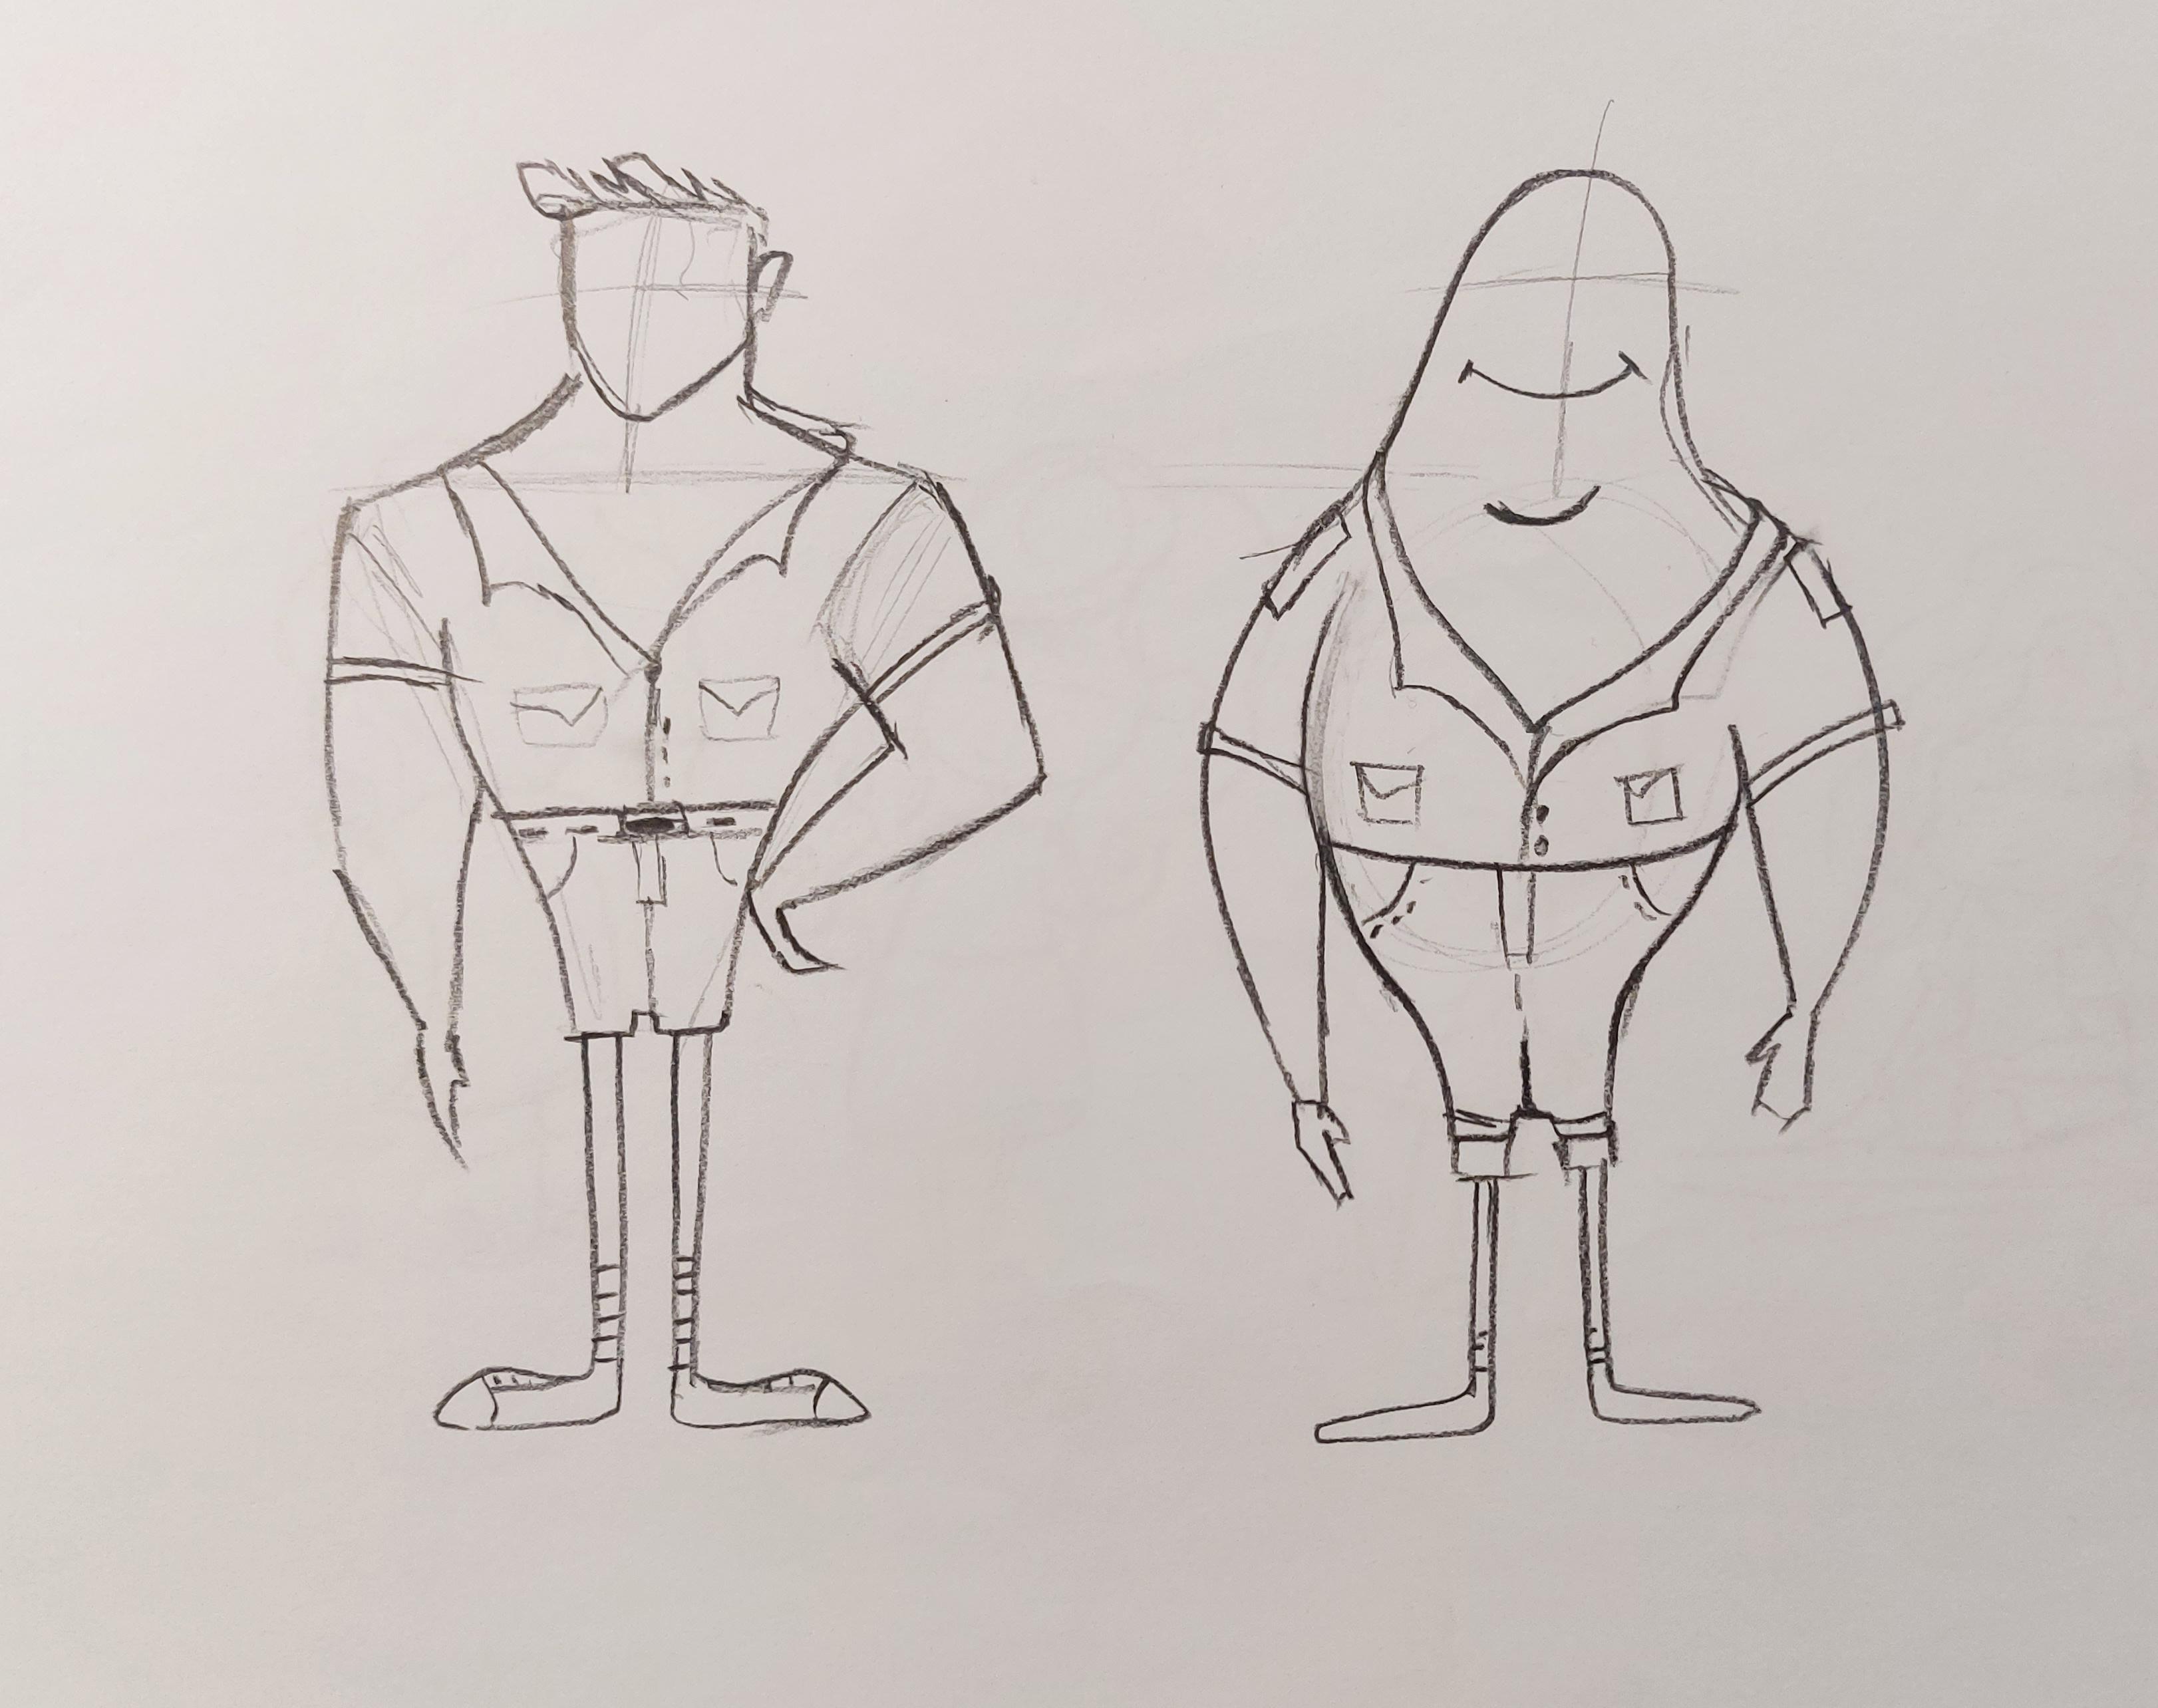
4. Figure Drawing Using Geometric Shapes.mp4: Hello there. Welcome to a new episode of Cta
Tutorial with me. This time again, we're going to work on
the figures there. This is a figure
tutorial, basically. This time we want to create the figures much more
easier with less lines. I'm going to tell you how. All right, first I
start with the head. Of course, I want my model's
head to look like this. Then goes the neck. A long neck. Almost a long neck. Then for the body, I try to create an upside down. See it looks like a U, it's just upside down. Then this would be the
ending part of the sleeves. It's like my cat is
wearing a T shirt. Therefore, I bring the arms up, then I bring my lines toward each other in the stomach area, and then I bring
it down like this, again, making them further away. You see in the beginning, they are a bit far
from each other. They come together, they
come close to each other, and then again, they fall apart. And then for his legs, I want to have these. I want to have these funny
looking legs and feet. There goes the arm and the hand. See, I've just
created it too easy. You've got to do it. It's so fun and enjoyable. I can create the same figure
in another direction. For example, I want to have
him in a three faces view. Don't matter. I can easily do that too. He goes the three face, the neck there goes
to body shape. This time I can consider
his body shape a triangle. See, you should create
your lines boldly. Don't be too scared of
creating your lines. There goes the sleeve
for the arm and the legs over here getting to each other. On the bottom, also
some shoes for him. See how easily I
have created that? I'm just not as scared of
creating the lines I need. There goes the hand. So simple, I don't want to make it too complicated
or too detailed. See in the next part, I want to work on another figure which is a bit more different.
There goes the head. This time, I consider
a bigger head comparing to the figure I
want to create for him. You'll see I just
created a very big head. Then I consider a
shape over plus for his body shape
from both sides. I try to create my lines
and bring them down. It still looks like
the upside down. It a bit deformed. There goes the shoulders
and the arms also. From here goes the
same thing, slave. In the arms here. All right, here goes my
figures hand over here. It's like it's got
something in his hand. The other hand would
actually be facing down. Then I also work
on the legs here. Very simply and easily. I create the legs, some shoes for him simply, my work is done here. The basic. Then I can also complete and work on the
main lines for his body. Then I can of course, erase, make my extra lines lighter here or I can erase them
completely. Totally. All right, let's
make another one. I hope you're enjoying it. I want my figure to
be so by overweight, you see the previous
one was a fitness guy. He was, he was an
athlete, probably. But this guy is just overweight. I don't want him to
have any exercise. Looks like an egg. It totally looks like an egg with another egg on
top as the head. This would be the head, the ear, and the body has a part of the sleeve on it
so I can later at the arms, this would be his bottom
starting the legs over here. Of course his legs are
also going to be tan, fat. Say they are bigger. Of course. Then I'm going to complete
the arms over here. And the hands, bringing
them all the way down toward the bottom and
toward beneath his stomach. Actually, it's like holding it because it's just too
much. Just joking. Now, let's erase or make
the extra lines lighter. My main work would
show itself better. See, I've got this, you've got this. Don't worry. Don't be scared of
moving your pencil in different directions
and be creative. All right, let's
start a new patch. What you say? Here we go. This time in this patch, again, I want to create a
general shape of an egg. See, I'm going to create an egg. This would be my egg completely. It can also look like
a drop of water. Say, clearly looks like a
drop of water or an egg. Then I just brought
two lines toward inside and I do not consider a separate head
or neck for this model, it's actually this is the head, this is the face basically which is melting into the body. Which is melt into the body. And it's just the face and body, No neck, no separate head. Also the legs will be short. It's like it's a
habit or something. These are more creative
actors that you can use. It's not just you always have to create perfect human figure. It should contain
all the parts of it. Sometimes you can merge
the parts together. For example, here we merge
the head with the body. All right, in the next model, again, I'm going
to create a head. This time I want to consider a very long head and the
long face for my model. What's the long face then? All right, after creating
the head and the ear, I want to work on my fig body. For example, I want figures, bodies bottom to be here. I want to end the body over
the line that I've created. I just connect these lines together There
I've got the body. It's like I'm creating the, it's like a vampire. Anyway, I create the other arm, and also on the other side, I'll do the same thing, here it goes. Then in here, come all the way down and
create his other hand again. He's got very long hand. Very long body. As I told you, it looks like a monster. Like a vampire or something. Fine. All right. Also long legs for him. A very long character, but in a very short time. All right, Next time I
want to create a boy. A kid actually see how we
can create a kid's figure. I want my model to
be looking upward, so that would be the
head in this direction. Then I create the shape
of his body like this. You see it's just
like a curved line, Another one in front of it. Now I've got to create my
models figure in this area. Here would be the
middle part of the body separating the upper body
part and the lower one. This would be the
collar, the neck, and the two sleeves here
to be the jeans or Ts, going all the way
to have the feet, basically the shoes, his legs
are going to be only lines. Then there goes the
arm and the hand. Again, just so linear and
with some simple lines there. The ear, there goes
the hair on his head. This is my kit, my bow K. This was
another patch of figure tutorials and we've created some interesting
figures together. So let's meet up again
and do some more.
5. Robotic Human Body Drawing: Hello there again. Welcome to a new episode of
figure creation. With me, you're doing
figure sketching, and let's see what
we've got this episode. This time we want to create
some robotic figures. It's usually used for, as I said, robot characters. We've got robotic figures. First, I'm going to create
it in the front view. First of all, I want to
start with my models head. I'm going to create
an oval here. All right. Then in this type
of figure creation, divided parts are the divisions are basically so important. Then I've got the neck. Then for the body I'm going to create a
curve facing downward. And then with a bit
of space over here, I create a line which
would be my robots waste. It would be here. All right. Then I connect these lines together then this would
be my models waste. See, based on your creativity, your design can
also be different. I'm just giving you a model, you can totally
change it yourself. You don't have to say just I've got to do
it exactly this way. No, if you use your imagination
and your own creativity, that will even be better. All right, now let's do
the lower body part, bringing these lines here. Okay, there goes the bottom that it comes up shaping
the top of the legs, where the legs are connecting
to the pelvis area. See, we've got to clearly show
that in a robotic figure. Now I'm going to work
on my main lines, make the darker, then
I work on his arms. Considering the arms here, two arms, one on each side. See, now for the rest of the work I'm going
to create the legs. I want my robot to be tall. Therefore, I consider
the knees over here. See only the placement
of the knees. I come all the way
down up to here, basically, down to here. Sorry, my apologies. I got to this line and get my lines closer
together and then I close the end of the leg or do the same
thing on the other side. I close it in the end, making it round here. That would be the knee. All right. Then again, for the bad part of the legs, for the lower part of the legs, for the coals, I've got to consider the ending part
of it, which would be here. That would be why let my feet not know what's
got into me today. This would be the feet, the calves, and the feet. Also, I'll do it
for the other leg. As I told you in the beginning, I want a very tall robot. Also, it looks like one of my legs in front
of the other one. The left one here is in front. All right, then I've got to
create the rest of the arms, bringing down all the way here and also all do the same
thing for the other arm. As you can see, it's very tall, so it's got long
arms and long legs. Then I work and emphasize
on the shoulders. This is the basic
figure for the robot. Say basic, but not much details. Let me tell you
something else as well. When I say it's a
robotic figure, it doesn't mean that
you can't it in other characters you can use in any other character
you like it to be. I'm just telling you it's
the basis of a robot. Can use it for another
character obviously. All right. I'm going to
do another one again, starting with the head. This would be the
head start to it. That would be the neck. This time I want to
create it in an angle, in a different angle, again with a curve
facing downward. I'm going to create the, I consider the ending part of the chest which
would be here. I work it like this, it looks like a say. It's like a, That would be
the ending part of the chest, also one line in the middle, in the center to keep
the balance of the body, to keep the symmetry
of the body, there goes the arm, the stomach area,
and the pelvis. Here would be start of the Lex, see, I'll connect all of these parts together. All right. Then I'll continue my line, making it more
prominent and bolder. Again, I want to make him and consider the height
as much as the previous one, though I bring the legs down. Having the knees over here, exactly as I did for
my previous one. This time I want to create
this leg very straight. It goes like this. Behind the leg, I've
got some bump in promontoriae all the
way down and the foot. All right. Now the other leg, again, I want to place the
other leg a bit more forward comparing
to this one, exactly as I did for
the other figure. I bring it down, he goes all the way down
the side in front of it. I've got to create
the foot as well. Here we go. Now I'm just going to complete my figure and add
some details there. Let's do the arms now. I bring it over here again. I want him to have and very long, long arms. It's like the Iron Man bringing
all the way down here. See it's got very big
arms. Here it goes. Now I also want to create
the same robotic figure, but this time I want to have it also chi and a
bit more overt. It's like we've got
a fat short robot. There it goes. Considering the head, the neck, then the body would
be shaped like this. It looks like a circle. See from here, I bring it down, it looks like a circle
with some angles here. I come down, I've got
crooked lines over here. Then goes the arms, the hands and the arms you say. It's got arms starting from here and finishing in this
area with the hand pick, but chubby and fat hands also. I've got to do it
on the other side. Another arm here,
finishing here. Right before the legs start. Now for his legs, I want them to be
up to here simply. I just create its legs. So simple and so normal there. See here we got a robot that is a bit fat
and short, obviously. See in this part, we've just worked
on the details, especially on the legs. Specifically on the legs, but when it got chobbier
and it got overweight, we've just done it. So generally,
therefore, it means that you don't need to create too much details for your
character as much as I did. It depends on your own character
and your own creativity. Just draw your lines
very simply and easily. See, see you next episode
with more of this.
6. Continuing the Drawing Of The Robotic Human Body: Hello again there and welcome to the new episode of a
figure sketching with me. All right, we are
going to continue our, our robotic figures
together for this figure. Well, again, I want to
create a fat robot, but I'm going to create
a big fat robot. On the contrary, on the
previous one that I've created, which was short, I
want this one to be big and overweight
at the same time. I'm going to start with the
face and the head as always. I do that, then I try
to create the neck. I just have to sharpen the tip of my pencil as
well in the process. Then for its body, I'm going to create a big
belly, very big stomach. I just create a big circle. Then from over here
I bring a line down. Right from here, I
come all the way down until I get to the stomach area which goes
a bit more wider and bigger. Of course, this would be
the stomach of my robot. All right, right now I do
want to work on the arms yet. I'm just going to
complete the body first. I'm going to create
the pelvis area. I know where the stomach ends and the legs are
going to be started. This is the general
and basic shape of my character, looking like this. All right, Now I want to determine the
placement of the legs as well. These would be the legs coming all the way
down up to here. I'll do the same
thing on both sides, one on the left,
one on the right. Each got two lines
connecting to each other. Then behind the calves, and then right
down to the ankle. They've got no ankle, but I mean the
placement of it then it gets straight to the feet. He goes the same way. All right. Now something that actually
gives a good look to our figure and complicit
is the arms as well. Right from here I
create these lines in order to get them for the
second part of the arm. I consider all of this area
as it's all in one shape. I've got the hand
in here like this, it got two separate
parts for the arm. This would be the second part. And we've got a third
part for the hand. I'm just going to do the same
thing on the other side. Come all the way down here, I've got an elbow separating
the two parts of the hand. Here I get a very big, prominent area, prominent shape. Then I've the hand. See it's too big. And then you make the body
part separated as I did here. You can clearly claim the
shape of a robot and say, this is a robot figure. I can also bring this part
higher onto the side a bit. All right, this is my first big fat robot character that we've got it
with our creativity, you can also alter
any part you want. I just told you the basics. The rest lies in
your own creativity. In your own imagination. Now I want to do the
exact same thing, the exact same figure. But this time I want to
create a female robot. Should be a female. This one. Therefore, you can also see the differences
we are going to make. There goes the
head and the neck. Coming down on the shoulders. That would be the end of the area placement of the eye of the arms that
we're going to create later. Now here goes, the lower body part of my
female robot comes from here. Over here I've got the pelvis. As you can see, she's got a bigger pelvis more
than a bigger stomach, but it's still a big fat robot. Then also the legs can be a
good way to emphasize that this female is an overweight one because I'm going to
create big thighs for her. Coming all the way to
the knees for females, we can express the overweight
mostly on the pelvis area. And the thighs and the legs, that will be the knee
coming all the way down to create defeat. There goes here. All right, then
for the other leg, I'm just going to do
the same thing exactly. Getting big legs and truby
thighs coming to the knee, bringing it down to get the
feet into the right place. Here we go again. This time I've decided to put one leg in front of the
other, more forward. Now I've got to apply the
arms and finish my figure. I stop the arm from here. Continuing down onto
the second part, that would be an elbow. The second part of the
arm comes from here, and over here I've got the hand. That's why I hadn't
finished my thigh area. Other all right. See again, The arms are in two separate parts and the
hand would be added there. All do the same thing
on the other side, I create big hands. Of course, you cannot
see them completely, but I tried to get them long and a bit
more prominent to show. It's got big arms, even though you
cannot see all of it. Just managing my lines,
there are better. Making them more organized. There goes my female Beck robot. All right, then for
the third figure, I want to create a short figure which is holding
both of the arms upwards. As I told you, my
third figure would be, sh, I'd be starting right
from here to sketch it. This would be the it, because I want to tell you
that you can even create bigger or smaller figures
with the same basics. Something that can
actually help you to progress in sketching
and improve it. It's not only about
character figures or my courses specifically, whatever you're working with, whatever sketching
you're working with, try to create a
sketch in a big size, a middle size, and small size. This is a practice
that can help you so much to improve your
sketching skills. I strongly advise
you to do that. Creating one figure
or one shape or anything that you are
sketching in big size, a middle one and smaller one. All right. As you can see, I've got my shorter model. The pelvis area goes here. I've completed, I've already
completed the chest, the waist, the purvis, and now I've got the
legs which will come down all the way to the line
standing on the same line, that will be the
knees over here. Then I come all the way down there getting all
these lines together, creating the whole leg down
to the feet of as you know, you should do them
for both sides. You can even put one leg
in front of the other one or create them
on the same level. All right? All right then
we've got it as well. Now I've got to work
on my model's arms. As I told you, I'm going to first determine the
placement of the elbows. It's like it's going to bring the arms up
right from here. I go in the opposite
direction and I go back up. The first part of
the arm is coming down until I hit the elbow area. Then from here I turn
over and go up again. Both arms and hands are upwards. It's praying or saying
I've got no idea. I don't know What's it about holding both
hands and arms up here? See, we've got another
one smaller but practically the same
robotic figure. It was done so easily. I hope you got it as well. We've just created
in smaller size, you can even created
a smaller than this. All the figures, you can create them in different
different shapes. Just giving you some models, Do not be afraid to go wild. And think out of the box. Here we go. Let's move on to the next part and
learn some more.
7. Cartoon Character Drawing Using Geometric Shapes: Hello, everyone. Welcome to a new episode of Character and Figure
Sketching with Me. In this episode, we are going to create figures which
are a bit more cute. It doesn't have the proportions that we've got in the
previous episodes. It means that we are going to deform them more than usual. For example, for the
first figure I'm going to create a male figure. Let me just start
over from the lower. I'm going to create
the figure of my man with an upside down triangle. It looks like a diamond. I'm going to tell you how easy you can just sketch
with this triangle. The upper line for my triangle would be
my model's shoulder. Right from here I
come up for the neck. It's like placing two triangles
on top of each other. Looks like a diamond shape. Here I come all the way up, When I got here, I sketch a flat line and
I bring it down again. This would be my
character's head. See, it was so easy. I already told you
about the shoulders. Now I've got to tell
you about the body. See, my dear friends, right from here I'm
going to create the body shape coming all the way down here on the left side, I've got a bit of curve
in the prominent part. I close that lines at the end, I close those lines and then from each side I create
some lines there. This is the shoulder and this
will be the arm, basically. That will be the
shoulder coming down. I've got the arms
perfectly also. I'll do the same thing
on the other side. I've got my both arms go. Big arms as you can see can also create the
sleeve we've so far, let me just complete
the T shirt as well. It's got the sleeves over here. He's wearing a T shirt. I make this line
later that when I want to design the
T shirt a bit, it doesn't just too much there. That would be the neck. Also, I've got the neck
here, for example, although I want to create
the color for his T shirt. See, I'll do it on both sides and make
it a bit more folded. All right, I've got the T shirt, I've got the arms all
the way to the waist. Now for the trousers, actually, I'm going to do it exactly opposite of what I
did for the upper body part. It means that I want to create a very small lower
body part for him. I just wear some shorts
for him, very thin legs. There is just like two lines. This is your character, you sketch it the
way you like it. No one is going to ask you why you did it this way your own. As you can see, I did on the contrary of the
big upper body part, I've got the lower
body part in the legs too small, It's basically tiny. We've also got two pockets
for his shirt and shirt. Then I go and
complete the head to maybe you can later complete
the face by yourself. All right, let's create
another one with a shape, something between
square or a rectangle. It's something between
a rectangle and square. As I told you, first I
created as the body, then I start working
on the head. For example, I want the head
to be a rectangle as well. A bit of a rectangle, it's a bit rounder. That would be the head. I consider the neck
coming all the way down to the collar of his shirt, of course, on both sides. Again, I want to create
wide shoulders over here, I want to actually merge the upper body part and
the lower body part. For example, for instance, this would be the belt. As I told you before, sometimes in character
creation you can even merge different body parts together to get a whole new character. I want to place one of the arms in the
pocket of the shorts. I'm going to erase
this area with my rubber and I
get the arm down. See, he's got white, but it's got a merged body. Not really separated there. I want to get the other
arm going up first. I create the sleeve
right from here. As you can see, he turned
the other arm upwards, bringing the other hand high, and raised his arm.
Raised his hand. I want to create
thin legs for him. See, he's got a good upper
body, as you can see. Long, thin legs. So as easy as that, I wear some socks for him. My model would look
more profound. Say I could just create a nice character with creating
a rect or a square also. Hey, would be nice. I can also erase
the extra lines. You can see it better. Now for the third figure, I want to create my character
in completely square shape. This time I create
a complete square, not a complete one, it's
still a bit stretched out. I place the head over here. You see, this time my character
would not have the neck. You see the neck is basically
merged with the shoulders. And I'll continue all the
body rod on the bottom. I've got one sleeve over here, another one on this side. Then I want to create almost
a big open caller for him. See, then I would want to work on the legs there. Again, on the contrary of the very and fat
upper body part, I can create thin and small
lower body part for him. See small pelvis and thin legs. But again, increase my contrast with creating big shoes
like that you see. Now you can simply get
the long arms going down, you say has got very
long arms there, almost hitting the ground there. I got the arms at
near to the feet. All of this again, lies in your own creativity. You've got no limits in creating your different
characters. They are yours. Don't be afraid to alternate
them and to differ them. I hope you've enjoyed
them as well. I'll see you in the next part.
8. Continuing the Cartoon Character Drawing Using Geometric Shapes: Hello there again. Welcome to a new episode of
a figure sketching with me, of course, character figures. All right, In the continuous of our previous episodes that we were working with geometrical
shapes to create our, this time I want to
start off with a circle. First of all, I create
a circle based on this. I'm going to create
the rest of my figure. I want the head of my
model to be over here. See, in this way it goes in this way
and in this shape, creating the hair
as well can also continue the circle
up to the hair area. Basically, in this way, this would be the
shape of the stomach. But I continue it all
the way to the top. This way basically
removing the neck area and merging the
body with the head. From here, I straightly
go to the shoulders, bringing it down, that
would be the arm here. See how deformed it is? It doesn't have any
proportions there. Deformed, as I told
you many times before, you've got no limits. I just do it the way I like it. For example, I want this
other arm raised here. It's got big arms there. Also hand here, a bit smaller comparing to the
rest of the arm you see. But it's got no neck
and lots of body parts. Then for example, I can even bring down the collar
all the way down to here, almost near the end
of the stomach area. It's a really open collar. There goes the shirt, the buttons on the shirt. All right. Now, how am I
going to create the legs? Again, I want to create
small legs for him. Small lower body parts. Small purves and
thin, thin legs. Also going to place the legs over here and the
feet facing this way. Because he is basically
standing in a three faces view. See as much as I
make my character. Deformed, still be attractive. Don't be afraid to
deform your character. Just let your hand
go free and make your imagination into sketches. See how pretty it will get, how attractive it will be. All right, now let's go for the other shape, another figure. This time I want to create
my figure in a drop. It looks like a water
drop or a tear drop. First of all, I'm going to
place the head over here. Can also use to create an old person because they
are basically curved. That will be the
head. I'll continue the body over here in this area. I want to have the trousers. I'd bring it all the way down. And these are his two legs. All right. Then now from here, I can create the arms. You see The sign has got no, it's just like from the
head it came to the neck. And the arm almost the neck. I brought the low and
also the hand is really near the legs, the sleeve. All right. I want to bring down the collar, all the way down
to the trousers, and also some pockets just
to give it some character. Here we go. Bringing it up also
another pocket over here. Again, as usual,
very small and thin legs and feet, also tiny feet. Here it goes. This was another model that we could actually create
our character figure. Again, I say you can create
it in so many different ways. Let's see, for example, how would it look in this way? I would start my
character from here. See again, I want to start off with my primary triangle shape. You remember that we
started with a triangle, but this time this triangle
would be a bit different. I've got the head over here, then I've got the neck
going to the shoulders. From here I come all the way down for creating
the waist again. But this time I make it
into his lower body part. It was his arm here. See, I'll do it
exactly the same way. I want to place one
of his arms this way, and the other one would
just be like this. All right, Then I get
his trousers up to here, putting his belt on this area, getting the pockets
even on his shirt. I want to open his
collar up to here, to his stomach
beneath his chest. He looks tough now for the feet in the legs. See what can we do there. Very slowly, I bring them down. Then I start with the feet. How easy that was, wasn't it? Here it goes, right, met. All right, then we are
done with this model. Let's do our last character in this patch that I want to create it
generally in this shape. That would be the
shape of the head. See how easily, even with
creating simple lines, you can get a character
out of it, its body. From here I go,
curved, coming down. I'll consider the
trousers over here. Maybe they are jeans. Who knows they are shorts. Anyway, that would be the
belt area under stomach. That would be the
color as you can see. Goes from here up to this point. Just giving it much
more character the very easily I create the arm and the hand
also on this other side, I'll work on the other
arm bringing it down. And as you can see, it's like he's got
very long arms there. Even one of them is
longer than the other. If you pay attention, then I consider very
small part over here. That will be the trousers, the pockets, the buttons
fill, do the clothing. The sleeves will also go here. Very small legs as
you can clearly see. Then I erase all my
extra lines there. Big smile we're having here. That will be the chin. All right, Then I've
got to create his legs. Tall, long and thin, but still has got big feet. There it goes. It's like an octopus or starfish
coming to life, merging with a human. Okay. All right. There goes a place
for maybe his medals, maybe his military or something. Here it goes. We
are done with it. We are finished. I hope you've enjoyed them. I hope that you could
create them as well. Right. The following,
the next episode.
9. Cartoon Little Girl Figure Drawing in Different Poses: Hello there again. Welcome to a new episode of a
figure sketching. All right, now this
time we are going to create a cartoony baby girl. First of all, I start with my character's
head and its face. Obviously, I'm going to consider a face
like this for her. I would also work on the hair. I can create her hair over here. All right, there goes the hair. Then I would have to create
her neck over here like this. Then right from here, I would come down and I
create a long dress for her. Then I put her arm behind her like she's
hiding something. She is waiting for something or someone along from
her long blouse. I also create shots for her, and then I create her tiny feet, She looks cute, blood. All right. Now for
my actors hair, I will create some wavy lines to show that she's
got wavy hair. All right, then again, for the second part, I'm going to create
a similar shape for my actors head and
some kind of hair for her. Then I move on to the neck, my actors body shape, her figure, which is the
point of this course. Mostly moving on like this. Then I erase all the
extra or mistaking lines. Again, she's putting
her hands on her fast, so I'll do it on both
sides and I create two very thin legs for her this time on the contrary
of our previous child, she is a bit slimmer. These are very basic and
general and simple shapes that you can use for creating so many
different characters. Even you can use them to
create characters from your own surroundings and
people around you, for example. You can exaggerate some things while you are working on the people that you've
got around you. For example, if they are artist, you can basically give
them a big brush or a palette of color that's a new. Again, I'm going to create
another one here with hair, which is mostly even. She's got some of her
hair behind his ear, she's got shirt cute hair. Then again, I consider a
very simple dress for her. Simple and easy. Now I work both of
her hands and arms coming toward the front of
her body, on her stomach. Basically, she's placing
her hands in front of her. Then I'll erase the extra lines. I've got it this way. My model show itself much more and it would be much more
attractive at the same time. All right, then I
am going to work on her hair, making them prettier. Styling them a bit
on the fourth model, I want to show that my baby
girl is sitting somewhere. Probably first I'm going to
complete her and her hair. Of course, she's got big hair. As you can see, you can do lots of things with
the hair sin specifically. All right? Because my figure
this time is sitting. Let me just edit this
area a bit here. And there goes the face. All right, because my
figure is sitting here. I will have a small
curve over there. I'll place her sleeves on
both sides of her body. Then I'll consider
her dress for her and then I'll show the
knees which are bend here. There goes her hand on
the floor or underground. This other hand is actually
placed on her leg. One hand is on the knees and
the other is on the floor. She's sitting on the floor. See just as easy as that. You can also create simple eyes, mouth for them just
to make them so cute. The part of a group guess. All right, now let's see for
creating the same character. Let me show you here below them. Let me just edit these parts more and then we can move on
to the next work of ours. Just editing these parts
to make them look better. See also here goes all the way as you can clearly see that I am moving on the
lines which I mainly need. I am going over them, emphasizing on them to
show them more and better. Then even later, you
can erase the rest of extra lines you've got here or anywhere
in your sketches. Don't worry about them. Here they go. All right. I can even show that a
part of her dress has been folded toward
inside backwards. All right, here it is. Now, let's continue this
in the next episode.
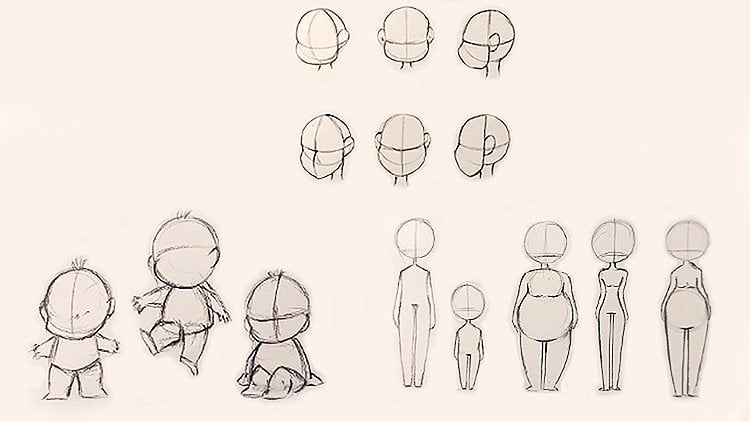
10. Cartoon Little Boy Figure Drawing in Different Poses: Hello there again. Welcome to the new episode of
Figures Catching. And in this episode we are going to create
different babies together, different. That will be cute. I've got eight circles here which basically shows the heads. So we've got eight
baby heads here, and I want to create them
all in the front view, I create a small neck, a body like this. It looks like corctangle, but it's not completely
that though. Then from here I'll bring it down and I create
shots for him or her. Here we've got the
arms and the hands, and also on the other side
I've got the other arm of this other arm goes
like this. All right, then for the legs, I create two straight
lines on the sides. I'll go more prominent
and more curved to show that they're a bit here. It looks like it's standing on the tip of toes,
tiptoeing, basically. All right. Then I also erase
my extra lines from the, well, this is a normal
shape of my character. This is a basic and a normal
shape for a baby character. But I'm going to also create it in other
different shapes. First I'm going to do
it on the side view. That will be the ear, the neck, and again the front part
would be the stomach, and this would be the back, which is more flat. From here I come like this. Therefore, I can create
my baby's bottom. Then from here, I'll
get my character's leg. From the side, my leg looks
like bowling pin upside down. It should be wider on the top. On bottom there
goes my cat's arms. They come down and they
would be placed here. That would be his
hand and his arm. This is my character
side view, right? The hands would go like
this for my character. All right. Now the next one that I
want to do for you is by placing the legs
in a cross shape. Again, my baby is
in the front view. I work on the neck. And now, like the
previous models, just like my previous models, I work on the shoulders. All right. Now I will come down in this way, who we are. As you can see, I'll give
it a very slight step here. I'll go corner ways. I don't make it too straight. Then I would create the
arm over here in the hand. Of course, as you can see, the arm is raised as well. I will create this
one in this way. It's like my character
is dancing here. Just as cute as this. Now, the legs, I want to show
that the legs are crossed. I bring the left leg
toward the right side. I'll do the other leg
in the opposite side. Therefore, you can see the
cross shape in the legs. All right. In cactus sketching, especially when you
are creating babies, most of the times I can see, not always, but
most of the time, the head of your characters
or bigger than the body, you should pay attention
to that as well. All right, for the
next character that I want to work in my patch, let me see what variety
I can give it this time. For example, I can create a
cranky baby or a picky one. I'll create the ear
for my chatter again. I'll do the neck, the shoulders, and the
height of its upper body. All right, then I work on his lower body which will
pay the pelvis for my baby. Then I'll bring the arms
to the side of the body. See bring him in here. And then from this area, or bring it underneath
my other arm. This time the arms
are crossed and this shows our baby is not
getting along well. It's like something
making the arms crossed. I erase the extra lines. Therefore, the main parts of the character would
be seen better. Of course, on the contrary of
the arms which are crossed, when I want to show
has got an attitude. I've got to place the legs a bit far apart from
each other, bit wide. See that? Right? Let's do for the rest
of our character. For which or left. This time I want to
create a charming baby. The one which is being
cute and charming. The basics are
practically the same. The ears, the neck,
the shoulders, and the height of the body. Then from here, you can say that basically created the
body and the legs together. Then I walked away in between the legs
and completed them. Here again, the
crossed legs or being placed in order to
show as posing. Probably. Then I'll bring it
all the way up. Continue that from here. I'll bring the arm down first. This arm comes right in front of the body
toward the other side. Now you've got to
erase the extra lines. Therefore, you can just connect
the two hands together. It's being really all right. Then for the next part, I want my character
to be dancing again. But dancing can be
a bit different. We can create it
in different ways. Even the head is a bit tilted. I want the hands and the arms to be in the
shape of this horizontal, coming from both
sides to the center. Then I come from here. Again, I say to the center. And then all can create the rest of the body from
beneath the arms. That will be the
ending of the body. One leg goes out like this and the other one will be a bit more bed, See, it's like he's
saying or something. All right, then for
the next character, what can we assume? Maybe this time my character is standing and he turned
his back on us. Say basically we are looking at our
character from behind. That will be the circle
of his head, the ear. And then obviously I
would do the body. If this is my character's body, that would be the front
part of his body and this would be his
back, basically. Therefore, even my
character's arm is a bit tilted to back, the bomb would be
the other hand. Then over here I've got my
character's bottom here. I've got to create one
leg which is standing. Then the other one
would be here, this would be the other leg. It's like he's turning over
to turn his back on us. Or maybe he's walking somewhere. Let me show this arm a bit
better than just the bump. You can always add
it to your work. Don't be afraid of it. All right, the last one I want to create both hands crossed and
both legs crossed as well. Hands and legs or cross. The first of all, I complete the head, creating the two ears, one higher than the other. Obviously, I create the neck. I want to create crossed. Therefore, I consider
a triangle shape here for the upper body part. Then I can create the
arms crossing each other. Then I would go and
work on his waist. Then I'll create
another triangle. Both of my triangles were
upside down as well. Don't forget that, then if I continue on
this triangle too, I can easily get my second crossing on
the legs this time. Let's see, for the other leg, the same way we've got it, Be careful about the
shape of the feet, it can really form
your character. I've just got to edit
this upper part of bit and erasing the extra
lines from my work. See now it's good. Easily, we could actually
create this figure as well. I hope you've enjoyed
them and you can get the most of it and
use it in your own work. Let's continue in
the next parts.
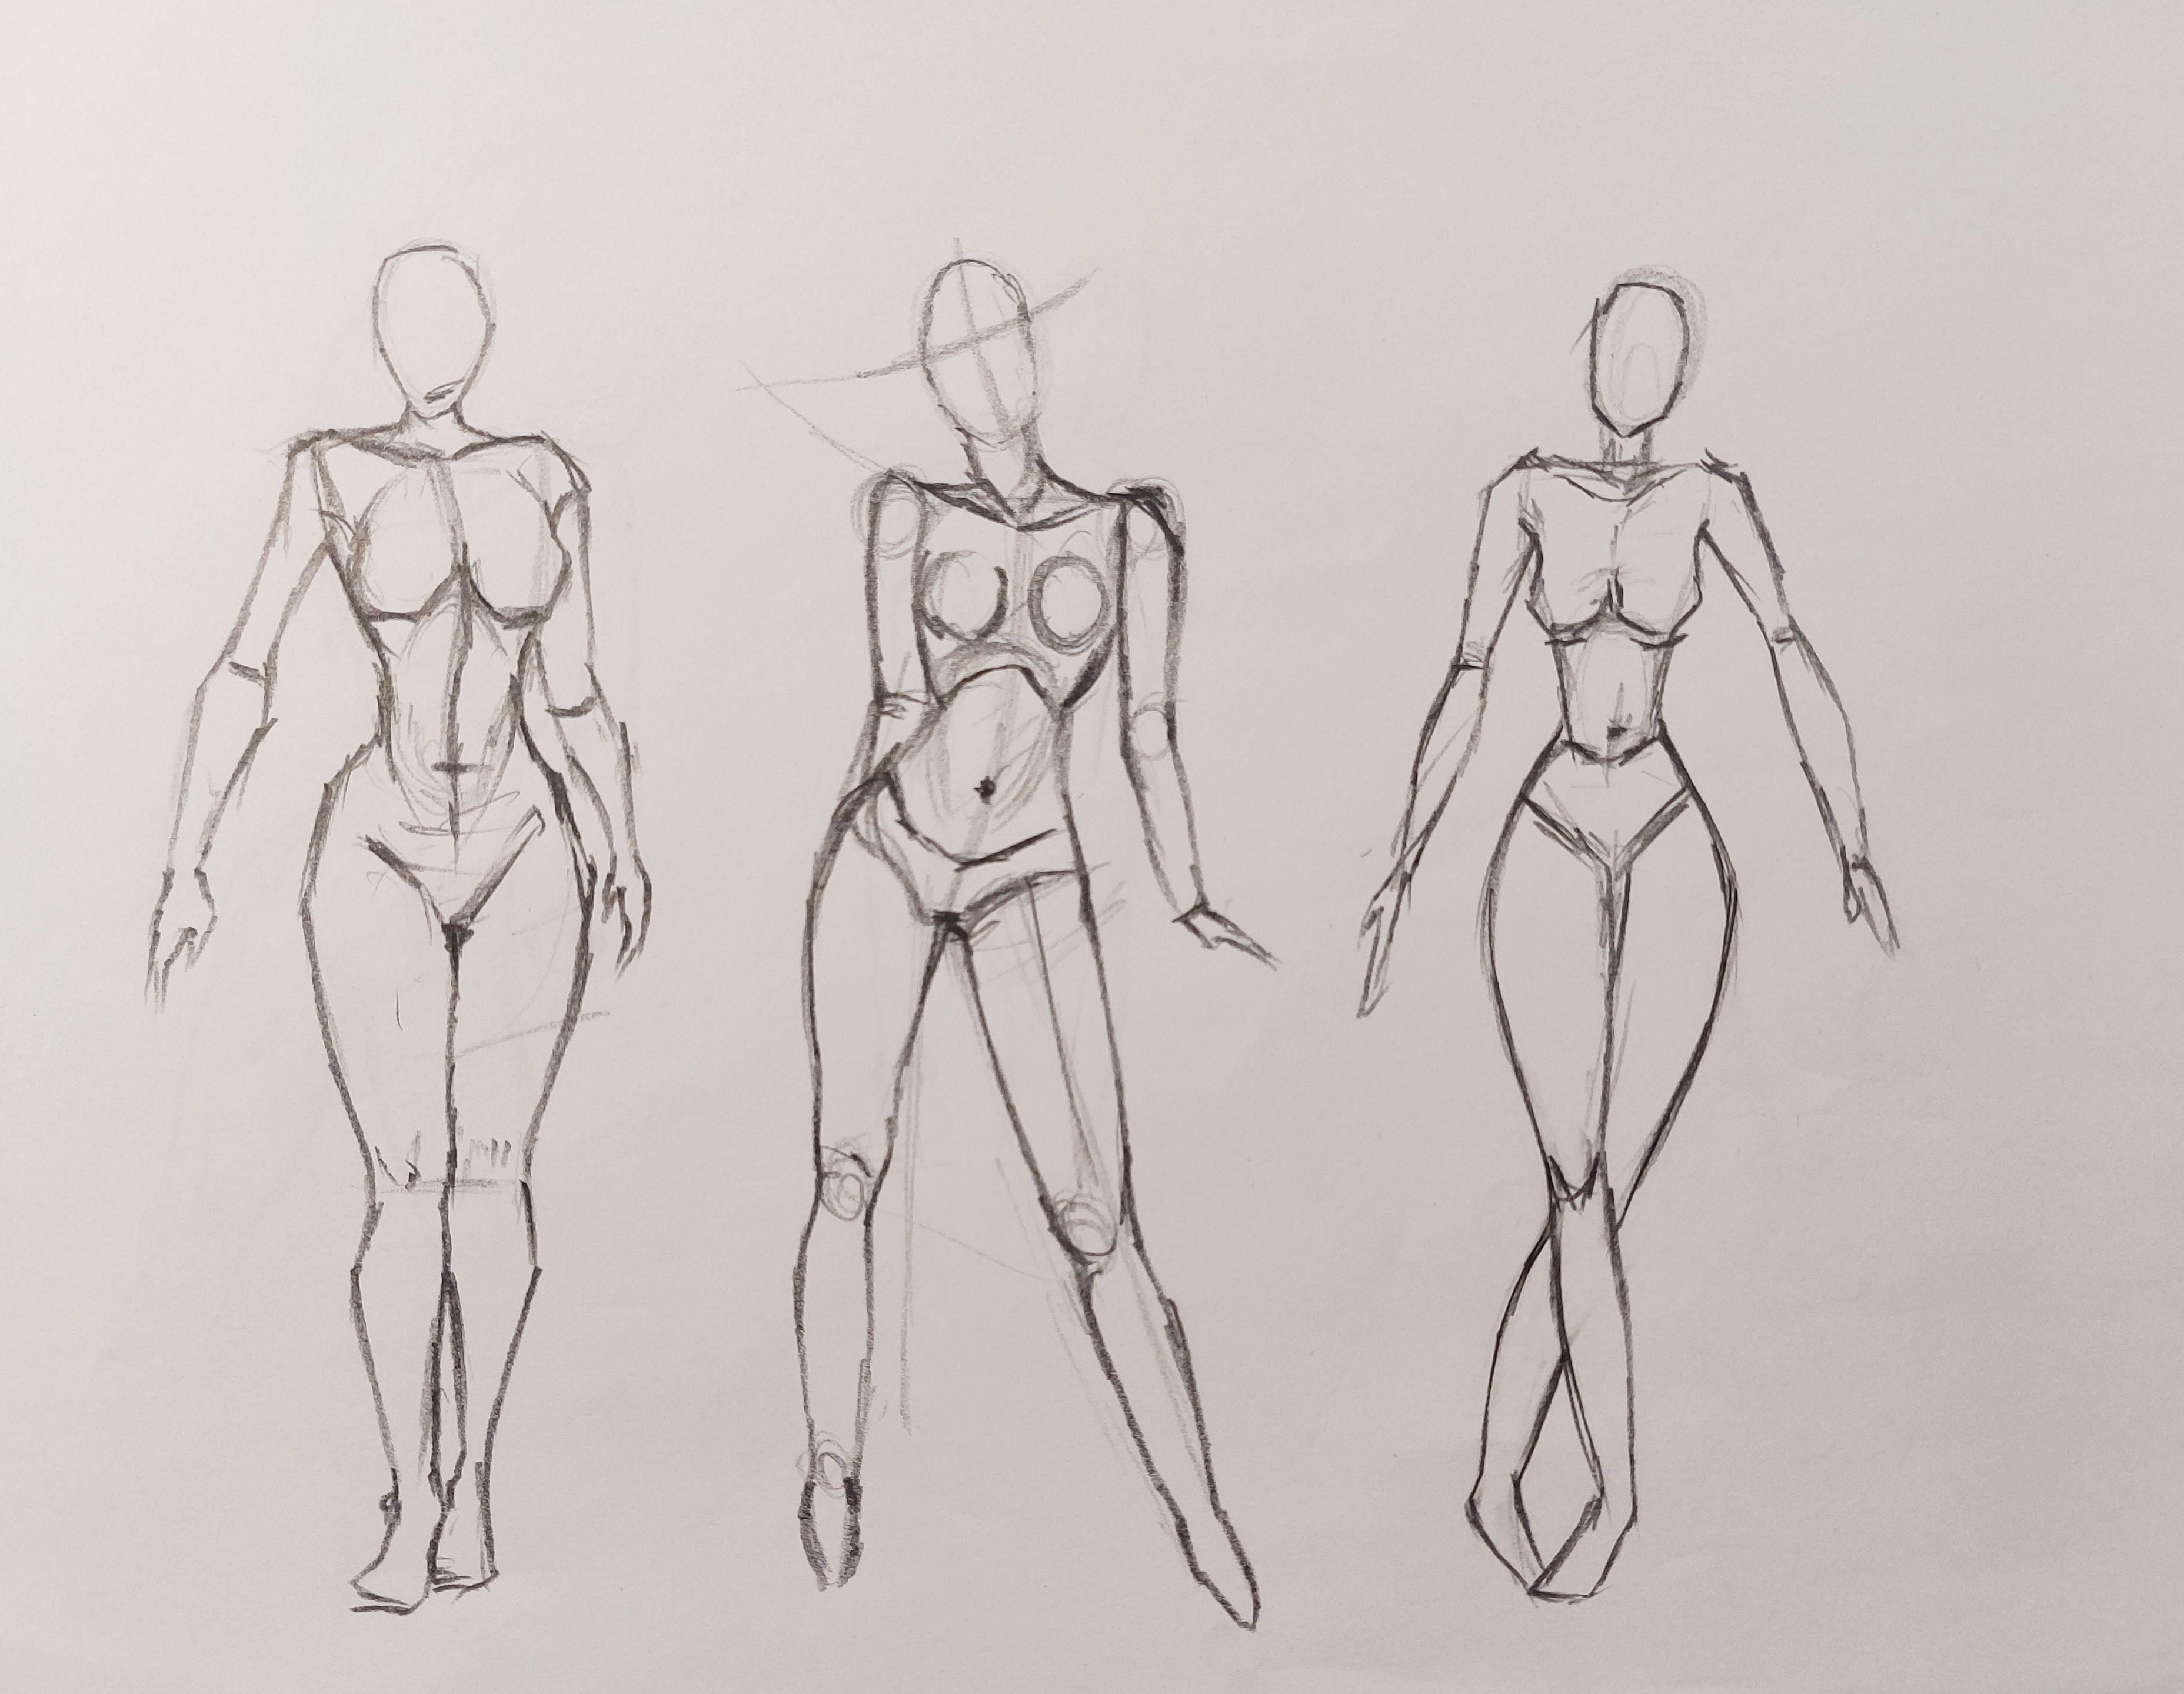
11. Drawing of Three Female Figures in a Standing Position: Hello that, welcome to new episode of Figure
Sketching with Me. This time, we want to work on some figures which are more
realistic and more human. First of all, I'm going to do a female humanistic
figure for you. First of all, again, I start with the head created as a circle,
almost a circle. Then I work on the neck. Now from here I can
create a V shape in order to get color
bones like this. Then I move toward
the shoulders, then I create a curved line to show the direction
of the body. This is basically my
symmetric line for my figure. All right, then up to
this area of my figure, there are chests and
breasts of this curved line that I've created
on the bottom will be actually the ending
part of the chest. Now from here I come down, I come from both sides and connect it to the upside down v. Then from here down, I'll continue creating
the waist there. I've got the stomach. All right, Then here I've got
the ending part of my body. I've got the pelvis area. From here I would go out a bit more because women usually
have wider pelvis, that means bigger one. Then from here I've
got her thighs that right now I should start
working on the arms. And of course more
details for my character. First of all, I place
the breasts here. I should place the
breasts over here, creating it as I go up, I do not forget that they are
connected to the armpits. Then from here, all
connected to this area. Later I can add the arm. See, I easily create the rest of the arm until I
get to the hands. We should work on the
lines a bit more. Our figure would
not look too thick. It's a woman's figure. It's a female's figure. It should be more delicate. Now this other arm
comes up to here. Then I'll continue
it from elbow down. Now I complete the hands there. All right. Now I want to
complete my character's legs. I want the legs to be
right next to each other. The line in between them
would be a straight line. I determined that I want
my knees over here, Then based on that, I come down toward
my model's knees. Then from here
again, I come down, I go out a bit, coming down toward inside again, it's like I've got a curved area over here under
calves and a bit gap here. Because this leg is
placed more forward, I place it first
and make it bigger. The other foot would be placed more behind and
more in the back. Id Now I've got this shape in between the lex,
the stomach area. That would be basically
the center of the stomach belly button. Probably there. I've completed the waist. See now this is a
complete human figure, humanly and it's
very proportionate. I just consider
some more details, I can show them better. It would look better, just as that I could create a very simple
female human figure. All right, then let's move on to work on the second figure. Again, I want to create
another female figure, but this time I want to
create it in another shape. First of all, I create my
figures face in this way, in an angle, not a
straight this time. Then you see my dear friends, the angle is very important
when the face is this way, the neck would be in this position and the shoulders would be placed like this. Basically, it's a little in the opposite direction and the opposite angle of the line that I've
had for the face. Then I'll start working. I want to create my body
based on this shape. First, I start with
the shoulders there, then I'd come down
toward the chest. The ending part of
the chest will be like a curve or a semicircle, but for forming the
stomach after that, I can create it almost as a
water drop going upside down. That would be the waist stomach. Then this would be the
ending part of her pelvis or beginning of the
legs, obviously. Here we go. Now we've
got to do the arms, one of them going
behind and the other one in this way
coming a bit out. Not stock exactly
next to the body. Now we want to see the
position of the legs. All right, from here I've
got the knees over there. And from here I've got to create my lines
until I hit the knee. All right, now in
the same direction, I just come down over here, I've got my ankles. All right, let's see which
direction this leg would be. Again, this one would be a bit longer because
as you can see, it's far from the one
that we've got on this side and the
legs are open a bit. It also comes from
here then with a bit of a curve or
a prominent part, but say goes down all
the way to the feet. We also, now we can work
on the details there. The ending part of
the chest here, The placement of the breasts, of course. And then obviously, Color bones. All right, now this
was our second figure. Now we want to create
a third one together. Say how it's done in
our third figure, we want to work on the
more attractive one. First of all, again, I work on the head, obviously, then I work
on my model's neck. So far so good, ain't it? Then let me just make the color bones
a bit more prominent. After sharpening my
pencil over here, I've got to create a perfect shape to make
her more attractive there. Again, over here I've got the ending part
of the chest area. I've got the stomach area, obviously the bottom area, which is very important
for female characters. All right, from here, first of all, I would
work on the breast. I create the breast with
plavage a bit of it. Then I would work on the
shoulders like this. Then I would work on
the waist, of course. And the stomach area that
I've told you before. There goes the waist in the pelvis area which
contains the bottom. This will be the ending
part of the pelvis. All right. Now the arms would
be placed like this. Again, I say you can
always alternate. You can just see it as basic
as a reference for yourself. The other arm will also
go down the same way. And getting the hands there. Now I want to work
on the legs in the continuous of this
curved that I've got here. I'll continue my lines. Therefore, the shape of
that female body will be attractive and
pretty say it looks so attractive, even right now. Then again, I've got some curve on the
lower part of the leg, you can clearly see that. Then this other leg completely comes
behind this other one. The knees would be
placed together, one of them is behind the other. Then I'll continue
all the way down. She's crossing her legs there. Then I would erase
the extra lines, making even some of my
lines more delicate. With that, we'll be
finishing our models figure. There goes that. As I told you before, the third one would be
much more attractive. This could be a good
reference for you and a good basic model
for a female person. Right, Let me work under arms and on the
hands a bit more. Just as easily as that, we created a beautiful
model altogether. I hope you've enjoyed this
episode as well as the others. See you in the next
one or more of them.
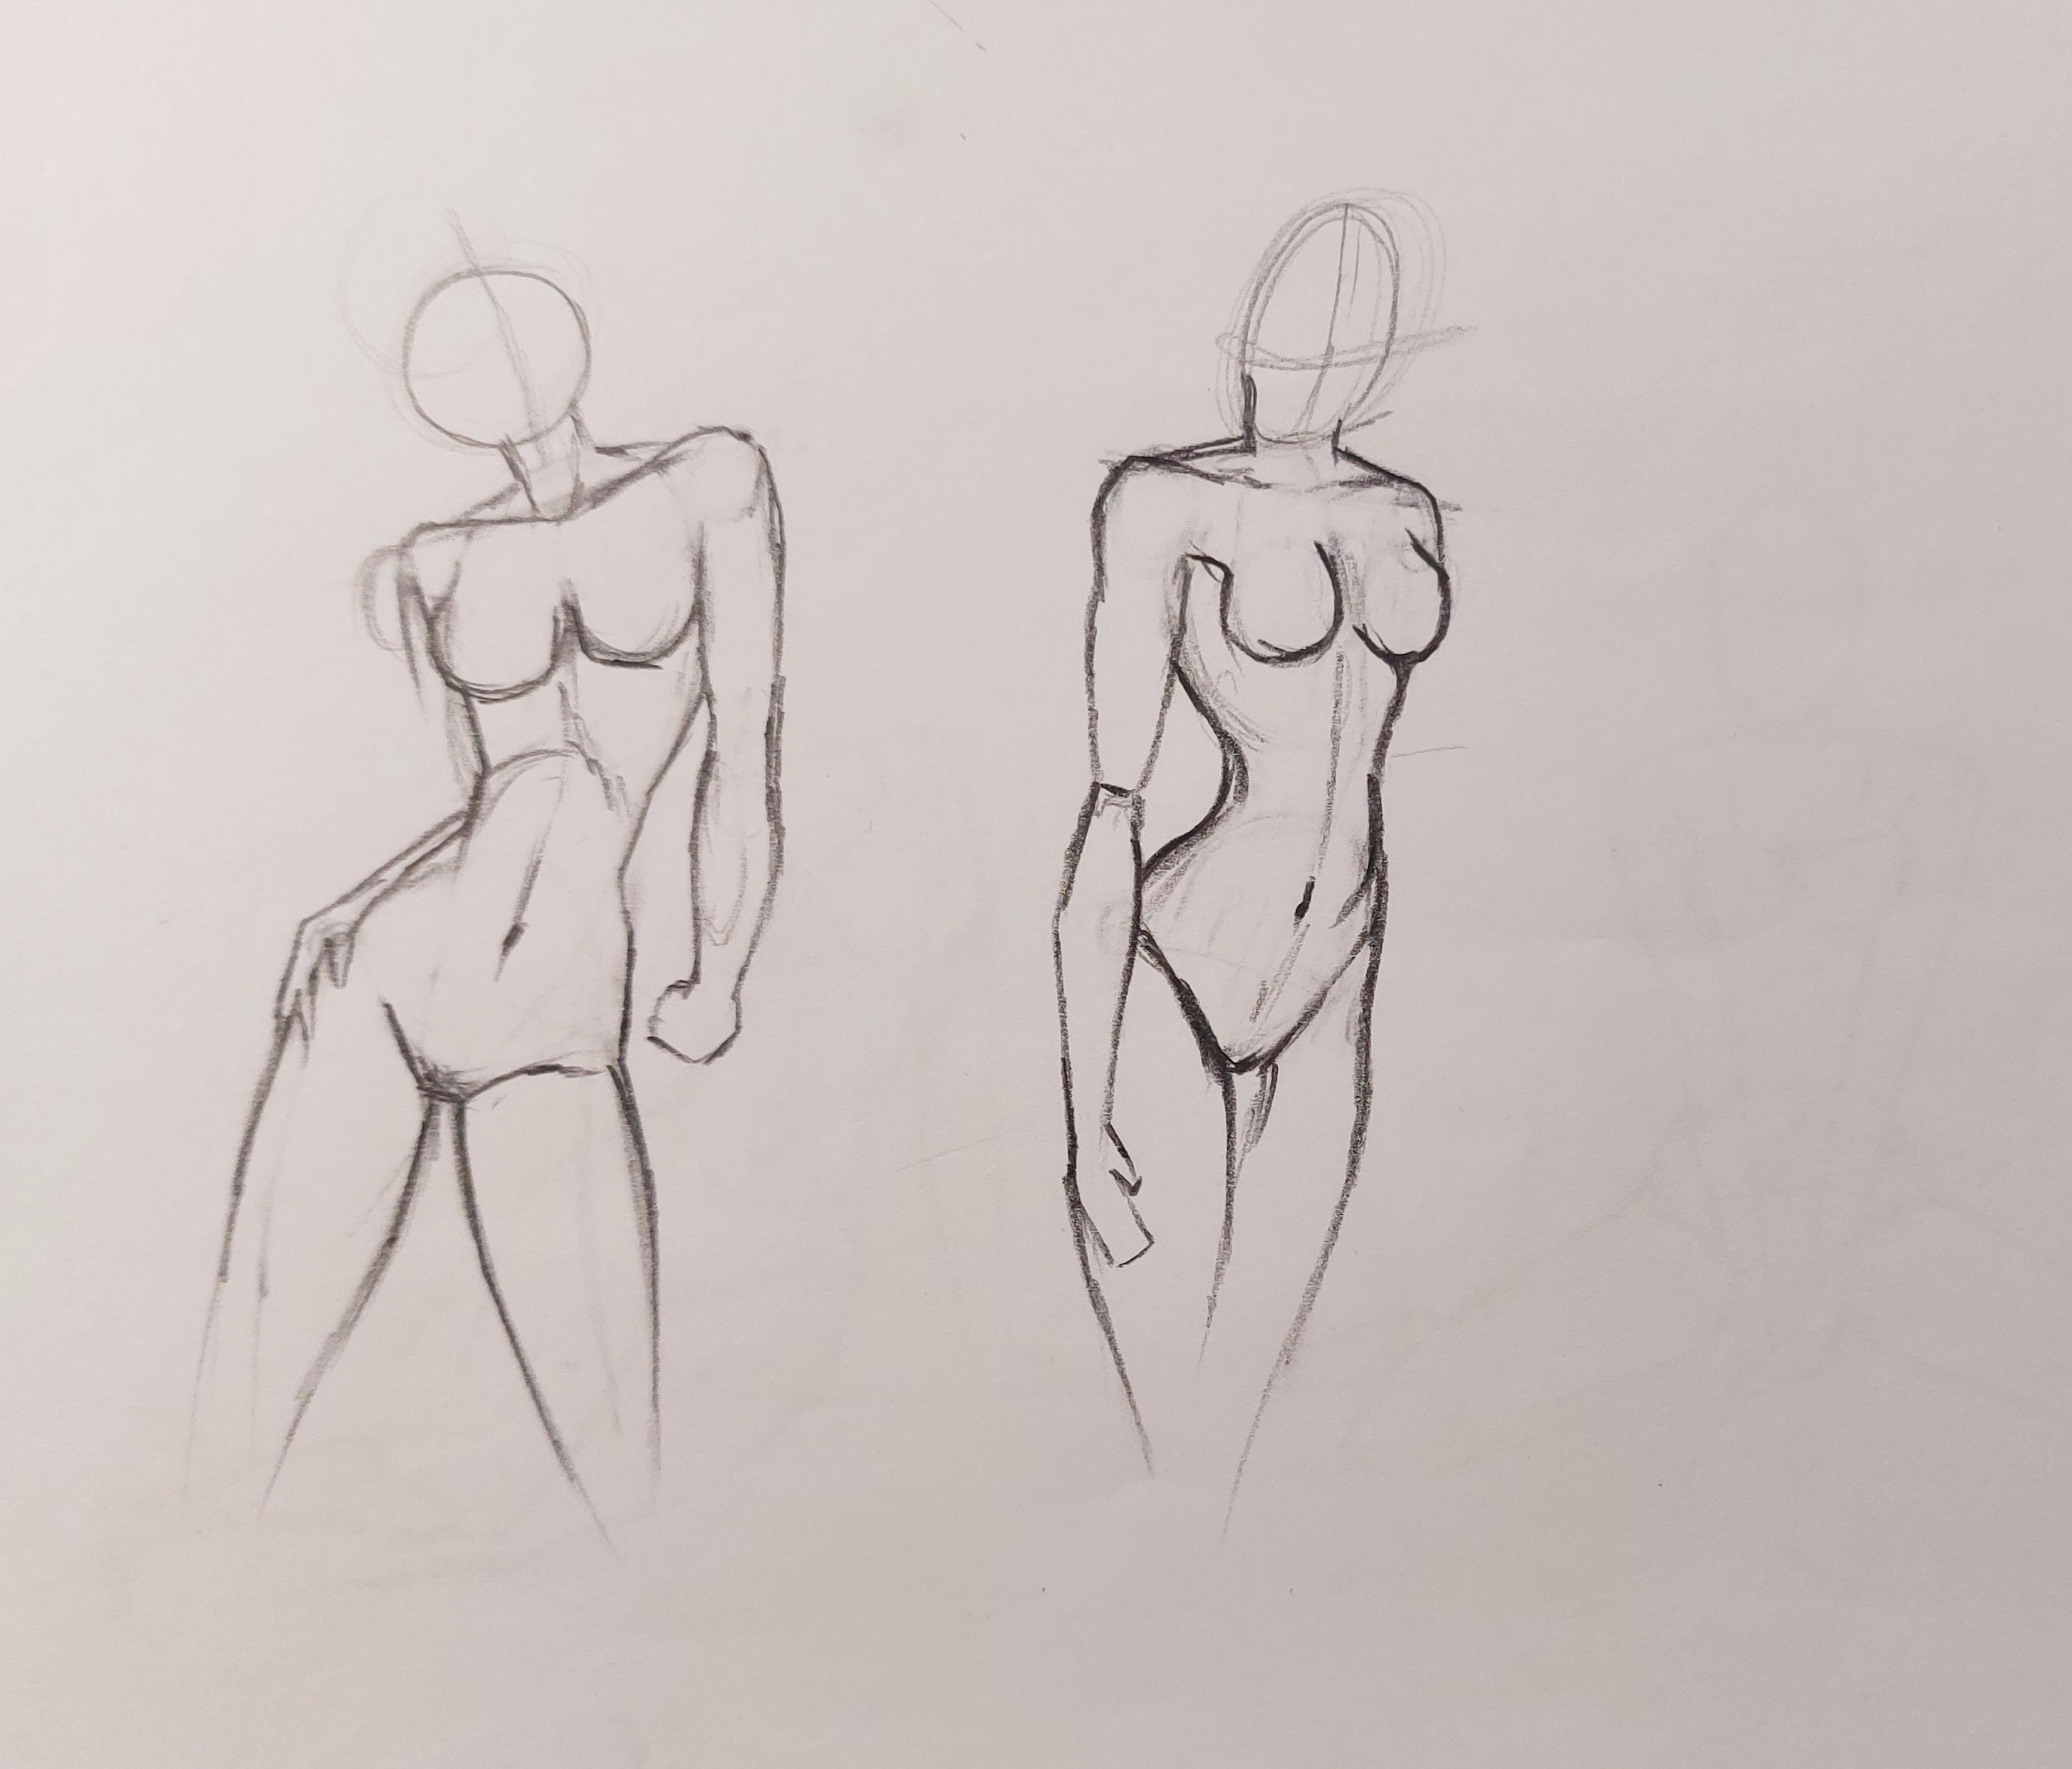
12. Drawing a Woman's Figure Using Lines and Angles: Hello there again.
Welcome to a new episode of Figure Sketching
What May, right? This time I want to tell you how easier you can
create figures. This time I want to tell you
how you can create figures. Now, we were using lines and angles to
create our figures. I mean, that before that
we worked on the linear, we worked on the
angular technique. But this time I want to
tell you how you can do it. We only lines and it's
a linear technique. First of all, I want to
create a circle as the head. And then I consider the direction I want my
figure to be worked in. For example, I want my figure
to be toward this side. I also consider the
shoulders, for example. I want his shoulders to be
placed in this angle there. I've got the line
for the shoulders, then I create the
upper body part with the shape of an oval.
That's going to be it. Then for the lower body part I work a sammy oval,
you see like that. All right. Then I create it again the direction
that I want it to be. There goes the pelvis area. Then also want to create the legs in the direction
that I want them to be. All right. Now what can I do next? I can make it more precise. That will be the
head and the neck. That would be work for us. It would be too easy. Then I will start
working on the body. See, for example,
here looks like this and I've got it here. It would go around to
make the shoulders. Here are the breasts. Of course, I would work on
the breasts a bit more. It's still female figure but
just in a linear technique. Then from here I come down or try to get
the stomach area. That will be the end of
the chest and start of the abdomen with a small wait, we've got it up to here. Then we will also work on her thighs and
I'll just continue the pelvis line coming
down to make the thighs. All right. Now in this area, with a bit of a space, I come down, it also
comes down this way. Now, I want to make
it even more precise. First, let's work on the hand. I just forgot about
the arms in the hands. You shouldn't do that. Just try to remember everything. Then from here I come
down again. Here it goes. Then I got this part
going to behind, and you can just see a part
of the arm on this side. Now I want to make it
even more precise. How can I do that? I can erase all the extra
lines of my work. First of all, I use my pencil to go over my main
lines of the character. Therefore, I would know which of these lines
or the main lines, I could only work on them. And I'll erase the extra ones. All right, then I've got
to erase all of these. Lines and you can see
how easily they are made and how beautifully
it will be shaped. Just as easy as that, the hand goes there. I would work on this
one a bit more, giving it some more
details there. Then I've got the
central part of her body also on the
abdomen, stomach. You also erase this area, therefore your figure would look better and more beautiful. Prettier. You can
easily do that. You've just got
to practice a bit in order to know where each
of the things will go. Right then I work on
the legs more precisely then we could actually make our figure in a linear
and angular way. You can do them both,
it doesn't matter. The only thing that matters is the way you want to do it again. For the next figure, I create a head with
a bit of an angle. I create the shoulders, then I'll create the
rest of the body. I place my figure in
a three faces view. It's like the front
part of the chest is facing forward and the lower body part
is facing backwards. She's a bit turned and twisted. It's just like that here it goes in here, if you've got it. All right. Now I would want to work on some more details on my figure. Again, I would start
working on the neck. I work on the shoulders. Here would be the
placement of the breast, on the chest, of course, there I've got the
shoulder again. Here I come down, then that would be the
the rest of the waist. And here I've got
to the pelvis area, making it more round
with a bit of curve, I come upwards, I get the
prominent area for the chest, basically for her breasts, especially the one
which is on the side. All right, then now
for the second time, I come over here and I'll bring it
down to make the arms all come down this way. And making all the way
through the hands, this was my mother's thigh. I'm going to create
it the same way, just a bit more curved comparing to the other
parts of the body. It's a bit more
bigger. All right. Now in this area, I bring this curve up a
little bit more higher. Right from here I'll
create my thigh there. I'll just make it now I will
erase all the extra lines of my work to make my work
actually show better. Then I've got it more precise. Say I'm just getting
it more precise. There goes behind her body, back of her body there. That's her hand
connecting to the arm. That would be the other arm, basically, the placement of it. There goes the second
figure that we've created. I hope you've enjoyed
this as well. Let's continue in next.
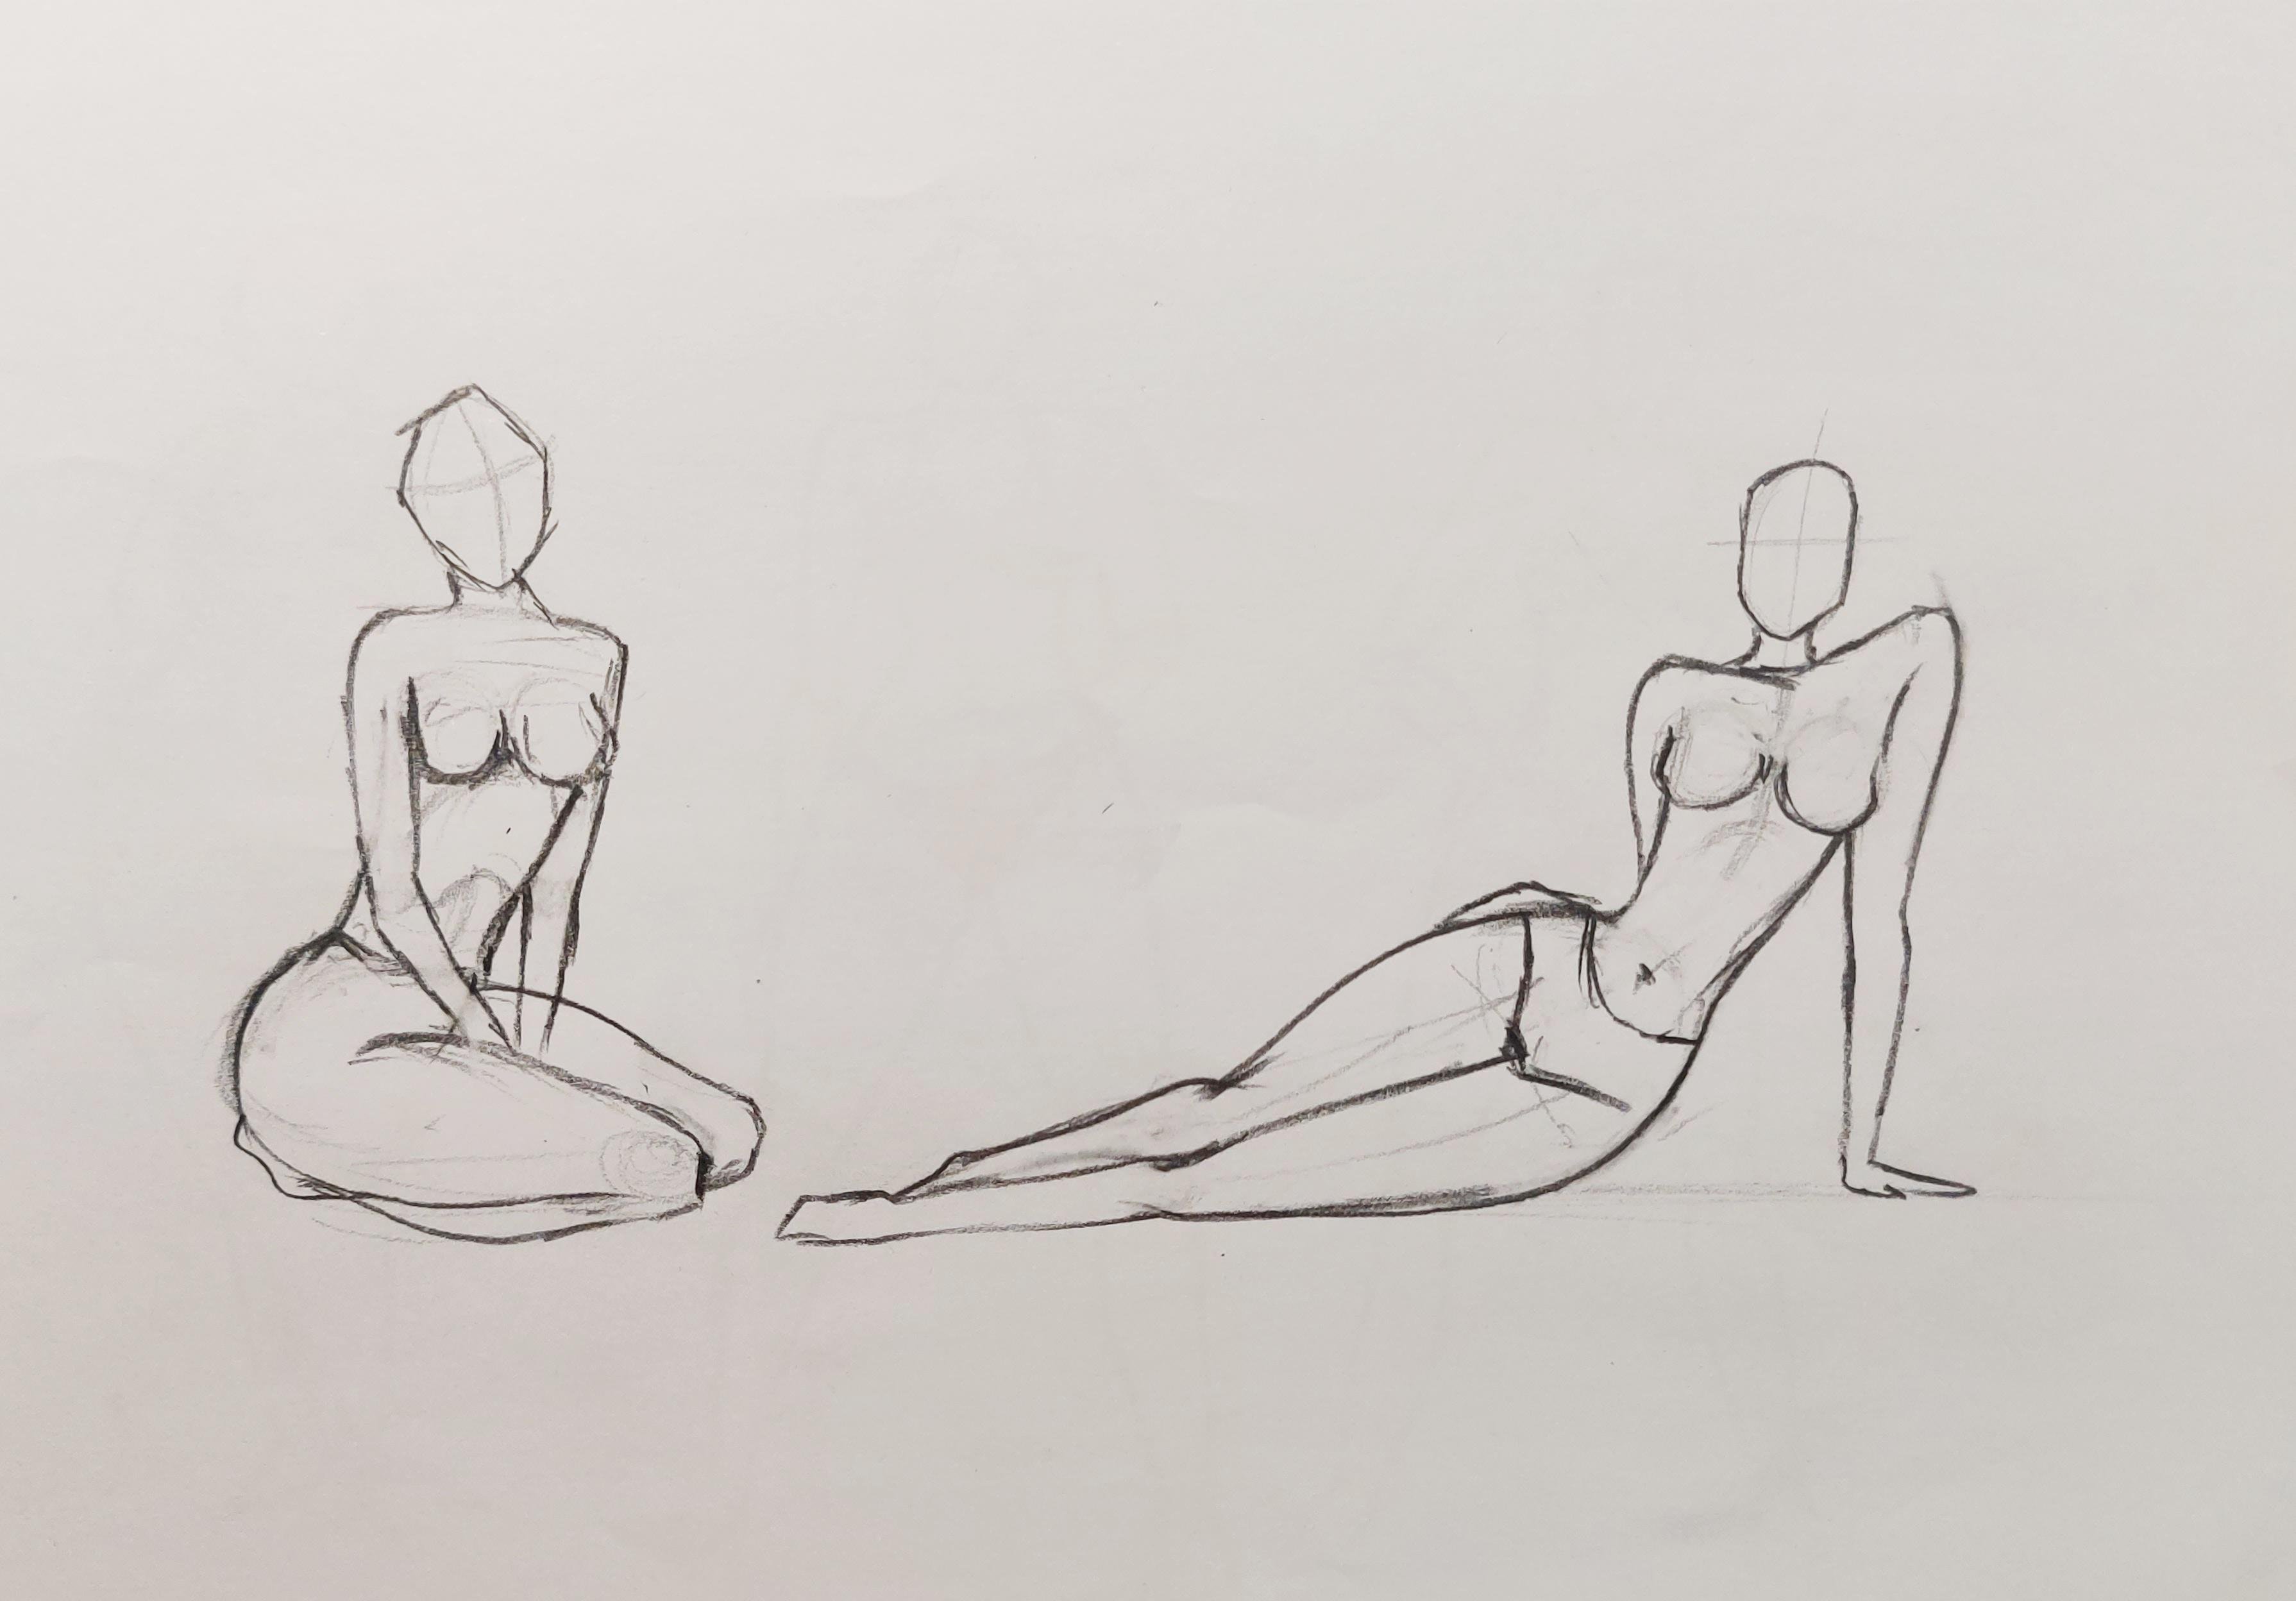
13. Drawing Of The Figure Of Women in a Sitting Position: Hello there again. Welcome to a new episode
of character creation. This time we are going to work on sitting figure together. First of all, we are going to start
from the figures head. I want my models head
to have this angle. Therefore, I created
in this angle. After that, I want to determine the direction of
my bodies figure. I want the shoulders
to be in this angle. I want the ending part of
the body to be in this way. Basically, I want it to
have this shape there. All right. First of all, I create the
shoulders like this. Basically this goes
on until the end of the chest, the stomach area, abdomens, and of course the pelvis area or
the lower body part. Now based on these parts
that I've done my sketching, I should start working on my figure and making
it with more details. Over here, we've got the
breasts as you can clearly see. I place them in their own
placement and position. Then from the sides I
attach it to the shoulders and I also attach it
to the stomach area, which would be the beginning
of the waist and the pelvis. It's also the same for here. Over here we have also a twist. The this would be
the ending part of my pelvis or basically
the beginning of the legs on both sides. I create a curved line to finish the upper body part
completely. All right. One of the legs would
be more bent than the other one and would come
on top of the other one. Basically, I continue
this line at first, I'll bring it down. Then I consider the knees. I continue until I
can finish it later. This would be the
ending part of the leg, but I don't want to
work on it right now. First I should create
the other leg again. I'll continue, I'll, I'll continue my lines
and I come down. Now from here, create
the back of the leg, the back of the carve. Actually see over here. I've got the back leg. This other leg actually
comes on top of this one. Say as I told you, one of them is on
top of the other. Then I would be creating
the arms as well. They would be coming from here and they are actually being placed on the ground or
flow doesn't matter. Let me just complete
and edit the shape of the breast bit now from here. I am bringing down the arms, placing them on the floor. I'll continue that
till the floor. Then I'll do the same thing
right up from the shoulder and bringing it down
over here on the floor. I create the hand, this would be the
shape of my model's. I want to bring the
other one towards here, behind the body almost. That would be she's sitting on the floor and
placing her hands there with one leg on top
of the other one and a bit more in front and her arms and
hands on the floor. Just as easy as that, we've created a figure which
is sitting there. Now I'm going to create another one which is
much more attractive, in my own opinion. First of all, I do my
model's head again. Then I want the
shoulders to be closer to each other and the arms will be actually right
next to each other. They are gripped in the
center of the body. Now I want to create
the so much higher. Basically there is a
very little distance between the body and the head. It's like she's
talking her neck in. That will be the ending
part of the chest. As you can see, the body
part has been drag little. And then the stomach area
admin the pelvis area. The bottom part. Right. Now, based on the parts
that I've already created, I start adding some details. First of all, her breasts, my model's breasts
would be placed here. Her body is tightened, therefore the breasts or
closer to each other. Because she's
tightening her body now from the shoulders, I'll bring the arms down and even a bit of it is
beneath the breast. Then they come to the waist. This is the ending
part of the body. The arms should be
finished over there. I bring both arms
to the center of the body and the ending part
of it at the same time. And of course, I give it a bit of prominent shape to show that her arms have some
prominent areas. They're not just two
straight lines there. After I've erased
my extra lines, I can shape it easier over here. I can have the legs. I'm opening the legs. As you can see, it's like she's placing her hands
between her legs. If the knees would be here, I can create them like this. Then I place the hands on the floor between the legs
and close to each other. Then it's like she is
sitting in a frog situation. In a frog pose, she's also bent her knees and you can
see feet behind her. Actually could have
created this figure very easily for
creating figures. You just need to get connection with a linear way
or angular way. Or even creating
your figures with geometrical shapes
that's on you. It depends which way
and which technique. You are better and you
are easier to do it. You feel easier to do it. Here it is. I hope you've enjoyed it, and let's continue
in the next part.
14. Continuation Of Drawing Of The Figure Of Women in a Sitting Position: Hello there mates. Welcome to a new episode
of figure is Sketching. What may again, today we are going to work on another
position of sitting figure. This time my figure is
sitting on the knees. And both of the knees. I want to show you
how it's done. First of all, obviously I create my model's head in this angle. All right, then I get
the neck, shoulders. Obviously these would
be depress breasts. And then of course stomach. Then there goes the stomach
and then the bottom. First of all, with single and with simple and easy lines, I am just going to work on
some shapes and edit my work. For example, I'm going to edit the breasts and then creating
the rest of the body. For instance, the shoulders
can be work done some more. The chest area, the
waist area, all of them. The arms which goes
to the elbows here. Then over here I should have the pelvis area, the bottom. That actually gets into
one with the thighs. If your knees would
be placed here, over there, I've got the
rest of the leg until here. That goes the foot. The second knee goes from here, coming up and here we go. All right, I get my arms to
the area between the legs. The arms and the hands
are between the legs. I erase the extra
lines of my work and she's just
sitting on the knees. You can see that
just as easily as that she is sitting on
the knees so easily. Working on the
head, on the neck. Just working on the
basic shapes a bit more. All right, let's edit it a bit. You can always do that. Don't worry about it, especially in the beginning. Let's move on to
our second figure. All right, then again, obviously I'll be
starting with my head. This time she is
in the front view, I create head neck. I want one shoulder to go
higher than the other. See, that's why I've
created this shape. It's an open V, that
will be the shoulders, then I'd be working
on the breasts, then goes the ending
part of the chest. But before that, I should create this curved line as a
symmetry line for my figure. Therefore, I do not forget. The curve on the whole body, through the whole body. Basically that would
be the stomach area, the pelvis area to the bottom. All right. Then pay
attention to here. From beneath the breast, I come down from the
upper part of the breast. I go up, basically I
am shaping the breast. Then I come toward the
inside of the body, the stomach, and then I get to prominent
shape of the hips. After I've created the hips, I come to the other side. See, because I've got
a very strong twist, the strong curve there. It's like our hip and our waist got a 90 degree between them. She is line down. If we consider the
knees over here, my legs would go
from here to there. So easily they are just
going to attach the knees. Then from here again, I'll continue my legs. This would be the ending
part of the body, basically the end of the
pelvis and starts of the legs. Then I've got it here
again to the knees. This will also create the de, then why finish my first
leg with the foot? The other leg goes exactly
behind this first one. Say there goes the knee area
and there comes the thigh. She's lying down. Then obviously erase
the extra lines there. I edit this line as well. I'll continue erasing
the rest of them. All right, then I start
catching the arms. The arms should exactly come to the floor and be on the floor on the parallel and on
the same level of the feet and the legs straight. Bring the arms down,
especially this one. I come from this shoulder
which has gotten up a bit. I'll bring it all the
way down to the floor. Here it goes. The other shoulder goes behind the body and you can just see a part of the
hand on the hip. You cannot see most of
the other arm there. There goes the pelvis. After that, again, I erase
all the extra lines of my work in order
to show it better. See, wasn't too hard, was it? You just have to pay attention
to the specific lines, the specific shapes there. You've got your figure so easily in any position and in any
way that you want it to be. Just as easy as that. Also work under head as well. I hope you've
enjoyed it as well. Let's see you in the next part.
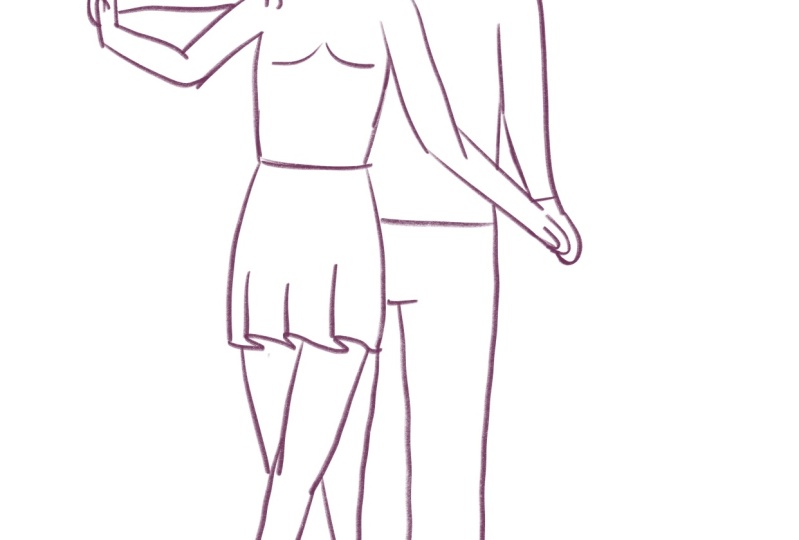
15. Figure Drawing Of Three Female Characters With Different Bodies: Hello everyone. Welcome
to the last part of our character figure
sketching together. This time I'm going to create
three different weights. Nova weight, slim figure, and a thin figure. All right, obviously as usual, I'm starting with
my figures head. I place it, I want my figure to be standing, All right? I work on the neck. The shoulders are
going to be wider because my figure is a
bit more overweight. These are the breasts. And there goes the end of the area which connects
it to the stomach. And the stomach connects the upper body part to
the pelvis in the hips. All right. First I start with the breasts, because the shoulders are wider. I bring these lines out a bit so I can make the
breasts also wider. They are a bit more
down than usual because when the person gets
overweight, that's normal. All right, here it is. This will be the summer area. If it was a slim figure, we would have created a
curved line toward outside. But this time I'm
going to create the curve facing
inside of the body. Then I connect it to the pelvis. Here would be the
knees. All right? So I create the stomach, right from the stomach, I go straight down to the knees. I don't cut my lines in between, it's just one line right from underneath the
press to the knees. All right. Then I also create
this curve here, this prominent part show
her waist is also wider. Say this is the
stomach belly button. From here I want to bring one of the knees
in front of the other. All right, from here I'll
bring the lines down. As you can see, also
her legs are bigger. Her thighs are bigger. And right from here, even below the knees, I've got to create the rest
of the leg bigger than usual. After that, the foot, the other leg will be
done the same way. Here we've got the knees and
it comes down straight on. There goes the foot. All right, then again, I want to work on the upper part of the
figure a bit more edited. The shoulders and the arms
need to be done. Of course. I'm also going to create
bigger arms for her, comparing to her body. It should have a symmetry. There goes the arm, and that is my model's hand. I'll do the same thing
for this other arm. I'll bring it down. There goes the other hand. All right then I'm almost done with my first body figure. Let me just work on the neck. And of course do not
forget about the head. It's one of the most
important parts of the body. All right, there it is. There's my first figure
which is overweight. A bit overweight, fat. You can put any name you
want on it. All right. Now I want to create
my second fire, which is basically
something between an overweight figure
and the thin one. You can call it average weight. I've got the head, the, the stomach area, and the pelvis area. Here we go. Then there goes the breasts. I work on the
breasts a bit more. I'll come up to here, I'll go higher, completing this area a bit more,
shaping her breasts. As I told you
before, be careful, this is an average
weight figure. When I want to create her waist, I pay attention that it
wouldn't be too thin, too small, or too big. Her waist is almost
medium sized, but her hips and her pelvis
is bigger than usual. That would be the ending
part of the pelvis. There goes this, her
underwear shorts. Right from here I can
start my legs, right? I'll continue the waist line
so I can create the thighs. I want to create
my model's legs. In this level, there
goes the knees. Right from here,
I come down from both sides to the
circle as the knee. Then I go lower to create
the rest of the leg, there will be the ending
part of the whole body. And by that I mean the foot, the foot goes there, all do the same
thing for the knee, for the other leg, bring it down, here goes the knee and there goes
below the knee, the calves. All right, there it goes. Here we are, the only part left. Here are the arms, which start with the shoulders. I go over the neck once more. I create the shoulders, then I bring down
my model's arm. It's not as big as
my first figure, but it's still not very thin. Either bring it down and all the way down one of
the arms or next to the body, and the other one is
placed behind the waist. Now let's work on our third
figure, the thin figure. Before that I just go
over the head once more. I forgot about that. Now I'm moving to
my third figure. Obviously I place the head. In its placement.
This time I want to create a thin
character, a slim one. All right? This time I want my shoulders to be
on different levels. One side would be higher, definitely because the, the shoulders are not on the same level and one
of them is higher. There goes the breasts, and also one of the breasts would be higher than the other. Then I move onto the stomach, the pelvis, or the
hips as you wish. Now let's make some more
details into our work. First, I create the shoulders, up to some point I work on them. Then from here I go down
to create the breasts. I place them here. I told you one of them would
be higher than the other. I try to keep that position
correctly during my work. There goes a figure, Then right from here, it brings down to the waist. And her waist would
be completely small because she's so thin. So I'll do it on both sides. I make a very big curve on both sides to
show a small waist. Then I get to her stomach
and then to the pelvis area. That would be the ending
part of it, of course. Then from here I can continue my lines to
create the thighs. These would be the knees. I know I connect this area
to the knees down here. Another one goes
on the other side. Of course I'll bring down
the thighs to the knees. Then from below the knees, I'll create the rest of the
leg all the way to the feet, one over here and one
on the other side. Just as I did for my
previous figures, there's not much difference in the basics of creating them. I'm just playing with the
sizes and measurements. As you can say, the
basics are the same. Pretty much the same. Also darkening this area, belly button, and
even some lines. Then I go to work on the arms, all the way to the hands
also on this other side. I create the other arm. See, this would be my elbow. I want this other arm to come toward the body
and on the hips. All right, This is
my third figure. As I told you, the
basics are the same. You just have to play
with the sizes and measurements a bit
to get a hold on it. I hope that you've enjoyed this episode as much
as you wish to be. See you on the next parts.
 Mila Keller, Drawing Artist and Cartoonist