Transcripts
1. About the Class: Like someone once said, the true secret of
happiness lies in taking a genuine interest in all
the details of daily life. I agree with it, and I
believe that you can find inspiration in all the
simple things around you. Hi. My name is Alexandrna, and I'm a watercolor artist with over ten years of
painting practice. I invite you to explore this beautiful world
of watercolor with me. In this class, we are going to explore the elegance
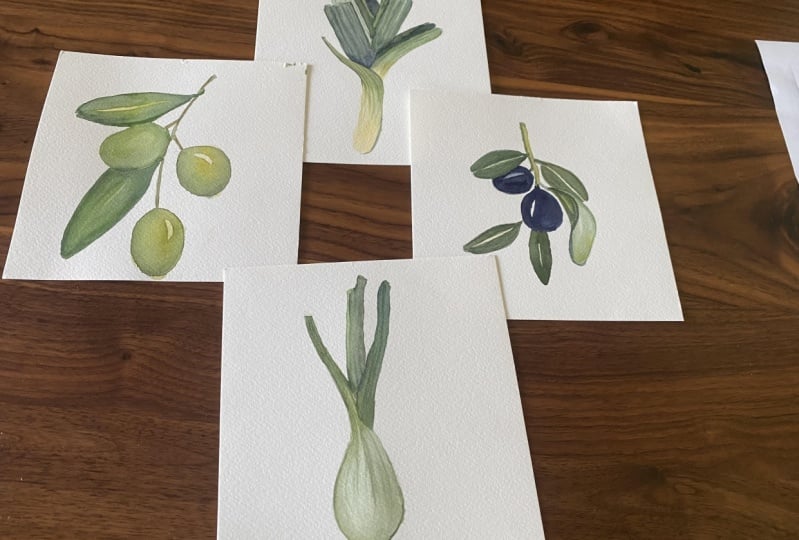
of simple subjects, a branch with green olives, a branch with black olives, a leak and a green onion. Whether you are a
total beginner or have some experience
with watercolors, this class is designed to be engaging and accessible
for everyone. As a class project, you can paint one or all of
these delightful subjects. Please don't forget to
submit your painting to the class project section
and lever review. It will help me to improve
my future classes and for other students to understand if this class is a
good fit for them. Embrace the cm effects of water color painting and
let your creativity flow. Grab your brushes,
prepare your watercolors, and let's dive into
the creative process. I hope to see you in the class.
2. Art Materials and Color Mixes: Hello, and welcome to the class. I'm so happy to see you here. Hello, and welcome to the class. I'm so happy to see you here. Let's start with art
materials and color mixes. You will find the
full list of colors I commonly use in the
attachments to this class. And in this lesson, I will
show you some colors and color mixes I will use for
painting these botanicals. I will use green cobalt
plume, yellow cha, realne paints gray,
green Earth, and mouth. I use different
brands of watercolor, but most often Vang, White Knights, Schmik
and Daniel Smith. Here are the olives
were going to paint. I used the watercolor
paper for the cards. And this is hot pressed texture. So the paper is very smooth. If you want to try some
watercolor postcards paper, I can suggest these two, and also I used aquapod, This is 100% cellulose paper, 300 GSM or 140 pounds and
cold pressed texture. Initially, I painted all
the vegetables in this pad. We will paint the green
onions here in this pad. Or you can choose
other cellulose paper. I will use three brushes by
silver brush black velvet. Number four, number
six, and number two. You can use other brand. Just make sure that you
use round brushes with natural or imitation
of the squaal hair. I will use mechanic pencil
by penal 0.3 millimeters, and ceramic palette
that I already have on the table filled
with some colors. Now let's move to
the color mixes we will need for this painting. First, let me show you the
swatches of the main colors. You can find the skin of this paper in the
attachments to this class. If you don't have these
particular colors, you can find some similar
colors from your palette. I will start with the
mixes for the leaves and for the green onion as well. It's mix of yellow and green. It gives us very light and warm green shade like sub green. And also, I will use another mix more muted
and olive green. It's mix with yellow
ocher and green color. Depending on the amount
of yellow ocher, you will add to the mix, we will get either color for the leaves and color
for the olives. If you have 80% of yellow ocher, you will get the
color for the olives. If you get 50 50 mix, it will be the mix
for the leaves. This mix is perfect
for leaves and if I will add some more
yellow ocher to the mix, it will be more yellowish and this colorable will
use for the olives. For painting the leaves. We will also need some
cold green shade. And for that, I will mix
green with cobalt blue. Another mix that can
help you to create a nice green shade is a
mix of yellow and blue. If you don't have
green Earth color, you can use this mix
of cobalt blue and len or any other yellow that you
have instead of green Earth. I got ahead of myself, so let's get back to the previous mix of
cobalt blue and green. Now, one more mix
with green that I love it's mix of green
and paints gray. It gives a very dark and muted green shade that I love to use in the shadows
of the leaves. For the black olives, I will use mix of
mouth and paints gray. It will be almost black, but still has this purple shade. Instead of mouth, you can use basically any purple
color that you have just to add some this
olive shade to the mix. That's basically it
with the color mixes. You can find the names of the colors in the description of the class and also the kind of the swatches as well
in the attachments. I will see you in
the next lesson.
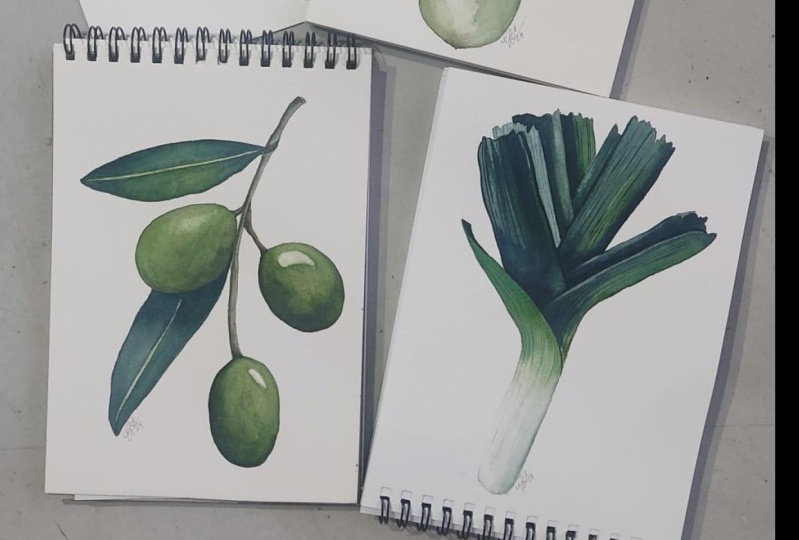
3. Sketch Green Olives: Let's prepare a simple
sketch of an olive branch. I will use a mechanic pencil, needable eraser, and
an ordinary eraser. I decided to pick the postcard
paper because I think that this branch will fit
perfectly to become a postcard. You can also find a kind of my sketch in the
attachments to this class. And I will start with
a simple direction and shape of the stem
or the branch itself. And then I will add some
olives and some leaves. I picked a very simple
composition for this lesson. So if you want to
add more lives, or to add more leaves, feel free to do it. In this lesson, I
will just show you the basics of painting
this olive branch. My sketch is ready, and I will remove the pencil
lies with needable erasers, so the final painting would
look very nice and light. I will see you in
the next lesson.
4. Painting Green Olives: Hello, dear students, and
welcome to the class. In this lesson, we will
paint some green olives. I painted this olive branch
on the paper for the cards, but you can use any size of
the paper for this painting. Let's start painting. First, I will prepare my
color mixes on the palette. For the color of the olives, I will mix green and yellow cha. For the stem, I will mix
yellow ka and pins gray. And for the leaves, I will green and cobbled blue. Also, I will use green and
a little bit of yellow och. It's not that yellow like here
in the mix for the olives. I will start painting the branch using mix of yellow
och and paints gray. I'm lifting the color, so it won't be too dark. I will paint this olive. I will cover it with Live in a small area without
water for the highlight. Somewhere I can make it even more green,
but not too green. Now I see that the green
shade is too much. I'm lifting the
color to one corner, so it would be the shadow
because on the right side, we have a highlight. On the left side, we
will have a dark area. Okay. Now I will make a bit shadow for
this little thing. I will do the same
with this olive. Maybe a bit more yellow ocher. And maybe a bit of pins gray. It also creates very
nice olive shade, and I will also add it
on the left side here. I can come back to the olive and also add with pains gray. Now, let's paint the
third one. Same steps. I'm using hot pressed paper. So it almost doesn't
have texture, and the colors are n blending. And it shouldn't be
too dark because on the background behind this live, we have a dark leaf. I lost the shape of the olive
here and I have to fix it. Do.
5. Painting the Leaves: Now we can go to the leaf
and I will add a little bit of green shade to this mix of
yellow ocher and pins gray. I will f cover one half of
the leaf with a clean water. And then I will cover it with
different shades of green. But I want the
sleeve to be cold. I'm using mixed
with cobald blume. Now I will load my
brush with warm color, and I will go right away
with the other half. But I will leave a
very thin white line separating these two huts. We will paint it later. I can add a bit of water here to blend the
different shade of green and even add a bit
of pure cobald blue. And maybe here as well. Okay. I also want to add some D color here and here to highlight
the olives. And also may be here
on the left side. And here as well. Just to add some shadow, so it would look natural. Now I can paint the last
leaf. What I will do. I will cover the bottom
of the leaf with water going to the olive. Then I will start applying the color from the
bottom to the top. Here under this olive will
be the darkest green color. I will even add a bit of
paints gray to the green. And I will do the same with the other half too much water. Also leaving a very thin
line in the middle. And blending the colors. The only thing left is to cover the middle white lines with a very light green shade
that I have on the palette. I load my brush with
a very light mix, and I carefully cover this white line with
this very light shade. The most important thing
is that the leaf is. The first painting
of the ves is done, and now we can move to the next lesson and
paint black olives.
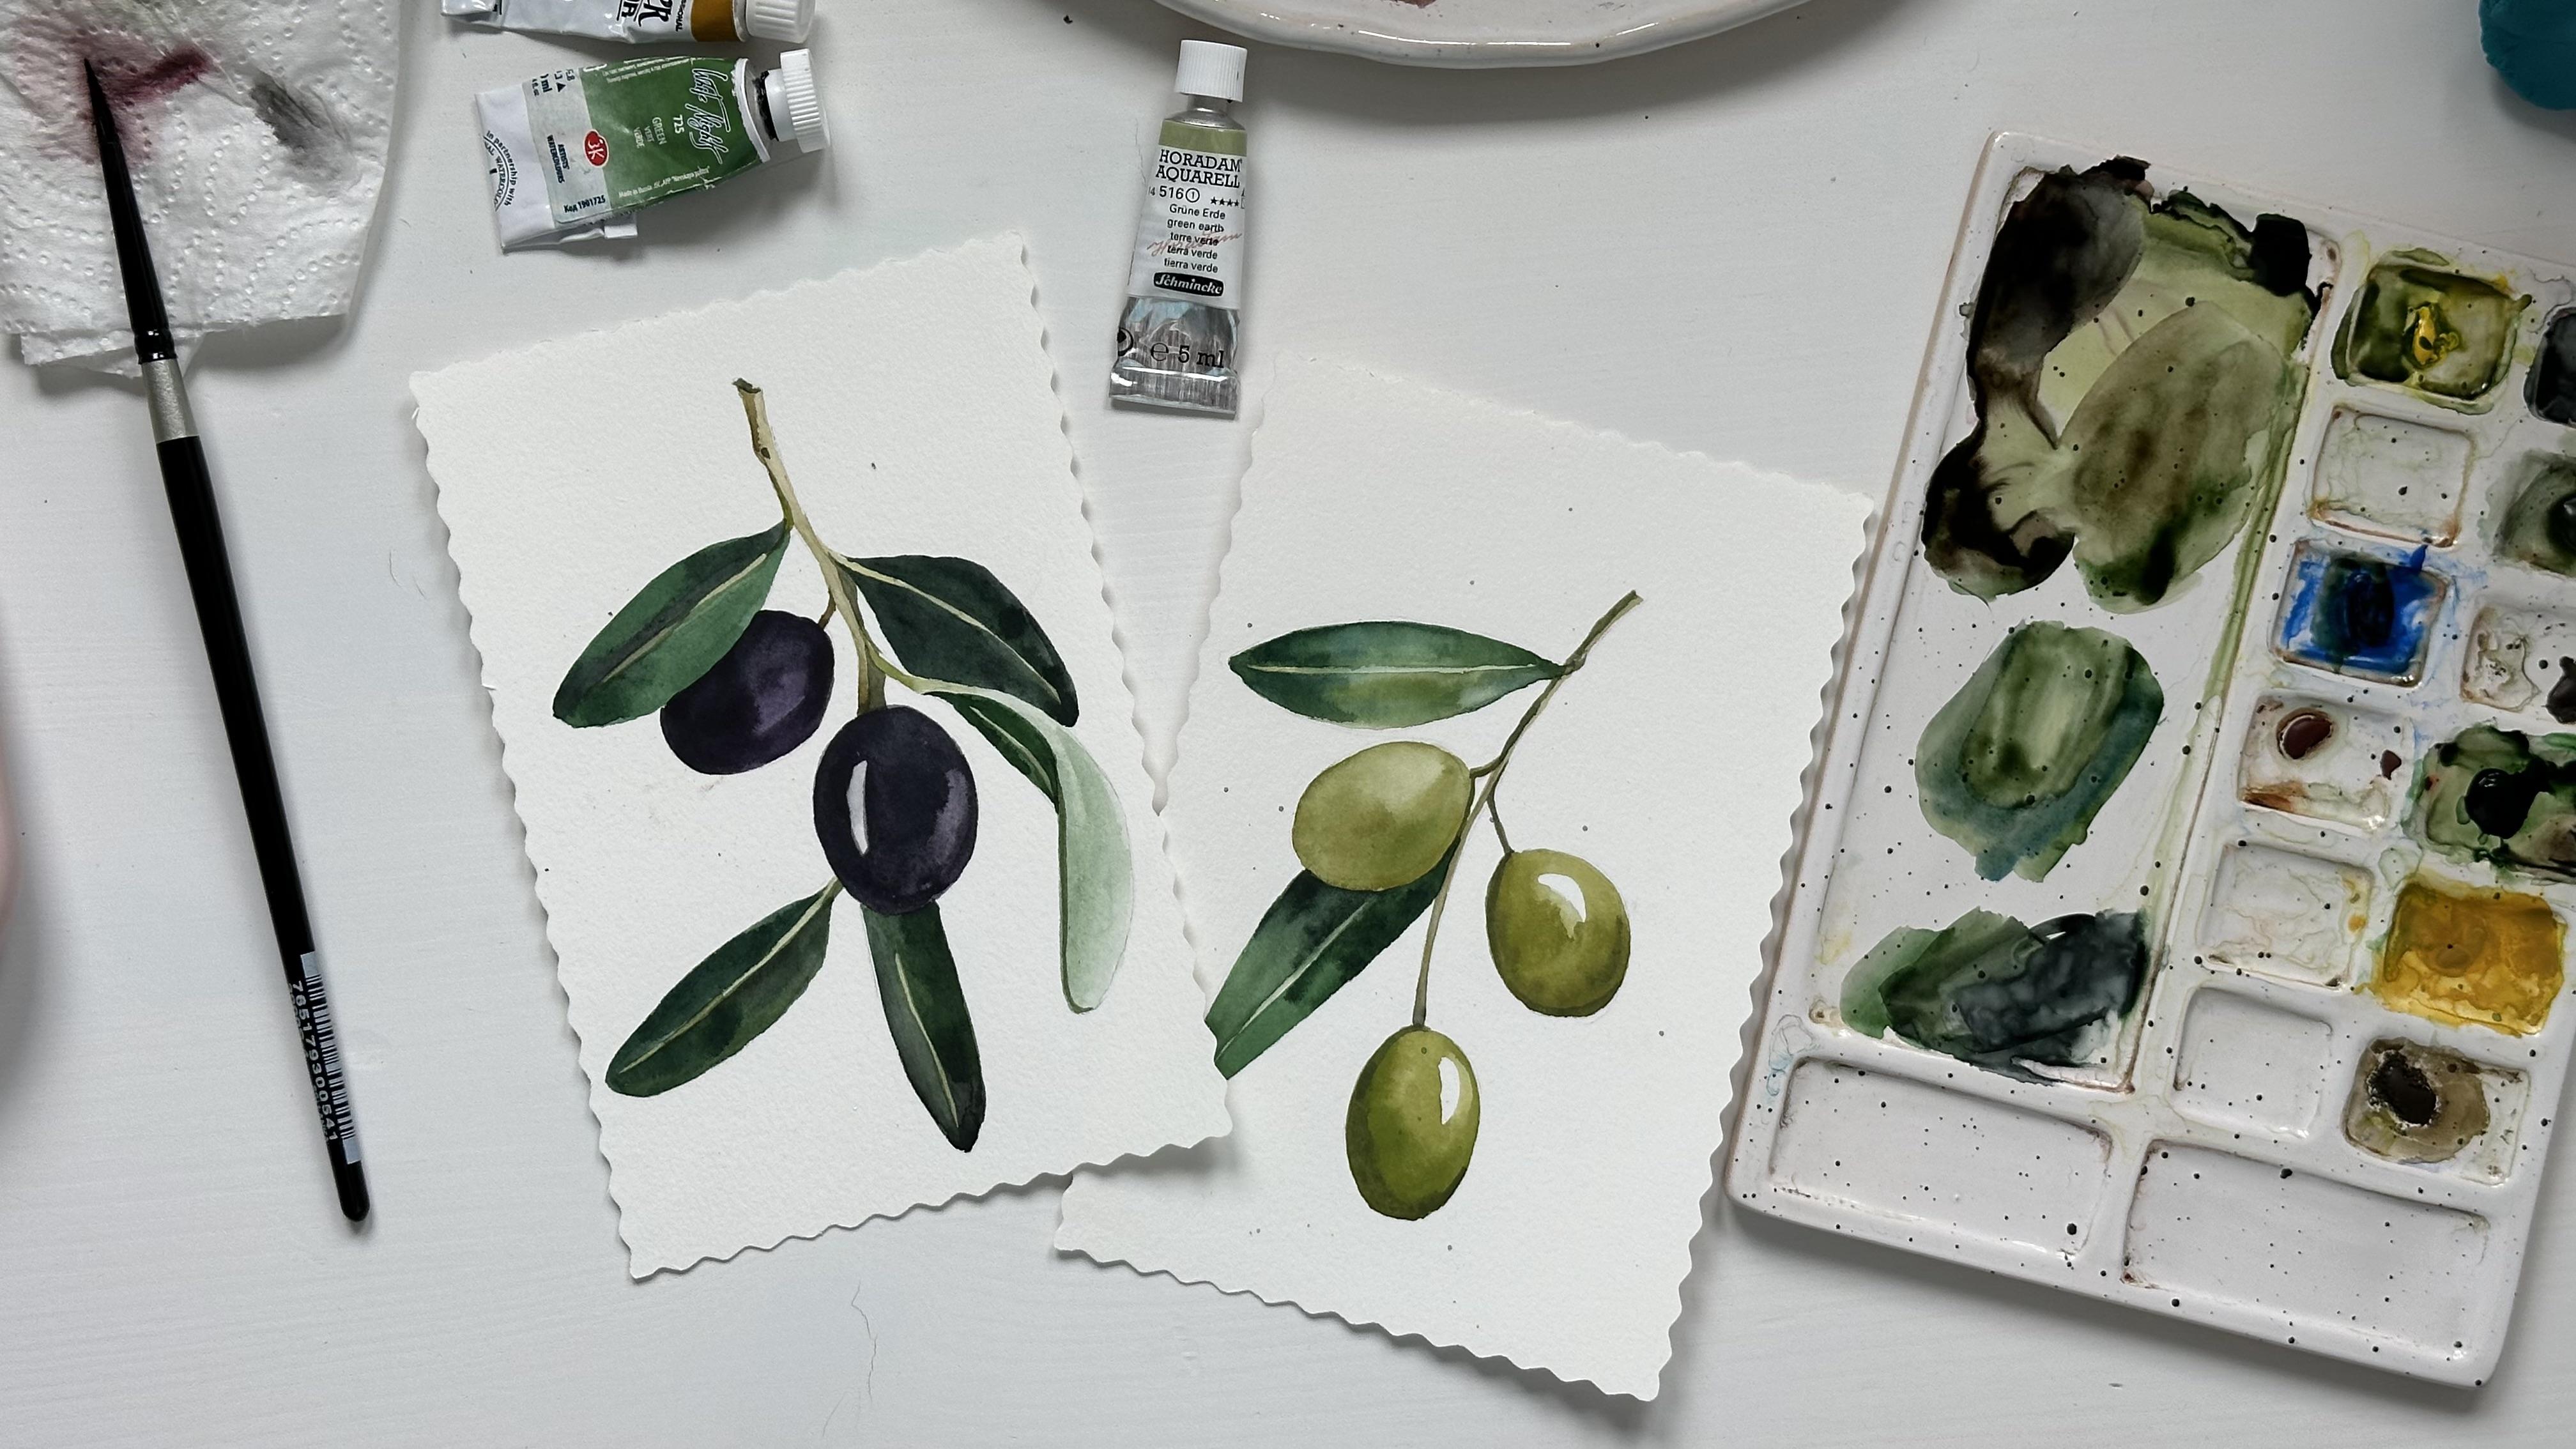
6. Black Olives - Part 1: Before we start painting
the black olives, let me show you the
color mixes I prepared. Two of the shades already
used in the previous lesson. So I'm mix in green and
cobalt blue right now for the co shade and
for the warm shade, I'm in green and yellow
on the left side. Also, I use some green
Earth by Schminke. It's a very neutral color, and you can use just a mix of green and cobalt
blue with a lot of water. If you don't have this particular
color in your palette. And I have some new color mix. It's paints gray and
mouth that I showed you in the first lesson
with all color mixes. I will use this shade for
painting black olives. Let's start by
painting the branch. I'm mixing yellow
ocher and green Earth. The colors I have
on the palette. You can use the previous mix of yellow ocher and paints gray. And a lot of water because we need to keep
this mix pretty light. Already prepared the sketch, and you can download the sketch from the
attachments to this class. I will add some more
intense and dark color on the left side and
closer to the olive. I will start painting the leaf using mix of green, cobalt blue, and a little bit
of paints gray and following the same
steps as we did before. So basically, I will paint
two halves of the leaf keeping the white line between two halves so
we can paint it later. Then I will move to painting the very light leaf using
green Earth color by. Again, if you don't have it, you can mix green
and cobalt blue, maybe add a little bit of
paints gray and a lot of water to get this very light
and neutral green shade. Now, I will move to
paint in the olive using the mix of
pins gray and mouth. I will cover the whole olive
with not too dark color, leaving white space
for the highlight. As always, I'm trying to repeat the shape of the object
with my brush strokes. O. Now I can add some more
p to the and using this dark paint
again the shadows. And now I can paint another
olive which is under the and I cover it with
a and opaque color.
7. Black Olives Part 2: I will prepare a dark green mix using green and paints gray
for painting another leaf. This dark leaf is right behind the light one
that we painted before, and it will help us to create the beautiful contrast
between light and dark parts. So be careful when
you're painting this leaf because the line
should be very consistent. Now, I'm mixing more warm
and light green shade for painting another leaf using mix of green
and yellow ca. And I will follow
the same steps. I will paint first
half and then another. We painted almost all leaves. The only thing left is to add some dark area to the light
leafing this contrast. I'm also keeping a very
thin white line in the middle of the leave to show the direction how it's twisting. You can just cover
it with one color. It's not so important, but it would be nice to
have this small detail. While the leaves
are getting dry, I will add some final details using darker mix of yellow cha, and pines gray, and I will add shadows to
the branch itself. And now using a very light
and warm green shade, I can add some light color to the middle white
lines of the leaves. It is always a good
idea to highlight the light parts with a dark shadow like we
did with a branch. So I'm doing the same
with this light. Highlighting and outlining
this light area with a showing that this is
flat and it has dimension. As a final detail, I might add some
very light color to cover this highlight, to make it not so bright. And our painting is done. I hope that you like it. Please share your class project, and let's move to
the next lesson.
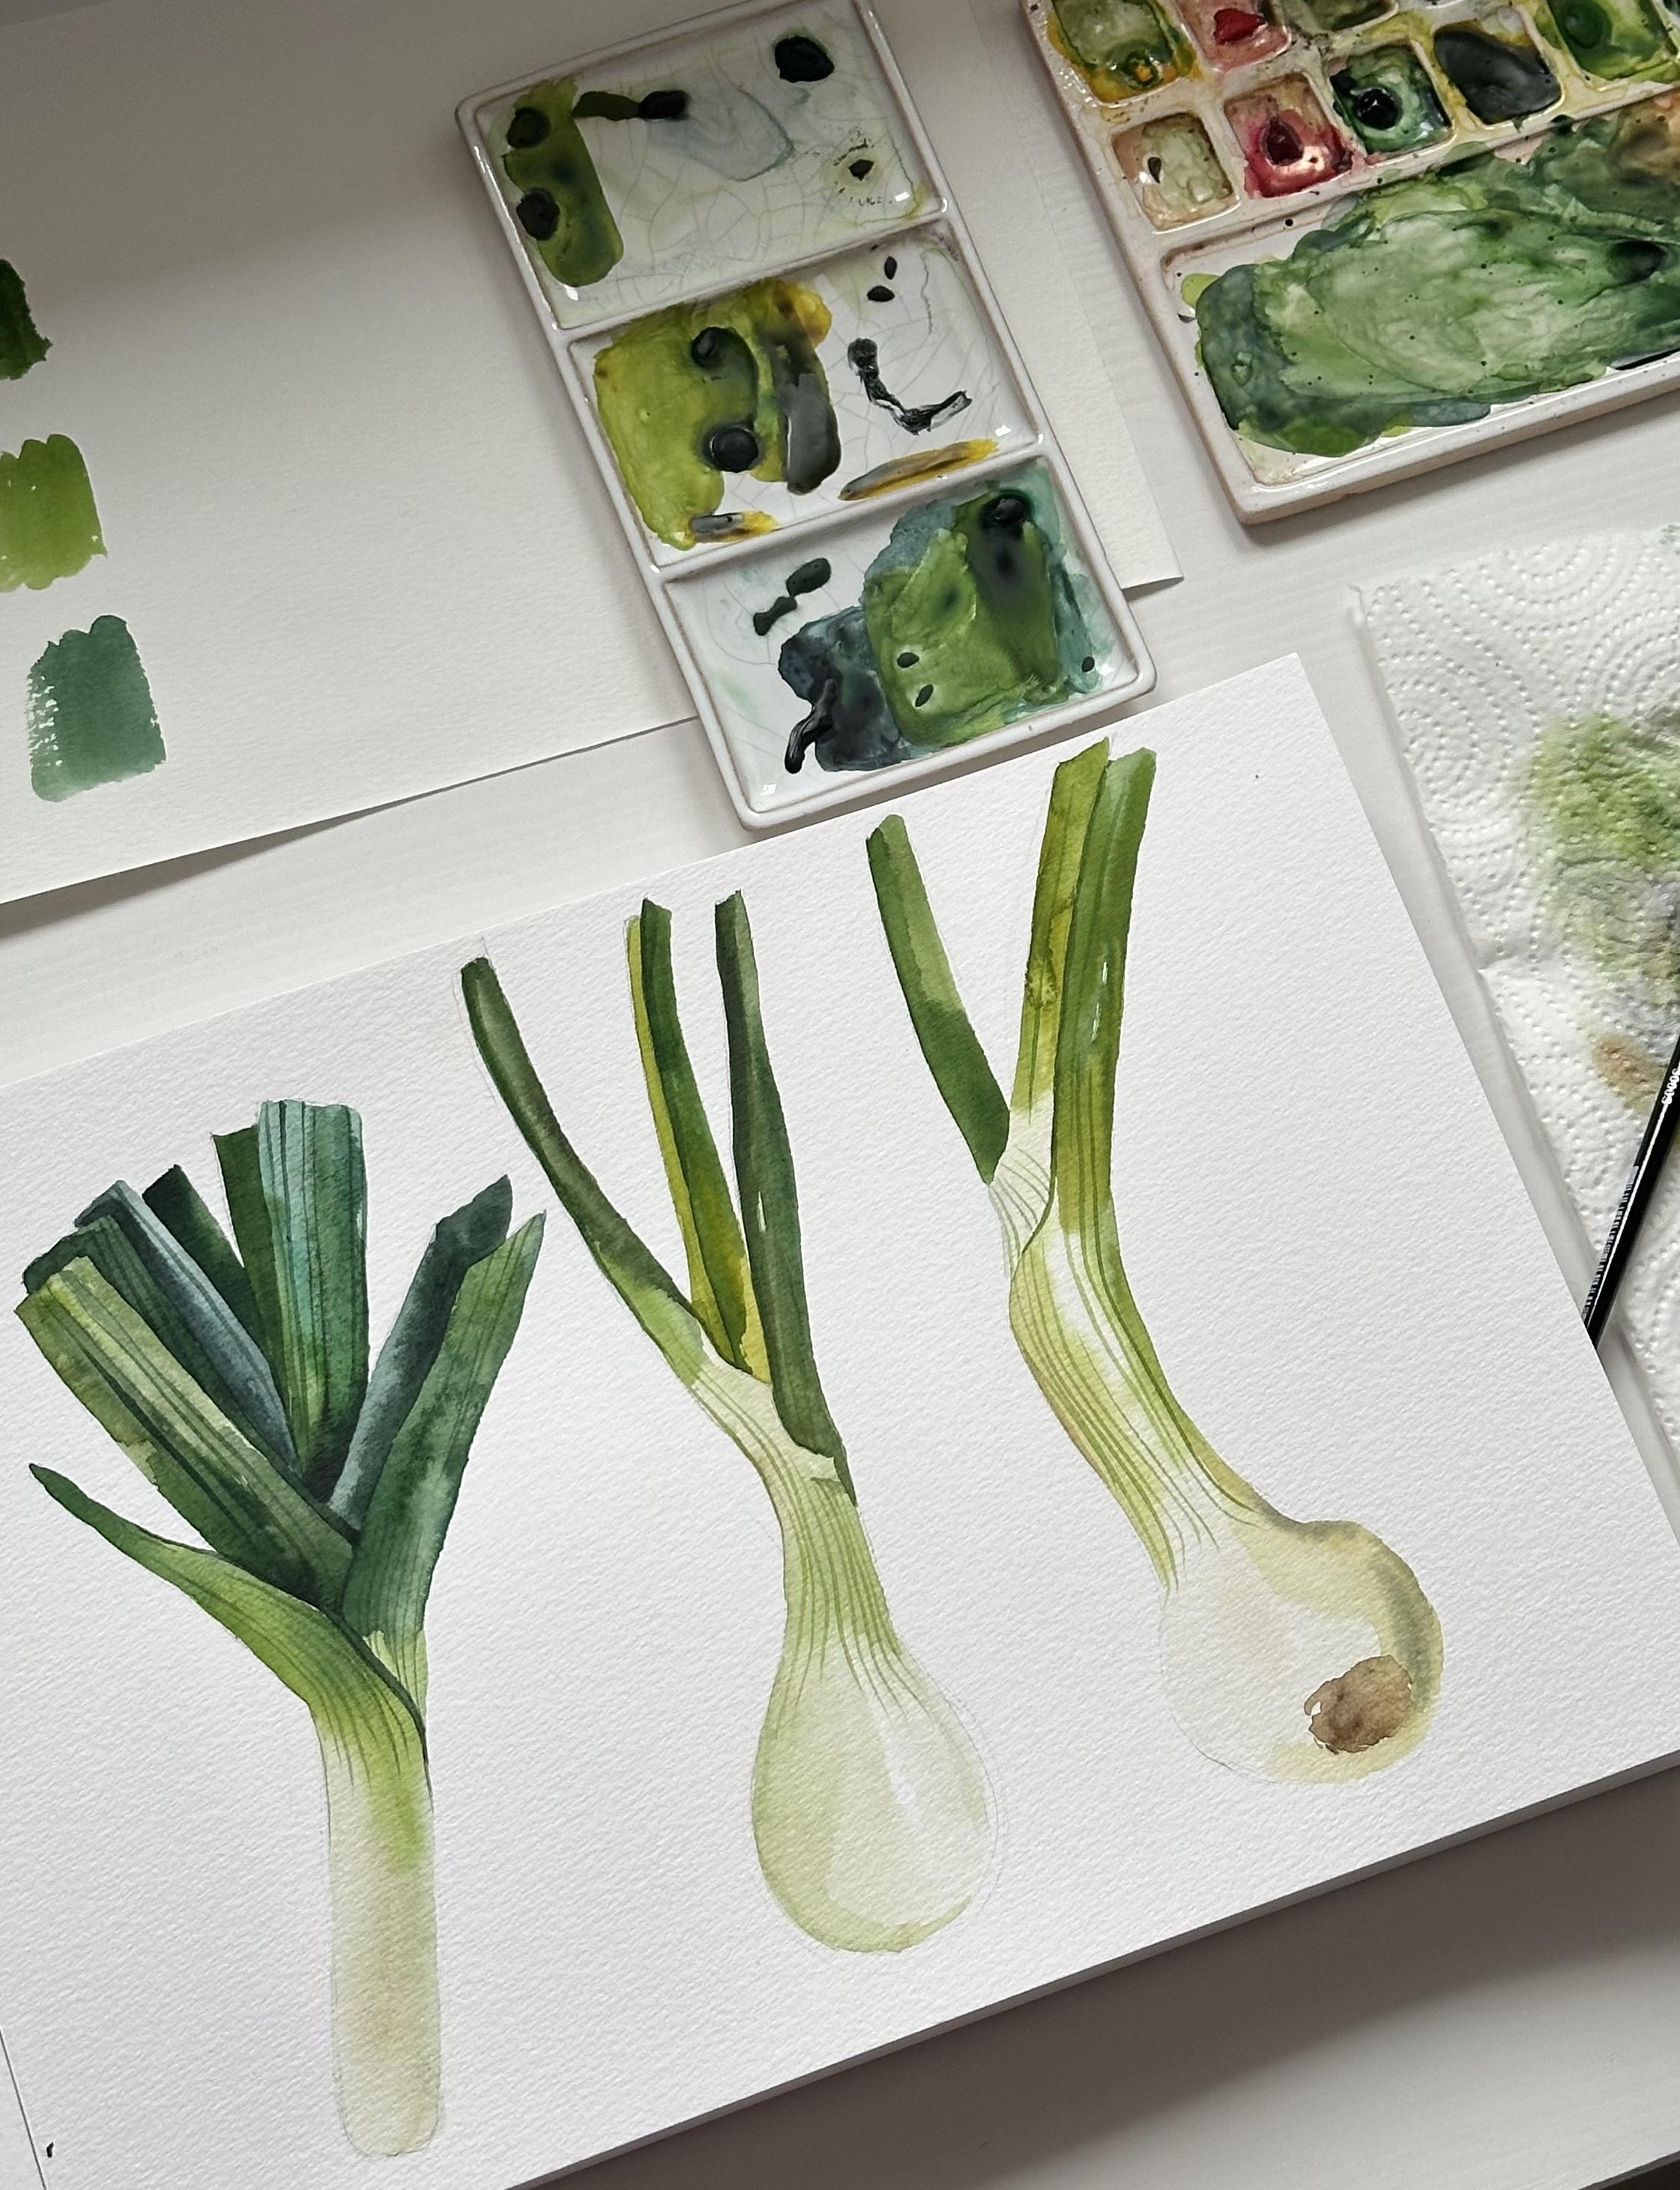
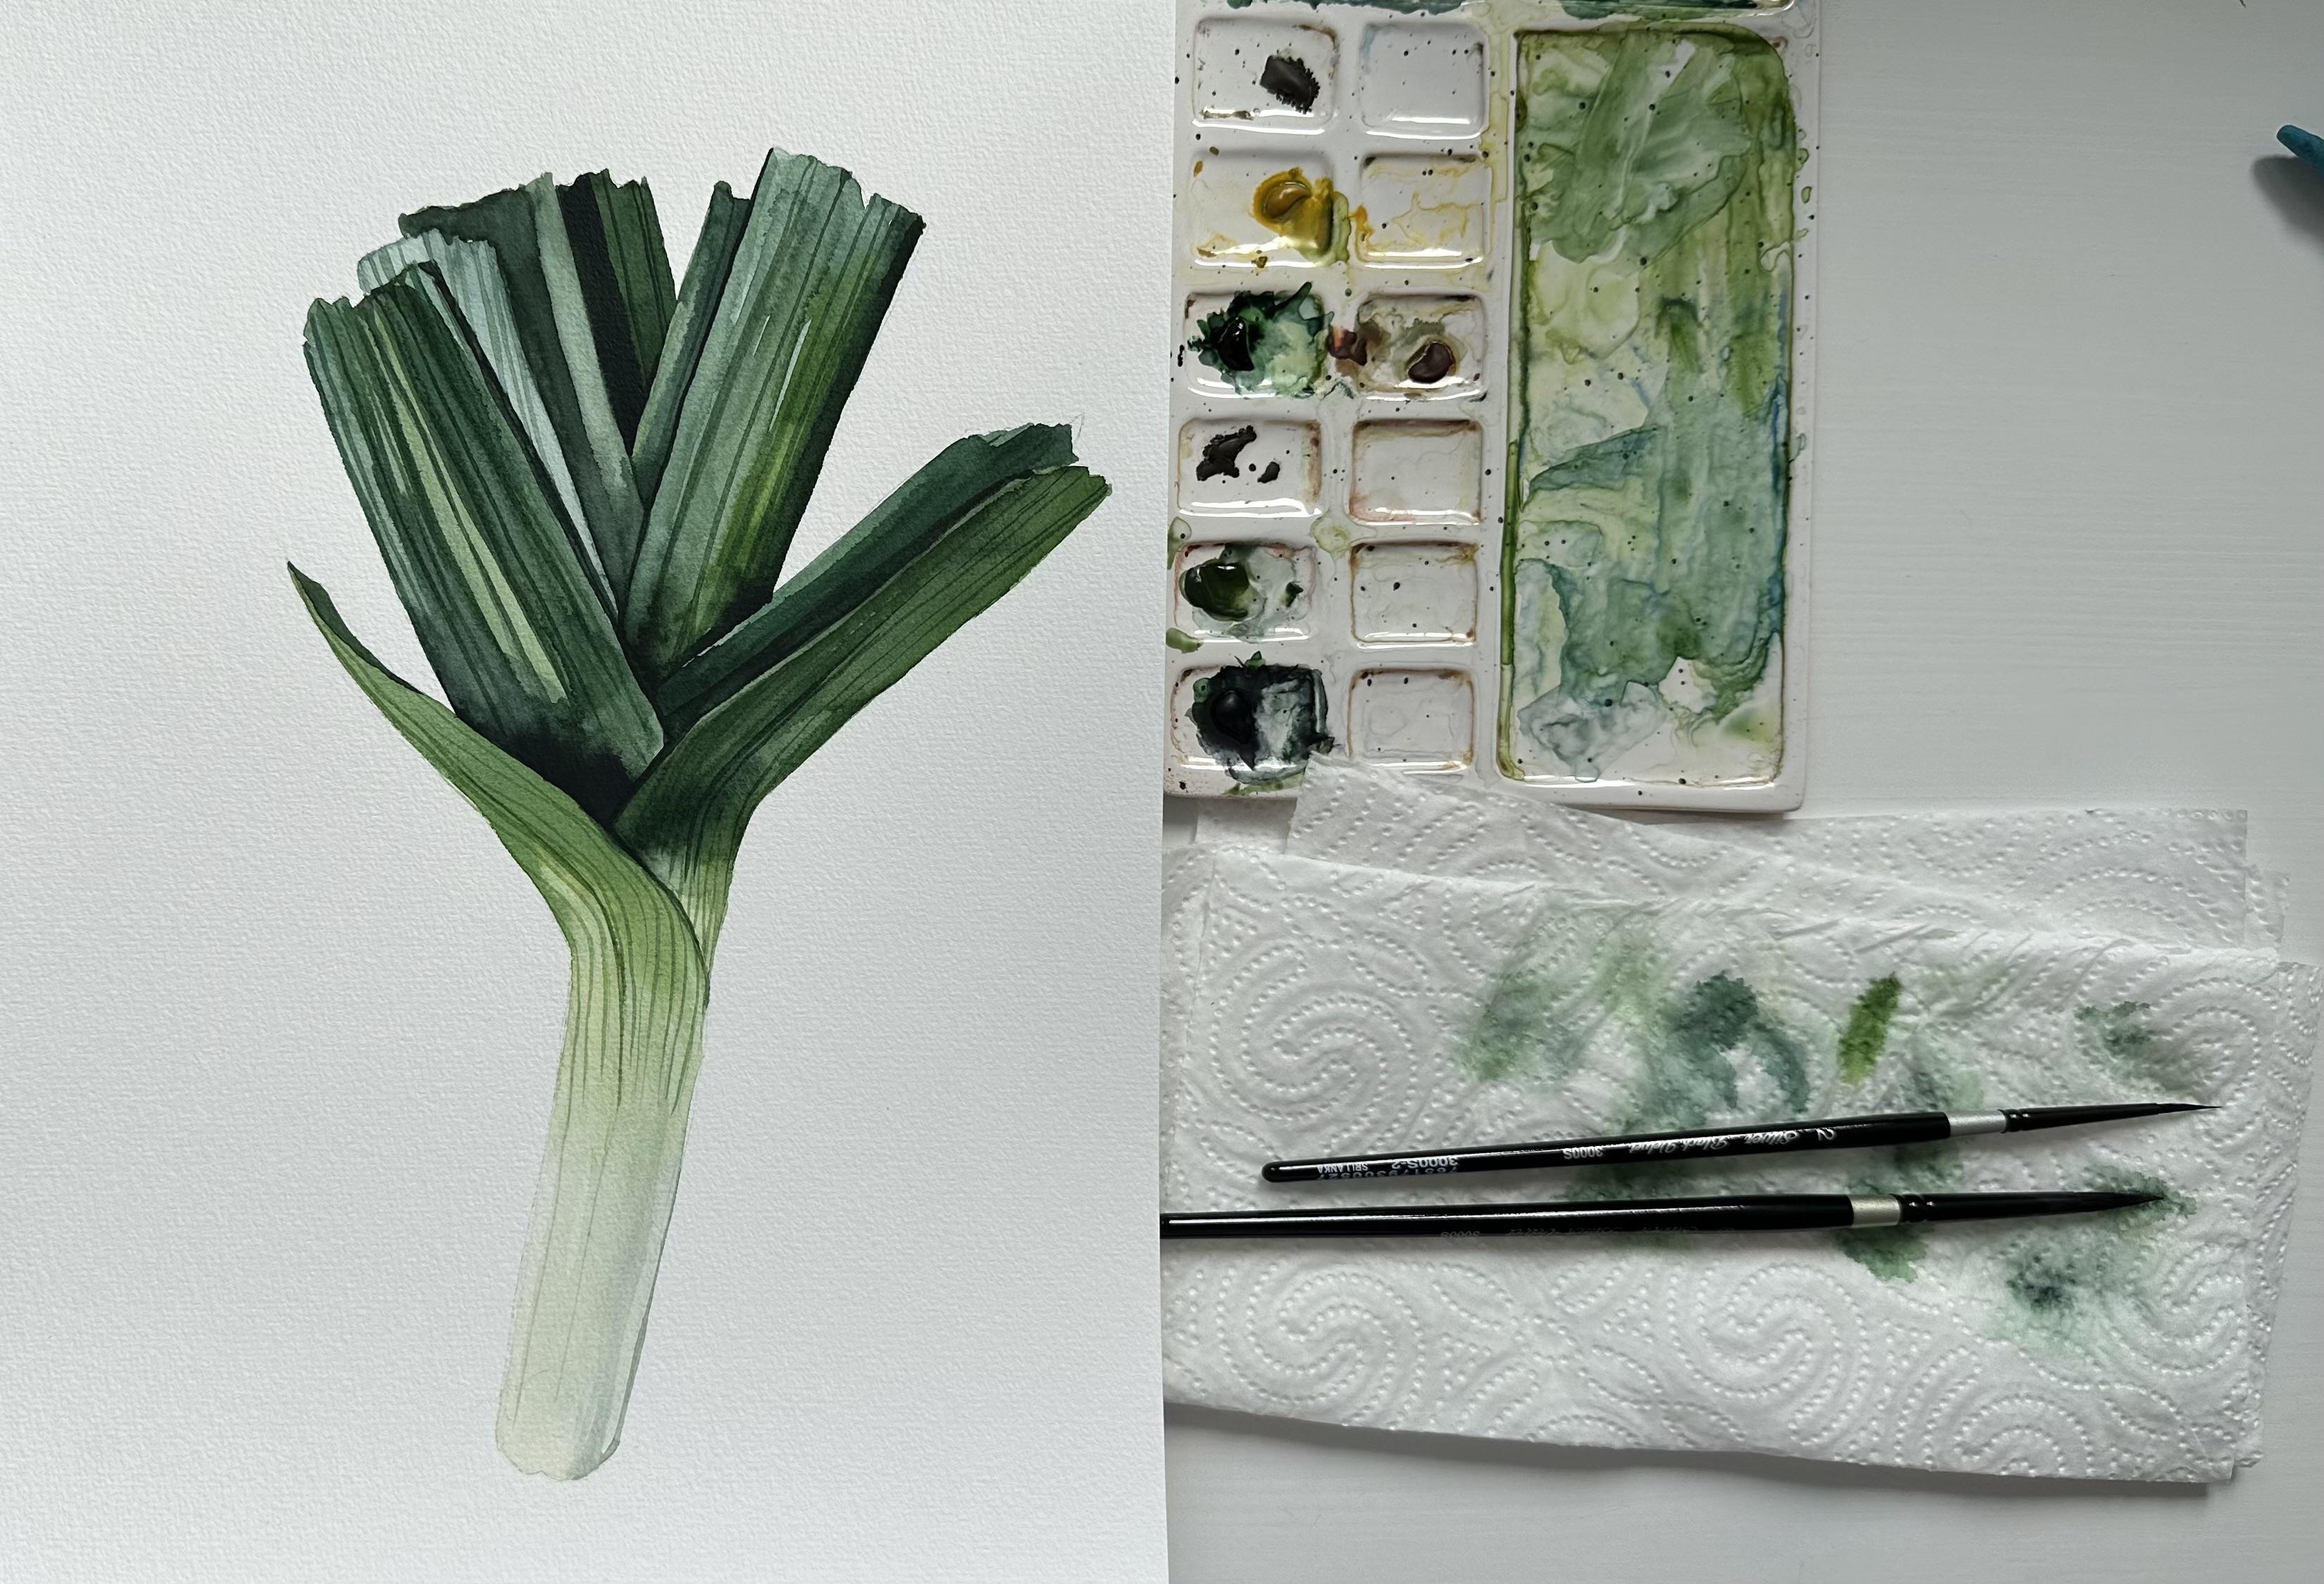
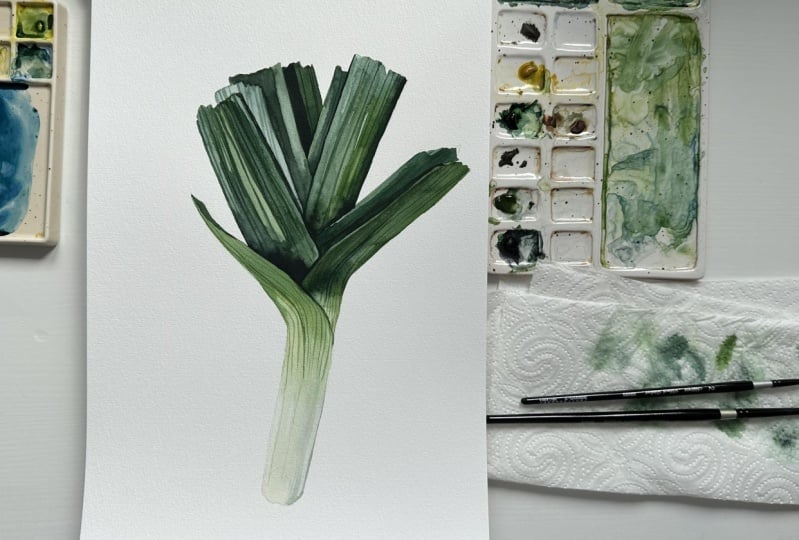
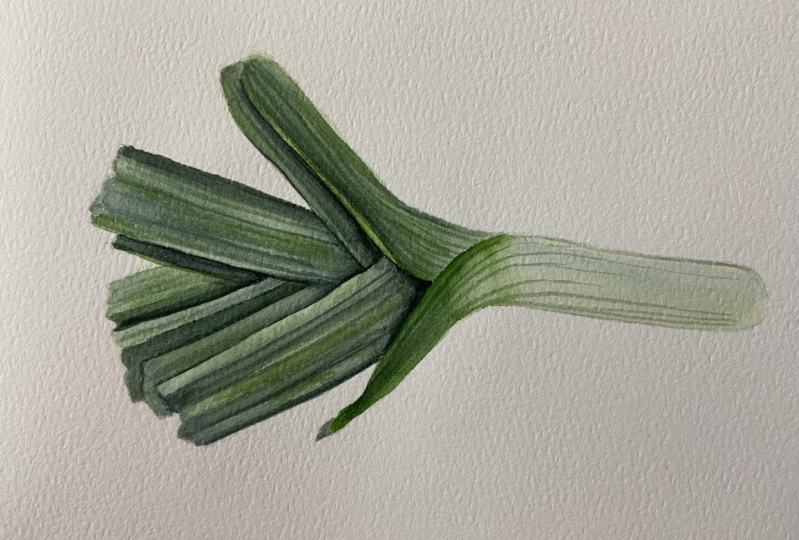
8. Sketch Leek: Welcome to another class project where we will paint a leak, and we will start by
drawing a sketch. You can follow the steps that I show in this lesson or you can download the skin of my sketch
and transfer it to paper. The basic structure of the leak is that one
leaf goes behind another and our main task is to create contrasts
between them. We'll use contrasts of
colors like color value, dark and light parts, and also color temperature using cold green shade and warm green shade
next to each other. Oh. My sketch is done. Now I will remove the
pencil lines with the needable eraser to
make the final painting. And I will see you in the next lesson where we
will paint with watercolor.
9. Leek - Part 1: Before we start painting
the leak with water color, let's prepare color
mixes on the palette. I prepare mix of green and yellow and green
and yellow ocher. Also, I will add some blue to
this mix to make it colder. And we will start by
painting the left part and we cover it with
the clean water. I will add even more
cobot blue to the mix, and we start by
applying the color on the right side because
there is a shadow. But the color should
be very light. So make sure that you have enough water in your color mix. I'm lifting the color
towards the top of the leaf and it still will be the lightest
part of the leak. So we have to keep
it very transparent. And somewhere in the middle, I will start adding mix
of yellow and green. Then I can add more green to the mix to make it more intense, and I will start introducing this color on
the right side of the leaf. The colors are nicely
blending on the wet surface. That's why we cover
it with water first. I can lift some of the color
with a clean and dry brush. Now, I can prepare a mix
of green and cobbled plume to paint the
top part of the leaf. And I will start introducing this color using the color
mixes I have on the palette, moving from the top to the
middle part of the leaf. Now, I will prepare even
darker mix using mix of green, cobalt blue, and paints gray, and I will move
to the next leaf. I will apply color straight to the paper because we need to
make this leave pretty dark. And if you want to make some
part of the painting light, you can first cover it with water and then
introduce in the color. It will help you to create
more transparent part. And here I will cover it with the one
color mix that I have, and I will add some more
of it to the middle of the leak because the middle part will
be the darkest one. While the surfaces getting dry, I will prepare some
more color mixes to have more color mix of green and yellow and also cobalt blue and the green
that I have on the palette. I will load my brush with the
mix of green, cobbled blue, and a little bit of
paint scree using a bit more water than
in the previous leaf. And I will start
painting the left side. I'm moving color from
the top to the bottom of the leaf because the bottom
will be than the top. Now on top of this light
color that we already have, I can add some more dark shade using mix with paint screen. And I already will
paint some lines representing the
texture of the leak. Oh. Oh I decided to add some pure paints gray at the bottom of the leave to
make this part even darker. But be careful because the
color look very black. It blend with the colors
that you on the paper. Oh Oh Oh. I will add some cobalt
blue on the palette. Using this cool green shade, I will move to the next part. I will use mix of
green and yellow to paint the right part
of the leaf because it's not totally cool H. And at the very
bottom of the leaf, I place again, very dark color. But we have to combine the colors that we have because you see there are rough edges, and we need to smooth them. So we'll use brush with water or with a
very light mix of green. Since I have dark
color on my brush, I will add a very small
part on the left side. There is a dark place
next to the light one, and I will do it. The contrast he picture to
look more natural and vivid. I don't like the
left side of the, so I will add more color to it moving
from the top to the bottom.
10. Leek - Part 2: Now, I will move
to the next leave. And I will follow
the same steps. First, I will start with a
very light mix of green, and then I will add
some darker shade. This leave also has a very light green
shade at the bottom, and we will repeat it, and then it will
become more intense. I start to add some
more dark green color, but it shouldn't be that
dark as the leave behind it. So we keep this diversity of the color creating
light dark contrast. For now, I keep a
very thin white line a space between
these two leaves. So it would be easier
for me to create this very light area in front
of the dark leaf behind. There is a pretty rough edge between the light part
and the dark part. I'll have to clean my
brush and dub it on the paper towel and using
just a little bit of water. I'm dragging this
dark edge towards the light one and blending
the between each other. I use almost the
same mix as I used before green and cobbled blue with a little
bit of paints gray. But I will make this leave behind darker than the
one that already painted. I just have to be very careful and make sure
that the leaf is. Otherwise, it will be very hard to create this dark
contrast behind it. I add even more cobalt
plu to the mix, and I will move to
paint in another leaf. I will start again from
the top of the leaf, and then I move to the
bottom or to the center. You see that the edges
of the s leaves, they are not straight. It's not a straight line, but it has a specific shape. Pay attention when
you are making the sketch and when
you are painting. I will make more
green and paints gray for painting the darkest
leaves on the background. Again, I'm moving from
the top to the center, lifting the color to them. When you are lifting the color, it will appear when you have color and now I
have it at the bottom, and I will add even
more green shade. Now, I can highlight the
contrast between leaves using dark shade and making this shadow behind
the leaf in front. Even it might look
like it's black, it's not pure black color, it's mix of green
and paints green. I will add some more
dark green shade on the left side of the leaf.
11. Leek - Part 3: S. Now, I will switch to the smaller brush number two and I loaded with the colors
that I have on the palette, not too dark, pretty
light green shade, and I will paint these very thin lines representing the
texture of the leak. These lines, they disappear
where the light part starts. I don't make them till the end till the
bottom of the leak. And I repeat the
shape of the lips. If you see that the lines
are too dark or too sharp, you can remove them by
using just clean water, and just blending
this very dark color into the color of the lik. You can also use paper towel
and absorb some water. It will also absorb some
color from the paper. I also want to add some dark
shade on the right side, highlighting the
shape of the lik. And I add some more lines on the other leaves using more dark green color
than for the first one. So you're basically matching the color using a bit darker
shade than the leaf itself. Oh. Now I will switch back
to the bigger brush. Number four, and number six, depending which one you're using to finish painting the leaves. I add some shadows behind some
of the leaves highlighting these contrasts between
further and leaves. F We have only one leaf
left to paint, and now we will do it. This leaf will be darker than the leaf on the left and lighter than the
leaf on the right. We have to create this dark shadow on the edge
between these two leaves, and then I will just lift the and the water
pressing the brush. So it would be not so
dark on the right side. Closer to the bottom, as always, I can add some
darker green shade. And our leaves are done. I'm switching back
to the brush number two to add some more lines. Just don't it because we don't need to add
lines to all the leaves, just some of them. Q Our painting is done. Please share your review and your painting in
the class project. I will be to see your paintings, and I will see you in the next lesson where we
will paint green onions.
12. Green Onion: You're today. Welcome to the last lesson where we will paint green onion. I already prepared a sketch, and you can download my sketch
from the attachments to this class or draw your own based on my final painting
that I also attached. For painting green onion, I will use basically
the same color mixes I used for painting the leak
in the previous lesson. I will mix on the pallette
green and yellow, and also I will add some
yellow ocher to this mix. First, you can
cover the main body of the onion with clean water. I'm covering with a very
light mix of green, and I'm lifting color towards
the top like I did before. The color structure
of green onion will be almost the same
like with the leak. It will be very
light at the bottom and pretty intense
and green at the top. We will use for the top leaves, green shades with
mix of coupled blue, and with mix of pines
gray and yellow. I will mix some yellow
k with pines gray and we'll add this color at
the very bottom of the onion. While the surface is still wet, I need to apply more
dark green shade and I'm mixing green and yellow, and I apply this color in
the middle of the sleeve. I need to blend it later. But as you remember, I can blend it with a
clean brush and water. Next, I will apply
some pure green color and I will mix it with water and some color that
I have on the palette, and I will add some light color at the
very top of the leaf. Lifting color
towards the bottom. I will add some more
intense green shades, still very light, but a bit than the first layer on the
right side of the onion. I have to make edges smooth, so I will clean my
brush and use in water. I will just blend this color with the first
layer and the dry surface. I have this rough edge between the dark green and
light green shade, and I will just drag some of the color down
creating the texture. While I'm waiting for
this part to get dry, I can mix some colors
for future lives. I will mix some warm green shade using yellow and
yellow and green, and also will use some cobalt blue for
creating some cold shade. I will start at the bottom of the right leave using
pretty dark green color. I will leave it and I
will load my brush with a warm and light green
painting another. A. I need to wait until all the
leaves will get dry, and meanwhile, I can paint these lines representing
the texture of the onion. I'm using brush number two and a light mix of green that
I have on the palette. I have the last leaf to paint. I will switch back to the
bigger brush, and this time, I will start not at
the top of the leaf, but at the bottom because I
need to paint the light area. The lighter than the
leaf on the right side. Because you remember
the rule of contrast, we always have two
objects next to each other and one
should be lighter and another one
should be darker. It would be easier
for the human eye to understand which object is closer to us and
which one is further. Then I'm moving to the
painting top of the leaf, and I'm using pretty
dark green shade. You can add even
more cobbled blue. And I'm dragging the color down, blending it with the part
that I already painted. This s leaf should be darker than the leaf on the left side. I don't like that this area
is too light and transparent, so I will add some more opaque color to this
right side at the bottom. Some final brush strokes
on the body of the onion. And we are done. This is our last class project. I hope that I will
see your paintings in the class project
section or on Instagram. Don't forget to share your
review to this class as well. I will be very g. Thank
you for painting with me, and I hope to see you
in my other classes.
 Aleksandryna Gromyko, Watercolor tutorials for everyone