Transcripts
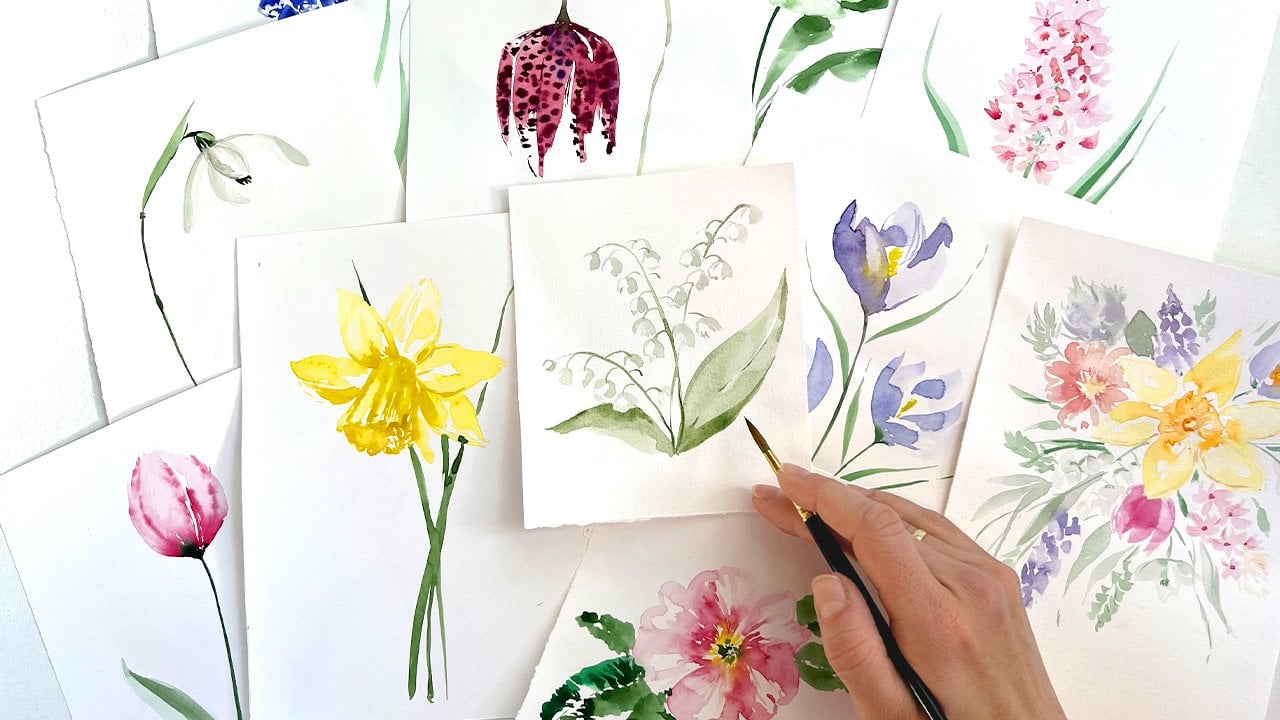
1. Welcome!: Hi friends, and welcome
back to my studio. Today I prepared a
new project for you, which includes a lot of drilling in painting roses and
really in Beijing greenery. And after all these exercises, you will be able to paint
your roles bouquet. I will show you an example, but you could easily apply
everything you practice during my course into
your role painting. So let's just start.
2. Roses 1: Let's paint this nice roles
in five different ways. Or let's say we will
just take this one for inspiration and
let's see what, what will get at the forum. Basic color for basic mixture. I take quinacridone,
rose, very diluted, and just with a hint of any green from your
palette to make it note these Barbie pinkish, but a pleasant, nice,
dusty pink color. Let's start from the
middle of the rows with tiny little strokes. Strokes. This is the middle of our rows. Clean the brush. Truck out
the color very carefully. Trunk out to the color. Again, take our mixture. Strokes, which
gets a bit thicker and bigger and roll
around and again, wash the brush, clean the brush, and drag out the
column bold mixture. Because strokes, to get
the biggest strokes, you start with a tip of
the brush on the belly. Let it go. Tip of the brush press
on the belly, let it go. Tip of the brush,
press on the value. Let it go. Wash the brush. The color, the color or shuttled around. You go from the
middle of the rows, the Beagle and
lighter petals are. Let's keep this in mind. When making very big, lovely petals around. Like this. Press on the belly. Let it go. Add some
random strokes around to make some volume
to make it looks natural. Take a beat off, dryer color, dry and darker color, and add to the root of
the petals randomly. Again a little bit and drop off.
3. Roses 2: Most water looks like and
just prepare something. Some circle I paid
and some circle very, very random, very pale. Just like this, which is also pretty nice and could
call it as a rose number 28. And let it here for
now to dry out. Now we repeat the same
technique as we have a wave. Rolls. Number one, we are taking
their bolder color, started the middle,
making C shapes. Maybe a little bit more curvy
to make rules is different. And drag out the color. Strokes, curvy strokes. And the color with very vague lean
movements of your brush. Make the law clog up the color. Another line. The color. Add some contrast to the rules of the petals to
make it brighter. But always, be careful. You could add color
and motor only while the part is still wet. Once it starts to dry,
don't touch anything. When we'll talk about this
later in the other videos. So we're almost done with this. I want to add some
nice curves around some shades, final touches. It's always important to stop at the right moment,
which is difficult. This is it.
4. Roses 3: Rows number three
will be in referrals. Unfortunately, I do not have
English roses in my studio. But we will manage English roses have very specific middle. Middle. Now looks more like DC. No worries. We will get to our rose. Looks like we just prepare the spot where petals
grows like this. A little bit of vertical
lookup from the top, filling that gap with
some bolder color. Now we repeat the same
technique as here, but we have started
already with bigger. And they put them
around our middle part. And now you could
see all our roles. Peers. We add some
random lines around and seeker strokes to show petals
which grow out of the body. Try to be not very symmetrical. Let's emphasize the middle. With bold mixture. At some details,
fill in some gaps. Connect middle of the
roles and the petals. Again, some shades randomly.
5. Roses 4: Bod of the rules, which will look
something like this. This will be our example. We paint strokes. This. Randomly. Wash the brush and make the shape of the
bottle diluted. Color. Our front of fraud petal. There'll be mostly
on the sunshine, so it should stay
as void as you can. Better add some shades
on these shady side. On the bottom. Maybe. True for me this curve. And let's add few
very pale petals. I like to add some white
space to divide petals. Try this. Sum, something. Nice. To divide petals and
emphasize the Gautam. To make it look natural. Let's add a stem. For stem, I'm taking cocoa green with a hint of
our quinacridone rose. Now let's paint the stem. The stem and the sleeps. Well this leaves. We start with the
tip of the brush, press on the Berlin, let it go again. Tip of the brush, press on the belly. Let it go. One more. Tip of the brush, barely let it go. I like how these things can green column mix
into each other. Tiny little details done.
6. Roses 5: Number five. Number five, take our
mixture, both mixture. Again. We start the middle,
tiny little strokes. And we make them a
little bit more curvy. Drug out the color. These curvy parts. Firewall from the
middle, the Beagle, the petals are eager and
braver should be your strokes. Now we have feeling the gaps in-between these white
spaces, white petals, some color, some fluffiness
shape around here. Like nitrile. Make it we need good crow side. Because our rows like this. Some contrast with
the darker color. Divide petals and
add some shades around to provide
all the petals here. Like this. Again, would be nice
to add some stem. The stem, I'm taking
green color, making stem. Leaves, tip of the brush, belly of the brush, some pearls. And one could go from
the tip of the brush, the brush and let
the colors mix. Some tiny little details.
7. Greenery Drills: For painting greenery, I do not use the bright green colors. Of course, you could
use anything you like. I prefer to mix green
color with one die or any other brownish color to
make it a little bit dusty. How would we do with
paint greenery? There are just too a
lot of different ways. E.g. we start with
the main branch. Then. Let's say we paint
in oils Polypterus. I press little bit
from the belly of the brush and let it go. And on the other side, I press on the belly of
the brush and let it cool. That's how I get these. A little bit of
roundish to sleep. E.g. again, small stamp, belly of the brush and I
vaguely beat the brush. Would always correct. Manually. You did not manage to
my kitchen Van Gogh, It's completely
fine to correct it. For some variety. I, I add a little bit of
oxygen to another link. And let's try to do it again. A little bit. Press on the belly of
the block. Let it go. I like to leave a little bit
of white space in between. The big middle wine. Next one we will paint
something very different. So you could try different
to click finish this. Next one, we will
paint some pain, more like Ross, e.g. a lot of tiny little details. This one we have basically done. Next one, let's
paint same color. Something. We've all
tiny little details. And I prepare a
place for cluster. With the tip of the brush. Small moves. The first cluster. I imagined that the
second cluster, cluster role like this
in this direction. Now I decorate it with strokes. Another cluster, leave a lot of whitespace. It makes greenery
very, very natural. Maybe one more
small preparations. It looks like we paint the skeleton and then
dress it with leaves. It's really, really
asks for one more here. Okay. Next one. I'll show you a very
lovely technique. When you paint. It's maybe it's a little
bit more childish, but sometimes it
really plays a lot. So you Just the outlines. And it looks really
modern and cool. And e.g. if you paint a book care, then you want to
add some greenery. And if you do it like this, this kind of leaves to make your artwork
really, really specific. And how you could play around. He would make the outlines slightly bigger,
slightly thicker. In some parts. Nice span. Your outline is Kirby. It looks interesting. Add some shade. In goods, too childish. Maybe. I lie to add some
curves everywhere. And middle lines. This one. Let's try something, something very abstract
and very spontaneous. I just preparing
game, my mixture. For spontaneous painting. It's nice to be ready
and prepared colors. And just with wave, very brave moves,
I paint something. I think it could
be a bumbles, e.g. it looks like a bumble sleeves. Very sharp, very dynamic. Just like this. Let's try something, something you want,
something different. I will show you the branch with fico. With the fecal leaves. I start with the
tip of the brush. I press on the balance of wash. And basically I'm painting with, with the body of rock. And I, I take a little
bit different heat, more dark and this real
quick, nice shade. I want the sleeve
have some texture. This chip textural, this eight, choose the one with the body of the brush. Just move my brush. Worry. Really. I want to make it a little bit. So I prefer these curved up. Some dark colas. And one more. It's nice if you
paint two halves of the leaf in slightly different
shades, lighter, e.g. in dark like him. I hope you could
see the difference. And it really creates
this nice, lovely fold. And for some structure, when the lighter part is dry, you could add some
just a few strokes, not only to imitate, try to imitate all just few and then you get
this nice feeling. Let's paint something more. E.g. let's try
something in-between. These. Now I paint with our clients, but they are a
little bit bolder. And these greens, some variety. If we on this stage
add some e.g. darker brown to the stamp. It will distribute all
these nice dark shade. And look how nice and lovely. It looks like. These white areas they
imitates of their curve, of them off the leaf. E.g. what we could also
do is to wash the brush, dry the brush, and remove all the color from
one side of the leaf. It will also create these, not as crispy as here, but it creates this nice volume. Let's paint something,
something for me. To close up the lesson. Let's paint something relaxing. You could make a
lot of experiments and paint different greenway
in different styles. And it's one of my favorite because you can't
really two things thrown here. And it has a lot of variety. Could just play around
with brush strokes. And every time you get an amazing, amazing,
beautiful result. E.g. here it is still
the paper is still wet. Just the right time to
add some dark spots. The volume. And here it is, We have a lot of different
green leaves here.
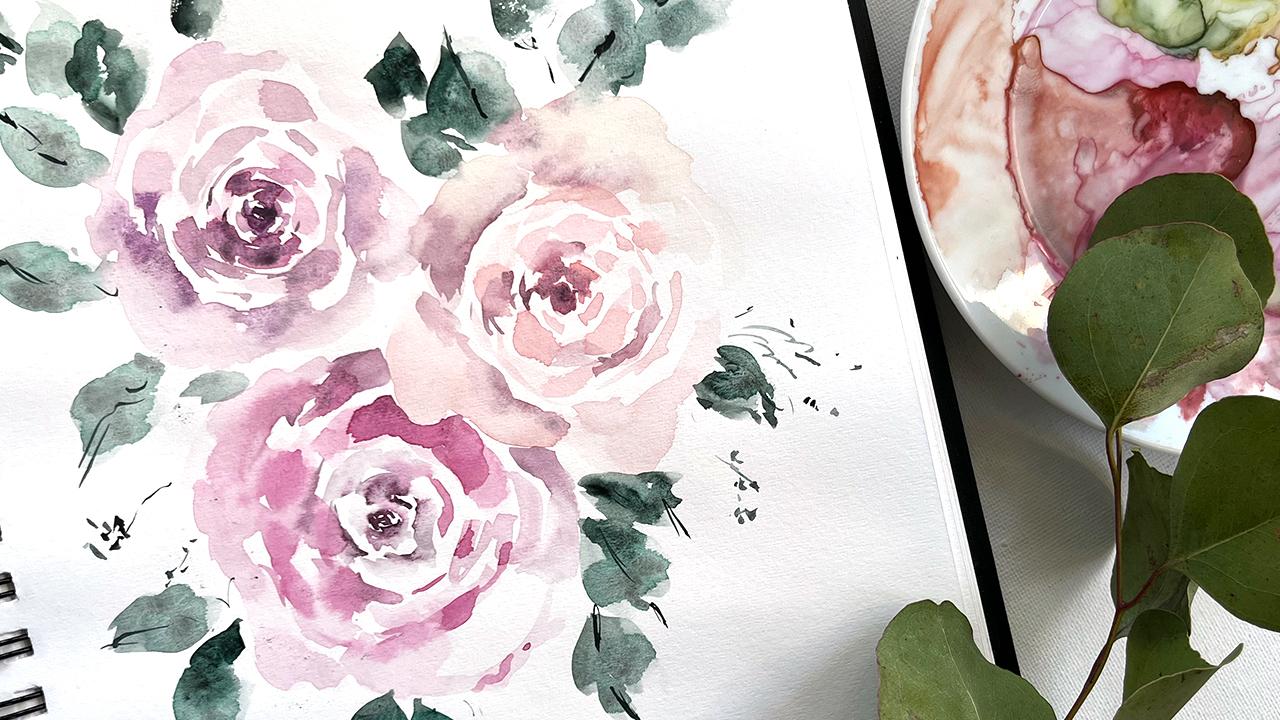
8. Final Project - Bouquet: I will start with the top rows and I'm taking
dark purple color. And I paint with C strokes. I paint the middle. C strokes are
overlapping each other. I'm mixing them with
Quinacridone Rose. For diversity. I, it's basically C, strokes everywhere
tip of the brush, belly of the brush, tip of the brush. I like the dusty
feeling of roses. And to get, to make a dusty, I mix quinacridone rose just
with a hint of Berlin green. And that's how I get these, these nice vintage coloration. Sometimes, or we could say
just the tops of the petals. And sometimes they
are really wide open. Like these curves. The more we go from
the middle, lighter. And C curve becomes the
petals and means of the car. And lighter become the strokes, even changing to a thicker
brush, bigger brush. It's number 12. And I called out. I go round and what
I like to do is to add some darker
color to them. To the beginning battles. Yeah. Until the middle, of course, it's nice to
emphasize the middle, to add some extra depth in it
with the tip of the brush, just with the tip of the brush. And randomly, Don't forget to
leave white spaces around. I would like to
immediately paint few alcoholic two
sleeves, Covey's. I may I take a lean
green just with the belly of the
brush with one move. I'm painting equality to
sleep rather randomly. And I let all the colors mix. I now start to paint
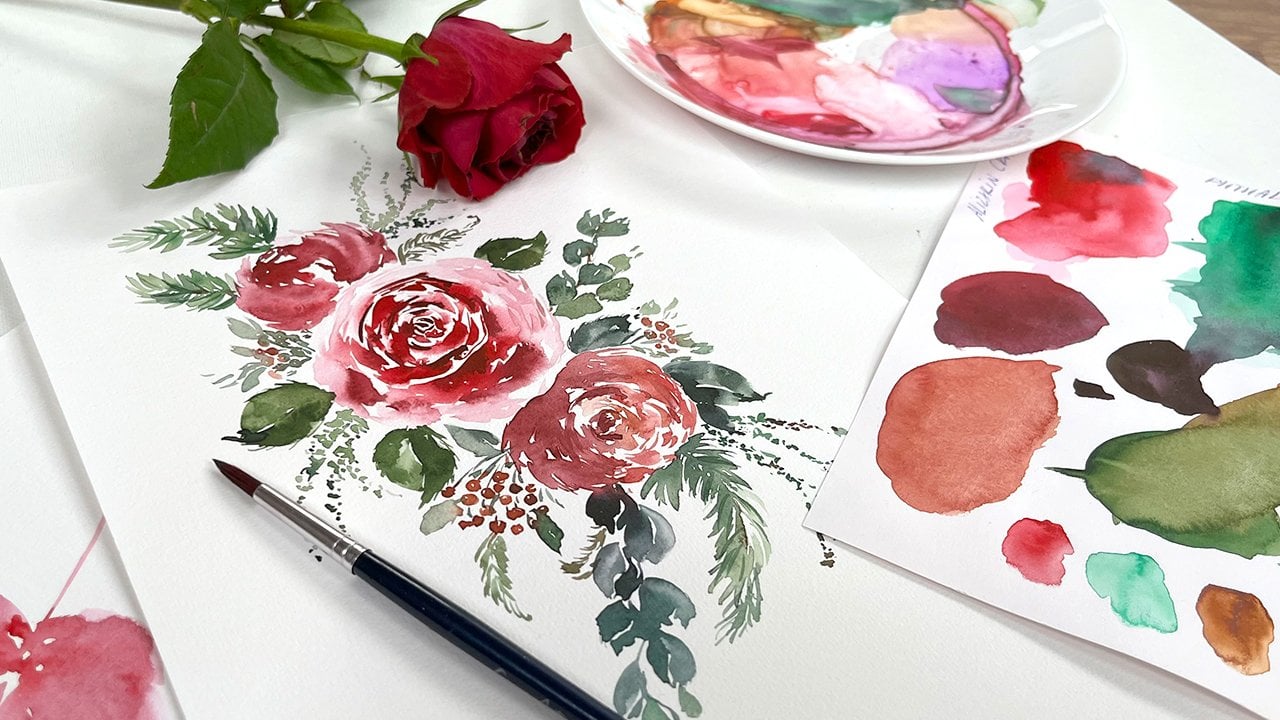
the second row. And the second rolls be more, be more warm, orange, little bit lighter
than this one. So I take pyrrole. It's very beautiful color. It could be very intense, orange if you take it bold, or it could be very pleasant. Light pink. Hint. It's the same, basically the same principle tip of the
brush belly of the brush. Strokes around
emphasize the middle. Allow watercolor, do its duty. Try not to control too much. And immediately I painting
some green leaves here. So our equilibrium sleeves, this green hints could connect with our rows. And the third rows will be here. We will be back to, I
collect this leaves. It's just a pure them. Maybe. Right now. More tense. Just like these other roles. The roles, so same principle. Let's try to do
something in trusting. And it will be slightly
underneath the authors. I'm painting the middle. Now. I am with, with the other brush. With just clean brush. I distribute a little bit
the darker color around. And let's see what's
happening, What's happening. I did not plan this. Let's see how it will work out. I feel a feeling that would be nice to make it a
little bit more pink. Wish. I take quinacridone
rows instead of purple. And I keep in mind these, these petals will go
underneath of the other rules. I make them darker. But the other petals, I make very light. And I go with some random moves, darker underneath the
other roles, and lighter. On the top. I want again to emphasize, to add some shades. Just with the tip of the brush. Mixture of quinacridone
rose example. I think we'll walk nice here. I just go round with
the same C strokes, maybe a little bit thinner
and smaller. This time. I go around and
immediately I switch to the green leaves. Polypterus. I want some leaves, a Charles trailing down. I'm painting them like this just with the belly of the brush. Just with the belly
of the brush. I want to add some variety here. This is a very beautiful color. It's, I forgot the word. So the color which has
fewer particles in it, and the particles just
distributes and flows. If guys, I forgot the word
of the name of these colors, I will tell you once. So remember, but
it's really nice to have one or two of
these in your palate. It allows you to play nicely with your colleagues. Now, I'm making different
feelings and these care, e.g. I. Add more flips. Yeah. Click to slaves. They're a little
bit too round dish. I keep this in mind. When I paint. I don't make them
too far, like roses. I collect those feelings. I add some random no name, no name graphs around. Just for the volume,
for contrast. And maybe what I like to
keep these hot shapes. So I'm actually not going to
paint too much here. Now. Now we have a lot of sunshine. Probably a little bit
difficult to see. Fun. Greenleaf. One more green. To make it really hot loop. I not hard getting just
heart causing little cane. I'll add some greenery, some some tiny strokes. I tried to cover with myself this sudden sunshine, Norway. And now with the
tip of the brush, I want to add some
structure and texture. I hold my brush on
the opposite T, which allows to make
very unpredictable, which is frightening, but
fun, unpredictable strokes. Rather uncontrolled moves,
which is really, really fun. So I think our, our lovely book kid is ready.
9. Final Thoughts: Thank you so much for
joining this class. I hope you really
liked the process. I hope you managed to
try different practices and I'm looking forward to
see your final picture. Bye-bye.
10. Join my Membership!: Hi friends, I'm
going to be killed. And I welcome you to
joy, to my membership. I know that we all somehow
at different stages of our painting skills
and that's fine because I split my
membership classes, my membership offers
into sudden bundles. And you could start
either from the very, very basic steps and then short-time get to another step
and then to another step. And as my favorite thing, we could paint together complex botanical illustrations or loose floral compositions. It, somehow, it takes time to realize what you're more into, either into loose painting or
some more precise painting, it's okay to give
yourself a try. And another thing I
would like to stress out that most of my classes, you could stop at
any moment, e.g. when a baby cries or
dog needs to go out. So really at any
moment and heavy, just 15 min daily practice. Good. Bring you into really nice progress with
watercolor painting, withdrawal away,
anything basically. So I invite you to
try out free classes, to try out churn
membership, e.g. for a month and feel how
how does it feel here. So I hope you will like
it and we could make, we could create a
really nice together. I hope I see you there. Bye bye.
 Olga Koelsch, Watercolor artist and Pattern Designer