Transcripts
1. Welcome to this Class: If you're like me
who find dreamy, soft, and dainty watercolor
flower paintings aesthetic and have always
wanted to create one. Then this class is for you. Since working with
watercolors in 2018, it's been my goal to try out this painting style and make floral compositions of my own. But it wasn't easy. What I imagine to paint is
far from what I am producing. It's like my hands are
not listening to me. But after some experience experimenting and practicing
with a growth mindset, I finally did it. Through this class, I am happy to share with
you that techniques and tricks you'll need to create
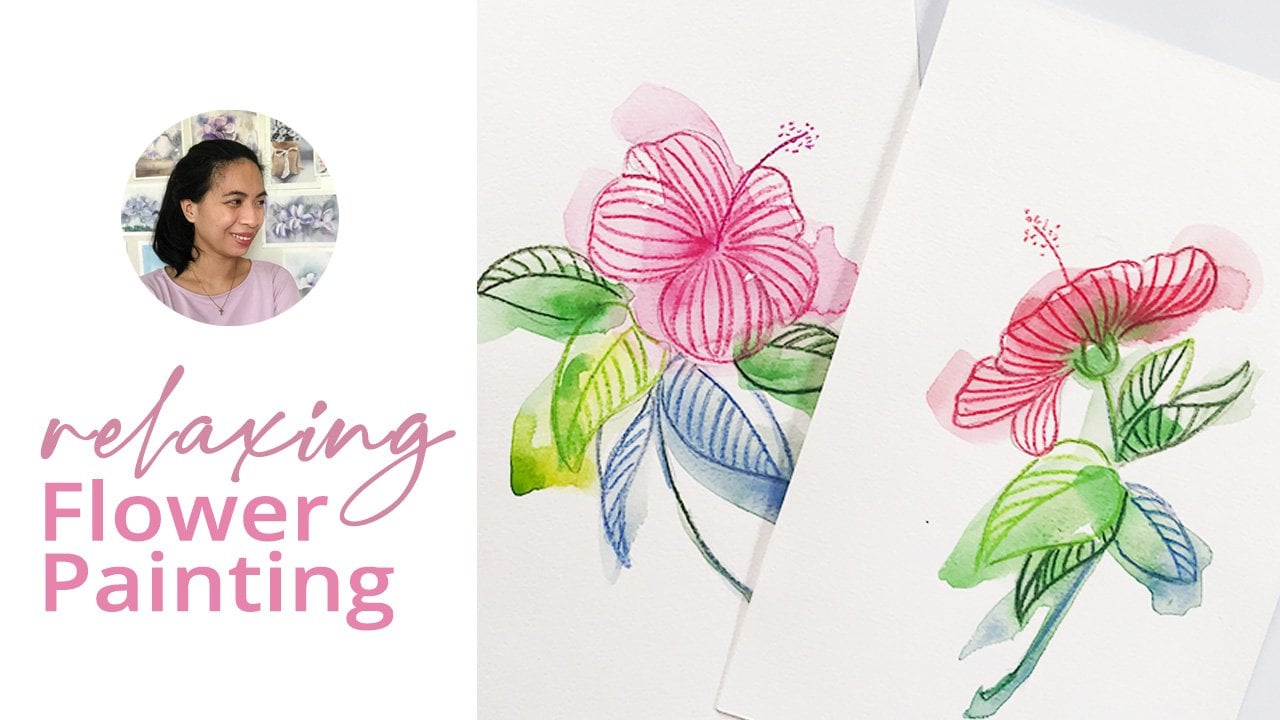
this floral paintings. Hello, I'm Bianca Luztre, an aspiring watercolor
artist from the Philippines. I started working with watercolors during one
of the worst times in my life and found comfort
in creating artworks. After a few years of
painting with this medium. I felt this urge to teach and share the joy of
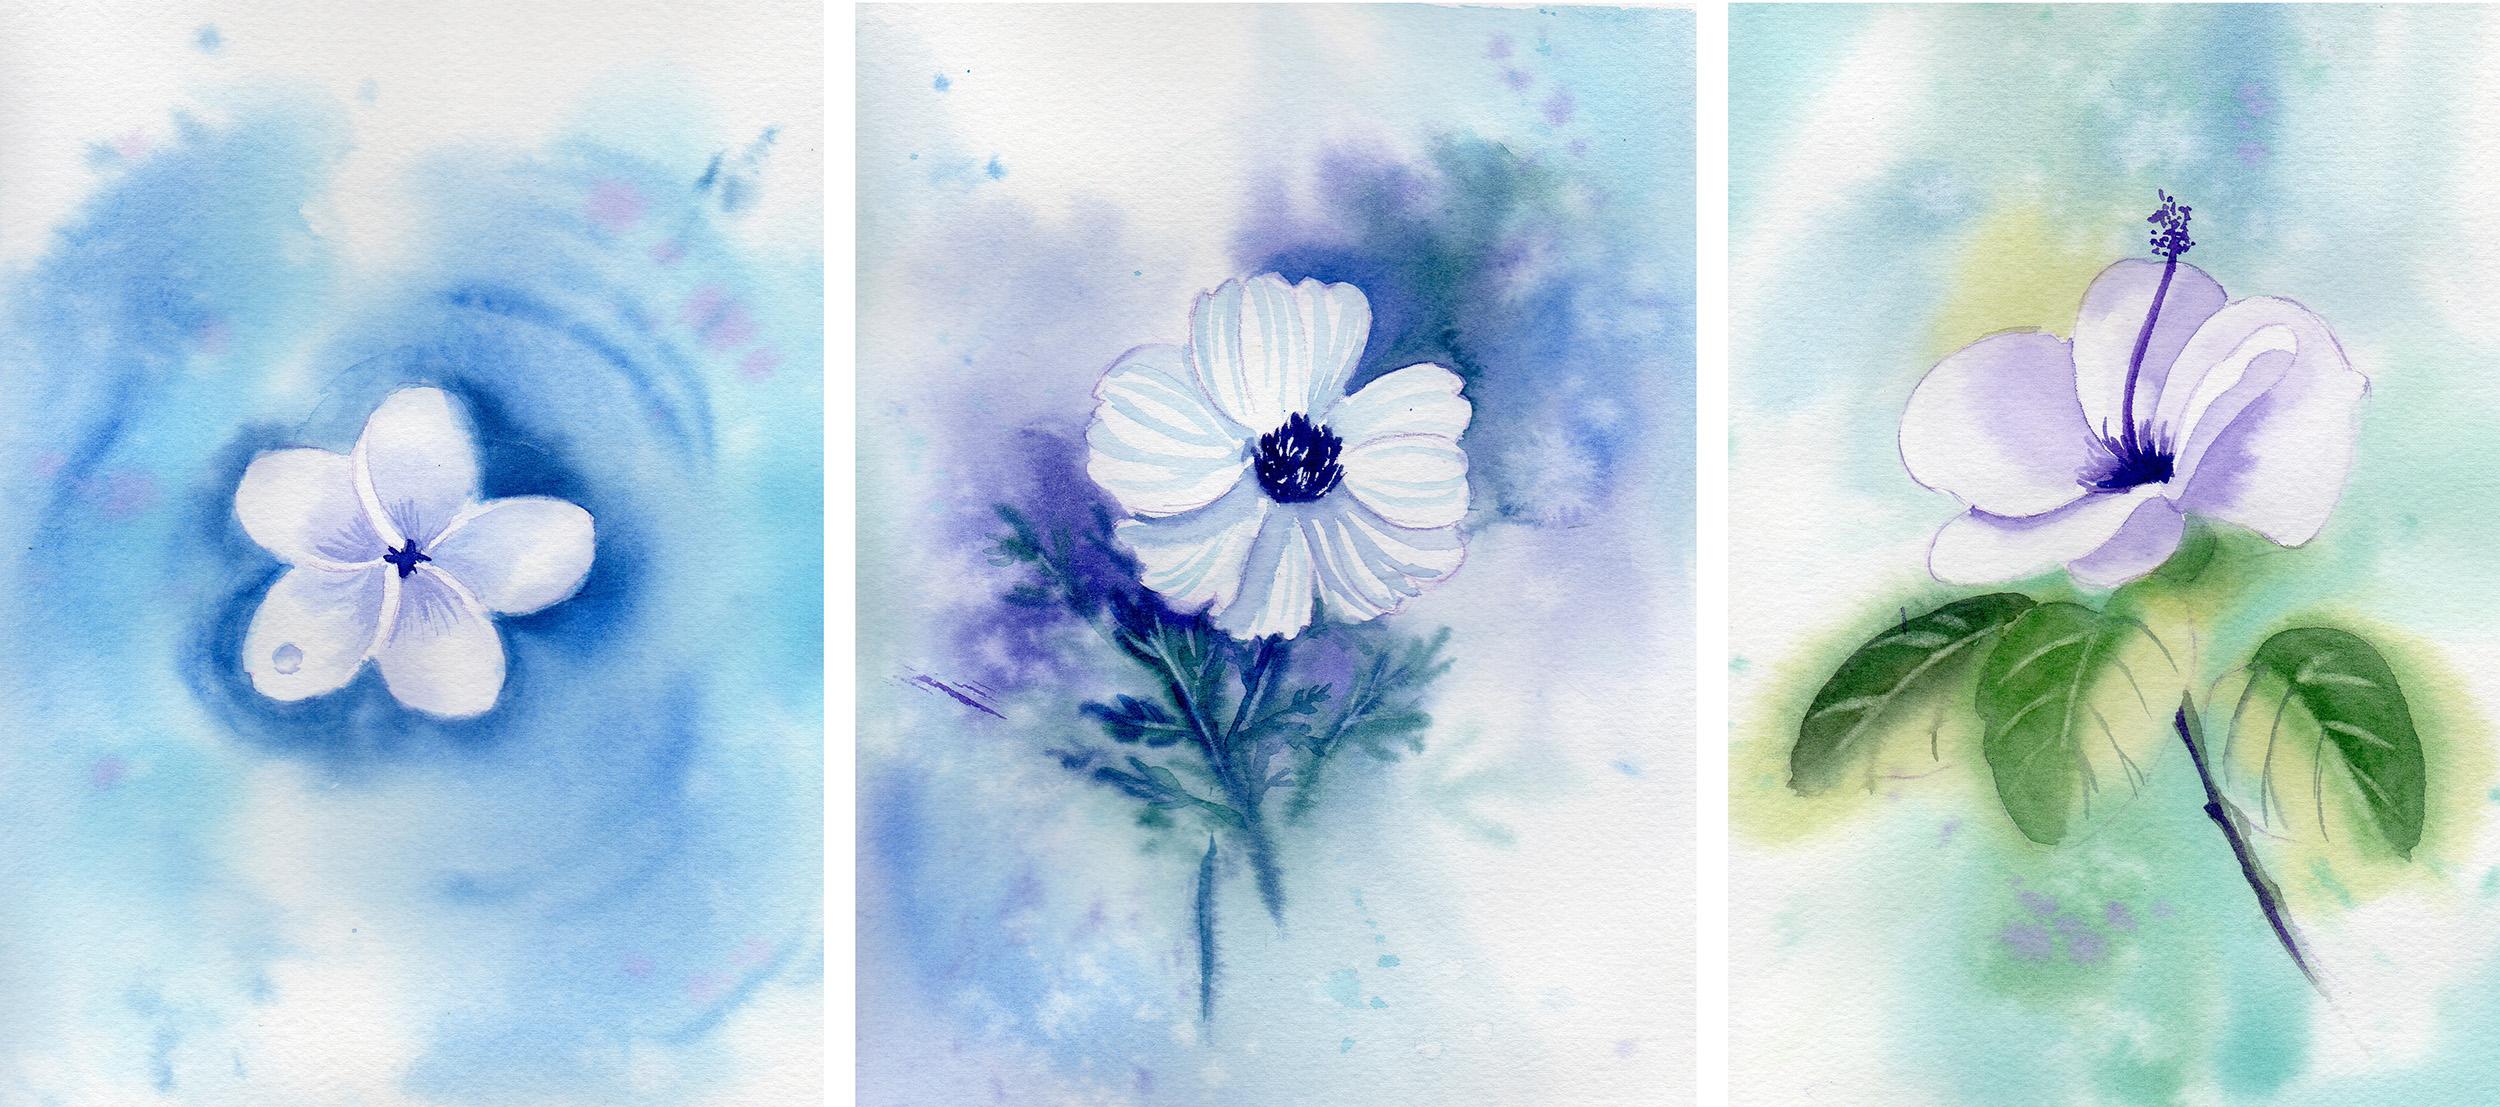
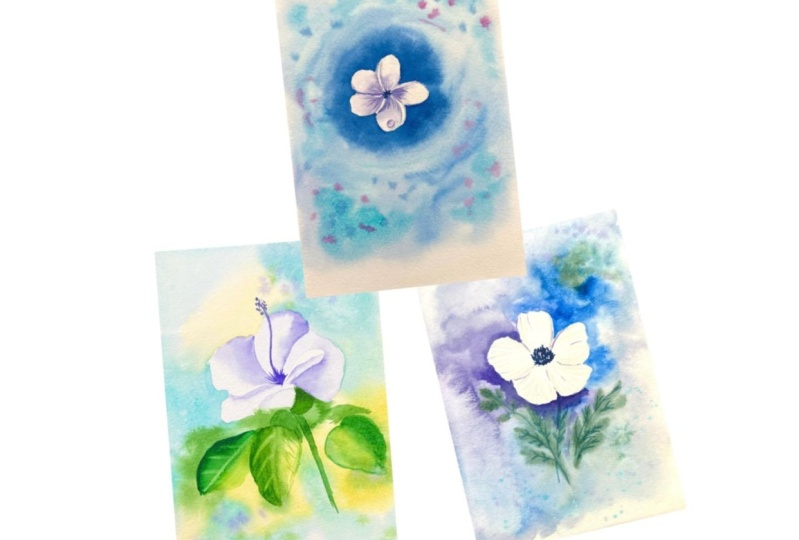
painting with others. Here we are. In this class, we will paint and finish
three floral paintings, aiming for a soft
and dreamy look. We'll begin with a quick
exercises to review watercolor techniques that are essential in this
painting style. We'll learn how to paint white flowers without
using white paint. Observe the wetness of the
paper to avoid mistakes. In case we did, how to correct them. We'll also discuss how
to properly soften edges to achieve balance
in our paintings. This class is designed for those with enough
experience with watercolor but beginners are also welcome to join the fine, since I will be guiding you step-by-step through out
the painting process. Grab your materials
and let's get started.
2. Class Project: Before diving into
our class projects, I will demonstrate
watercolor techniques to be used in each painting. These exercises are designed
to help you prepare for each project so I highly encourage you to
watch those first. We'll be painting
three white flowers, starting with the easiest one, and increasing the
difficulty as we move to the second, and
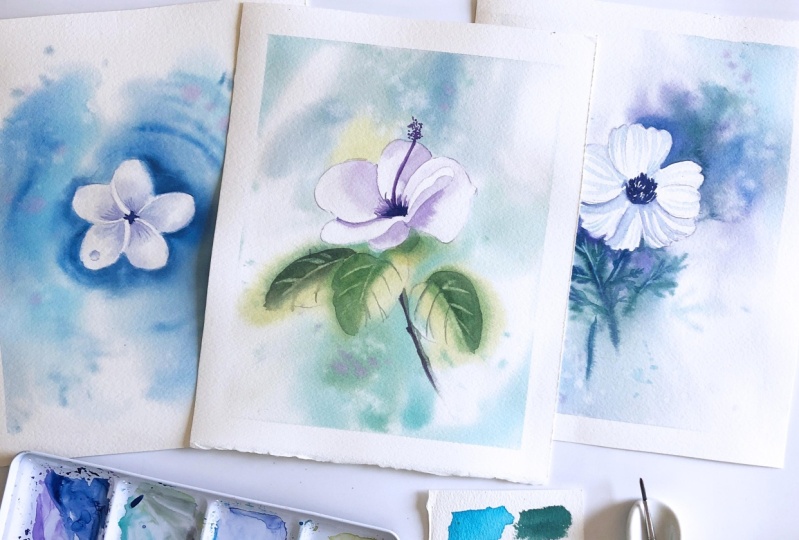
third artwork. You'll need the
following materials. Watercolor paper preferably
100 percent cotton. I will be using the smooth side of my orange watercolor paper. Watercolor brushes. One inch flat brush, a round tip brush, one big and one small, and a flat synthetic brush. This brush is optional. Watercolor paints. These are the colors
that I'll use, but feel free to use
your preferred palette. Water jar. I have this plastic jar and I
keep the middle one clean. Paper towel or rag, pencil and eraser for sketch, and masking tape if you
want a crisp border. I have uploaded a PDF guide with the list of colors, materials, and scanned copies
of the exercises, finished paintings,
and reference photos. Feel free to download that
from the Resources tab. Once done with this class, you can share your
favorite piece or upload them all for
everyone to see. Soon as I'm free, I'll give you feedback
on your paintings. If you're all set, let's
jump into the next video.
3. Technique - Wet on Wet: Let's prepare ourselves by practicing some of the essential watercolor
techniques and painting dreamy
watercolor flowers. We'll start with wet on wet. You'll need a separate jar of clean water for this
exercise and for demonstration
purposes let's cover only a small area here with
direct painting first. Charging my brush with blue and covering half of the
background with that color. I'll have some purple
to blend with the blue to create a two-tone background. What you're seeing right now
is not how I do wet on wet. If you do this on a bigger area, chances are while you're
preparing your second color, the first color in the background that
you laid down earlier, must have started
to dry already. This is how it looks with
direct painting. Not so bad? Next, let's pre-wet the small background area with clean water using
a bigger brush. This, ladies and gentlemen, is how I do wet on wet. You can either prepare
the background area with clean water or with a very watery paint mixture before dropping in
your other colors. Remember to prepare
your background colors before doing the wet
on wet technique. Tilting the paper will
help you see if you have thoroughly wet the area
you want to cover. Since most of our projects we'll be using this technique
for the background, let me show you how it
looks like when the paper is pre-wet with
clean water only. I loaded my brush
with dark blue, then rinse and
loaded with purple, leaving the middle part blank. While wet you can paint in some more shapes and let them
blend with the background. It's important to note though, that I'm using 100 percent
cotton watercolor paper. It might look different
if you're using a paper made with
different materials. Here's wet on wet with a few
lines and splatter marks. Now, let me show you how
I make my backgrounds extra smooth by softening
my wet on wet background. The approach will be the
same with the above example. Preparing the area
with clean water, then dropping the colors to let them blend with each other. But after that, you will
need another type of brush to soften the feathery
edges of the paint puddles. If you are using a hot
pressed watercolor paper, then you will have a
different experience. This extra step is for those using cold pressed
or rough watercolor paper and if you observe a feathery effect when you
use the wet on wet technique, like what you see here. This is a cheap Chinese
calligraphy brush, a generic one, and the
bristles are a bit stiff. It should be dry before using
it to soften the edges. What I'll do is lightly brush between the colors
and you'll see that it further blends the
background colors smoothly. Splatter for some
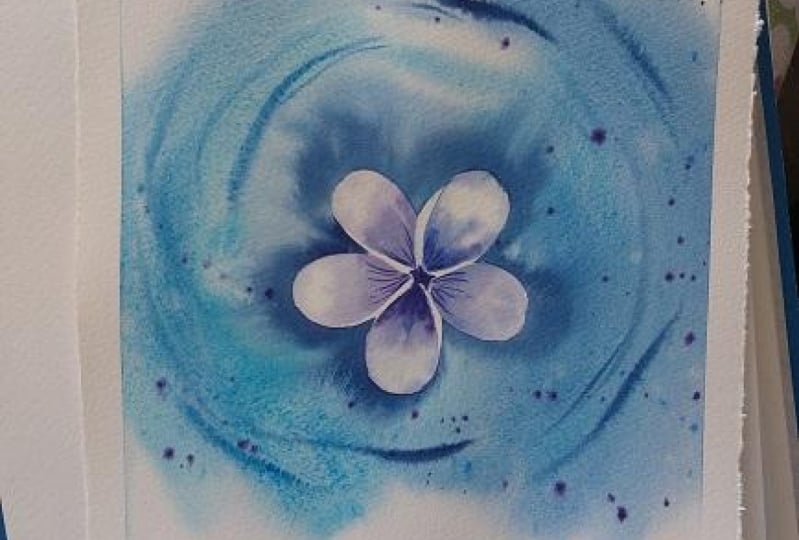
texture and that's how we will create the
background of our first project, this white [inaudible]
floating in the water. Now for the ripples, all you need to do is
load your brush with a thicker paint mixture and draw the ripple lines
with quick motion. The paper is still
wet at this point. You can also tap the belly
of your brush on a rag or paper towel to remove the excess water and
paint those ripples away. That's wet on wet
technique for you. Let's continue with
this mini exercises on the next video.
4. Technique - Damp on Damp: We've seen how to create smooth backgrounds
with a wet-on-wet technique. Now, let's paint blurry but
distinguishable shapes with the damp-on-damp technique. To compare the two, wet-on-wet and damp-on-damp, let's draw leaves with both techniques and
see the difference. We'll try wet-on-wet first. As discussed in the
previous video, I'm preparing my painting
area with clean water first before drawing
in my leaf shape. I am reloading my brush with clean water and brushing
it back and forth, making sure that the
paper is wet enough. Tilting my paper to show
you how shiny it is. Usually the shinier the paper, the wetter it is. So keep in mind that the
wetness of the paper plays an important part
in the difference between wet-on-wet
and damp-on-damp. The other factor is the
load of your brush. I charged my brush with
my blue puddle here. With short strokes, I will draw a leaf shape from
the inside out. If you'll observe carefully, wherever you lift the brush, that's where the paint
spreads outwards. This is how it looks like
when dried completely. The shape is barely noticeable. Now, this is how I do damp-on-damp by observing
three key factors : the wetness of the paper, the load of the brush, and the direction
of the strokes. First, the paper
should not be too wet. Compared to the first example, I only wet the second
one just enough for my paint to be blurry
once I drop them in, less shine than the first one. If you accidentally
put in too much water, all you need to do is blot your brush on the paper towel or a rag and let it absorb the
excess water from the paper. Next, make sure
that the brush is loaded with more
paint than water. You can see that I am reloading
my brush with more paint, but I am not dipping
it on my water bucket. That's the direction
of your brush stroke. We saw earlier how
the paint spreads every time we lift up our
brush from the paper. Instead of drawing
from inside out, let's draw the leaf
shape from outside in. This way, the paint will spread
when you lift the brush, but it will be
hidden on the stems. Continue doing this
until you're satisfied. I will also recommend
that you use a smaller brush when working
with small blurry shapes. Try different brushes and see
which works best for you. This technique is
what we'll use for the blurry leaf shapes on our white cosmos
painting project. Here's damp-on-damp for you. In the next video, let's discuss ways to soften edges and why even bother
using this technique.
5. Technique - Softening Edges: Continuing our mini exercises for the needed watercolor
techniques in painting dreamy florals with
softening edges. When you paint a shape
directly on the paper, it creates a hard edge and
nothing's wrong with that. But if you want to achieve balance and rhythm
in your painting, you might want to introduce
some soft edges too. You can do that by
rinsing your brush clean and scrubbing it on
the area you want to soften. It's like erasing the paint
that's already in the paper, but you will have to
observe and match the wetness of the
shape and the brush. If your brush is too wet, you'll create blooms like this. It's not yet evident, but once this dries, the cauliflower effect, as they call it, will be noticeable. Let me repeat that
once again and show you how not to do it. I painted the shape here, rinsed my brush clean, I did not blot the excess water. Then I'll soften the
other side of the shape. You can already see
the blooms it created. The water from the
brush is disturbing the paint that is
already starting to dry. That's why it happens. Here are the two shapes softened without
matching the wetness. Now, there are two ways
you can successively soften an edge without
creating blooms. First, you can prepare
the area where you want the soft edge to be by painting it with
clean water first, then go ahead and
paint your shape and connect it with the
pre-wetted area. This way, you can lower
the chances of blooms. It's like wet on wet. Now, while this is still wet, you can soften it even
more with a clean brush. The other way is to carefully match the wetness
of both shapes. The colored and uncolored one, but it takes some practice
to get used to it. I've painted the shape
here and I will give the other side a softer
look by using clean water. Since I am not yet sure
how loaded my brush is, I will not go directly
on the shape, but paint water
somewhere near it so that I can check if their
wetness is matched or not. If they are, meaning they have the same shine when
you tilt the paper, then I can connect both and
proceed to soften this part. We discussed wet on wet and damp and damp in the
previous videos, and these techniques
create soft edges. But if you directly
paint a shape and want some parts to be soft, then use this
technique like what we have in this white
hibiscus project. One side of the leaves is
hard and the other is soft. Here's a comparison of
our practice pieces. Let's end this mini exercise
series in the next video.
6. Technique - Lifting: The last technique we'll discuss is what
we call lifting. I have here two negatively
painted petal shape. The one at the top is still wet, and the other one has
completely dried. My favorite brush in doing this method is this
flat synthetic brush. To do this technique, simply scrub your clean brush on the area that you want to lift and pat it dry with a paper towel to let it
absorb the reactivated paint. This is how I do it
with the paint has already dried on my paper. See, the left side of the
petal has a softer look now. But what happens when you lift without matching the wetness
of the paper and the brush? You got it right. Blooms. That's why I prefer lifting once everything has
completely dried. This technique is what
we'll use for all of our three white flowers
in correcting mistakes, softening edges when the
paint has dried already, and adding highlights like
the veins on these leaves. That's lifting for you. We've discussed all the
watercolor techniques we need for our class projects, so let's go ahead and paint a white frangipani
on the next video.
7. Frangipani - Part 1: [MUSIC] Time to apply what we just learned
on our first project. White Frangipani. We'll use wet on wet
on the background and paint around the flower
shape to define it. We won't use white paint. Instead, we'll use the white of the paper and darken the
background to make it pop out. You'll find a reference photo in the Resources tab and yes, we will only use this photo as our guide for the flower
shape and shadows. Specifically, this one. My color palette for
this floral painting consists of manganese blue, cobalt blue, permanent
violet, and royal blue. Color is a very personal thing. Feel free to choose
your own palette. Let's start by wetting the
background with the flat brush beginning from the
outside going inwards. Keep reloading your brush
with clean water as needed and wet the paper to prepare
it for our background. Depending on the weather and the temperature of the
room you're working in, you might need to keep on
wetting your paper even more. As you reach the flower shape, it's time to switch to a smaller brush and
carefully paint around it. If you need to retake
your paper for a more comfortable
angle to paint around our flower shape, then please do so. In case you accidentally painted inside the white flower, don't worry, you can
easily fix that later. Re-wetting [LAUGHTER] the
outer areas once more, since they are starting to dry. Always tilt your paper
to check whether you have covered the desired
area for your background. Or to see if you have
accidentally wetted the areas that you
want to keep dry. With a paper towel pad the
areas you want to keep white. In this case, we want to keep
the frangipani shape white. Since we will use the background color
to define our flower. Keep doing this until the whole flower
shape is dry again. Once done, you can either
start working with the background or re-wet the areas that [LAUGHTER]
you accidentally dried. Yes. It is a cycle. Wet the dry or dry the wet
until you've got it right. Once satisfied with this, we can now start working on our background with a
wet on wet technique. I'll begin with my lightest
color, Manganese Blue. Our goal here is to create a soft background with varying shades of blue
and a touch of purple. The shape of the
background color doesn't really matter
at this point. Let's have fun and drop
our colors as we see fit. Since the frangipani is
floating on the water, I'll make an imperfect
circle shape around it without even bothering
to cover the whole area. I'll try and shed my
brush alternatively with different colors and
drop them on my paper. I made a mistake here and accidentally painted
inside the white shape. But there's a really easy
trick on how to fix it, which I'll demo later. I'll continue working
on the other side of the background with
the same approach. You may also notice that I am quickly working
on my background. It's because during the
time I'm recording this, it's summer and the paper dries quicker than I want it to. To make the flower pop out, I'm making sure
to paint the area closest to it, the darkest. That's what I meant when
I said in the intro, that we'll paint white flowers
without using white paint. We're actually doing the technique called
negative painting, where we paint around the
shape instead of inside it. By making the
surrounding areas dark, we can easily make out
the shape of the flower. With a stronger and
darker blue mixture, I will further define
the white flower shape. This could also work as
its shadow on the water. At this point, you
may want to rotate the paper and work on a
more comfortable angle. Or if you want the
next of challenge, then you can paint like this. I have used this brush
for quite some time now. I already know how
to work with it. Every time I purchase
a new material, I make sure to spend
enough time getting to know what the material
can do and cannot do. I recommend the same for you. Now here comes the handy
calligraphy brush. Using it to further
soften my background by lightly rubbing it on
my still wet paper. It's so addicting to do. But I need to stop before
this brush gets too wet or I will disturb
the background too much. Checking if my paper is
still wet enough for me to paint the ripples. If yours has dried already, then you have to wait
for this to completely dry or use a blow dryer or heat gun to speed
up the process. Then carefully re-wet the
areas where you want to paint the ripples with clean water and using a thicker
paint mixture, draw the ripple marks
with quick motion. My paper's wetness is
still workable for me. I will load my brush with the thicker dark blue paint and draw the ripples with
broken circle shape. Splattering with clean
water and we can leave this to dry to
add the final details. I'll see you in the next video [MUSIC].
8. Frangipani - Part 2: [MUSIC] Welcome back. Once completely dry
you can already see the mistake that I was
referring to earlier. It's time to fix that
using the lifting method. With a clean damp brush, I will likely scrub
off the paint that got into my white flower. This flat synthetic brush is my go-to when doing this technique. Sorry for the autofocus. Anyways, if we don't
have a brush like this, you can use any
brush that you have. Generally the stiffer
the brush is, the easier it is to lift
paint on dry surface. Don't forget to pat it dry
with the paper towel or a rag or the reactivated paint will just stay on the paper. Keep doing this until
you're satisfied. I want some blurry edges
for my frangipani. That's why I'm going around and working
on the whole shape. I prefer correcting
mistakes with lifting on a completely
dry surface. But don't forget that
you can also lift paint while the paper is wet. In doing that, your brush
should be drier than the paper and you have to keep rinsing it to get
rid of the paint. I'm just demonstrating
lifting on dry because it's so much
easier to control for me. Once done with the lifting, my white flower has now
softer edges and I managed to somewhat erase the
background colors that got into my flower. Now it's time to add details
on the flower itself. I'll use wet on
wet technique too. Refer back to the
reference photo as your guide on where to
place the darker color. I will work with each
petal individually, starting with wetting
the petal shape and leaving a narrow gap
between each petal. Then using a watery mixture of manganese blue and
permanent violet, I will charge my brush and drop that lovely blue-violet
color starting from the inner part of the
petal going outwards. Since we're working
on a smaller area, make sure that your brush
is loaded less compared when we were working on the background with the
wet on wet technique. When unsure, you can always
use a scrap paper to see how loaded your brush is or just stop the belly of your
brush on the paper towel. For the next three
minutes or so I will work on each petal
using the same approach. From time to time
I will also drop a slightly stronger
blue mixture at the center or the innermost
part of each petal, where the shadowed area is. If you're getting confused
where to place those colors, just look back at our reference
image to help you decide. I have replaced the
yellow and pink parts on the flower with my preferred
blue-violet mixture. Again, color is a
very personal thing. Your preference towards
color combination is greatly influenced with your
taste and experience. If you feel like using
another palette, please feel free to do so. This is your painting so own it. I used to avoid using reference images with
one color palettes, like yellows and reds. I'm not sure why, but I find it so hard
to work with them. The colors are too bright for me the shadows are hard to
mix or some other reason. Later I realize that
I have the freedom to interpret a reference
photo with my own colors. Instead of avoiding
photos like this, frangipani I use it
as a reference for the shape and form and for
the light and shadows. Another thing I learned from experience is that
I shouldn't hurry. I used to think that when
working with wet and wet, I should move fast and get things right the
first time I do it. But I was wrong if
the paper dries, then I can just remove it. Don't hurry and don't worry. When we're relaxed, we feel
things happening right. Now that you know how
to work with wet on wet or damp on damp and how to observe and match the wetness try to enjoy the
process of painting itself, rather than worry how your
artwork will end up looking. I left my paint to dry and now we're onto the
final details. All that's left is
darkening the middle part of the flower to draw
our attention to it. Adding some marks on
the flower with wet on dry technique or
direct painting. But if you want an
extra challenge, I will spend the last three
minutes demonstrating how I painted the tiny droplets
of water on this petal. I am using the same
blue-violet mixture for the details on my flower, about 50/50 of the manganese
blue and permanent violet, just thicker this time. At this point, you
can also switch to a smaller brush if you find
that easier to work with. This round tip brush is my go-to when adding
details because it holds enough paint and water and the tip is
easy to work with. Time for the water droplet. You can call it a day and
consider your painting done at this point
or work with me. Let's make this
painting more visually exciting by adding
this final detail. What I did here is painted a semicircle for the top
of the water droplet. Rinse my brush and
soften the bottom part. Now I added the shadow below the circular shape that I created and made the
top part darker. I'll keep tweaking this
droplet until I'm satisfied. Here is our white
frangipani painting. To summarize what we did, we started with a light sketch of the flower at the center. Using a bigger brush, we prepared the background
with clean water and switch to a smaller one as we got closer to
the flower shape. We avoided painting clean
water on the frangipani itself and used the white of the paper for the
white of the flower. Using wet on wet technique, we dropped our background
colors Made made the area closest to the
flower shape, the darkest. Charged our brush with
thicker paint for the ripple marks
and left it to dry. With lifting method, we fixed some errors and gave the
edges a softer look. Use wet on wet again to add shadows and colors
on the petal itself. Made the center part darker
and added final details. The droplet is optional for those looking
for extra challenge. Finally, I am
retouching the shape of the flower with the same background
colors I used earlier. I hope you had fun painting
along for our first project. See you on the next one, where we'll paint white cosmos. [MUSIC]
9. Cosmos - Part 1: [MUSIC] We're on to our second
project, a white cosmos. Like what we did with
our frangipani artwork, the background will be
done using wet on wet. The white flower will be
defined with negative painting, and the leaves will be painted with damp on damp technique. Just like the first project, the reference photos colors are different from what I'll paint. You'll find a copy of this
in the resources tab. I will use manganese
blue, and cobalt blue, and I'll mix hookers
green with cobalt blue, and royal blue with
permanent violet, a limited color palette. Here's a simple sketch I
prepared for my cosmos. I didn't bother to draw
the individual leaves, but sketched a simple
guide for them, preparing the background with clean water and working
from outside in. If you're wondering, before, I used to stretch my paper
by wetting it completely and securing it on a thick
plywood with staple wires, but I find that time consuming for small
paintings like this one. So I skipped that step
for these projects. The size of the paper is small, so the buckling is still
manageable for me. But if you want to stretch
your paper using a method that you're familiar
with, please go ahead. Stretching papers
before painting works wonders by keeping
your painting nice and flat and I find it easier manipulating the pigments
while doing wet on wet, and damp on damp techniques. It's optional, and
it's your call. Now, I've switched to my smaller round tip brush
working around the flower. This shape is more complicated
than the first time, but it's really a
good opportunity to practice negative painting. I hope you'll give this a go. Dropping my background
colors now, starting with the lightest one, manganese blue, and not
worrying about the shape. Our goal is to make
the flower shapes pop out by surrounding the white
part with darker colors. To make the painting
visually interesting, I will strongly define the lower left and
upper right sides of the flower and leave
the other ones soft. I delight in
different shapes and sizes so I am
deliberately creating a semi-abstract and defined and messy but soft background. Just remember to make the
colors closest to the flower, the darkest for a
contrasting look, splatter here and there for
additional texture too. I will now introduce greens on my painting by drawing some
stems in random shapes. We're still doing the
wet on wet technique. We need to wait for a
little more before we can move the damp
on damp technique. Depending on your
room temperature, you should observe
if the paper is still wet or damp already. I'll drop more background
colors as I see fit and leave whitespaces
for a contrast. Now softening the background
with my calligraphy brush. You can also use hake
brush if you have one or just skip this step
if you don't have any, I just want mine to be
extra soft and smooth. If a bristle falls off during the process,
like this line, just leave it be, we can easily pick that up once the first layer
has dried completely. Going in and defining
the flower shape even more with a
round tip brush. This time, I'm carefully
painting around and refining the smaller shapes
that make up the petals. Splattering blue-violet
here and there, and covering the white flower
with my hand to protect it. Time to paint, some
blurry leaves in the background while the
paper is still damp. If you watched the
exercise videos earlier, you would recall some
factors to keep in mind when doing the
damp on damp technique. First, the paper should
be damp and not too wet, second, the brush
should be loaded with thicker paint
and less water. It will be easier too, if you use a smaller brush, like what I'm doing
here, and lastly, it will look better if
you paint from outside in to control the spread of the paint every time
you lift up the brush. I do tend to forget
that last factor, but I'll just let it be. Check the reference photo as your guide for the
leaf structure. I'm not making an exact copy of the leaves, and that's okay. As discussed earlier, this technique does
require some practice, but it's not impossible to do. I think the material
of the paper also plays an important part. When I was a beginner, I only used student grade papers made of wood pulp
for over a year, and there was a dramatic
difference when I shifted to 100 percent
cotton papers. Don't get me wrong, I'm not forcing you to purchase 100 percent
cotton papers, especially if you're
just playing with watercolors and testing whether it's a medium for you or not. But if you've been painting
for quite some time now and is considering to
upgrade your materials, paper should be the
first one on your list. Speaking from
experience because I made the mistake by
upgrading the paint first, then my brushes, and paper was last. There was a huge difference
with my paintings when I upgraded the paper and
I thought to myself, it's not me, it's the paper. In case you are using
watercolor papers made from different materials and see that it's not performing like
the one you're watching, don't be discouraged just
keep on painting and practicing and if you get a
chance to try cotton papers, that's when you'll
know if it's you, or it's the paper. While waiting for the
background to dry naturally, I can work on the middle
part of the flower. With quick short strokes, I will build the shape that I see in the reference photo, just replacing the dark yellow with my dark
blue-violet mixture. Splattering some more
on my damp paper, and we can leave this
to dry and finish our second project in
the next video. See you.
10. Cosmos - Part 2: [MUSIC] Welcome back. In the last video, we finished our background, blurry leaves and
middle of the flower. Let's wrap up our
second project and add our final details on
this cosmos painting. I will start by
softening the edges of my petals by lifting, same approach with
our first project. Clean your brush, blot the
excess water on a rag. Lightly scrub on
areas you want to lift and part the
reactivate the paint, dry with paper towel. Keep doing this until
you're satisfied. I am often asked what I do with those pencil marks that are
still visible on my painting. I always answer with, I just let them become part
of the final painting. Sometimes I will erase some of those lines so that only
a light sketch remains. But for demonstration purposes, I'm leaving it here so
that you can clearly see what I'm doing and
which part I'm working on. Having planned that those
pencil marks will be visible and become part
of the final painting, I used a purple lead for
my mechanical pencil, but that's only a personal
preference, and it's optional. There are, however, some
graphite pencils that don't react well with water and you'll end up
with messy smudges. Better test it out
on a scrap paper first and see if
it smudges or not. Once done lifting the
edges of my flower, I will now lift some veins for highlights using
the same technique. That's why I prefer this
flat brush in lifting on dry paper because it's so easy to lift thin
lines when needed. Checking the reference photo, those highlights
aren't really there, but I thought it would
make the painting look more interesting
and complicated. Here we are, adding those white marks by
lifting up paint. Next, let's paint the
shadows on the petals with a very watery mixture of
manganese blue and blue violet. About 80 percent of manganese blue and 20
percent of blue violet. Nothing fancy here. We're just painting the
shadows directly on our paper and using their
reference photo to decide where to place them. Make the shadows as
light as possible so that the flower is still
lighter than the background. The higher the contrast is, the eye goes first to that area. By making the center
of the flower the darkest and surrounding
it with white petals, when someone looks
at this painting, they should be drawn to
the center of the flower first and move their eyes
around the painting. One is the trick to check that is by grabbing your
camera and changing the settings to black
and white and see if we can still make out
the flower shape or not. I'm showing you the
finished version of this painting in black and white to check if we can still distinguish if it's a
cosmos flower or not. It looks like one, doesn't it? I'll continue working on this shadows until the petals
are separated by them. You can also soften the
edges with a clean brush. How are you feeling about
your painting so far? Any lessons learned? Are you getting excited
to see its completion? One thing I like reminding my students is
that they can only compare their art works
with their old paintings. Not with somebody else's, not even with my own version. You can only measure your
improvement by looking back and see how you did and how your art journey
is moving along. Paint, experiment and
remember what happened. You will develop your
own painting style if you never stop trying, practicing, and enjoying
the painting process. Hold on and let's finish
this project together. I did check this painting by taking a photo and changing
it to black and white, and then I realized
the background is not dark enough to make the flower
the center of interests. I will retouch that by doing the same approach we did
with the background earlier. Wet the area first
with clean water, drop your desired colors
and work with wet on wet. To make this painting
visually more exciting, let's add contrast to that
blurry leaf shapes by painting some defined stems
and leaves with hard edges. To summarize what we did, we started with a simple
sketch of our cosmos, prepared the background area for the wet on wet technique. Avoided the flower
shape and painted the background randomly using the colors that we prepared. Splattered for texture using our background colors and
sometimes clean water. Painted the center of the flower while waiting for
the background to dry a bit. Using a smaller brush
loaded with thicker paint, we drew the leaves with the
damp on damp technique. Left the first layer to
dry and lifted paint to soften edges of the petals and add highlights on the stems. Painted the petal
shadows wet on dry. Retouch the background
and made it darker so that the white
flower pops out even more. Now, painting some
more leaves and stems wet on dry to contrast the
blurry ones in the background. Here's our white
cosmos painting. It's a bit more complicated
than our friend Japan project in terms of form and
shape and techniques used. Let's challenge
ourselves one more time with our hibiscus art
project in the next video. See you. [MUSIC]
11. Hibiscus - Part 1: Last project. You're doing great
so far so let's end this class with our
white hibiscus painting. The background, as usual will be done with
wet on wet technique. The leaves will be softened and the veins will be defined
with the lifting method. You guessed it right, the reference photo will be
used for the form and shape, but I will not copy the
local colors on this image. For our limited palette, I will use cobalt blue
and permanent violet, olive green, and a mixture of that with manganese
blue for variation. [MUSIC] Here is a simple sketch and a scanned copy of this is available in the resources tab, so go ahead and download
that if you haven't already. Let's start with our
wet on wet background. Using a big flat brush
to cover larger areas faster and we'll switch to a smaller one once I
reach the flower shape. [MUSIC] If for some reason you find it hard to see the clean water that you're using to prepare the
background area, you can try painting it with a very watery colored
mixture instead. Say cobalt blue
with lots of water. That way, it's easier to
see the areas that you have already painted and prepared for the wet on wet background. The color that you
will use however, should be a part
of the background. [MUSIC] This step
requires patience, especially if you have
to keep reloading your brush and rewetting the background area
due to the weather, or hot room temperature, but the result is
very satisfying. Another way to make things
easier for you is to rotate your paper as you work
closely on the flower shape. Also, don't forget to prepare the
background colors ahead, for a faster application. Let's start coloring
in our background. I'll begin with olive green this time and cover the area
where the leaves will be. Don't pay too much attention on the shape of the background, we will define the leaves later, once we apply a second
layer of paint. [MUSIC] I will also use that same color
on other parts of the background for
harmony and unity. Then, I will charge my
brush with other colors and have fun covering the
background area randomly. Be mindful though,
when you're close to the flower shape and be
careful applying paint. Make sure to paint around the hibiscus flower
shape and not inside it. My background looks
messy at this point, but I won't worry
about that too much. As long as I use a limited color palette and
make the dark parts dark, light areas light, it will all make sense later. I also keep in mind
not to overwork my background or it will
not look fresh anymore. [MUSIC] Splattering for texture and protecting the white
flower with my hands. I notice that the top left and lower right parts are too black, so I'll cover them with more
of my background colors. [MUSIC] Now I'll grab my calligraphy brush to soften
the background even more. Again, this is optional. If you want a softer blending
for your background, you can also use the
smooth side of your paper, or try using a hot
pressed watercolor paper. You may also try using a
clean brush and work on those areas where it's
too feathery for you. Splatter with clean
water to create intentional looms and add
texture on the background. It just makes the painting look more interesting,
doesn't it? Now, with a darker
green mixture, I'll paint the dark
side of the leaves. You can observe the
reference photo to give you an idea which side is
dark and which is light. The paper is somewhat
damp at this point, and I'm charging my small brush with a thicker
paint consistency. You can consider
this damp on damp. While waiting for the
background to dry naturally, we can paint the center
of the flower with our thick permanent
violet mixture. I am following the pattern as I see in the reference image too. [MUSIC] With the same color, I will splatter some more and since my
paper is still damp, it creates soft edges. Leave this to dry, and let's finish this
project in the next video.
12. Hibiscus - Part 2: [MUSIC] Welcome back. So happy to see that
you are challenging yourself with our last
painting project. Here's where we left off
from the last video. If we have been working along
with me from Project 1, you know what to do next. Soften edges with
the lifting method. There might be some colors
that are hard to lift. If you notice that
you are having difficulty removing
paint from your paper, you might want to
check the color chart of the watercolor
brand you're using. Brands like Daniel Smith, Winsor and Newton,
ShinHan, Holbein, and other big companies
provide charts on their website with ratings
for the staining power, light fastness or permanency,
transparency and opacity, granulation, intensity, and whether it is
easy or hard to lift. Here's a sample from Holbein. Most of the colors I'm
using here are from them, except for olive green, which is from ShinHan. Here they show you how to read the watercolor
packaging and they also have a legend for
the properties of each color. Let's check manganese blue. It has three stars for
permanency and it says ONE, which means it's opaque, non-staining, and
an easy lift color. What about permanent violet? Two stars for permanency and
labeled TNE or transparent, non-staining, and easy to lift. That's a useful chart when deciding on your
colors, isn't it? Referring back to the
reference photo as my guide for the
shadows on my petal. Instead of lines, we will use these shadows to separate the flower petals
from each other. We'll paint the shadow first
with permanent violet, rinse our brush, blot
the excess water, and soften the edges. Or if it's easier for you, use wet on wet instead and
work on the individual petals like what we did with the white frangipani
painting, our first project. Remember that you have
to match the wetness of the paper and the brush to avoid backgrounds or blooms
before softening an edge. Another option though is for you to paint the
shadows directly, wait for them to dry completely, and lift the paint. If in case, upon checking
the color chart of your watercolor brand you used a color that is
considered hard to lift, you can let the water settle in the paper first and
moisten the pigment, then proceed with working
your brush over that shape. I hope that helps. I'll continue working on my
shadow shapes while observing the reference image to help me decide where
to place them. If like me, you're using colors different from the
photo itself and find it distracting to use the reference image because
of the color difference, then simply turn it into
black and white so that you can focus on the lights and darks instead of
the local colors. Add more paint where
it's supposed to be darker and enjoy the
process of softening edges. This technique can be very
challenging at first, but once you have enough
experience with it, I swear it is quite
a bit addicting. I used to paint with
hard edges only, especially when I was just a watercolor beginner but when I encountered
this technique and gave myself enough
time to practice and master it is truly
satisfying to do. Using both hard and soft edges, gave my paintings a
balanced look and made them more interesting
and exciting to look at. I mixed some of my green
with cobalt blue for a darker tone and I'll start
working with the leaves. I'll paint half of
the shape directly, then soften the other side
using a clean, damp brush. I will do the same
for the other two. Our painting is finally
taking shape now and the background looks
soft and not messy anymore. I'm so excited to finish
this one with you and hope that as you're
working on our projects, you are relaxed too. Just like me when I was
filming this class. No need to hurry. Do not worry and finish
what you started. Watercolor paintings
sometimes look better once they
have already dried. The first layer may not
look appealing but it's better if you finish a painting rather
than perfecting it. Finished, not perfect. That's what I used
to remind myself of when I was starting to
paint full compositions. I think it was only on my second year with
watercolors when I finally had the confidence to paint a full composition with
backgrounds and foregrounds, and painting it on my own using the techniques
I learned from books, tutorials like this,
workshops and seminars, and lots and lots of
experience and mistakes. I was painting veins using
the tip of my brush. This is also one of
the challenges I had to get through
with watercolors, applying just enough pressure on my brush to paint thin lines. Oftentimes I will
accidentally paint thick ones and it's
so frustrating, especially when you're
nearly finished with your painting and all that's
left are final details. If you want to use
watercolor pencil or switch to a liner or smaller brush to
achieve thin lines, then please do so. I'm now painting
the stem directly and softening the
edge for contrast. Charged my brush with
permanent violet to paint the pistil that
contains the stamen, stigma, and style of the hibiscus flower
and we're nearly done. You can do it. To
summarize what we did, we started with a simple
sketch of our flower, prepared the background
area with clean water. Using wet on wet, we painted the background. With a limited palette, did damp on damp for the leaves and splattered
paint for texture. Painted the center of the
flower with our darkest color. Left it to dry and lifted
paint for softer edges. Painted shadows on the petals. Defined the leaves and
softened the edges. Added final details and
now I am lifting paint again from the leaves to add highlights and define the veins. When doing this, make sure
that the painting has completely dried or
you'll have blooms. Here's our last project. Hope you had fun. I'll see you on the next video for suggestions on
what to do from here.
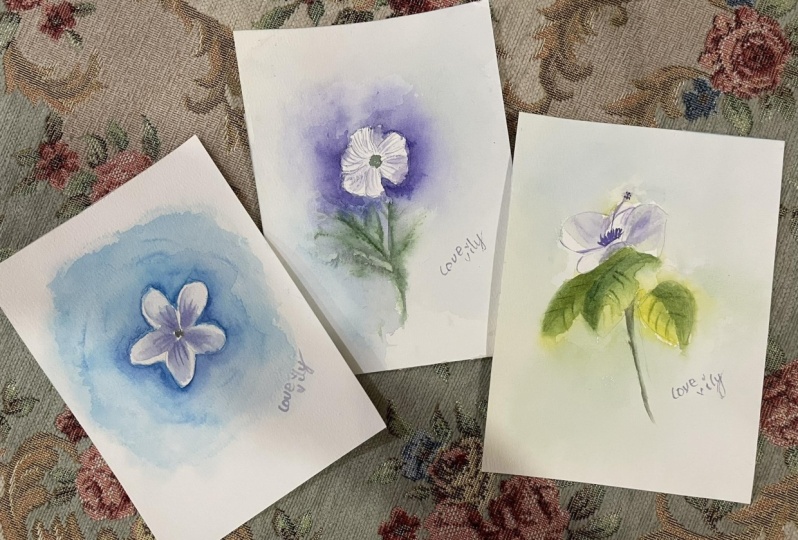
13. Before You Go: That was awesome. Whether you just
finished watching the whole class and
plan to paint later, or you painted along and create your own version of
a white flowers, hats off to you. We've practice three watercolor techniques that would help us create soft and dreamy
looks for floral paintings. Wet-on-wet for
smooth backgrounds, damp-on-damp for blurry but
distinguishable shapes, and softening edges for a
balanced look in our paintings. We also learned how to
observe the wetness of the paper and the importance
of timing to avoid blooms, correct mistakes, and produce dainty appearance for
our floral artworks. Working with a limited
palette was fine. We only used a few colors, but the results are
still a static. Now that you know the
watercolor techniques needed to create these dreamy and
soft painting style, you may want to try painting
white flowers on your own. I have included some photos which you might want to paint, but feel free to pick
your own reference photo. These techniques also work well with still life subjects, abstract paintings,
colorful backgrounds, and even atmospheric landscapes. I look forward to seeing and appreciating your versions
of a white flowers. Don't forget to upload them
in our projects gallery. A review is greatly appreciated to help me
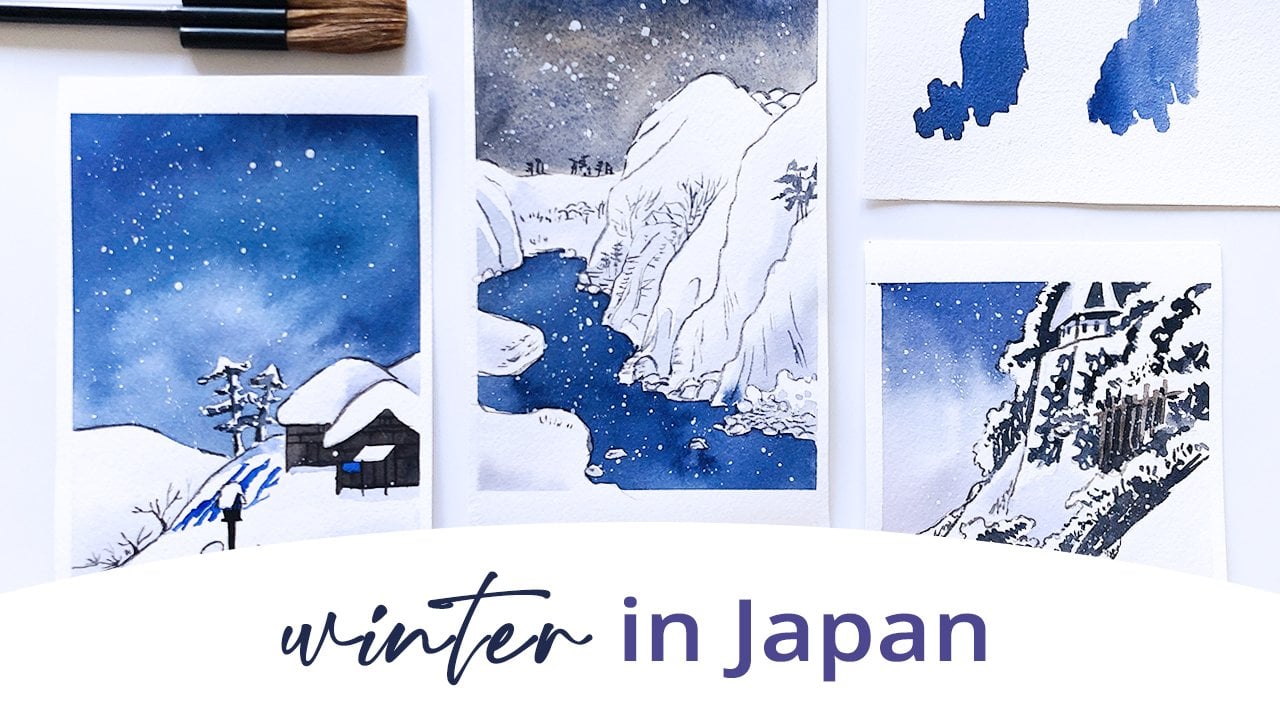
improve my classes. You may also try painting
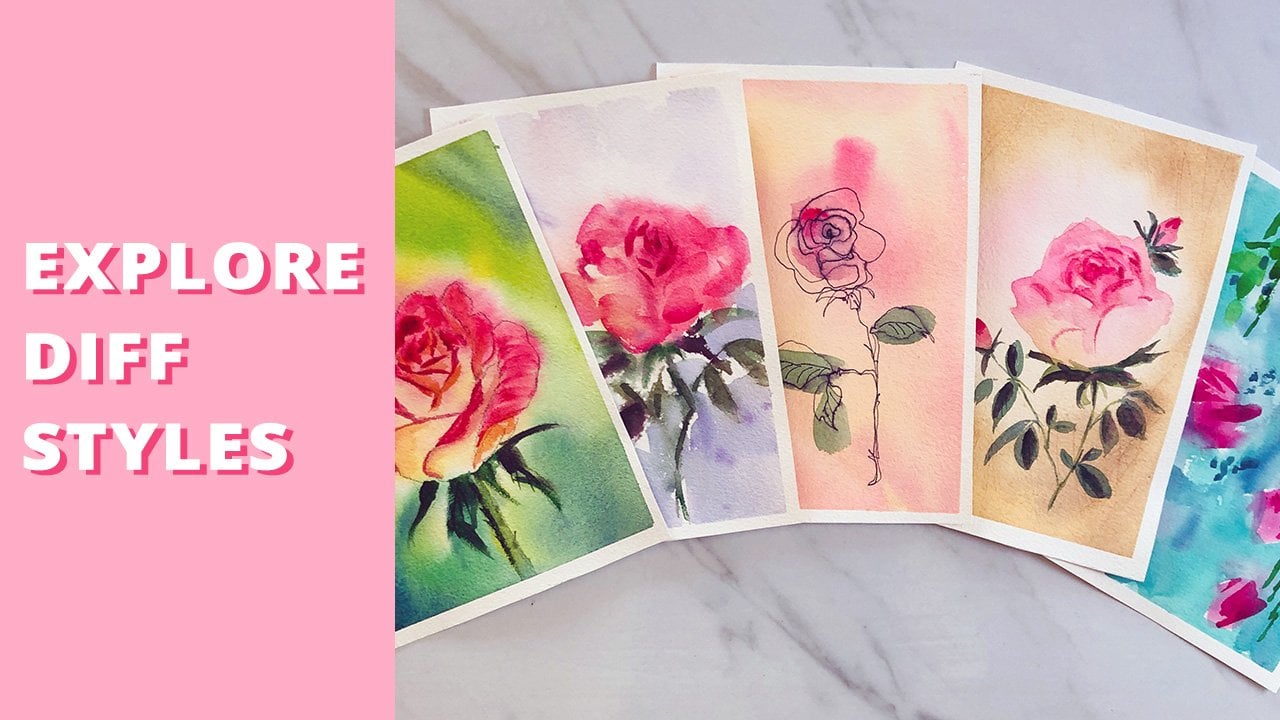
these enchanted forests with negative painting
technique or try out loose and
expressive florals. Hope to see you in my
other classes too. Thanks so much and may our artwork bring more
color to this world.
 Bianca Luztre, Watercolor, Productivity, Color Mixing