Transcripts
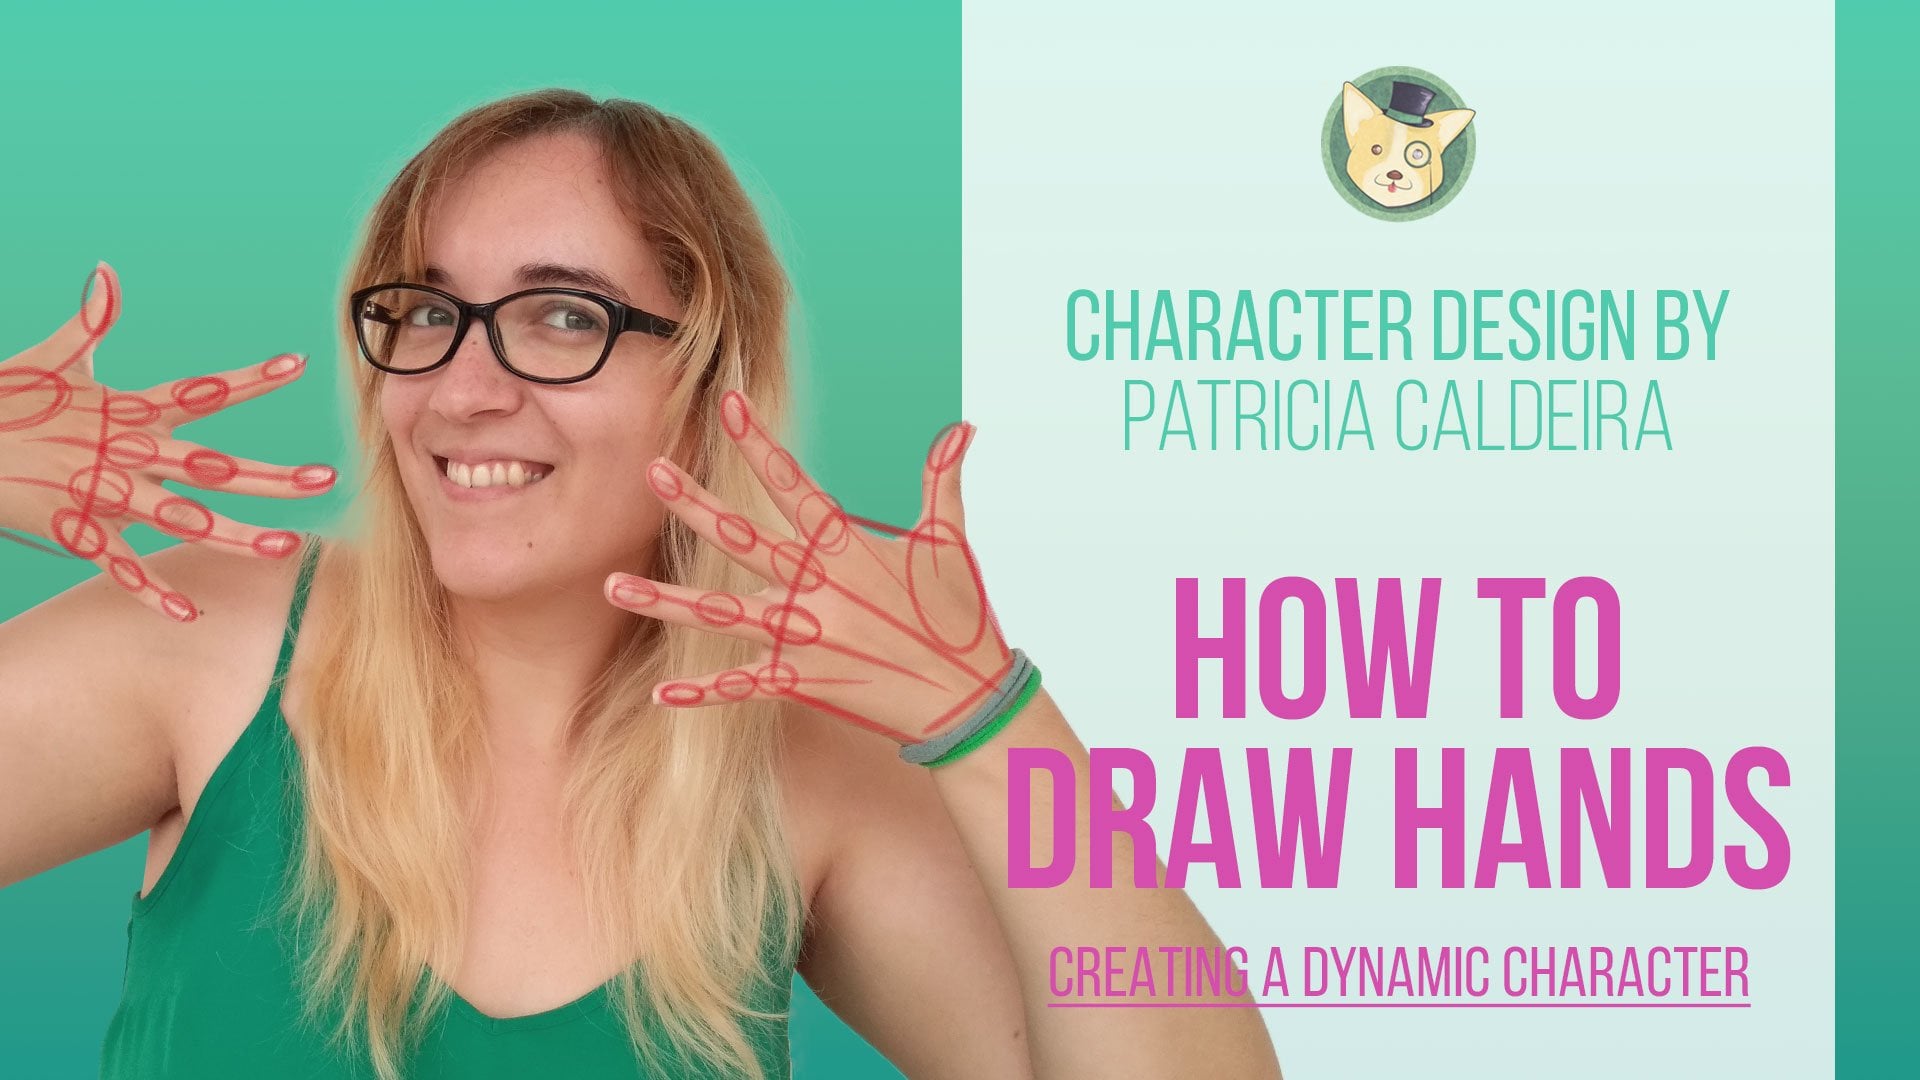
1. Intro: Hi there. Drawing hands
can feel like a nightmare. But it's time to stop
hiding those hands behind your characters and put
them back in the spotlight. Hi, I'm Patrici from Don Korgi, a professional artist
and art teacher. And I'm here to show
you how to draw dynamic hands in action
poses step by step. We'll start with
drawing the gesture of the hand to add extra
expression to your hands. Then we'll break down
the basic shapes, refine them and clean
everything out. Each lesson is designed to
be short and digestible, so you can easily follow
along and practice. By the end of this class, you'll have a collection of dynamic hand drawings
that you'll be proud of. You'll also get
helpful assignments to improve your art skills, as well as some handy
references to give you a boost. Are you ready to get started? Join now and I'll see
you in the next video.
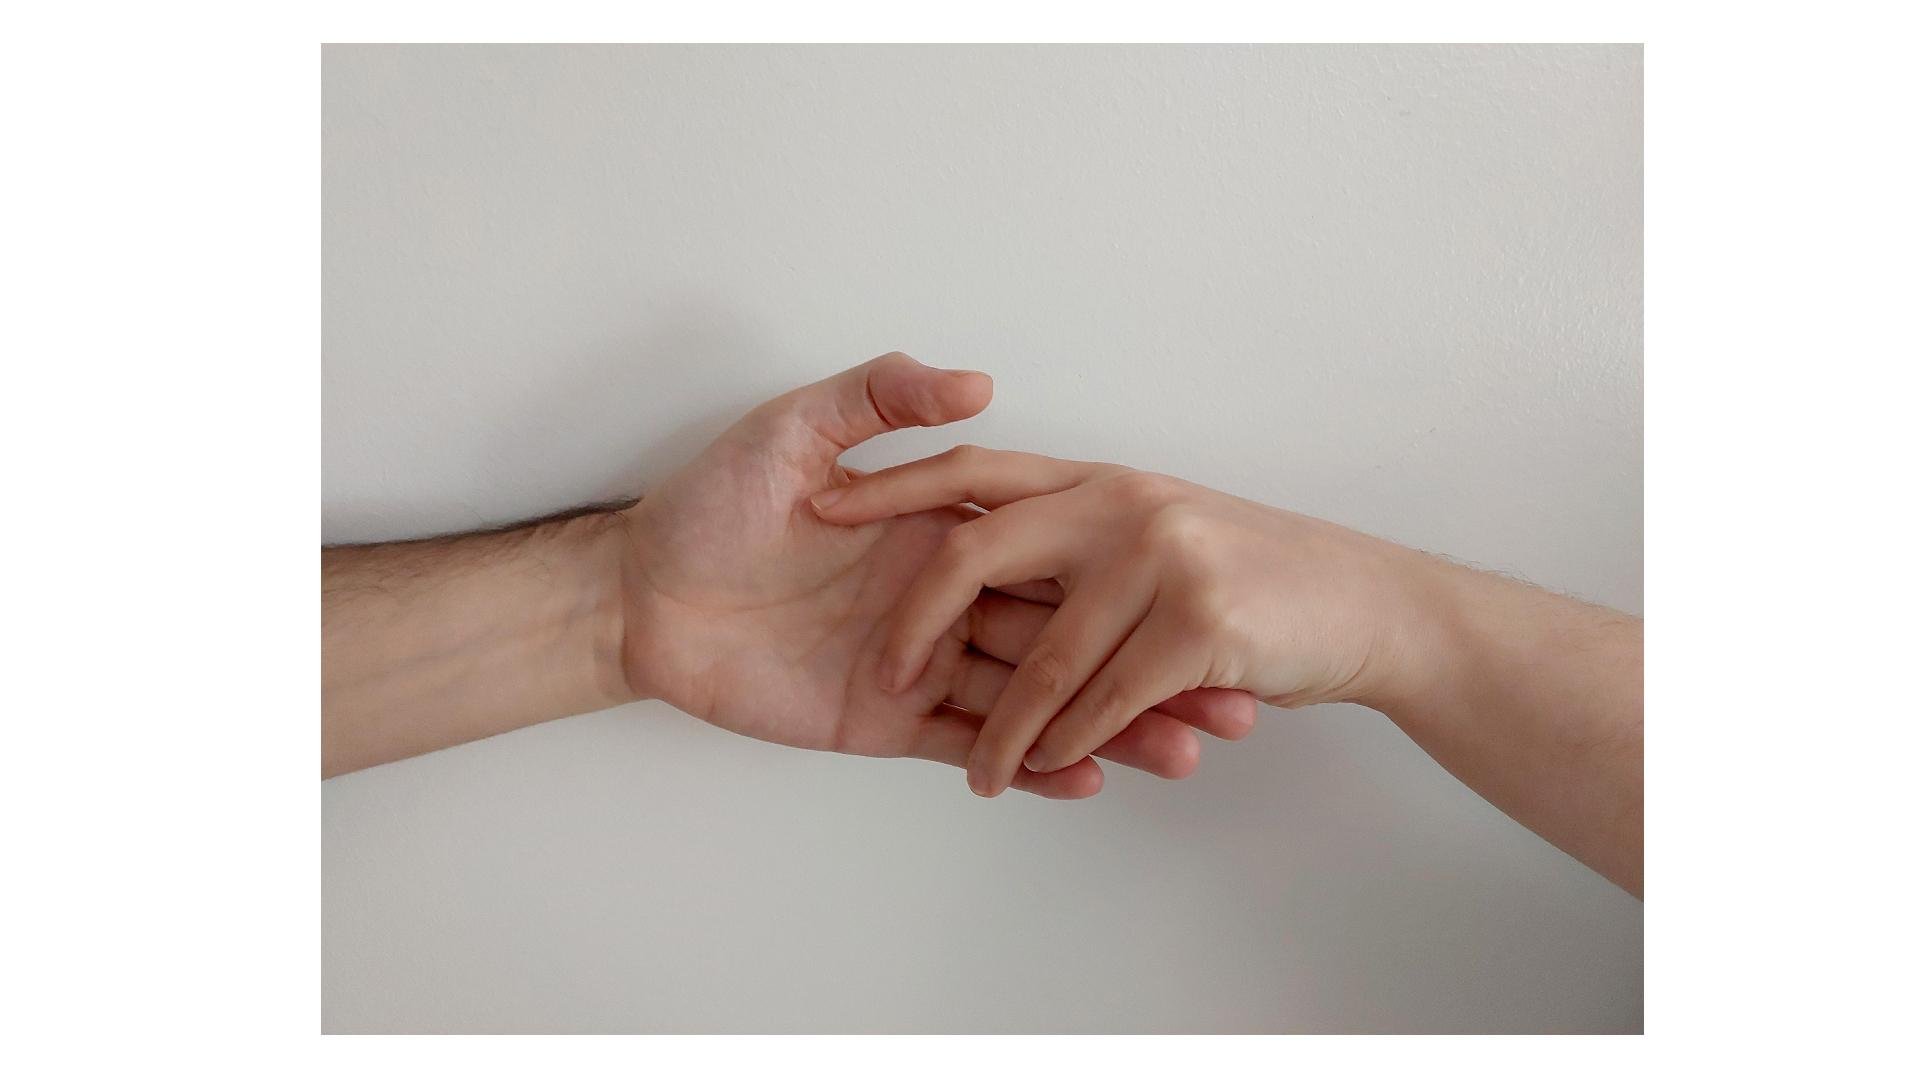
2. References & Resources: Hello, and welcome. Before we start drawing, I wanted to give you
a little something that will help us practice
drawing our hands. I've created a pack full
of hand references. These references are all
portraying different actions, so you can practice hands in different angles
and positions. We'll be using these photos throughout the following videos. Some are more
complex than others. Choose the ones you feel
more comfortable with. For example, if you're
feeling a bit overwhelmed, start with easier poses. Then you can slowly
grow from there and start trying to draw
more complex poses. It's all up to you. Don't forget to
download this pack. Take a good look at each photo and then follow me
to the next video.
3. Drawing The Gesture Of The Hand: Hi and welcome back. Before doing a refined
drawing of a hand, let's first do a quick warm up by drawing a few
gestures of hands. But first, what is
a gesture drawing? To put it simply, it's
a quick drawing of something where the goal is to capture and
focus on the movement. Here, we ignore most details so we can improve at
capturing the movement. This exercise is most often done when drawing the full
body and capturing a pose. However, you can also do it with other subjects
such as the hands. Our goal here is
mostly to warm up. Get familiar with hands
and their movements, as well as their shape. These drawings are not
supposed to be perfect. What matters is that
you draw the pose of the hand and that the
pose is understandable. You can even time your
drawings if you want. For example, 2 minutes per hand is usually a
good number to start, since it allows you enough time to observe the pose and draw it, but also not long enough so
you can get lost in details. It's a good idea to practice this exercise before going for other more refined drawings. This way, you get to warm up. But also get less overwhelmed about what
you'll draw later. By not focusing on details and capturing
a perfect drawing, you get more confident and
relaxed about your art. With that said, follow me to the next video where we'll talk about your
first assignment.
4. First Quick Assignment: Hello, and welcome
back, fellow artist. It's time for your
first assignment. We talked about the gesture of the hand in the previous video, and now it's time to
actually practice that. Again, this is a very quick exercise where you just want to capture the movement and pose of the hand with as few
strokes as possible. Don't focus on details,
only the pose. First, download
the Hefferns pack I gave you if you haven't yet, then pick three photos. And now all you
have to do is draw three quick gestures of
the photos you chose. That's it. If you want, set a timer for each gesture. 2 minutes is usually a
good number to start with. I highly recommend you use a timer so you don't lose
yourself in details. This is it for now. Have fun, and don't forget
to post your gestures, so I can see them and give
you any feedback you need. I'll be doing the exact same
exercise and you can see my demonstration in the next
video. I will see you there.
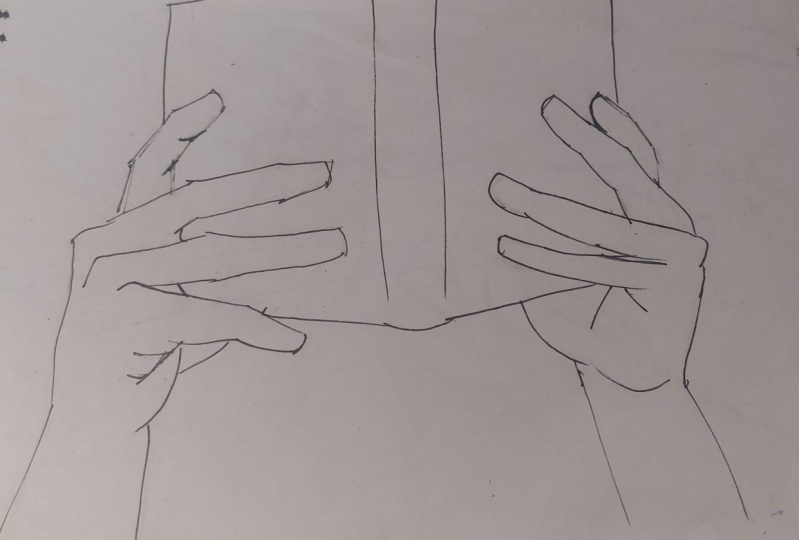
5. DEMO: Drawing The Gesture Of The Hand: All right. Hello
and welcome back. In the previous video, we
talked about your assignment, and now I'm going to
demonstrate how I would go about when
doing this assignment. I have here three references and these are the ones
I'm going to use. Let's start with our first one. First thing I'm going to do
is to lower the opacity. So if you're going to be drawing the gesture of a hand
or anything really, and you're feeling a
little bit overwhelmed and are not very confident
about doing this. One thing we can do is to first find the gesture on
the image itself. Just slower the opacity
like I'm doing here. If you're doing
this traditionally, you can print the images
with the opacity lowered. It's a bit transparent
and then draw on top of those images
with a pencil or a pen. The first thing you're
going to do is to find the shapes on the image itself. For example, in this case, I'm going to go,
maybe not a circle. We can go and do a
bein shape like this, then circle here for the thumb. I like to use circles
for the thumb, and then the rest
of the fingers. For me, this will be it. I think these are good shapes
for a gesture, very quick, just a few shapes and lines, circles a pin shape and
lines, and that's it. When you find those,
you can go to the side. And draw the same thing. Ben shape, it's bigger on
one side than the other, and we have here a circle for the thumb line and another circle for
the thumb right here. Now from here, we
have one finger, then the other one here. Here and our final
finger going right here. I can even go ahead and
draw here a bit of the arm. There we go. Very quick. It might be a bit weird. You can draw shapes for
the fingers if you want. I like to keep things simple. This is just a quick gesture, nothing too detailed, and
it can be weird. It's fine. Same thing when drawing
the human body. Sometimes we can end
up with weird shapes, and that's perfectly fine. Because then afterwards,
after the gesture, this is just a warm up, but you can actually use these
images and work on them, refine them a bit at some shadows and then
details and so on and so on, which we'll be doing
in the next videos. First gesture then, let's
go for the second one. Let's go in, find the shapes. I'm going to say
something like this. Circle for the thumb.
Dumb right here. Now we have here this shape. You can do something like this, or we can do shapes, that's totally up to you. It really depends
on how you like. You can do shapes or
you can do lines. We have our pen. If there's an object
in your image, it's good to draw it
because otherwise, it might be a bit too weird. Sometimes, it's difficult to see the position of the hand if
you don't draw the object, so feel free to draw the
object as well. It can help. Now repeating my shapes here. We got something like this. Top. It doesn't need to look perfect or exactly the same
as the first image you did. There we go. We forgot
the thumb here. There we go, something
like this, and this. Then we got our pan right here. These are just quick duals. You don't need to add any
kind of unnecessary detail. We're just going through the motions of the
gesture of the hand. One finger here, and the
other one here, there we go. I can even finish here my thumb
with a shape. This is it. Fix anything that needs fixing
and go for the next one. Our third image. Here we go two hands. Once again, find shapes. Here we have the hand, we can go to the wrist. Now instead of drawing
all the fingers, you can also just join them together with a bigger
shape if that helps you. Again, we got here our thumb. Then I'm going to say
we got here one finger, and then the big shape for
the other three fingers. That's it. We got
our quart here. Now for this one, let's
see how we can do this. We can do like been shape here. Circle for the thumb, wrist. And then our thumb right here. Now we can do some
shapes for the fingers. Again, we can join some of these together,
something like this. If it makes sense, you can
join the shapes together. This is just a gesture,
nothing too complicated. There we go. Let's start
with the first hand now, repeat our our gestures, the lines we found, and we
got something like this, and then like this. We got cord going
right through here. Now we've got a pin shape
happening in there. As you can see, I'm being
very messy with my lines. I'm just going for the gesture. I'm not focusing on details or on having
a perfect drawing. I just want a gesture.
I just want to sketch. We got these two fingers. Then this one.
That's what we did. Then we have this one here. A There we go. This is it. Three different
gestures, very messy, sure. But the puse is there. Again, you can use a ter if you prefer or just draw
it with other aer. As I'm doing here, it's
totally up to you. This is it, three gestures, just simple shapes or lines. Whenever you're ready,
follow me to the next video, where we'll be
starting to refine our hand drawings.
I'll see you there.
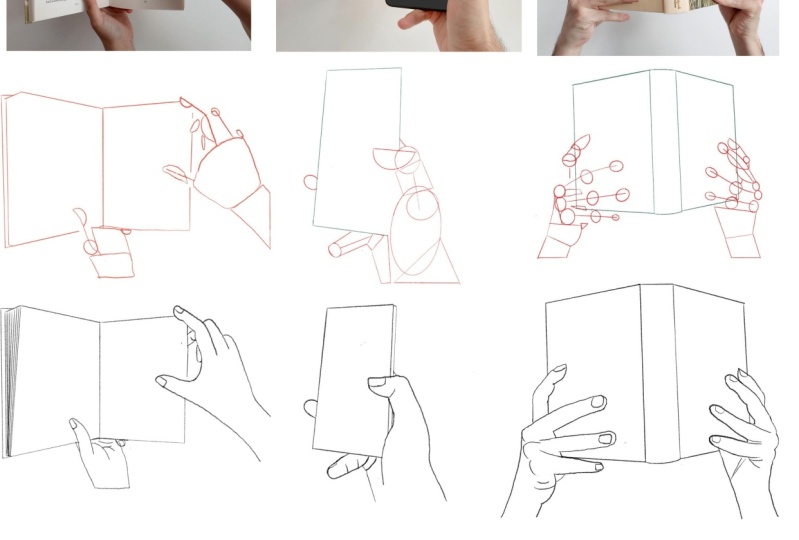
6. Finding Basic Shapes In Hands: Hello, and welcome back. Now that we've warmed up a bit, we can start refining
our drawings, doing something a bit more
detailed step by step. The first thing we're going
to do is the basic shapes. When learning
anything in drawing, it's a good idea to try to break down everything
into simple shapes. This can be circles, rectangles, square, triangles, as
long as it helps you. And it's understandable for you. Again, I'm going to
start doing this. This is still a bit
of gesture drawing, but a bit more complex. We're focusing on shapes here, not just the movement itself, or the gesture itself. I'm going to go over here. And start, let me just lower
the opacity a bit more, there we will and start
finding the shape. First shape, as you can see, it's very similar to
the one we did before. Basically, it doesn't matter
the position the hand is in. The shapes will
probably be the same. You just need to adapt them to the position the hand is in. We always have
this squared shape for the palm of the hand. It can change a bit
depending on the position, but it's almost always
the same shape. Now for the time here, I'm going to start with a circle and then a
hetangular shape. There we go. You can use the same image as before
for the gesture we did, or you can use a new one. I wanted to use a
new one just so we have some diversity
here of hands, so you can see different things. But you can use the exact same
one you use for a gesture. It can be even helpful since you already
have a base there, and then you can start finding the shapes. Let's continue. Here, I'm going to draw a lemon wedge and there
we go part of it is done. Now let's continue. Next finger. We can't really see most of it. But we do see here bit
of its reflection. Next finger, we know it
goes up to here part of it. Then I'm going to draw a bullet shape for
the rest of the finger. Now here things start getting
a bit more complicated, but it's fine, try to
find simple shapes. We can start by a
rectangle again. Then we got here a circle. And we can even turn that circle into a cylinder like this. Now we connect this
to just like this. Now the same thing
for the left finger, circle here and create
a cylinder right here. There we go. We
have here our hand, you can even if you want, you can also draw the object. The hand is grabbing. It's usually helpful if you do. There we go. We found our shapes and now we're
going to practice them. You want to practice
the shapes you found without the help
of the image below it. I'm going to go here to the side and start
trying the same shapes. We had here our square for the palm of the hand,
something like this. It doesn't need to be perfect. The circle for the thumb is
going up and lemon wedge. Here, the direction of the palm of the hand
is a bit wrong, so I'm fixing that. There we go. Something like this. You
don't have to worry about it being exactly
the same as before. Usually, you will not be able to draw the same thing
twice exactly the same. Don't worry too much
about doing that. We just want to find
the right proportions. I'm just drawing the glass. As you can see, I'm not
being too detailed about it, just going with it, just simple loose lines. We got here, our reflection, one finger, then we got
the other one here. I'm always looking at my image. If you see there's
anything wrong, you can just go back to a draw
some draw it to the side. For example, I'm seeing here that the glass is not
really in the right place. I'm going to redo that. Always looking at my
image to the side. Bullet shape right here, and now we know that the
glass let's go through here. Here we have our other shape, goes up to here, the circle. Or cylinder and connect both. Now another circle
cylinder and connect here. It's always possible
to fix your drawing, so don't worry too much. You can fix it next
time if needed. This is it for now,
I've found my shapes. I practice them. Take your time if you want to draw
your own hand. Another thing I want
you to remember is that there are no right shapes. Basically, as long as
it makes sense to you and it works, then it's right. The shapes I find might
not be the you find. Take your time and I will
see you in the next video.
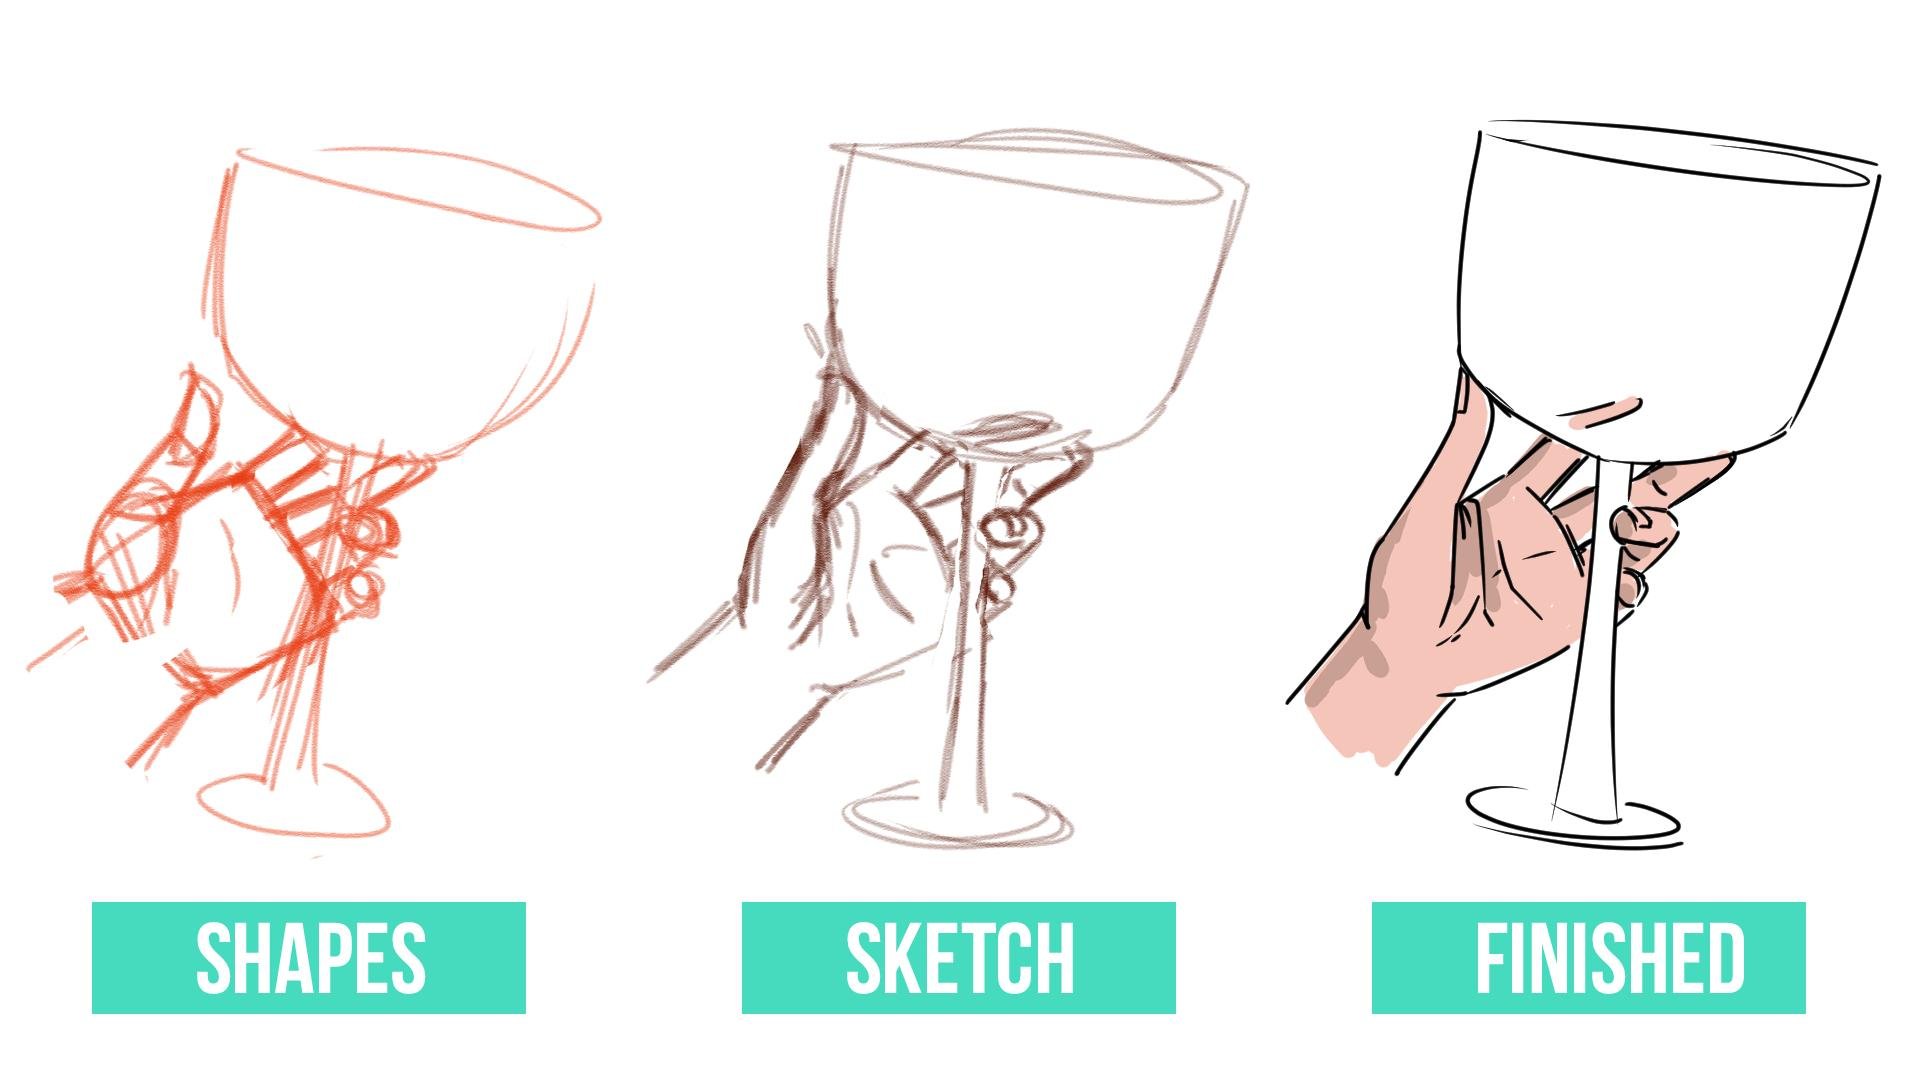
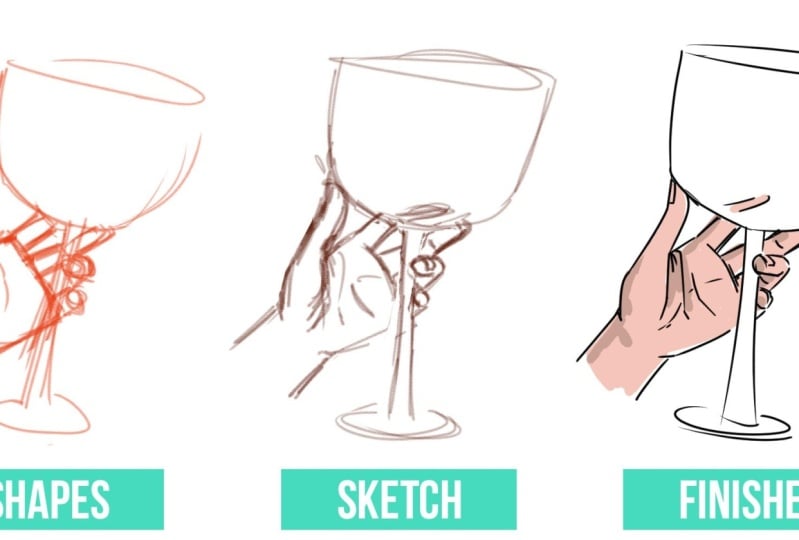
7. Refining Your Sketch & Details!: All right. Hello
and welcome back. We're going for the next
step of drawing our hand, which is a refined sketch. Basically we're going to
take the shapes we did, but start adding more details or start giving it
more of a hand look. I'm keeping my image right here, my reference, so I can always take a look at
it whenever needed. Now I'm going to go in and
start adding some details. I'm going to start
outlining my hand here. I like to start, I just
noticed something. This cup is not in the right
place for this finger. Let's just fix
that very quickly. Following our image
and and not get distracted. Let's
start with the thumb. I always like to
start with the thumb. I don't know why
I feel like it's a very central area of the hand. That's what I like
to start with, but it doesn't need to be
the place where you start. Tom D, going to add here
to one of the wrist. As you can see, I'm still
being very loose with this, can add my nail here. I'm still not being
perfect with my lines. We're just going and adding
any details we might need. Now, next finger. I'm not going to pay too
much attention to the glass. I just want to mostly
focus on my hand here. We have here the ref, the
other finger right there. I just want to
focus on the hand, although it is useful to
have the glass right there, but I'm not going to be
refining it too much. Another finger t.
As you can see, I'm just going over
the previous mines. I think those kind of details, the nail, the lines, those lines we have
on our fingers, where the finger folds now here, we have the same. Now we are missing here, these lines of the hand. They are also very useful to add some more
expression to your hands. Basically, this is it. We're going to go through our first shapes and start
adding some details, more expression to our drawing, and you can see
that it's already a bit different drawing
here, a more refined. We already see a bit more
details in the hand. Remember that it's always possible to fix anything
in your drawing. Even if you're doing
this, Traditionally, it's always possible
to change things around and fix anything
you think needs fixing, like I'm doing right now. This is also the time
that you can fix any kind of mistake you think you did throughout your drawing. This is it for now. Also, you don't need to be super realistic
with your drawings. Personally, I like to just
have my own take of it. I don't like for things
to be super realistic. Of course, it depends on
everyone and their preferences, but I like for my drawings
to resemble the reference, but not being an
exact copy of it. Now all you have to do
is clean up our drawing. Follow me to the next video, where we'll be doing that.
8. Finishing Your Drawing!: All right. Hello,
and welcome back. Here we are. We are almost
done with our drawing of hand. Now it's time to actually
finish our drawing. What we're going to do is take this sketch and clean the line. What I'm going to do is lower
the opacity of my image. Now I'm going to create
a new layer on top, going to pick black
as my line color, but you can pick anything else, and then a brush. I'm using clip studio paint, and I like to use
the G pin for this. But you can use whatever
brush you want. It's totally up to you and if you're doing
this traditional, you can use a pen or you can just refine it
with a pencil its, however you feel most
comfortable with it. I'm going to keep here my image in case I've
missed anything again, just like it happened before. And I'm just going to
go over on my lines. We have the sketch.
All you have to do now is draw it over again
with some clean lines. I like to be very rough
with them, but this time, being a bit less
messy with the lines. Basically, that's it. But it can be fun to keep some
expression in your lines. But again, this is all a matter of preference while drawing. Again, as you can see, I'm being very rough
with the glass here. I'm not focusing on
the glass right now. I just want to draw my head. And this is mostly it. There we go. A hand
holding a glass now. Is it exactly the
same as my image? Not really. There's
always some difference. But again, it's a matter
of preference about being very realistic or just
giving it your own take, but the pose is there. I like to be rough
with these lines. I think it can be very
fun and I think it gives a bit more expression to it
sometimes and more movement. If you want, you can
even go in and add some color to your
drawing. See here. Can very quickly just color it. Now this is completely optional. But if you want to add something
extra to your drawing, it can be fun to color it. Again, I'm being
very rough with it. T sometimes avoiding being perfect with our drawings can be very advantageous
for our drawings. Give some extra expression
to it. There we go. We can even add
some shadows to it. There we go. Here is our hand. From start to finish. If you want, you can just stick to the shapes phase for a while. Just do that with
several hand pauses, and then when you feel
confident in those shapes, you can go for the next phase, which is refining the
sketch, and so on. As always, just take your time. There's no rush in doing this. Whenever you're
ready, follow me to the next video where we'll be talking about
your assignment.
9. New Assignment Time: Hello and welcome back. We just went through
the whole process of drawing hands in
actionable poses. As you can see, drawing hands in different poses can be
a bit more complex. But by breaking it down into smaller steps makes the
whole process much easier. Not only that, but it's also a good idea to practice
the gesture of it first, so you can get more
familiar with the movement. Now, we already practice
some gesture drawing. What I want you to do now is to choose one photo from
the reference pack. And draw that hand
from start to finish, just as we did in the class. Start by finding the shapes, then refining the sketch
and adding details, and finally clean everything
up with new lines. If you want, you can
even color your drawing. Once you're done, you
can post your drawing. I always like to see your
art from these assignments. This is it for now. Have
fun with your assignment, and I'll see you
in the next video.
10. Conclusion:Before You Go!: Hello again. Thank you so much for joining my class on
drawing dynamic hands. I hope you've enjoyed
the lessons and found them helpful in improving
your artistic skills. It's been a pleasure guiding
you through each step, and I'm excited to see how your hand drawings
have evolved. If you've enjoyed this class
and found it valuable, I would greatly appreciate it if you could leave a review. Your feedback helps
me improve and helps other students find the right
courses for their needs. Keep practicing, stay creative, and remember, keep on drawing.
 Patricia Caldeira, Illustrator | Digital Artist | Designer