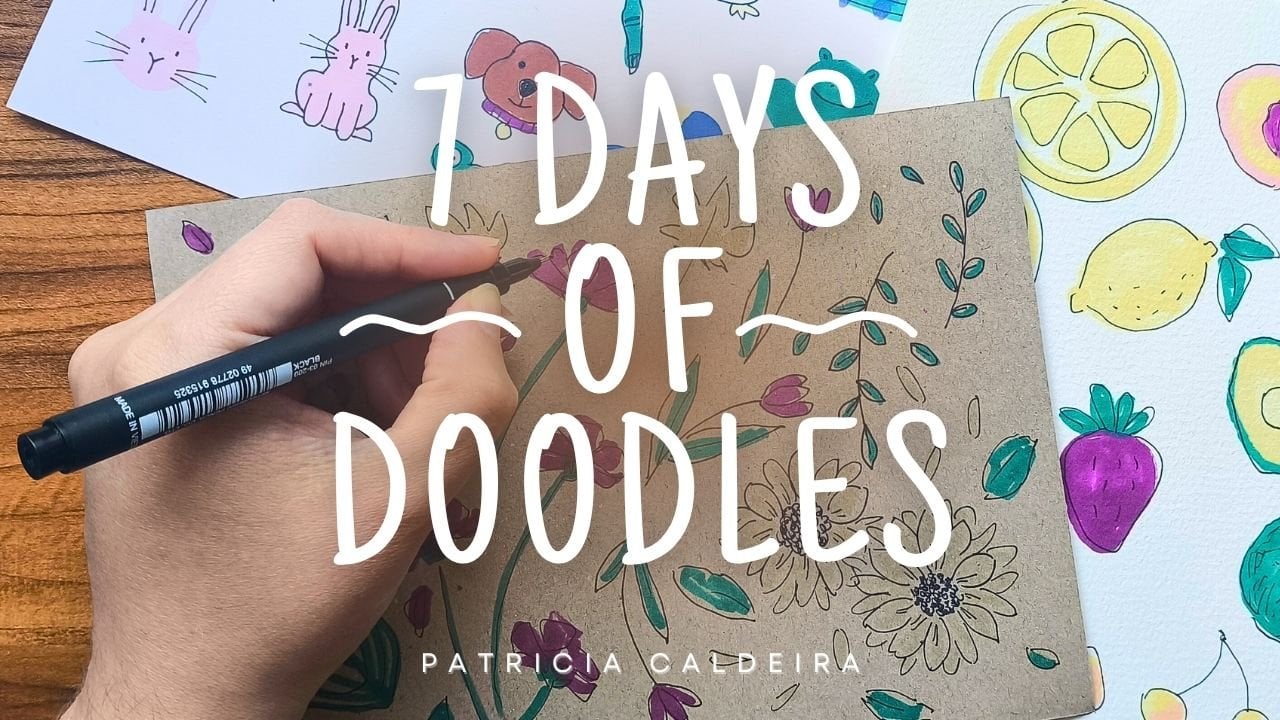
Transcripts
1. Intro: Hi and welcome
character designer. It's time to bring diversity and depth to your
character roster. Characters come in
all shapes and sizes. What truly makes them stand out? Maybe it's a hero's
towering statue, a side kicks compact build, or even a villains
imposing presence. And this class we'll cover all the essential
techniques for drawing different body types and proportions in character design. We'll explore a variety
of body shapes, dive into the nuances
of height differences, and even mix and match different proportions to
create unique characters. By the end of this class, you'll have the skills to
create a diverse cast of characters that truly
represent the world around us. We'll kick off with a fun assignment to get
your creative juice flow. Then move on to exploring different body types and shapes. And finally, put
your new skills to the test by transforming
one of your characters. Throughout the
course, I'll be doing live demos to show you
each step of the process, and you'll get references and resources to help
you improve faster. Plus, I'll be here every step
of the way to guide you. So are you ready to add new dimensions to your
character designs? Join now, and I'll see
you in the next video.
2. First Quick Assignment!: Hello, and welcome. Before we start learning, I want to give you a very
quick and simple assignment. Since we'll be exploring different body types in
the next few videos, I'd like for you to grab your character or draw a
new one if you prefer. That's the character you'll
be using for the next videos. Alternatively, you can download the karate made and we'll be
using through this class. I'll leave it for
you, so download it and use it to explore and
draw different body types. All right, this is it for now. Take your time, and I'll
see you in the next video.
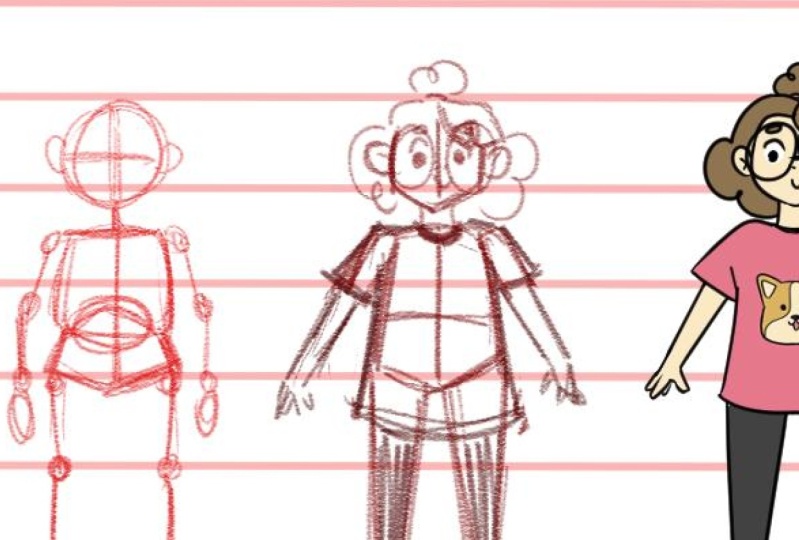
3. Different Bodies - Different Shapes!: Hello, and welcome back. When learning how to
draw any new subject, I think it's always
important to break it into the most simple
shapes possible. If you look at the body, you'll see that you can divide
it into different shapes. So it's easier to find its
proportions and to draw it. However, depending on the
type of body you're drawing, the shapes might
vary quite a bit. It's always good to
have a good variety of curves and straight lines
when drawing the human body. But, for example, thin
bodies have fewer curves, and we tend to use more rectangular and
triangular shapes. For hobby bodies,
it's the opposite. Rounder shapes work really well. It doesn't need to be made
out entirely of circles. A rectangle can
have round corners, and you can do the same
with other shapes. You don't need to limit yourself to regular
and basic shapes. Been shapes or lemon wedges are great to build certain
parts of the body, especially the arms and legs. Make up your own shapes. It's important to remember that there are no wrong
ways to do this. As long as it works for you, then it's the right way. The shapes I used to draw the body might not
be the same for you. So even though I show
you a way of doing this, I invite you to explore
different shapes, so it makes more sense
for you while drawing. When it comes to
drawing and art in general, experimentation is key. So don't shy away from it. All right, this is it for now. Follow me to the next video
where we'll talk a bit about references and
resources for you to use.
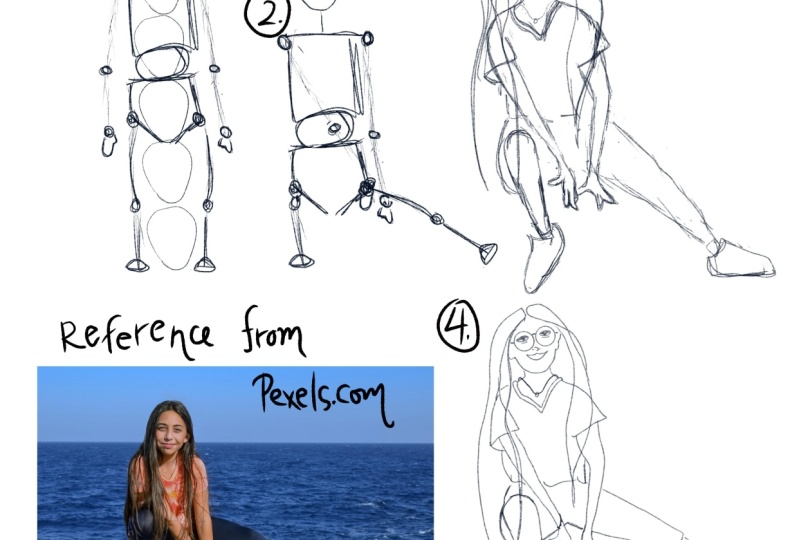
4. References & Resources: Hello, and welcome back. In this video, we're going to very quickly talk
about references. When learning how
to draw anything, it's good to look for
references first. This will help you
have a better visual of the subject and
train your memory. But it will also help
you in your practice. For example, something
you can do with these references is to
draw on top of them. This is an exercise I like to recommend whenever learning
to draw something new, find a good or several good reference photos
and save them. Then lower their opacity. With that done, you
can either print these photos or open them in your favorite
drawing software. Now go over each photo and draw the shapes
you see in them. Break the body into simple and basic shapes as
we talked about previously. By doing this, you start getting a better feeling of the form
and proportions of the body. You're also developing
muscle memory. Explore different shapes, not only depending on the
body type we're drawing, but also try different things and decide what feels
better to draw. This is an excellent way to start learning how
to draw the body. The next step of this
exercise is usually to draw those shapes and practice
them. But we'll get there. For now, the important thing is to find good
reference photos. One place you can do this
is by searching Pinterest. Another option is to go on free stock photo websites
such as N Splash and Pexels. Finally, you can look up different reference
photo models who take pictures so artists
can use them as reference. A few of those are a dark stock, the post archives,
and Joke pub stock. Throughout the class, we'll be drawing different
types of bodies. And for each one,
I'll also give you a template with the basic
shapes and proportions. So you can download
those as you learn and use them while practicing.
This is all for now. I'll see you in the
next video where we'll learn the proportions
to draw a short character. So read your pencil
and I'll see you soon.
5. Drawing Short Characters: All right, so welcome back. We're now going
to start to draw. And the first one we're going to tackle right now
concerns height, and we're going to be drawing or exploring how to draw
a shorter character. So usually an average
height of an adult person, let's say, is around
seven to eight heads. One, two, three, four,
five, six, seven. To draw a shorter person, we have to draw fewer heads. So this is a way of doing it using the
head as a measurement, which is the one I like to use. I think it's the easiest. You just draw the head and
then multiply it until you have the desired height
for your characters. So for a shorter character, you want to go below seven. For example, something
between five or six could be a good height. I have this template available
for you to download, if you want to use
it as a reference, don't forget to
download this one, and now I have here my character and decide
the proportions. Now we're going to draw it. So I can explain to you as well how to do this
and not just an image. So I'm going to go over
here, create a new layer. And the first thing we want
to do is to draw the head, six heads, I'm going to
change here things a little. I have here this
bit of an ellipse. But for my character who
uses rounder shapes, I'm going to try to
draw more of a circle, not a perfect circle, obviously, but
something close to it. All right. So now
I have the head. So as you can see, it doesn't really matter the size of the circle of
the head you're doing. Everything else will then go accordingly to the size
of the head you've done. So I have here the head. Now I'm going to
multiply it a few times. So let me move it here below. To heads, merge them. Now I want to and bring it down. So there we go. I
have all the heads, six heads for a
shorter character. Now let me let me just merge
all of these together. And now at the top, I'm going to start
drawing my character. I have here by the side more or less where
I want everything. So as you can see, the
first head is for the head. Then we have not
really half of it. Usually for an average height, you will go for half of the head and you
would have the neck. Here we just have a
tiny little bit of it. For the shoulder
line and the neck where the neck encounters
the shoulder line, more than one head and
a half for the torso and the waist area, and the last three
heads are for the legs. I'm going to be drawing
these shapes and then I'm going to draw my
character accordingly. So I'll have here
another layer on top. I add bit of transparency
to the heads below, and now I can draw
on top once again. So shoulders or less here, bit higher up perhaps. Remember that this
phase is just a sketch. So it is fine to look messy. Don't be afraid for your
sketches to look messy. It's perfectly fine. Also, these are the kind
of shapes I like to use, but you can find other shapes. That feel more
comfortable to you. There are no strict
rules when doing this. We all have different
ways of doing things, so find out the shapes that
make the most sense to you. That's the most important. So as you can see, I'm just building
up the skeleton of my character, the legs. And here we have the feet. I like to add a little bit
of curvature to my legs, the bottom half of the legs, so I don't forget
about it as I draw. All right, so now I think
I can draw my character. Let me move it a bit to the side so we
can see her clearly. Alright, so again,
some transpiracy, a new layer on top, and now I'm going to
draw my character. Still a sketch, so it
doesn't need to be perfect. We're just figuring things out. Okay, we have here. The hair, of course, her proportions right now are going to be a little
bit different from what I have originally because I am using different
proportions. We will get something
different as we go along. We're going to be drawing
a tall character, we're going to be drawing
very thin character, a heavier character,
so things will change a bit as we
go for her legs. I'm keeping the same kind of shapes I used for
my character before. So I'm not really using those
realistic shapes, right? I want to keep my character
pretty recognizable, but not for the clothing. Have a long t shirt
and her leggings. I want to change the
arms a little bit. I don't like the way
they look like this, making something
similar to what I have. Now I think I can draw her. Might need to fix
things here a bit. No. And now that I figured out all the proportions and throw my character
accordingly, all I have to do is go in and draw all the line art
and perhaps even color it. So when I want to do that, I will go right ahead, lower the opacity of my sketch, and then create a
new layer on top. I'm using a vector layer here. Clip Studio Paint has what
is called vector layers, and what that means is that anything I'm drawing inside
this layer is a vector, is a line made out
of several points. And when you're
drawing in vector, you can edit your lines
as much as you want, like resize them and
making them bigger or smaller and you won't
lose any quality to them. I do enjoy using
the vector layers for this, for the inart. Other drawing software
have something similar. It's not necessary. Use the kind of layer and
organization you like best. See, I'm going to start drawing. I'm not going to
spend a whole lot of time here to keep
things symmetrical, I think I'm even going
to draw one side of my character and then
duplicate it and mirror it. This is one way to make
your work go faster. But if you're learning and you're still getting
the hangout of drawing, I do recommend for you to
draw everything, right? It's much better for you
to get some practice. Also, I'm not spending a
whole lot of time here, mostly because I
don't think this is not the most important
part, the line art. I'm just cleaning up
my drawing, right? So I don't want you to be ing time or wasting
time with this part. What I want you to gather from this lesson is the proportions, how to draw those proportions,
how you want them. If you want to draw shorter
characters, you know, you can do so by using the
head as a measurement. Average height characters
or adults, in this case, are about seven to
eight heads tall, and if you want to draw
a shorter character, then you want to go
lower than that. All right, so once it is done, now I'm going to duplicate this, transform it, and then
flip it horizontally. And finally, I'll move
it to the other side. This way, things are a
bit faster and you don't have to be looking at me doing
this over and over again. Of course, I still need
to fix some things. That's pretty normal. Let's
merge this together first, and I'll fix things. I don't like how the eyes
and the nos turn out, so I'm going to redo them. This way, they look but
I think this can be a very fun exercise for you
to explore your characters. Yeah, maybe you decided on
some proportions for them. But as you experiment with
these kind of things, you might change your mind. It's possible. Now all I'm
missing is the glasses. The glasses are very important. Now duplicate them, flip them, and move them to the
other side in the sheets. I'm going to very quickly
add some colors to her. Going to fast forward this because you don't need to
be watching all of it. All right. So it's not perfect. Obviously, I'm doing
this very quickly. So I'm not really concentrating
on having this perfect. All I want you to gather from
here is the proportions. So here is the version of my carat with very
normal proportions. Like as you can see, my
carat is very short. My carat usually will
be very short and with very round and
cartoonish proportions. And here would be more
regular proportions, but in a shorter height. So that's how it looks. In the next, we're going to explore tall proportions
in the next video. Follow me to the
next video where we'll be exploring
tall characters.
6. Drawing Tall Characters: Hello and welcome
back. So as I said, now we're going to
explore tall proportions. So I have here another template. Again, you can download this
template I have right here, so it can help you in
your own drawings, don't forget to download it
and use it as a reference. An average height and average adult height is usually if you're using
the head as a measurement, is usually seven to eight heads tall for a shorter heights, as we've done in
the previous video, we would go with fewer heads. So in this case,
about six heads, but you can go below that, especially if you're
drawing a child. For the taller height, however, we're going in the opposite way. We'll want to draw more heads. For my reference, I made the taller character
about eight heads high. The thing you will notice
most are the legs. The legs occupy a
whole lot of the body. That's fun. I think that can be a fun thing when
creating a character. And what we're going
to do right now is do the same thing
we did previously, and we're going to start by
drawing the heads, right? You can draw the head in any format or even
size you want. I'm using these guidelines. But for example, if you
draw a bigger head, then the guidelines will have more space
between them, right? So only the size of
the head will matter. Draw one head and
then just repeat it along your drawing,
duplicate it. So as you can see
this time around, I did the head a
little bit different, so the guidelines don't match exactly the previous guidelines
I had, which is fine. We have the measurement
which is the head, and that's all that
matters right now. Let's merge all of
these together. So the head is the head, right. Let's add here guidelines. We can add some
ears, for example. Then the shoulder line is about halfway down
the second head, so run here, and the torso is going to go
up half of the next head. Then we got our waist here, and it occupies
most of this area. I'm just following here my
hefrans and now we go down for the legs and the
shoulders go more or less halfway through
this head right here. So let's do this knees here, and then the rest of
the legs and our feet. Now, all we are
missing is the arms. Again, I'm going to be doing the same thing and open
the arms a little bit. But we do know that
the elbow goes here. Elbow elbow, and then we go here and have our
hands and hands, right? This is more or less it. Let me just redo
it. Okay, elbow, elbow, hands, and hand. Okay. Now it's a bit more accordingly what I've
done previously. Now as you can see, this is not perfect compared
to this one. Of course, I was very
careful with this one, so you can have a good
template to look at and mine right now
is just a sketch. I'm not looking to be perfect. I just want to have a
base skeleton here. Let's call it skeleton. I know where everything goes. Now once again, I'm
going to go ahead. And draw my sketch with
my characters features. Of course, I'm using
besides the height, I'm using very regular
proportions here. So she does not look exactly. She looks a bit different from
her original proportions. I have a much more
cartoonish style going around there, okay? I'm being very quick with this, I don't need it to be perfect, I'll make the lines later on. This is just a sketch right now. But as you can see, even though it's the same
characters before, her proportions do change a bit. She even looks a bit
more adult in here. I'd say, very messy sketch. That's fine. Sketches are
supposed to be messy. It's time to draw the line art, and I'm going to do
the same thing I did before just to save time. Again, if you're
still a beginner and are still getting
used to drawing, I do recommend you draw every
part of your drawing so you get some practice in and
get used to drawing lines, to drawing everything
and getting used to the drawing software or any
other medium you're using. Then when you're already quite experienced and need to
save time while working, you can do the same
kind of thing. I shallow. So as you can see, there's a lot of legs here
when drawing a taket. And of course, this is also
something you can change according to the character you're drawing and what
you want for them. Maybe your character is
more torso than legs, and that's perfectly fine. These are all things that
are worth exploring. I think it can be very fun
to explore them. All right. So duplicate this, flip it, move it to the other side, and now fix everything that it's fixing and finish the drawing. Now we're going to
talk about this a bit more in a later video, but all of these proportions that I'm showing you right now, they can be exaggerated. If you're drawing a
cartoon character, don't be afraid of
exaggerating things. It can be very fun
to do. All right. Now it's time to color
drawing very quickly. So I'm just going to grab
the paint bucket and start look at the
size difference from my original character, just picking colors and adding those colors
to my new drawing. Thankfully, I don't have a lot
of colors on my character. I like to keep things simple,
the Corgi illustration. And bring it here so I don't
have to be drawing it. Again, it's very weird to
see my characters so tall. I think I never draw
tall characters, so it's a bit weird to see a very tall
character, but fun. Always fun to try new things. There we go, my very,
very tall avatar. This is it. Use the template as a reference to
draw your character. It's always useful to have it by your side and look at it. You can even use
the same head size as I use in the
template for practice. This way, you'll be
drawing exactly what you see then as you get more used to those
shapes and proportions, you can do your own thing and be more free with those shapes. This is it right now. We've
seen two different heights, and next we're going to explore body shapes and body sizes. I'll see you in the next video.
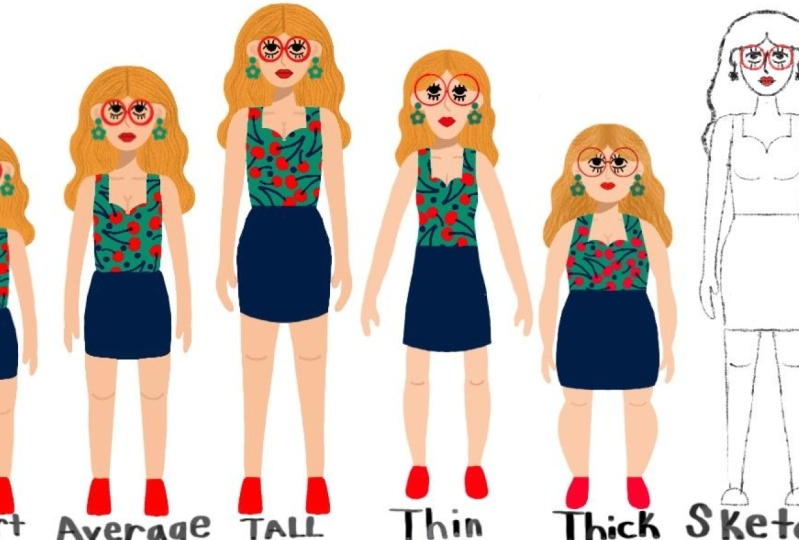
7. Drawing Thin Characters: All right. Hello,
and welcome back. So as I said, we're now we
explored heights, right? We explore different heights, shorter and taller characters, and now we're going to
explore different body sizes. We're going to see a thin body, a thinner body, and
then a shabbier one. So for a thinner body, the shapes you're going to use. I like to use triangles, maybe some rectangles
and shapes that might resemble something closer to a bit of a lemon wedge, especially for legs and arms. I'm going to go right ahead, create a new layer. And grab my pencil and I'm
going to start drawing. So we have seven heads
for a very regular, a very average height. There we go. All right. So now let's draw shapes. My character's
head, in this case, might be a bit thinner than
what I would usually draw. Then we can go to here and we have our shoulders
then one triangle and then another triangle
these triangles are for the torso and the waist areas. Okay. I'm going to do
like I did previously, open arms, just so it's easier right now
to see everything. The hands go a bit lower. Something looks weird. Let me fix my pencil once again. I have the basic shapes down. Let's now sketch our character. Again, it's going to be very
different from what I have. And as I said before, I want her to have
this time around, I want her to have a thinner
face because it's what makes sense when you're changing your character and exploring
different things with them, you'll notice that it's not only the body that changes, usually, the face, the eyes,
as you draw them, you might feel like other
things need to change. I think that's very interesting to explore all those things. Who's your character
and how they would look in different proportions. What would change in them? This is a very good
exercise for you to do. Now for the legs, I'm
going to keep them in my character does have her body is made out of
very basic shapes already, so that helps in making
this whole process quick. So as you can see, very
different right here, she is very short and
chubbier and here, her t shirt is
still a bit larger, but you can clearly see the difference in
proportions here. Everything is about
everything is thin. We're making everything
smaller, and of course, this can be less or
more exaggerated. Now this is done, I'm going
once again to do my line art. I'm trying to do this very
quickly here because you don't need to be watching
me do a real line art. I would waste much
more time, usually. But if you're doing this whole
process of the sketches, the shapes first, and
sketching, then the line art, do feel free to take as
long as you need, okay? You don't need to
rush any of this. I'm rushing it because I
don't want you to waste time. I want you to have fun with your drawings.
That's what I want. That's the most important thing, having fun with your drawings. Another thing you
can do to accentuate thinness of someone
how skinny they are is to how do I say this
give their body less shapes. For example, usually,
when drawing the legs, I would do add some
curves here and there, right at that contrast contrast between one part of
one leg and the other, same thing with the arms. But when drawing someone
who's very skinny, as you can see, there's
less contrast here. Instead of doing
something like this, add a bit of fat in there, just go with skin instead of going straight and then curve, everything goes straight down. This is just something
you could do. It's not strictly necessary. Again, it really depends
on what you're doing for your characters or even your
own tastes and preferences. I'm going to
something like this, merge both of these
together and then fix anything that needs fixing
and finish the drawing. As you can see, everything
else and even the hair is not as grand as
I did previously. I'm making it a
bit more close to the body to accentuate
her thinness. I don't know, right
now, I think she looks like a teenager, when teenagers just randomly
go a few centimeters high, but everything else forgets about it and you're very lanky
and weird for a bit there. That's what I'm going for.
The glasses need to be giant. Those I keep them giant. I love drawing the
giant glasses. All right now all I have to do once again is add the colors. Grab my pint pocket and start picking colors and adding
them to the right places. Also, about the paint bucket. As you can see, I created a
new layer below my lines. And what I do, so each color
says within the lines is that I use the refer other
layers option on Clip Studio. Other drawing software have
the same kind of options. They might just
present themselves differently, but
do look them up. And what this does is
just like the name says, I am drawing on a new layer, but Clip Studio will
have my lines into account and keep the colors
within those bounds. It's very useful and you can
color your drawings very, very quickly that way, coping my Corgi illustration here
and bring it to my t shirt. New t shirt in this case, and I think we are done. There we go. A very thin body. It's all about triangles,
some rectangles. You can exaggerate this
as much as you can, having maybe everything
closer to the body. So this is it for
a thin character, very different from
what I have originally. And now take your time and
whenever you're ready, follow me to the next video where we'll be drawing
a hobby kind of body. So I will see you right there.
8. Drawing Chubby Characters: Hello and welcome
V. Here we are for almost the last step of our class and we're going to explore the
last type of body, which is going to be
shabby proportions. Once again, just like with
the thinner type of body, you can exaggerate this as
much or as less as you want. But generally speaking, when drawing a
shabbier character, you want to draw round shapes, as I said before, so circles, oval shapes, lemon wedge shapes like this. There's a lot of contrast
of curves in here, right? Like in the thinner body, I would say to keep the
body a bit more shapeless because usually if you're
skinner and have less fat, then your body doesn't make as much shapes or as
much curves in there. This is your template, download it, use
it as a reference. Now we're going to draw. Again, I'm going to
use my character. I'm going to draw my character and my character is
already a bit shabby, but very short, very cartoonish. We're going to readapt my character to more
average height, but with shabbier shapes. Let's start by drawing
our heads, right. One, two, six, seven. All right. And now to draw our shapes. So we have our head. Then about almost halfway
through the second head, we have our shoulder line, and we can draw some
oval shapes right here or like a round triangle
right a bit there we go. And then the other one for
the other side of the body. For example, if I
want for the waist to be broader than
the shoulder line, I will want to broaden this
shape a bit. There we go. Now for now for the legs, we keep things very simple
and then finally the arms. Now I can draw my
character in more detail. We can draw their face a
bit rounder this time. The neck can be also thicker. Everything accompanies your
character's body type. It's not just their body shapes, everything else as well. Like the hands can be
a bit shorter and we can draw the fingers a bit bigger as well or a
bit chubbier as well. Something like this could work. This is it. These are my shapes. I'm adapting her legs as well. My character usually
doesn't have a lot of form on her arms and her legs. But for the purpose
of this class, I think it deserves to
be a bit more adapted. We have everything
we need right now. Let's draw our line art. So I did that curve a bit too
pointy for what I wanted, so I redid it. Just like before, I'm also
adapting other body parts like making the feet rounder and
more compact, let's say. So the whole body looks different and accompanies
the hobby idea. Again, you can exaggerate all of these features
more or less. I like to go with
something in between, but also let myself explore
something different. Like I said, my character
is already a bit chubbier, so I'm taking this
opportunity to do something different to explore
different shapes and different styles even. It's very important to
explore different things. It's time to color everything, but something here can
continue with the coloring. Now let's grab my
Corgi illustration and now we bring it to this. It's a bit smaller in this case, but I'm going to leave it
like this. So there we go. We have here how I would go about drawing
show your character. So rounder shapes,
lots of curves there. Have fun with it, experiment
with different things. This is it for now. Follow me to the next video where we're going
to talk about mix and matching
different body types and your assignment as well. I will see you right there.
9. Mix & Match Different Bodies And Proportions: Hello, and welcome back. We've gone through a lot
of drawing and learning. We saw how to draw people
with different heights, but different weights as well. Of course, every single one of these can be more or
less exaggerated. It's all up to you and the type of character
you're drawing. You have a base of
how to do things. So all you have
to do from now on is adapt it into different
types of bodies. Not only that, but you can mix and match
different aspects. Short and thin bodies,
short and chewy, tall and thin, or
tall and shabby, but you can even
do more than that. If you're into character design, drawing expressive and unique characters is very important, and most of the time that can be done through
exaggeration. So for example, a character can have very thin
and short legs, accompanied by a round belly. There are many options, and as I said before, it's important to explore
different things. You can always base your
drawings from real life, but even then people are so diverse and different
from each other. Don't be afraid to try different things even
if they sound absurd. Times what you try might
not work, but others, it might surprise you and you end up creating something
quite interesting. It's okay to do bad drawings. You're experimenting
and exploring. So let yourself be creative
and try different things. Above all, have fun with
your art and drawings. Okay, this is it for now. Follow me to the next video so we can talk about
your assignment.
10. Practice Time! Assignment 2: Hello, and welcome back. It's time for your assignment. We learned how to draw
different body types, so you can create more
interesting characters. So now it's time to draw something based on
what you learned. Grab the character
from the beginning. Again, it can be one you drew, or you can unload the
character I left for you. Now, all you have to do
is adapt that character. Two different body type
than what I have right now, similar to what I did
throughout the previous videos. Once you're done, don't forget
to post your character. I always love to see your
work and can give you any feedback or answer any
questions you might have. Also, if you draw other
sketches through the class, feel free to share
those as well. All right, thank
you for watching. Have fun with your assignment, and I'll see you
in the next video.
11. Conclusion - Before You Go!: Hi, again, artist. Congratulations on
finishing this class. I hope you had an
amazing time and learned a tone about drawing different body types
and proportions. Also, thank you so
much for joining. It's been a pleasure
guiding you through each step of this diverse
character design journey, and I'm excited to see how your character
roster has expanded. If you enjoy this class
and found it valuable, I would greatly appreciate it if you could leave a review. Your feedback helps me improve and helps other students find the right courses for their character design
needs until next time, happy character designing and
as always, keep on drawing.
 Patricia Caldeira, Illustrator | Digital Artist | Designer